|
Lemon verbena (Aloysia citrodora) is a woody perennial shrub you can add to your garden for delightful teas, lemony fish and poultry dishes, puddings, custards, and syrup. You can also use it to create a fast-growing* lemon-scented hedge. *Lemon verbena grown from seed grows slowly. Plants grown from cuttings or dividing grow fast.
Is lemon verbena an effective herbal remedy or not?
There are numerous claims about the effectiveness of lemon verbena as an herbal remedy for everything from stomach upset, anxiety, and muscle repair to weight loss and joint pain. While claims like these often turn out to be untrue or exaggerated, science is beginning to support at least some of them. The National Institutes of Health published a study concluding that lemon verbena has “promising antioxidant and anti-proliferation effects.” Until we know more about how lemon verbena can improve our health, we can happily grow it at home for other reasons. How to grow lemon verbena These plants are drought-tolerant. They grow best in fertile soil with excellent drainage and full sun. Plant seeds, seedlings, or tip cuttings 12-18” apart. In USDA Hardiness Zones 8a-10b, you can grow these plants as perennials. In cooler regions, it can be grown as an annual. Common pests and diseases of lemon verbena Aphids, slugs, and snails are the most common pests of lemon verbena. Leaf miners, mealybugs, spider mites, thrips, and whiteflies may also cause problems. Yellow sticky sheets can significantly reduce populations of these pests. These plants also experience root rots, which can be avoided by allowing the soil to dry out between waterings. Other potential diseases of lemon verbena include gray mold, powdery mildew, spotted wilt, and Verticillium wilt. Again, monitor soil moisture levels and avoid overhead watering. Add this lemony fresh herb to your landscape for years of delicious flavor and showy flowers.
0 Comments
The maple syrup on your French toast and those yummy maple syrup candies seen around the holidays are tree sap. .jpg) Sugar maple leaves (Superior National Forest) CC BY 2.0 Sugar maples (Acer saccharum) are related to soapberries and lychee. These deciduous hardwood trees create glorious fall foliage before winter sets in. As temperatures rise, trees convert the starches stored over the winter into sugary sap. That sap starts rising through the phloem to feed new growth. That’s where we step in.  Sugar maple tap and bucket (Wagner2005) CC BY 3.0 DEED Many years ago, in Stafford, Virginia, I opened a private K-12 school called Children’s Academy. We had a silver maple tree on the property, so we decided to try our hand at tapping it. Tapping trees refers to the way we get to the sap. Taps, also known as spiles or cask pegs, used to be hand-carved wooden tubes, but modern taps are metal. Taps are hammered into the tree to reach the phloem, just under the bark, where the sap flows. Maple description Most of us are familiar with hand-shaped, pointy maple leaves. These trees can get quite large, growing 80 feet tall or more. The bark is a lovely pale gray. The greenish-yellow flowers do not have petals. Instead, they grow in several panicles, clustered together, usually after 30-55 growing degree days. The fruit grows in winged pairs that most of us called ‘helicopters’ because they spin as they fall. Those fruits are called samaras, and they contain maple seeds.
Other maples Sugar and black maples (Acer nigrum) are the primary sources of maple syrup, but our silver maple did well enough. Other maples, including our silver, have lower sugar levels and produce a cloudy (but still delicious) syrup. Norway maples are quickly taking over suburban streets because of their ability to withstand air pollution and weather fleck better than sugar maples. Unfortunately, they are not good sources of sap. One way to tell which maple tree you have is to look at the sap in a leaf petiole. Sugar maple sap is clear. Norway maple sap is white. How maple trees grow Maples love cold winters and are best suited to USDA Hardiness Zones 3-5. They take 30 years to reach seed-bearing age and live 200 years or more. These trees are very shade-tolerant. They are best planted as saplings in the spring or fall in well-draining soil. They prefer slightly acidic soil but can grow in soil pH levels of 5.0—7.0. .jpg) Sugar making in Montreal, October 1852 by Cornelius Krieghoff (artist); Sarony & Major (engraver) Public Domain How to make maple syrup
Sap was traditionally boiled over an open fire for a very long time to get rid of the excess water. But it takes, on average, 40 gallons of sap to make one gallon of syrup. Collecting sap is very labor-intensive, and all that cooking uses a lot of energy, so now you know why maple syrup is so pricey. Compounding that problem is the maple tree’s sensitivity to air pollution. Maple tree decline Starting in the 1950s and culminating 40 years later, a drastic decline in Canadian sugar maples was considered a serious threat to the species (and global maple syrup supplies). Acid rain was killing all the sugar maples in Canada and the northeast US. So Canada and the US created The Canada – United States Air Quality Agreement in 1991. By 2023, the actions outlined in that agreement resulted in a significant decrease in the chemicals responsible for acid rain and sugar maples started to recover. [See what we can do when we work together?] Did you know that the samaras can be soaked, boiled, seasoned, and roasted (without the wings) for a yummy snack? I didn’t either. Now we know. Have you ever heard of galangal? I saw it used on an episode of Chopped and had to learn more. Imagine ginger crossed with horseradish, black pepper, and a little pine. To me, that sounds like a perfect addition to stir-fry. Even more intriguing, the fragrant flowers, glossy leaves, tender shoots, and cardamom-flavored berries are also edible.  Galanga rhizomes (Susan Slater) CC BY-SA 4.0 Galangal is a rhizome that looks a lot like ginger but has more of a peppery bite. It is a popular ingredient in many Asian dishes and you can grow it at home. Not only does galangal make a tasty ingredient, but it is also an attractive grass plant. Galangal is a member of the ginger family (Zingiberaceae) and a close cousin of turmeric. Before you jump on the galangal bandwagon, you need to know that four different plants go by that name:
All of them are edible, but we are only discussing the Alpinia galangals here. Lesser galangal has a more bitter pine flavor, while great galangal has a more medicinal ginger flavor. Under ideal conditions, greater galangal can grow 6 feet tall and 3 feet wide. Lesser galangal is smaller.
Plant rhizomes when the soil is warm. Cover them with 3 or 4 inches of soil. Space plants 12-18 inches apart. They will need good drainage and partial or full sun exposure. If you have scorching summers, your galangal may need protection from the afternoon sun to prevent sunburn damage. Use a one-gallon or larger container for potted galangal.
These plants need plenty of water in the early stages. Soaker hoses are an excellent tool for watering galangal. Mulching around your galangal will help the soil stay moist without becoming soggy. How you feed your galangal will depend on where it is being grown. An inexpensive lab-based soil test can tell you what you need to feed plants growing in the ground. Container-grown galangal will benefit from light monthly feedings of fish emulsion or other balanced fertilizer. Galangal pests and diseases When ginger stalks turn brown, they are dead. Cut them off and add them to the compost pile. When galangal stalks turn brown, it is often a symptom of too much or too little water. Chlorosis or dull leaves may indicate insufficient nutrients. The most common pests include aphids, root borers, grasshoppers, and spider mites. Beneficial insects and the judicious use of Bt can eliminate most of these pests. Severe infestations may require the use of spinosad. Prevent root rot and rust by avoiding overhead watering and ensuring good drainage. Harvest your galangal by digging up the entire plant, removing what you want, and replanting the rest. Instead of tamping down the soil, which damages valuable root hairs, “mud in” the replanted part. You will want to harvest before the rhizomes become tough. And be sure to save some for replanting. As a bonus, research has shown that eating galangal increases alertness, improves focus, impedes caffeine crashes, and may provide anti-inflammatory protection. And hummingbirds love galangal. How’s that for a stir-fry? Most of us grow lettuce for the leaves, but celtuce is a variety of lettuce that is more often grown for its stem. 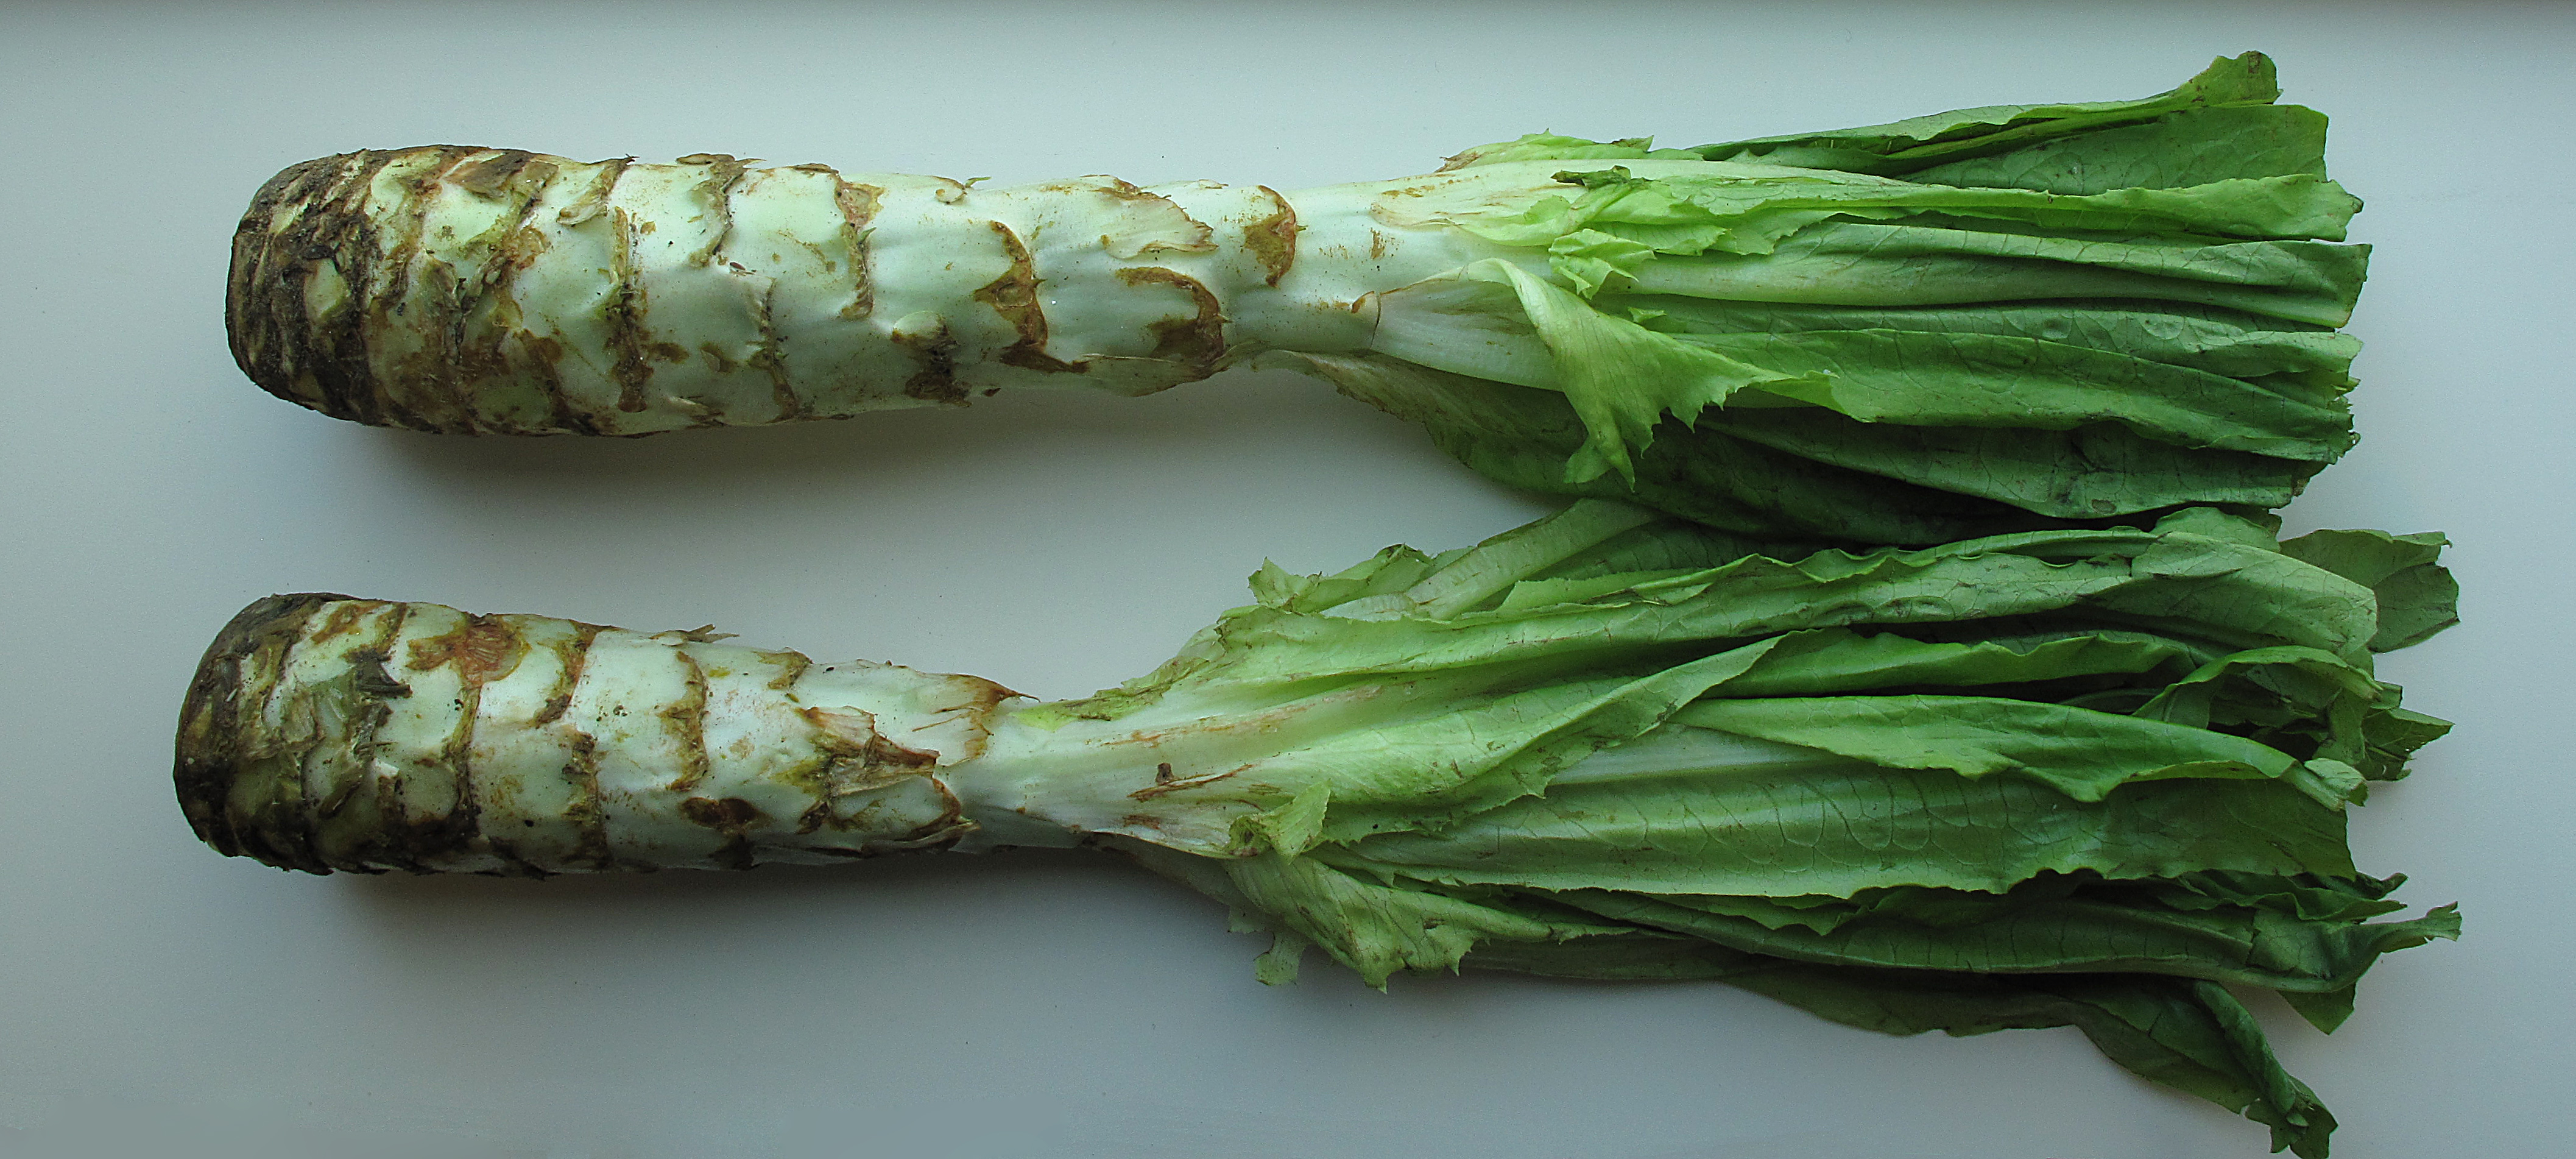 Celtuce (Downtowngal) CC BY-SA 3.0 Also known as asparagus lettuce, celery lettuce, Chinese lettuce, stem lettuce, or wosun, celtuce tastes like a cross between, you guessed it, asparagus, broccoli, and celery. Popular in Chinese food, celtuce was probably developed along with other lettuces during Roman times and then found its way to China during the Tang Dynasty. Celtuce (Lactuca sativa var. augustana, angustata, or asparagina) is a cool-weather crop that needs consistent moisture to prevent it from turning bitter. Celtuce description These plants look like a giant, open Romaine, with upright lance-shaped leaves. They can grow as large as a cabbage plant.  Celtuce grown with cabbages (David Ebro) CC BY-SA 3.0 Like other lettuces, celtuce is day length-sensitive, which means it tends to bolt when the days are long. Bolting refers to premature flowering and stem elongation, which makes your celtuce taste bitter. But if it does bolt, let it go. Celtuce can grow 4 or 5 feet tall, providing nectar, pollen, habitat, and landing platforms for many beneficial insects (and you get free seeds!).
How to grow celtuce Plant seeds no more than ¼-inch deep. They germinate best in temperatures from 35°F to 60°F and should be planted 14- to 24-inches apart. These plants will reach maturity in about 60 days. They will be 12-18-inches long. Early leaves can be harvested 4 or 5 weeks after planting, starting at the bottom of the plant. This cut-and-come-again characteristic means you can get a surprising amount of food from a single plant. Mature leaves are edible but tend to be too bitter due to their milky sap. One way to avoid the limitations of a hot summer is to grow your celtuce indoors, where temperatures tend to be more stable. Lettuce and celtuce root systems are shallow, so containers do not need to be especially large. These plants need nutrient-rich soil, so use high-quality potting soil in your containers. Problems with celtuce Aphids, slugs, snails, and whiteflies are attracted to your celtuce. And I’m going to assume that most lettuce problems apply to celtuce. Celtuce stems tend to split after heavy rain, providing entry for pests and diseases. How about sharing a pack of celtuce seeds with your friends and neighbors to see what you think about this delicious crunchy green? Imagine a tuber with the texture of water chestnut and the flavor of a starchy apple. This cousin of wood sorrel is called oca.  Oca tubers (Laurenjm) CC BY-SA 3.0 Oca (Oxalis tuberosa) is a perennial edible that overwinters as underground stems similar to sweet potatoes. Oca has been a dietary staple of the Andes region for centuries, and you can grow it at home and enjoy it raw, cooked, or pickled. Highly nutritious, oca is a very flexible plant. The tubers, leaves, and stems are all edible. Oca description The tubers are small and nubby. To me, they almost look like turmeric rhizomes. They can be orange, pink, or yellow, but most commonly are red. The leaves look a lot like Bermuda buttercup. Flowers appear after 3 or 4 months. Oca starts producing tubers when temperatures drop into the low 50s (°F) and the days get shorter.  Oca plant (Izawa Ryu) CC BY-SA 4.0 How to grow oca
These plants grow best in cool, wet weather. When shopping for oca tubers, opt for sweet oca over sour oca. Both are edible, but the names pretty much say it all. Plant seed tubers two to three inches deep and 24-36” apart. Like yacón, another Andean native, these plants grow well in poor soil and harsh climates, but need a long growing season. Each oca plant can produce up to three pounds of tubers yearly, though one pound is more likely. Oca pests and diseases Nematodes and weevils can damage your oca crop. Some viral diseases may also appear, but you can reduce most problems with a three-year crop rotation. If you have a plant that looks sick, the first thing you should do is to rule out insect feeding. Insect feeding usually creates holes and ragged edges on leaves, gnawed areas on fruits, or damaged roots. You might see eggs or insects on the underside of leaves, telltale slime trails, or ant brigades. Next, ask yourself where the problem is happening. Is it the leaves, fruit, stems, or the whole plant? If you know the type of plant, you may be able to narrow things down to a family-specific condition. This chart should help you figure out what's happening to your plant:  And here's a way to download your won version:
I’ve written about so many foods we can grow at home that it is a pleasant surprise to discover yet another option: shiso.  Bicolor shiso (Raffi Kojian) CC BY-SA 3.0 Shiso (Perilla frutescens) is a member of the mint family. This herb from Southeast Asia is called beefsteak plant, rattlesnake weed, and Chinese basil in the US. You can eat the leaves fresh in a salad, stirred into a casserole, or dried and used as a seasoning. They make a tasty garnish, too. And the seed pods can be salted and eaten as a snack.  Green shiso leaves (Zeimusu) CC BY-SA 3.0 Shiso description Shiso is a substantial plant that can grow 3 feet tall. In Zones 11-12, it can be grown as a perennial. You can also grow it indoors year-round as an edible houseplant or treat it as an annual. The broad leaves have pointed ends and are serrated. There are several varieties of shiso:
When the stalks dry, they make the sound of a rattlesnake’s rattle when brushed. _(2).jpg) Shiso seed pods (USGS Bee Inventory and Monitoring Lab) Public Domain How to grow shiso
Shiso can be grown from seeds. They should germinate in 14 to 20 days. These plants grow well in partial shade and can handle full sun in mild regions. Treat these plants like basil, pinching the growing tips regularly to encourage bushy growth. Add this new taste to your kitchen garden or windowsill today.
The most likely culprit of bleaching is too much or too little sun, especially for seedlings and new transplants. Sunburned leaves turn white and die. Air pollution, ozone damage, PAN, and weather flecking can cause bleaching. And if you or your neighbor recently applied herbicides, localized bleaching may be from chemical overspray. Frost damage can also cause bleaching.
Bleaching through the soil Zinc deficiencies appear as yellowing between young leaf veins and overall bleaching that does not reach leaf edges or midribs. This bleaching can also cause narrow yellow or white stripes between the veins of the upper leaves. Bleached leaves may also be telling you the soil is low in iron. Persimmon trees, in particular, are sensitive to iron deficiencies. It may be time for one of those inexpensive, lab-based soil tests. If your soil looks lighter than it used to, add more organic material. Bleaching caused by disease White mold can make leaves look bleached. Bleached leaves and stems on tomato or pea plants often indicate Fusarium wilt. If leaf tips are turning white, it may be Ascochyta leaf blight. If your blackberries or raspberries have tiny bleached bits, it means temperatures rose suddenly and humidity levels dropped. This condition is called white drupelet. Trees with silvery or bleached leaves may have silver leaf, a potentially deadly fungal disease. And if you happen to be growing rice in Viet Nam, there is a newish bacterial infection that causes bleached leaves. While you cannot reverse the damage done to bleached plant tissue, you can use that information to help your plants regain their health and productivity. Charcoal rot is a fungal disease of beans, corn, cucurbits, and potatoes. Also known as dry-weather wilt, this disease can be devastating in areas with hot, dry summers.
Since you have no control over the hot, dry weather that compounds this problem, your best bets are to invest in certified disease-free seeds and seedlings and look for short-season varieties that can develop before the disease takes hold. 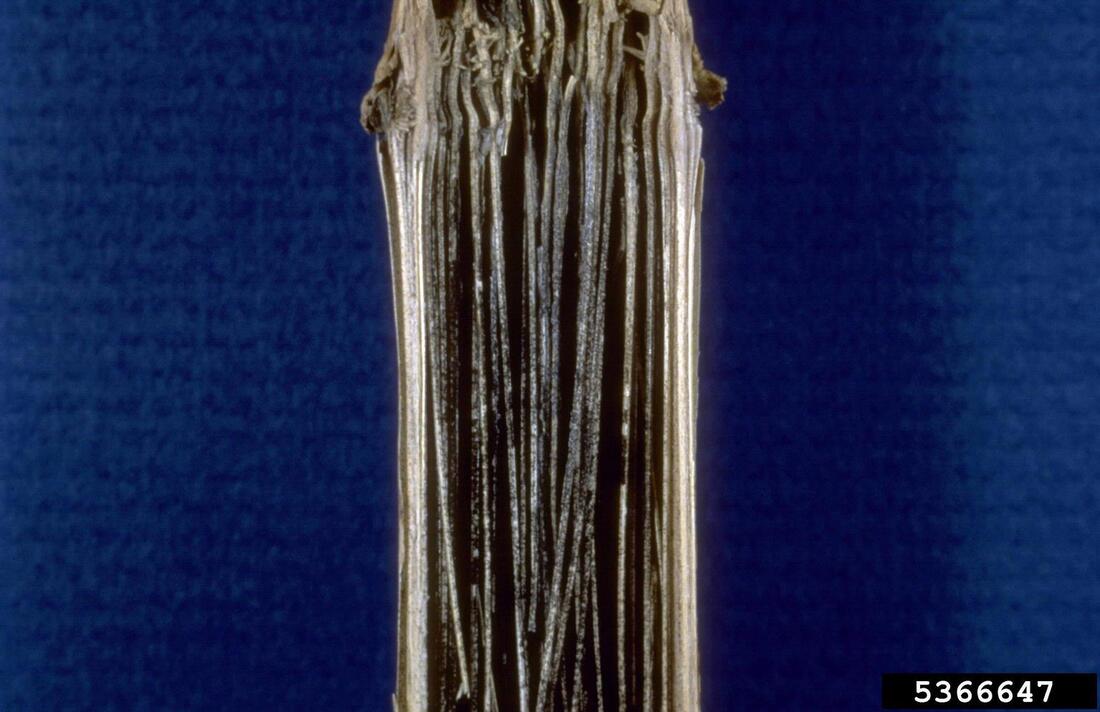 Corn stalk infected with charcoal rot (William M. Brown Jr., Bugwood.org) CC BY 3.0 US DEED The pathogen responsible for charcoal rot (Macrophomina phaseolina) can remain viable in dry soil for several years.
Healthy plants produce flowers that get pollinated by bees, bats, and wind. Those pollinated flowers turn into the lion’s share of why we garden.
Food
Too much or too little food can eliminate flower production in the garden. Excessive amounts of nitrogen make plants produce lots of leaves but little or no flowers. Not enough nitrogen, phosphorus, or potassium can also delay flowering. An inexpensive lab-based soil test is the only way to know what is in your soil. Light Different plants have different sun exposure needs. Raspberries exposed to scorching afternoon sun will put all their energy into recovering from sunburn rather than producing delicious berries. Plants that need lots of sunlight do not generate enough sugar to make flowers if planted in a shady corner. Pruning Prune too much, too little, too soon, too late, or in the wrong place, and flower production can be reduced or eliminated. Plants pruned too heavily may not have the resources needed to generate flowers. Each species has unique pruning needs. Generally speaking, it is better to wait until after flower and fruit production or until plants enter dormancy before any significant pruning occurs. Did you know that young walnut trees produce almost all of their flowers on the ends of long stems? Cut those off, and you will have an attractive little tree and no walnuts. Learn more about production pruning to ensure you are giving your plants the care they need. Temperature Sudden low or high temperature shifts can trick plants into halting flower production. A late frost can also kill flower buds before they emerge. Seeds planted too early in the season will use up too many nutrients to get started to have enough energy for flowers. Some plants require a minimum of chill hours before flower production begins. If winter is too mild, there may be no flowers the following spring. Planting at the right time of year, in an appropriate location, and providing proper care can boost flower production and your harvests. If you squeeze a potato and a pale ooze comes out of its eyes, it has brown rot. Also known as bacterial wilt of tomato and potato and southern bacterial wilt, potato brown rot is not the bacterial wilt that infects cucurbits or the brown rot of stone fruit trees. Instead, this disease targets the nightshade family, infecting eggplant, peppers, potatoes, and tomatoes. Oddly enough, bananas, ginger, and olives are also susceptible. 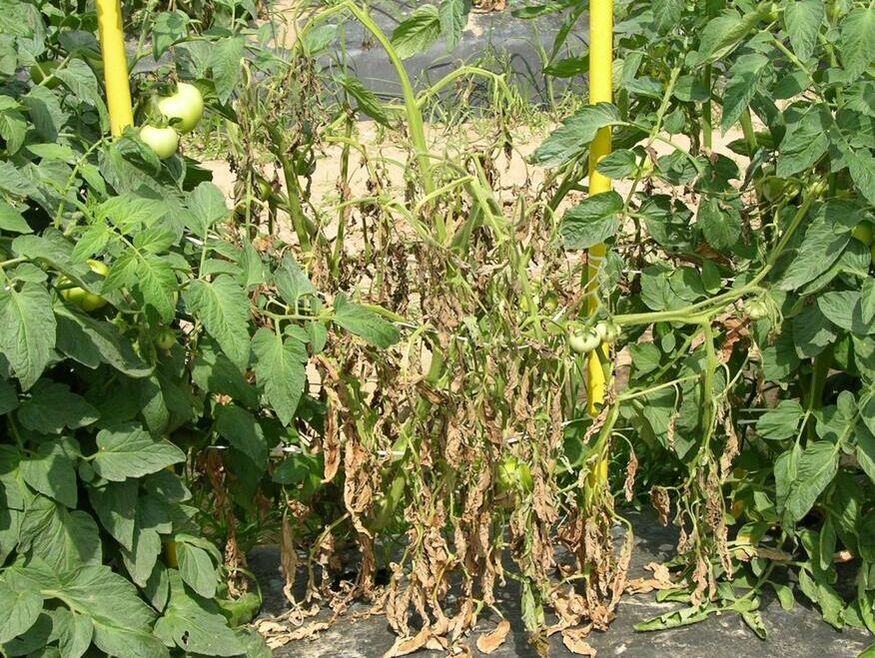 Tomato plant infected with southern brown rot (Don Ferrin, LSU, Bugwood.org) CC BY 3.0
Bacteria enter plants through wounds and natural openings and move to the xylem, where they reproduce, clogging veins and killing the plant.
Managing potato brown rot Chemical treatments are ineffective against potato brown rot, and serious infections require soil solarization, so prevention is your best bet. These tips can help prevent potato brown rot in your garden:
Back in the 1920s, Rudolph Boysen started crossing various cane fruits. He used blackberries, dewberries, loganberries, and raspberries to create a hybrid. It didn’t grow well, and he abandoned the idea. Those canes were rescued by Walter Knott, of Knott’s Berry Farm fame, a few years later. The rest, as they say, is history.  Boysenberry bramble (Baybay 1901) CC BY-SA 4.0 You generally won’t find boysenberries in stores because they are so juicy and thin-skinned that they start leaking delicious juice within a day or two of being picked. But boysenberries are easy to grow and provide extra-large, sweet-tart treats all summer.
Please note that “thornless” is not a guarantee. Thornless varieties generally have fewer thorns than their cousins. And thornlessness can be genetic, hormonal, or created in a lab. Genetically thornless boysenberry plants will stay that way. The others may not. Propagating boysenberries Like other hybrid plants, boysenberries are not grown from seed. You can try, but you are unlikely to get an edible boysenberry. Boysenberries are best grown in USDA Hardiness Zones 5-9, though you may be able to manage in Zone 4. They prefer full sun, soil pH of 6.0-7.0, and good drainage. Boysenberry roots are perennial and will fill spread using underground stems called rhizomes, so plan accordingly. You can buy dormant bare-root boysenberry plants. You can also use root cuttings, root division, and tip layering. As with any new plant, put your boysenberry into quarantine before adding it to your landscape. Caring for boysenberry plants Boysenberry plants only need to be fed when planted and again each spring. Like other brambles, you can let them grow wild or train them up a fence, stock panel, or trellis. Training your boysenberries makes pruning and harvesting a lot easier. When your boysenberries have entered dormancy, prune first-year primocanes, leaving 5-7 per plant. Cut lateral branches back to no more than 12 inches. This pruning will reduce the risk of pests and disease while making room for the next batch of canes. If you live in a cold climate, cover your boysenberries with a thick blanket of straw in winter and use a dark mulch. If you live in a warmer region, apply light-colored mulch and provide a little afternoon shade.
Good cultural practices go a long way toward keeping your boysenberry plants healthy. How about a boysenberry pie? Or maybe some boysenberry jam? It may be as close as your backyard!
Tomatoes seem to be the only plants affected by pepino mosaic naturally. Scientists have mechanically infected potatoes and eggplants in the lab, though pepper plants seem immune for now.  Tomato infected with pepino mosaic (Goldlocki) CC BY-SA 3.0 DEED Pepino mosaic may not wipe out your crop, but the flavor and appearance of your tomatoes will suffer. And these plants are more likely to contract other viral diseases.
Pepino mosaic symptoms Fruit marbling and other discolorations are the most common symptoms of pepino mosaic. Leaf blistering and interveinal chlorosis may also occur, as well as yellow angular leaf spots, brown stem streaks, and leaf and stem death. The top of the plant may look stunted or oddly clustered. You may also see dark spots on young leaves near the top of the plant. Lower leaves may look scorched. Blossoms may turn brown and fall off. Pepino mosaic is easily mistaken for chemical overspray and tomato brown rugose. These symptoms generally do not appear for two or three weeks after infection. Pepino mosaic spreads rapidly because infected plants remain in place. Pepino mosaic management Pepino mosaic is spread primarily on contaminated tools, shoes, and clothing. Infected seeds may also carry the disease. Unfortunately, bumblebees can also transport pepino mosaic. You can’t do anything about the bees, but you can prevent pepino mosaic in your garden with these good cultural practices:
Before planting parsnips, you should know about parsnip canker. Carrots, dill, parsley, and sunflowers may also get this disease.  Healthy parsnips (Jeffery Martin) Public Domain Parsnip canker is an infection of Itersonilia perplexans and several other fungi that can reduce your crop by as much as 80%. But it is preventable.
Symptoms of parsnip canker Like other cankers, symptoms include dark, mushy areas on parsnip crowns and shoulders. These areas may be black, brown, orange, or purple and typically have pale green halos. Lesions may also occur on the underside of young leaves. Parsnip canker management When growing parsnips, many gardeners mound soil over the crown as the plant grows in a practice known as hilling. Hilling in the UK has been shown to expose pathogens to predators, reducing the chance of infection. Unfortunately, this practice spread pathogens to neighboring plants in Australian gardens. I suspect it has something to do with temperature and humidity differences, but I am only guessing. Other steps you can take to prevent parsnip canker include the following:
Foliar sprays of fixed copper may help treat the disease if applied early enough. And you can cut out the bad bits and enjoy the rest of the root. Parsnips have a lot to offer, and they are easy to grow. The ones you might find in the grocery store are never as sweet and crisp as those you can grow in your yard. As your raspberry and blackberry seasons wind down and you begin your winter preparations, watch for signs of raspberry crown borers, also known as blackberry crown borers (Pennisetia marginata). 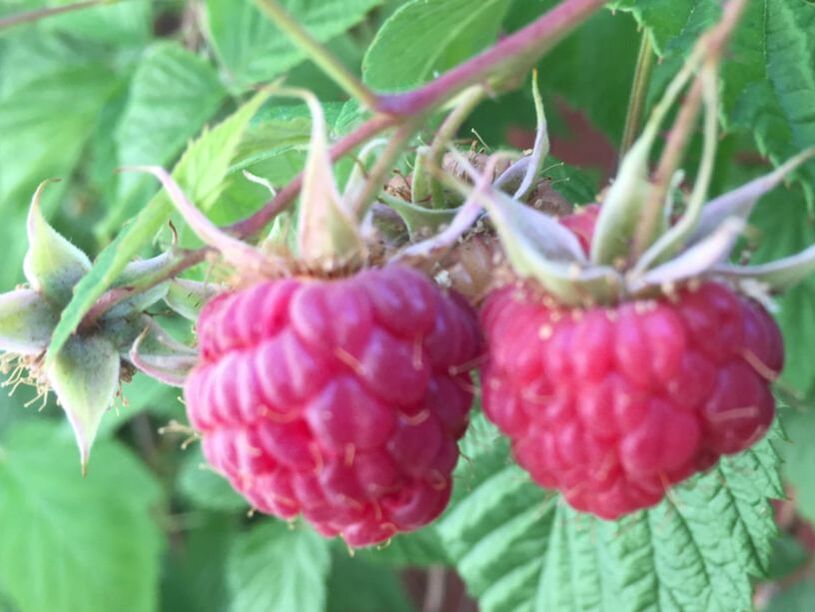 Delicious fresh raspberries! (Kate Russell) The first signs of infestation include withering and wilting. Close inspection of the crown at soil level may yield a small hole surrounded by frass that looks like sawdust. There are no biological or organic treatments against this pest. Commercial growers often use Diazinon to combat these pests, but that chemical is highly toxic to bees (and it probably isn’t good for us, either). The more you know about raspberry crown borers, the better equipped you will be to prevent infestation. Is it a moth or a wasp? It all starts with what looks like a wasp. This type of clearwing moth has a one-inch wingspan. It is black with four or more stripes around the abdomen. The antennae are feathery and curled at the tips, the wings have longitudinal bars, and the legs are yellow. First-year larvae are one-half to one-inch long, while second-year larvae may reach an inch-and-a-half long.  Adult raspberry crown borer with egg (University of Georgia Plant Pathology Archive) CC BY 3.0  Raspberry crown borer larva (University of Georgia Plant Pathology Archive) CC BY 3.0 Raspberry crown borer lifecycle
These fascinating (and destructive) parasites go through a two-year cycle that starts with females laying up to 140 rust-colored eggs on the underside of leaflets in late summer. Take a peek and extermigate any eggs you see. Larvae create tiny blistered hibernaculum (“winter tents”) in the base of the crown, where they are safe from winter weather and predators. As temperatures rise, larvae burrow galleries throughout the crown, feeding as they go. In some cases, these larvae emerge as adults at the end of the summer. They often remain in these protected galleries through a second winter, causing even more damage. Keeping plants healthy and monitoring for eggs and entry holes are the best preventative tools. Any plants infested with raspberry crown borers should be removed and destroyed. No, we’re not talking about the sudden appearance of wax fruit in your backyard orchard. But if your peach trees are languishing, this may be the information you need.
Phony peach is a bacterial disease. Many trees with bacterial infections look scorched. Bacteria block the vascular tissue, so water and nutrients cannot move around, often killing a tree within two or three years. Phony peach disease does not behave this way. This disease gets its name because it makes you think the tree is healthy, maybe just a little slow. But it is dying. Cause and carriers of phony peach disease Xylella fastidiosa bacteria cause phony peach disease. This bacteria is also responsible for alfalfa dwarf, bacterial leaf scorch, citrus variegated chlorosis, coffee leaf scorch, oleander leaf scorch, olive quick decline, and Pierce’s disease. Sharpshooters, especially glassy-winged sharpshooters, carry the bacteria responsible for phony peach disease. Symptoms of phony peach disease Symptoms of phony peach disease initially look insignificant, giving it time to spread before you can start protecting neighboring trees. Remove infected trees right away.If you are aware of and look for these symptoms, you may be able to save the rest of your peach trees:
As the disease progresses, you may also see shoot dieback and a significant reduction in normal shoot development. Phony peach disease management In this case, prevention is the only way to go. Use the following good habits to prevent phony peach disease from occurring in your landscape:
Viruses are nearly always bad news, but sometimes they can surprise you. The tobacco mild green mosaic virus is one of those.
This viral disease can infect your peppers, potatoes, and tomatoes. It can also help out. Symptoms of tobacco mild green mosaic Stunting, leaf mottling and puckering, and deformed fruits are all symptoms of tobacco mild green mosaic. These symptoms look similar to cucumber green mottle mosaic, tobacco mosaic, and tomato brown rugose, and with good reason. The viruses that cause these diseases are close cousins. There are no chemical treatments for tobacco mild green mosaic. Good cultural practices like hand washing, sanitizing your tools, and avoiding infected areas, can slow the spread of this disease. And keep weeds in the nightshade family at a distance. Tobacco mild green mosaic trivia This virus is an approved herbicide in the US. Scientists discovered that the virus responsible for tobacco mild green mosaic is lethal to tropical soda apple. Tropical soda apple (Solanum viarum Dunal) is a spiny, invasive weed that makes farmland, orchards, and pastures less productive. Florida estimated, in 2022, that tropical soda apple infested 1 million acres of their agricultural land. According to the American Chemical Society, this virus can kill parasitic nematodes. In 2017, parasitic nematodes cost the global agricultural industry $157 billion. That’s a lot of zucchini! So maybe the tobacco mild green mosaic virus isn’t all bad. Do your tomatoes have brown or yellow spots? Do they look lumpy? Are the leaves mottled and narrow? It may be a relatively new viral disease called brown rugose. Rugose means lumpy or wrinkled.  Brown rugose of fruits and leaves (Aviv Dombrovsky and Elisheva Smith) CC BY 3.0 Easily mistaken for chemical overspray, brown rugose is a close cousin to tobacco mild green mosaic and often occurs in tandem with the pepino mosaic virus (PepMV). First seen in 2015 in Jordan, the tomato brown rugose fruit virus (ToBRFV) infects eggplants, peppers, and tomatoes. By 2018, it had reached Europe and North America. Yellow spots on fruits infected with brown rugose (Aviv Dombrovsky and Elisheva Smith) CC BY 3.0 Symptoms of brown rugose In addition to lumpy, spotted, wrinkled fruit, the brown rugose virus also causes fruits to be deformed, ripen unevenly, or develop a brown inner wall. Leaves may become narrow and discolored. Shoestringing may occur in severe cases. Mosaic pattern and narrowing of leaves seen in brown rugose (Aviv Dombrovsky and Elisheva Smith) CC BY 3.0 Mosaic patterns and stunting are common. Brown streaking and dead areas may also develop on leaf stems (petioles), flower stems (pedicles), and calyxes (sepals). Brown rugose causes dead areas on pedicels, calyxes, and petioles (A. Dombrovsky and E. Smith) CC BY 3.0 Brown rugose management
This persistent virus spreads through contaminated garden tools, hands, seeds, weeds, global grocery store and seedling markets, and local pollinators. With all of those avenues of transmission, quarantining new plants and good sanitation are your best control measures. Also, only install seeds certified to be ToBRFV-free and do not use grocery store tomato seeds. These viruses can survive in the soil for more than ten years, so it is better to err on the side of caution. If you suspect brown rugose in your garden, do yourself and your neighbors a favor and contact your local County Extension Office. There’s always a certain measure of chaos in a garden, but chaos gardening has a purpose. Seeds don’t last forever. And few of us get around to using them all. While you can host a fun seed swap, you can also use those seeds to create a chaos garden. Like books sitting on a shelf, seeds left in a packet do no one any good. 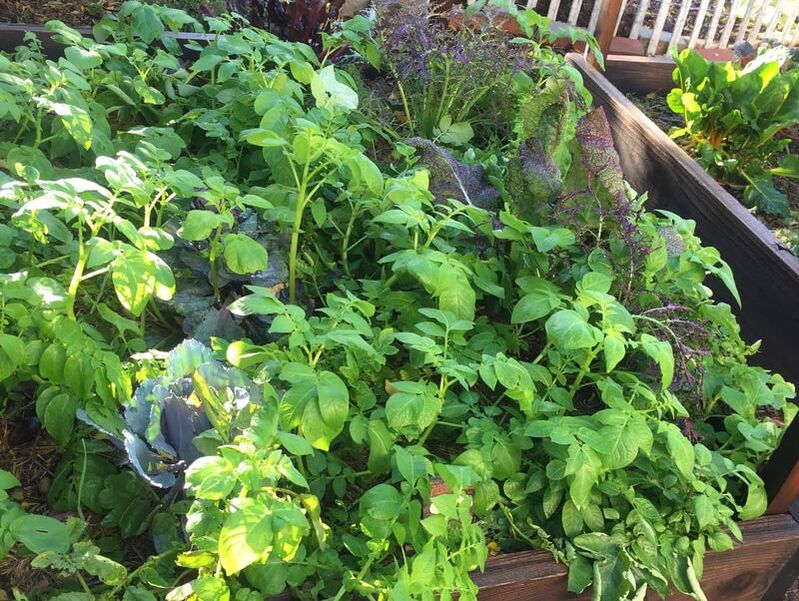 Beans, cabbages, chard, mustard and tomatoes grow well together (Kate Russell) Monoculture v. mixed plantings In Nature, monoculture rarely exists and never lasts. Pests and disease can quickly take hold, potentially wiping out everything. [Can you say Potato Famine?] Plants grow best when surrounded by other plant species. Meadows are healthier than lawns. Companion planting (in its true sense) is more productive than monoculture. Research has demonstrated that mixed plantings reduce the need for crop rotation, fertilizer, irrigation, pesticides, and added pollinators. And that means a lot less work for you. Chaos garden design takes advantage of this research by throwing every leftover seed you have into the mix. Instead of every plant grabbing for the same nutrients, a mixture of plant species grows at differing rates, using different nutrients at different times, reducing the strain of competition for all of them. This tight mix of plants chokes out weeds. It also attracts a variety of pollinators and other beneficial insects. This increasing biodiversity boosts pollination rates and creates bigger harvests.  Mixed planting of ferns, flowers, and vegetables (PxFuel) Public Domain You can use a bare patch of ground, raised bed, a sidewalk strip, an old kiddie pool, or a window box for your chaos garden. Keyhole garden spaces work well, too. How to plant a chaos garden Unlike most vegetable gardens, which require planning, rows, and lots of preparation, a chaos garden lets Nature take its course and do most of the work for you. The process is simple:
At this point, you can decide whether to water your chaos garden or not. You can fertilize it or not. It is up to you. 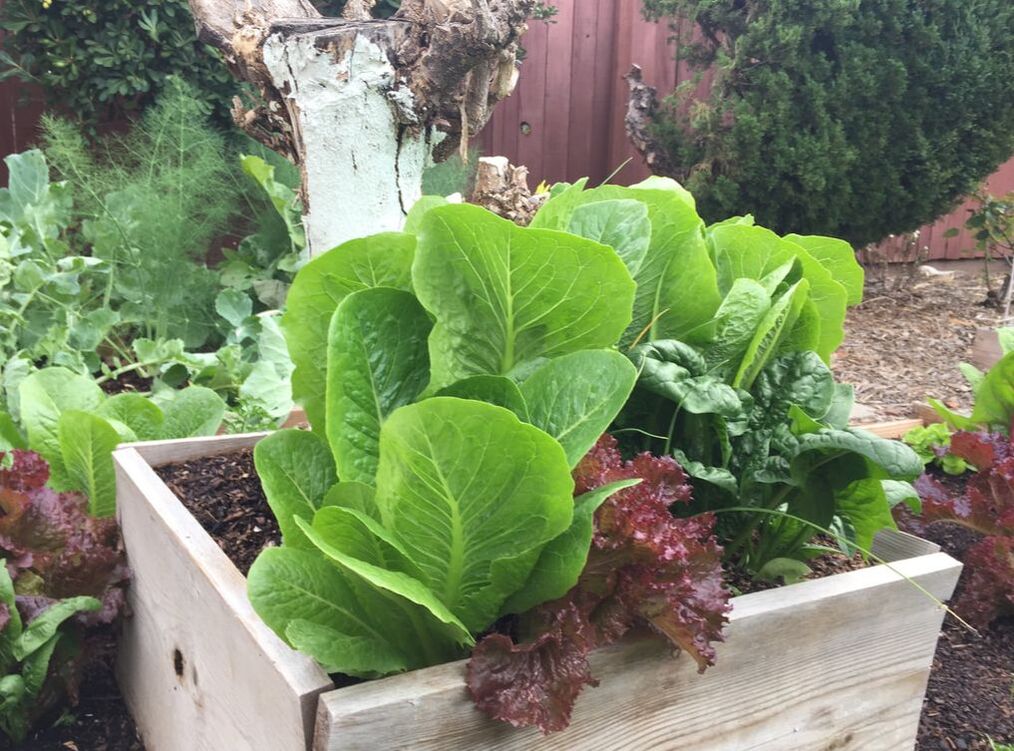 Mixed salad planting (Kate Russell) The downside of chaos gardening
Plants growing close together in a riot of leaves and stems can set the stage for fungal diseases such as blights, rots, and spots, so avoid overhead watering. It can also hide pest infestations. Simply throwing a bunch of seeds into a space does not mean your chaos garden is completely maintenance-free. You should still monitor your chaos garden for signs of pests and diseases. Chaos gardening is a great way to eliminate the waste of unused seeds. And you might be pleasantly surprised when you see how well they grow.
Popular in Indonesian, Malaysian, and Philippine recipes, pandan leaves are floral, grassy, and sweet, much like vanilla beans. They create green food coloring and give basmati rice, jasmine rice, and white bread their characteristic aromas.  Pandan cake (Midori) CC BY 3.0 Pandan cultivation
Unknown in the wild, the only way to create a pandan plant is through cuttings and suckers. Pandan is a wholly human-created plant that has been around since ancient times. When I say human-created, I do not mean someone was splicing genes 5,000 years ago. Instead, people cultivated pandan vegetatively for specific traits. Plants generated in this way are called cultigens. Pandan plants are available for purchase, or you may be able to get a cutting from a friend. As always, place new plants in quarantine when you bring them home. Just in case. Being tropical plants, pandan plants prefer moist, loose soil. They grow best with plenty of bright sunlight but can also grow in partial shade (or in your living room). When watering your pandan, keep the leaves and crown free of water. If your pandan is in a container, it is best to water from the base, filling the saucer instead of from above. The addition of a small amount of vermiculite can lighten the soil, as well as improve its moisture-holding ability. In winter, pandan plants need significantly less water. In summer, they need more to prevent sunburn. Pandan pests and diseases If the leaves start yellowing, it is probably due to overwatering. Allow the top 2 or 3 inches of soil to dry before adding water. Too much moisture often leads to root rot. Yellowing leaves may also indicate aphid, mealybug, or mite infestations. Profoundly cheaper than vanilla, a pandan plant might be just what you’ve been looking for! |
Welcome!You can grow a surprising amount of food in your own yard. Ask me how! To help The Daily Garden grow, you may see affiliate ads sprouting up in various places.
You can also get my book, Stop Wasting Your Yard!  Index
All
Archives
April 2024
|
||||||||||||||||||||||||


_1.jpg)
 RSS Feed