|
Loquats are delicious, highly productive, broadleaf evergreen trees. Loquats, also known as Japanese plums, are native to Asia. These easy-to-grow trees are members of the rose family. 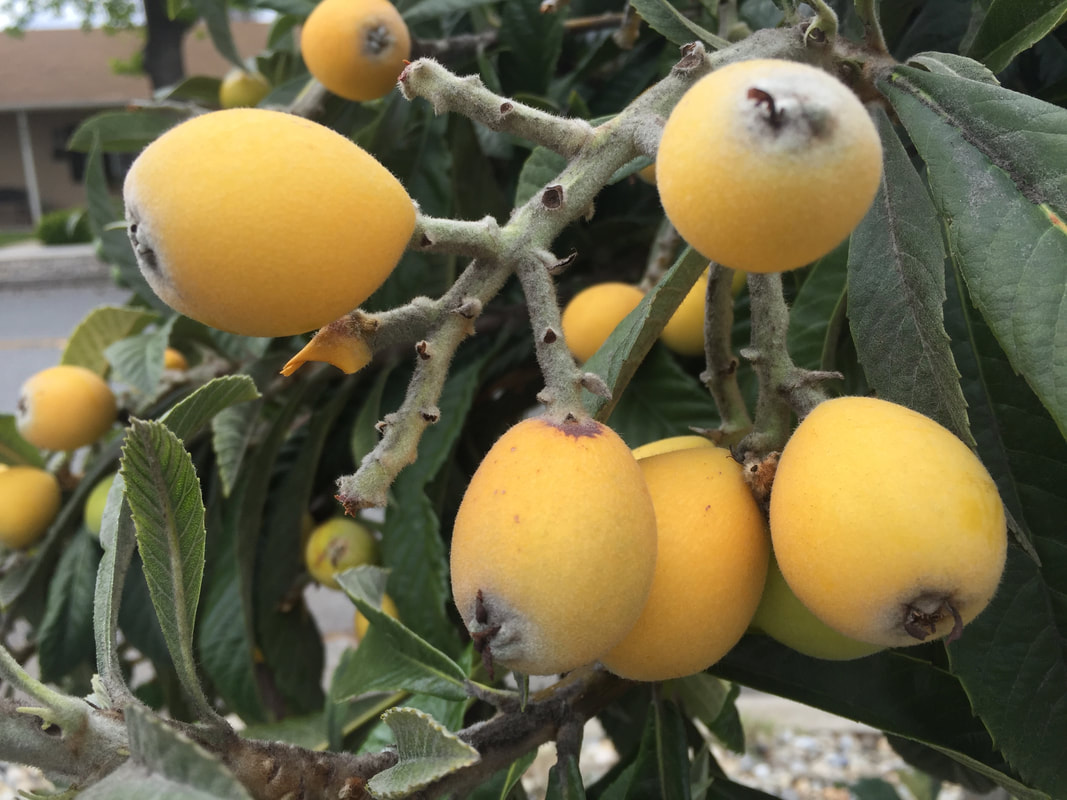 Loquats (Kate Russell) Loquat tree characteristics Loquat trees (Eriobotrya japonica) can reach 10 to 25 feet tall and across. Most specimens are smaller than that. In some cases, they look more like a spreading shrub. They offer lovely, fragrant white blooms in November and December, and can handle temperatures as low as 28°F. Leaves are elliptical, wrinkled, leathery, and toothed around the edge (margins). They are darker on top and lighter underneath. Smooth or slightly fuzzy yellow to orange fruits ripen in spring. These fruits contain one or more very large seeds and the fruit is delicious. These trees can make a bit of a mess when fruit drop time comes around. Loquat trees have a shallow root system, so care should be taken when digging nearby, and regular irrigation is helpful during the peak of summer. On the flip side, they cannot tolerate standing water.
Pests and diseases of loquat The loquat tree is resistant to most pests and diseases. Fireblight, various rots, cankers, blights, and leaf spot may occur. Aphids, caterpillars, fruit flies, and scale insects may feed on your loquat tree. This attractive, rounded tree provides beauty at a time when many plants are sleeping through winter. The fruit can be eaten fresh, or used to make jams, jellies, or pies. I’m ordering mine today! UPDATE: Loquat seed toxicity
It was recently brought to my attention that loquat seeds can be toxic to dogs and other animals. I did some research and this is what I learned:
So, once again, too much of a good thing can be a bad thing. If your dog eats a few loquats, the worst thing that will happen is a little stomach upset. If your dog is crazy in love with loquats, you should probably limit their access to the fruit.
7 Comments
Nothing says summer like a sweet, juicy, sun-warmed nectarine. The good news is, you can probably grow a nectarine tree in your yard, along a fence, or even in a large container. 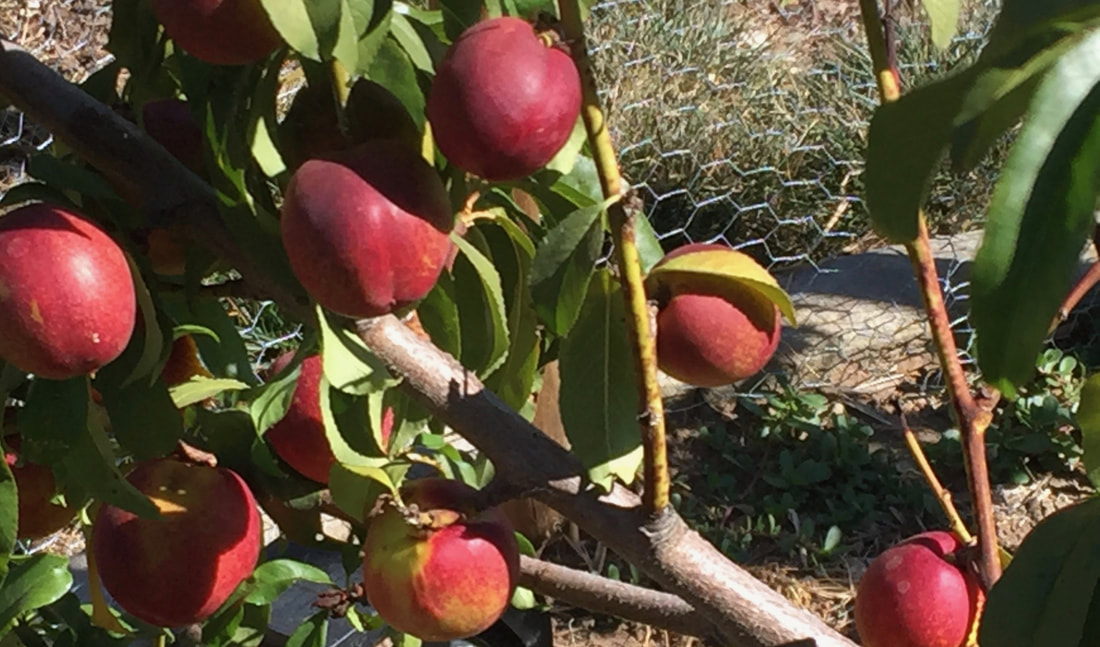 Nectarines (Kate Russell) Nectarines are delicious fresh, stewed, baked, and sautéed. They freeze well and make excellent jam. Nectarines (and peaches) are so useful and tasty, that they have been cultivated for thousands of years. First grown in China, nectarines and peaches have been around for 2.6 million years! What’s the difference between nectarines and peaches? Fur. The only difference between a nectarine and a peach is a single gene that produces fuzzy skin (dominant) or smooth skin (recessive). A nectarine (Prunus persica var. nucipersica or var. nectarina) is simply a peach without the furry skin (trichomes). Nectarines and peaches are both members of the rose family, along with apples, pears, blackberries, raspberries, and strawberries. Nectarines and peaches, like apricots, cherries, plums, and almonds, are stone fruits. There are both cling and freestone varieties, and you can find yellow and white peaches and nectarines. [Yellow fruits are more acidic than white fruits.] Peaches and nectarines are also in a group of plants that use specialized cells for storage, manufacturing, and as weapons. These cells are called idioblasts. Don’t worry, though, they can’t hurt you. 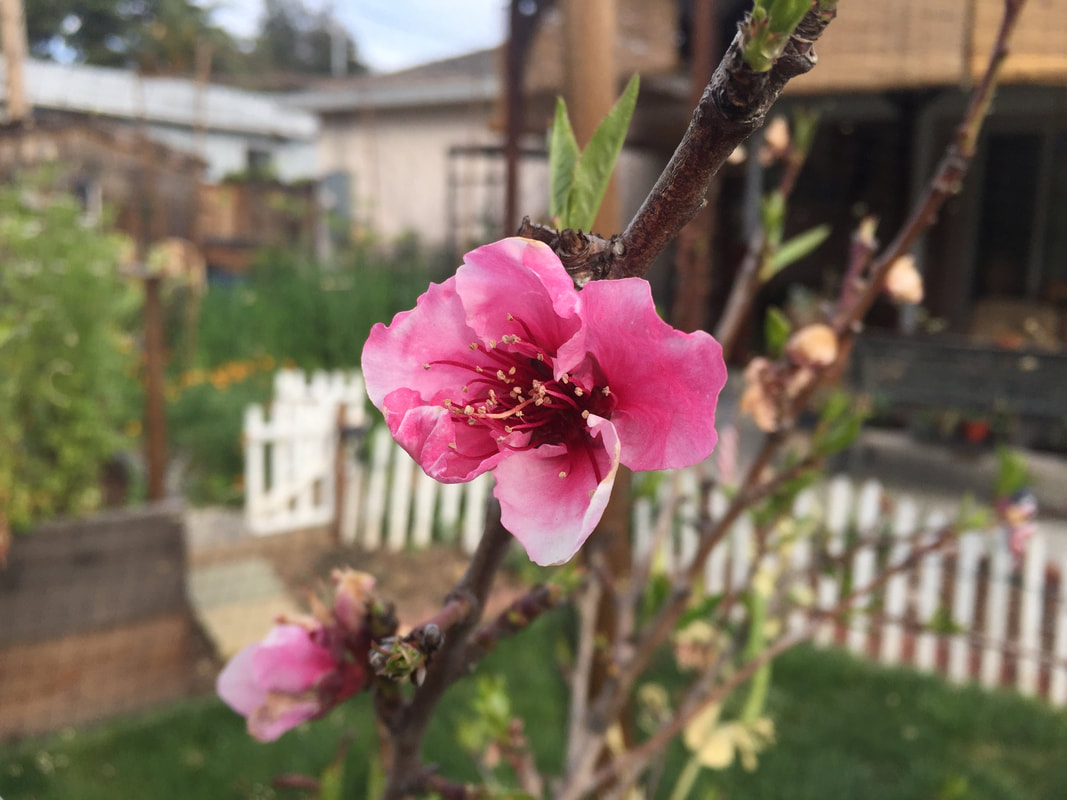 Nectarine blossom (Kate Russell) Nectarine characteristics The main reason you do not see nectarines in the store year round is because they do not ship and store well. While nectarines are usually smaller, firmer, and more aromatic than peaches, they also bruise more easily. [All the more reason to grow your own!] A standard nectarine tree can reach over 30 feet in height, semi-dwarf varieties reach 12 to 15 feet tall and wide, while dwarf nectarine trees are only 8 to 10 feet and they can be pruned for an even smaller size while still producing a good crop. Nectarines can also be espaliered, if you only have a narrow space along a wall or fence. Each spring, your nectarine tree will produce lovely pink blossoms, followed by a delicious crop of fruit, and then all the leaves fall off (making dormant pruning so much easier!). Before you jump on the nectarine bandwagon, however, that yummy fruit can only occur if enough chill hours are accumulated each winter. Nectarines and chill hours Chill hours are an accumulation of temperatures between 32°F and 45°F. Somehow, trees keep track of this information. I have no idea how. If enough chill hours are not accumulated, nectarine flowers and buds will not form properly, which means you might not get any fruit. Different nectarine varieties have different chill hour requirements, so it is important that you select a variety appropriate to your location. Do not trust your local box store to sell you the right one. Most nectarine trees need 650 to 850 chill hours. You can learn your own chill hours on my chilling hours page. Nectarine site selection Once you have found a variety that matches your garden’s chill hours and your personal tastes, you will want to select a site with excellent drainage and plenty of sunshine. Also, nectarines prefer a soil pH of 6.5. In areas with alkaline soil, acidification may be needed for the best results. Nectarines, like peaches, are self-fruiting, so you do not need multiple trees for pollination. While you may be tempted to grow a nectarine tree from a pit, think twice about that. Most commercially grown nectarines are actually from two different trees: a root stock and a fruit producing tree. These two trees are grafted together to take advantage of the benefits provided by a strong root system and good fruit production. Your store bought nectarine pit may never produce fruit at all. Or it might. You are far better off buying bare root stock from a reputable producer. Nectarine trees can also be started from twig cuttings called scions. How to plant a nectarine tree Bare root trees are best planted in winter and early spring. Examine the root system for signs of disease or damage. These bits should be cut out. If your bare root tree is not going to be planted right away, it should be soaked in a bucket of water for 6 to 12 hours, but no longer. [Plants can drown, too, you know!] When you are ready to plant, dig a hole that allows the roots to spread out freely. If the soil is heavy clay, be sure to rough up the edges of the planting hole. Containerized and balled trees should be given a hole slightly larger and the same depth as the container or root ball. In any case, it is very important that the soil level remains the same. Add soil around the roots and water thoroughly. This removes air pockets that can dry roots out before they ever get a chance to grow. Mulch around your new tree and water regularly until the root system has become established. The first 2 or 3 years, flowers should be removed, to encourage a strong root system. I know it’s hard, but you’ll thank me later. Feeding and watering nectarines Nectarine trees use a lot more nitrogen than other fruit and nut trees. You can use blood meal, ammonium sulfate, or commercial 10-10-10 fertilizer to feed your nectarine tree. Young trees will need a total of 10 to 15 lbs. of manure or 1/4 lb. of urea, spread out over the months of spring and summer. Mature trees should receive twice that amount. If your nectarine tree doesn’t get enough nitrogen, you will start seeing red areas on the leaves. Nectarines are shallow-rooted trees, so they are susceptible to water stress during the summer. You can protect your tree with deep irrigation and a thick layer of mulch, just make sure that the mulch does not actually touch the tree trunk. If your nectarine tree becomes too water stressed, it will develop a condition called bitter fruit which is exactly how it sounds. The problem is, once bitter fruit occurs, the tree will forever after produce fruit that is bitter. If you keep your nectarine tree properly irrigated throughout the growing season, you can improve the taste and sweetness of the fruit with deficit irrigation, just before harvest. Another technique used to improve both the quantity and quality of fruit is called cincturing, or scaffold girdling. This is not the same thing as girdling your nectarine tree with the weedwacker. Get help from an experienced arborist, rather than trying this on your own, as it can kill your nectarine tree. Nectarine pruning and thinning Nectarine trees perform best when they are trained in what’s called an open center system. This is exactly what it sounds like. Each winter, you will want to remove 50% of the previous year’s new growth. This will stimulate fruit production and maintain a reasonable tree size. One problem that commonly occurs with nectarines and peaches is that trees produce more fruit than they can support. This can mean broken branches. Proper pruning and fruit thinning can save your tree. Thin fruits to 6 inches apart when they are the size of a marble. If you think there is too much fruit on a branch, you can always prop it up with a board or other support until after the fruit is harvested, and then prune and thin more heavily next year. Nectarine pests and diseases The most common diseases faced by nectarine trees here, in San Jose, California, are peach leaf curl and brown rot. Nectarine are also susceptible to crown gall, bacterial blight, citrus blast, bacterial spot, stem blight, and shot hole disease.
Peach twig borers are a common pest of nectarines. Peach twig borer infestations often appear as dead twigs, called flags or shoot strikes. Luckily, many beneficial insects, such as braconid wasps, mealybug destroyers, and tachinid flies love to eat peach twig borers, so avoid using broad spectrum pesticides. Armyworms, earwigs, eugenia psyllid, Japanese beetles, mealybugs, San Jose scale, green fruit beetles, Mediterranean fruit fly, armored scale, eriophyid mites, katydids, and birds are also common pests. [Who can blame them?] You can use tree cages to protect your crop from birds in summer. Kaolin clay can be applied to individual fruits to protect against some pests. In fall, after harvesting your delicious crop and before the first heavy rain, apply fixed copper to control shot hole fungus, fertilize plants one last time, and give your tree a deep watering. After all the leaves fall, move them away from your nectarine tree. Destroy or compost the leaves to prevent the spread of apple scab. As always, remove mummies as soon as they are seen. Bordeaux mixture, dormant oil sprays, and fixed copper sprays should be used in fall and winter to protect against San Jose scale, shot hole disease, and other fungal diseases. You can prevent brown rot with a spring fungicide application. Crawling pests can be blocking from reaching fruit by wrapping the tree trunk with a sticky barrier.  Ripe nectarines (Kate Russell) Harvesting nectarines
Nectarines are ready for harvest when they come away from the tree easily with a gentle twisting motion. The fruit will bruise easily, so be gentle when handling ripe nectarines. If you install a nectarine tree this spring, you can expect to have a tree for 7 to 20 years, depending on where you live. Since each nectarine tree can produce up to 65 lbs. of fruit each year, or approximately 200 nectarines, you will have plenty of delicious fruit to go along with a lovely tree. Plant one today! They will never jump through a hoop for you, but you can train your trees to be healthier and more productive. Tree training helps fruit and nut trees stay healthy, produce larger crops, and avoid broken branches. Proper tree training also reduces the likelihood of pests and disease. Too much fruit and strong winds can result in broken branches. Proper training can prevent these problems. You may not want to go as far as pollarding or coppicing, but training your trees for good structure, air flow, and the retention of productive wood is always a good idea, except when it isn’t. Trees that are particularly large or unstable should never be trimmed or pruned by an amateur. It is too dangerous. When to train trees Most fruit and nut trees are deciduous. This means they go dormant and lose their leaves in winter. This is handy for several reasons. First, it allows you to remove leaves that may be carrying pests or diseases. Secondly, it allows you to see the true structure of your trees. This makes training them a lot easier. The only exceptions are cherry and apricot trees, which should only be pruned in summer, to avoid Eutypa dieback. Making a proper cut You may want to read up on pruning before you start training your trees. Put simply, you will want to make a smooth cut that is flush with, but does not cut into, the branch collar. There is no need to paint or treat these cuts. Your tree will develop a protective callus over the area, all on its own. Tree training basics To maintain a healthy fruit or nut tree in your backyard, you will probably want to keep it pruned to a manageable size. This is usually 6 feet tall and 6 feet wide. If it gets too large, you won’t be able to reach. Surprisingly, trees of this size can still produce a lot of fruit. As with any other pruning job, you will want to remove any dead, diseased, or damaged limbs. You will also want to eliminate one of any pair of crossed branches. These will tend to rub against each other, creating points of entry for pests and disease. As you prune, try to work from the inside out and avoid leaving stubs. You can orchestrate the direction new twigs will take by cutting just above buds that face in the direction you want the new twigs to grow. Do not use downward facing buds as these tend to be weak and break easily. Your overall goal should be to expose the tree’s interior to more sunlight, without risking extensive sunburn damage. The big picture Before cutting, take the time to really look at your tree’s structure and shape. Learn what is typical for that particular species, and think about what you want from your tree over the next several years. Consider issues such as wind exposure, shifting shade patterns, fruit and leaf litter, and tree maintenance. What is proper training for a tree in one location may be completely inappropriate in a different location. If you’re not sure, ask me. You can also look at this fruiting wood characteristics chart, from UC Davis, that can help you decide what to remove and what to leave for another year. Once you have really looked at your tree and prepared your tools, you will need to select the training style best suited to your tree species. The lowest branches are usually at knee height, regardless of the style chosen. Central leader The central leader training style is best suited to semi-dwarf and standard size trees. This style features a single main, vertical trunk. Competing upright shoots are removed and an alternating spiral of lateral branches is encouraged. This is your classic Christmas tree shape. Modified central leader The modified central leader style allows more sunlight into the center than a central leader system. To create this shape, a tree is first trained as a central leader, until it reaches the desired height. Then, the central trunk is topped, or removed, just above the most recent lateral growth. This causes the tree to develop more of an open center. This method is particularly good for cherries and pears. Open center The open center style seems to be the most popular for backyard orchards. In this style, three or four low-growing scaffold (main) branches are encouraged, with the center kept open, like a bowl. Lateral (horizontal) branches make up the sides of this bowl shape and are trimmed back to approximately 30 inches. Fruiting wood will grow from these branches. This method provides good sun exposure and air flow. Also known as vase-shaped training, it is a good method for almonds, Asian pears, and European plums. The “Y” system
The “Y” system features two scaffolding branches, heading in opposite directions, creating a “Y” shape. Look at it as a two-dimensional open center style. This method is particularly good for peaches and nectarines. It can also be used for apples, plums, cherries, and pears. Espalier Espalier training is a trellising system used to create a two dimensional shape. This method works well alongside driveways, paths, buildings, and fences. If you end up removing smaller, new wood, you can save these and use them as scions, to create new trees or modify existing trees. They make good gifts for fellow gardeners, as well! Also, as you work closely with your tree, keep a look out for scale and other insect pests that may be overwintering in your tree’s bark. Peaches may be the last thing on your mind right now, but autumn is a good time of year to find room on your property for a peach tree. Even if you don’t have room in your yard, dwarf peach varieties can be grown in containers. Peach trees make a lovely addition to a foodscape. Fragrant spring blossoms give way to fruit that practically defines summer. Autumn leaf drop makes pruning easy and what winter would be complete without a surprise dessert of peach cobbler? A mature peach tree can produce up to 65 pounds of fruit each year. That’s over 200 peaches!  Autumn red peach (Jack Dykinga) Public Domain History of the peach Did you know that peach trees have been around for over 2.6 million years? Traditionally thought to be from Persia, genetic research shows that peaches actually originated in China. Also, it was thought that peach cultivation started some 6,000 years ago, until some ancient writings showed that certain kings and emperors, back in the 10th century B.C., favored a delectable peach now and then. So, if you love peaches, you are in good company. The peach tree Peaches and nectarines are the same fruit, like fraternal twins. The only difference is that peaches have fuzzy skin (trichomes) and nectarines are smooth skinned. This difference is due to a recessive gene, the same way blue eyes or red hair occurs. Peaches are in the rose family, members of the Prunus genus, all of which produce fruits called drupes. This makes them cousin to almonds, apricots, cherries, and plums. Peach trees are in a group of plants that use specialized cells for storage, manufacturing, and as weapons. These cells are called idioblasts. Standard peach trees can grow 25 to 33 feet tall and 25 feet wide, if you let them. For the best productivity and tree health, it is better to keep them pruned to 15 feet by 15 feet. Dwarfs can reach 8 to 10 feet. Most peach trees in Maine only live 7 years, while California peach trees live 12 to 20 years. Peach trees and chill hours Before you plant a peach tree, you need to understand chill hours. Each winter, peach trees enter a period of dormancy. Being deciduous, they lose all their leaves and enter a winter rest. During that rest, the number of hours spent between 32°F and 45°F are accumulated (don’t ask me how - I have no idea). These “chill hours” must reach a certain number for a tree to be able to blossom properly in the spring. Once enough chill hours are accumulated, the tree enters a different type of dormancy called quiescence. Depending on the variety, peach trees need 600 to 900 chill hours. Here in the Bay Area, we generally only get 450 chill hours. When selecting a peach tree variety, you want to take chill hours into account. There are several models used to calculate chill hours, and each one gives you different information. Below you can see the chill hour results for the South Bay Area. Go to my page on chilling hours to learn how to get your local information. There are hundreds of varieties to choose from. According to UC Davis, using the Dynamic Model, the following varieties have their chill hours noted alongside:
[Using the Dynamic Model, San Jose receives an average of 52 chill portions each year, so only two varieties would be a good choice.] You can see detailed list of different fruit trees at the UC Davis Home Orchard. Peach varieties Peach varieties are divided between cling and freestone. Those names refer to how easily the fruit comes away from the pit. Freestone peaches tend to have firmer fruit, while clingstone peaches are known for their sweeter taste. Clingstone varieties are harvested May through August, while the freestone harvest extends into October. There is also a hybrid cross between the two, called a semi-freestone, and flat varieties, called pan-tao. Not all peach tree varieties perform well in all regions or microclimates. Check with your local County Extension Office and be sure to verify your growing zone using the USDA Hardiness Zone Map. Growing a tree from a peach pit While you can eat a peach and then plant its seed, this doesn’t always work out the way you expect. Like apples and many other fruits, peach seeds do not necessarily produce offspring that taste as good or grow as well as the stock you buy at your local nursery. This is because most fruit and nut trees are grafted. Grafted trees have an aboveground part from one variety and a root stock from another variety. This is done to take advantage of one variety’s ability to develop strong roots, while other varieties may taste better or be more pest or disease resistant. Also, your pit grown peach tree will not produce fruit for a few years, and some will never produce fruit. If you want to give it a try, you can simply put your peach pit in the ground and let nature take its course, or you can refrigerate the pit until December or January. This method, called stratification, fools the pit into triggering winter processes (vernalization), in preparation for spring. Just soak your pits in water for a couple of hours, and then place them in a plastic bag, along with a little moist soil. This bag goes into the refrigerator, until you see signs of germination. This can take a few weeks or months, depending on the variety and other factors. Since peaches emit high levels of ethylene gas (a ripening agent), you should keep them away from other fruits and vegetables. Once it starts germinating, remove it from its cold environment and let the planting begin! But first, you need to select the best location for your peach tree. Peach tree site selection Peach trees need plenty of sunshine, but they will also benefit from a little protection at the extreme points of summer and winter, if possible. Being susceptible to several fungal diseases, peach trees also need good drainage. Peach trees prefer a soil pH of 6.5. Here, in the Bay Area, we tend to have more alkaline soil, so acidification may help your tree thrive. Of course, you won’t know what your soil is without a test from a reputable lab. Just sayin’… How to plant a peach tree Bare root trees are best planted in January and February. Your peach sapling should be planted right away, or soaked in water for 6 to 12 hours before planting. If you have a bare root tree, gently spread the roots out to see how much space they can use and dig a hole that will accommodate them. This is also a good time to clip off any dead, diseased, or damaged roots. Be sure to rough up the edges of your planting hole. If you don’t, the smooth clay left by your shovel can create a tough barrier for young roots. Containerized and balled trees should be given a hole slightly larger and the same depth as the container or root ball. It is very important that the soil level remains the same. Add soil around the roots and gently tamp it down. This removes air pockets that can dry roots out before they ever get a chance to grow. Mulch around your new tree and water it in well. Peach trees can also be started from twig cuttings called scions. Peach tree care Peaches are self-pollinating, which means that another tree is not needed to produce a crop. If you have room for more than one tree, be sure to space them 12 by 16 to 18 by 18 feet apart. Peaches perform best when trained with what’s called the “Y” system. The “Y” system features two scaffolding (main) branches, heading in opposite directions, creating a “Y” shape. You can picture it as a two-dimensional open center system, which also works with peaches. These tree training systems leave the trees open in the center, allowing lots of air and sunlight to reach the fruiting wood. Peaches can also be espaliered. Feeding and watering peaches Peach trees use a lot of nitrogen. You can use blood meal, ammonium sulfate, or commercial 10-10-10 fertilizer to feed your peach tree. Nitrogen deficiencies in peach appear as red areas on the leaves. Peaches are shallow-rooted, so they are susceptible to water stress during the summer. Too much stress can lead to a condition called bitter fruit that can mean the end of the useful production of your tree, so irrigate accordingly. Near the end of fruit development, deficit irrigation can be used to improve taste and sweetness. While you certainly want to avoid girdling your peach tree with the weedwacker, doing it on purpose, called cincturing, or scaffold girdling, can increase production and fruit quality. You just have to be really careful that you don’t kill your tree in the process. Peach pests and diseases Peaches are susceptible to these bacterial diseases: crown gall, bacterial blight, citrus blast, and bacterial spot. Fungal diseases include stem blight, peach leaf curl, shot hole disease, and brown rot. Armyworms, peach twig borers, earwigs, eugenia psyllid, Japanese beetles, mealybugs, San Jose scale, green fruit beetles, Mediterranean fruit flies, armored scale, eriophyid mites, katydids, and birds are the biggest pests. Luckily, beneficial insects, such as braconid wasps, mealybug destroyers, and tachinid flies love to eat peach twig borers! Pheromone traps can be used to monitor many of these pests and sticky barriers will prevent many pests from ever reaching tender buds, shoots, and fruit. Bordeaux mixture, fixed copper, and dormant oil can be used to prevent or treat some bacterial diseases, fungal diseases, and pest infestations. Kaolin clay can also be used to prevent some pest damage. Since fruiting occurs from pollination by honey bees, flies, and other pollinators, avoid using broad spectrum pesticides. When to harvest peaches Color and smell are good ripeness indicators, when it comes to peaches. Yellow skin, which may or may not have a red tinge, and that amazing sweet summer aroma of ripe peaches are reason enough to give one a try. Taste, ultimately, is the only true indicator of ripeness, but who can complain about conducting that test? If the fruit comes away from the stem easily, it is ripe.  Peach blossoms (Fan Wen) CC BY-SA 4.0 Too much of a good thing
Your peach tree will produce far more fruit than it can support. This leads to a low quality harvest and broken limbs (the tree’s - not yours). You can protect your tree and improve crop quality by thinning flowers and fruit partway through the growing season. First, when your tree is covered with blossoms, leave it alone and enjoy it. As the flowers start developing into tiny fruits, it is time to thin. The basic rule of thumb for thinning fruit is to leave one fruit per spur, with fruit 4-6” apart. Apricots, nectarines and peaches are normally thinned when the fruit is 1/2-3/4” in diameter. Make a place for a peach tree in your yard today for a decade of fresh summer peaches in your pantry! Persian limes with brown bottoms have stylar end rot.
Also known as stylar end breakdown, stylar end rot primarily affects Bearss, Tahitian, and other Persian lime species but can occur in other lime and lemon varieties. Stylar end rot found on guava is a fungal disease. Stylar end rot is a physiological disease caused by too much heat. Even though limes, lemons, and other citrus have thick, waxy skins to protect themselves from the sun’s heat and drought conditions, sometimes that protection isn’t enough. Symptoms of stylar end rot The stylar end of a fruit is the part with the dried-up petals. It is opposite the stem end. Stylar end rot starts as a small, grayish sunken area that slowly becomes firm and leathery. Some fungal diseases exhibit similar symptoms:
Affected areas can spread to cover 1/4 to 1/2 of the fruit. Bacteria and fungi often infect these compromised areas. The tissues inside break down and turn brown or pink. Diseased fruit can go in the compost pile, but only if it is free of other fungi and bacteria. Otherwise, toss it in the trash. Preventing stylar end rot You can’t. Stylar end rot occurs when vulnerable citrus fruits experience an accumulated 18 hours of temperatures over 105°F. Think of it as reverse chill hours. Pick the fruit earlier, after particularly hot summers, and hope for cooler weather next year. You can grow these tasty nuts in your own backyard, if you have room and patience. The delicious flavor of pistachios doesn’t come cheap. They are not inexpensive and they require effort to pry from their shells. That being said, pistachios have a protein-rich flavor that begs us to eat just one more, and another, and another.  Immature pistachio cluster (Paolo Galli) CC BY-SA 3.0 What are pistachios?
The meat of a pistachio (Pistacia vera L.) is not technically a nut. Like apricots, olives, cherries, coconuts, and mangoes, pistachios are drupes, or stone fruits. Pistachios are the edible seeds held within a hard shell. When these seeds ripen, the shell pops open with an audible pop. In the world of botany, the thing that makes a drupe a drupe is that the fruit develops from a single ovary. How do pistachios grow? Pistachio trees need long, hot, dry summers and gentle winters to produce those hard-shelled nuts. Pistachio trees can tolerate a lot of salinity as long as they get hot, dry summers. Soggy soil will kill your pistachio tree, so good drainage is critical. Pistachios are a slow-growing, alternate bearing, deciduous tree that needs 600 to 1500 chill hours, depending on variety, to produce fruit. Those chill hours can be hard to come by in many warmer regions, but the trees are lovely and some varieties can be very productive. A healthy, mature pistachio tree can produce 110 pounds of seeds every other year. That’s a lot of pistachios! Pistachio varieties The following cultivars have been shown to produce well in the warmer regions:
Pistachio pollination Pistachio trees are dioecious. That means there are both male and female trees. You only need one male for up to 10 females for successful pollination, but these trees get rather large, so you probably won’t have room for more than one of each. Mature trees can reach 33 feet in height and should be spaced 20 feet apart. How to grow pistachios Plant pistachio rootstock from January through early May. Be sure to provide support by inserting a large, heavy stake next to the root ball. You will want the wind to push the tree toward the support for the best development. Irrigate the root ball immediately and follow with regular waterings until the root system is established. This may take several months, so be patient. Your pistachio tree will also need to be fertilized regularly. During the first dormant season, cut the top of the main shoot off, just above leaf buds. This heading cut will promote a solid structure later on. Pistachio pests and diseases A disease called panicle and shoot blight, caused by the Botryosphaeria fungi, kills flowers and young shoots of pistachio trees. In 2011, 50% of the Australia pistachio harvest was lost to anthracnose. Verticillium wilt can also be a problem. Severe drought has also reduced commercial production in many areas. Common pistachio pests include leaf-footed bugs, mealybugs, nematodes, and late season navel orangeworms. Harvesting pistachios After waiting for 5 to 7 years, you will finally be able to harvest your very own pistachios. Like almonds, this is done by shaking the tree. Ripe nuts fall and are collected from the ground. If you see any nuts with mold, toss them in the trash. That particular mold is carcinogenic. Also, be sure to dry your pistachios out completely before storing - they have been known to spontaneously combust. Don’t let all those problems discourage you or scare you off. These beautiful trees can produce an edible crop for decades, if cared for properly. Tiny brown spots on your apples? It might be bitter pit. Bitter pit is a disorder of apples. It is related to low calcium levels. Also known as blotchy cork and Baldwin spot, this disease can also affect quince and pears.  Early signs of bitter pit on lower left apple (Paebi) CC BY-SA 3.0 Causes of bitter pit Much like blossom end rot, bitter pit occurs when there is not enough calcium in a fruit. Calcium deficiencies are almost unheard of west of the Rocky Mountains. Insufficient or irregular watering can make it hard for plants to move calcium to where they need it. Calcium is a low-mobility nutrient. It takes a lot of water to move calcium around once absorbed. Inadequate irrigation means newer leaves may look burnt or die due to a lack of calcium, regardless of how much is in the soil. The optimal range is 1000 to 1500 ppm.
How to control bitter pit
Many commercial growers spray trees with calcium, while others dip fruit in a calcium solution, but these methods are unrealistic for the home grower. Regular irrigation is the best way to avoid bitter pit in your apple crop. Applying too much fertilizer, thinning fruit too early, and thinning too much can increase the odds of bitter pit. Removing excessive vegetation without over-pruning can help reduce the likelihood of bitter pit. Maybe removing some foliage means more calcium for the rest of the tree. That's my guess, anyway. Bottom line: those spongy little dead spots won’t hurt you. But they create points of entry for pests and diseases that create more work for you later. You know, one of those ounce-of-prevention situations. Keep your trees healthy and treat them right to make your job easier. Cling peaches. Freestone fruit. What do those words mean? If you have ever bit into a sweet, juicy peach or nectarine, you may have discovered that the fruit practically fell away from the pit as you neared the center. Or, you may have had to fight for every morsel, leaving behind a ragged, fruit-covered pit. When the fruit comes away from the pit easily, it is called freestone. When the fruit clings to the pit, it is, you guessed it, a cling variety. Texture differences Freestone fruits tend to be more firm than clingstones. This makes them better suited for canning. The clingstone varieties are best for fresh eating, though you can certainly can them, or turn them into a delicious jam or chutney! Harvest times Clingstones are generally harvested May through August, while freestone varieties are harvested May through October.  Nectarines (Kate Russell) If you are going to plant a peach or nectarine tree, take the time to decide which type you want before you plant. Of course, biting into a fresh, sweet peach or nectarine, you won’t care if it’s a freestone or a cling!
Chickens, jays, and mockingbirds can wreak havoc on your fruit and nut tree crops unless you provide protection. Floating eye balloons, hanging old CDs, motion-sensing sprinklers, and noise cannons are just a few of the countless methods ‘guaranteed’ to protect your fruit and nut crop from marauding birds, but most of them do not work; not for long, anyway. Caging your tree is the only way to be sure that you get the lion’s share of your fruit or nut crop. 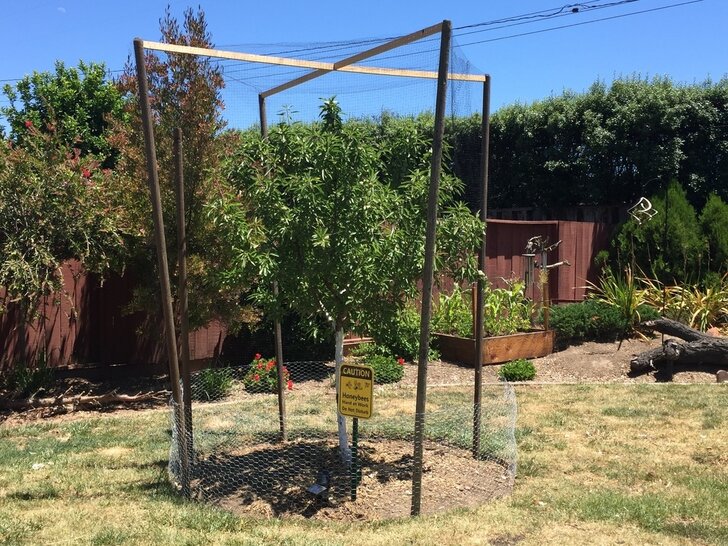 Caged almond tree (Kate Russell) The netting used over your tree cage will still allow pollinators easy access. Unfortunately, it also allows codling moths and other flying insect pests to reach your fruit and nut trees. Even so, birds and squirrels can take a big bite out of apple, apricot, almond, nectarine, fig, and other crops. Tree cages can stop that damage before it even starts. Plus, these cages stay up, year round, so there's no wrestling with netting every spring and fall. Store bought vs. DIY tree cages Store bought tree cages can be astronomically expensive and most of the really nice ones are in the UK. The added shipping costs make it impossible or unrealistic for most of us. Luckily, it is surprisingly easy to make a tree cage yourself for less than $50. If you can scrounge old tree supports, it’s even cheaper. Make your own tree cage This tree cage design is intended for dwarf variety trees that will be pruned to 6 to 8 feet tall and 8 feet wide. You can adjust the measurements for bigger trees, but longer lodge poles can be harder to find and more expensive.
3. Place one lodge pole in each hole and gently press the dirt you dug up back into the hole, making sure that the drilled hole runs outside to inside of the tree space, rather than side-to-side. You’ll see why in a minute. Also, dig one more hole to create the doorway space. 4. Take both 1”x2” boards and cut a 1/2-inch notch out of the middle of each, only cutting halfway through. I used a handsaw to make the perpendicular cuts and then a hammer and chisel to knock out the chad. Fit the 1”x2”s together in the middle and hammer together into a giant X-shape.
8. Drape bird netting over the X-shape and staple it down to make it taut. Ideally, you want birds and bats to bounce off, not get tangled. Bring the netting down over the sides until it reaches the chicken wire. You can use the wrapping wire from the roll of chicken wire (or string) to “sew” the netting to the chicken wire. I used heavy duty black thread and an embroidery needle.6. Staple 2’ chicken wire to the lodge poles, all the way around.
7. If you are really handy (which I am not), you can build yourself a fancy door. I opted for something far more simple: I cut a piece of bird netting that was larger than the door opening, attached it to the opening at the top, and ran a piece of thin scrap wood through the holes at the bottom. The wood weighs the netting down enough to keep chickens, mockingbirds, and jays away from my fruit and nut trees, and it’s easy to use. For added stability, you can add a cross piece above head height between one of the four lodge poles and the door lodge pole. Pineapple guavas are neither pineapples nor guavas, but they can make a good addition to your foodscape. 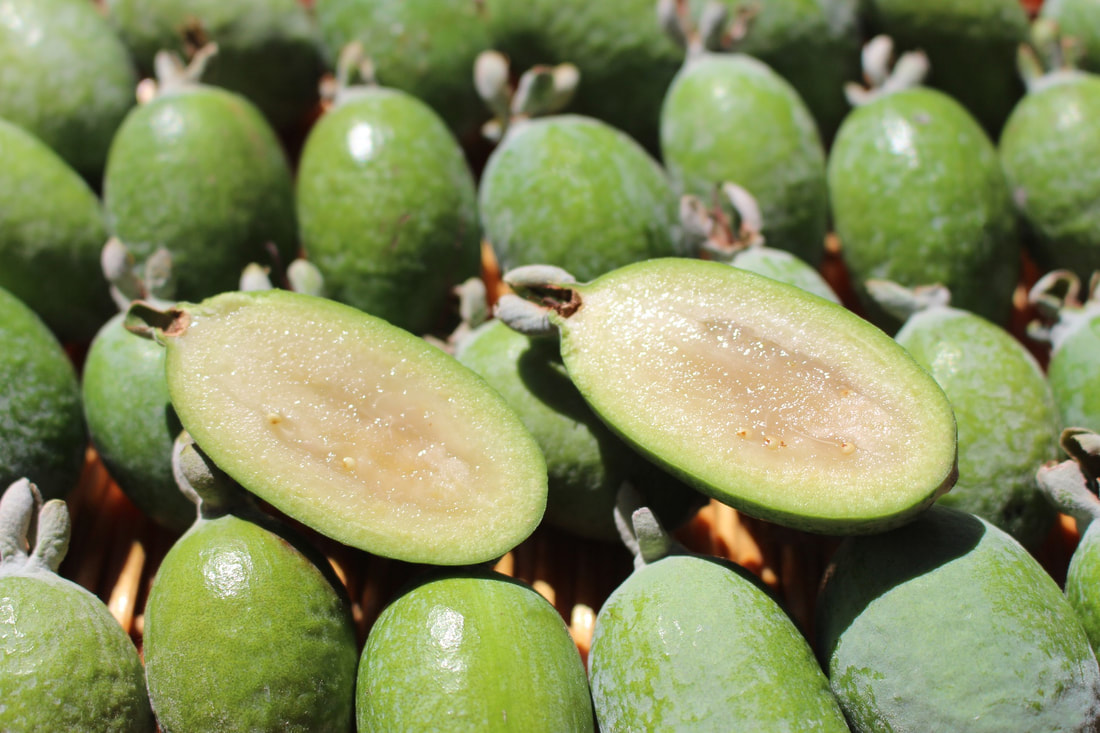 Pineapple guava fruit (Chesna) Pixabay Distant cousin to guavas, pineapple guava (Acca sellowiana, or Feijoa (fay-zho-uh) sellowiana) is a member of the myrtle family. Native to Brazil and Argentina, it is well suited to the Bay Area’s hot summers and cool winters. It is somewhat frost tolerant. The edible flowers look like tiny versions of bottlebrush and have a cinnamon flavor. (Of course, if you eat all the flowers, you won’t get any fruit!) 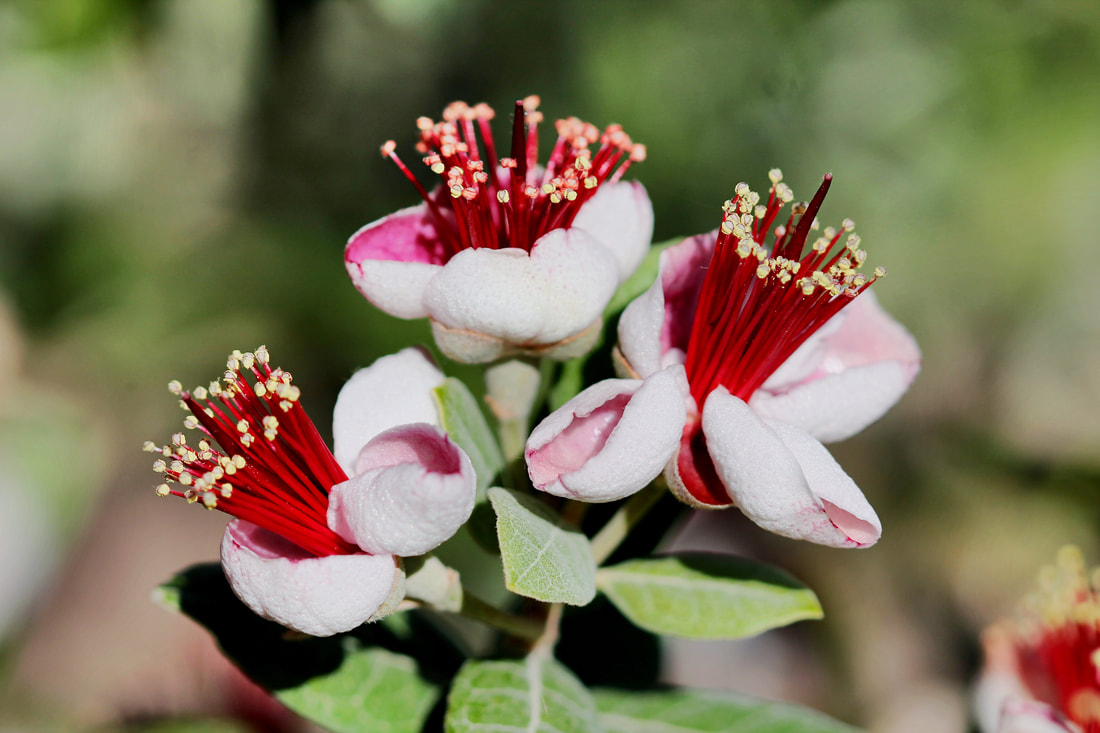 Pineapple guava flowers (Renee Grayson) CC BY 2.0 Growth habits Pineapple guava is a relatively slow-growing perennial evergreen shrub that can eventually reach a height and width of 10 to 15 feet. Leaves are green on top and silvery underneath, which looks really nice when a breeze comes through. Pineapple guava plants grow best in USDA Hardiness zones 8 through 11 and they need 50 chill hours each winter to set fruit (I get 300 in the Bay Area). If temperatures are above 90 °F for too long, fruit set can be reduced. Pineapple guava are very drought tolerant, but they do need to be irrigated as fruit is being produced. How to grow pineapple guava Growing pineapple guava from seed is a slow business. It can take a year for seedlings to show any real growth. Most pineapple guava trees are purchased as 1- or 2-year old plants. If you only have room for one specimen, make sure that it is a self-pollinating variety. Most pineapple guavas require a second specimen for pollination. They prefer partial shade, a soil pH of 5.5 to 7.0, and can tolerate some salt spray. They do not respond well to bright, reflected light, so installing pineapple guava next to a driveway probably isn’t the best idea. They can be grown in large containers, and they can also be espaliered or pruned as a small tree, or used to create hedgerows or windbreaks. There are several varieties of pineapple guava to choose from. Caring for pineapple guava One of the best things about pineapple guava is how little care they need. You can ignore them completely, once they are established, or you can give them a boost with these maintenance tips:
Harvesting the fruit Pineapple guava fruit are egg-shaped and can be 3/4 to 3-1/2 inches long. The fruit is described as tasting like a cross between pineapple, apple, strawberry, guava, and mint. Fruit reaches full maturity (and the best flavor) in fall, but it bruises easily. Ripeness can be determined by giving fruit a gentle squeeze. Harvesting fruit too soon is a waste, since unripe fruit is bitter. Waiting for it to fall on its own usually means bruised fruit. Probably the best solution is to set up a net under the tree to gently capture fruit as it falls, but this isn’t alway feasible. Commercially, ‘touch picking’ is used. Touch picking means that if the fruit breaks free when you touch it, it’s ripe. Regularly checking for ripe fruit before it falls will reduce the number of bruised fruit. Some people eat the entire fruit, skin and all, while others cut it in half and scoop the fruit out with a spoon. 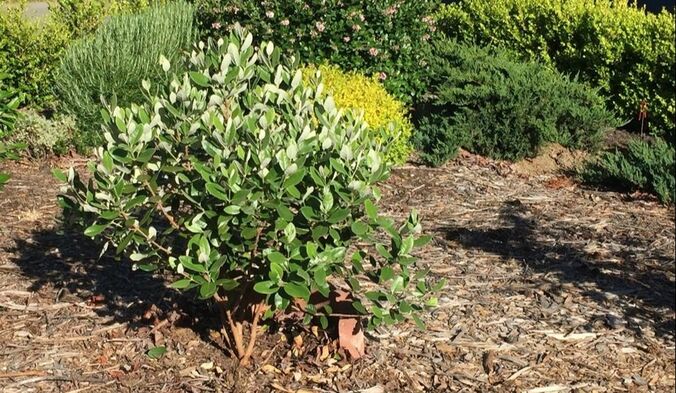 Young pineapple guava (Kate Russell) Pineapple guava no real pest or disease problems. Black scale and fruit flies may show up, but these shrubs are truly trouble-free.
Pineapple guava fruit does not ship well, so most stores never carry it. Adding these trouble-free shrubs to your foodscape means you will have a ready supply of delicious fresh fruit each fall for many years to come. As fruit trees begin putting out fruit in spring, it is your job to take some of that fruit off. It may seem counterproductive. Why on earth would I plant a fruit tree only to take the fruit off when it has only just started growing? Why would you want to reduce your crop that way? Read on and find out! Why thin fruit? Most fruit trees will produce far more fruit than can be supported or made flavorful. Too much fruit and branches start breaking. Now, the tree doesn’t care how the fruit tastes, as long as it tastes good enough to cause animals to help with seed dispersal. To get the sweetness, size, and shape that we want, we have to intervene. Thinning fruit also helps reduce the likelihood of pests or diseases getting established in the nooks and crannies between fruit. Finally, fruit thinning reduces the chance of your tree taking a year off of production (alternate bearing) out of sheer exhaustion. How (and when) to thin fruit trees Different trees have different thinning needs. Generally, the time to thin fruit is dictated by fruit size. Stone fruits are thinned when they reach 3/4 to 1 inch in diameter, while pome fruits can be thinned when they are 1/2 to 1 inch. This is usually in April and May in the Bay Area. You can also predict the time for thinning by noting it 30 to 45 days after full bloom on your calendar. To actually remove the fruit, give it a gentle twist. Sometimes, pruners are needed. Your fruit tree is working very hard at this stage, so be kind. Do not be tempted to thin your fruit trees too early, as this can lead to split fruit later on, especially in peaches. Of course, thinning too late won’t help your fruit become as large as it might have. Fruit thinning by species Some trees do not require thinning. These include cherries, figs, citrus, Bartlett pears, pomegranates, and persimmons. You may want to monitor your persimmons tree, however, as a very productive year can lead to breakage. Use this information to determine just how much to thin, depending on tree species:
Natural fruit drop We are not the only ones who want to protect our fruit trees from breakage due to too much fruit. These trees have evolved to protect themselves with what is erroneously called “June drop”. June drop can occur late spring through early summer and it refers to a fruit tree dropping many immature fruits. Fruits that are diseased or infested may also drop prematurely. Don’t be afraid to get up close and personal with your fruit trees in spring. Thinning fruit will ensure a better crop and a healthier tree. Thinning also gives you a chance to see what’s really going on for your fruit trees, allowing you to halt a minor pest invasion before it causes any real damage. For those of you (like me) who need ways to remember what and how to thin, give this a try: Spring season of thinning, no need to despair
Help them grow stronger with inches to spare Small apricots and plums, give them each two to four Peaches and nectarines, need three inches or more Then muster the clusters of apples and pears Save just the biggest, only one or two there Mutants and mummies and twins all must go Leave only the best. Now just watch them grow! -KR Bacterial spot is a relatively new disease to California.
When bacteria infect a plant, the plant’s first line of defense is often to surround the infected area with a strong barrier. While not always as effective as our immune systems, this often prevents further spread of the disease. These damaged areas usually appear as spots on leaves. Bacterial spot is just one of many different bacterial diseases that attack your plants. First seen in 2006, this particular bacterial spot attacks almonds and other stone fruits, such as peach and nectarine. Bacterial spot (Xanthomonas arboricola pruni) first appears as an amber colored gum oozing from immature nuts. This disease is common in the Southeastern U.S., Europe, Australia, and the Middle East. Bacterial spot symptoms Symptoms first appear mid-April to early May. Damage looks similar to that caused by leaf-footed bugs and anthracnose. Use these notes to differentiate between the three conditions:
Leaves may become spotted, develop angular or circular red lesions, and drop early. If you cut open an affected nut, you will find a pencil eraser-sized lesion. These lesions get bigger, transforming your delicious almond into an orange slime. (Ew!!!) Almond varieties most commonly affected are ‘Fritz’, ‘Monterey’, ‘Nonpareil’, ‘Mission’, ’Neplus Ultra’, and ‘Padre’. How to control bacterial spot Commercial growers use zinc sulfate in the fall to make trees drop all of their leaves, which are then gathered and destroyed. Leaf and mummy removal is followed by spraying with dormant oil and copper treatments, combined with the antibiotic oxytetracycline. Obviously, you are not going to hit your backyard fruit and nut trees with all these chemicals. These tips can help minimize the damage caused by bacterial spot in your garden:
To prevent infection, trees can be treated with oil and copper mixtures before winter. This is yet another reason why it is a good idea to quarantine new plants before installing them. Renewal pruning is a method that stimulates new growth while removing unproductive wood or canes.
According to some, renewal pruning refers specifically to plants that produce canes from the root system. I am going to use the broader definition above. The general rule of thumb for renewal pruning is to remove one-third of any older wood each year. These are thinning cuts that take branches back to the main stem or crown, depending on the growth habit. [When making thinning cuts, be sure to avoid damaging the branch collar.] Each species has its own characteristics, which need to be taken into account before you start lopping off branches. Some of the more common approaches to renewal pruning are listed below. Renewal pruning of currants Currants produce fruit on spurs that emerge from 2- and 3-year old wood. After that, those limbs are far less productive. Use the following pruning schedule on currants:
Renewal pruning of fruit trees Fruit and nut trees produce fruit on spurs and on twig tips. Some species only produce fruit on new spurs, while others can use the same spurs for several years. For example, figs, grapes, persimmon, and quince produce fruit on new shoots and one-year old wood. Pears, walnuts, and apples, on the other hand can produce fruit on the same spurs for several years. UC Davis offers a chart of fruiting wood characteristics that can help you decide what to remove and what to leave for another year. Did you know that large, unproductive branches are called bulls? I didn't either. Renewal pruning of raspberries and blackberries Some varieties of raspberry and blackberry produce fruit on primocanes. These are fall-bearing varieties that produce the best fruit on first-year canes. While leaving them in place will provide some fruit the following spring, the quality and quantity are usually poor. For these berries, it is better to cut the canes back to ground level in late autumn. This gives the plant time to pull carbohydrates from the leaves down into the crown and root system. These nutrients will be used to grow new canes in spring. Summer-bearing floricanes produce fruit on buds from second-year canes, so removing them at the end of year one would be problematic. Rejuvenation pruning Some trees and shrubs can become so out of control that they risk falling over, severe disease infestation, or they simply look awful. In some (but not all) of these cases, rejuvenation pruning can be used to give them a new start on life. These plants are cut to ground level and allowed to start over from an established root system. Before you try this method, be sure to research the plant to make sure this is an appropriate choice. Cutting back some plants in this way will kill them. Whole tree pruning Traditionally, trees that produce fruit in new growth, such as cherries, are pruned by removing selective branches. Another method being studied is whole tree pruning, in which all the major limbs are removed each winter, leaving only 12 to 18 inch nubs. This method is not for the faint of heart, but it is gaining popularity among commercial growers. Don’t be afraid to prune your trees and shrubs. It is an excellent way to help your plants to stay healthy and productive. As you move around under the canopy or peaking into the center of your shrub, you may even discover a new pest or disease before it gets out of hand! Luscious summer pears are one of the most difficult tree fruits to grow in San Jose, California, but the rewards, for many, are worth it. European pears (Pyrus communis) actually hail from Western Asia and modern day Iraq and Iran. People have been growing pears for over 4,000 years and Bartlett pears have been the standard for over 200 years. In the world gardening and agriculture, that's pretty amazing.  Eight varieties of pears (left to right) Bartlett, Red Bartlett, a different Red Bartlett, D’Anjou, Bosc, Comice, Concorde, Seckel (Agyle) Public Domain Pear varieties
Pears do require a cold rest period, called vernalization, each winter. Silicon Valley only averages 400 chill hours, while Bartlett pears need 800 chill hours each winter. You will need to identify a species suitable to your microclimate. Pears are categorized by the season in which they ripen. Summer pears have thin skins, ripen on the tree in July through September, and most are small to medium sized, and the fruit is fine-textured. Winter pears feature gritty textured fruit that ripens September through November. Below is a list of popular pears with notes, chill hours, and best zones for growing:
How to grow pears Unless you select a self-fruitful variety, you will need at least two trees for a fruit set. Also, keep in mind that full size trees may take up to 20 years to reach full production, while semi-dwarfs take 5 to 8 years. Most bare root stock available in garden centers are 2 or 3 years old. Choose a site that can accommodate the tree’s full size and provide full sun. Pest and disease problems can be reduced by providing good air flow around each tree. Pear trees are best pruned into a “Y” shape. They tend to grow very upright and need trimming to create a healthier, more spread out growth. Pear fruits do not require as much thinning as apples. You can leave 2 or 3 fruits per cluster without problems. Pear pests & diseases More pests attack pears than any other fruit tree in the Bay Area. These pests include aphids, San Jose scale, mites, pear psylla, codling moth, redhumped caterpillars, Eriophyid mites, birds, and squirrels. Common pear diseases include fire blight (Erwinia amylovora), crown gall, leaf spot, pear scab, and apple scab. Pear tree care These seasonal chores can help keep your pear trees healthy:
Pear ripening If you allow your pears to ripen on the tree, you will probably never get to enjoy one. Pears are a favorite food of squirrels and birds. I once lost an entire season’s crop because the squirrels were willing to harvest the pears two days earlier than I was. Pears ripen from the inside out. The easiest way to tell if it is time to harvest a pear is to use the Cradle Test. To do this, cup one hand under a pear and use the other hand to swing the fruit from its 6:00 position to a 9:00 position, with a twisting motion. If the fruit falls, it’s ready. Actually pears taste better if they are harvested when they are mature but not fully ripe. Then place them in the refrigerator for a few days, up to two weeks for summer pears, and 3 to 4 weeks for winter pears. After the fruit has been chilled, bring it back to room temperature and enjoy. Oh, by the way, don’t bruise the fruit at any point in this process. As I said, growing pears is not an easy process. The sweet, juicy flavor of a fresh, properly ripened pear, however, is exquisite. Plum orchards once covered The Valley of Heart's Delight (what is now known as Silicon Valley). Many homes are still graced by individual specimens of these prolific fruit producers, and it is easy to add one to your landscape, as well. Plums are members of the Rose family, in the Prunus genus. This makes them cousins to other stone fruits, such as peaches, nectarines, and cherries. One variety of apricot (Prunus armeniaca) is so closely related that it is actually a plum! Fruits of the plum tree are called drupes. 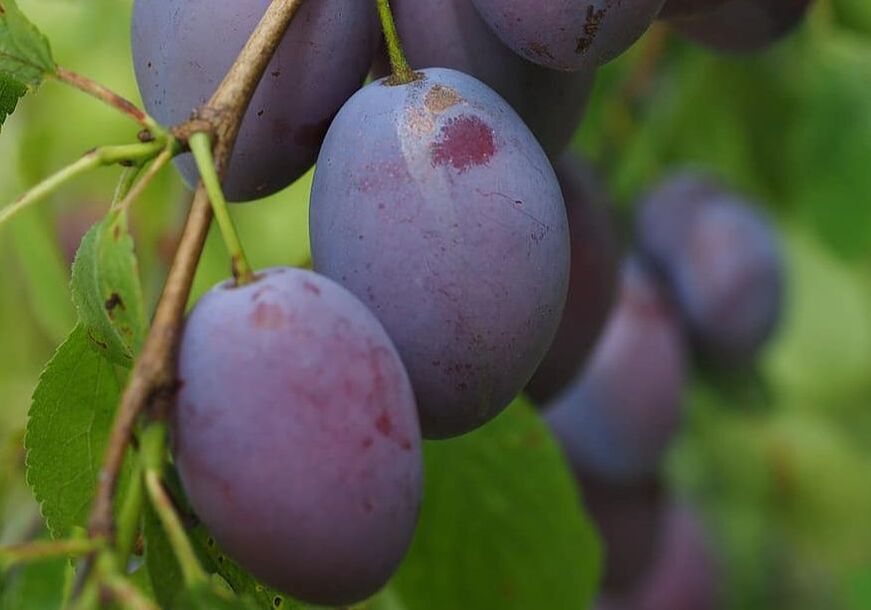 Purple plums (Pikist) Plum varieties When deciding on a plum variety, keep in mind that plums can be sweet or tart, early or late blooming and ripening, standard size, dwarf, or semi-dwarf. Two varieties are commonly grown are Japanese plum (Prunus salicina) and European plum (Prunus domestica), but there are others. Some European plum varieties do not require cross-pollination, but all plum trees produce far more if there is a second tree nearby. Japanese plums bloom and mature earlier, but European plums tend to be sweeter. 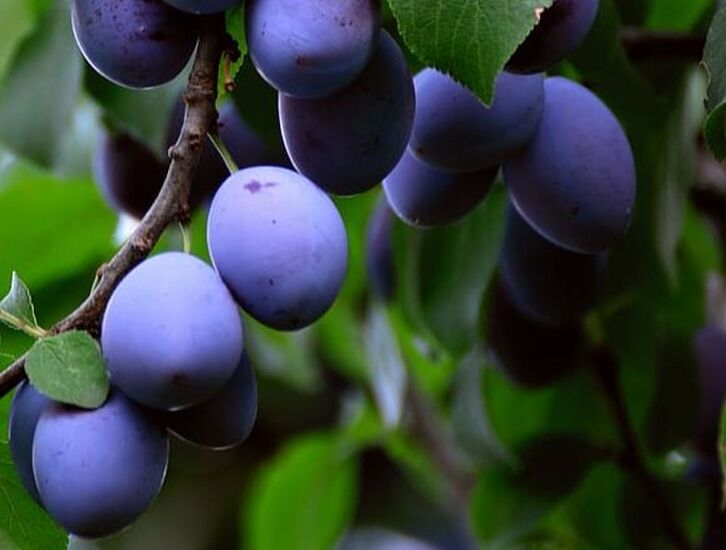 Purple plums (Wallpaper Flare) Standard plum trees can grow to 30 feet tall and 25 feet wide, semi-dwarfs can be 15 feet wide, and dwarf varieties rarely need more than 10 feet. Plums come in skins of many different colors, from yellow, to red and purple, to nearly black. The interior fruit can be yellow, white, red, or green. Commercially, plums grown to be consumed as fresh fruit are called “sugar plums”, while the remainder are grown to be dried and sold as prunes. Prunes are almost exclusively made from European plums. You can also find plum-apricot and plum-cherry hybrids! 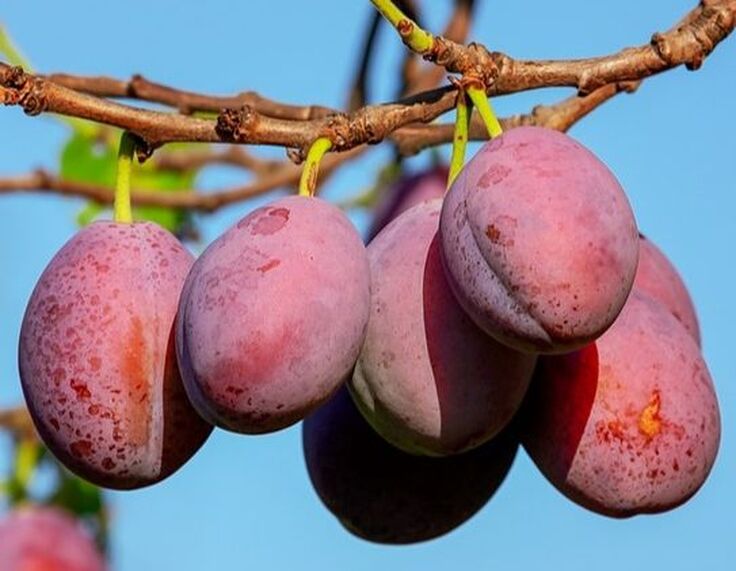 Red plums (Couleur) How to grow plums
Plums love mild winters and hot, dry summers. While they prefer more sandy soil than many gardens tend to have, they are pretty tolerant of clay, as long as the drainage is good. They do need a lot of sun. Plums are best started from certified disease-free root stock. You can also start a tree from a friend or neighbor’s tree by taking one of the many suckers that tend to appear. Suckers root more easily if they are dipped in rooting hormones (auxins), but they will create their own auxins in a day or so. If starting from seed, plums should be planted 3 inches deep. Be sure to mark the spot so you don’t lose track of your new baby! Plum tree care Plum trees thrive here in warm regions. Trees do require the following seasonal care:
Plum tree pests & diseases The most common plum pests are aphids, mites, and San Jose scale. Other pests include Oriental fruit fly, plum curculio, mealybugs, redhumped caterpillars, green fruit beetles (Cotinis mutabilis), and mealy plum aphid (Hyalopterus pruni). Sticky barriers can reduce the impact of many crawling insect pests. Fungal diseases that affected plum trees include canker, brown rot (Monomania fructicola), and shot hole, also known as Coryneum blight. One of the most common problems faced by plum tree owners is overproduction. Overproduction, or overbearing, can cause broken limbs, so it is important to thin fruit to no more than one fruit every 2 to 4 inches. Don’t be concerned if your plums have a whitish coating on them. This is a protective epicuticular wax known as “wax bloom” and is easy wiped off. Add a plum tree to your landscape this spring for decades of delicious summer fruit and year-round jams and jellies! Over 11,000 years ago, figs were one of our first attempts at agriculture, even before barley, wheat, and legumes. Farmers and scientists had curious ideas about wild and farmed fig trees in those early years. They thought tiny wasps flew from the wild (fruitless caprifig) trees to the farmed female (fruited) trees to help them hang on to the fruit! If that weren’t interesting enough, did you know that figs are not fruit? Read on! 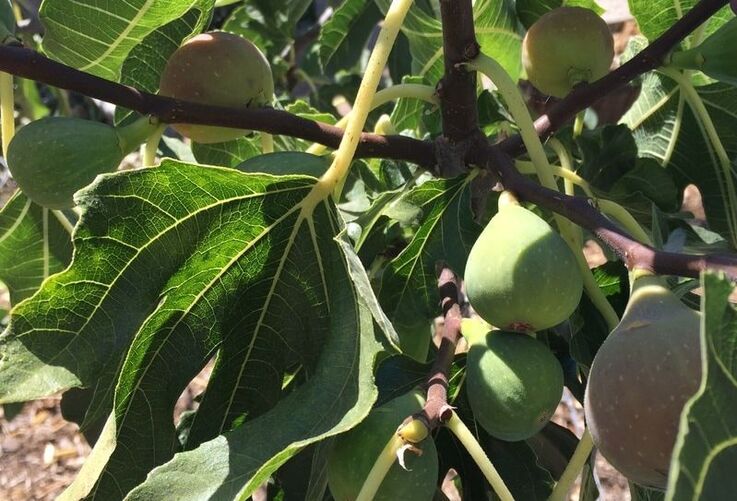 Fresh figs (Kate Russell) The fig tree
Figs (Ficus carica L.) are deciduous trees or shrubs that can grow 30 feet tall. They send out multiple trunks to create a fan-like tree. The wood tends to be weak, so pruning keeps the tree structurally sound. Broad, fragrant leaves provide lovely shade but avoid the sap. It contains a form of latex that can irritate your skin. Fig trees prefer sunny, well drained locations. They can also grow well in poor, rocky soil. These trees are very drought tolerant. Botanically, fig trees are gynodioecious, which means they have hermaphrodite flowers and female flowers on separate plants. You can either buy a self-pollinating variety or multiple trees. It ends up that those ancient farmers were partly correct about fig trees Tiny specialized wasps called Blastophaga psenes pollinate the flowers hidden inside a hollow structure called the syconium. The fruit is technically a scion or infructescence. An infructescence is a fruit head made of the ovaries from a flower cluster. These arrangements are often called false fruits or multiple fruits. Within each fig “fruit” are several one-seeded fruits called druplets. Pineapple, wheat, and corn are other examples of infructescence. How to grow figs Originally from the Middle East and western Asia, these resilient trees grow well in regions with hot, dry summers and cool, wet winters. Figs reproduce in several different ways. Naturally, birds and mammals that eat the fruit end up spreading seeds. Fig trees also tend to send out aggressive roots, stolons, and suckers that can generate new plants. You can bend a low-growing branch down to the ground or a container, hold it down with a rock or some wire, and wait for roots to grow. After roots emerge, you can separate it from the parent plant. Most buy fig trees as bare root trees. Fig trees can be grown in large containers, but you will want to take advantage of their deep roots. Planting fig trees in the ground practically eliminates the need for irrigation. Like grapes, fig trees have deep roots that allow them to get most of their water from the soil’s saturation (or phreatic) zone. Fig pests & diseases Thrips, ants, green fruit beetles, dried fruit beetles, gophers, and birds are the only serious pests. You can thwart ants with a sticky barrier around the trunks. Netting is invaluable for protecting fig crops. Eriophyid mites do not cause significant damage, but they can carry fig mosaic. Whitewash the trunks to protect them from Sunburn damage. Just paint a 50:50 mix of water and white later (not enamel) paint on exposed surfaces. Some fig varieties produce two crops a year. The first, or ‘breba’ crop, occurs in mid-summer. The second main crop ripens in late summer or fall. Be sure to allow figs to ripen on the tree. They will not continue to ripen once picked. Forget the bagged, dried version of this healthful fruit. Plucking a freshly ripened fig from the tree and taking a bite is heavenly. You can always dry your own. Add figs to your foodscape for decades of delicious fiber and welcome summer shade. Hazelnuts, filberts, or cobnuts, whatever you call them, these delicious nuts grow on trouble-free shrubs that make excellent additions to your foodscape. Since hazelnut shrubs naturally grow alongside creeks and under taller overgrowth, they are a good choice for locations with partial shade.  Hazelnuts (Simon A. Eugster) CC BY-SA 3.0 Why grow hazels? The obvious reason for growing a hazel bush is the delicious nuts. Hazelnut plants can produce food for 80 years! Hazelnut shrubs also make excellent, drought tolerant anchor plants in the landscape. Traditionally, hazels were planted as hedgerows between properties and grazing fields. They were frequently coppiced, or cut to ground level to stimulate new growth, to provide long, slender poles for basket-making and wattle and daub fencing.
How hazels grow
Unlike most plants, hazelnuts bloom and pollinate in winter. Yellow pollen-crusted catkins release their bounty to the wind, which carries it to tiny red flowers. There, the pollen stays dormant until summer. That’s when the nuts start to form. Hazels are monoecious, or hermaphroditic, having both male catkins and female flowers on the same plant. Catkins are hanging flower clusters that contain pollen. Hazelnuts are self-infertile, which means you will need more than one plant to produce a crop of edible nuts. Members of the hazel family are all deciduous. Some are trees and some are suckering shrubs. These suckers can be used to to create new shrubs elsewhere on your property or given to family and friends to start their own. Commercially, the suckers are generally removed and the shrub is trained into a tree form, to make management and harvest easier. What you do with yours is entirely up to you, but it is nice to have options! How to grow hazelnuts If you have access to suckers, use them! Otherwise, you can plant nuts in loose soil and water occasionally. Germination rates and speed can be increased by scarification, or scoring the outer layer of the nut. Once seedlings are 12 inches tall, they can be transplanted to their permanent location. They will begin producing nuts in their 3rd or 4th year. These nuts grow in clusters called burrs. Hazels are shallow-rooted plants that cannot tolerate soggy ground. They are drought tolerant and require little effort on your part, once they are established. Only during the peak of California summers do they need any irrigation. Hazelnut pests and diseases One very serious threat to hazelnuts has kept them from being grown commercially in the Eastern U.S. It is called eastern filbert blight. Our native species are resistant, and some are immune. This disease has recently made its way west to Oregon and California. Pests include bud mites, jay birds, and squirrels. Ads claim that giant eye floating balloons are a good way to keep birds out of fruit and nut trees, but I was unable to find any research that verified those claims. Harvesting hazelnuts Hazelnut harvesting begins in autumn, as the leaves and burrs turn brown. Remove nuts from the burrs and lay them out in a single layer, in a protected area, to dry for a few days. Roasting makes it easy to remove the inner paper, which can taste bitter, and it brings out that rich hazelnut flavor that we all know and love! Sweet, flavorful apricots, warm from the sun, freshly plucked from the tree, are one of life’s perfect moments. In my opinion, they rank right up there with their cousins, peaches and nectarines, as foods that define summer. 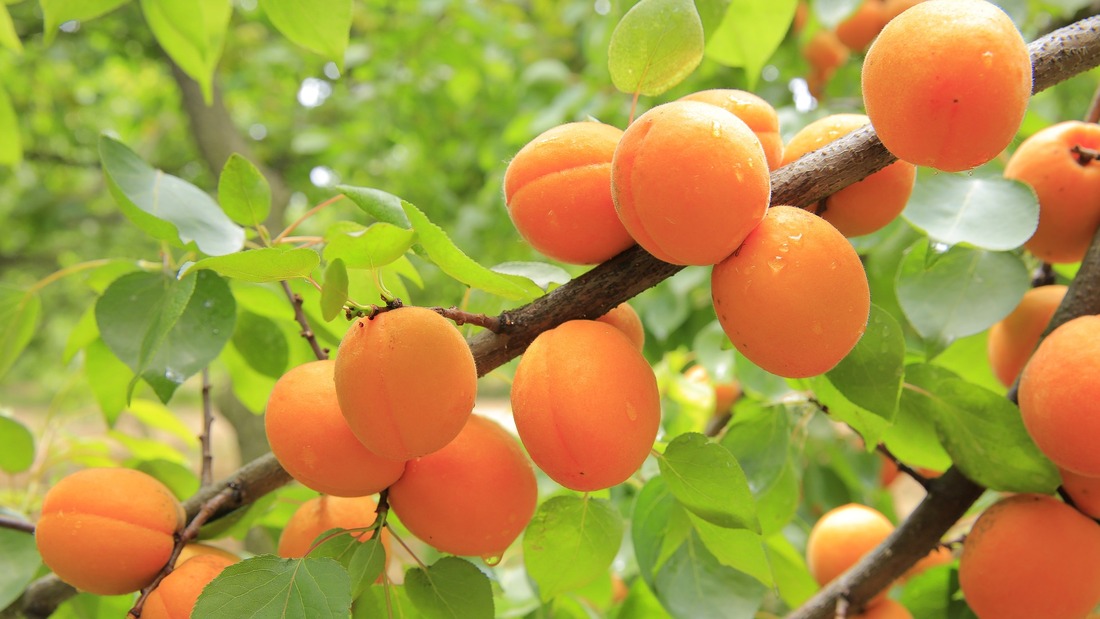 Apricots ripening on branch (夏 沐沐) Pixabay Apricots (Prunus armeniaca) are also related to cherries, plums, prunes, and almonds. If you look at the pits, you will see the similarities; they are all stone fruits. While dwarf varieties can be grown in large containers, apricots prefer being planted in the ground, in a sunny location. Plant an apricot tree and you will be treated to lovely spring blossoms and delicious summer fruit. The trunk will, over time, develop a striking gnarled look, too.
How to plant an apricot tree Unlike apples, pears, and other members of the rose family, apricots grown from seed have a higher chance of being similar to the parent plant. While there are no guarantees, you can take the pit from an apricot, cover it with an inch of soil, keep it watered and in a sunny location to start your homegrown apricot tree. For faster results, bare root stock can be used. Apricot bare root stock should be planted in January or early February, here in the Bay Area. Apricots prefer well-drained soil, but they can tolerate some clay. Before placing your apricot rootstock, be sure to amend the site with lots of compost, to help it get a healthy start. Also, if you have heavy clay, be sure to score the edges of the planting hole. Smooth clay is an impenetrable barrier to young roots. How to select an apricot tree When selecting rootstock, be sure to match the variety with your microclimate. Chilling hours vary by species, as does disease and pest resistance. If your tree does not accumulate enough chill hours, you won't get any fruit. Most apricots are self-fertile, so it is usually not necessary to have more than one tree. Contact your local Cooperative Extension Office for the best varieties for your area. The following varieties are good choices for warm weather regions:
Apricot tree care Each fall, before the rains begin, prune away 20% of last year’s growth, along with any dead, diseased, or poorly placed branches. This will allow more light to reach interior branches, stimulate new spur development, and improve the overall health of the tree. [Spurs are flower-bearing buds]. Spray for pest and disease control in winter and again in spring. Feed mature apricot trees 1 to 2 pounds of urea just before spring irrigation is begun and water it in thoroughly. Young trees should be given the same amount of urea, but spread it out in quarters over a 4 month period. As fruits reach 1/2 inch in diameter, they should be thinned to one fruit every 4 to 6 inches, for the best size and flavor. This also reduces the likelihood of pests and diseases. Irrigating apricots Begin irrigating in spring by watering every 2 or 3 weeks to a depth of 18 to 24 inches. This is one of those times where guessing isn’t good enough. I use my soil sampler, but you can use a trowel to gently dig down to the appropriate depth. If the soil isn’t moist, you need to figure out where the water is going and redirect it. Many times, hydrophobic soil will push water away. Watering more slowly can avoid this problem. Apricot pests and diseases Peach twig borers, Fuller rose beetles, San Jose scale, mites, and aphids are common apricot pests. Apricot is susceptible to Eutypa dieback, so pruning should only be done during summer, unlike other trees which are pruned during winter dormancy. Autumn and winter sprays of dormant oil, fixed copper, or Bordeaux mixture, as well as the use of sticky barriers, can help protect your apricot tree against other pests and diseases, such as brown rot, bacterial canker, shot hole disease, and crown gall. Despite these fungal diseases, do not use sulfur on apricots. A little space in your yard or on a balcony is all that is needed to start growing fresh apricots - give it a try! The seeds from this tree may not be edible, but they are certainly a natural way to cut down on your laundry bill! This discovery started when I was looking for a laundry detergent that wouldn’t hurt my landscape. I have a large diameter vinyl hose attached to the back of my washing machine (in summer) and I use the water to irrigate my fruit and nut trees, lawn, and ornamentals. (This isn’t legal everywhere, and isn’t necessarily a good idea, depending upon your preferred brand of laundry soap.) In my search for living a less polluting (and more cost effective) life, I stumbled upon soapnuts, also known as soapberries. Believe it or not, I was delighted to discover that these tree fruits cleaned my laundry just as well as commercial soap! Not only that, but they have natural fabric softening properties.
What are soapnut trees?
Soapnut trees are members of the Lychee family (Sapindus), which includes 5 to 12 different species of trees and shrubs (depending on who you ask) that all produce saponins. These saponins are found in the fruit, or drupes, of the soapnut tree (as well as in soapwort plants and sea cucumbers). Saponins are surfactants, chemicals that reduce the surface tension between molecules, allowing water to lift away grease, soil, and other impurities from your laundry. In fact, people have been using soapnuts as a sudsy cleaning agent for far longer than commercially made soaps and detergents. The soapnuts used to clean laundry, hair, and skin nowadays are mostly from the S. mukorossi variety. This particular tree also goes by the names Sapindus detergens, Indian soapberry, Chinese soapberry, Reetha, Areetha, Ritha, and Doda, just to name a few. [If you are feeling particularly nerdly today, you can see this plant’s genetic code here.] How soapnut trees grow Soapnut trees prefer temperate to tropical conditions. Some varieties are deciduous, while others are evergreen. The Indian soapberry tree, in particular, is a lovely deciduous tree that can tolerate poor soil. Trees will need the equivalent of 60 to 80 inches of rainfall each year. (San Jose, CA gets an average of 15 inches of rain, so some irrigation will be needed in the Bay Area.) Ultimately (and under ideal conditions), your soapnut tree can reach a height of 80 feet, with a girth of 15 feet. Most trees, however, end up significantly smaller than that (12 to 16 feet tall). The tree has smooth gray bark and a semi-umbrella shape. Small, greenish-white flowers emerge in summer and fruit appears in July and August. A mature soapnut tree can produce 60 or more pounds of soapberry fruit each year. How to grow a soap nut tree To grow your own soapnut tree, you will first have to find a seed. This has become easier in recent years, as more people discover just how effective soapnuts are. You can search online for seeds, or you can give soapnuts a try and hope to find a seed. The drupes (pictured) normally contain up to three seeds. The seeds need to be roughed up a little (scarified) before they can germinate. It is best to plant in spring. You can use a fine-grit sandpaper to score the outer hull, then soak the seeds in warm water for 24 hours. The most common way to keep the water warm is to place the seed and the warm water in a thermos. (My guess is that these prerequisites evolved out of the natural processes of seeds being eaten and then, well, you know.) Start each seed in a large container filled with high quality potting soil, planting them one inch deep. Keep the soil moist down to at least 2 inches, but not waterlogged, and provide plenty of sunlight. It may take a long time for your seeds to germinate. Once they do, they will grow quickly. After 3 or 4 months (or when frost isn’t expected any time soon), you can place your soapnut tree in the ground. Select a site that provides partial shade or dappled sunlight, if possible, and plenty of room to grow. Using homegrown soapnuts Once your soapnut tree produces fruit, you will want to collect the drupes in early winter, remove the seeds, and allow the fruit to dry out. A small muslin bag with tie strings can be used to hold 4 or 5 soapnuts and tossed in the laundry. The soapnuts do not have to be removed for the rinse cycle because the normally colder water of rinse cycles does not pull as much of the sudsing saponins as warm or hot wash water. The same bag of soapnuts can be used for up to 10 loads of wash. After that, toss them into the compost pile and reuse the bag! Other advantages of soapnuts Besides being disease-resistant plants, soapnuts also have gentle insecticidal properties that have been shown to interfere with mosquito and lice life cycles. Whether this means that washing your clothes with soapnuts will render them mosquito-proof has yet to be shown. Did you know that soapnuts are used to clean cardamom seeds, improving their color and flavor? If you use graywater from your washing machine, soapnuts are a far better option than soaps and detergents sold over-the-counter, and they’re free! Unfortunately, it may take your soapnut tree up to 10 years to begin producing fruit. (At least it’s faster that stone pines!) The nice thing is, soapnuts are lovely trees, long before they provide you and your family with a lifetime supply of environmentally safe laundry soap and shampoo! Growing apples is highly rewarding, but don’t try starting one from seed. 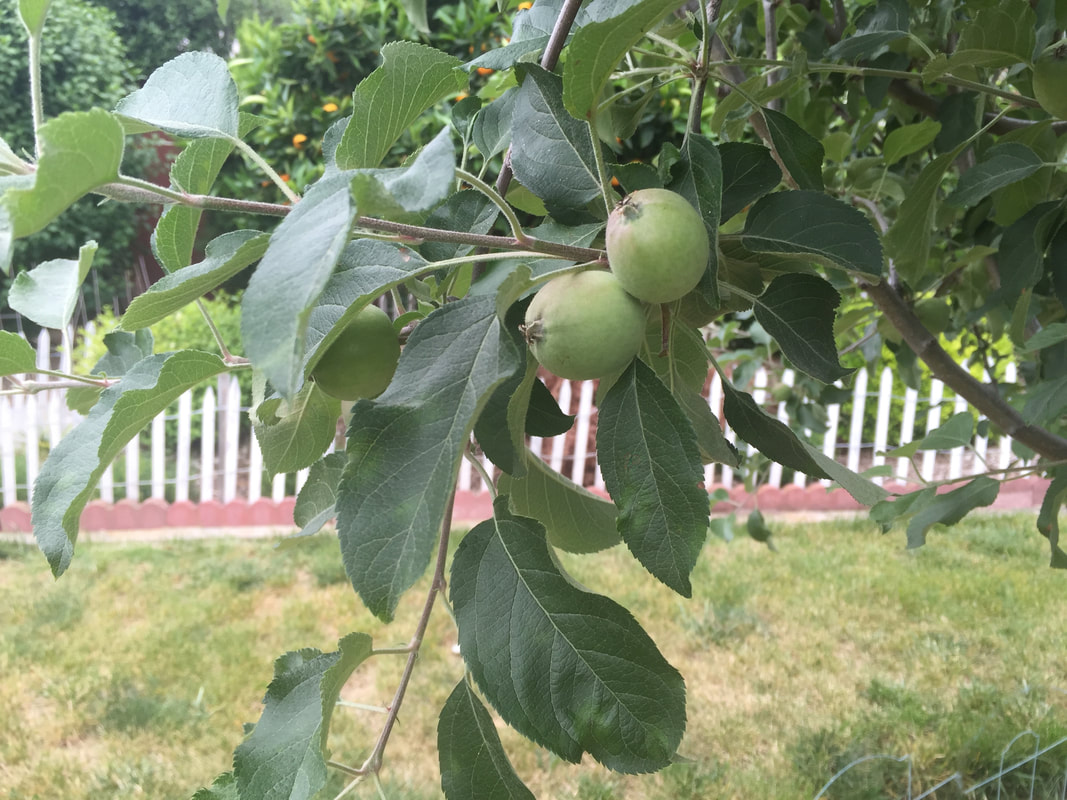 Immature apples (Kate Russell) These particular fruit trees are known as extreme heterozygotes. In plain English, the offspring are nothing like their parents. Planting seeds from a Red Delicious apple will not produce apples that look or taste like that shiny red fruit. It may not taste good at all. Most modern apple trees today are propagated from cuttings grafted onto sturdy rootstock. [Did you know that apples are related to roses?] Apple history Apples (Malus pumila, aka Malus domestica) have a rich and varied history. They hold a place in nearly every culture and religion, being one of our earliest attempts at tree cultivation. But wild apple trees (Malus sieversii) bear little resemblance to their domesticated progeny. Wild apple trees, still found in central Asia, can grow 40 feet in height, and the fruit is smaller and more tart than most people find palatable. Most of the apples sold in grocery stores are crosses between Malus pumila and crab apples. There are currently more than 7,500 apple cultivars with various traits of skin color, texture, disease and pest resistance, juiciness, storage ability, and more. In 2010, the entire apple genome was mapped, with over 57,000 genes identified. [Humans are estimated to have up to 25,000 genes. I guess we must be just one big family then.]  Apples come in lots of colors, sizes, and shapes Bare root apples The best way to start growing apples is with bare rootstock. Some apple varieties require cross-pollination, while others are self-pollinating. If you only have room for one tree, you need a self-pollinating variety, or all you will get is summer shade. Plant your bare rootstock during late winter or early spring. Before you buy, however, you may want to conduct a soil test with a reputable lab. This inexpensive test is an excellent investment in a tree that will probably live and produce fruit for the next 100 years. Also, consider the size of your mature tree - it is far easier to pick apples and care for your tree if it is a dwarf or semi-dwarf variety. Chill hours Chill hours are the accumulated time spent between 32°F and 45°F each year. In this temperature range, the growth-inhibiting hormone responsible for dormancy begins to break down, allowing trees and shrubs to start producing the buds that become the leaves and flowers of spring. The flowers and buds do not form properly unless enough chill hours occur. The number of hours needed is species-specific, so you need to know how many chill hours occur, on average, in your yard before selecting a tree variety. Red apples generally need 1200 to 1500 chill hours to develop their color and flavor. Green apples need less. How to grow apples Apples grow best in well-drained, nutrient-rich soil with full sunlight. Apple trees need some space for good airflow. Full-sized trees will need a 20-foot circle of space, while dwarf varieties need only 10. Dwarf apple trees tend to overproduce, breaking branches, so you may need to do more pruning or provide tree support. You can grow dwarf apple trees in containers. Once your bare root tree arrives, dig a hole twice the diameter of the spread-out roots and as deep as the root ball. Failing to plant trees at the proper depth is the main cause of tree deaths. Remove any grass or weeds growing within two feet of this circle. Remove any dead, damaged, or diseased roots, and then soak the rootstock in a bucket of water for a couple of hours or overnight if they are dried out. Mix some aged compost with soil from the hole and spread it out in the bottom of the hole. Be sure there are no smooth edges in the hole. Heavy clay and other compacted soils can create impenetrable barriers to young roots. You can help your apple tree get a better start by roughing up and scoring the edges of the planting hole. Place the tree in the hole, ensuring that the graft union (where the rootstock joins the scion) is at least 2 inches above soil level to avoid crown rot and other fungal diseases. Resist the urge to tamp down the soil. To eliminate big air pockets, "mud in" your baby tree by watering heavily at planting time. Seasonal apple tree care Winter apple tree care includes pruning 15 to 20% of the previous year’s growth, allowing more light to reach the middle of the tree, removing dead or diseased branches, and spraying dormant oil to control San Jose scale, and aphid and mite eggs. In spring, treat apple trees with a fungicide to help prevent powdery mildew and apple scab. These treatments should occur when the twig tips first green, when the buds are pink, and then every ten days until the rainy season ends. Thin the tiny fruits to one every six inches for better growth and flavor. If apple maggots or codling moths have been a problem in previous years, bagging the fruit or coating it with kaolin clay are organic methods of protecting your valuable crop. Before you start irrigating a mature apple tree in spring, feed it with two pounds of urea or 40 pounds of aged manure. Summer chores include feeding young trees 20 pounds of aged manure or 8 ounces of urea every month and watering it in. (If you use drip emitters, be sure you do not use more than 1 ounce of urea per emitter per application.) Spray for codling moths from late spring to the end of summer, and monitor for aphids and mites. Irrigate trees every 2 to 3 weeks. As you pick ripe apples, watch for and remove any mummies you come across.  A nice apple harvest After harvesting, fertilize mature trees the same way you did in summer. Remove all leaves from around the tree and compost them to help prevent apple scab. Mulching around (but not touching) your apple trees will reduce weeds, stabilize temperatures, and provide the slow release of nutrients.
Apple pests and diseases Few pests or diseases will kill an apple tree outright, but it has many attackers. The use of sticky barriers around the trunk will halt some, such as ants, slugs and snails, and Fuller rose beetles, but most apple problems come in on the wind. Stem blight, crown gall, leaf spot, powdery mildew, fireblight, and other bacterial blights are common diseases of apple trees. Cedar apple rust can also occur if apples are grown near Eastern red cedar trees. Also, apples share a susceptibility to bacteria blast with lilacs and stone fruits. Common pests include codling moths, apple maggots, San Jose scale, redhumped caterpillars, armyworms, and Eriophyid mites. New to the apple scene is another pest, chili thrips. Also, any local fog can cause more russeting. Russeting is when the apple skin turns brown and rough. Find a spot in your landscape for one of these beauties because plucking an apple from your very own tree and taking a bite, well, it's just one of life's finer experiences. And we all want to keep that doctor away! |
Welcome!You can grow a surprising amount of food in your own yard. Ask me how! To help The Daily Garden grow, you may see affiliate ads sprouting up in various places.
You can also get my book, Stop Wasting Your Yard!  Index
All
Archives
April 2024
|
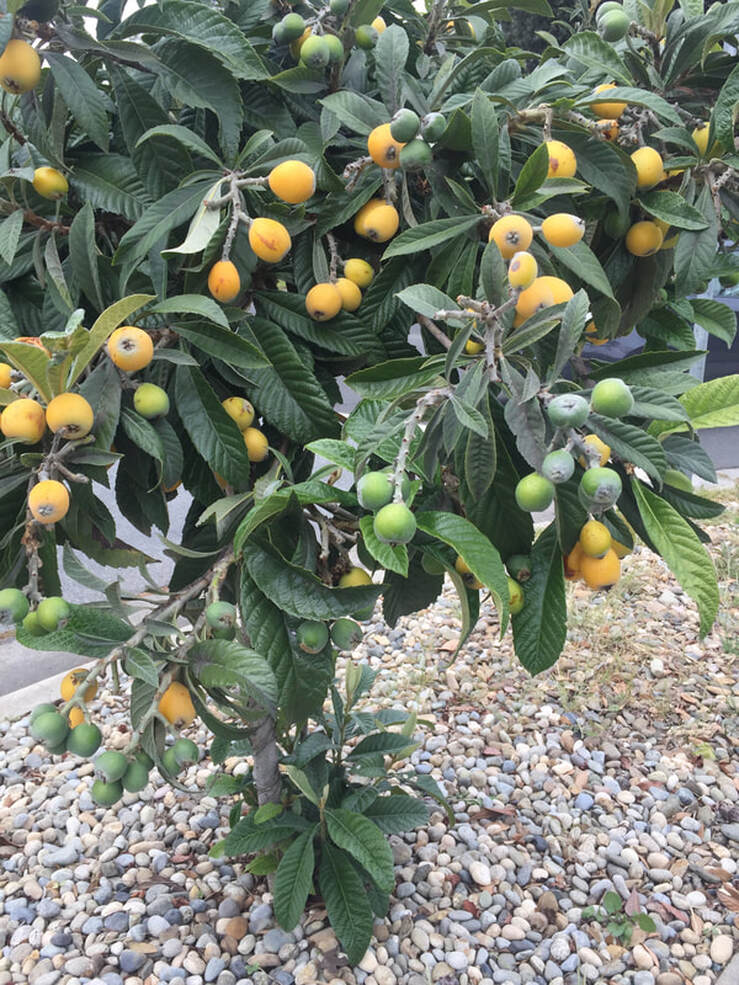
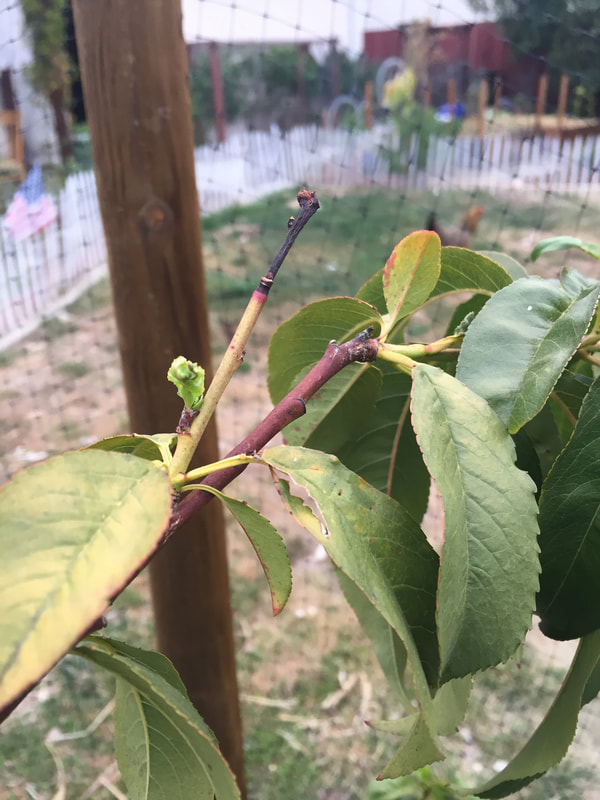
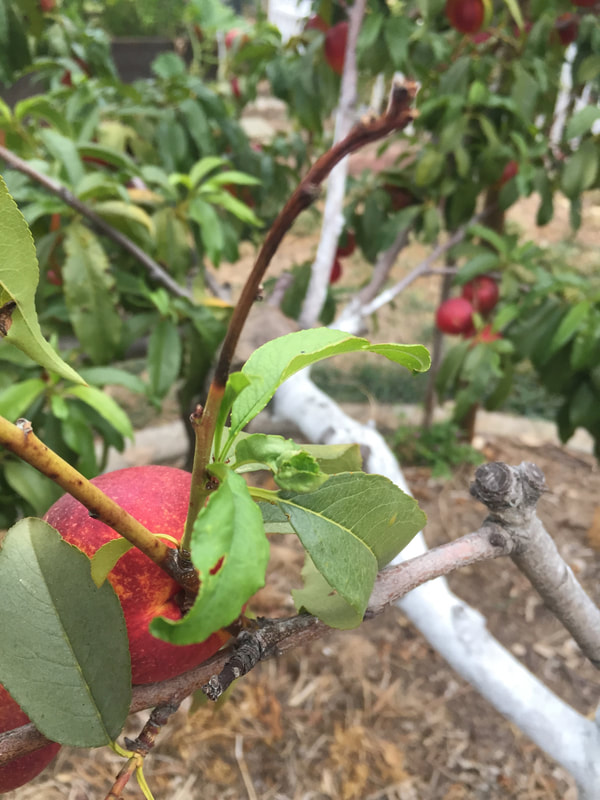

.jpg)
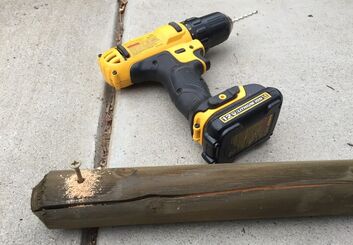
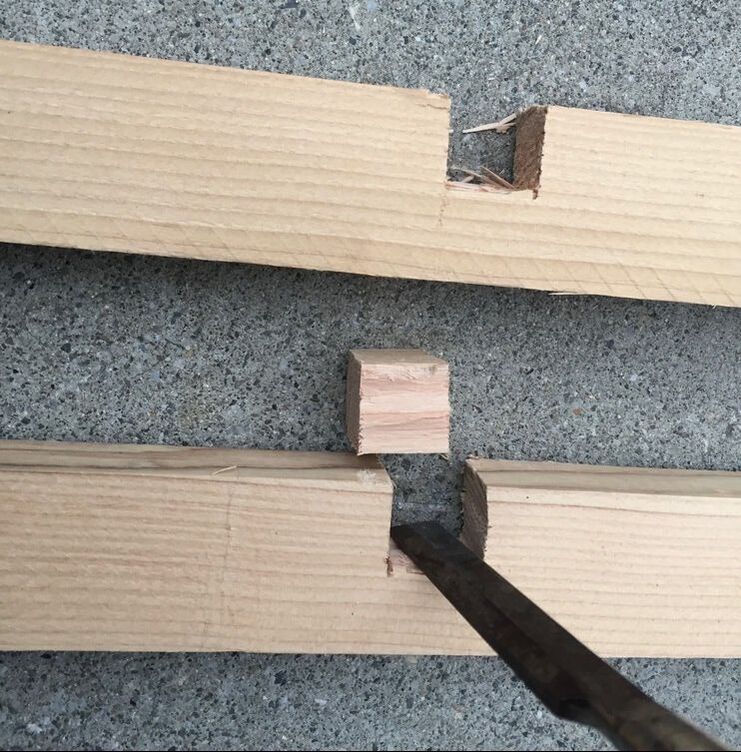
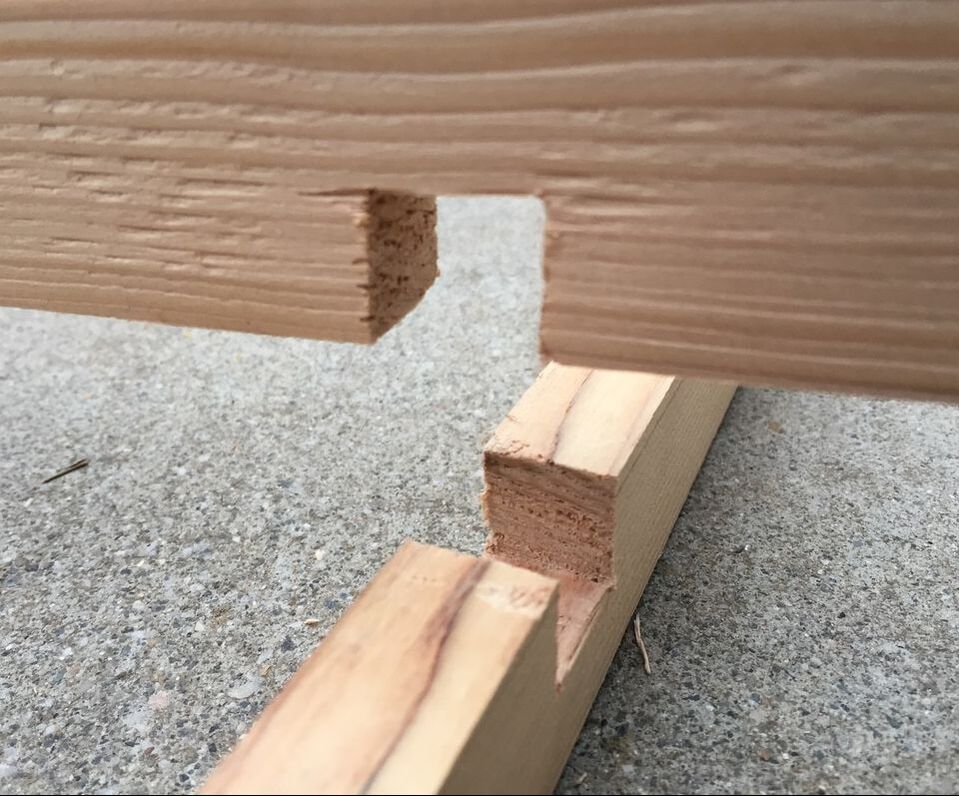
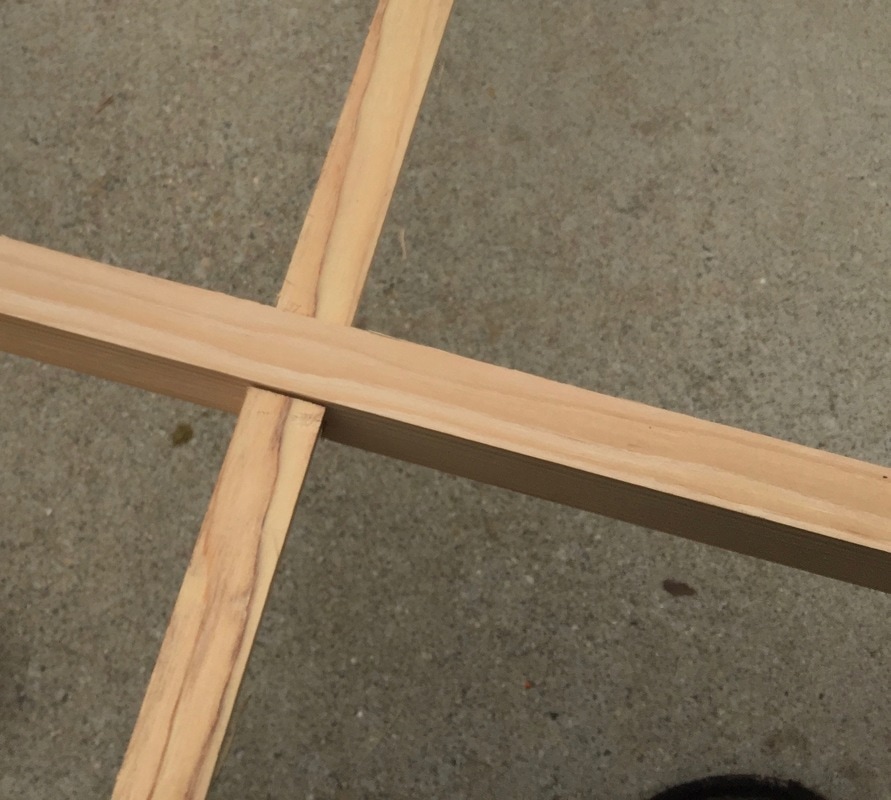
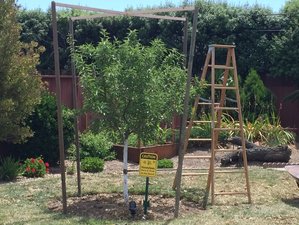
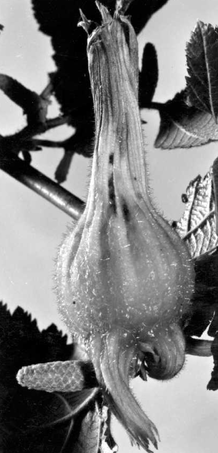

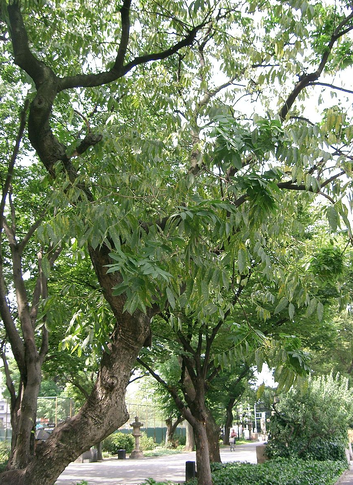
 RSS Feed