|
Bright, cheery colors, delicate textures, and you can eat them! Edible flowers have been part of the human diet since, well, since there have been people! Did you know that carnation petals have been used as one of the ingredients in the French liqueur, Chartreuse, since the 17th century?  Carnations (Darkone) CC BY-SA 1.0 Before we start, let me first share a story from my early trials with edible flowers. My dear sister decided to marry an Australian sailor and asked me to make her wedding cake. It was a lovely tiered white cake with yellow borders. I decided to add some stunning yellow flowers I saw outside. My sister’s reaction of horror was not what I expected - until she explained that the Angel’s Trumpet flowers I used were extremely poisonous. Needless to say, the flowers and the frosting came off. So… When in doubt, don’t Before you go popping random blossoms in your mouth, you need to know that some flowers can make you sick, and others can kill you. If you are even remotely unsure about a plant, do not eat it. Sometimes there is a fine line between edible and inedible. For example, regular garden variety pea flowers and shoots are edible and delicious, while fragrant sweet peas (Lathyrus odoratus) are poisonous. Some varieties of daylilies are edible and others are not. The same is true for phlox and geraniums. Make sure you know what you have before tasting it. Also, chemical sprays and car fume residue can be toxic, too. Chemical pesticides, herbicides, and insecticides should not be used on flowers that will be eaten. Never eat flowers from commercially grown plants, as there is no way to know for sure what has been applied to or used in growing these plants. Now that I have reminded you to be careful, let’s see just how many flowers in your garden are edible!
Edible herbs All herb flowers are edible. Basil, chives, cilantro, garlic, dill, lavender, marjoram, mint, oregano, rosemary, sage, savory, and thyme flowers can all be used to add an extra depth and a touch of color to many different dishes. You can also eat the flowers of anise hyssop, angelica, bee balm, burnet, chervil, fennel, ginger, and lemon verbena.
Edible flowers There are a surprising number of edible flowers. All members of the viola family, which includes Johnny-jump-ups and pansies, and the dianthus family, or carnation fame, are edible.
Edible fruit tree flowers The flowers of many fruit and nut trees are also edible. Apple, apricot, peach, pear, and plum blossoms can be used to add color and a delicate complexity to many dishes. When using these flowers, be sure to only use the petals, and not the stamens or pistils. Because they contain low levels of cyanide, apple blossoms should be eaten in moderation. Citrus blossoms are very pungent and should be used sparingly. Leftovers can be added to floral arrangements, so that you can still enjoy the aroma. 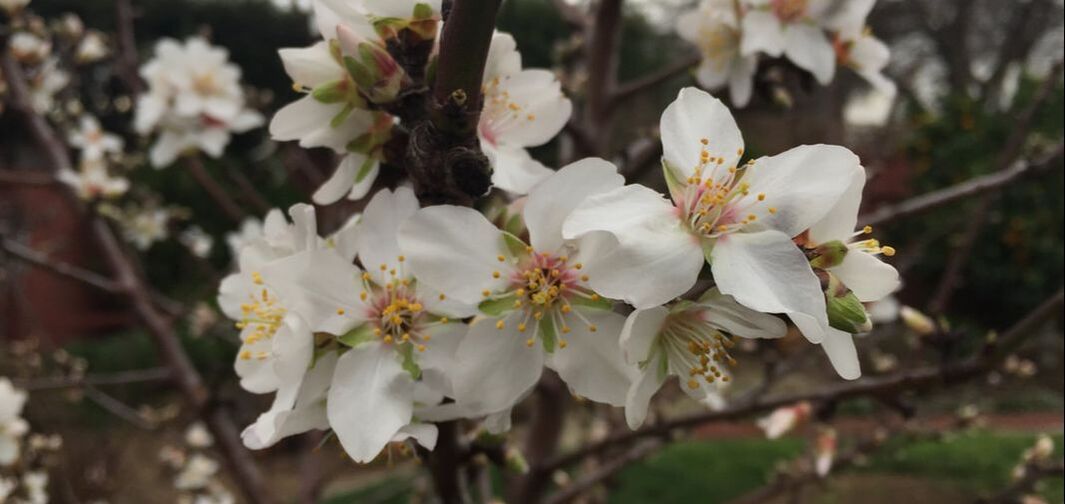 Almond blossoms Edible vegetable flowers Your probably already eat several vegetable flowers: artichoke, broccoli, and cauliflower, for example. While eating the flowers of your vegetable plants reduces your crop yield, it can be a nice way to try something new. There are several different vegetable plants with edible flowers:
 Artichoke flower Ways to use edible flowers
While it is easy to sprinkle petals into a salad for a splash of color and flavor, there are many other ways to incorporate edible flowers into your diet:
Preparing edible flowers Edible flowers should be picked just before using and thoroughly rinsed off. This will help remove dust, frass, microorganisms, and any surface chemicals that may have blown in or been applied. Taste the flowers before using them, so that you know what flavor you are adding to your food. Remove the pistils and stamens from most flowers. The only exceptions are violas and Johnny-jump-ups - in these cases, the other parts add good flavor. If you detect some bitterness in any edible flower, you may need to remove the white base of the petals. This is commonly needed when working with carnations, chrysanthemums, day lilies, and roses. How many edible flowers do you have in your garden? Tell us in the comments! We’ve all heard of cash crops, those garden plants grown as food, or to sell. But, what can you do with a growing area after a crop is harvested? Catch crops! Whether you grow your edibles in the ground, raised beds, or containers, there comes a time when the crop matures and the plants are harvested. What’s left? Usually, bare soil and a bunch of stems, cut off at ground level. It’s not attractive, it’s not good for your soil, and it’s bad for the environment. Post-harvest soil After a crop has completed its life cycle, the soil is probably a little depleted. The last thing it needs is exposure to eroding wind, sun, and rain. But that’s exactly what it gets. Without the supporting roots and shading leaves, nitrogen is exposed to the elements, which can cause it to simply blow or wash away. You’ve worked too hard and too long in the garden to lose all that valuable topsoil, so how can you protect it?  Wax beans make a productive catch crop Plant a catch crop Catch crops are a combination of cover crops and succession planting. Rather than leaving the soil exposed and the beneficial soil microorganisms to starve, cover crops are used to maintain the relationships between plants, soil, and mycorrhizae that produce nearly all the plants we eat. Catch crops are fast-growing plants that fill in the spaces left behind a harvested crop. In commercial agriculture, catch crops are planted after a field is harvested. In the home garden, you can plant your catch crop before the current crop is even done, providing your soil (and your view) with year round protection.
Which plants make good catch crops?
The best catch crops grow very quickly. Radishes, rye, arugula, mustard, lettuce, endive, sunflowers, buckwheat, beans, barley, and oats are generally the best choices for catch crops. Research has shown that these crops help retain nitrogen in the soil, improve soil structure, and prevent erosion when grown as catch crops. Other crops, such as sorghum hybrids, do not make good catch crops. One sorghum-sudangrass hybrid (Sudex) resulted in 50 to 75% mortality of tomato, broccoli, and lettuce crops. This type of chemical warfare is called allelopathy. Stick with the plants listed above. Your soil will be better off, plus you can harvest the beans, sunflower seeds, salad makings, and grain, assuming you do not use your catch crop as a green manure. [If the catch crop is cut and allowed to decompose in place, it becomes a green manure, feeding the soil and improving soil structure even more.] Benefits of planting a catch crop In addition to preventing erosion and keeping your garden attractive, catch crops prevent important minerals [plant food] from being washed away. This reduces ground water contamination. It also improves the size and quality of the crop that follows! Research has shown that crop yields increase by nearly 5%, simply by being grown after a cover crop. Using catch crops and cover crops also increases biodiversity. We are not simply talking about plants and animals here, either. Biodiversity is also occurring at the microscopic level. Soils that contain a wider range of microorganisms and other living things is healthier. Healthier soil grows better food for you and your family. Catch crops also help block sunlight to weeds, competing with them for water and sunlight. This makes it less likely that local weeds will survive long enough to produce seeds that grow into future competition. This reduces the need for herbicides (or the number of hours spent weeding each year). As your cash crops near the end of their normal lifecycle, be sure to plant catch crops! Small living spaces do not eliminate your gardening options, they simply mean looking at what you have in a new way. Rather than tolerating a lack of space, you can look at it as a challenge to grow vertically! Balconied apartments, duplexed mini yards, townhouses, and small properties are often seen as too small to garden, but this is simply untrue. All you have to do is look at the dandelions and other weeds pushing their way through concrete in a dank alley to see that plants can and will grow pretty much anywhere that isn’t completely dark or in the Arctic Circle.
Growing up Here are just a few fun and easy vertical container gardening ideas:
The point I’m trying to make here is that the only thing limiting your vertical garden is your imagination - and sunlight. Light levels Sunlight is often the most limiting factor when it comes to growing plants in tight spaces or indoors. This is not a time for guessing. You need to know how much sunlight actually reaches each area. For the uninitiated, sunlight exposure is defined as:
If you try growing sun-loving plants in an area with inadequate light levels, the plants will get long-stemmed (‘leggy’) and weak. This is called etiolation. Often, these plants will look pale or bleached, and they usually die. For each space that you have identified, take the time to note when it receives direct sunlight, and for how long. This information can make or break your vertical garden. Plant selection You need to select plants that are suited to the available sunlight. Plants such as tomatoes, peppers, and cucumbers need full sun, while root vegetables, such as carrots, beets, and potatoes, can perform beautifully in partial sun, partial shade, or dappled sun. Salad greens and other leafy vegetables can grow very nicely in full shade or dappled sun. Herbs need sunlight, but they are a pretty tolerant bunch. Once you have identified how much sunlight is available, and the types of plants you want to grow, then comes container selection! Choosing your containers Different plants have different types of roots. If you want to grow plants with taproots, your containers will need to be deeper. Plants with fibrous root systems need more lateral space. 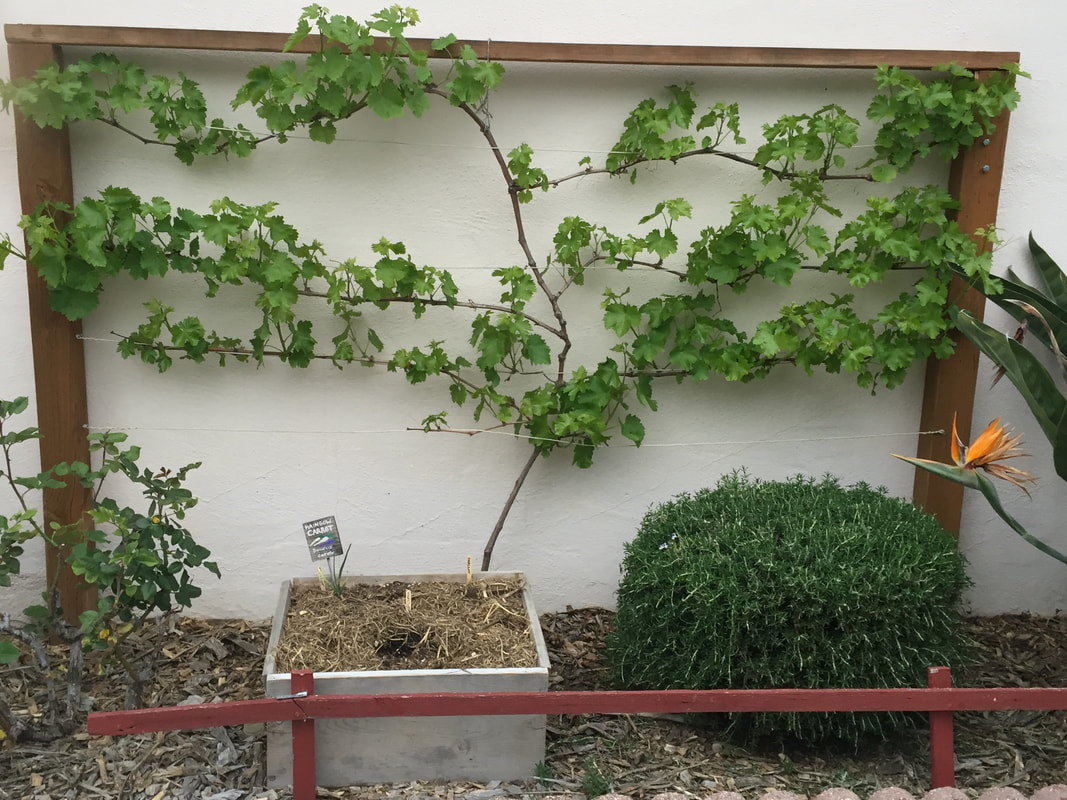 Espaliered grape with boxed carrot Note: There are countless images of amazing and inspiring vertical gardens online. Keep in mind that many of the plants pictured are not actually growing. Very often, they are well hydrated, cut plants, put in place just for the photo shoot. Do not use these images to guide you in your plant selection. Most plants need more root room than many of those images imply. Find out about the normal root depth of the plants you want to grow. 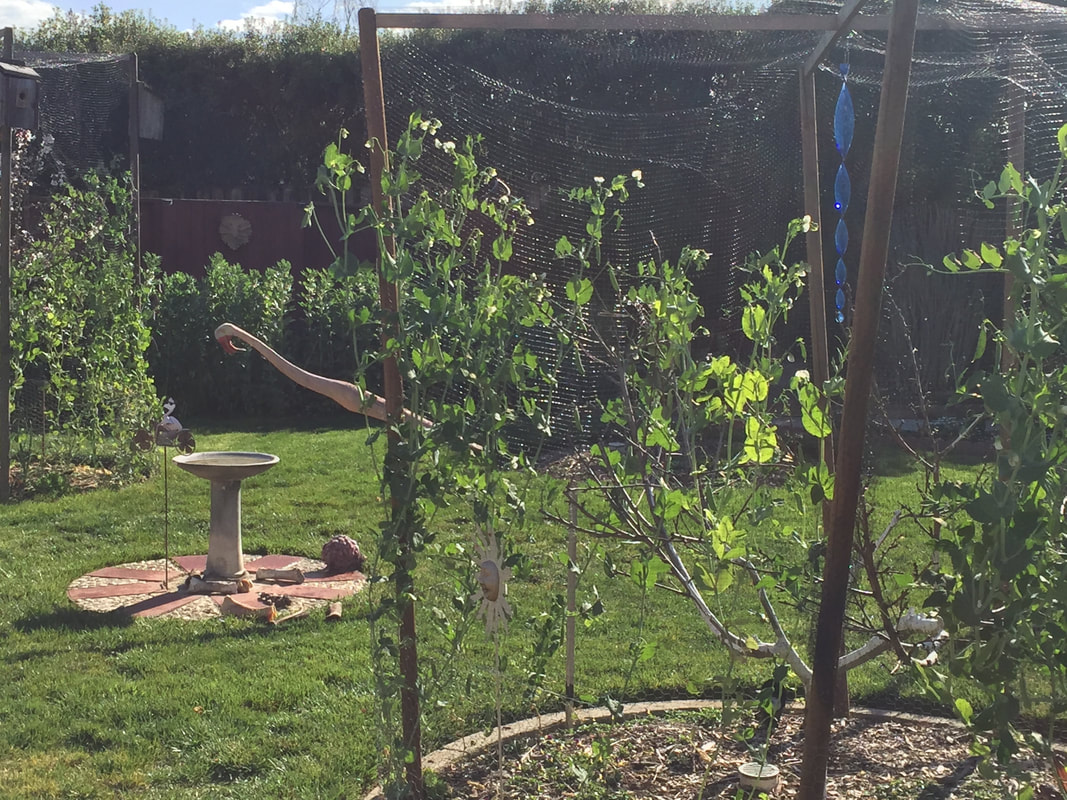 Peas growing up tree cages are productive but a pain to clean up after Manufactured planting containers are generally plastic or ceramic, with drainage holes and trays that are either attached or separate. Use these gardening container tips to help your plants stay healthy:
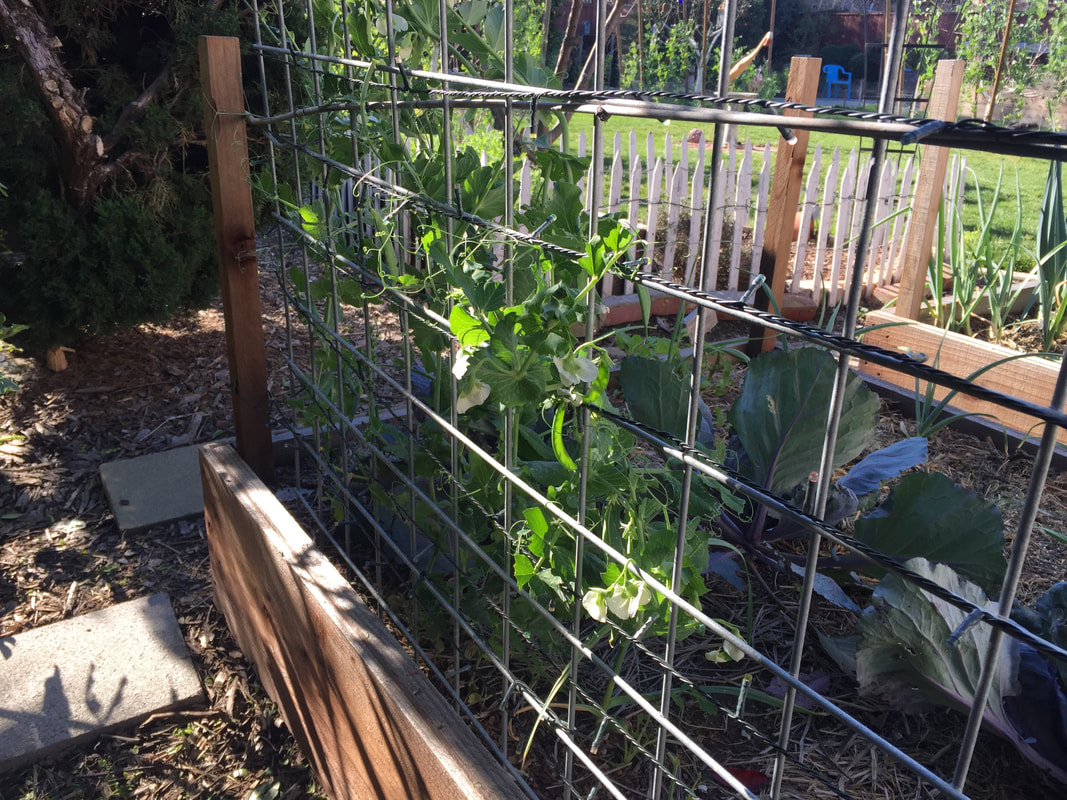 Peas growing up a cattle panel Trellises and hammocks
A trellis can be a sheet of lattice, purchased from your local lumber yard, a section of wood-framed chicken wire, a teepee of bamboo rods, a stock panel, or any other framework that supports your plants as they grow upward. If you are growing crops that produce heavy fruit, you may need to provide a little extra support. Melons, pumpkins, and squash can be held in place with net or fabric hammocks, attached to the trellis or fence. As you go about your normal day, keep an eye open for unique, useful items that are often kicked to the curb by your neighbors. That unwanted pet staircase can be repurposed into a beautiful, space-saving tiered herb garden! Saving seeds is a great way to save money and encourage plants that thrive in your microclimate. People have been saving seeds for over 12,000 years.  You can make your own seed box from scrap wood Once you have plant varieties that work for you, there is often no need to continue buying seeds. Your plants will produce them for free! There are three steps to successful seed saving: selection, timing, and storage. But, before we learn how to save seeds, we should review some basic information about plant reproduction. Plant reproduction Plants produce seeds to pass on genetic information. Those seeds are produced when a female gamete is pollinated. The way pollination occurs, and the plants involved, make a big difference in what the resulting seeds will become:
Seeds produced from plants pollinated by insects, wind, and other natural mechanisms are called open-pollinated (OP). Open-pollinated seeds are more genetically diverse, which helps plants adapt to new conditions. As long as cross-pollination between a different variety does not occur, open-pollinated seeds will produce similar offspring. That being said, bees can travel for several miles, carrying pollen, so there is no guarantee of avoiding cross-pollination unless you keep your plants sequestered in a greenhouse. The nice thing is, you may end up with something more beautiful, better adapted, or tastier than what you had before! If not, you can always add it to the compost pile and try again next year. So let’s get started! Select seeds to save The first step is to identify which plants in your garden are open-pollinated. You can use seed packets, plant labels, and online receipts to track down this information. Personally, I have a plastic tub that contains all of my seeds and seed packets, so everything is in one place. I put seeds in envelopes and then write what it is, and where and when it was planted, on the envelope. It really helps me keep track of things! Once you have figured out which of your plants are open-pollinated, pick the ones that grow well and taste the best. Be sure to save seeds from more than one plant of a particular variety, to maintain that healthy diversity. Do not save seeds from plants that lack vigor or flavor. One trick I use is I attached colored ribbons to plants that I plan to save seeds from, using different colors to indicate early or late producing. 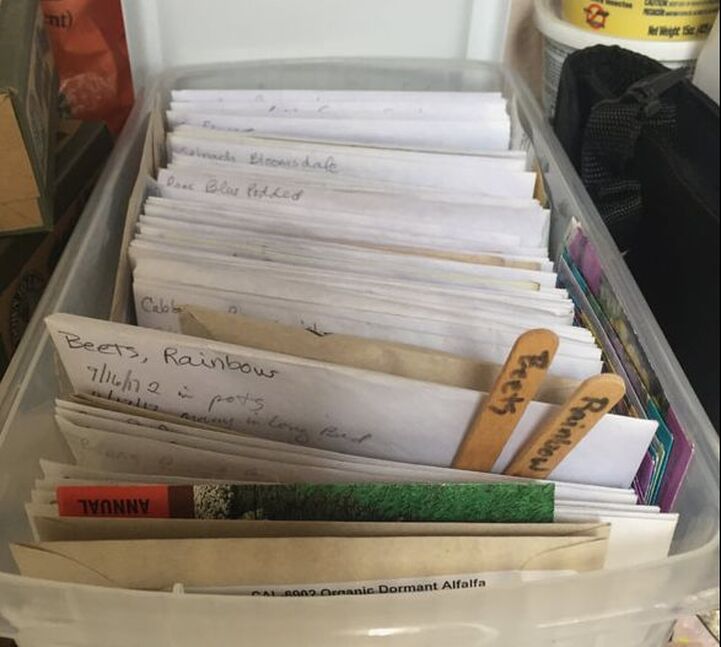 Plastic bins work well for seed saving A note on GMOs and other seed patents: private corporations have invested in and own this genetic information. It is illegal to save, use, sell, or trade these plants and their seeds, according to the World Trade Organization’s agreement on property rights. Consider yourself warned. Seed harvesting
Leave the very best fruits to ripen naturally on your chosen plants. With tomatoes and peppers, you can even let them get a little wrinkly before picking. Then, open the fruit and remove the seeds. With tomatoes, I just drop the gel-covered seeds onto a paper towel and spread them out a little. Next, I write the name of the plant variety on the paper towel and allow it to dry completely before storing. Pepper seeds are just scraped off the white pith and allowed to dry. Peas and beans should be allowed to dry completely on the vine. Keep in mind, however, that this tells the plant it has completed its reproductive cycle and production may begin to lag. Seeds from plants such as lettuce, carrots, and onions can be collected using paper bags tied over the top of the pollinated flower heads. Generally, I do not save those seeds. Instead, I simply let them do their thing naturally. As a result, I have onions, carrots, and lettuces growing all over my property, with zero effort on my part! Storing seeds Many people suggest storing seeds in glass jars or plastic bags, after the seeds have dried completely. Unless you are absolutely sure there is no moisture, it is a good idea to include one of those silica packets you find in shoe boxes and jerky bags, just wrap it in a piece of tissue. As you already saw, I use paper envelopes stored in a secure, but not airtight plastic container, that is kept outside year round. My thinking is, this exposes the seeds to as much of the local, natural environment as possible, weeding out the weak through natural selection. However you store your seeds, be sure to label them right away. It helps if you include the plant name and variety, plus the date the seeds were harvested. Older seeds lose their vigor, so you will want to use seeds within one year for the best results. Seeds need to be kept in a cool, dry, dark place to avoid germinating at the wrong time of year or when you’re not looking. Disease control Seed surfaces can be contaminated with bacteria, fungi, viruses, spores and nematodes. The inside of a seed can also host pathogens. This is why it is so important to only collect seeds from healthy plants. In a study conducted at UC Davis, it was found that pumpkins exhibiting surface lesions of Fusarium wilt (Fsc 1) could still be used as a safe seed source, while pumpkins that were infected all the way into the seed cavity could not. Saving your own seeds allows you to encourage the plants that thrive in your garden. Over time, you may even create your own heirloom varieties! Do your basil plants wither into oblivion each summer? Do frost sensitive lettuces lose their flavor after a severe cold snap? You can use agroforestry to stabilize temperatures and reduce erosion and wind damage in your garden or foodscape.  Alley cropping (USDA) Public Domain What is agroforestry? Technically, agroforestry refers to the intentional addition of trees and shrubs into crop and animal farming for economic, environmental, and social benefits. To qualify as agroforestry, four conditions must be present:
There are five different agroforestry systems: alley cropping, forest farming, riparian forest buffers, silvopasture, and windbreaks. In each case, you can take the basic principle and modify it to benefit your home garden. Alley cropping The alley cropping method of agroforestry plants fruits, vegetables, herbs, grains and more between rows of immature trees. The trees provide protection while still allowing adequate sunlight to reach the other crops. Growing dwarf fruit and nut trees in your foodscape allows you to do the same thing year after year. Forest farming Forest farming, also known as multi-story cropping, uses the shade provided by a forest canopy to grow herbs and other edible plants, as well as ornamentals, that perform better in shady environments. You can apply the same principle by planting shade-loving and sun-sensitive plants under existing trees.
Rows of trees can be used to create a windbreak. These barriers work the same way as fences, providing protection for plants, animals, buildings, and soil against wind, snow, dust, and even bad smells. These barriers increase biodiversity by providing habitat and food for local wildlife. These windbreaks are also known as hedgerows, shelterbelts, or living snow fences. Hedges and rows of trees on your property can provide the same benefits. You can get a bonus when these plants are also edibles.  Windbreaks (USDA) Public Domain Each of these agroforestry methods take advantage of natural processes to create sustainable, environmentally friendly conditions that help plants and soil stay healthier, with less effort on our part. These vegetative barriers also reduce erosion, improve air and water quality, increase biodiversity, and provide more opportunities for growing your own food or selling marketable crops.
At exactly 8:28 AM, on December 21, 2017, the northern hemisphere of planet Earth was tilted as far away from our sun as it gets. [The Earth is actually as close to the sun as it gets between the 3rd and 5th of January, but we are tipped away, so we don’t notice.] So, how is your garden affected by winter solstice? What is winter solstice? Before we learn how shortening and lengthening days affect your garden and landscape plants, let’s take a moment to discuss what, exactly, is meant by winter solstice. The word solstice comes to us from the Latin words for sun (sol) and “to stand still” (sistere). Obviously, the sun and earth never really stop moving. It’s an illusion that refers to the two extremes of the Earth’s travels around the sun. We all know that the Earth has an equator around the middle and poles at either end, except those ends are not exactly up and down. The Earth is tilted 23.5° (23.44°, if you want to be really accurate). This means, for half of each trip around the sun, the northern hemisphere is closer to the sun, while the southern hemisphere is closer the other half of the year. You can see it easily if you hold one hand up at an angle and the other up as a fist. Your fist is the sun. Move the slanted, open hand around your fist, keeping the angle pointing in the same direction the whole time. Moving from one side to the other, you will see that different parts of your open hand are closer to your fist. When either hemisphere is at the farthest point from the sun, we call it the winter solstice. Six months later, when we are as close as we will get, we call it summer solstice. So what does this have to do with gardening?  Earth’s rotation (NWS) Public Domain Why does it keep getting colder after the days start getting longer? Simple logic tells us that longer days should mean warmer temperatures. Experience has taught us otherwise. But, why? Even though the days are getting longer, we will not see our coldest temperatures until January and February. It ends up that our planet’s temperatures are largely controlled by its oceans. It takes a lot of time and sunlight to heat up an ocean. Dormancy and frost damage Most perennial plants go into some sort of dormancy as the number of daylight hours shorten and temperatures drop. Life process are slowed, new leaves and buds stay protected within buds, and many chemical changes occur that protect the plant from winter’s cold. You can protect your garden plants from frost damage during dormancy by adding a protective layer of aged compost, mulch, straw, or even a fabric covering around and over (but not touching) your plants. Keeping plants well irrigated, but not soggy will also protect against frost damage. Maintaining a more constant temperature can help your plants avoid falling prey to one warm day that might trigger budbreak, when the following days of cold and frost would simply kill those tender new buds and shoots.  Stonehenge (Andrew Dunn) CC BY-SA 2.0 Winter solstice in history
Rather than risking stress to your plants by working in and around them in the cold, use this day, as people have throughout history, as a truer new year, to look back on lessons learned and accomplishments reached, and then forward, to new and existing goals, both in the garden and in life. Did you know that Stonehenge was built to line up with sunset on winter solstice? There’s a lot more to wind than meets the eye. You may not see it, but gentle breezes and wailing typhoons carry insect pheromones, fungal spores, viruses, and bacteria. Gentle breezes help plants develop stronger stems, and gale-force winds can rip trees from the ground.  Wind (USA.gov) Public Domain Beneficial winds Seedling development is a function of sunlight, moisture, temperature, and wind. Being blown around stimulates the stem to be stronger. Botanists call this action thigmomorphogenesis. Plants grown in greenhouses, without any wind, are gently knocked around by a machine that helps prevent the plants from becoming too tall and spindly. Note: While most pollen is too sticky to be affected by wind, wind is the primary mechanism for pollination of corn plants. Pollen is too sticky to wipe or rub off your eyelashes, so don’t try. You can damage your cornea. Believe me. It takes soap and water. Wind damage Wind dries plants out. Plants exposed to a lot of wind need more water than their protected brethren. Wind can also speed up erosion. Ground covers and mulch reduce that erosion. During heavy winds, you may want to move containerized plants next to a fence or wall to prevent breakage. Protect tall plants against wind damage with stakes, tree supports, and tomato cages. Wind damage can be in the form of branches flailing around and tearing holes in leaves and branches rubbing together. Wind damage provides pathogens with a way in. And hot summer winds can lead to blossom drop and fruit set failure. Wind wounds Strong winds can rip heavily laden branches or overly large limbs from a tree, leaving jagged wounds. You can help these trees recover quickly by cutting the tear to make it a flat surface, close to the trunk, but not too close. Do not cut into the branch collar. And you do not need to paint the wound. Instead, allow the tree to protect itself. It will grow a callus over the area. You may, later on, need to provide the callus with sunburn protection. Diseases on the breezes Disease-causing pathogens are usually microscopic. As such, they can catch a free ride on every breeze that blows through. [I wonder if that would make it a case of phoresy…] In any case, several diseases can arrive in your garden in the wind. Gray mold (Botrytis cinerea) is always present. That is why rotting fruit gets that gray fuzz so quickly. It’s everywhere. Mummy berry spores blow into your garden on the wind. So do chemical oversprays. The chances of ringspot on Brussels sprout skyrockets after a windy day, and citrus blast often occurs right after periods of wind-driven rain. You can reduce the likelihood of citrus blast by providing citrus trees with some wind protection. Wind protection Wind protection can take many forms. It may be a fence, a hedge, or a row cover.. You can protect plants from wind by installing them close to your house. Pineapple guava, mature blueberry bushes, and many fruit and nut trees can provide a windbreak. Portable cold frames can protect smaller plants against cold winter winds. When spring comes around, wind can mess up a plant trying to get established in a new location (ecesis). The wind is one of the main reasons for taking the time to harden off plants started in protected areas. And when you start planting those tiny seeds, such as lettuce, you can often lose most of your crop to the wind. They simply blow away. [You may want to check your neighbor’s yard for all that lettuce and endive you planted last year…] And all those delicate seedlings that emerge can be protected from the wind with a moistened layer of vermiculite. Or, you can cover them with a plastic gallon jug (cloche) with the bottom cut out. Just be sure to bury the edges or weigh down the jug enough to prevent it from blowing away, too!  Floating row covers (Keith Evans) CC BY-SA 2.0 Finally, I wanted to share this with you. While researching wind and its impact on plants, I learned that there are three types of wind in the universe:
I never knew that our planet outgassed anything. So, now you know. Our planet farts into outer space. Swale… Doesn’t it sound elegant to say, “The iris are growing next to the swale?” Well, it certainly sounds classier than saying, “Those flowers, over by the ditch,” but swales and ditches are very similar. The joy of ditches Traditionally, a ditch is a V-shaped or U-shaped channel that is cut next to roads that redirect melted snow water downhill, without flooding the road. When I was a kid in Upstate New York, hammering open rocks in the dried out ditch in front of our house was great fun. You never knew what they were going to look like on the inside until you cracked them open! You couldn’t play in the ditch in spring, though. In spring, the ditch held water that was moving too rapidly to be absorbed and too cold to be any fun.  Brick swale (Didiunsw) CC BY-SA 4.0 Swales are swell
Unlike a ditch, swales are low places that collect water. They can occur naturally or be manmade. You see them all the time next to freeway on-ramps and off-ramps. These particular swales, or contour bands, act as infiltration basins. They are called contour bands because a trench is dug along the natural contour, and then that dug out soil is used to create a berm on the downhill side. Swales collect water that may contain pollutants and filter the toxins out naturally. Since the water in a swale is in a low place, it doesn’t run off. Instead, it is slowly absorbed. Often, ornamental plants that can tolerate pollutants and wet soil are planted around swales. Also, microorganisms in the soil begin breaking those pollutants down into less toxic materials. Rainwater as resource We all know that, in nature, rain falls down, is absorbed by the soil, and is then used by plants to grow. Simple. But we have now paved much of that soil. In the United States alone, by 2004, more than 43,000 square miles of land was covered with concrete. That’s about the size of Ohio, and I’m pretty sure that number is higher today. When rain falls on concrete, or other impermeable surfaces, the water runs off and away, carrying topsoil, fertilizers, pollutants, and small bits of trash and plastic with it. We call that run-off urban drool and all of it the ends up in our rivers, lakes, and oceans. The California Native Plant Society tells us that urban drool is the #1 source of ocean pollution. The average 2700 sq. ft. roof in San Jose, California, can collect more than 25,000 gallons of water each year. Rather than allowing that water to go to waste, you can harness it for your garden with a swale. Swales in your backyard Swales help retain and filter water three ways: slow, spread, sink. First, the flow of water is slowed down because it has a low place to collect. Then, rather than running off, it has a chance to slowly spread and expand through the nearby soil. Finally, the water sinks, naturally, into the soil where it feeds aquifers and underground creeks. All this water attracts the root systems of many of your larger and medium sized trees and shrubs. These nearby plants tap into this resource, which means they need less irrigation water. Swales as damage reduction Swales are an effective way to redirect water away from your home, without letting all that water go to waste. Most homes are built with a slightly sloping grade that should take rain water away from your home. This design really helps prevent foundations from shifting, but where does that water go once it’s away from your house? If the slope isn’t steep enough, very often, you will still end up with a muddy yard. Instead, you can redirect water from your downspouts into swales that draw the water away from your house and out into the yard, where it will nurture your plants. Swales can be beautiful Swales don’t have to look like a ditch. Instead, they can be made beautiful with river rocks, and plants that can handle the periodic moisture. This would include sedge, mosses, birch, iris, white cedar, azalea, rhododendron, hydrangea, hosta, Peace lily, japonica, ferns, pussywillow, coreopsis, geranium, and scarlet monkey. Heck, if you had a way to filter out the first flush of rain, you might even be able to grow rice! First flush refers to the first 1/2 inch or so of rain that contains higher levels of dust, debris, and pollutants. Before you install any plants, though, make sure that they are not invasive in your area. Swales can be an attractive part of your landscape. They make the soil healthier, which makes your plants healthier. Plus, there’s less mud in your yard with a swale. Swales can be one part of a rain garden. Creating areas where rain water can be slowed down and prevented from running off is called watershed design. Cold frames allow gardeners to extend the growing season. A cold frame is a walled box with a clear roof. It can be raised above the soil level, sunken, or sit on top of the ground. The transparent roof allows sunlight in and keeps heat from escaping. The result: a warm, sunny, productive growing space! The microclimate created within a cold frame protects against frost damage and it allows seedlings to be started earlier and winter crops to be grown later. Many cold frames are temporary arrangements, but there are also permanent cold frames. Two things to keep in mind when starting with cold frames: it will take a couple of weeks for your cold frame to warm the soil; and, more plants die in a cold frame from heat and drought than from cold. Consider yourself warned! So, what, exactly, are cold frames?  The Lost Gardens of Helgian, in Cornwall, England, feature formal cold frames (Daderot) Public Domain Cold frames, greenhouse, hotbeds and hoophouses Hoophouses are large tunnels made with plastic sheeting laid over bent rod frames. Hoophouses, used predominantly in commercial agriculture, are heated, humidified, vented, and irrigated. Greenhouses also tend to be large, and they are heated. Cold frames are small and, well, they are cold. Traditionally, cold frames were built against the southern wall of greenhouses (in northern latitudes; the other way around in southern latitudes). These cold frames were used to harden off seedlings started in the greenhouse, before moving them to the garden proper. Hotbeds, or hotboxes, are the same size as cold frames, but they generate or retain a lot more heat. In each case, a more nurturing microclimate is being created, providing growers with the ability to grow more food, flowers, and ornamentals over a longer period of time.  Old glass windows are commonly used to make DIY cold frames (Clark Hamilton) CC BY 2.0 Cold frame design
You can certainly buy cold frame kits, but this innovation is easy to make for yourself. There are tons of free online instructions and designs available. [Personally, I enjoy the variety found at Instructables.] The next time you see someone getting their windows replaced, grab the old one(s). These old windows act as the roof to your cold frame. All you have to do is build a 2-foot tall frame for the sides. Just be sure to use wood that is rot resistant, such as redwood or cedar, and that it does not contain any toxic chemicals, paint, or stain. Ideally, your frame will tilt the glass toward the winter sun, allowing the space to collect as much heat and light as possible. You will want to make sure that the angled roof directs rain away from your home’s foundation, if that is where you put your cold frame. If you do not have access to old windows, you can also use plastic sheeting, clear plastic panels, or row cover material. When building a cold frame, be sure that you can prop the cover up, or remove it, during warmer weather, or you may cook your plants. Crops suited to cold frames Being relatively low to the ground, cold frames are suited to low-growing, cool season crops. This includes lettuce, spinach, scallions, radishes, turnips, rutabagas, parsley, cilantro, chard, beets, and daikon, just to name a few. You certainly won’t bring sunflowers to harvest in a cold frame, but you can use one to nurture their seedlings, giving them an early start. Cold frames and dormancy Unless you have a greenhouse, or bring them indoors, some tender perennials simply do not look their best during the winter months. Some may not be able to survive at all. You can use a cold frame to protect these plants from harsh winter weather. They will still go dormant, but it will be a gentle dormancy, rather than a life threatening struggle to survive. This makes them better able to thrive when spring arrives. To overwinter dormant plants in a cold frame, use these steps:
Heat management in cold frames The whole point of a cold frame is to protect plants from weather they might not otherwise be able to handle, especially damage from frost. However, problems can arise when a warm day occurs in the middle of winter. This can trigger plants into thinking it is time to start growing again, even if it’s January. On days when temperatures are 35°F to 45°F, open the cold frame part way. If temperatures reach 45°F to 50°F, open it completely. [Just be sure to close it again before you go to bed!] Seedling support Just as cool weather crops can be grown deeper into winter, seedlings can get as much as a 6 week head start when started indoors or in a greenhouse, and then hardened off in a cold frame. Seedlings can be planted directly in the soil and protected with a portable cold frame, or potted seedlings can be held in a permanent cold frame until they are strong enough (and temperatures outside are warm enough) to be given their place in the soil. Seeds will need to be watered regularly. Once they germinate, be sure to vent the cold frame frequently to avoid damping off disease of seedlings. Most pests are kept out of a well-designed cold frame. The same characteristics will also prevent pollinators from doing what they do, so don’t expect to be able to grow melons or squash in your cold frame unless you hand-pollinate the flowers. The aroma of lilacs is intoxicating, and fleeting. Lilacs may only bloom for a couple of weeks, usually near the end of May, but they are worth the wait. These cousins to olive trees and privet shrubs add beauty in a landscape, and the heady blooms are bound to attract pollinators.  Purple lilac bush (Titus Tscharntke) Public Domain Lilac varieties The purple standard lilac (Syringa vulgaris) actually comes in 12 varieties. These small trees can range anywhere from 6 to over 32 feet in height! Most lilacs only bloom once a year, though some varieties have double-flowers. There are also some new reblooming, or remontant, varieties that flower multiple times within a single season. If you don’t have room for a full-sized lilac, you can try a dwarf. Dwarf varieties are becoming more popular in landscapes and as indoor plants, reaching heights of only 4 to 5 feet. Dwarf (or miniature) varieties of lilac are mostly variations on the Meyer lilac (S. meyeri), also known as a Korean lilac. How to plant lilacs Autumn is the perfect time to get your lilacs started. If you received an offshoot or root cutting from a friend, don’t worry if it is looking pretty pathetic right now. That’s normal. Simply select a good location and get started. Lilacs prefer well-drained, neutral soil (with a pH at or near 7.0) with lots of organic material. Lilacs hate wet feet, so good drainage is critical, especially in clay soil.
Growing lilacs in containers
To successfully grow lilacs in containers, you will need to select a dwarf variety and a large container. Lilacs prefer having room to spread their roots, so the container needs to be at least 12 inches deep and 24 inches wide. Be sure to use potting soil with a neutral pH. Lilacs dislike both alkaline and acidic soil. Water thoroughly at planting time and keep the soil evenly moist (not soggy) until the roots have taken hold. After that, water any time the top inch of soil dries out, and not before. Containerized lilacs need at least 6 hours of full sun every day to bloom properly. Many homes do not have that much direct sunlight, so you may need to supplement with grow lights. Stabilize temperatures and reduce moisture loss adding a thin layer of mulch, such as attractive redwood chips, around your potted lilac, just be sure to leave a little space between the mulch and shrub stems. Caring for lilacs Lilac flowers bloom on old wood, so pruning should be kept to a minimum. Pruning should be limited to removing dead, diseased, rubbing branches, suckers, and spent flowers. Since flowers are produced on older wood, do not put off deadheading your lilacs. If you wait until the end of the season, the wood that grows in will be too young to produce flowers the next season. If your lilac becomes unruly, cut all canes back to eye level and remove one-third of the oldest canes at ground level. The next year, cut half of the remaining old wood down to the ground. In year three, cut the remaining old wood. Or, you can cut the whole thing back to a height of 6 to 8 inches. This more drastic method creates the best blooms, in the long run, but it will take your lilac a few years to get back to full size. Each spring, top dress the soil around lilacs with aged compost. Then, cover that top dressing with mulch. This will add nutrients and protect the microorganisms that help your lilacs get to those nutrients. Commercial fertilizer is not recommended for lilacs planted in the ground. Excessive nutrients causes plants to produce more leaves, and no flowers. Lilac pests and diseases I have found Fuller rose beetles to cause the most damage to my lilacs. Scalloped leaves are a sure sign of this pest. Lilacs are also susceptible to powdery mildew, phytophthora, and pseudomonas. Slugs and snails are said to cause some damage, but I have not had that experience. Propagating lilac If you already have a lilac, you can take root, shoot, and sucker cuttings to propagate new plants. Dig up some roots, or suckers with roots attached, and place them in a bucket with some water until you are ready to plant. You can also use 8 to 12 inches new growth twigs. Simply strip away most of the lower leaves and place them in rich potting soil and keep them moist (above and below ground) until roots start to grow. Since woody stems can be difficult to start rooting, many people apply rooting powder to the lower portion of the stem. Since rooting powders are synthetic plant hormones, I don’t use them. While lilacs are not edible, I can practically taste their sweet fragrance. Also, the pollinators who are drawn to lilac blossoms often stick around to pollinate other plants in your garden. Succession planting takes a long term view of garden usage. Instead of simply planting whatever seed packets looked best in the garden catalog, successful gardeners look at the same space over time to see what can be planted after the current crop. Benefits of succession planting Succession planting makes efficient use of fertile ground by leap-frogging plants and crops for a continuous harvest. This eliminates the deluge of every plant reaching harvestable size within the same week. That’s great if you’re putting up tomato sauce, but it can be a bit much when talking about 20 Romaine plants! By changing the life stage and/or plant type in any given bed, the odds of total crop failure due to pests or disease are reduced. Growing plants at various life stages in the same place also cuts back on the amount of real estate available to weeds. Finally, planting fast-growing crops with slow-growing crops makes good use of soil that might have otherwise gone fallow. Different methods of succession planting In its simplest form, succession planting refers to following one crop with another crop. This is generally done as the weather changes, following a summer crop with a cool season crop. But there is more to it than that. In addition to consecutive plantings, there is also staggered planting, intercropping, and varietal planting. Varietal planting Varietal planting means installing different varieties of the same plant in the same place, at the same time. These varieties have different maturity dates, providing a continuous harvest. You can fine tune your varietal plantings by taking note of days to maturity and mature size information on seed packets. You may be able to start with an early maturing variety, followed by a mid-season harvest, then a late-season harvest. You may even be able to squeeze in yet another early harvest at the end. Staggered planting Staggered planting refers to planting seeds of the same plant in the same area, but on different days. This extends the harvest season, providing a continuous, smaller harvest of the same plant. Staggered planting is best suited for lettuce, spinach, radishes, beets, carrots, and peas. For most of these crops, you can start a new set of seeds every week or two, for the best possible production. 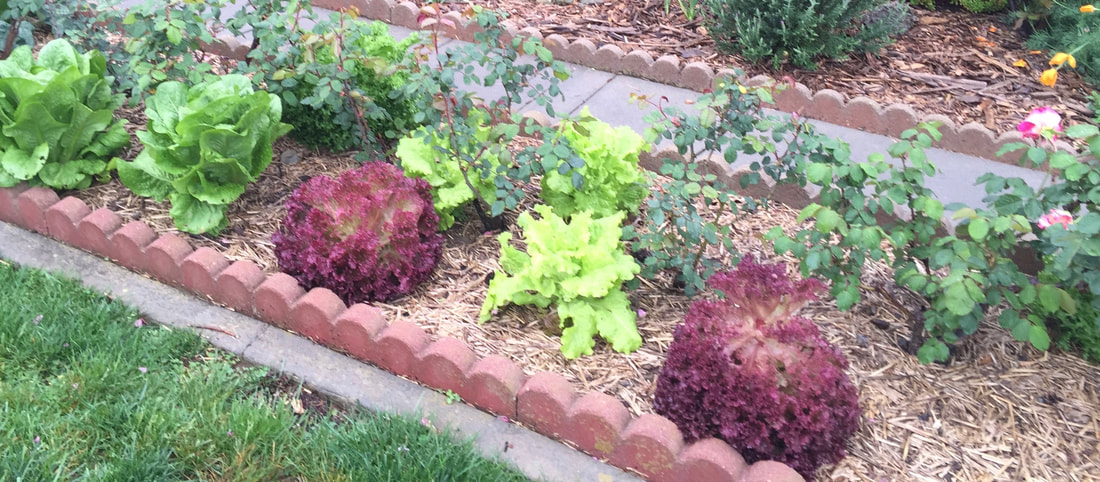 Romaine and red leaf lettuce intercropped with roses Intercropping
Intercropping puts different crops together in the same place, at the same time. This allows gardeners to make use of soil resources that might have gone unused with a single crop. It also increases biodiversity, reducing potential pest and disease problems. One example of intercropping is the Three Sisters Method of growing beans, corn and squash together. Intercropping is the scientific basis behind the Companion Planting craze. I’m sorry, but there are no magic pairings of plants that “like” each other. There are structural and developmental needs of different plants that either support one another or don’t interfere with each other, while growing in the same space. Basic intercropping pairings include:
Planning for succession planting Your can take advantage of the benefits of succession planting, simply by growing two seasonally different crops in the same bed. As one crop is winding down, the next season’s crop can be getting started. Or, you can get really in-depth into this concept by investing some planning time. To make the most out of your garden space with succession planting, you will need to know the following:
The next step is to collect information on all the plants you want to grow. You can do this with pencil and paper, in a spreadsheet, or you can clean off a big table and start moving seed packets around into different groups until you reach what looks like a good plan. Do yourself and your garden a favor and take note of what works and what doesn’t. Just remember, every garden is different, every year is different, and sometimes we are simply unlucky when it comes to temperature extremes, pest infestations, and nutrient deficiencies. Succession planting can offset some of those problems. Heat islands: tropical paradise or slow death for trees? We’ve all seen it, but most of us don’t understand what it means. Naked upper branches of trees, singed leaves, neighborhood shrubs struggling to survive, our own garden and landscape plants growing less well than expected are all signs of heat island effect.  Sweet gum tree showing signs of heat and drought stress What are heat islands? The term ‘heat islands’ refers to land that used to be soil, bushes, and trees, and is now concrete, asphalt, and buildings. Before all that development, natural cycles and the permeability of the soil kept things cooler and healthier for plants. All the impervious, manmade materials that now cover up 3% of the earth’s landmass absorb heat, creating a zone of higher temperatures called heat islands. Do I have heat islands? Unless you live in a tent in the wilderness, yes, you have heat islands. Driveways, patios, extended foundations, concrete paths and walkways, roofs, sidewalks, and the street in front of your home can all create their own heat islands. How do heat islands impact landscape plants? Plants installed in or near heat islands must contend with soil temperatures that can be 50 to 90° hotter than the air. This means, on a scorching summer day, when the air is 95°F, your plants’ roots may be struggling to survive temperatures as high as 185°F! All this strain takes its toll. Most trees reach what is called a ’thermal death threshold’ at 115°F. Held too long at temperatures above this point and even the healthiest tree can die. Even if they survive, plants growing in heat islands have significantly shorter lifespans and are more susceptible to pests and disease. Also, things don’t cool down for these plants as the sun sets. While we may enjoy the lower temperatures of evening, concrete and asphalt hang on to all that absorbed heat, slowly releasing it into the immediate area, making evenings the hottest part of your plants’ day. Impact of heat islands on water use Plants growing in heat islands need as much as 50% more water than the same plants grown elsewhere. Since a mature tree can use up to 250 gallons of water a day during the peak of summer, that percentage can translate into a lot of water! Also, if you re growing edibles, such as cucumbers, peppers, lettuce, broccoli, or cauliflower, in a heat island, the stress can cause these foods to turn bitter, or bolt.  Green roof of Chicago City Hall (TonyTheTiger) How can you help plants in heat islands? City managers are working toward reducing the heat island effect and you can. too! Use these tips to help your plants survive the heat island effect:
Since plants that are growing in heat islands are already under a lot of stress, be sure to monitor for pests and diseases regularly, so that you can apply treatments right away, before things get out of hand. Reducing heat islands on your property There are many steps you can take to reduce the number of heat islands on your property. Not only will this help your plants to be healthier, it also reduces energy bills (if you use A/C), water consumption, and emissions from energy production. Here are just a few of the ways you can reduce the number of heat islands on your property:
 Traditional asphalt (left) creates runoff; porous asphalt (right) allows soil to breath and absorb rain (EPA) Help your plants and the environment by eliminating heat islands around your home.
Echeveria are succulents native to Texas, Mexico, and Central America. While most stonecrops are not edible (my plants of choice), these plants serve well in gardens and landscapes, protecting areas that would otherwise go unplanted. They require very little care, are drought tolerant, and easy to propagate.  Echeveria elegans Echeveria identification It can be difficult to distinguish between different types of succulent plants. They nearly all grow in a rosette shape, have thick, rubbery or waxy leaves, and tend to have hairs or spines. They also tend to spread, self-propagating wherever conditions are favorable. Echeveria, in particular, tend to reproduce by generating stalked offspring, called ‘offsets’, that appear from underneath in a behavior frequently called ‘hen and chicks’. Echeveria are polycarpic, which means they can produce flowers multiple times. In winter, many echeveria plants lose their leaves, though not all. Echeveria pests and disease Rot and frost are problems for echeveria. Frost, particularly after a rain, can kill most succulents. Leaves that have begun dying off should be removed to avoid spreading fungal disease throughout the plant. Mealybugs and aphids can be troublesome.  Echeveria nodulosa (Karl Thomas Moore) CC BY-SA 4.0 Propagating echeveria
Nearly all succulents, or stonecrops, can be propagated from a single, healthy leaf. Simply break it off and lay it on loose soil and water regularly. Once roots develop, you can plant it wherever it will receive plenty of sun. You can also break off an offset and transplant it where you want it. Non-hybrids can also be started from seed. Growing conditions can cause extreme variations in shape, size, and color. If you can’t grow food, grow plants that take as little care, food, and water as possible. Echeveria certainly fits the bill. Aeoniums are a genus of plants that take little to no care and look better each year. While I generally prefer edibles, sometimes you have a space in the landscape that you just can’t find the right plant for - aeoniums might be what you need. And while they may not be a familiar flavor, many aeoniums are edible. You have seen these plants many times before, but you may be surprised to see just how lovely they can become, given the chance. Aeonium [ay-oh-nee-um] is a group of succulents known to the Greeks as aionos, which means ageless. They earn this name because they are monocarpic, meaning each rosette produces only one flower and then it dies. Originally from the Canary Islands, Morocco, and Ethiopia, these rugged succulents can thrive in the hottest weather. They perform well in containers and can be grown indoors if they receive enough light. 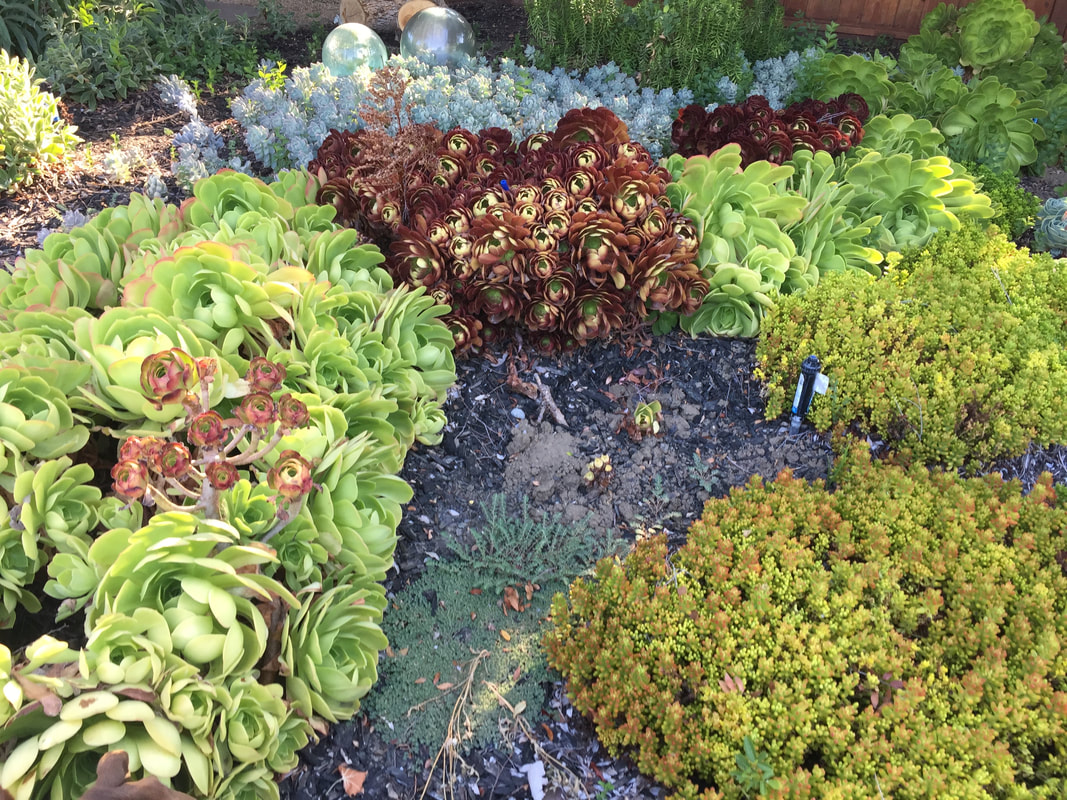 A mix of sedum, echeveria, and aeonium used instead of lawn Aeonium identification Most of the aeonium plants you see today are hybrids and they can look very similar to other stonecrops, such as sedum and echeveria. The biggest difference is that aeoniums often have fine hairs or spines on the edges (margins) of the leaves. Also, the leaves, which can be rounded or pointed, tend to be somewhat thinner than echeveria. When aeonium produce a flower, it is actually an inflorescence (a cluster of flowers) on a stalk that can reach 3 feet in height. These flowers can be very striking. The surface of aeonium leaves may be fuzzy, sticky, or smooth, and the stems can be scaly, smooth, hairy, or fissured. Plants stressed by drought or sunlight may exhibit red or purple highlights. This is not a concern. It is just what they do. Types of aeonium Most aeonium are classified as either low-growing or large. The large varieties include A. arboreum, A. holochrysum, and A. valvredense. Low-growing varieties are A. smithii and A. tabuliforme.
Caring for aeonium
Being tropical, these plants need strong light, good drainage, and watering only after long periods of dry soil. They do need protection from freezing temperatures so some sort of cover should be provided between the first and last frost dates. Too much rain can also cause rot. Pests and diseases of aeonium Aphid and mealybug infestations of the plant crown (where the stem meets the roots) can often be spotted by the presence of protective ants. Since many of these plants are edible and they contain a lot of water, many herbivores will feed on them, including squirrels, tortoises, and rabbits. Propagating aeonium Being succulents, aeonium are easy to propagate from a leaf. This is best done in autumn, when plants are actively growing. Simply take a healthy leaf from the plant and place it in good soil, in bright shade, and water occasionally. Aeoniums readily self-seed, if they are in a good location. The range of shapes, textures, and colors make these plants easy to play with when creating a rich visual tapestry in a landscape. Salvia is one tough, beautiful plant. The bees love it, and you might, too! This member of the mint family is one of those no-brainer plants. They tend to grow well without any help from us. Composing the largest genus of mints, this group of plants includes the culinary favorite, sage (Salvia officinalis). Most ornamental salvias are referred to by their Latin name ‘salvere’, which means to feel ‘well and healthy’.  Honeybee on salvia (Stuart Russell) Salvia description
Salvias tend to be woody plants, which is one reason why they are so good at handling drought. Depending on the variety, they can be evergreen or annual, perennial, or biennial, Like other mints, the stems tend to grow at angles to each other and are square. The flower spikes are a big attraction. They consist of a modified leaf, called a bract, and stalked, clustered flowers, called racemes or panicles. Flowers can be red, pink, yellow, or white, but the deep bluish-purple is my favorite. Hummingbirds, butterflies, and other beneficial pollinators love them, as well. Weird salvia science Unlike most mints, which have four stamens, salvia has a unique pollination mechanism that uses only two stamens and connective tissue (thecae) that create a lever action. In male flowers, this lever-action dumps pollen on visiting pollinators. This mechanism also pushes the stigma close to the same general area on pollinators. After a pollinator leaves, everything returns to its normal position. This increases the likelihood of pollination and fertilization. How to grow salvia Depending on the variety, salvias can be grown from seeds, seedlings, or cuttings, once the last frost date has passed. Most salvias prefer full sun and good air circulation. An exception is the Japanese yellow sage (Salvia koyamae), which prefers shade and moist soil. If your soil is heavy clay, like mine, you will want to incorporate some aged compost to lighten it up before planting. Salvias will produce more blooms with regular feeding. You can also mulch around plants with aged compost for reduced moisture loss and slow-release feeding. If you prune your salvias before they bloom, flowering can be significantly delayed. Better to shear your salvias at a time of year when they are not flowering. And be sure to deadhead spent blooms the rest of the year to stimulate more flower production. While being drought tolerant, your salvias will need to be watered. Just wait until you notice some moderate wilting, to avoid common fungal diseases. Salvia pests and diseases Rust, powdery mildew, and leaf spot may occur, but they can often be prevented with proper water management [Read: avoid overhead watering]. Aphids and thrips will be the most common pests. [Aren’t they always?] Many salvias have hairs on leaves and stems that discourage many pests and grazers (and my chickens). Whether you choose edible culinary sage, fragrant pineapple sage (Salvia elegans), the sacred white sage (Salvia apiana), or sturdy purple sage (Salvia dorrii), try adding some salvia to your landscape or garden today! Pergolas are more than shade structures. Shade structures protect us from the sun’s summer glare, but they are often poorly made and generally don’t last more than a season or two. Pergolas, on the other hand, are sturdy structures that can provide shade for decades. Let’s find out why pergolas are such a good idea.  Pergolas cool concrete patios and provide climbing structures Pergolas reduce the heat sink effect Many homes have concrete patios. Concrete acts as a heat sink that absorbs and then radiates a phenomenal amount of heat in the summer. This is also known as the urban heat island (UHI) effect. As this heat is radiated, it can cause several problems:
Shade can reduce the ambient temperature by as much as 15°. If it’s 100°F outside, that can make a huge difference in your comfort, your plants’ health, and your cooling bill. Pergolas as protection The word ‘pergola’ comes from the Latin word ‘projecting eave’. People have been creating shade for themselves since, well, since there have been people! At first, pergolas provide only marginal protection from the elements. Over time, as climbing plants make their way up and across the top of your pergola, the shade protection can become significant. After many years of growth, your pergola may even offer something of a rain barrier! A structure by any other name… Pergolas are spaces defined by upright posts or beams and an open lattice above that is normally used as support for climbing plants. Many people call pergolas by other names: arbors, gazebos, and bowers, but they are technically incorrect. The words describe slightly different versions on a theme, but there are differences:
 Green tunnel (Andrew Bossi) CC BY-SA 2.5 Pergola: DIY, ready-made, or custom This decision is one of those time-or-money questions. Most of us have one or the other, but rarely both. If you have time and tools, you can find designs online and at your local library for a wide variety of pergola styles. The building process is relatively straightforward. If you prefer more convenience, there are ready-made pergolas with the lumber already cut and drilled and all you do is assemble the pieces. If you have money to spare, the sky is the limit. You can custom design a pergola to fit your space and style, creating a unique, artistic sanctuary in your garden or landscape. Plants and pergolas One of the biggest problems with vine-covered pergolas is weather. [I’m speaking from personal experience here.] One night of freezing temperatures and your trumpet vine, wisteria, or honeysuckle can be killed off, leaving behind a skeleton of its former self. Luckily, in most cases, the root system will be able to recover thanks to that heat-sink concrete patio slab. Of course, covering an 8- or 9-foot high pergola with some square footage takes time. You may want to supplement your shade with shade cloth for the first few years. And if freezing temperatures are predicted, hang some old fashioned Christmas lights, drape plants with fabric (without touching), or fire up the BBQ grill. [Just make sure you don’t start a fire somewhere else!] Pergola plant selection As you select plants to grow up your pergola, make sure they are suited to your microclimate in terms of temperature, sun exposure, and soil. This will help your plants thrive and reduce your workload. You should also consider bloom time. Some people install multiple plants with different bloom times and colors for a longer season of flowers. Of course, my personal favorites are the edibles! Here are some popular plants for pergolas: Training your pergola plants
Most climbing plants, even self-clinging varieties, will benefit from a little help, at first. You can gently tie new stems to the nearest pergola post, leaving the ties in place until the tendrils have taken a firm hold on their own. Once plants have reached the top of the pergola, these ties can be removed. So, more than just shade, a pergola can provide support structure for climbing plants, reduced water and electric bills, increased home value, and even art! Bee balm is a striking North American native that attracts more than just bees to your garden. Bees and other pollinators are what help your garden plants produce the fruits and vegetables we love. Adding plants that they love can increase your bounty many times over. Bee balm also provides pollen and nectar to other beneficial insects.  Female ruby-throated hummingbird sipping nectar from scarlet bee balm (Joe Schneid) CC BY 3.0 Antiseptic bee balm Bee balm is a perennial. It is also a member of the mint family. Like other mints, bee balm has antiseptic properties. In fact, it is still used as a primary ingredient in popular mouthwashes. Native Americans used bee balm leaves and flowers to treat headaches, wounds, flatulence, and respiratory problems. They also used it to season wild game. While somewhat bitter, it tastes like a combination of peppermint and oregano.
How to grow bee balm
Bee balm, like other mints, prefers rich, moist soil. If enough moisture is present, bee balm can overtake an area. Some varieties can tolerate more dryness than others, so do your homework. It is easiest to buy bee balm plants from a reputable seller, or, if you know someone with an established plant, you can ask them to share some with you the next time they are dividing their plants. Bee balm can be planted in spring or fall. Plants should be spaced two feet apart, and the planting hole should have some compost worked into it, to a depth of 12 to 15 inches. In most regions, bee balm prefers full sun, but scorching California summers can sometimes be a bit much, so you may want to place your bee balm in where it will be protected from direct sunlight in the hottest part of the day. On the flip side of the calendar, your bee balm plant may die back to ground level in the winter, but don’t panic. Simply cover the area with mulch and it will be back when temperatures warm. Bee balm pests and diseases Powdery mildew is really the only problem that occurs with bee balm. You can protect your bee balm from powdery mildew by avoiding overhead watering and by pruning for good air flow. Fungicides can be used with marginal success. Caring for bee balm Bee balm is a low maintenance plant. You will want to provide it with a layer of compost each spring, covered with mulch, for good soil health. It may need to be watered during the peak of summer and be sure to remove spent blooms (deadhead) to encourage fresh flowers throughout the growing season. So, sooth your senses and savor the site of butterflies and bees in your garden with bee balm! Cattle panels, or livestock panels, make it easy to grow vertically. Manufactured for the farming community, cattle panels, also known as stock panels, are used to modify corrals, create paths, and move livestock from one place to another. Being made for the rigors of farming and livestock, these panels are durable. 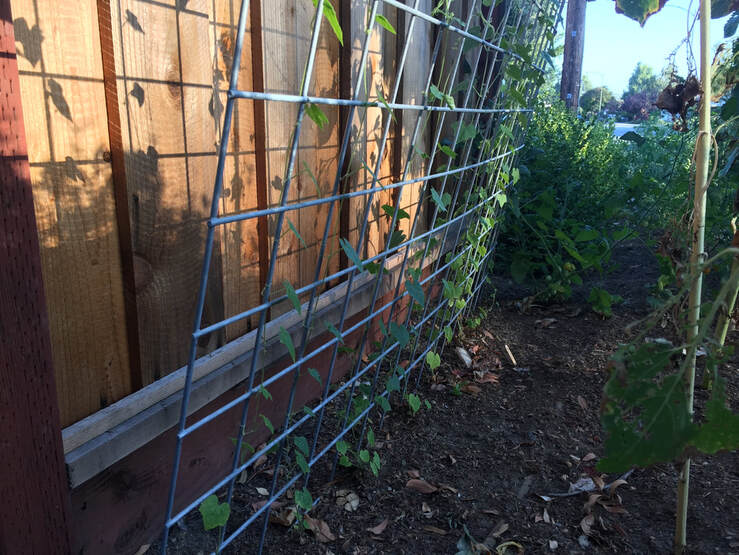 Mexican sour gherkins growing up cattle panel Cattle panel description
Cattle panels are made out of heavy duty 4 gauge (1/4”) galvanized rods that are welded into a grid. Most livestock panels are quite large, usually 16 to 20 feet long and a little over 4 feet wide. They are surprisingly affordable, at $20 to $30 each. [Getting them home can be tricky.] Hog panels are similar, except they are 3 feet wide, and the squares are more narrow along one edge. Once nice thing about stock panels is that you can cut out the horizontal rods along one edge to make legs that can be stuck in the ground for added support. If a full-sized panel is bigger than your garden space can handle, have the seller cut it in half for you, and then you’ll have two panels! Admittedly, this metal is sturdy, so bending (or cutting) it takes some effort. Cutting these panels requires the use of bolt cutters and some arm muscle. Gloves are a good idea whenever handling stock panels, too. Once the job is done, however, your garden will have added vertical space and it is easy to repurpose your stock panels as the seasons change. Advantages of growing up Apartment balconies, strips of ground between a house and a fence, and areas next to walkways are just a few places where you can get more out of your garden by growing vertically. Not only does growing vertical take up less space, it often improves air flow, reducing fungal diseases and making plants healthier than they would be spreading out on the ground. Healthier plants are better able to defend themselves against pests and disease, so you don’t have to resort to chemicals. Ways to use cattle panels in the garden Because these panels are so sturdy, they can be used in several different ways in the garden. Here are just a few ideas to get you inspired:
Which plants get trellised? Many different plants can be trained up a stock panel: pole beans, peas, cucumbers, melons, and squash come to mind for most people, but raspberry and blackberry canes can also be trellised using cattle panels. Tomatoes, too, can be coaxed into growing up and around these panels, gaining support similar to what they would get from a tomato cage. Grapes, gourds, and even pumpkins can be trellised on stock panels, but heavier produce may need a hammock for added support, especially as some of them can become quite large! Cattle panels are not your frail, fancy trellises, prone to rust and breakage. These suckers are sturdy and will last for many years in your garden. Yarrow is a trouble-free plant that offers many benefits in your garden or landscape.  Yarrow flowers Yarrow (Achillea millefolium) is native to all of the temperate (non-polar and non-equatorial) regions of Earth. Traditionally, the above ground portions of yarrow, also known as the nosebleed plant, old man’s pepper, soldier’s woundwort, and thousand-seal, was used medicinally to stop the flow of blood from wounds, ease toothache, treat digestive discomfort, and to induce sweating. The science behind what yarrow can and cannot do is limited. It is a mild sedative. Some studies have shown that it can relax the smooth muscle of the uterus, so it should not be taken by pregnant women. Yarrow may also be able to intensify the effects of blood-thinning and blood pressure reducing medications, lithium, and sleep aids. Also, yarrow is believed to slightly increase stomach acid. Even if you never touch the stuff, yarrow is a good addition to a landscape. It looks nice in containers, too.
The yarrow plant Yarrow makes an excellent ground cover. If mowed regularly, it will remain prostrate. If left to its own devices, it will grow to be a foot or two tall. The lovely feathery leaves feel soft and delicate to the touch, but these plants are tough. I don’t do anything for mine and they just keep on growing. Yarrow is drought tolerant and butterflies are drawn to the flowers. Edible yarrow While not particularly edible, the way lettuce or spinach are, yarrow can be dried and used to make a tea. Young leaves and flowers are sometimes added to salads, but I just tried it and don’t care for it. The tea is very nice. Yarrow has been used as livestock feed, in some regions, and to some, it is a weed. Yarrow’s true value, however, lies in its role as an insectary. Yarrow as insectary Increasing the biodiversity in your garden or landscape helps to keep it healthier. Mutually beneficial arrangements that have taken millions of years to sort themselves out really are effective. Rather than trying to Disnefy your landscape, with neat and tidy arrangements, adding a variety of flower shapes, sizes, and colors will attract more beneficial insects. Okay, okay, so we all want the topiary elephant, but diversity is still healthier than monoculture. Yarrow flowers provide nectar and pollen to many beneficial insects, including:
Aphids, striped and spotted cucumber beetles, flea beetles, and lygus bugs are also attracted to yarrow, but, in this case, that’s a good thing. First, it means they are not on your tomatoes. Second, those particular aphids are destined to be eaten by the larval forms of all those beneficial insects! Sort of a hoverfly happy meal! Growing yarrow Yarrow seeds need light to germinate, so do not bury them in the soil. A light dusting of soil or vermiculite will hold the seeds in place, but you might want to use a mister to water the seeds until the germinate. Either that, or you can saturate the soil with water, add seeds, and cover with plastic until the seeds germinate. Once your yarrow gets going, you will want to find it a permanent home. Yarrow tends to spread on its own, and it can even be used as a low border hedge. You can easily dig established plants up and divide them. Do you have areas of bare soil in your landscape? These encourage erosion and unhealthy soil. Adding yarrow to your landscape or garden is a good way to reduce erosion, attract and feed beneficial insects, and hey, the flowers are lovely, too! Insectary plants are grown to attract and provide for beneficial insects. There are many insect parasites and predators that can help control garden pests without the use of chemical pesticides. While they may not eliminate all of the pests, insect parasites have evolved into effective predators of the insects that plague our gardens and landscapes. By installing plants that attract and feed these beneficial insects, the need for more stringent measures is reduced. And, hey, who doesn’t want a garden filled with flowers?  Borage What makes an insect beneficial? Insects are called ‘beneficials’ when they help us get what we want. In the case of gardening, beneficial insects may be pollinators, predators, or parasites. Pollinators, such as solitary bees, increase crop yields by transferring pollen to female flowers. If you have a monochrome garden with no flowers other than your cucumber and tomato plants, you won’t get nearly the same production as you would with a diverse color palette and many other flowers besides your vegies. Other beneficials, such as lady beetles, chow down on aphids and many other pests, like they were a bag of potato chips. A third group of beneficials is the parasites. These insects lay their eggs in insect pests, killing them from the inside out. The syrphid wasp, or hoverfly, and many other tiny parasitic wasps, are very efficient killers and, no, they do not sting people. The problem with buying predatory insects Some beneficial insects are so well known that you can buy them. Lady beetles (ladybugs), lacewings, and praying mantis are purchased each spring by the millions, It is true, they are voracious feeders and they can put a serious dent in an aphid or other pest population. And they can fly, which means that if your landscape does not give them what they want and need, they will go elsewhere. This is where insectary plants comes in. Color, shape, and height Some insects prefer globe flowers, while other prefer flat landing strips. Most insects see a very limited range of color (even if that range is frequently beyond what we can see). Some insects prefer flowers and foliage that are low to the ground, while others seek out taller flowers with a better view. By planting a wide variety of flower colors, shapes, and heights, you can attract and retain the widest range of beneficial insects to your garden or landscape.  Chives Plant selection The trick to attracting and maintaining these beneficial insects is to plan for sequential flowering. Of course, your job will be even easier if you select plants well suited to your microclimate, while you’re at it! The choice of which plants to use depends on the pests commonly found in your garden or landscape. These plants are nearly always a good bet:
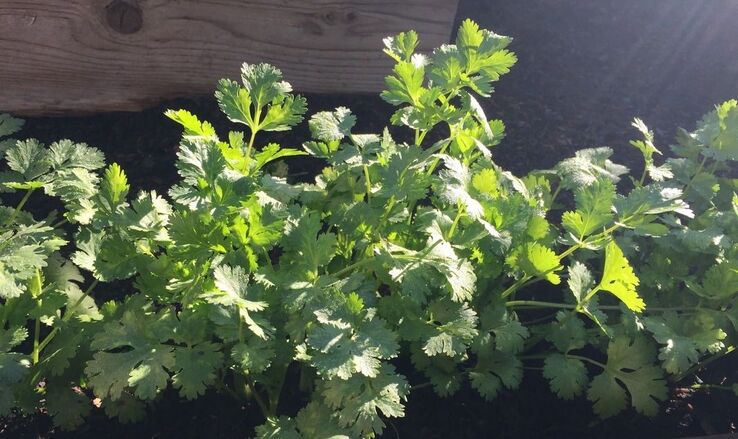 Cilantro Where to put insectary plants
Your insectary plants can be used to create hedgerows that surround a garden plot, along a walkway path, or you can simply intersperse these helpers throughout the landscape. Most residential gardens, however, are too small to make this much of a concern, unlike agricultural fields, so you can put them wherever they will thrive and look nice. Like other plants in the landscape, your insectary plants will need weeding, irrigation, and protection from vertebrate pests to stay healthy. The initial investment of time and effort will make your job as a gardener that much easier, once these plants become established. Be sure to provide your guests with water, while you're at it!  Traditional lawn The scent of freshly cut grass and the sound of a lawn mower trigger many childhood memories of summer, but the history of lawns goes all the way back to our origins in Africa. Lawn history As far as historians can tell, our African ancestors maintained areas of low-growing grasses around their homes to make it easier to see predators before they got too close. That same train of thought continued well into Medieval times, when grand expanses of lawn exposed enemy armies as they approached. England’s 12th and 13th century nobility decided that lawns provided a great place for sports that eventually evolved into tennis, croquet, and golf. The less wealthy commoners also maintained grassy areas, but that was to feed their sheep and cattle. Traditional lawns Those grand expanses of greenery are easy to grow in England. Adequate moisture, fertile, well-drained soil, and lots of overcast days allow turf grasses to thrive. Plus, it’s much easier to find a sheep to keep your lawn neatly trimmed. Not so, here in the good ol’ US of A. The seed and sod originally brought to the U.S. was from plants native to England and cooler parts of Europe, which are completely unsuitable to many other warmer climates. Also, lawns are work - ask any greenskeeper. Most homeowners did not have the time or resources to maintain a lawn ‘just for show’, until the invention of the lawn mower, in 1830. Making it easier to maintain a neatly trimmed ornamental lawn, lawn mowers played a big role in making lawns popular among the poor and middle classes. In 1952, a man named Abraham Levitt created the first planned suburban community, complete with established lawns, and the American Dream, as we know it today, was born. (I’ll bet you thought it was a lot older than that, didn’t you? I did, too.) Modern lawns are commonly grown from sod. Sod is squares of soil with the grass already growing in it. Lawns can also be grown from seed, but grass seed isn’t cheap. Either is sod, for that matter. Grass varieties You can get warm season grass and cool season grass. The seasonality refers to when those particular grasses do the most growing. Bermudagrass, St. Augustinegrass, zoysiagrass, and kikuyugrass are popular Bay Area warm season grasses that stay green all summer (if watered regularly), but they tend to have a dormant winter period. Our fall grasses include bentgrass, Kentucky bluegrass, tall fescue, fine fescue, and perennial ryegrass. These stay green year round. Each region has its own characteristics that make one variety better suited than another. Grasses are generally categorized according to water needs, disease resistance, salinity tolerance, shade tolerance, traffic tolerance, and maintenance needs. Contact your local Cooperative Extension Office for recommendations for your area. Lawn pests & diseases Lawns, or turf grasses, only have a few insect pests in the San Jose area. Cutworms, grubs, crane flies, masked chafers (white grubs), and chinch bugs may cause some problems. Birds, raccoons, and moles may cause further damage by hunting and digging up the insects. Lawn diseases are equally rare. Leaf spot, rust, anthracnose, Fusarium blight, fairy rings, and other fungal diseases can occur, but these are usually the result of frequent, shallow watering. Lawn maintenance The key to a beautiful lawn is good cultural practices. Cultural practices that ensure a healthy lawn include:
Lawn weeds Weeds are the bane of every lawn aficionado. The list is long and the battle never ends. Some of the more common lawn weeds include:
Your weed and pest problems may vary.  Wood chip mulch and edible plants make an excellent lawn alternative Lawn alternatives
Many communities now have lawn replacement programs designed to reduce water use. I did it and received a check for $960! Instead of grass that required watering, fertilizing, weeding, mowing, and edging, I added CA native blackberries, a dwarf pomegranate, a pineapple guava tree, and an artichoke. Once these plants are established, they require little or no care at all, plus they provide food. I encourage you to investigate your options. There are many low-growing plants that use far less water and fertilizer and mowing and edging to look and feel nice. Oregano, yarrow, mint, chamomile, and creeping thyme all provide the added benefit of being edible. Lawns can also be replaced with rain gardens and rock gardens. For the sake of all things living, do not install a fake lawn. The plastic off-gases chemicals of dubious health and, honestly, they look like crap. If you must have a lawn, give it the care it needs. The Three Sisters of Native American agriculture are corn, beans, and squash.
Benefits of the Three Sisters Method
Planting these three sisters together allows them to benefit each other in several ways:
In some areas, a fourth plant was added to the mix. This was usually a flowering plant used to attract pollinators, such as honey bees, to increase yield. Just as the three plants benefit each other as they grow, eating them together provides fatty acids and the eight essential amino acids needed to form complete proteins. Planting by the Three Sisters Method Rather than planting in rows, the Three Sisters Methods calls for flat-topped mounds, 12” high and 20” wide. Several corn seeds would be planted in each mound. In some areas, rotten fish or eels would be added at the same time, to act as fertilizer. Some areas planted all three types of seeds at the same time. Others would wait until the corn was 6” tall before adding squash and beans. Seeds would be alternately planted around the corn. Two types of beans were used: common beans (Phaseolus vulgaris) and tepary beans (Phaseolus acutifolius), which are more drought tolerant. You can create your own Three Sisters garden design using the same companion planting concepts. Since corn has higher pollination rates when planted in blocks, rather than rows, you can set aside an area of the yard, or a raised bed, as your very own Three Sisters garden. The corn will grow up, the beans will climb the corn and add nitrogen to the soil, while the squash protects the ground with its wide leaves. Come autumn, your family will be able to enjoy a high protein meal of beans and corn with a side order of baked or steamed squash, with very little effort on your part. Give it a try this growing season and see how well it works for you! Designing a garden before planting lightens your workload and helps you get the most out of any garden space. You don’t have to be a landscape architect to put the elements of garden design to work for you. And remember that most plants are very forgiving. Your garden design should reflect you rather than a textbook. It does not have to look like a glossy magazine photograph. Garden design is part science, part art, and part whimsy. So, grab some paper, a pencil with an eraser, and a rough sketch of your garden area, and get started! Whether you are working with a balcony, a small rental yard, or a more substantial suburban backyard, there are always options for gardening. The first thing you need to ask yourself is: What do you want out of your garden? Some people garden for fresh tomatoes, melons, and herbs. Others garden as a means toward self-sufficiency, while some do it out of necessity. For some, it provides a sense of sanctuary, while others are working kitchen gardens. Keep your underlying goal in mind as you ask yourself the next question. What do you have to work with? The physical properties of your garden and landscape location directly impact plants are soil, sun, and climate. Soil supports your plants. If you use containers or raised beds, soil composition is easy. Just add potting soil. If plants will be grown in the ground, get your soil tested by a reputable local lab. These tests are inexpensive and invaluable.
Top dress your soil with aged compost at the beginning of the design process. As you plan and decide, worms, microorganisms, and other beneficial critters will improve the soil for whatever you plant. Sun exposure dictates which plants will thrive in your yard. Whatever the design, you will need to work within the parameters created by how much sunlight each area of the garden gets at different times of day and throughout the seasons. Color code your drawing to show which areas get full sun, partial sun, partial shade, or dappled shade, taking hourly notes. Your microclimate includes plant hardiness zone, annual rainfall, wind, slope, pollutants, and even tap water chemistry, all affect which plants will perform well in your garden. Principles of design Professional landscape architects use specific design principles to help them make good decisions, and you can, too. Below, you will find a description of eight design principle with questions to ask yourself about your own space. 1. Boundaries The limits of your property certainly create boundaries, but you can use garden beds to build boundaries within boundaries. As you create boundaries within your garden, see if they feel right. Whether fences, hedgerows, or walls, boundaries can keep chickens out of the salad patch, nosy neighbors from seeing in, and hide any eyesores. Identify fixed boundaries already in place and those you want to add. 2. Lines Lines are visual cues that pull our eyes along a path. Lines can be straight, curved, vertical, or horizontal. Buildings, fences, pools, existing plants, and paths create lines. A row of tall sunflowers will draw your eyes skyward. A curving stone path quietly invites you in to explore. Look at the lines that already exist in your yard and see how each of them makes you feel. Do they fulfill your goals? If not, how can they be changed? 3. Surfaces Imagine walking through a garden on a concrete sidewalk. Now imagine walking through that garden on a path made of wooden planks, wood chips, or cobblestones. The feel of the entire space changes. Do the surfaces currently in your garden allow for proper drainage? Are they durable? Are they comfortable or safe to walk on? Do they match your Dream Garden? 4. Form Form and shape have an impact on how a space is perceived. Shapes are two-dimensional. Forms are three-dimensional. Geometric forms, like circles and squares, create a more formal garden. The more natural forms of streams and shrubs create a relaxed atmosphere. When shopping for plants, keep their mature form and shape in mind, as well as size. What shapes and forms will create the feel you want in your garden? 5. Texture Texture refers to a plant’s bark, foliage, flowers, and overall structure. Texture can be coarse, medium, or fine. Coarse-textured plants attract attention and delineate space, while fine-textured plants soothe and create openness. Buildings, paths, and other design components also have texture. Create a sense of expansion by putting finer textures around the edges, medium textures inside the perimeter, and one or a few coarse-textured plants closest to the house. Reverse those plantings to create a sense of closeness. How many different textures do you currently have in your garden? Do those textures create the feel you want from your garden? If not, what can you change? 6. Color If everything in your garden were green, it would eventually get boring. What colors occur in your garden during each season? Are there times or spaces that need help? You can use color schemes and a color wheel to create balance and add contrast to your garden design. The color wheel refers to the three primary colors (red, yellow, and blue), three secondary colors (green, orange, and purple), and so on. Color schemes can be monochromatic (all one color, in addition to green foliage), analogous (any 3 to 5 colors that are next to each other on the color wheel), or complementary (colors opposite each other on the color wheel). The buildings, paths, and other existing features of your yard are part of this color factor. What colors already exist on your property? Are there places you can alter to create a more pleasing experience? Research has demonstrated that color plays a role in our moods. What mood do you want to get from your garden?
7. Garden furniture and art Most gardens offer a place to sit, relax, and enjoy a cup of coffee or a glass of wine. Patio furniture, awnings, yard art, pergolas, picnic tables, fire pits, and all the other elements of your space influence the overall feel of your garden. Looking at what you already have, ask yourself if those items fit in with your overall design, color scheme, forms, and textures. 8. Lighting Lighting can provide safety and add atmosphere to a landscape. Solar lights are a popular choice for illuminating a garden at night, but some plants, like some people, need the lights out to sleep well. Consider directing outdoor lighting onto paths, doorways, and seating areas to avoid distressing plants. Themes Your garden is your own. There is no right or wrong garden design, as long as your plants are healthy and you enjoy it. If you are unsure about how to start, consider these garden themes:
Plant selection Plant selection is similar to painting a room. You know what you want the result to look like, so you buy your paint. A week goes by, and you are still sanding, spackling, and taping. Adding plants to your garden or landscape, like the paint, is the last step in a process that takes time. Permit yourself to take the time you need to plan and prepare. After analyzing soil, sunlight, surfaces, lighting, lines, location, boundaries, form, furniture, color, texture, and art, you can finally decide which plants will suit your purposes and microclimate. Companion plants While deciding which plants to put near each other (and which ones need some space), you may want to consider companion planting. While there have been a lot of false claims and propaganda about companion planting, there are some scientific facts you can put to work for you, such as the Three Sisters Method of growing corn, squash, and pole beans together, used by Native Americans. Quarantine As tempting as it may be to install your new plants as soon as you get home, it is a far better idea to place them in a quarantine area until you are sure that they are free of pests and diseases, saving you a lot of time and money in the long run. Plant installation When installing plants, ensure that each location provides the correct sunlight and wind protection. It is nearly always a good idea to install larger plants first, starting with trees, then shrubs, then perennials, and ending with annuals and ground cover. Not only will this plan help you to stay focused on the design, but it will also protect smaller plants from being damaged by the installation of larger plants. Print a Google Maps image of your property for an easy place to start. Heck, print a few of them! Then play around with it. Explore each of the design principles. Pencil some new plants in. Use your eraser and different colors. Add what you already have and try new ideas before picking up a shovel! Take some before and after photos and enjoy what you accomplish! There’s more to sunny marigolds than meets the eye. These brightly colored annual and perennial flowers add gold, yellow, white, red, and copper to the landscape through summer and fall. The simple daisy shapes or full to bursting carnation-like blooms, members of the sunflower family, are able to thrive in our scorching hot summers long after fainter hearts have collapsed. If that weren’t reason enough, there is magic in marigolds!  Red marigold (Kokkarani) CC BY-SA 4.0 Marigold magic
The magic of marigold lies in its scent. While we may (or may not) enjoy it, many animal and insect pests really don’t like it. These makes marigolds an excellent natural deterrent to pests that will attack your tomatoes, eggplant, potatoes, and sweet peppers. Deer, rabbits, moles, and voles are also said to dislike the scent enough to forage elsewhere. Chemicals in the roots even attract and then kill nematodes. While nothing works 100%, marigolds can help reduce some nematode populations as they give your edibles a lovely floral border! Types of marigolds Marigolds used to only be available in yellow carnation type blooms. Now, the range of colors and bloom shapes is astounding. As you shop for marigold seeds or seedlings, keep in mind that there are three main types of marigolds:
Be forewarned, marigolds in the Tagetes genus are generally not edible. If you want edible marigolds, go for the Calendula, or pot marigolds. Growing marigolds Marigolds can be grown in containers, on windowsills, or in any sunny spot in the landscape or garden, as long as they are not near legumes. Some people claim that marigolds should not be grown near legumes. They say that the chemicals that make marigolds beneficial, can also interrupt the nitrogen-fixing capabilities of legumes, such as peas and beans, but I don’t know if this is true. Larger varieties of marigolds should be placed 2 to 3 feet apart, while the smaller, lower growing varieties can be one foot apart. Seeds can be started indoors before the last frost, but they will want a site with plenty of sunshine. While they prefer full sun, marigolds can also be grown in partial shade. Marigold seeds germinate quickly. As they start growing, seedlings will benefit from a layer of mulch placed around them. This mulch will shade the soil, add nutrients, and reduce competition from weeds. After that, they never need fertilizer. In fact, too many nutrients encourages leaf growth, rather than flowers. Flower production can be encouraged by removing, or deadheading, spent blooms. Do not use overhead watering. Instead, water near the base of each plant, allowing the soil to dry out between waterings. Marigold pests & diseases Damping-off disease can be a problem when seeds are started indoors. Marigolds are quite hardy and drought tolerant. Too much moisture can cause bacterial spot, powdery mildew, gray mold, Alternaria leaf spot, and root rot. Aphids and mites may try infesting your marigolds, but a quick spray from the hose early (in the morning), or brushing the pests off with a soft brush, is all the treatment that is needed. Many butterflies are attracted to marigolds, and they make excellent dried flower arrangements. Add marigolds to your garden shopping list and spread some beneficial color! Rain gardens do not cultivate rain. They are not ponds or wetlands. Most of the time, a rain garden isn’t wet at all. So… What is a rain garden? A rain garden is a sunken area designed to redirect rain water away from buildings, driveways, lawns, and other landscape features that may have drainage problems, and to hold onto that water long enough to filter sediment and pollutants. Rain gardens typically use native plants that do not require additional irrigation. These plants help hold, filter, and slow the release of rainwater, reducing runoff and pollution, while allowing more water to be absorbed. This usually occurs within 48 hours, preventing mosquito breeding. According to The Groundwater Foundation, “Rain gardens are effective in removing up to 90% of nutrients and chemicals and up to 80% of sediments from the rainwater runoff. Compared to a conventional lawn, rain gardens allow for 30% more water to soak into the ground.” Now, industrial and commercial properties have high tech rain gardens that incorporate sand and filtering systems and all that, but we, as homeowners, don’t need to go quite that far to get similar benefits.  Rain garden infographic courtesy of Kkastner Why have a rain garden? If you live in California, you know that our occasional rains can be disruptive. The ground can be dry to the point of becoming hydrophobic, repelling water and causing flash floods. You may not have a flash flood in your yard, but the principles behind rain gardens can still help prevent the loss of topsoil and other problems associated with urban drool. Also, the majority of the water that comes off your roof and driveway contains a lot of pollutants that you probably don’t want in your edibles. Installing a rain garden also helps attract beneficial insects and other pollinators, increasing biodiversity. Rain gardens are very low maintenance once installed and they look nice!  Recently planted home rain garden (BrianAsh) CC BY-SA 4.0 How and where are rain gardens installed?
Since most of the water for your rain garden will probably come from rain gutter downspouts, you will need to select a location that allows for a path (read decorative trench) from those downspouts to a low area in your yard. Areas with full sun are preferred over shady areas. You will want to make sure that your rain garden site is at least 10 feet away from your home or other buildings and not over a septic field. Once you have a location, use these steps to create your rain garden:
This is a big project, but it is one that will improve soil and water quality in your area for a very long time. If you have the space, consider adding a rain garden to your landscape. (And be sure to share photos!) |
Welcome!You can grow a surprising amount of food in your own yard. Ask me how! To help The Daily Garden grow, you may see affiliate ads sprouting up in various places.
You can also get my book, Stop Wasting Your Yard!  Index
All
Archives
April 2024
|
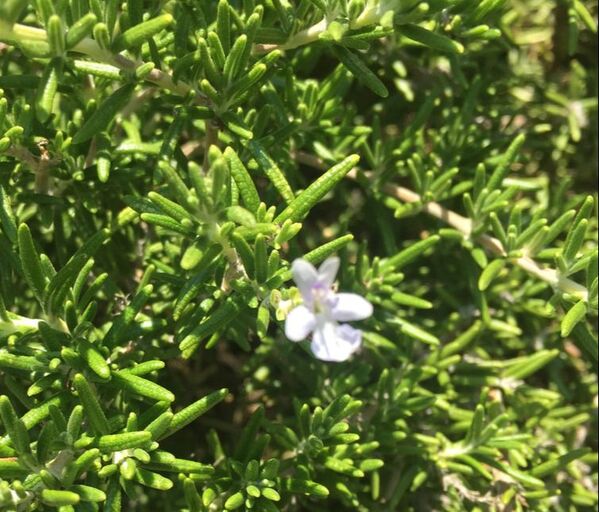
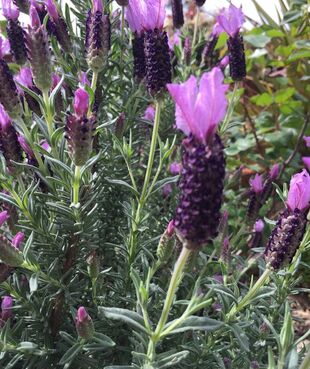


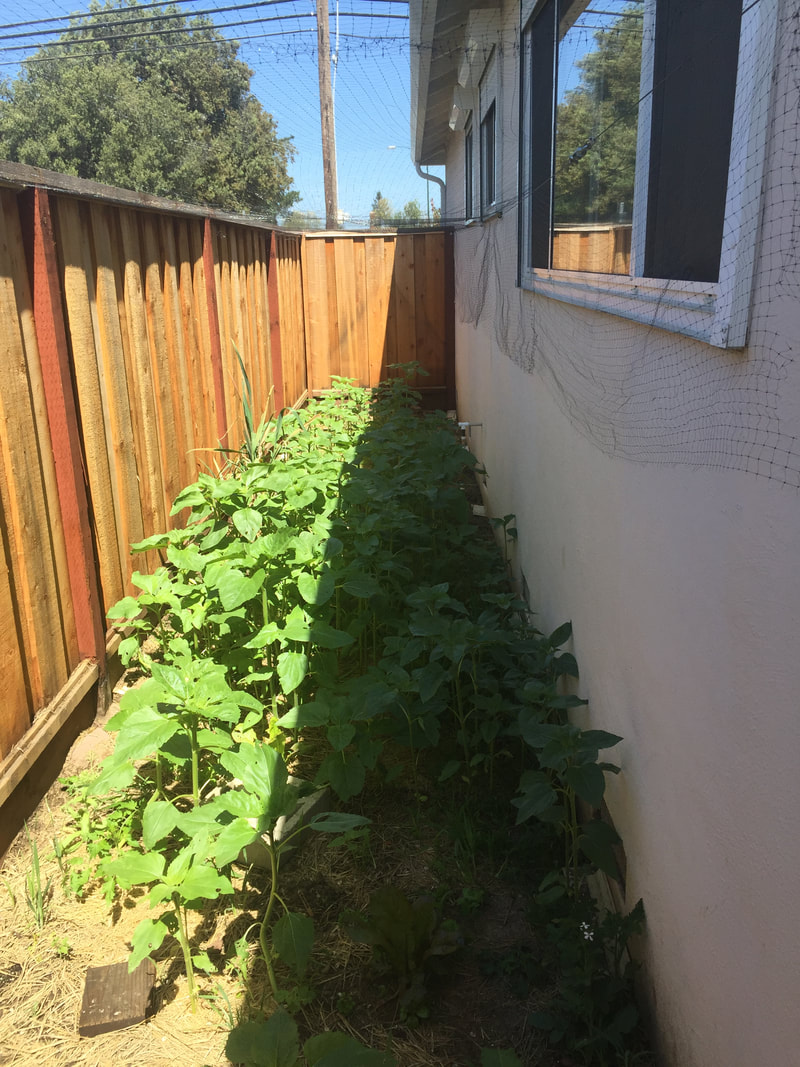
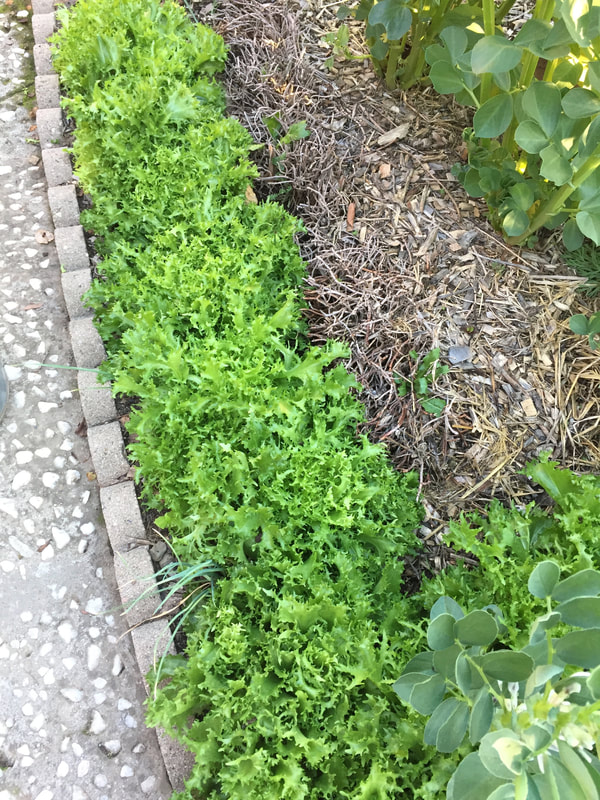


.JPG)


 RSS Feed