The Daily Garden
  • Home
  • Garden Word of the Day
  • Monthly Chores
  • DIY Chickens

Garden Word of the Day

Infiltration Rate

2/20/2017

0 Comments

 
Infiltration rate is a measurement of how quickly water can enter soil. 


Infiltration rates are reported as the depth water (in millimeters) can reach within one hour. For example, an infiltration rate of 10 mm per hour means that a 10 mm layer of water on top of the soil will take one hour to soak in. Understanding the infiltration rate of your garden or landscape can mean the difference between irrigation and flooding.


Soil types & infiltration

When soil is extremely dry, it won’t absorb water at all because it becomes hydrophobic. Before that point is reached, water is absorbed quickly in what is called the initial infiltration rate. It happens quickly because the macropores in the soil contain only air, giving the water plenty of places to go. As the pores begin to fill, absorption slows down to a steady rate called the basic infiltration rate. According to the Food and Agriculture Organization of the United Nations (I never knew there was such a group until today!), different types of soil have different basic infiltration rates:

  • sand - more than 30 mm/hr
  • sandy loam - 20 to 30 mm/hr
  • loam - 10 to 20 mm/hr
  • clay loam - 5 to 10 mm/hr
  • clay - 1 to 5 mm/hr


Clearly, taking an infiltration test can help you have a better understanding of what type of soil you have. It also helps you to select plants that are best suited to your soil.


Benefits of better infiltration

Understanding and amending the infiltration rate of your soil can provide many benefits:

  • improved soil structure
  • soil moisture tension (ability of plants to pull water from the soil)
  • a better habitat for beneficial microorganisms
  • reduced water consumption
  • more effective drainage
  • reduce soil compaction
  • it can make the soil easier to work

Picture
Photo from the Federation of Vermont Lakes and Ponds

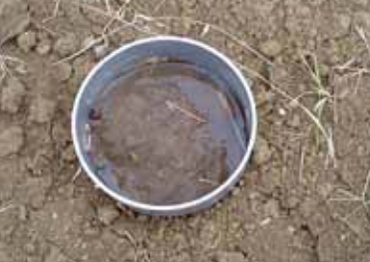
How to conduct an infiltration field test

Generally speaking, most of these tests are done with specialized equipment. You can, however, follow these steps to perform a modified version that will give you useful information:

  1. Select a level location.
  2. Expose bare soil, disturbing it as little as possible.
  3. Use a large metal coffee can or restaurant size vegetable can with both ends cut out.
  4. Place a board on top of the can (to prevent bending the can) and start hammering in circles until the can is buried 2 to 3 inches into the soil.
  5. Measure the above ground portion of the can and subtract one inch.
  6. Have a watch or timer ready and fill the can with water to one inch from the top.
  7. Record the amount of time it take for all the water, including puddles, to be absorbed.


Another testing method you can try only requires a shovel and a watch:

  1. Dig a hole, 6 inches across and 6 inches deep.
  2. Fill it with water and allow it to stand for one hour.
  3. Measure the remaining water and then refill the hole.
  4. Allow it to stand for a second hour and measure the water depth again.
  5. Add the two measurements for a reasonable infiltration rate.


If your soil is like mine, compacted heavy clay when we moved in, adding organic material is the best way to improve the infiltration rate. If you plan on installing a rain garden, checking the infiltration rate is critical. Standing water can drown even the healthiest plant, given enough time.


Help your garden and your landscape with improved permeability and infiltration rates. Your plants will be healthier, more beautiful, and more productive.
0 Comments


Leave a Reply.

    Welcome!

    You can grow a surprising amount of food in your own yard. Ask me how!

    ​~ Kate


    Sign up for The Daily Garden!
    Picture

    Index

    All
    Artichokes
    Asparagus
    Beans
    Beets
    Beneficial Insects
    Berries
    Bok Choy
    Broccoli
    Brussels Sprouts
    Bulbs
    Cabbage
    Carrots
    Cauliflower
    Celeriac
    Celery
    Chayote
    Chickens
    Chickpeas
    Children's Activities
    Collards
    Compost & Mulch
    Container Gardening
    Corn
    Cover Crops
    Cucamelons
    Cucumbers
    Currants
    Eggplant
    Endives
    Fennel
    Fenugreek
    Flowers
    Fruit & Nut Trees
    Garden Design
    Garlic
    Grain
    Grapes
    Groundcherry
    Guava
    Herbs
    Hops
    Horseradish
    Irrigation
    Jerusalem Artichokes
    Kale
    Kiwifruit
    Kohlrabi
    Lawns
    Lettuce
    Melons
    Mint
    Native-plants
    Onions
    Parsley
    Parsnips
    Peanuts
    Peas
    Peppers
    Pests & Diseases
    Pineapples
    Plants 101
    Potatoes
    Pruning
    Pumpkins
    Quarantine
    Raised Bed Gardening
    Rhubarb
    Shade Gardening
    Soil
    Sorghum
    Spinach
    Squash
    Strawberries
    Succulents
    Sunburn
    Sunflowers
    Sweet-potatoes
    Tomatillos
    Tomatoes
    Turnips
    Vines
    Weeds
    Wheat
    Zucchini

    RSS Feed

    Archives

    December 2019
    November 2019
    October 2019
    September 2019
    August 2019
    July 2019
    June 2019
    May 2019
    April 2019
    March 2019
    February 2019
    January 2019
    December 2018
    November 2018
    October 2018
    September 2018
    August 2018
    July 2018
    June 2018
    May 2018
    April 2018
    March 2018
    February 2018
    January 2018
    December 2017
    November 2017
    October 2017
    September 2017
    August 2017
    July 2017
    June 2017
    May 2017
    April 2017
    March 2017
    February 2017
    January 2017
    December 2016
    November 2016
    October 2016
    September 2016
    August 2016
    July 2016
    June 2016
    May 2016
    April 2016
    March 2016
    February 2016
    January 2016
    December 2015
    November 2015
    October 2015
    August 2015
    July 2015
    June 2015
    May 2015
    March 2015
    February 2015
    January 2015

Proudly powered by Weebly
  • Home
  • Garden Word of the Day
  • Monthly Chores
  • DIY Chickens