|
When it comes to children’s gardens, what child hasn’t dreamt of a pizza garden? And who says grownups can’t have a pizza garden of their own? You can!  Pizza (HoaLuu) Practically every ingredient found on a pizza, besides the cheese and pepperoni, can be grown in your backyard. The sauce, the spices, the toppings, and even the crust can be homegrown and homemade. 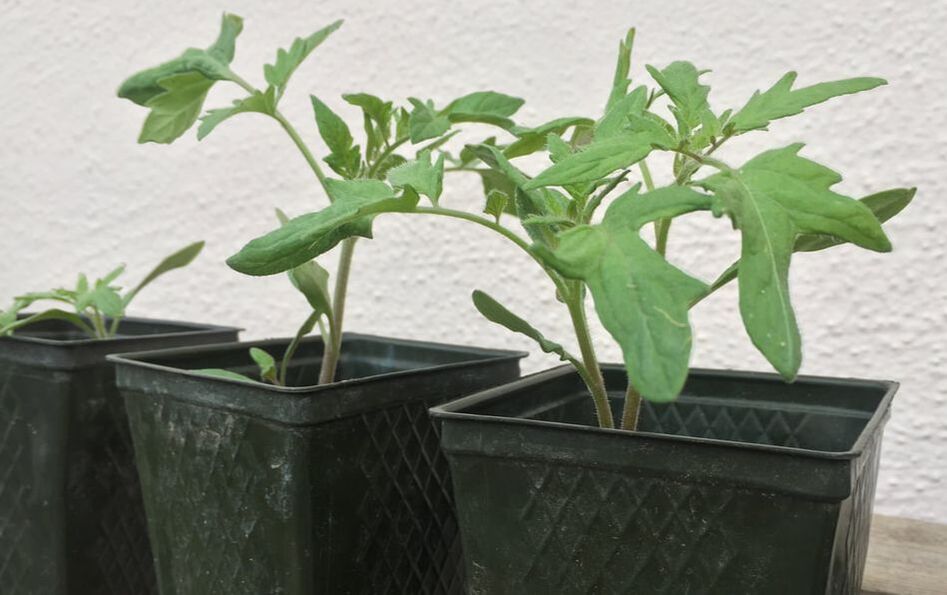 Tomato seedlings (Kate Russell) Start with the sauce Most pizzas start with a tomato sauce. These members of the nightshade family are usually pretty high on a gardener’s list already. The nice thing about tomatoes is they are easy to turn into a sauce that can be canned or frozen for later use. And be sure to plant plenty of garlic in your pizza garden. You will also need some herbs and spices. Pizza herbs and spices Traditionally, my Italian red sauces contain basil, marjoram, oregano, and thyme. You may also want some red pepper flakes from last year’s chili peppers. Parsley and rosemary are nice additions, too. Other herbs you might want to have include chives, cilantro, dill, or summer savory.
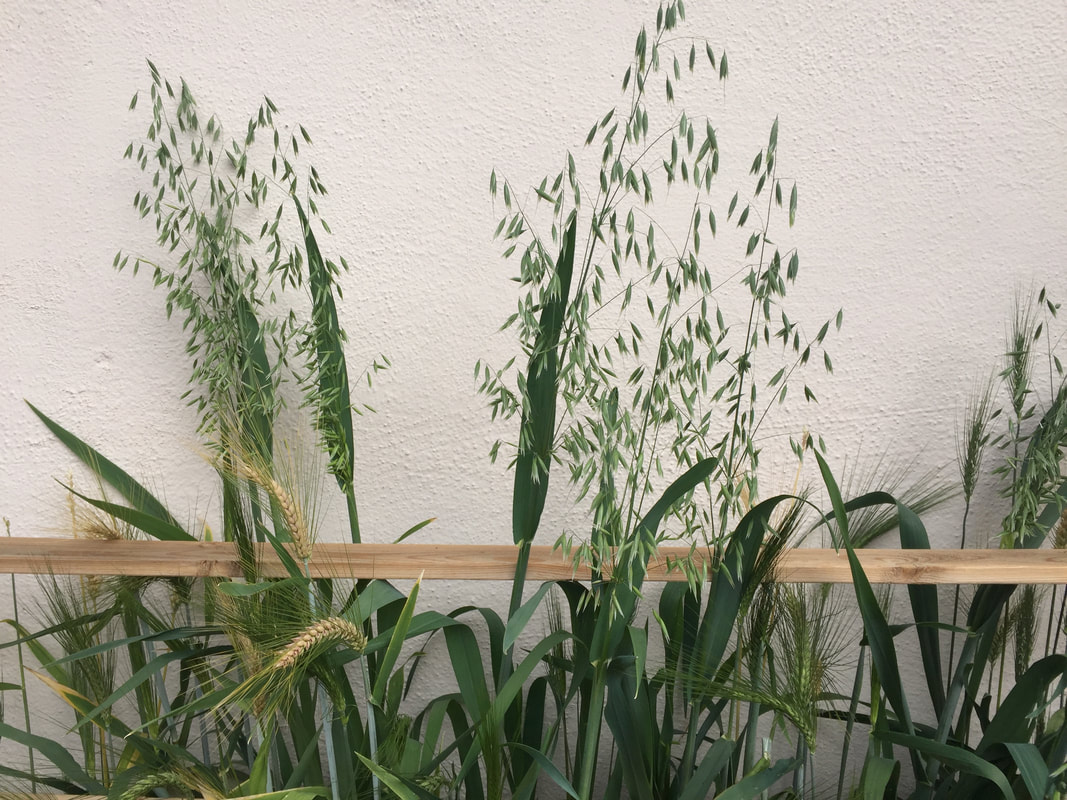
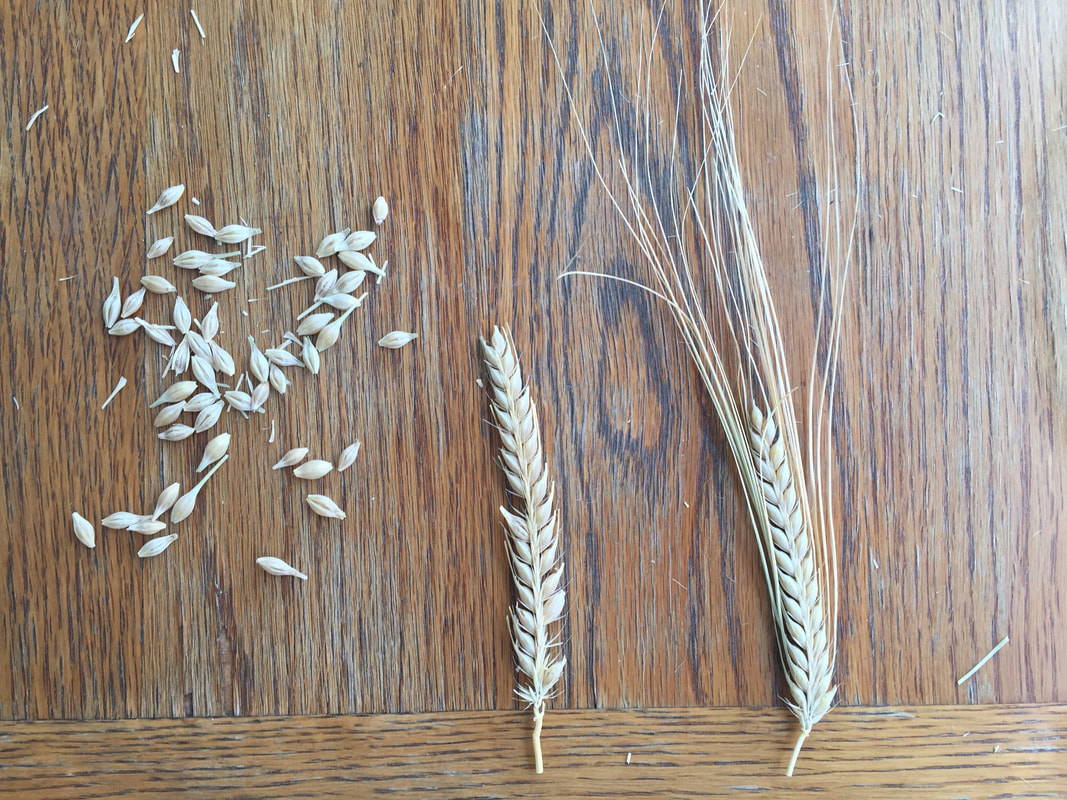
Pizza toppings In this case, plant selection is exactly like ordering a pizza. Are you an artichoke hearts, spinach, and mushroom pizza person? Maybe you prefer a rainbow of red, orange, and yellow bell peppers with red, white, and yellow onions. Or, how about a garden variety pizza topped with broccoli, eggplant, and shallots? Other ingredients you might want to consider adding to your pizza garden might include beets, banana peppers, chili peppers, jalapeño peppers, leeks, pineapple, scallions, yellow squash, or zucchini. You may also want to add cherry tomatoes, tomato slices, or sun-dried tomatoes. If you have the space and the time, you can even plant an olive tree, assuming you are in the right Hardiness Zone. Can you think of any others? Let us know in the comments! By the way, I have grown mushrooms from a kit before and was surprised at how easy it was. I will do it again soon and write a post about it. If any of my readers are mushroom growers, I would love to talk with you about the possibility of educating us all…] Pizza crust anyone? Flour is inexpensive and readily available. Converting wheat into flour is labor-intensive. But, if you really want to, planting 9 square feet of wheat should provide 4 cups of finished flour, enough for a single loaf of bread or two medium pizzas. Or, you could grow some cauliflower for your pizza crust.
Planting your pizza garden Raised beds make creating a themed garden easier, but they are certainly not necessary. You can even make your pizza garden a little whimsical by creating it in the shape of a pizza with “slices” of different plantings. This would make a fun keyhole garden. Just be sure that all your plants are in healthy soil, with plenty of sunshine.
If pizza isn’t your thing, pick a different recipe, and create your own garden theme using those ingredients. The possibilities are practically endless: taco garden, beef stew garden, holiday dinner garden...
You can instill a love of gardening in your child with a children’s garden. 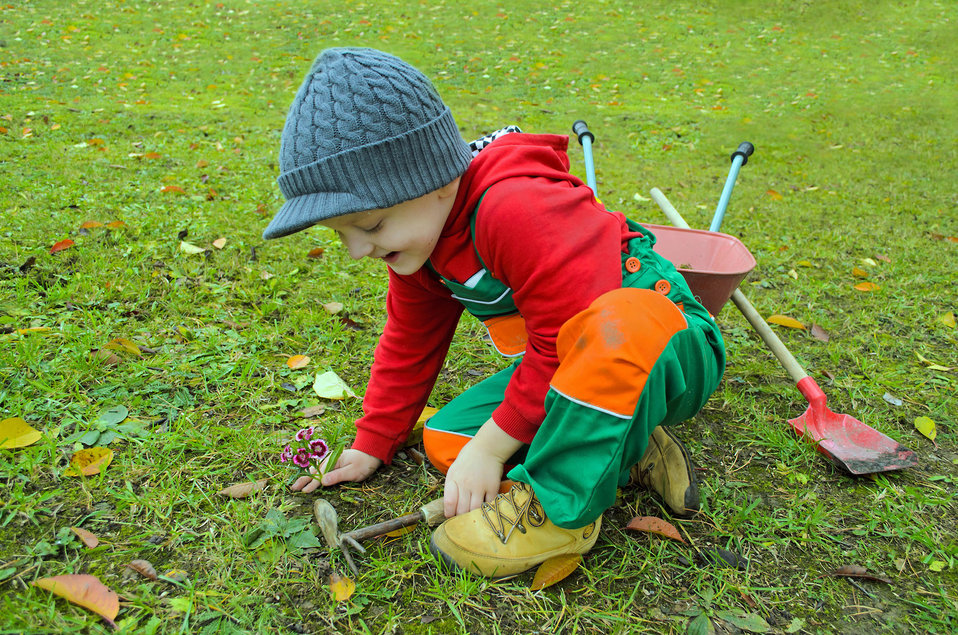 Child gardener (Public Domain) I learned my love of gardening as a child. It all started with a clear plastic cup, a black sponge, and four hard, dry corn seeds. It was an educational toy which had a child insert the sponge into the cup and then push the corn seeds between the cup and the sponge. Each seed was positioned so that it pointed in a different direction. Water was added and the magic of germination began. I was impressed by the fact that the first roots (radicles) always knew to go down, while the first shoots (plumules) always found a way to move upward, even if it took some twisting and turning. The whole process still amazes me and you can let your child in on some of that magic with a garden designed with them in mind. Make it child-sized Adult-sized shovels and trowels can take all the fun out of gardening for a child. So can cheaply made tools that tend to break. Start your children’s garden off right by investing in a well-made child-sized trowel, shovel, hoe, and rake. A small bucket and watering can will be handy, too. 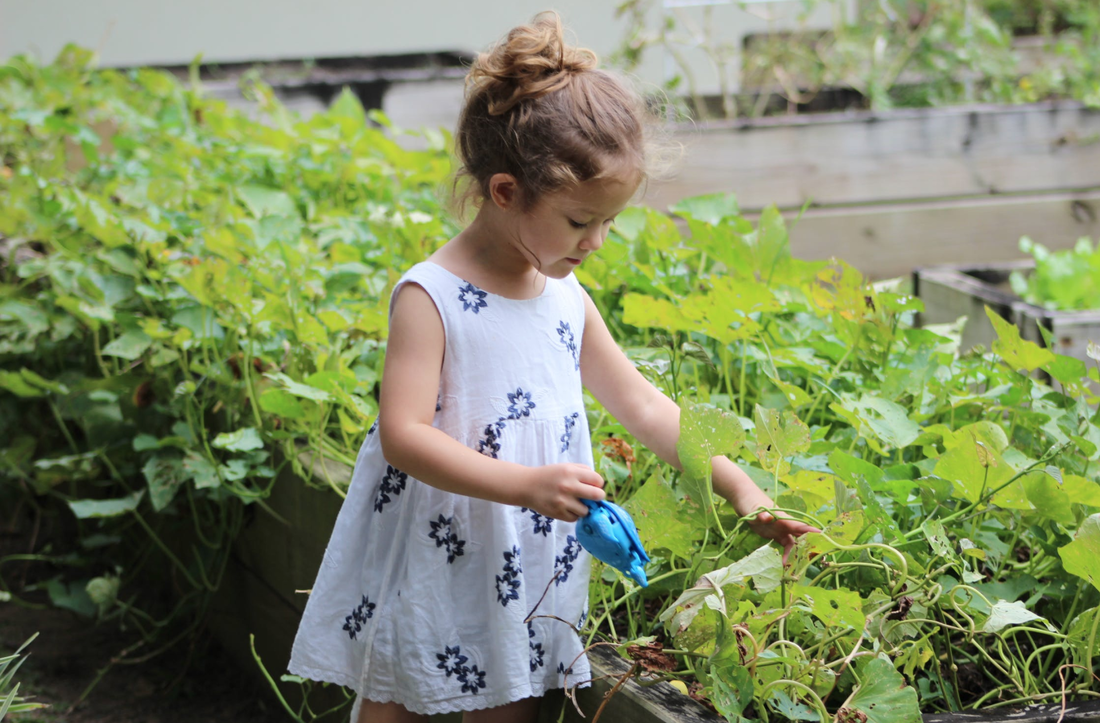 Girl watering garden plants (Maggie Zhao) Create a space You may not want your child(ren) digging around your prized rhubarb or roses, so set aside space just for them and their garden. You can make the space a fun shape, too, such as a triangle, a butterfly, or a series of small circles. This will help create ownership, which will carry your child through some of the more difficult tasks, such as waiting for plants to germinate or flower.  Ask them what they want to grow Do they want to grow their own pumpkin for Halloween? Or, maybe a sunflower fort, a pizza garden, a Three Sisters garden, a butterfly garden, or a pole bean teepee. The possibilities are practically limitless. Head to the library with your child and explore the gardening books section. Check out several and be sure to grab one or two grown-up gardening books geared towards your region or microclimate while you are at it. That way, as plants are selected, you can research the best way to help them thrive. [See, you don't have to know how to garden to help your child create a garden of their own!] Grab a pad of paper and a snack and start exploring all the garden design possibilities with your child. Including them in the planning process is important. As you look through photos and drawings together, have your child create a list of plants they want in their garden (if they are old enough). And you will be there to instill some basic gardening principles and to rule out plants not suited to your area. As much as your child may want their own banana tree, it wouldn’t be a good choice for a beginner. In the beginning, you should keep explanations simple. You can always delve deeper into the information for yourself once they go to bed. Popular children’s garden plants You can’t go wrong with radishes. They grow so fast that things start happening before your child loses interest. Soaring giants, such as corn and sunflowers, are nearly always a good choice. Plants with large seeds, such as beans, melons, and squashes are easy to work with and the edible harvest is a bonus. Climbing plants, such as pole beans or dramatic red noodle beans, can be used to create hanging walls or secret hideaways. Mounding miniature lettuces and spiky shallots look nice and are always welcome in the kitchen. Cherry tomato plants are prolific and they provide healthy snacks as your child works and plays in the yard. Marigolds, snapdragons, and zinnias add color with little effort.  Girl surrounded by sunflowers (Nghĩa Phạm) Include scents and textures Children are very tactile. They like to touch, taste, and smell whatever is around them. This makes many herbs good choices for a children’s garden. Chives, dill, mint, and sage add delicious aromas and an edible harvest. Fuzzy lambs’ ears and ornamental grasses are fun to touch, while English thyme can make a fragrant ground cover. Edible flowers, such as nasturtiums, pansies, and violets are also good choices. Just be sure to educate your child about how not all flowers are edible. Plants to avoid Most edible plants a re a sage bet, but some plants are toxic and should be avoided when designing a young child’s garden. [Especially those marked with an asterisk.] These plants include:
As your child gets older, the risk of toxic plants becomes less of a problem.
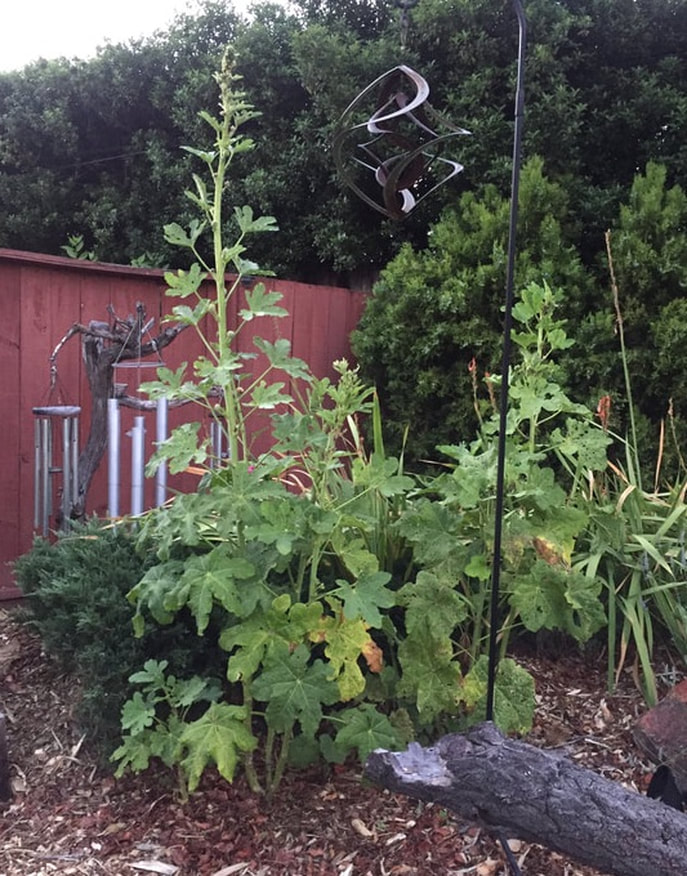
Special touches Birdfeeders, pinwheels, crawl-throughs, and other special touches can help make your child’s garden even more engaging and fun. Yard sales are a great place to find a child-sized garden bench and unique garden art without spending a lot of money. You may also want to include a fruit cocktail tree. These trees have been grafted to provide more than one type of fruit on the same tree. If your child is so inclined, encourage them to document their garden. They can create a book of bug drawings, a chart of plant growth, or a photo album of their garden over the seasons. At the end of the day, after you have both washed up and eaten supper, you may want to curl up with a good gardening bedtime story, such as Frances Hodgson Burnett’s The Secret Garden. It sure worked for me! Hollyhocks are probably not your first thought when it comes to edible gardening, but these tall, bold beauties of our grandparents’ time may surprise you. 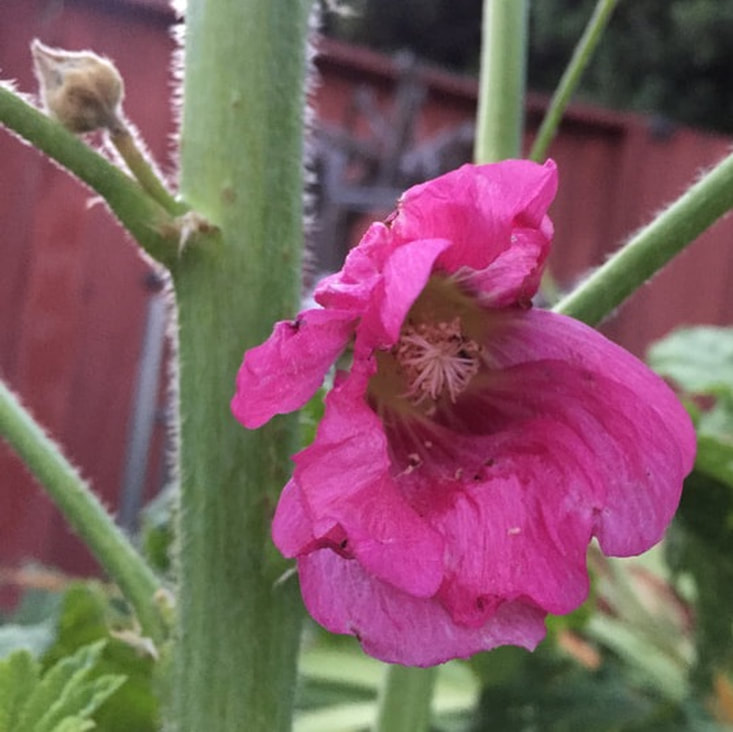 Hollyhock flower First, did you know that all parts of a hollyhock are edible? My chickens may not share that world view, but we frequently differ on menu items. In addition to being edible, hollyhocks are surprisingly useful plants. Hollyhock stems make excellent starter firewood, and the roots have been used for centuries as medicine. While I do not make any medical claims about plants, research has shown that infusions of hollyhock roots may reduce stress. I’ll leave that to you. Let’s see what else we can find out about these durable garden flowers. Hollyhocks are members of the mallow family. Native to Europe and Asia, there are 60 or so species of hollyhock, or Alcea, with Alcea rosea being the most commonly grown. The Alcea genus includes all the hollyhocks, except for one species that is native to the western hemisphere, the streambank wild hollyhock (Iliamna rivularis).  Streambank wild hollyhock (Wikipedia) Public Domain While the streambank wild hollyhock is in a different genus, the blooms are still lovely. For this post, we will be focusing solely on Alcea hollyhocks.
Caring for hollyhocks Hollyhocks are not particularly picky. They grow best in Hardiness Zones 3-8, can be grown in full sun or partial shade, and prefer good drainage. The only thing hollyhocks do not seem to like is dry soil. Here in California (Zone 9b), dry soil is the rule in summer, but a thick layer of arborist chips mulched over the area and planting them in a relatively protected corner of the yard seems to be help enough and they return every spring to fill my summer with gorgeous flowers. Being near a fence or trellis also protects these tall stems from wind damage.  Yellow hollyhock (Pixabay) To keep your hollyhocks healthy, cut stems back to 6” or so above soil level after flowering is completed. Continue to top dress and irrigate the area and new stems will appear throughout the growing season. In winter, cut plants back again and protect with a 6” layer of straw or mulch. Come spring, gradually remove this protective layer to help plants become acclimated. Once spring growth is in full swing, remove the straw and start thinning. By removing the cut stems from the area and composting them, you will interrupt the disease triangles and thwart pests of hollyhocks. 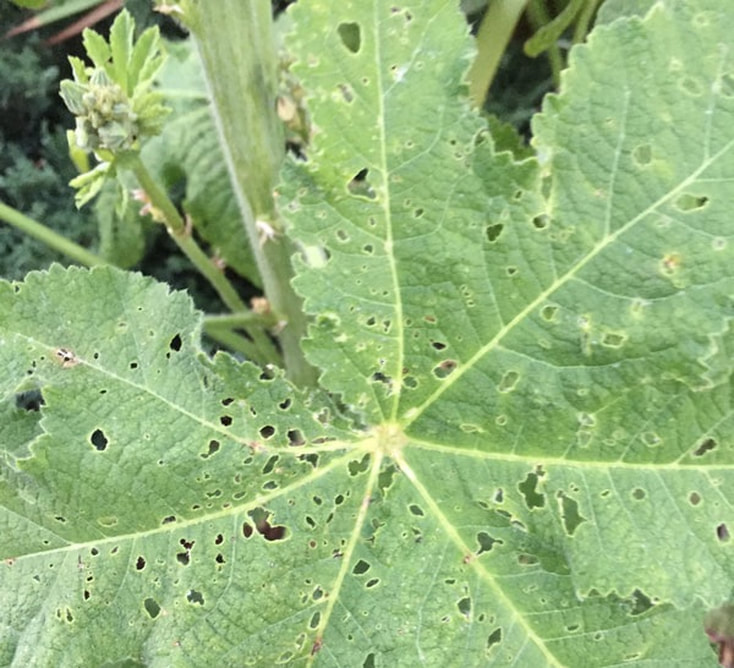 Flea beetle damage on hollyhock leaf Hollyhock pests and diseases
On the downside, like other members of the mallow family, hollyhocks are prone to mildew and rust and will attract weevils, mallow flea beetles, and orange tortrix moths. The caterpillars of a few other moths and butterflies, including painted ladies, will also chew on hollyhock leaves, as will slugs and snails, spider mites, and Japanese beetles. Aphids, capsid bugs, and cutworms may also cause problems. Because they are prone to rust and mildew, hollyhocks should always be watered at ground level. Wet leaves nearly always attract disease. Diseased leaves should be removed and thrown in the trash whenever they are seen. Hollyhocks and children Hollyhock seeds are large and easy to work with, making them a good choice for a children’s activity. Hollyhocks do not like being transplanted, so it is better to sow seeds where you want them. A hollyhock’s long taproot doesn’t like being disturbed, once it begins its downward growth. Traditionally, hollyhocks have been used to create secret garden spaces for children and solitary readers. Simply draw a line where you want you secret hideaway’s walls and plant seeds along that line. Seeds should be planted in groups of 3 or 4, placed 2 to 3 feet apart. Only cover lightly with soil, if at all, and keep the area moist but not soggy until germination occurs. Thin each group by snipping off all but the best one seedling at ground level. They may look tiny and lonely, at first, but these plants get large and need good air flow to stay healthy. Before you know it, you will have a secret garden space of your very own, attended by the many bees, butterflies, hummingbirds and other pollinators that love hollyhocks as much as we do! Chromatography allows you to take a closer look at the glorious colors of autumn leaves. Autumn leaves change colors because chlorophyll levels are reduced. These levels change because of plant hormones, called auxins, that prepare leaves to fall before snow or heavy rains in winter. This period of preparation is called senescence. The act of dropping leaves is called abscission. Through most of the growing season, leaves are one shade of green or another. The green pigment we see is the chlorophyll used in photosynthesis. There are actually several other colors present, we just can’t see them. Chromatography gives you an inside view into those colors.  Materials needed to perform chromatography at home (Kate Russell) Chromatography and pepper heat High-tech chromatography (and some crazy math) are used to rank the heat of chili peppers. The American Spice Trade Association (ASTA) measures the pungency of different samples with Scoville heat units (SHUs), as a function of capsaicin levels. Chromatography and companion planting While there is plenty of science to support the importance of installing plants where they will thrive, the concept of plants ‘liking’ and ‘helping’ one another is actually a failed attempt at simplifying complex processes. Back in the 1930’s, Dr. Ehrenfried Pfeiffer conducted a study he called the “sensitive crystallization method” using chromatography. Somehow, the good doctor decided that matching colors implied compatibility, which it doesn’t. But the process is very fascinating, nonetheless, so let’s get started! Your chromatography experiment You will need the following supplies:
Here are the steps:
 The chromatography results are in! (Kate Russell) You can speed up this process by setting the jars in a Pyrex baking pan and pouring boiling water around (not in) the jars.
Check out my pages on deciduous, abscission, and senescence to see what those different colors mean. If you enjoy curry, you may want to try growing your own fenugreek. But don’t do it for the wrong reasons. Fenugreek is one of those foods touted as a miraculous cure-all for cramps, hair loss, high blood sugar, insufficient breast milk, indigestion, and diabetes. While there may be some truth to the diabetes claim, all the other claims lack any scientific proof, and even the diabetes research is incomplete at this time. That being said, there are plenty of delicious reasons to grow your own fenugreek.  Fenugreek plants (SandeepHanda) Pixabay Fenugreek as food For over 4,000 years, people have grown this annual legume. It thrives in semiarid conditions, and its seeds and leaves are popular ingredients in dishes from South and Central Asia. Like other legumes, fenugreek is high in protein and fiber. A 3.5 ounce serving of fenugreek seed provides 323 calories, 58g. carbohydrates, 25g. dietary fiber, and 23g. of protein. It also contains significant portions of the RDAs for thiamine (28%), riboflavin (31%), Vitamin B6, (46%), folate (14%), iron (262%), magnesium (54%), manganese (59%), phosphorus (42%), and zinc (26%). [Who knew curry was so good for us?!!?] Fenugreek seeds are generally roasted to reduce bitterness and enrich flavor. And it’s not just the seeds of the fenugreek plant that are eaten. Fresh fenugreek leaves, which are said to taste similar to spinach, are used as a vegetable in many Persian and Indian dishes. Dried leaves are used as an herb. 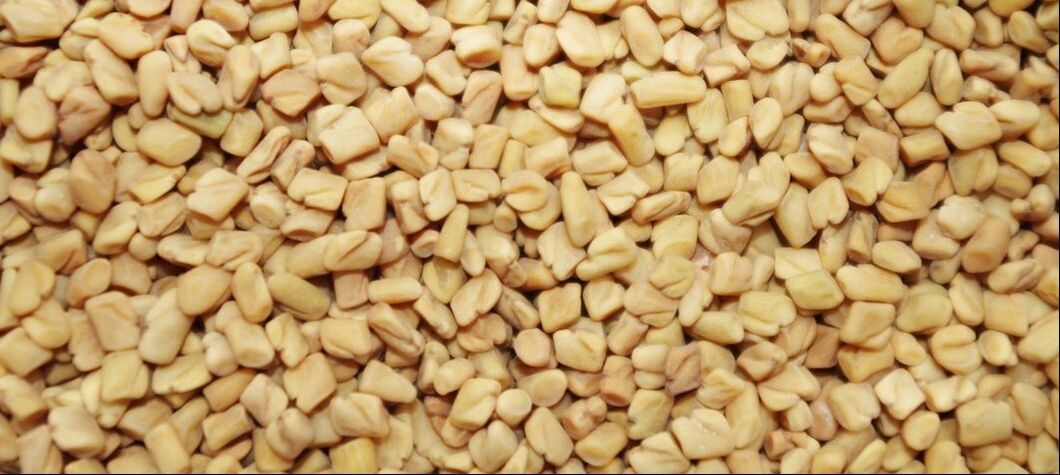 Fenugreek seeds (Ajale) Pixabay The fenugreek plant
Fenugreek (Trigonella foenum-graecum), also known as methi, samurai, and hilba, among others, is a fragrant annual. It may grow as a single stem, or as a small bushy plant, reaching a height of 2 feet. Green to purple oval leaves are small and trifoliate (having three leaflets). It looks a lot like clover and alfalfa. Flowers are small and either white or purple. Seeds develop inside curved yellow pods. This plant is moderately drought resistant and it can handle a light frost. How to grow fenugreek This plant needs heat, so you may want to grow it in a container, maybe on a windowsill. Fenugreek has a shallow root system, so the container does not need to be very large. You can grow fenugreek as a microgreen by simply sprinkling seeds on top the soil in a shallow container, and then lightly covering them with more soil. Fenugreek seeds should be planted 1/4” deep, in rich potting soil. Keep the soil moist until germination occurs. Fenugreek does not like our heavy clay, and it does not take kindly to being transplanted, so it is best started where it will stay for the growing season. These seeds sprout very quickly, usually in only 2 to 4 days, making it an exciting children’s activity. Fenugreek pests and diseases Fenugreek is susceptible to root rot, powdery mildew, and charcoal rot. These diseases can be minimized by allowing the soil to dry out between waterings. Aphids are the most common pest of fenugreek. Harvesting fenugreek Fenugreek can be grown as a microgreen, or you can go for the full growing experience. Generally, young leaves and shoots are snipped off the plant early in the growing season. Then the plant is allowed to continue growing to produce seeds, usually 3 to 5 months after planting. To harvest seeds, the plant is removed and hung upside down to dry. Have you had your fenugreek today? One of the many attractions of gardening is that you can play with it. We are not limited to the furrowed rows of earlier generations. You can be as creative as local growing conditions and the needs of your plants will allow. Deciding on a theme is one way to pull your garden together artistically or aesthetically.  The White Garden at Sissinghurst Castle Garden, designed by Vita Sackville-West (Pete Chapman) CC BY-SA 2.0 Themes provide a unifying framework, a story, and a uniqueness to your garden, and they can be a lot of fun. They are more artistic than simply how you grow your plants. Garden themes make it easy to decide which plants work best in a landscape, a raised bed, or even a single container, by providing a long-term, broader perspective on that space. You can create a theme based on flower color, leaf shape, or even a particular shade of green. You can create a garden theme that takes advantage of a shady corner, transforming it from a seldom used, mostly wasted space into a storybook hideaway, complete with peek-a-boo elf statues and a reading chaise lounge. [More lemonade, please!] Or, you can create a theme around a favorite book or movie, a sensory garden, or a copycat garden. Garden themes can be whimsical or more practical. Rain gardens are one type of more utilitarian garden theme.  Recently planted home rain garden (BrianAsh) CC BY-SA 4.0 Before you start your garden design, we should consider some garden planning basics. Information you will want to have on hand as you select your plants includes:
Creating a garden plan Planning a garden can feel overwhelming. Sometimes, the best way to start is to select one type of plant, often tomatoes, and grow from there. A single potted tomato, however, will not transform your landscape. You can also go to the other end of that spectrum and learn about landscape design, using boundaries, surfaces, forms, texture, color, art, and lighting to create your masterpiece. Somewhere in between those two extremes is a balance of what you want, what you have the time to maintain, and what plants need to stay healthy. A theme can help pull your garden together. Types of themed gardens Traditionally, themed gardens were classified by geographic location, terrain, or historical prototype. Using a theme narrows your options and pushes you to be more creative. Some traditional garden themes include:
But there is another way of looking at themed gardens. You can create your themed garden to create a favorite dish or holiday meal, or it may be a children’s garden, an herb garden, or an edible storybook garden. Having a theme can help guide you with plant selection. Today, we will look at some common edible garden themes, the plants that might be included in those gardens, and maybe a little garden art, just for fun. Butterfly gardens and pollinator gardens The more pollinators visit your garden, the bigger your harvest will be. You can attract bees, butterflies, honey bees, and many other beneficial insects with brilliant blooms of borage, salvia, and butterfly bush, and by allowing many food plants to go through their complete lifecycle. Carrots, caraway, celery, chervil, cilantro, cumin, parsnips, dill, fennel, and parsley are umbellifers. Umbellifers have umbrella-shaped flowers that beneficial insects love. Allowing lettuces, Swiss chard, and others to go to seed also provides nectar and pollen for these beneficial insects and hummingbirds. These plants will change shape, color, texture, and size over the course of a year, keeping your landscape interesting. Just be sure to provide a water source for all these tiny helpers. A birdbath or small fountain is all that’s needed. Just be sure to clean them every once in a while.
Unique plants, such as golfball-sized Parisian carrots and cucumbers that look like miniature watermelons (Mexican sour gherkins) add whimsy and fun to your children’s garden. Favorites, like strawberries, blueberries, and groundcherries, can create a magical play area filled with delicious, healthy edibles, curving paths, secret hideaways, and storybook reminders. [You may be surprised to discover that most children love the taste of spinach when they have grown it themselves…] Fruit cocktail gardens You may have seen grafted fruit cocktail trees available through garden catalogs. These dwarf trees usually feature nectarines, peaches, plums, and apricots, all on the same tree. You can flesh out your fruit cocktail garden with potted raspberries, blackberries, currants, and strawberries and surround the whole thing with a blueberry hedge. Imagine all that sweet deliciousness in one place! Gift gardens Gift gardens are spaces dedicated to growing gift plants. Flowers, herbs, and succulents all make lovely presents. One type of planting forward, gift gardens provide the space (and reminders) needed to have that perfect gift ready when you need a handy gift. Maintaining a gift garden ensures you will always be prepared for those special occasions.
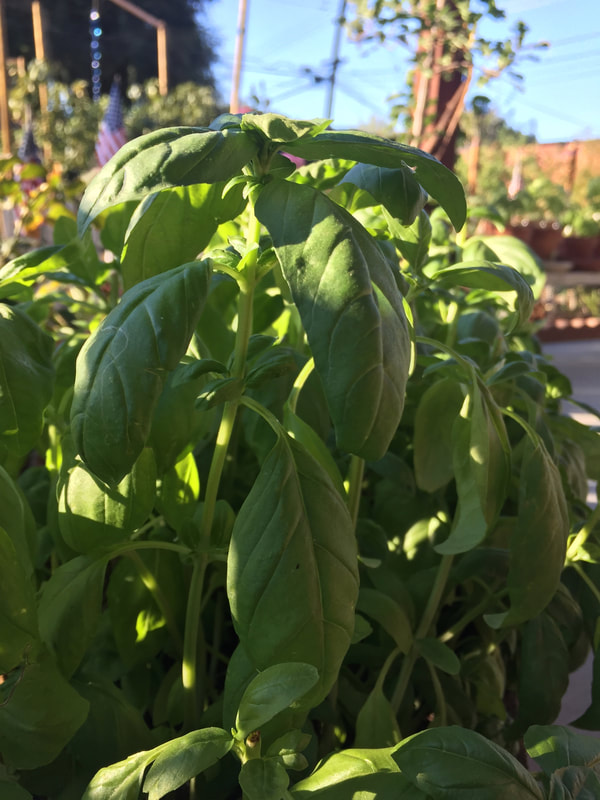
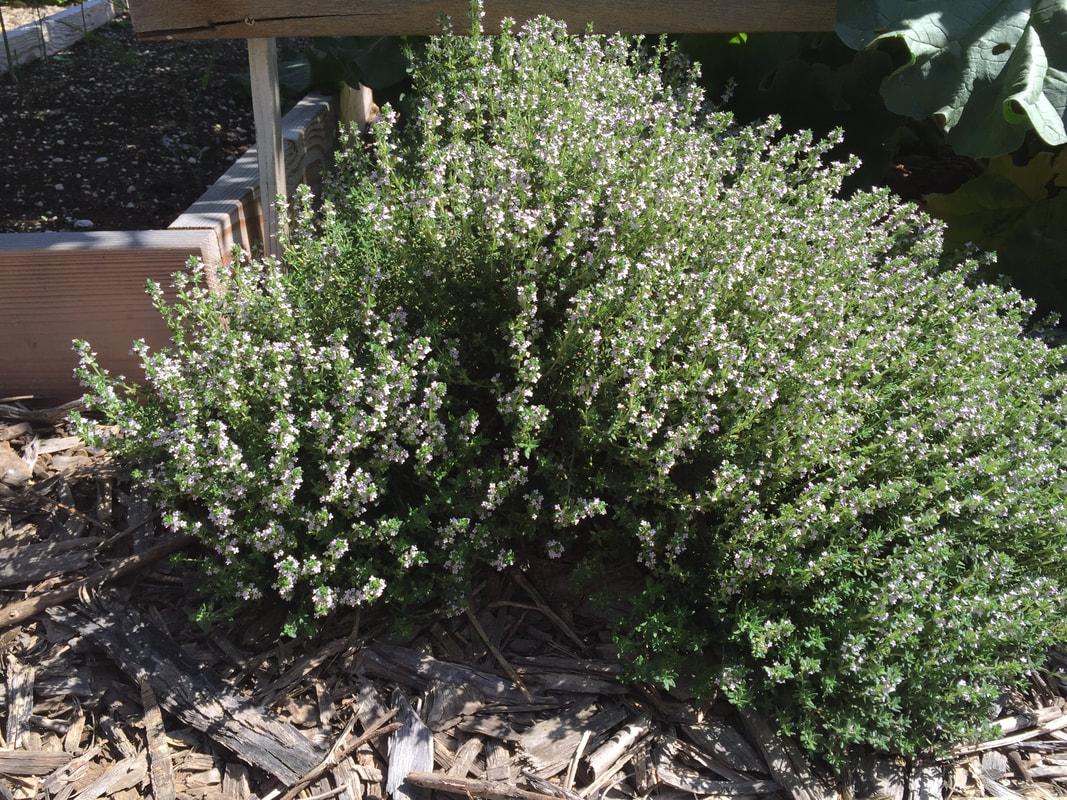
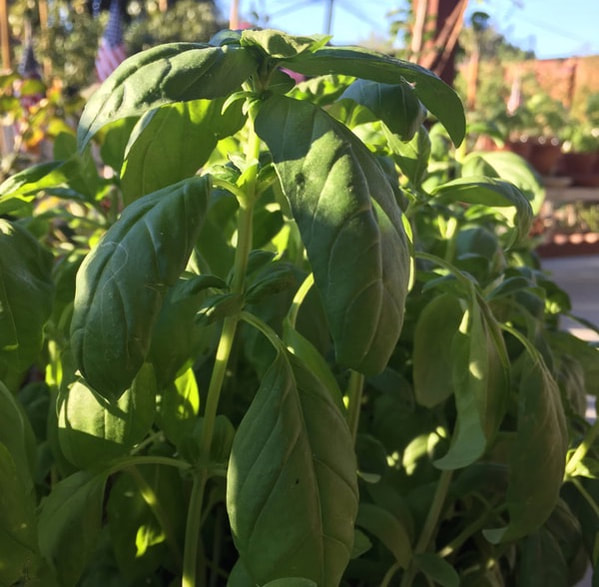
Herb gardens Herb gardens are attractive, tenacious, and rewarding. Except for basil, most herbs will continue to grow for many years. Rosemary, lavender, and thyme add fragrance, flavor, and beauty wherever they grow. Members of the mint family, oregano, lemon balm, summer savory, marjoram, and sage are best grown in containers due to their invasive behavior. You can add chives, cilantro, and tarragon to an herb garden. You may want to add a nice place to sit and enjoy a good book. It’s going to smell so lovely. You’ll want to stick around. Holiday dinner gardens Nothing says gardener like fresh Brussels sprouts and baby beets at Thanksgiving, fresh greens at Easter, and juicy watermelon on July 4th. If you plan, you can harvest many popular holiday meal ingredients right when you need them. Beans, beets, carrots, fennel, onions, pearl onions, peas, potatoes, sweet potatoes, spinach, and tomatoes are just a few possibilities. Sage, basil, oregano, parsley, and mint can also be grown for your holiday meals. Whatever traditions your family celebrates, your holiday dinners garden can save you a trip to the grocery store and give you full bragging rights.  Pizza (HoaLuu) Needpix Pizza gardens Pizza gardens are fun. Imagine a round garden space, cut into wedge-shaped sections and planted with popular pizza ingredients. Aside from the meat and cheese, you can grow nearly every other pizza ingredient at home. Tomatoes, onions, and garlic make the sauce, along with fragrant herbs, such as basil, oregano, and thyme. You can also grow sweet red, green, orange, and yellow peppers, hot peppers, zucchini and other summer squash, and artichokes for your pizza. If you like, you can even grow an olive tree in a container, and a patch of wheat or cauliflower for the crust. If pizza isn’t your thing, you can pick a different dish and create your garden theme using those ingredients. Stir fry garden, anyone?
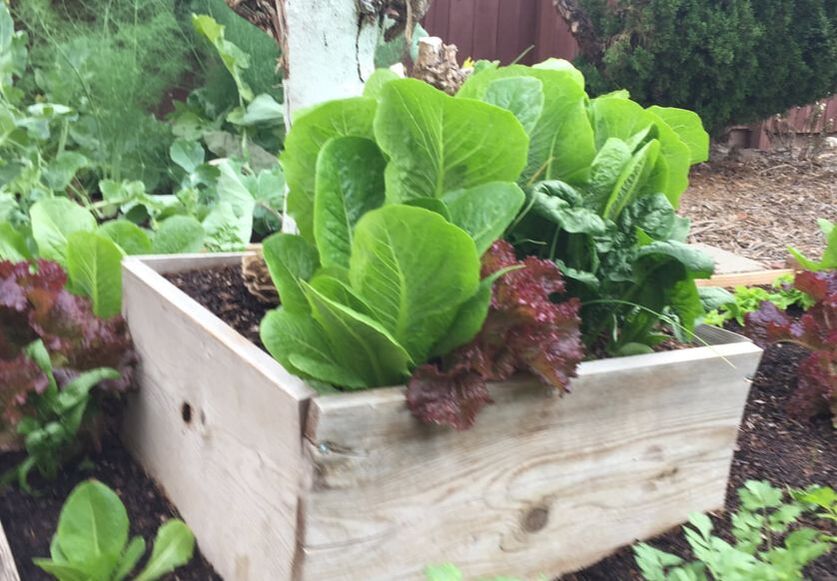
Your salad garden can include cucumbers, bell peppers, carrots, artichokes, corn, dandelion greens, mustard greens, fennel, jicama, and kale . You can even add a dwarf almond tree for some slivered almonds on top of that salad. If you prefer vegetables stir-fried, a stir-fry garden makes it simple to throw together a flavorful, healthy, fresh-from-the-garden meal. Carrots, onions, garlic, cilantro, bell peppers, hot peppers, and even your saffron can all be grown at home.
Tea gardens
Put aside images of a serene, manicured Japanese tea garden and imagine, instead, growing your tea. Tea plants (Camellia sinensis) can be grown outdoors in USDA Hardiness Zones 8 - 12 or indoors year-round. But, this traditional black tea is not the only plant grown for its use as a tea. You can also enjoy chamomile, mint, and lavender tea. Other options for a tea garden include lemon balm, jasmine, coriander, bergamot, hibiscus, elderberries, ginger, rose hips, raspberry and blackberry leaves, licorice, lemon grass, blackcurrants, dill, and dandelions can also be used to make tea. Pick a patch of ground today and cover it with aged compost or arborist wood chips. As you select your theme and start choosing plants, worms and microorganisms will be busy working to improve your soil. Before you know it, you will be enjoying the fruits (or vegetables and herbs) of your labor! Celery is a kitchen staple that you may (or may not) be able to grow in your home garden. I say “may not” because it has thwarted me the few times I have tried it. Not that the plants didn’t grow, they grew quite well, through the cooler months, but they grew outward, rather than upward, and the flavor was very strong. Before we learn from what I did wrong, let’s learn the truth about this challenging crop.  Celery A misrepresented edible Celery plants have been misrepresented in elementary schools across the country for decades. The part we eat is not a stem, and the stringy bits that get caught in your teeth are not all plant veins. The familiar stalks, which are so well suited to dips and fillings, are actually the plant’s petioles, or leaf stems. Some of the differences between a stem and a petiole are:
 Celery petioles wrap around a central axis Some of the indigestible strings of celery fame are vascular tissue, This is why, if you place a celery stalk in a glass of dyed water, you can see the dye move up, through the xylem. [Kids love this stuff!] The other stringy bits, however, are living structural components, called collenchyma. The tissues that make up the collenchyma are able to absorb water and behave much like a stiff gel, to hold the plant upright. The celery plant Celery (Apium graveolens) got its name from the Latin for ‘aromatic bee favorite’. As an umbellifer, celery is cousin to carrots, fennel, cumin, caraway, celeriac, parsnips, dill, parsley, anise, and poison hemlock. Celery flowers attract many pollinators and other beneficial insects, such as hoverflies. There are actually three different types of celery, each grown for a distinct crop: petioles, leaves, or roots. The celery plant originated in marshland - very unlike my former dry California summers, and only slightly moist winters. 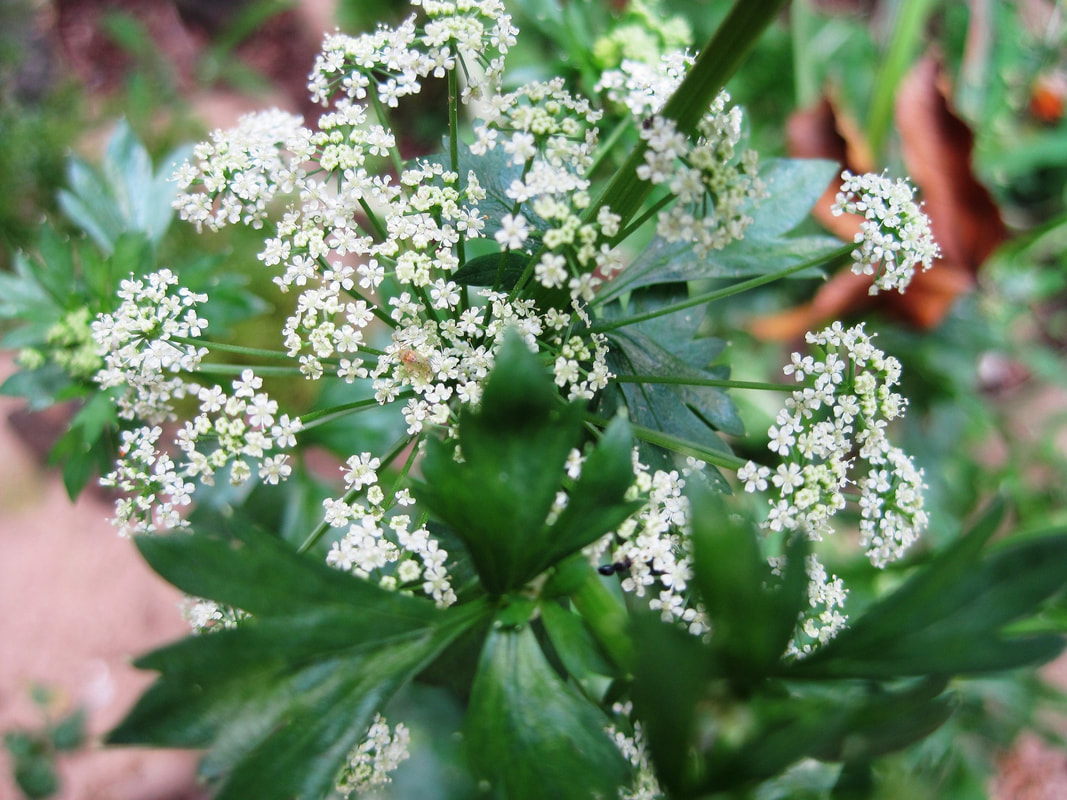 Celery flowers (bluesnap) Pixabay How celery grows
Celery is a cool weather plant. It grows best when temperatures are 55 to 70°F. Grown in summer, it will bolt, or go to seed. This is fine, if you want to harvest celery seed for your spice cabinet. It is also a good way to end up with celery plants throughout your foodscape. Once a celery plant has gone to seed, the petioles will become very tough. [You can still use them to make soup stock, however.] Celery plants can tolerate light frost, but not consecutive frosts. Celery is a biennial, grown as an annual. How to grow celery While you can start a new celery plant from the base of a store bought celery, you need to be aware that those plants are certified safe to eat, but they are not certified safe to grow. Installing a store bought celery plant in your garden may be fine, and it may introduce a destructive virus or bacteria that may take years to overcome. It’s your call. Of course, you can always delegate those store bought celeries to indoor containers… Celery is grown from seed. Seeds should be started 8 to 10 weeks before your area’s last frost date. You can also direct sow seeds in late summer for a winter crop. In either case, seeds should be planted 1/4-inch deep. Some growers recommend soaking seeds overnight prior to planting, to speed germination. Be sure to harden off your seedlings before planting them outside. Seedlings should be spaced 10 to 12 inches apart in the garden, containers, or raised beds, once they are 6 inches tall. If you have a particularly bright window, celery can be grown on a windowsill. Celery needs lots of sun and it is a heavy feeder. You can protect and feed plants as they grow by top dressing around the plants with aged compost. Once petioles begin to emerge, you need to tie them together, to force them to grow upright. Celery needs least one inch of water a week to grow those crispy petioles. And they should be fed every 10 to 14 days. As the plants grow, gently build up soil around the plants, keeping the leaves exposed. This blanches, or etiolates, the stalks, by blocking light from reaching the chlorophyll, making them turn pale green to white. This also help prevent bitterness. You can get a similar effect by wrapping plants with straw, heavy fabric, or cardboard tubes, the same way you would with cardoons, to halt photosynthesis. Be cautious when watering, after you have set up your planting method. Water that sits on leaves and stems can lead to rot and other problems. Celery pests and diseases Celery is susceptible to aster yellows, bacterial leafspot, Phytophthora tentaculata, blights, mosaic virus, fusarium wilt, pink rot, and crater rot. Aphids, armyworms, earwigs, leafminers, lygus bugs, carrot rust flies, nematodes, whiteflies, treehoppers, cutworms, and voles will all take a bite out of your celery plants. You can sprinkle your celery plants with diatomaceous earth, to reduce many of the pests. Celery trivia Like peanuts, celery is known to cause allergic reactions in some people. Contrary to popular wishful thinking, eating celery is not a 'negative calorie' experience. Digesting that celery stalk does not use up more energy than it provides. Finally, did you know that celery flowers and leaves were used as garlands for King Tut’s tomb, some 3,300 years ago? I didn’t, either. Legumes are nitrogen-fixing plants that produce many of the foods we eat. Peas and beans are common legumes. Peanuts, chickpeas, alfalfa, clover, lentils, vetch, mesquite, carob, tamarind, lupins, wisteria, and soybeans are also legumes. The unique behavior that makes legumes so valuable is that most of them are able to convert atmospheric nitrogen into a form that is usable by other plants. Nitrogen Over 80% of our atmosphere is made up of nitrogen. Plants are greedy for nitrogen, but they can’t use atmospheric nitrogen. Some plants, our beloved legumes in particular, have developed mutually beneficial relationships with certain bacteria that live on or in their roots. These bacteria are able to combine atmospheric nitrogen with hydrogen to create ammonia, which is then converted into a usable form of nitrogen. This is called the Nitrogen Cycle and is what makes legumes an important part of crop rotation and cover crops. Some people claim that marigold plants interrupt the nitrogen-fixing ability of legumes, but I have not found any research to support those claims. 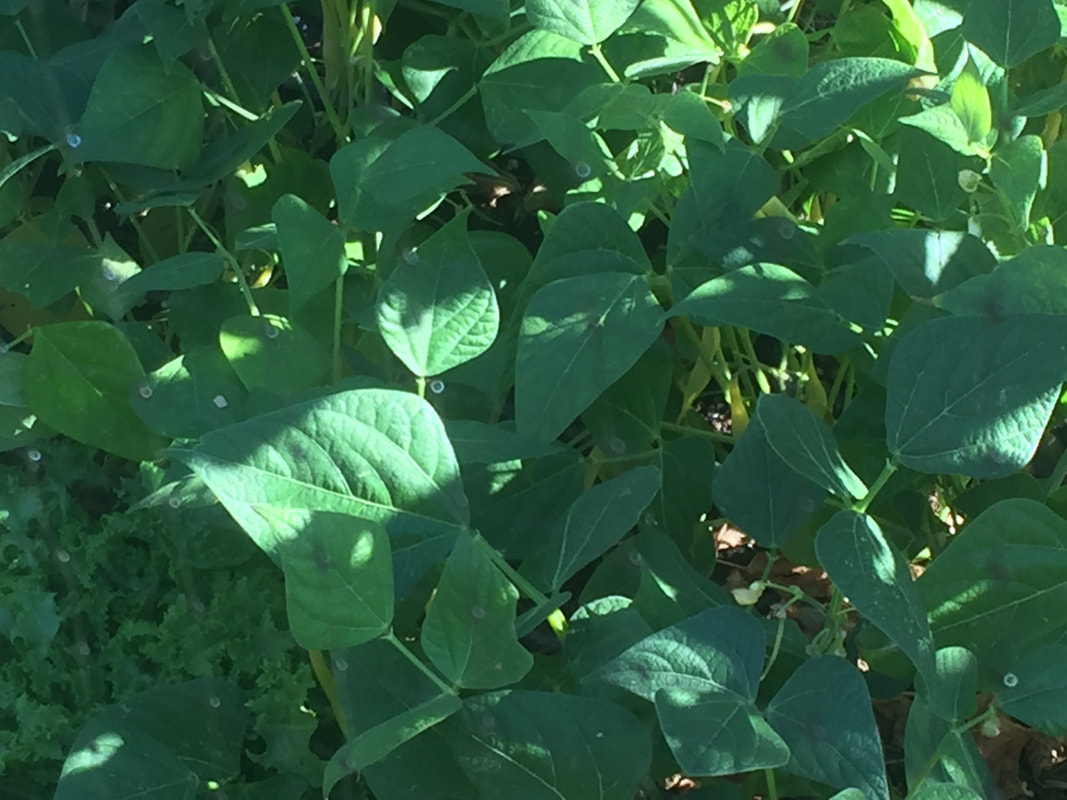 Wax beans Legume plants With so many family members, it should come as no surprise that there is plenty of variety. Some legumes grow low to the ground in a spreading habit, while others vine, and other stand upright. All legumes are dicots, which means they produce two seed leaves before true leaves appear. It also means that the seeds tend to be made up of two halves. The fruit, nut, or seed of legumes is technically called a pulse. Pulses are grain seeds held within a pod, or simple dry fruits, that develop from a single carpel. Most legume seeds have a “zipper” along one side that opens up when the seed is ripe. This behavior is called dehiscence. These seeds are often rather large and fast-growing, making them an excellent choice when gardening with children.  Freshly dug peanuts (Pollinator) CC BY-SA 3.0 Legumes as soil amendment Legumes can be used as a green manure, cover crop, or an edible harvest. When used as a green manure, plants are allowed to reach the flowering stage and are then cut and left where they fall to decompose. This returns valuable nutrients to the soil and improves soil structure. Other legumes are grown as a cover crop to prevent erosion. Most legumes have strong, deep roots that help aerate compacted soil.  Legume selection (USDA) Public Domain Legumes as food
Legumes are a high protein, high fiber food source. Fava beans, wax beans, lentils, lima beans, and wheat are all just a few of the legumes we eat on a daily basis. Pests and diseases of legume crops While the pests and diseases of most legumes are more species specific, nearly all legumes are susceptible to Fusarium wilt. Bean mosaic and powdery mildew are common bean and pea diseases. Stinkbugs enjoy legumes and, what makes them worse is that they can also transmit tomato bacterial spot. Weevils and treehoppers are common pests of legumes. Adding legumes to your garden or landscape can improve the soil, feed nearby plants, and they provide a delicious harvest. Give legumes a try! We’ve all seen those cans of yellow wax beans in grocery stores, but these plants are easy to grow, they add nitrogen to your soil, and the crisp sweetness of a freshly picked bean far surpasses anything canned. Wax beans (Phaseolus vulgaris) actually refers to several different yellow-podded members of the common bean family. This family also includes lima beans, kidney beans, pinto beans, and immature ‘green’ beans. It is believed that wax beans got their name because the yellow color looks similar to beeswax, but no one is really sure. Wax beans are available in both bush and pole varieties. 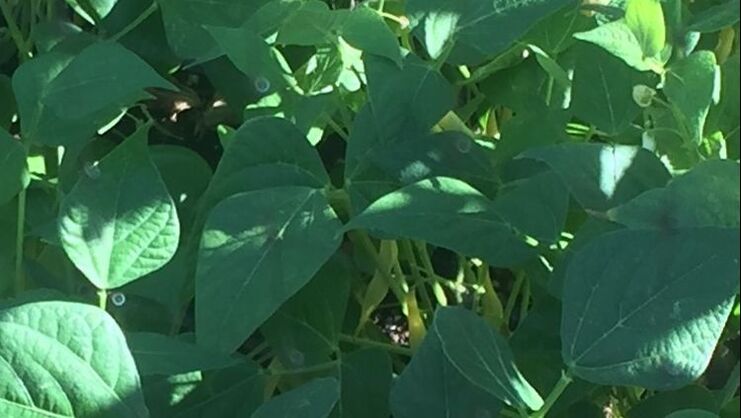 Can you find the wax beans? How wax beans grow Beans are self-pollinating annuals. These plants are fun and rewarding to grow. They grow quickly enough to work well as a children’s activity, reaching maturity in only 60 days. What’s really fun about these plants is that they can be grown pretty much anywhere: on a windowsill, in a container, in a straw bale, and in partial shade. Of course, they prefer sunny raised beds or traditional garden rows, but, the point is, these plants are EASY. Like other legumes, wax beans are able to ‘fix’ atmospheric nitrogen, making it available not only to themselves, but to nearby plants. Of course, this only works until the plant starts producing seeds, then the free lunch is over. How to grow wax beans Like other beans, wax bean seeds are mostly endosperm (plant food). Plant seeds one inch deep and 2 to 4 inches apart. If you grow bush beans (not the canned barbecue product), your plants will get 18 to 24 inches tall and about a foot wide, so thin accordingly. Pole beans, however, can be trained up trellising, fences, lattice, sunflowers, trees, pretty much anything they can wrap their tendrils around, without thinning. They can also be used in the traditional Three Sisters Method, with corn and squash. Trellising pole beans on something that goes over your head looks really nice, with ripe beans hanging down, from overhead. It’s makes picking easy, too! Some people say that planting marigolds nearby can be a problem, claiming that they interrupt the nitrogen-fixing capabilities of legumes, such as peas and beans, but I don’t know if this is true. Wax bean pests and diseases When it comes to bean pests, it’s all the usual culprits: cutworms, bagrada bugs, cucumber beetles, weevils, thrips, wireworms, leaf miners, and dried fruit beetles. As delicious as fresh wax beans are, it’s no wonder so many critters are after your harvest. Bindweed can also choke out your bean plants. Common wax bean diseases include anthracnose, bean mosaic, and fusarium wilt. Wax beans should not be planted near soybeans to reduce the likelihood of stem blight. 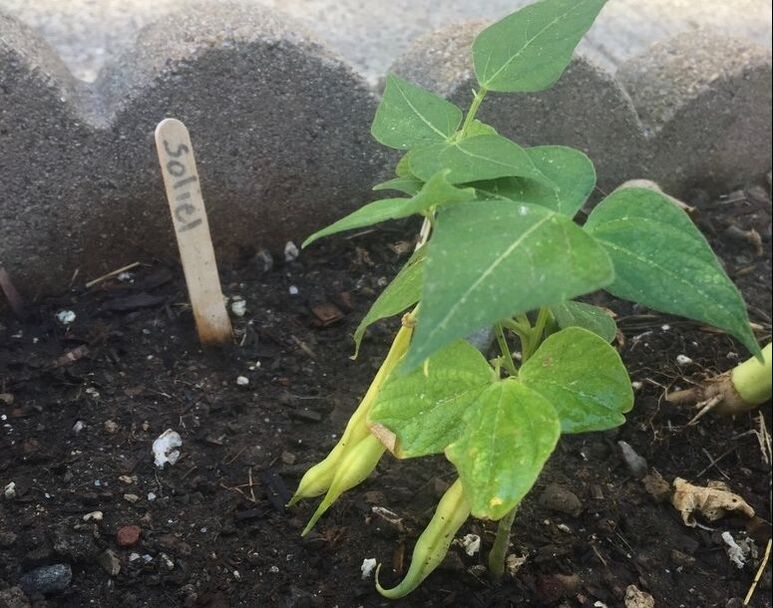 Even this baby wax bean plant is being productive! Harvesting wax beans
Beans are one of those edible plants that produce more food if ripe beans are harvested regularly. In other words: the more you pick, the more you get. Once picked, you can eat them fresh, steam them, add them to stir-fry, and or can them for winter eating. Wax beans are sensitive to ethylene gas, so they should be stored away from apples, bananas, and other ‘gaseous’ produce. Plant some wax beans today! The large floral disk of sunflowers, jam packed with seeds, hardly needs description, but there is a lot more to this cheery bloom than meets the eye. Ancient history & sunflowers Sunflowers are native to North America. Recent research has shown that they were also growing in Central America way back into antiquity. There are some interesting name exchanges in primitive languages that lead archeologists to believe there were far more cultural exchanges between the two regions than was previously thought. According to researchers at the University of Cincinnati, “sunflowers were domesticated thousands of years and hundreds of miles apart” making them an interesting topic in human history. More currently, sunflowers are one of the world’s top oil producing plants. Each year, nearly 45 million tons of sunflowers are grown worldwide!  Sunflower The sunflower family Sunflowers are part of a plant family called Asteraceae. The sunflower family includes asters, artichokes, dahlias, yarrow, marigolds, endive, dandelions, and Echinacea, just to name a few. Sunflowers can be annual or perennial, depending on the variety, microclimate, and growing conditions. Some varieties grow as a single fat, hairy stalk, while others grow several branches. There are several species of sunflower (Helianthus annus). Some dwarf varieties are only a foot and a half tall, while others can reach twelve feet! Benefits of sunflowers If the happy blooms and tasty seeds weren’t reason enough to add them to your garden, sunflowers also attract many beneficial insects. Honey bees, lacewings, butterflies, hoverflies, and parasitic wasps enjoy the nectar, pollen, and prey insects found on and near sunflowers. Personally, I love the tiny finches that are so fond of eating the wide, spade-shaped leaves. Local squirrels and seed eating birds can become problematic, or you can simply plant a few extras near the fence line. Heliotropism Heliotropism refers to a plant’s ability to track the sun’s movement and sunflowers are masters of heliotropism. Sunflowers use phytohormones called auxins and an internal circadian clock to follow the sun across the sky each day. During the night, they turn their west-facing blooms back toward the east, in anticipation of the dawn. Scientists were surprised to discover that bringing outdoor sunflowers indoors, with a constant overhead light source, the plants still went through their east to west cycle for a few days. It was also found that certain genes tell the east side of the plants grow more quickly during the day, while the west side of the plants grows more at night. As the plants mature, this movement slows, leaving most sunflowers facing east, rather than west. The reason? Scientists found that eastward facing flower heads (capitula) heated up more quickly than their westward neighbors. This added warmth attracted FIVE TIMES more beneficial insects, for better pollination and pest protection! Sunflowers and children Sunflowers grow quickly and often to impressive heights, which makes them an excellent choice when gardening with children. In fact, if you plant your sunflower seeds properly, you can create a fort, a maze, or a magic castle right in your own back yard! Or, to watch germination as it occurs, you can place sunflower seeds inside a clear glass with a dark colored sponge. Place the seeds between the glass and the sponge and add water. Before you know it, the magic happens! Then take your sunflower sprouts and add them to a salad or plant them in the garden! In either case, they make a healthy snack and provide your children with a sense of ownership. How to grow sunflowers Most sunflower plants are grown from seed. A few species also propagate using creeping roots, which makes them a noxious weed in some agricultural areas. Sunflowers need lots of sun, water, and nitrogen, but they are less picky about soil than many other plants. Seeds can be started in cell flats or other small containers and then transplanted, or they can be directly sown into the garden or landscape, after the last chance of frost has passed. Seeds should be planted one inch deep and watered daily until they sprout. After they have sprouted, plants will need an inch of rain or irrigation each week, depending on the weather. For optimal growth, space your sunflower 2 ½ to 3 feet apart. Dwarf varieties only need 6 inches. Seedlings often need protection from birds, squirrels, slugs and snails. Sunflowers can take up to 3 months to reach full size. Sunflowers need lots of nutrients, so adding aged compost to the planting area will help them to get a good start. They do, occasionally need staking. Sunflower seeds contain a chemical that is toxic to grass plants, so you should harvest the seeds before they start falling on your lawn or near other members of the grain family (Poaceae), such as corn, millet, wheat, barley, or bamboo. You can also plant sunflowers much the way Native Americans did, using the Three Sisters Method, by replacing corn with sunflowers. The squash or melon leaves will shade the ground around your sunflowers and pole beans will climb the stalks and provide a nitrogen boost before they go to seed themselves. Sunflower pests & diseases Sunflowers tend to be sturdy plants that fend for themselves rather well. Keep a look out for ant trails going up the stalks that can indicate an aphid problem. Sticky barriers can be used to block the ants, which makes the aphids more vulnerable to their natural enemies. Other sunflower pests include dried fruit beetles, cutworms, carrot beetles, some foliage-feeding caterpillars, leaf beetles, spider mites, thrips, and the dreaded sunflower bud moth. Fungal diseases, such as crown gall, downy mildews, powdery mildew, rust, and Verticillium wilt can be a problem, but this occurs more in agricultural fields than in backyard gardens. 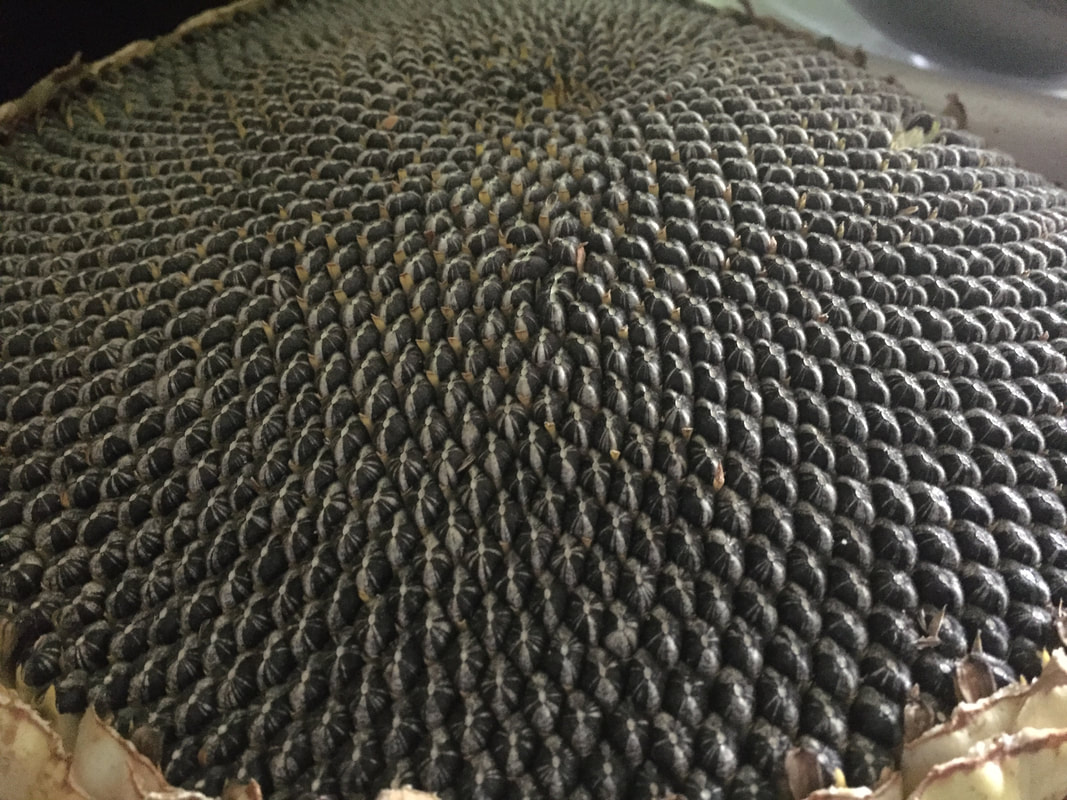 Sunflower head Harvesting sunflowers
Once your sunflower head has reached full size, it will probably be bent over and surprisingly heavy. If you stroke the face of the flower head with your hand, dozens of tiny dried bits (pappus) will fall away. Personally, I give all my sunflowers a quick rub to dislodge potential pests and to remove these bits. Before removing the head from the stalk, use your fingernail to nick out a few seeds and open them up. Are the seeds plump? If not, give them some more time. You certainly don’t want to harvest a head of empty shells! Seeds have normally reached maturity around the same time the petals start to fall from the flower. You can protect immature heads from birds with netting or large paper bags. Once the seeds have reached maturity, cut the stem an inch or two below the flower head. Seeds can be allowed to dry in the head, or they can be rubbed loose over a newspaper or old sheet. Be sure to blow away any chaff that may harbor pests or disease. I always save several of the largest, healthiest looking seeds for next year’s crop. After that, allow seeds to dry out completely before storing in an airtight container. You can also salt and/or roast your seeds. If you suspect seed pests, freezing your sunflower seeds will kill off any eggs that may be lurking in the shells. Sunflower seeds stored in the refrigerator or freezer are good for a year, while raw seeds stored at room temperature are only good for 2 or 3 months. Roasted, shelled seeds have a shelf life of 3 to 4 months, and unshelled roasted seeds can last 4 to 5 months. Sunflower trivia Sunflower oil can be used as a horticultural oil, but I definitely prefer it as sunflower butter on toast or in place of peanut butter in cookies. Yummy! One variety, the giant whorled sunflower (Helianthus verticillatus) was first seen in 1892. Then it was believed to be extinct until 1994 when it was discovered by Vanderbilt University student, Jennifer Ellis. The giant whorled sunflower is currently listed as an endangered species and is only found in Alabama, Georgia, and Tennessee - the birthplace of the sunflower species. In the 1500s, Spanish conquistadores banned the use of sunflowers in Mexico, believing that they were an aphrodisiac. Add some sunflowers to your garden today! (No matter what the Spaniards said!) Bats in the garden? Let’s hope so! While bats can be vectors for diseases, such as rabies, more often than not, bats are a gardener’s friend. In just one afternoon, you and your kids can build a bat box that just might attract these garden predators for many years to come.  Commerson’s leaf-nosed bats (James J Sharp) CC BY-SA 3.0 It is estimated that a pregnant or nursing bat will consume 2/3 of their body weight in insects each night. According to UC Division of Agriculture and Natural Resources (UCANR), bats protect over $23 billion of American crops each year. That’s a substantial impact for a flying mammal that weighs in around 1/3 of an ounce! A little bat history Bats started flying around over 50 million years ago, after the dinosaurs died off, but we know surprisingly little about them. One thing we do know is that their numbers are in serious decline. According to the U.S. Forest Service, “Currently 56% of the bat species present in North America are listed or being considered for listing under the Endangered Species Act.” Loss of habitat and human prejudice are mostly to blame. Vampires! Contrary to popular myth, most bats are not vampires. Vampire bats are only found in Latin America and they prefer the blood of animals to that of humans. Most bats are insectivores. The rest of them eat fruit, mice, or other small mammals. These fruit eaters are frequently considered a “keystone” species. This means that the plants which rely upon bats for pollination and seed dispersal are critical to the survival of other animals and birds. Bats are the major pollinators of agave. You know, the stuff used to make tequila. And the Mexican Free-tailed bat is responsible for pollinating most of the sugarcane used to make a well known brand of rum. [Take a closer look at the label and you will see the bat!] Many years ago, while volunteering at Woodland Park Zoo in Seattle, I worked with fruit bats in the Nocturnal House. Larger than our native bats, the zoo’s fruit bats were sweet-tempered, gentle, and loved being scratched around the face and ears. Not what you expected, right?  Little brown bat (Andy Reago & Chrissy McClarren) CC BY 2.0 Bat species
Scientists are still debating bat classification. One camp believes that all bats evolved from a single mammalian flying ancestor. Others classify bats into two groups: megabats and microbats. Megabats are found in Asia, Australia, Africa and the South Pacific. The largest megabat species has a 5’6” wingspan! This group evolved from lemur-like animals and they do not have the gift of echolocation. Microbats are found everywhere except Antarctica and are believed to have evolved from shrew-like animals. Microbats do use echolocation to navigate. All bats have an excellent sense of smell. Worldwide, there are 925 bat species. I tracked down three major bat families in North America:
The most common bats found in gardens include:
Benefits of bats All bats in the Bay Area are insectivores. A single bat can consume hundreds of insects in an hour and they may live for 5 to 30 years, depending on the species. While research has shown that bats do not have a significant impact on mosquito populations, they do help control beetles, moths and moth larvae, wasps, ants, and cockroaches. Bat lifecycle Bats generally mate in fall, but females hold onto the sperm for several months, until conditions are more favorable for their young. Then conception occurs. A single pup is born each year around May or June, blind and hairless. The pup is diligently cared for until it learns to fly after a month or two. Young bats will try to eat pretty much anything. Unfortunately, they do not like banana slugs. Like dolphins, microbats are believed to use the Earth’s magnetic field to find their way. Many microbat species migrate over 1,000 miles each year, the same way salmon do, returning to their place of birth. Residential bats Each year, many bat pups starve to death when humans try blocking bats from entering, not realizing that the young are already inside. Result, less bats in the world and dead bats in your attic. If you really must get rid of bats, hire a professional. A better choice would be to build your own bat house and lure your guests away from your home while taking advantage of their voracious appetite for garden pests. That being said, bats can carry diseases that are dangerous to humans, so wild bats should NEVER be handled. This is for your safety and theirs. How to build a bat box Bat boxes are simple to make. Since bats prefer tight, skinny spaces, a bat box is, for the most part, several sheets of wood separated by thin boards. To make the most out of your bat house, be sure to avoid these common problems:
Bat Conservation International has the best bat house plans I have seen. When placing your bat house, keep in mind that those hung on poles or in trees are almost never used because they get too cold at night, or opossums and raccoons will eat the bats. Chimneys work well, but then there’s the issue of guano (bat poop) accumulation. Guano should never be handled without skin and respiratory protection. Guano may contain lots of nitrogen, phosphate, and potassium, like most fertilizers, but it can also make you really sick. It is used to make gunpowder… No self-respecting baked potato would consider its raiment complete without freshly snipped chives. Chives can elevate even the simplest dish, and they look lovely, growing on a window sill. 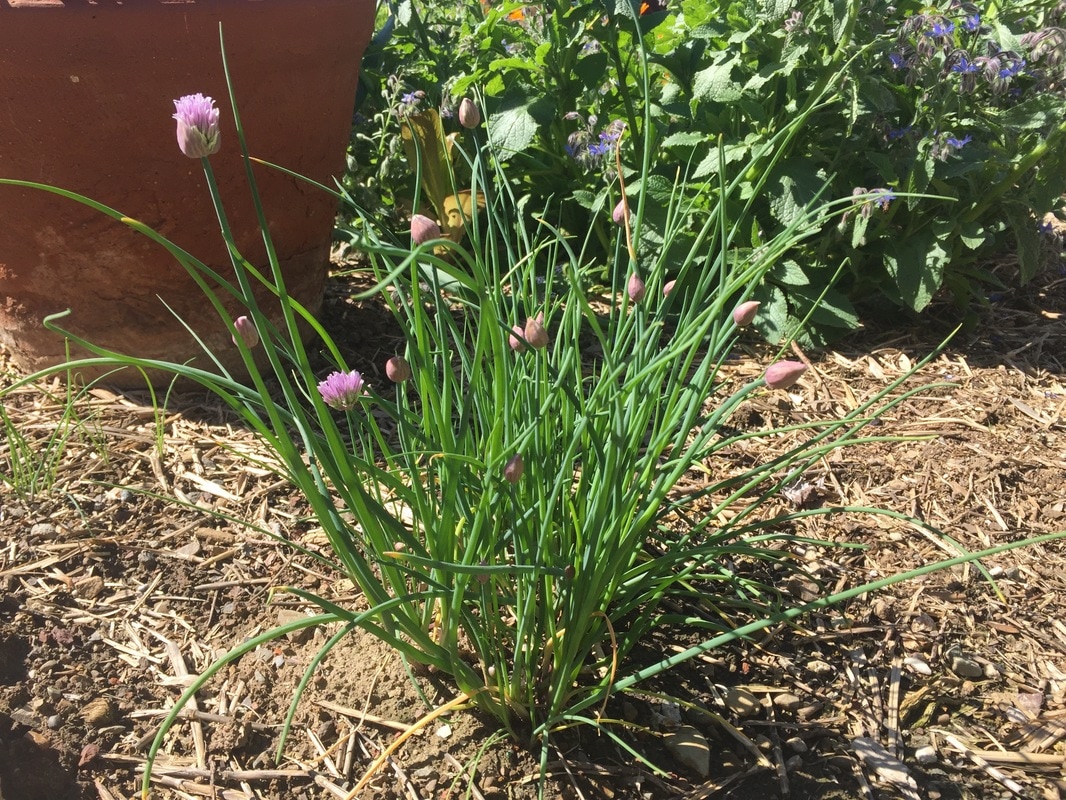 Chives Chives are members of the onion family. Chives (Allium schoenoprasum) are edible perennial bulbs. Their tender green spikes are frequently offset by purple spherical blooms that are equally edible. Many beneficial insects are attracted to the flowers, as well. Plant them once and they will provide many years of flavorful beauty.
How to grow chives Chives are so easy to grow that they are an excellent children’s activity. Chives prefer well-drained soil with a pH of 6.0-7.0 and full sun. I have had chive plants perform equally well in partially shaded clay. This herb is tenacious - I’ve even had chive plants return after being decimated by chickens! Plant seeds 1/4 inch deep and water well. Light is not needed, at first, but seeds must be kept moist and at a temperature of 60-70°F to germinate. Chives make excellent container plants and they transplant easily, once seedlings are 4 to 6 inches tall. Established plants can and should be divided periodically to avoid overcrowding. To divide a chive plant, gently dig the entire plant out of the ground and pull it apart into smaller clumps, or you can leave it in the ground and sink a shovel down through the middle, removing a portion to be transplanted elsewhere. You will want at least 5 - 10 bulbs in the clump to be moved. Once established, your chive plants will readily self-seed. Chive pests and diseases The only pest I have seen on my chives is an infrequent visit from individual slugs. Onion maggots and thrips are said to cause problems, but I have never seen them. Damping off disease, powdery mildew, and pink root are also said to attack chives, but not in my experience. I think, in this case, the chive plant is the anti-pest. In fact, European gypsies traditionally hang bunches of dried chives to ward of evil and illness! Harvesting chives Snip off however much you will be using, as close to the base as you can without damaging the rest of the plant. If your chive plant starts looking worn out, especially in late winter, you can cut the entire plant to a height of 2 or 3 inches to stimulate fresh growth. If you harvest more chives than you need, you can snip them into small bits, lay them between layers of cloth or paper towel to dry and then store in an airtight container. Herbs are excellent additions to an edible landscape or a windowsill garden, and chives are the easiest of the edible herbs to grow. Get yours started today! Vascular bundles are similar to the human circulatory system. They are the visible veins seen on the back of leaves, but vascular bundles also make up the majority of a plant’s structure.  Deciduous leaves have veins that are easy to see Parts of the vascular bundle Vascular bundles are made up of the xylem and the phloem. The xylem carries water and dissolved minerals up from the soil, through the roots, to stems and leaves. The phloem carries dissolved food, especially sugars, down, from the leaves, to storage tissues in the stems and roots.  Vascular bundle - xylem carrying water and minerals up and the phloem carrying products of photosynthesis down into the plant. (Nefronus) CC BY-SA 4.0 There are various arrangements of vascular bundles, depending upon the type of plant.  Dicot vascular bundles are arranged in a circle, while monocot veins are scattered (CNX OpenStax) CC BY 4.0 Diseases of the vascular system
The flow of water and nutrients is critical to a plant’s health. Many pests and diseases take advantage of this fact. Damage to the vascular bundle can cause wilting, chlorosis, or even death. Common pests and diseases of vascular bundles include:
Fun with the vascular system You're never too old to enjoy this one and your kids are sure to enjoy it - put some celery stalks in a cup of water with food coloring and watch the dye move through the stalk's vascular system. Try it with other plants and show us pictures! If you slice into a stalk of celery, you will be able to see vascular bundles that carry water, nutrients and hormones throughout the plant. These vascular bundles, or veins, are made up of the xylem and phloem.  The xylem mostly carries water. Xylem is Greek for wood, so an easy way to remember the word meaning is to think “water wood”. The xylem also carries some mineral salts, but that is mostly the job of the phloem. Generally, the xylem is found closer to the center of a stem, while the phloem is closer to the outer edge.
The most interesting thing about the xylem is that it pulls water upward from the ground, against gravity. If you’ve ever picked up a bucket full of water, you know this isn’t always easy. There is some debate about how this actually occurs, but most botanists agree that it has a lot to do with surface tension. Water molecules like to stick together. As a plant breaths, evapotranspiration occurs, reducing the amount of water in the leaves and stem. The water in the ground in then pulled upward by the water in the above ground portion of the plant. The structure of the xylem helps support the water molecules as they are drawn up. Xylem vessels are actually made up of elongated cells that are dead. Weird, right? These cells are arranged end to end, with little openings between each cell. There are secondary xylem cells that contain lignin. Lignin is found in cell walls and it is what holds plants upright. Diseases of the xylem include Fusarium wilt, root rot, damping off, and tomato spotted wilt. Children's activity: This is crazy easy and the kids seem to really enjoy it. Simply take several celery stalks and place them in separate cups or glasses. To each cup, add some water and a few drops of a specific food coloring. As the stalks pull the water up, they bring the dye too, and the color changes can be striking. (It works faster if you trim the base of each stalk to create fresh openings for the vascular tissue.) Planting it forward means adding plants to a landscape that can be gifted to others, shared at a holiday meal, or otherwise used at a specific time in the future. It also means designing a garden or landscape that provides year-round food and color.  Tomato in hand Seasonal planting As one season passes and another arrives, a whole new set of conditions take the stage. Sunlight hours, temperatures, and rainfall make it easier for some plants and harder for others. Planning a garden design for year-round food and flowers can increase biodiversity and pollination, while reducing weeds, pests, and erosion. It also makes a landscape look lovely every month of the year.
Companion planting is touted as an easy way to make plants help each other to grow faster and better. The problem is, most of the claims made about companion planting are bogus. Companion planting fallacies Companion planting enthusiasts claim that different plants “like” and “help” each other when grown together. While it feels nice to believe there is a magic relationship that occurs between these ‘companions’, nearly all of the lists you will find on the Internet are not based on scientific research. Most of this useless information is based on a 1930’s study by Dr. Ehrenfried Pfeiffer. He used chromatography* in something he called the “sensitive crystallization method” to determine which plants worked well together. Unfortunately, Dr. Pfeiffer’s results don’t have anything to do with how plants actually grow. * You can conduct your own chromatography experiment by crushing various leaves or flowers and mixing them with water. Then suspend a white coffee filter over the solution, with just the bottom edge touching the liquid. Over time, the various components will be drawn upward into the paper. Since different compounds have different weights and colors, the results look really impressive. This is a great kids’ activity! History of companion planting Over 5,000 years ago, the Iroquois and other native Americans sowed corn, pole beans and squash together using the Three Sisters Method. Corn grows tall, providing the nitrogen-fixing pole beans with a trellis. The squash shades the ground, reducing competitive weeds and retaining moisture. As an added benefit to gardeners, eating corn (a seed) with beans (a legume) provides a complete dietary protein! This is an example of science-based companion planting. More accurate terms for the concept are polyculture or intercropping. Benefits of intercropping Folklore and mysticism aside, intercropping improves pest control, maximizes production, increases pollination, and provides better habitat for more biodiversity. Here are the real benefits of putting the right specimens together:
Getting started with intercropping As seed catalogs begin to arrive each spring, many gardeners are thinking about garden design and the placement of the next season’s crops. Rather than following corporate agriculture’s lead, with its heavy focus on monoculture and the resulting susceptibility to pests and diseases, knowledgable gardeners recognize the value of polyculture. Polyculture more closely follows nature’s tendency to combine many different species in a single space. Let’s take a look at the various factors that meet the scientific criteria to actually make a positive difference in the garden. Spatial interaction Some plants need shade, while others grow straight and tall. Combining shade-loving plants, or climbing varieties, with taller specimens can help you make the most of a growing area. As in the Three Sisters Method, corn and sunflowers not only provide fresh food, but their sturdy stalks make excellent supports for climbing plants, such as pole beans and cucumbers. You can further support those plants with ground-shading squash or fast-growing lettuces. It may help to think of an area in terms of layers: the uppermost canopy, climbers, low growers, and even root crops can often be grown in the same place, at the same time, increasing the output of your soil. Trap crops I have an ornamental apricot tree that grows in my backyard. Since it does not produce fruit, it’s not my favorite. In fact, I nearly took it out. Then, I saw that it was covered with aphids. At first, that seemed like yet another reason for taking the tree out, but then I learned about trap crops. Trap crops distract pests away from food crops. By providing a rich food source for these pests, my other plants were more likely to be ignored. Also, this heavy infestation acted like a restaurant road sign for beneficial insects, such as lady beetles and lacewings, inviting them to come and stay a while, which they do. Commercial growers have learned to take advantage of trap crops to lure pests away from crops. These heavy concentrations of pests are then killed off with insecticides or even vacuumed off of plants! Chemical warfare Biochemicals are produced by some plants that either benefit or harm neighboring plants. This is called allelopathy. In some cases, such as many aromatic herbs, these secondary chemicals are offensive to insects pests or herbivores. This chemical warfare is also used by sorghum to reduce nearby weed populations. Common pea plants also use chemicals to inhibit the growth of nearby lettuce, wheat, cress, or sorghum, along with weeds. On the flip side of the same equation, allelopathy research has shown that growing garlic and eggplant together benefits both plants. Nitrogen fixation Legumes have evolved a unique relationship with certain bacteria that allows them to fix atmospheric nitrogen into a form usable by plants. Neighboring plants benefit from this relationship by gaining access to more nitrogen. This benefits remains in effect until the legumes begin going to seed. At that point, there is no excess nitrogen to be shared. You can improve seedling growth of many other crops by adding an occasional lima bean, fava bean, alfalfa, or other legume plant in the mix, or using these beneficial plants as a cover crop or green manure. Biodiversity Diverse habitats attracts beneficial insects, such as predators and pollinators. Monoculture, growing the same crop over an area, is prone to serious pest and disease problems (which is why chemicals are used so frequently in modern agriculture). The diversity created by growing many different plants in the same space can confuse pests into looking elsewhere for a host. Also, one plant may attract a pollinator, which is then given easy access to the plants in need of pollination.  Roses and lettuces grow well together Nurse cropping
Nurse cropping uses larger plants to provide protective shade and increased moisture for smaller or more sensitive plants. Tall, sturdy plants, such as corn, Jerusalem artichoke, and sunflower can be grown close together as a windbreak or to provide shade. In another form of nurse cropping, fast growing annuals can be planted alongside tender, more slow-growing perennials, to provide shelter, or to reduce erosion, until the woodier plants are able to protect themselves. Some plants, from arid climates, are able to accumulate salts from the soil, making them good ‘companions’ to more salt-sensitive plants. Security Installing a wide variety of plants in an area also provides security. If one crop doesn’t survive, the other might. While most gardeners do not look to their plantings as a critical food source, this is not always the case. When a garden provides the majority of a family’s food, that security can be critical. Succession planting is similar to intercropping in that plants, such as lettuce and spinach, are installed successively to provide an ongoing crop. The science behind which plants perform best together is still being researched. Bottom line: pay attention to your plants and do what works best for you, your soil, and the varieties in your garden. And ALWAYS verify information before using it or sharing it. 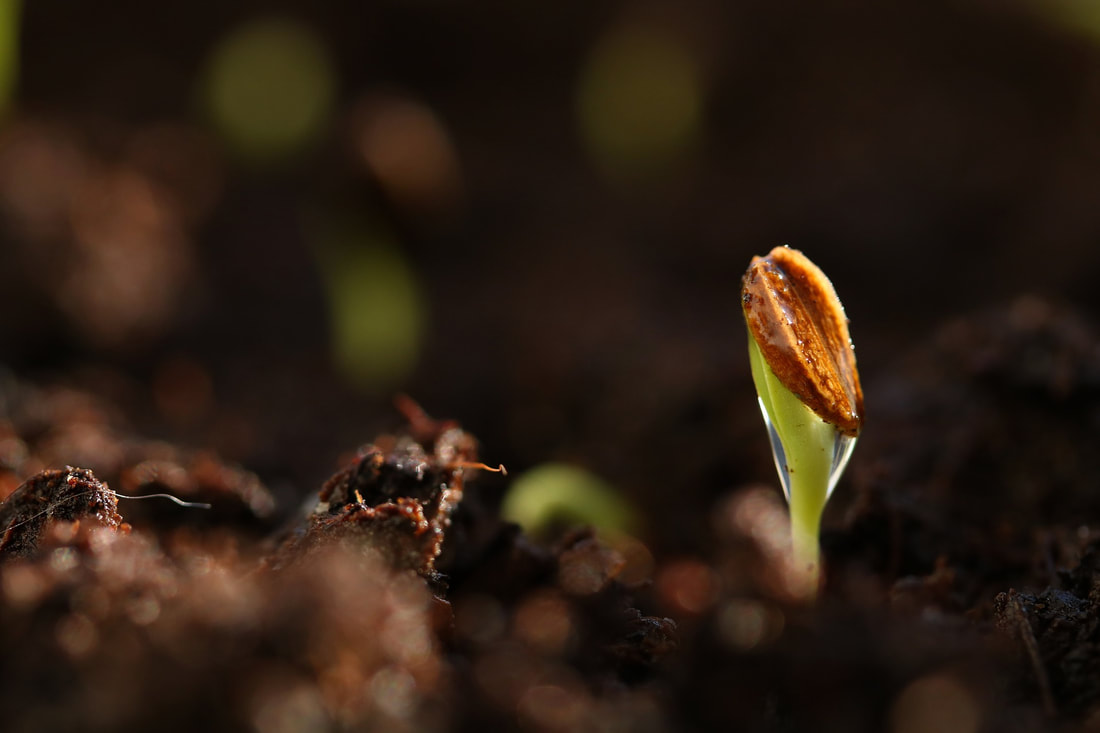 Germinating seed (katerinavulcova) Pixabay Seeds may not look alive, but they contain some amazing magic. Held dormant by a protective seed coat, the contents of a seed can remain viable for a long time, waiting for the right conditions. How germination begins The process of germination all starts when enough moisture and heat are present. These conditions soften the protective seed coat and activate enzymes within the seed. The enzymes convert starchy endosperm into energizing sugars, providing the plant with the energy it needs to grow. When conditions are less than ideal, seeds may still germinate, but they end up using too many resources to get started, leaving them ill-prepared to thrive. Most of these plants never look or produce as well as they might have. The process of germination Once the barrier of the seed coat has been broken and feeding begins, the radicle, or first root, pushes downward into the soil. This primary root nearly always starts out looking like a taproot, but it can quickly change to a fibrous root system as secondary roots form, depending on the plant species. Next comes the first stem, or plumule. and the first set of leaves, or cotyledons, followed by true leaves.  Stages of bean germination (Maky_Orel) Pixabay Seed propagation Some seeds, such as eggplant and watermelon, need quite a bit of heat to germinate. They also need long growing seasons to reach full flavor. You can start heat-loving seeds indoors, on heating mats specially designed for seed germination, to get a head start on the growing season. The fact is, different seeds germinate best at different temperatures. While you can certainly try planting earlier or later in the season, this generally ends up being a waste of time and seeds. I have collected information from a variety of sources to create the table below, showing minimum and maximum temperatures, ideal temperature ranges, and the number of days it takes a species to germinate under ideal conditions at various temperatures. Take a close look at it (email me if you would like a pdf) and note how planting the same seed at different temperatures has a profound impact on how long it takes that seed to germinate.  Table compiled from various sources by Kate Russell Note: If you use pre-emergent herbicides, you may be halting germination for many different plants, including the ones you want to grow. Several inches of mulch is a safer choice. Even if weeds sprout in mulch, their stems and roots are not as well attached to the earth, so they are easier to pull.
Seeds don’t use a calendar to tell them when to start growing. Each species has an ideal germination temperature. You can increase the odds of your seeds growing into healthy seedlings by planting them at the correct temperature. Children’s activity This activity is what turned me on to gardening many, many years ago. It is simple, inexpensive, and a lot of fun for junior gardeners (and the rest of us, too!) Materials:
As moisture is absorbed from the sponge into the seeds, they will begin to expand. You will need to monitor the sponge, making sure that it remains moist, but not soggy. Within 2 weeks, if conditions are right, tiny sprouts will begin to emerge! Encourage your child to draw pictures of how each of the seeds behaves differently and to measure the growth every few days. When the seeds have outgrown their cup, you can transplant them to a sunny location and watch them grow in the garden! |
Welcome!You can grow a surprising amount of food in your own yard. Ask me how! To help The Daily Garden grow, you may see affiliate ads sprouting up in various places.
You can also get my book, Stop Wasting Your Yard!  Index
All
Archives
July 2024
|


 RSS Feed