|
Fuzzy greenish brown skin and refreshing green fruit are what most of us know as kiwifruit, or simply kiwi. What you probably didn’t know is that there are actually many different types of kiwifruit, and that some of them can withstand temperatures as low as -40°F!  Kiwifruit and kiwi berries (Hiperpinguino) CC BY-SA 3.0 The word kiwi can refer to the smallest cousin of emus and ostriches (Apterygidae Apteryx), the people of New Zealand, or a delicious fruit that you might want to add to your garden or foodscape. Kiwifruit are native to China. Commercial cultivation didn’t start until the early 1900’s. Kiwifruit cultivars Your first decision, when growing kiwifruit, is to decide which species is best suited to your microclimate and taste. Collectively, kiwifruit are the berries of approximately 60 different woody vines in the Actinidia genus. The cultivars you see most often in the grocery are the ‘Blake’, ‘Hayward’, and ‘Saanichton’ kiwifruits. Some kiwi cultivars don’t taste good at all, but you probably won’t find them for sale at your local garden center. Nearly all of the fuzzy varieties of kiwifruit (A. deliciosa) are enjoyable to eat. Other varieties can also be quite tasty:
 Kiwifruit by species (Crowhurst et al.) A = hardy kiwi, C = golden kiwifruit, D = 'A. deliciosa', E = 'A. eriantha', I = 'A. indochinensis', P = silver vine, S = 'A. setosa'. CC BY-SA 3.0 In addition to the familiar egg-shaped kiwifruit, you can also plant fast-growing kiwi berries, a smaller, smooth-skinned version with a similar flavor. Also known as baby kiwi, cocktail kiwi, grape kiwi, and dessert kiwi, three cultivars are available:
Kiwifruit vines need a certain number of chill hours to produce fruit, depending on the variety. Be sure to calculate your local chill hours and select a cultivar that will produce fruit for you. How kiwi grows Pollination of kiwifruit is tricky. Apparently, bees are not impressed by kiwi flowers (I think they’re lovely). Commercial kiwifruit growers often have to inundate their kiwi orchards with honey bee hives, in a practice called saturation pollination, to increase the likelihood of pollination. As a home grower, you can always hand pollinate. Also, very few kiwifruit cultivars are self-pollinating. Most kiwifruit vines are either male or female (dioecious). If you want fruit from a cultivar that is not self-pollinating, you will need at least two vines, but one male plant for every 3 to 8 female plants is ideal. Even self-pollinating vines will produce more fruit if there is a male plant nearby.  Trellised kiwi in flower (A.j.morris) CC BY-SA 3.0 Like many bare root fruit trees, kiwifruit plants are generally sold as fruit producers grafted to sturdy rootstock that have been produced asexually, with cuttings. This gives you the best of both cultivars and an assurance of fruit that will be similar to the parent plant.
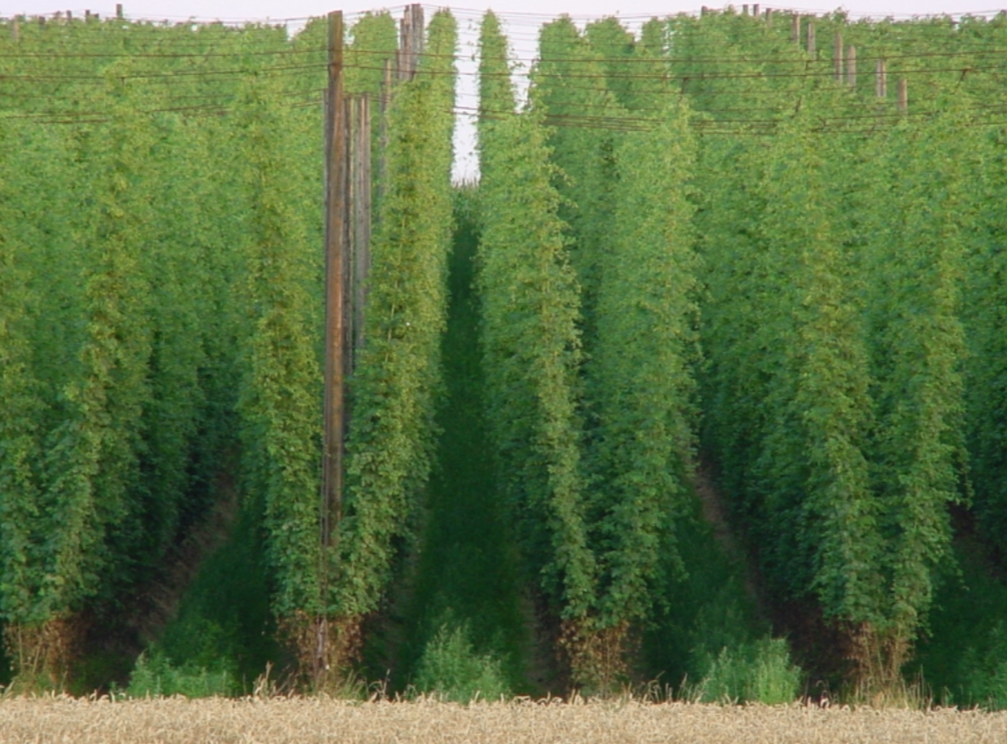
How to grow kiwi Being vines, kiwifruit grow best on a sturdy trellis or pergola. This gets the vines and fruit off the ground, provides excellent sun exposure, and ensures good air circulation. Kiwifruit vines tends to be weak, so the trellising also protects the vines from breakage. Kiwifruit grows best where it is protected from heavy winds. Vines need good drainage, but the soil must be kept moist at all times. This is a good time to put that drip irrigation system to work! Kiwis should be planted 15 to 20 feet apart, with one exception: plant one male and one female in the same hole. Caring for kiwifruit vines Kiwifruit is borne on all the canes, but production is at its peak in the first year or two. Vines should be pruned off in their third year. One way to make this job easy it to create a three-color system of ribbons or ties. Every year, simply look for a specific color and remove those vines. When you’re done pruning, use those ribbons on the current year’s growth. Kiwi vines should be fed a high-nitrogen fertilizer, once in spring and again in early summer, to give them the nutrients they need to produce all those leaves and delicious fruit. You may need to provide frost protection in winter, depending on your location and the vine cultivar. Kiwifruit pests and diseases Very few insects will bother your kiwifruit vines. Armored scale, boxelder bugs, and leafrollers are all you have to watch for. Nematodes in the soil may also cause problems. Kiwifruit diseases are nearly all of the fungal variety, although a devastating bacterial disease (Pseudomonas syringae actinidiae (PSA)) has appeared in New Zealand, Italy, and Chile. Armillaria root rot, bleeding canker, botrytis fruit rot, crown gall, phytophthora root and crown rot, sooty mold, and bacterial blight are the most common diseases of kiwifruit, in the US. Kiwifruit vines take several years to produce fruit. But it’s worth the wait! Traveling in Germany a few years ago, I was a little confused by grids of 20-foot poles pointing skyward. They looked alien, like a giant, bristling growth. That was before I learned about hops. Hops are flowers from the Humulus lupulus plant and they love to grow up!  Hop flower (LuckyStar) CC BY 2.5 Hops in beer I do not know how to make beer, so my knowledge in this area is limited. [Brewers, feel free to add better information in the Comments!] I do know that hops have been used in beer-making since the 9th century. Before that, other flowers and bitter herbs were used, including dandelion, marigold, horehound, and burdock root, in a mash called gruit. One of the main reason brewers switched to using hops was because there was a tax on gruit, but no tax on hops. Of course, that situation was only temporary. Hops are said to have an antibacterial effect, as well as providing a bitterness that balances malt’s sweetness. It is the unfertilized female flowers that are used in beer-making. The acids in beer have sedative properties, with or without alcohol. Hops varieties The flavor and aroma of hops flowers is largely the result of where they are grown. While there are many different hops cultivars, the plants can be [overly] simplified into three different types: American, British, and Continental European. American hops are robust, heavy producers with long sidearms. They tolerate a wider range of soil pH and soil structures. American hops are generally planted 4 feet apart in rows that are 14 feet apart. Common American varieties include Willamette, Chinook, Brewers Gold, and Zeus. British and Continental European varieties are genetically different from the American varieties. They have smaller, finer root systems and are less tolerant of soil variations. These varieties have shorter sidearms and can be grown 3 feet apart in 12-foot rows. This allows for more plant density on the same acreage. British varieties prefer more alkaline soil (pH 6.5 or higher) and can tolerate heavier soils. Common British varieties include Viking, Fuggie, and Challenger. Continental European varieties, such as Magnum, Glacier, and Pearle, prefer more acidic soil (pH 5.5 to 6.2). One subset of the European hops, referred to as noble hops, are less bitter, with a stronger aroma than others. These hops are used to make Pilsners and other mild beers. Hops plant structure Hops flowers are green, soft-petalled seed cones, also known as strobiles. Hops plants are dioecious, which means the plants are either male or female. To prevent male pollen from fertilizing the female flowers, plants are propagated vegetatively. When hops plants are grown from seed, the males are culled as soon as they are seen, similar to other flower bud crops. The hops vine is called a bine. As the bine wraps around a support, side branches, called sidearms, emerge. At the end of the growing season, everything aboveground dies back. In spring, the roots put out new bines and the whole process begins again. How hops grow Hops plants are fast growing, perennial climbers. That’s what all those poles and strings were - hopfields or hop yards. Hops grow from rhizomes that are placed in ‘hills’ or mounds that are 6 to 12 inches high. This helps with drainage. The rhizomes are placed 4 inches below the soil surface. Commercially produced hops are generally started in pots, in March. Then they grow in greenhouses until July. Plants are placed 7 to 8 feet apart in a grid formation that matches a series of poles that support strings used by the hops plants to climb toward the sun. In these commercial fields, air flow is critical to disease and pest management, so the bottom 3 feet of foliage is removed. If you are growing just a few plants for yourself, you don’t need to do that.
Hops prefer very specific conditions, requiring moist, temperate regions with plenty of boron in the soil. Most of the world’s hops production occurs along the 48th parallel north, which includes Germany, China, and Poland. Hops grow well in the same conditions preferred by potatoes, making Idaho, eastern Washington, and parts of California and Oregon good hops growing country. One acre can produce 2,000 to 3,000 pounds of mature hops flowers, on average.
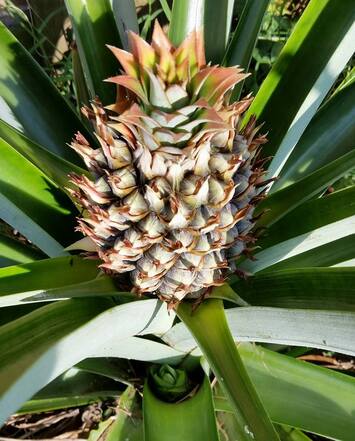
You do not need to install 20-foot telephone-style poles in your yard to grow hops. One neighbor of mine simply attached strings from a fence to the roof of his house. Each spring, the bines emerge and lovely green flowers appear in late summer, shading the sunny side of his house! You can also grow hops using a tee-pee of bamboo poles, just to see what it’s like. Pests and diseases of hops Powdery mildew and downy mildews can be particularly troublesome. Mites and weeds become more problematic as interior sunlight and air flow increase. Hops are toxic to dogs, so do not grow hops in areas frequented by Fido. You can, however, eat the young bines the same way you would eat asparagus. Sweet, luscious pineapple - try growing it at home! If you are lucky enough to live in California, you might be able to grow a pineapple plant for yourself. While you may or may not get fruit, it’s an interesting experience and, hey, it just might work! (Plus, three-fourths of the world’s pineapple crop comes from Costa Rica, where they use a lot of pesticides. Just sayin’) Pineapples got their name back in the 1600s because European explorers thought they resembled pine cones, which were called 'pine apples' at that time. The Latin names, Ananas comosus, mean ‘excellent fruit’ and ‘tufted’, respectively. Pineapples are cousins to bromeliads, and the fruit are technically berries. 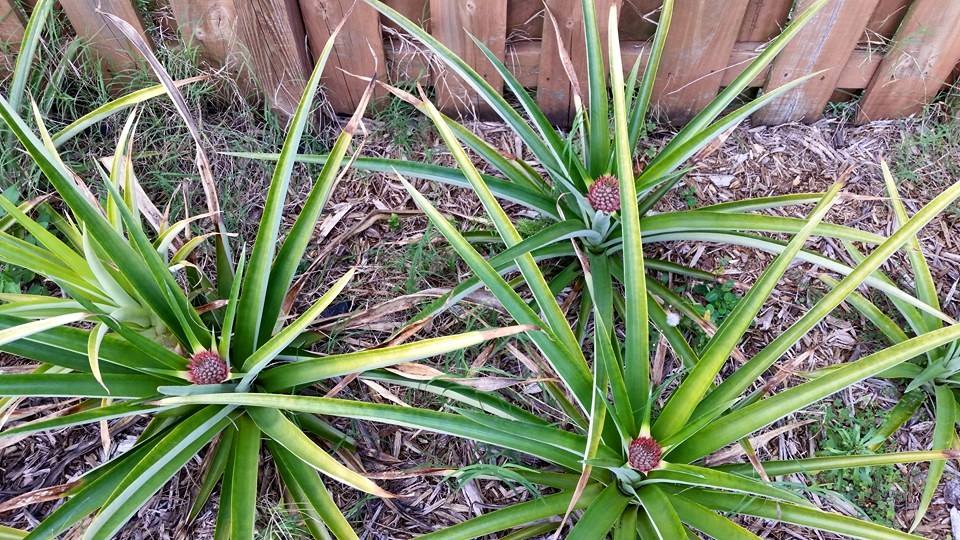 Young pineapple plants, courtesy of Jo Halstead
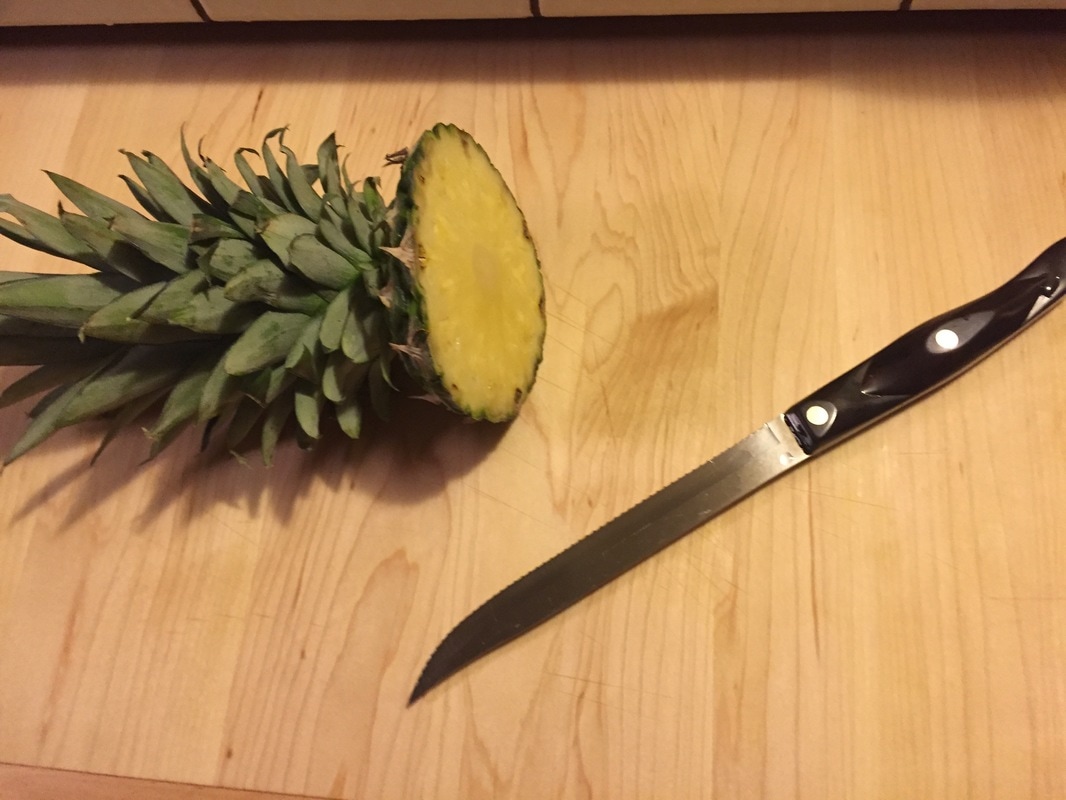
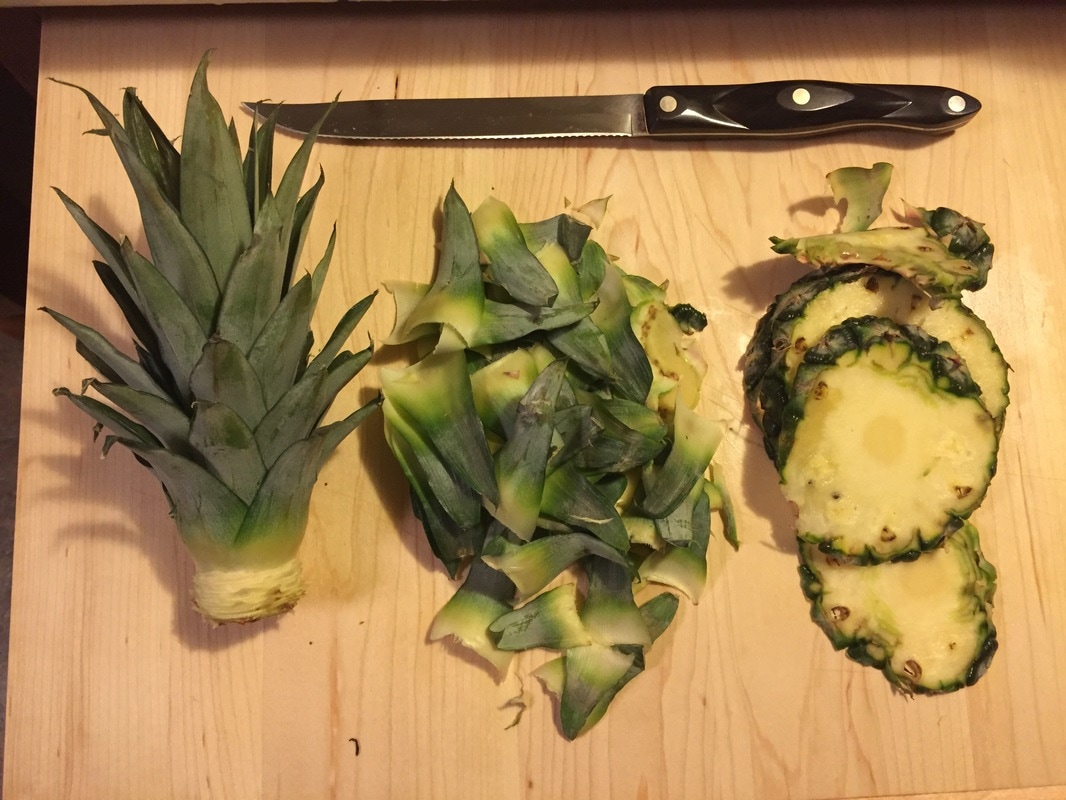
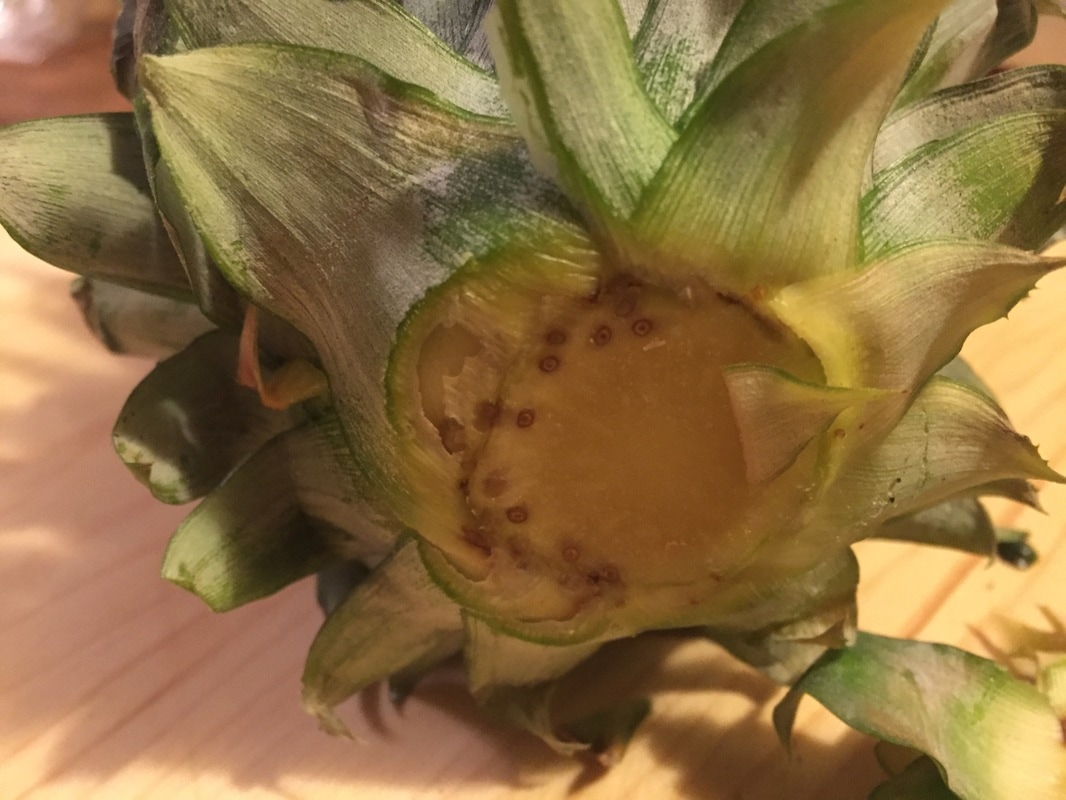
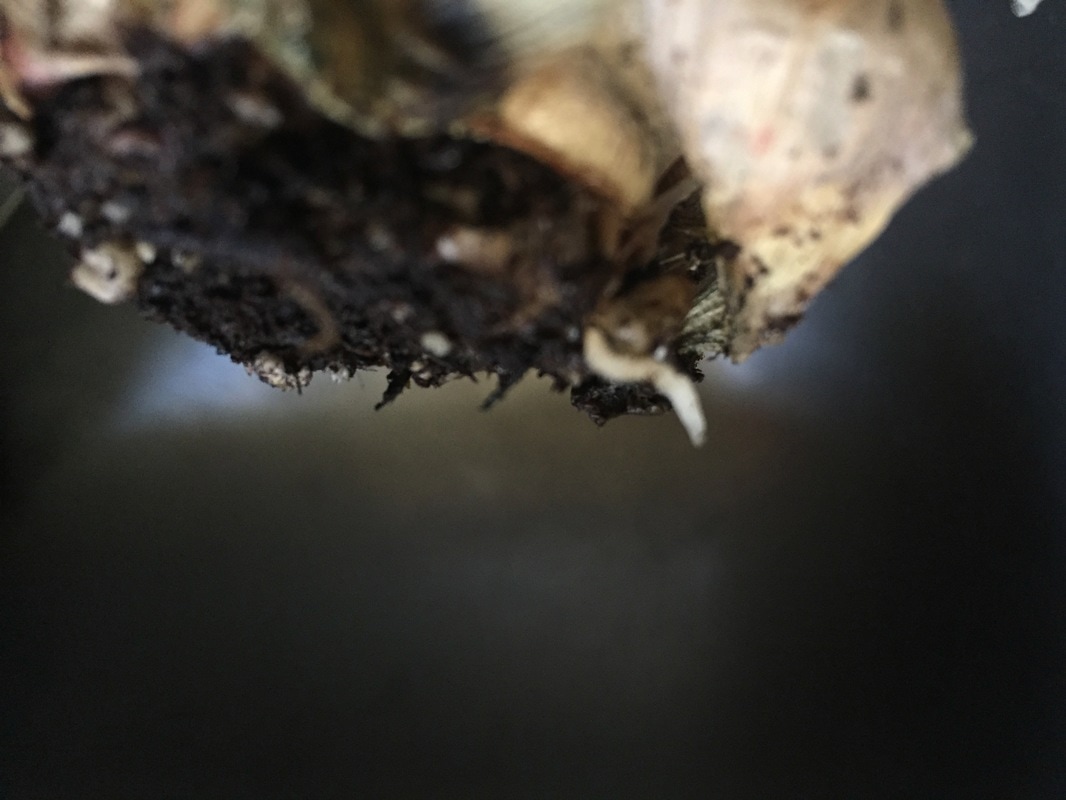
When a pineapple seed is pollinated, the fruit isn’t considered marketable. In Hawaii, where the majority of pineapples used to be grown, hummingbirds could not be imported, for fear that they would pollinate all the pineapples. There are some wild pineapple plants that only flower at night and these are pollinated by bats. How to start your own pineapple plant You can try growing your own pineapple from the crown of a mature fruit. Simply follow these steps:
Pineapple pests and diseases
Pineapples are highly susceptible to a number of fungal diseases, including heart rot and root rot. They may also become infected by fruitlet core rot, butt rot, and yellow spot virus. Thrips, mites, ants, scale, and garden centipedes can becomes pests, and mealybugs can infect pineapple plants with wilt disease. Be sure that your pineapple is ripe before you harvest, because it will not ripen after it is picked. Did you know that pineapple leaves are used to make clothing and wallpaper? Me, neither. The next time you buy a pineapple in the grocery store, try starting your own pineapple plant! Currants are edible plants, native to the northern hemisphere. Not to be mistaken with the tiny black raisins made from black Corinth grapes, currants are members of the Ribes family, along with gooseberries and jostaberries (a cross between currants and gooseberries). Most Americans are unfamiliar with currants because they were banned in 1920. This ban was put in place because currants are co-hosts, along with white pine, to white pine blister rust (Cronartium ribicola). This fungal disease was devastating to white pines on the east coast. That ban was lifted, in 1966, as resistant cultivars were developed. The small, pea-sized fruits can be red, pink, white, or black and are produced in clusters called ‘strigs’. Currants are tart, so they are not usually eaten fresh. They are more commonly used for jams, jellies, pies, syrups, wine and brandy. The flowers are also edible. 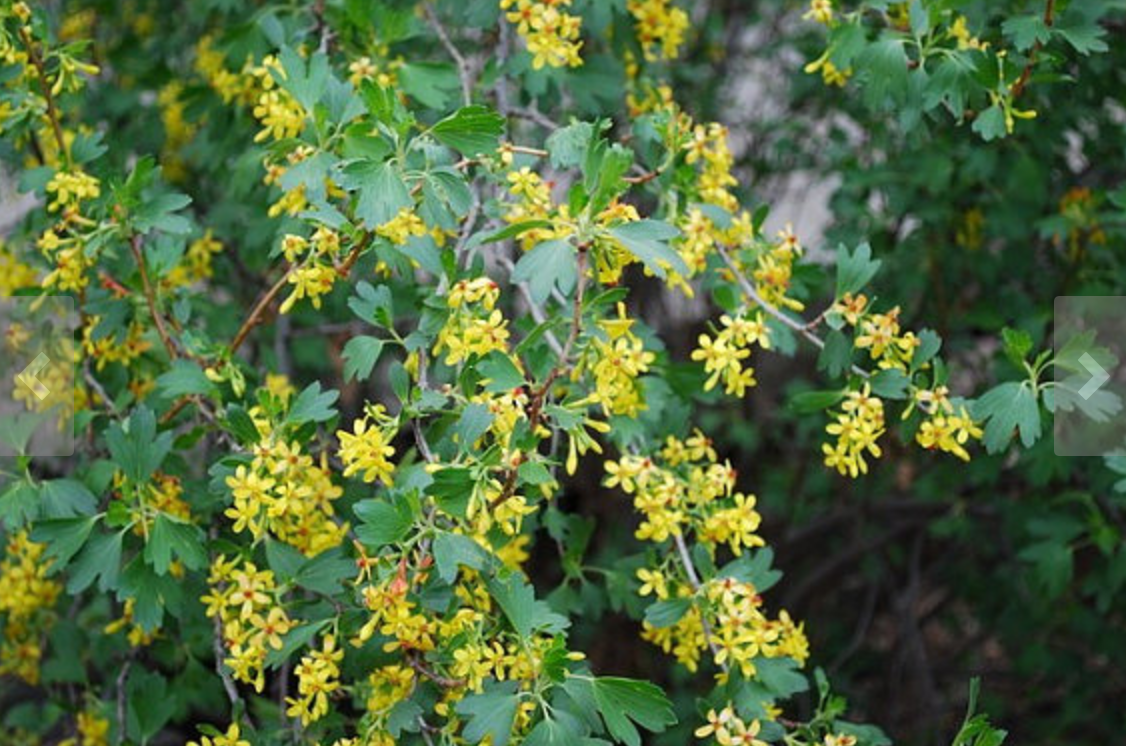 Golden currants courtesy of Gary MacPherson at ColoradoHardyPlants Currant plants are thornless, deciduous shrubs that make excellent additions to native gardens. They are drought tolerant and provide food and shelter to many indigenous birds. Native Americans frequently used currants as both food and medicine. In particular, they used currant roots to treat menstrual and menopausal problems. Scientists have found that currant roots and seeds contain high levels of gamma-Linolenic acid, a chemical known to be effective for those same issues.
Currant varieties According to Wikipedia, there are black currants, red currants, and white currants. According to the University of Massachusetts, “Species are Ribes rubrum (most red currants and some whites), R. petraeum (white), R. vulgare (pink, white, and red), and R. nigrum and R. ussurienses (black). Native currants… belong to the species R. odoratum." My order of Golden Currants (Ribes aureum) just arrived. Clearly, there is some confusion. Here’s the bottom line, as well as I can figure:
How to grow currants Traditionally, currants grow in cool climates with fertile, well-drained soil, where they are found in full sun or partial shade. Currants prefer heavier soil and more shade. Mulch can be used to keep roots cool and moist in summer. Most currant bushes reach 3 to 5 feet in height, but they can go as tall as 9 feet, under ideal conditions. Currents can be grown in large containers. Currants are normally purchased as bare root stock or young saplings that were propagated from hardwood cuttings. These young currant bushes need a lot of water to get established, but are very drought tolerant later on. Currents also need a lot of potassium. My clay garden soil tends to have plenty of that, so no treatment is needed around here. Most currant plants are self-pollinating, but production is significantly higher per plant with multiple plants nearby. Pruning currants Currants can be pruned as shrubs or trees, depending on your preferences and the plant’s location. Currants should be pruned once a year in winter using a method called renewal pruning. Renewal pruning ensures that there are fruit-producing 2- and 3-year old stems each year. Use the following pruning schedule on currants:
Pests & diseases of currants Aphids, mites, currant borers, and the larva of some moths and butterflies are really the only pests that bother currants. Problems are more commonly caused by mineral imbalances in the soil or improper irrigation. Rust, powdery mildew, anthracnose, and leaf spot can sometimes appear on currants. Since currant flowers tend to appear early in the season, sometimes as early as February, they provide pollen and nectar to our earliest pollinators. This helps set the stage for a more productive year overall. Each bush can produce up to 10 pounds of fruit, so it won’t hurt to leave some behind for the birds. Add some native golden currants to your home garden in early spring or late fall for many years of fruit and flowers! Hazelnuts, filberts, or cobnuts, whatever you call them, these delicious nuts grow on trouble-free shrubs that make excellent additions to your foodscape. Since hazelnut shrubs naturally grow alongside creeks and under taller overgrowth, they are a good choice for locations with partial shade.  Hazelnuts (Simon A. Eugster) CC BY-SA 3.0 Why grow hazels? The obvious reason for growing a hazel bush is the delicious nuts. Hazelnut plants can produce food for 80 years! Hazelnut shrubs also make excellent, drought tolerant anchor plants in the landscape. Traditionally, hazels were planted as hedgerows between properties and grazing fields. They were frequently coppiced, or cut to ground level to stimulate new growth, to provide long, slender poles for basket-making and wattle and daub fencing.
Unlike most plants, hazelnuts bloom and pollinate in winter. Yellow pollen-crusted catkins release their bounty to the wind, which carries it to tiny red flowers. There, the pollen stays dormant until summer. That’s when the nuts start to form.
Hazels are monoecious, or hermaphroditic, having both male catkins and female flowers on the same plant. Catkins are hanging flower clusters that contain pollen. Hazelnuts are self-infertile, which means you will need more than one plant to produce a crop of edible nuts. Members of the hazel family are all deciduous. Some are trees and some are suckering shrubs. These suckers can be used to to create new shrubs elsewhere on your property or given to family and friends to start their own. Commercially, the suckers are generally removed and the shrub is trained into a tree form, to make management and harvest easier. What you do with yours is entirely up to you, but it is nice to have options! How to grow hazelnuts If you have access to suckers, use them! Otherwise, you can plant nuts in loose soil and water occasionally. Germination rates and speed can be increased by scarification, or scoring the outer layer of the nut. Once seedlings are 12 inches tall, they can be transplanted to their permanent location. They will begin producing nuts in their 3rd or 4th year. These nuts grow in clusters called burrs. Hazels are shallow-rooted plants that cannot tolerate soggy ground. They are drought tolerant and require little effort on your part, once they are established. Only during the peak of hot summers do they need any irrigation. Hazelnut pests and diseases One very serious threat to hazelnuts has kept them from being grown commercially in the Eastern U.S. It is called eastern filbert blight. Our native species are resistant, and some are immune. This disease has recently made its way west to Oregon and California. Pests include bud mites, jay birds, and squirrels. Ads claim that giant eye floating balloons are a good way to keep birds out of fruit and nut trees, but I was unable to find any research that verified those claims. Harvesting hazelnuts Hazelnut harvesting begins in autumn, as the leaves and burrs turn brown. Remove nuts from the burrs and lay them out in a single layer, in a protected area, to dry for a few days. Roasting makes it easy to remove the inner paper, which can taste bitter, and it brings out that rich hazelnut flavor that we all know and love! Homegrown blueberries? Yes, you can! While blueberries traditionally grow in colder climates, there are varieties that grow successfully in warmer temperatures.  Blueberries (PhreddieH3) Public Domain Blueberry varieties
There are three main types of blueberry plant: southern highbush, northern highbush, and rabbit eye. Southern highbush and rabbiteye varieties often perform well in higher temperatures. Generally, the northern highbush types need more chilling hours than my garden can provide. Even when they do grow, the fruit often lacks good flavor. Also, the northern highbush types will take longer to start producing fruit in warmer areas. Two popular southern highbush varieties for warm areas are Southmoon and O’Neal. Santa Clara County Master Gardener offer this list of blueberry plants that perform well in warmer climates. Prepare for planting Blueberry plants are nearly always sold as 1-gallon yearlings.These young plants will benefit from 7 to 10 days of acclimation, or hardening off, after growing in a greenhouse. Be sure to keep the soil moist but not soggy. The root system is a hairy ball that should never be allowed to dry out completely. If it does, the plant dies. At the same time, too much water can set the stage for fungal disease. Yeah, I know - picky, picky, picky! Of course, once you start picking scrumptious blueberries off your very own edible hedge, you’ll realize it’s well worth the effort. How to grow blueberries So, choose the best varieties for your microclimate and taste. Even though most blueberry plants are self-pollinating, you will get a substantial increase in both fruit quantity and quality through cross-pollination with multiple plants. Plants should be spaced 4 to 6 feet apart. Blueberries perform best with 6 to 8 hours of sunlight each day, so select the site accordingly. Good drainage is important, too, so be sure to amend the planting area with plenty of aged compost. This is critical in area with compacted clay soil. Plants should be placed with the crown at soil level. Since blueberries have a shallow root system, you can help them stay happy and healthy by mulching and watering regularly in summer. Blueberries can also be grown in containers. Feeding blueberries Blueberries seem to prefer ammoniacal nitrogen based fertilizers over nitrate based. I have heard tell that blueberries do not take up the nitrogen in nitrate based fertilizers. Too much nitrogen can burn blueberry plants, so do not feed until leaves have emerged, and then feed sparingly. Acidifying blueberry soil Blueberries prefer a soil pH of 4.5 to 5.5. To really know what you are working with, have your soil tested by a reputable lab. Over-the-counter test kits and strips are unreliable. Unless you want to spend hundreds of dollars on lab equipment, lab tests are really the only way to go. If it ends up that acidification is needed, try amending the soil with coffee grounds, citrus rinds, or oak leaves. You can also buy commercially available acidifiers. Keep in mind that changing pH is a slow process and that it requires regular monitoring. Blueberry pests and diseases Citrus thrips, katydids, light brown apple moth, masked chafer, blueberry bud mites, cranberry weevils, scale insects, Pacific flathead borers, plum curculio, sharp nosed leafhoppers, spotted wing drosophila, span worms, and Asian longhorn beetles will all try attacking your blueberry plants, but birds will probably cause the most damage. Personally, I built cage frames around my blueberry bushes and stapled netting to the frame. It works very nicely. Common blueberry diseases include twig blight, canker, stem blight, mummy berry, anthracnose, and blueberry stunt disease. Removing dead or diseased canes and treating with dormant oil can go a long way toward protecting your blueberry plants. Your blueberry plants can live for 20 years, producing fruit after the third year. What summer picnic would be complete without the tang of rhubarb pie? While purists may enjoy their rhubarb raw, dipped lightly in sugar, many of us prefer rhubarb pie with luscious strawberries. However you eat rhubarb, it is a sturdy perennial that can provide shape, color, and food in a garden or landscape for decades. These plants can get pretty big, making rhubarb excellent anchor plants in a foodscape. 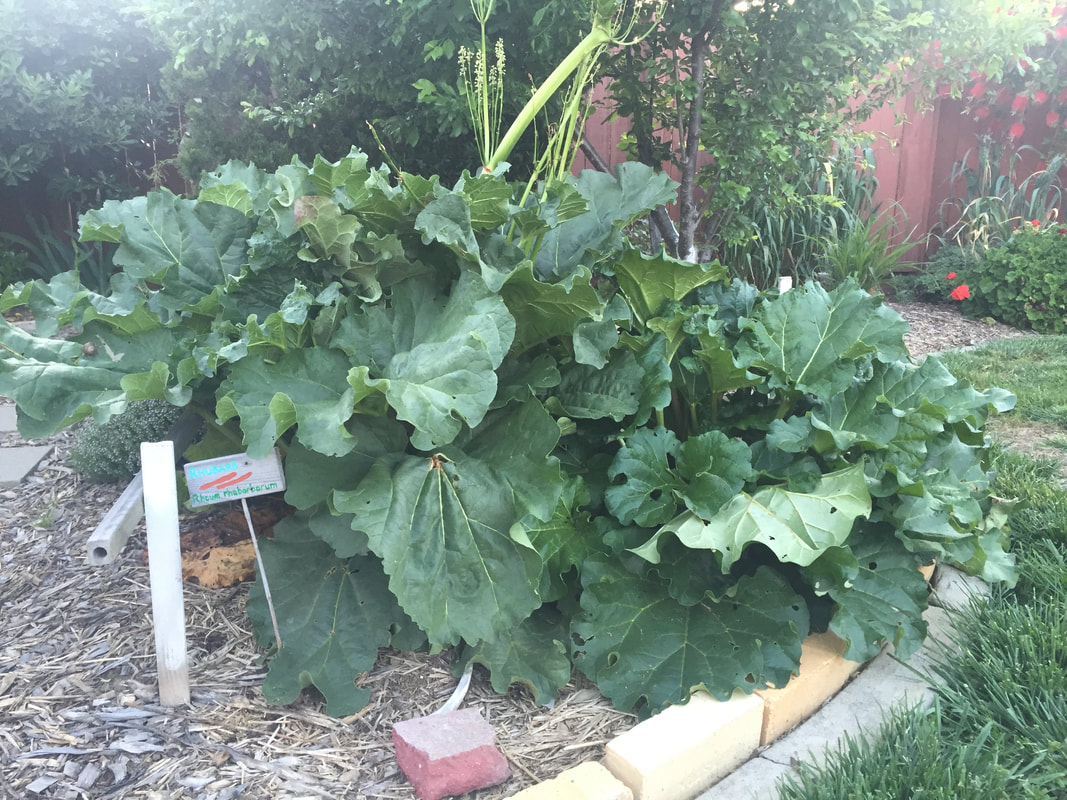 Rhubarb Rhubarb (Rheum rhabarbarum) is generally a cool season plant. It needs temperatures below 40ºF in the winter and prefers temperatures below 75ºF in the summer. That being said, I have had excellent success with rhubarb in San Jose (CA) where our peak summer heat can reach above 100°F. You may be surprised to learn that rhubarb is related to buckwheat. If you look at the seeds, you can see the similarity. Rhubarb is believed to have started in Asia, some 5,000 years ago. Marco Polo is cited as the one who brought it to Europe and Benjamin Franklin carried rhubarb to North America, way back in the 1700s!
How to grow rhubarb When selecting a site for rhubarb, keep the plant’s mature size in mind. Rhubarb plants can reach 3’ in height and 4’ in diameter. Rhubarb generally prefers full sunlight, but mine are under a small apricot tree (which probably protects the rhubarb from our summer heat). In temperate regions, the rhubarb harvest begins in April and continues until September. Individual plants will be productive for 8-20 years, but, since they grow from rhizomes, the plants will replace themselves over time. [Side note: my mother purchased a 200-year old farm house in Upstate New York many years ago and decided to plant rhubarb along the southern side of an outbuilding. Apparently, the original owners felt the same way because, come spring, not only did the new plants come up, but so did the offspring of the original plants! Needless to say, Mom had plenty of rhubarb!] Rhubarb can be grown in large containers, as long as there is enough room for a season’s growth. Rhubarb will do much better in the ground. Follow these steps to get your rhubarb patch started:
*While rhubarb leaves are mildly toxic, they are not the poison we have been led to believe. You would have to eat several pounds of rhubarb leaves to cause problems. In fact, spinach has more oxalic acid than rhubarb. That being said, I do not feed them to my chickens. One easy way to keep weeds down in a rhubarb patch is to simply take a few of the large rhubarb leaves and lay them on the ground. The leaves block sunlight needed by the weeds and then they break down, adding organic matter to the soil.
Get your rhubarb crowns in today for a lifetime of red-stalked deliciousness! April is an excellent time of year to start planting asparagus. Now, growing asparagus is not a task for the impatient. You will not get a crop the first year. You won’t get a crop the second year, either. However, those succulent stalks are certainly worth the wait. Plus, once they start producing, you will continue to get harvests for many years. Asparagus was offered to the Egyptian gods over 5,000 years ago, and people have been enjoying it ever since. 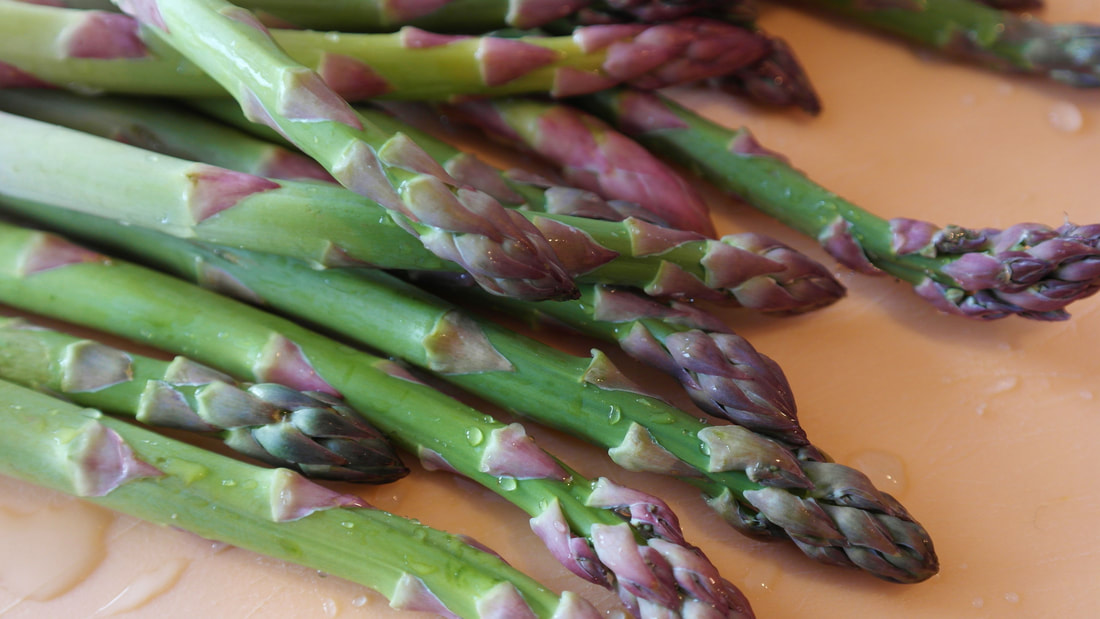 Asparagus stalks (PxHere) Public Domain Asparagus lifecycle Unlike many of our vegetable crops, asparagus grows from crowns, which are food storage rhizomes. The familiar spears, left to their own, will open up and grow into ferny branches that can reach 4-5’ in height. Asparagus leaves are actually modified stems, much like conifers. The root system is adventitious. Yellow to greenish-white flowers emerge and become red berries when fertilized. DO NOT EAT ASPARAGUS BERRIES. They are poisonous to people.  Purple asparagus really makes a statement! How to grow asparagus Before you starting planting asparagus, give the site some thought. Asparagus plants may take a few years to really start producing, they will continue to produce for 20-30 years or more! Asparagus loves raised beds in full or partial sun, and lots of compost-rich soil. Asparagus does not compete well against weeds, so be sure to keep the asparagus bed weed free. Mulching will help a lot. One year old crowns are the best way to start. Dig a trench 12” deep in the bed and place asparagus crowns 18” apart. Spread the roots out, cover with soil and water, but do not fill in the trench. Watch for new growth. As shoots begin to appear, add more soil, repeating until the trench has been filled. If you want to grow asparagus from seed, the seeds must be germinated between damp paper towels and then gently transferred to soil. Keep the asparagus bed consistently moist, but not soggy. While spears may appear the first year or two, force yourself to ignore them. Allow the plants to go through their annual cycle. This will help them develop a strong root system, necessary for long term production. Asparagus pests & diseases Asparagus is susceptible to Fusarium wilt and asparagus rust. Remove and discard diseased shoots. Aphids can also become a problem. To get rid of the aphids, simply spray the plants with the hose. Harvesting asparagus By the third year, you should be able to harvest some, but not all, of the spears. They taste the best when they are 5-7” tall. Cut or snap the spears off at or near ground level. By late spring or early summer, your asparagus harvesting season is done. Allow any spear that come up to complete their normal cycle. If you want white asparagus, you will need to blanch them. That means covering them with soil, newspaper, or some other material that will halt photosynthesis as they grow. 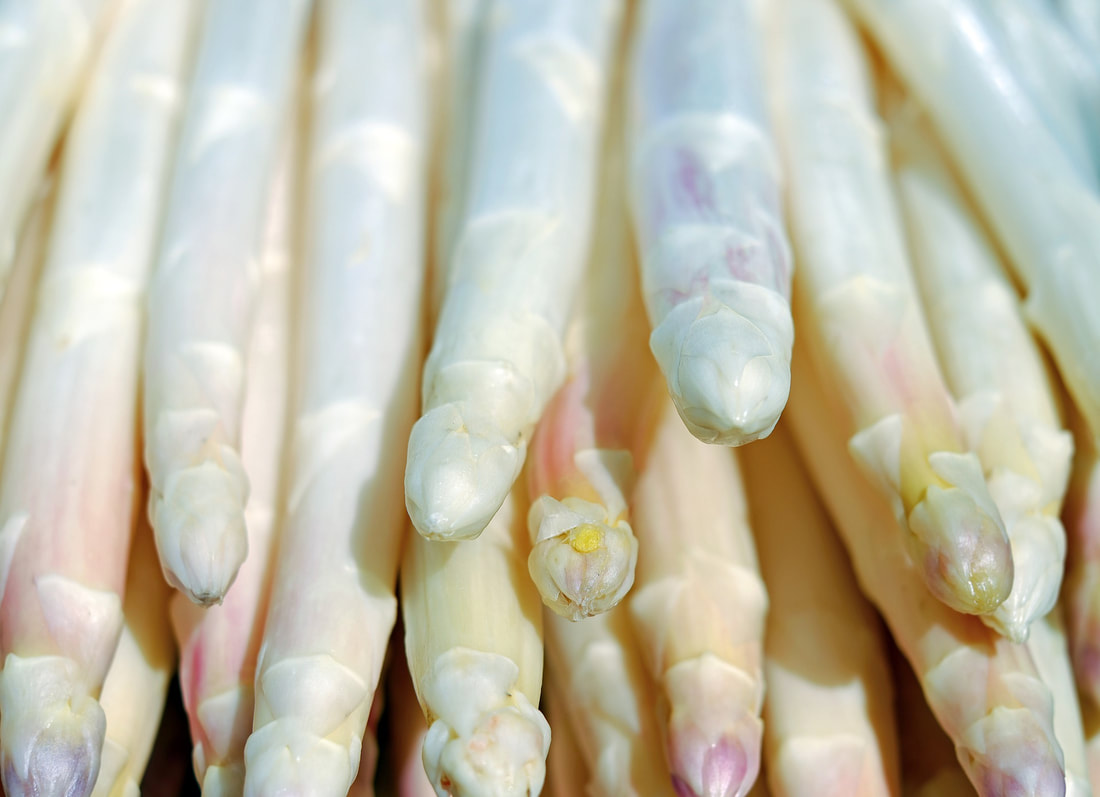 White asparagus stalks (Couleur) Pixabay If you end up with a bumper crop of asparagus, you may be tempted to eat it all. That might be a bad idea. Eating a lot of asparagus can make urine smell pretty awful. Instead, the shoots can be pickled and stored for several years. They taste particularly good in a Bloody Mary.
California is famous for its wine grapes, but did you know it is easy to grow your own table grapes at home? Not only will you get sweet, luscious grapes, but the vines can be trained over a patio or pergola, providing a nice shady spot in summer!  Princess seedless white grapes How to grow grapes
Pruning grape vines The variety of grapes being grown determines which of two pruning methods to use. Grapes are either spur-pruned or cane-pruned. This is because different grape varieties produce fruit on different bud spurs. Cane pruning leaves only the trunk and two to four shoots from the previous year’s growth to be trained along support wires. New buds will emerge from these canes to produce leaves and fruit. ‘Thompson Seedless’ and ‘Concord’ are cane-pruned grapes. One cane-pruning method is called the Four Arm Kniffen method and the University of Maine offers an excellent how-to video here. Spur pruning leaves the bilateral cordons, or horizontal branches, permanently in place. In spring, new growth will emerge from this old wood. ‘Flame Seedless’, ‘Tokay’, and ‘Ribier’ are spur-pruned grapes. In either case, you will want to trim each cane to have no more than 14 spurs. Otherwise, all the plant’s energy will go into vegetative growth, rather than producing grapes. Irrigating grapes While most of a grapevine’s roots are in the top 3’ of soil, some of those roots can go down as much as 15’ deep! Grapes perform best when they are watered deeply and allowed to dry out between waterings. The amount of water needed depends on the type of soil, the depth of the roots, and the weather. On average, a deep watering every 2-3 weeks during summer is adequate. During cooler or wet weather, little or no water is needed. Once your vines have bloomed, it is important to water regularly. As fruit develops, erratic watering can lead to water-stress and cracked fruit. Feeding grape vines If grapes are being grown in rich soil, nothing needs to be added. Too many nutrients can reduce or eliminate fruit production. Remember, in the plant world, it’s all about reproduction. Grapes are the reproductive part of the vine. If the plant doesn’t feel the need to reproduce, it won’t. Assuming your soil isn’t perfectly rich, nitrogen and potassium can be added before berry set. (‘Berry set’ is when the grapes are 1/4” in diameter.) Zinc should only be added before the vines bloom. The only way to know if these additives are needed is to have your soil tested by a reputable lab. Harvesting grapes To reduce the chance of pest problems, harvest grapes as soon as they taste ripe. Unripe grapes will not ripen off the vine. Grape clusters should be cut, not pulled, from the vine, and then cooled after being harvested. Do not rinse grapes off before storing them. Do that just before eating. Pests & diseases of grapes Spider mites, aphids, mealybugs, cutworms, thrips, click beetles, leafhoppers, branch and twig borers, and ants can infest grape vines. Diseases such as Eutypa Dieback and Pierce’s Disease can infect grape vines, and powdery mildew is a common problem. Birds and rodents can also wreck havoc on your harvest. Monitor grape vines regularly for these pests and diseases to ensure timely control. Contact your local County Extension office for information specific to your region. While grape vines take some time to become productive, an established grape vine can produce fruit for 50-100 years! Only one or two vines are needed to provide a family with an abundance of grapes. Get yours started today! |
Welcome!You can grow a surprising amount of food in your own yard. Ask me how! To help The Daily Garden grow, you may see affiliate ads sprouting up in various places.
You can also get my book, Stop Wasting Your Yard!  Index
All
Archives
July 2024
|


 RSS Feed