|
There’s always a certain measure of chaos in a garden, but chaos gardening has a purpose. Seeds don’t last forever. And few of us get around to using them all. While you can host a fun seed swap, you can also use those seeds to create a chaos garden. Like books sitting on a shelf, seeds left in a packet do no one any good. 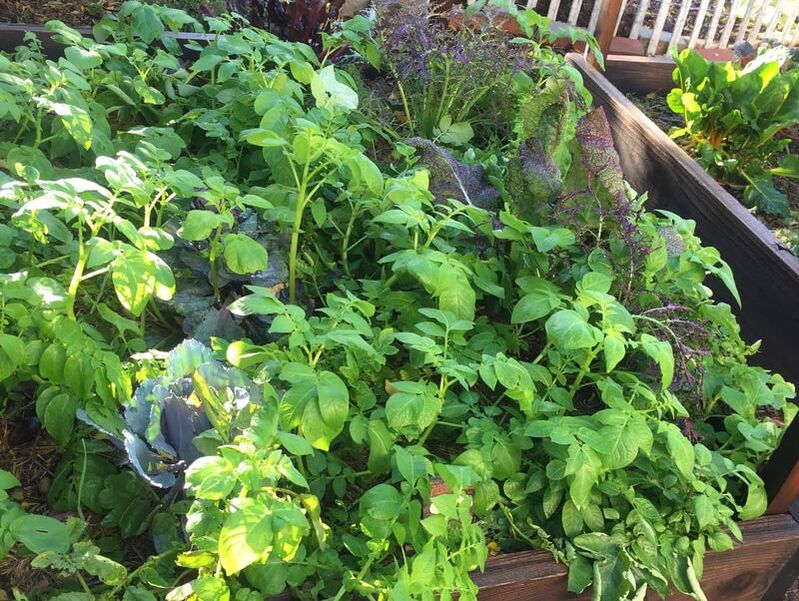 Beans, cabbages, chard, mustard and tomatoes grow well together (Kate Russell) Monoculture v. mixed plantings In Nature, monoculture rarely exists and never lasts. Pests and disease can quickly take hold, potentially wiping out everything. [Can you say Potato Famine?] Plants grow best when surrounded by other plant species. Meadows are healthier than lawns. Companion planting (in its true sense) is more productive than monoculture. Research has demonstrated that mixed plantings reduce the need for crop rotation, fertilizer, irrigation, pesticides, and added pollinators. And that means a lot less work for you. Chaos garden design takes advantage of this research by throwing every leftover seed you have into the mix. Instead of every plant grabbing for the same nutrients, a mixture of plant species grows at differing rates, using different nutrients at different times, reducing the strain of competition for all of them. This tight mix of plants chokes out weeds. It also attracts a variety of pollinators and other beneficial insects. This increasing biodiversity boosts pollination rates and creates bigger harvests. 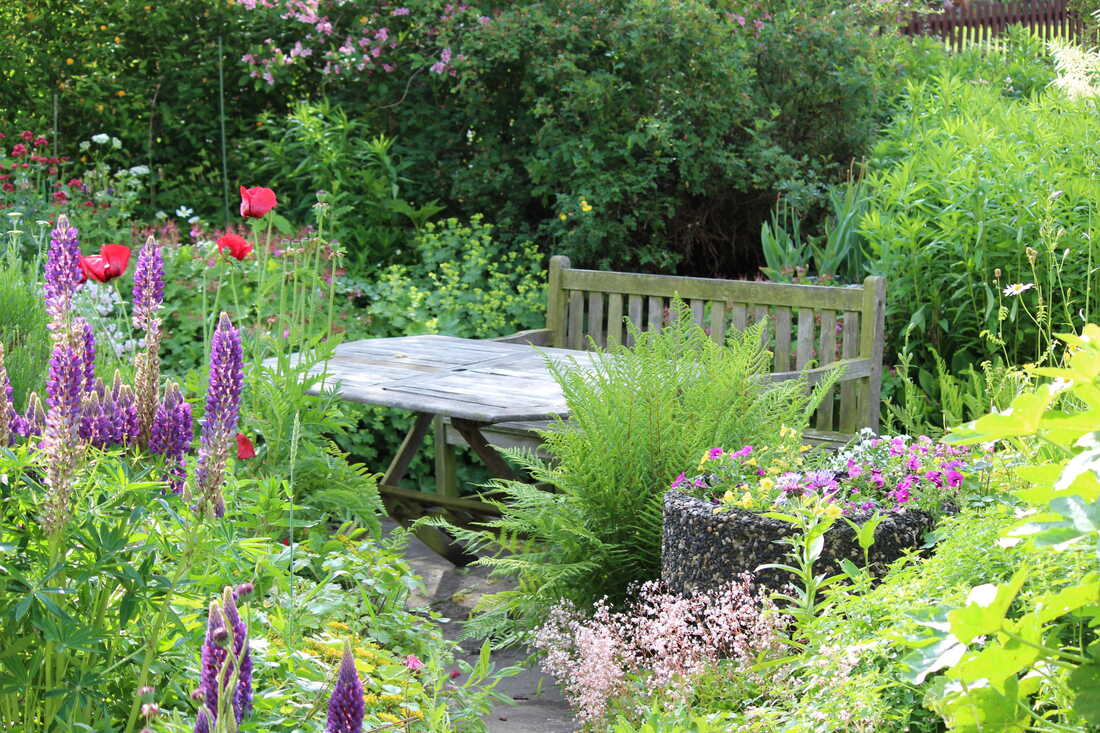 Mixed planting of ferns, flowers, and vegetables (PxFuel) Public Domain You can use a bare patch of ground, raised bed, a sidewalk strip, an old kiddie pool, or a window box for your chaos garden. Keyhole garden spaces work well, too. How to plant a chaos garden Unlike most vegetable gardens, which require planning, rows, and lots of preparation, a chaos garden lets Nature take its course and do most of the work for you. The process is simple:
At this point, you can decide whether to water your chaos garden or not. You can fertilize it or not. It is up to you. 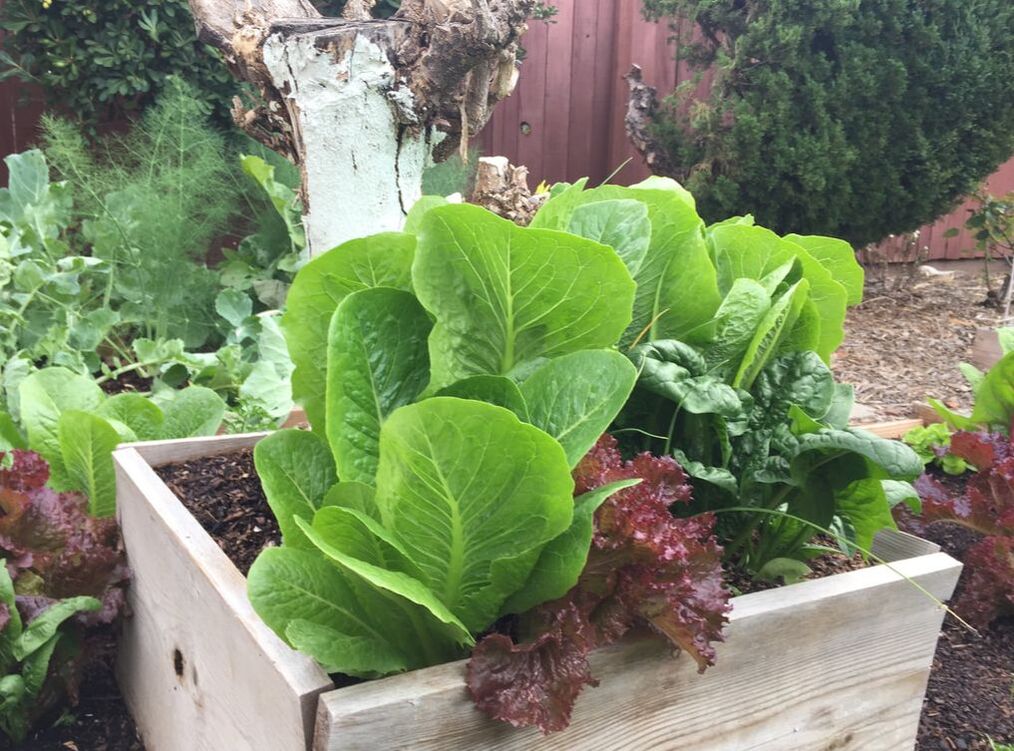 Mixed salad planting (Kate Russell) The downside of chaos gardening
Plants growing close together in a riot of leaves and stems can set the stage for fungal diseases such as blights, rots, and spots, so avoid overhead watering. It can also hide pest infestations. Simply throwing a bunch of seeds into a space does not mean your chaos garden is completely maintenance-free. You should still monitor your chaos garden for signs of pests and diseases. Chaos gardening is a great way to eliminate the waste of unused seeds. And you might be pleasantly surprised when you see how well they grow. Imagine your landscape in tune with natural cycles and rhythms, filled with a balance of plants, animals, and other organisms that allow it to thrive with little help on your part. Regenerative gardening can make that dream come true. 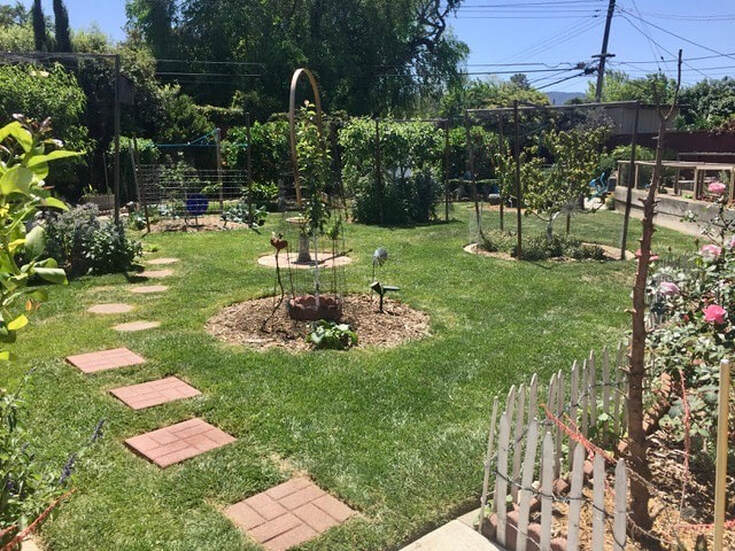 Paths protect plants and soil (Kate Russell) Regenerative gardening and biodiversity You can plant rows of hybrids and install invasive box store specials. Or, you can create an environment that supports biodiversity, reduces pests and diseases, increases pollination rates, sequesters carbon, and creates a nurturing space in your backyard. You can make regenerative gardening a part of your landscape with these simple tasks. Attract birds While some birds, such as jays, will damage your tomato and fruit crops, many others, including chickadees, phoebes, and wrens, will take a big bite out of your insect population. Compost Composting your kitchen and garden waste adds plant nutrients, improves soil structure, and feeds helpful soil microorganisms, and composting is free. Cut the chemicals Natural cycles keep pests and diseases in check. Chemical herbicides, fungicides, and pesticides interrupt those natural cycles, while most organic gardening products do not. Integrated pest management (IPM) can help you win those battles without nuking your yard. 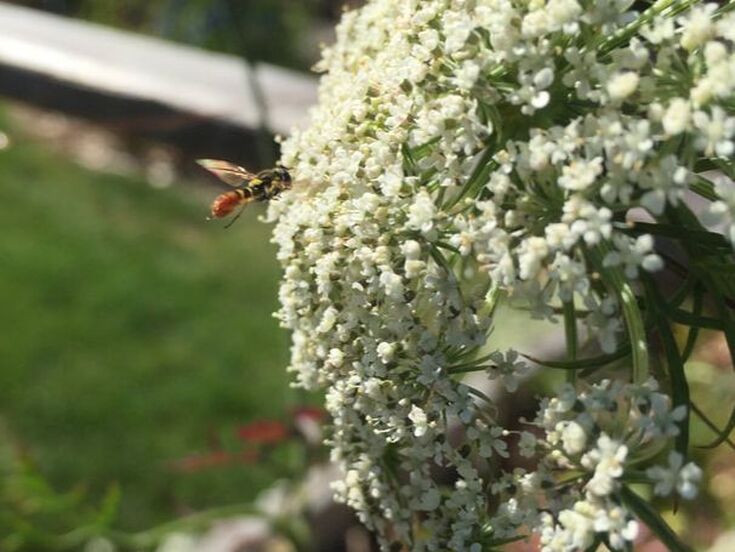 Hoverfly on carrot flower (Kate Russell) Go green During the dormant season, plant cover crops and green manures to feed beneficial soil bacteria, reduce erosion, and minimize weeds. Clovers, blackeyed peas, and other legumes make excellent cover crops as they add nitrogen to the surrounding soil. And sturdy fava bean roots make short work of compacted soil. Herbs and flowers Diversify your landscape by adding herbs and flowers. Intersperse your ornamental plants and edible crops with flowers of various colors, sizes, and shapes. Dill, marigolds, rosemary, sweet alyssum, thyme, and other herbs and flowers attract beneficial insects, such as honey bees and hoverflies. These garden helpers reduce the number of pests in your garden while increasing your harvest. And fresh herbs are always good to have on hand!  Red and green lettuce growing among the roses (Kate Russell) Mulch
A thick layer of clean mulch stabilizes soil temperatures, retains moisture, reduces weeds, and improves soil structure. You can often get mulch for free from local tree trimmers. Just be sure to keep it away from tree trunks. Nab those natives Native plants already know how to live successfully in your region. Adding them to your landscape provides food for beneficial insects and reduces your workload. Paths for peds Walking on the soil compacts it, making life more difficult for delicate plant roots. A simple path can protect plants, microorganisms, earthworms, and other aspects of your regenerated garden. Rest Digging the soil damages the fungal networks that feed our plants. After harvesting, let an area go fallow for a season to rest and recover. And replace that lawn with a self-sustaining meadow. Take the test You need to know what is in your soil before adding anything. Over-fertilizing is expensive, destructive, and hard to correct. An inexpensive soil test tells you exactly what is in your soil, what is needed, and what has reached toxic levels. Just Google “soil test” to find a lab near you, or use the University of Massachusetts soil test lab. Sadly, those pretty plastic tubes you see in garden centers are not (yet) accurate enough to be helpful. We cannot fix everything overnight, but we can all take small steps that move us in the right direction. Regenerative gardening is one of those steps. Walking a garden path has long been known to soothe the soul. Today, we are exploring that idea in more depth. Can a garden be designed with healing in mind? I think so.  Healing Garden at AdventHealth Celebration CC BY-SA 3.0 We’ve already looked at several garden designs and themes. We’ve learned about scent gardens, sensory gardens, and tranquil gardens. Each of these can help us deal with emotional hurt and trauma. But how do they help us? How can we create a garden space that helps us deal with life’s difficulties? Let’s find out. How gardens help us heal Traumatic events can take many forms. Assault, betrayal, death, illness, and the mind-numbing exhaustion that comes from dealing with a global pandemic all have one thing in common: they create a sense of helplessness. According to trauma expert Robert Stolorow, trauma creates a “dreadful sense of estrangement and isolation” that leaves us feeling disconnected and out of control.  Dark path (Tama66) Pixabay Gardening helps us deal with that sense of helplessness because we have some level of control. There is little risk. Like a beloved pet, our garden plants accept us exactly as we are, without judgment. They don’t hurt us. Gardens offer the possibility of a better future, even if that future is nothing more than a germinating seed. 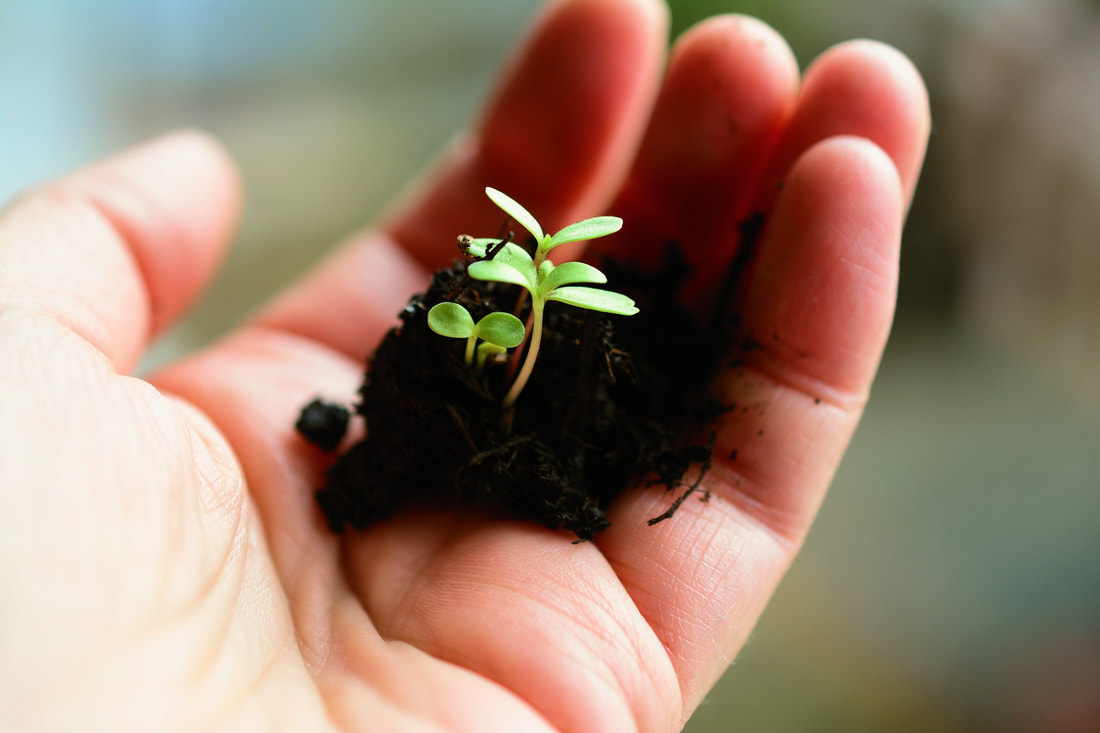 Seedlings in hand (Conger Design) Pixabay Spending time in a garden brings us back in touch with natural cycles. No matter what we have gone through, spring bulbs bloom, summer squash grows, and the seasons advance as they always do. This helps ease our natural fight/flight/freeze response. The sights, smells, textures, and sounds of a garden reassure us on a lizard-brain level. The act of gardening resets us physically. Bending, pulling, breathing, reaching—blood flows to our brains, our muscles, helping us think more clearly and sleep more deeply. We are more in the moment when gardening. Time passes unnoticed. We are in the zone, in a flow state, fully engaged in the right now, experiencing ourselves doing something positive instead of experiencing pain and loss. And these claims are not just my opinion. Recent research has demonstrated that gardening has powerful therapeutic effects. Known in the psychology world as horticulture therapy, caring for plants reconnects us with ourselves, our communities, and nature. It is believed that planting seeds and caring for plants parallels our healing. There is even a professional association dedicated to this type of therapy. According to the American Horticultural Therapy Association, “horticultural therapy helps improve memory, cognitive abilities, task initiation, language skills, and socialization. In physical rehabilitation, horticultural therapy can help strengthen muscles and improve coordination, balance, and endurance. In vocational horticultural therapy settings, people learn to work independently, problem solve, and follow directions.” Horticultural therapy is frequently used in prisons, mental hospitals, rehabilitation facilities and retirement homes to improve healing and recovery. Building a healing garden You may have nothing more than a window sill or balcony, like me. You may have a huge yard. Odds are, you’re probably somewhere in between. Whatever your starting point, how can you create a space that will help you through difficult times? First, any act of gardening will be a step in the right direction. Second, there is no Right Answer when designing a garden to help you heal emotionally. Whatever helps you is the best design. My healing garden design This post was inspired by a garden design that popped into my head while writing my gardening as therapy post. Let me share it with you, if I may. Imagine standing on the edge of a space in a rage, distraught and exhausted. Ready to lash out or give up, your feelings are mirrored by the plants closest to you: sharp thorns, ominous colors, looming trees, darkly shaded nooks and crannies. And a hard, rigid path. A few steps down that path, things begin to change. It's a little brighter, the colors are somewhat softer, and you hear a gentle rustle. The path becomes less rigid, and it beckons. 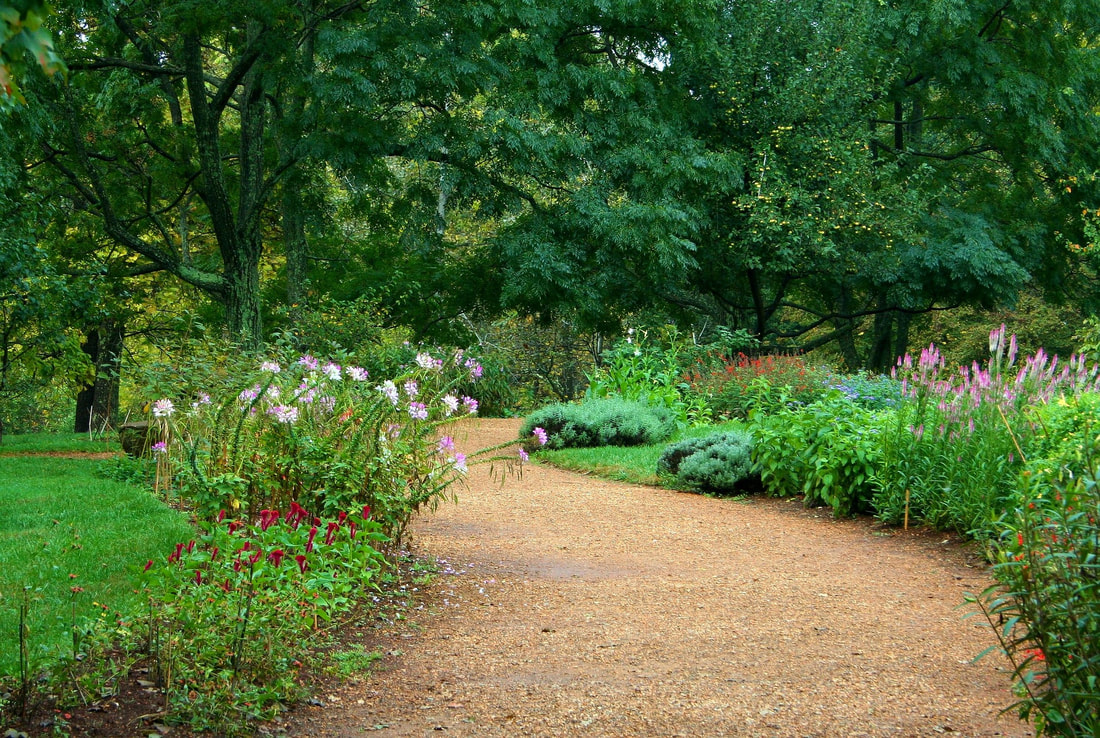 Garden path (James DeMers) Pixabay The crunch of gravel under your feet is echoed by a gentle wind chime. A few shade-loving flowers brighten the way. A sweet aroma is carried on the breeze. A soft leaf brushes your hand, and you come around a bend. The path is now soft and mossy. The view in front of you is a small woodland clearing with a patch of blue sky overhead. A bench invites you to set a spell. Birds flutter and splash in a nearby birdbath. Cascading flowers and fragrant herbs remind you that life isn’t always bad. 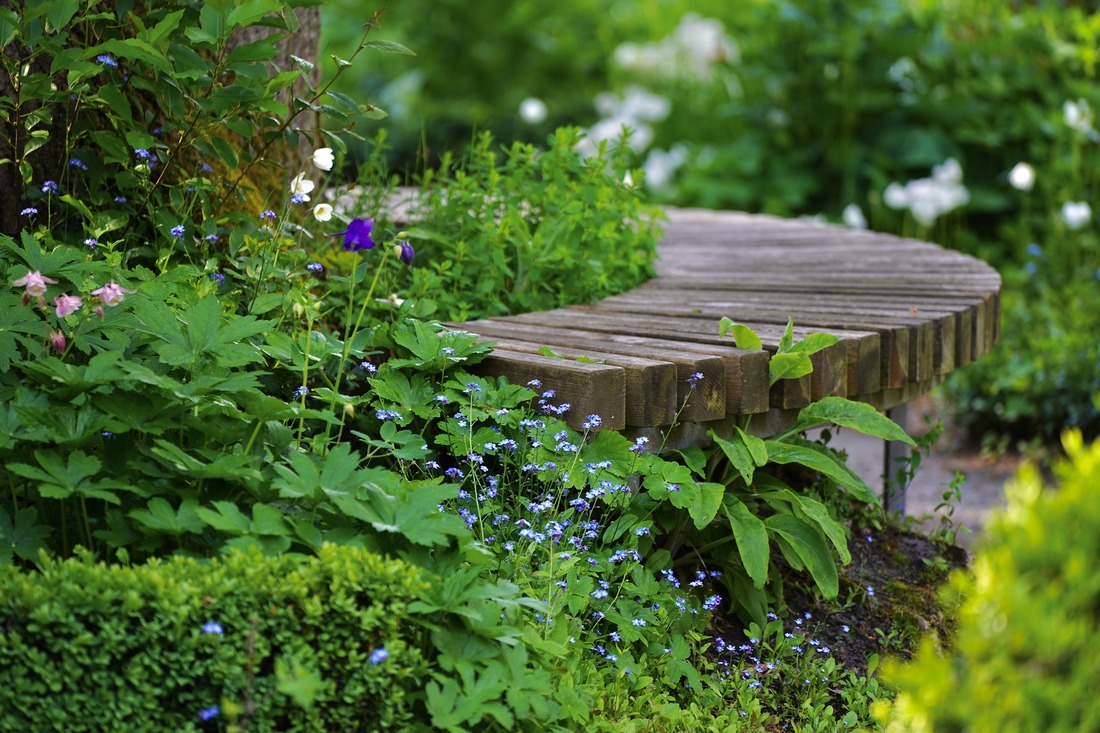 Garden bench (Mammiya) Pixabay Don’t you feel better? I know I do.
I just learned about something you may be able to implement in your landscape called food foresting. It ends up I was doing my own version of forest gardening when I lived in California. More on that in a minute. Also known as forest gardening, this low-maintenance, highly sustainable method taps into the natural cycles of forest growth to produce fruit and nut trees, as well as edible herbs, perennial vegetables, shrubs, and vines. It is currently considered the most resilient agroecosystem, and you may be able to put it to work for you.  Comparison between natural and farming systems (Martin Crawford, et al.) CC BY-SA 3.0 We all know that forests are critical to planetary and human health. According to the U.S. Department of Agriculture, “one large tree can provide a day’s supply of oxygen for up to four people.” They also provide renewable materials, cushion climate change, sequester carbon, and support biodiversity. They’re pretty nice to walk through, too. And forest gardening may solve problems associated with modern agriculture and provide bigger harvests from your landscape. Food forest ecosystems We all know that forests are dominated by trees. In the shade of those trees, other plants grow. Many of these plants are not edible, but they can be replaced with edible plants. There are different types of forests (boreal, temperate, tropical, and others), but we will skip that for now. Trees provide shelter for birds and other critters. They also provide food for other plants, herbivores, and soil-dwelling organisms. When trees die, they fall. This mulches the ground below and creates openings in the canopy. Those openings allow young saplings to grow. The nutrient cycling and intercropping support of forest plants make them sustainable. Forest gardening taps into that cycle with perennial herbs, shrubs, trees, vegetables, and vines. Did you know the majority of a forest’s biomass is underground, in the form of roots? I didn’t either. The history of forest gardening From the 1500s through the 1700s, Genoan landowners were required to plant four trees each year: olive, fig, mulberry, and chestnut. As a result, that area has rich, productive forests and farmland. [Imagine how productive your yard could be if you plant 4 food-producing trees each year!] But food forests go back much further than that. I was surprised to learn that forest gardening has been around since ancient times. Prehistoric humans living in tropical regions used it to supplement the naturally occurring food they would glean from the jungle. They did this by protecting and nurturing favored plants growing close to their settlements while eliminating the undesirables. Some of those cultivated areas are still in use today. These mostly annual plantings are more similar to modern agriculture than one might expect. In a far colder region, First Nation villages of Alaska have also used food forests to stabilize their food supply. They added non-native berries, herbs, and stone fruits to forest edges and next to existing trees in an early example of intercropping, or companion planting. The indigenous people of the Pacific Northwest clear areas of forest to grow medicinal herbs, Pacific crabapple, rice roots, soapberry, wild cherry, and wild ginger. Unlike the annual growing cycles used by their jungle-bound cousins, these gardeners collected perennial plants and cared for them over many years. They used controlled burns, coppicing, fertilizing, and pruning to increase their harvests. In the 1980s, Robert Hart used these principles and adapted them to temperate regions. Since forest floors do not get much direct sunlight, Mr. Hart focused on shade-tolerant plants. Since many of the plants used in forest gardens are perennial, forest gardening has close ties to permaculture.  The seven layers of a forest garden (Quercusrobur) CC BY-SA 3.0 Plants suited to food forests
Food forests have layers, just like other forests. Each layer is suitable for a specific type of edible plant. Look at the various layers of your yard. Does it already have a canopy? How and where can you add fruit and nut trees? Just be sure to keep their mature sizes in mind. Once you have trees in place (literally or on paper), consider the understory. There are a surprising number of herbs, shrubs, and vines that you can integrate into your backyard food forest. Here is a list of the layers and examples of good plant choices for food forests:
Back to my California yard When we bought a house in California, there was already apple, apricot, nectarine, and orange trees. Nothing else was particularly edible. By the time we moved 11 years later, my prim suburban backyard had been transformed with a shopping list of edible plants. Here’s a partial list: almond, artichoke, arugula, basil, beans, carrots, chives, cilantro, dill, eggplant, fennel, garlic, groundcherries, kale, lettuce…I could go on, but you get the idea. Imagine my surprise when I learned that I now live only 10 minutes away from the U.S.’s largest food forest, Beacon Food Forest. Do you have a food forest near you? Maybe I'll create a balcony plantation. Creating a sun map of your yard may surprise you. And your plants will thank you.
Sun-loving tomatoes will never produce abundant fruit if they don’t get enough sunlight, while tender lettuces may bolt before producing much in the way of salad greens if they get too much sunlight. Without enough sunlight, plants die. Without the right type of sunlight, plants fail to thrive. Just as a soil map can help you take better care of your plants, creating a sun map of your yard will help you see where different types of sun exposure occur at different times of the year. This will help you place plants where they can grow and thrive. How to make a sun map Making a sun map of your yard is not hard, but it does take some time - a full year, in fact. That’s because the angle of the sun changes from season to season and you will need information from each season to make an accurate sun map. The easiest way to create a sun map is to start by taking photos in the morning, midday, afternoon, and early evening in each of the four seasons. To make this job easy to remember, you might want to set aside the spring and autumn equinoxes and the summer and winter solstices for this task. If you aren’t that motivated, you can do it in spring and summer. Select viewpoints that give you the widest perspective on your property. You might want to position a lawn chair, plant stake, or other marker at each of your shooting spots so that they remain consistent, but this isn’t necessary. The important thing is to get out there and take the photos. To put those photos to work, you can use graphics layering software (beyond me), you can draw a sketch of your property, or use a printed Google Maps screenshot of a terrain view of your property. I start with the terrain view and then trace the image. These images are very handy, I keep copies in my file cabinet. The next step is to decide on a key for each type of sun exposure.
Sun exposure Morning sunlight and afternoon sunlight are different. Sunlight in summer and winter are different, too. Sun exposure is classified this way:
These terms do not give you a ton of information, but they give you enough to make better decisions about where you grow your plants. Your key will use different symbols to indicate different types of sun exposure. For example, your key may use dots for full sun, dashes for partial sun, slashes for partial shade, and tiny triangles for full shade. Take your property map and your photos and pencil in the different sun exposures, using your key. For more helpful information, use different colored pencils for each season. This will help you see how things change over the course of the year. Or, you may prefer creating a different sun map for each season and saving the colored pencils for the different sun exposures. How you do it doesn't matter. That you do it does matter.
Why map the sun? The most important benefit of a sun map is that it helps you position plants, raised beds, and structures, such as garden sheds, properly in the first place. If everything is already in place, a sun map will help you select the best locations for annual plants. A sun map can also help you figure out why fungal diseases may keep occurring in certain areas. Locating plants prone to fungal disease in areas where they will receive morning’s first light will help dry leaves as quickly as possible. And if your summers are like mine, you can reduce the afternoon scorch by locating plants where they will receive some protection in the afternoon.
Sunlight calculators
Retailers are happy to sell you a physical sunlight calculator and apps for your phone, but these are not useful. You can see for yourself if an area is shaded or not. Much like OTC soil tests, the information these products provide is not detailed enough to actually mean anything. It is all too easy to forget about the effect of seasons on sun exposure. As neighboring trees leaf out or drop their leaves, nearby plants can find themselves in a completely new environment in a short period of time. Creating a sun map may also give you a better view on how your plant population changes over the seasons. It's pretty amazing stuff! I have been asked several times what I would plant in a survival garden, so here it is. Assuming you are talking about a total social breakdown situation and not a Robinson Crusoe deserted island situation, a survival garden (like any other garden) has to be designed around your soil, microclimate, and personal tastes. On a deserted island, you would probably have to focus on fish and coconuts. In a social breakdown survival situation, you would probably want to focus on high nutrient foods that are easy to store. And you would need access to water or none of this will matter.  Variety of drying beans (Kate Russell) Major crops High nutrient, easy to store foods include legumes, such as beans, peas, peanuts, and lentils. These plants have the advantage of being able to fix atmospheric nitrogen into a form plants can use and they can be dried for long term storage. Other good choices for a survival garden include members of the squash family, especially winter squashes, such as easy to store butternut squash and pumpkins. 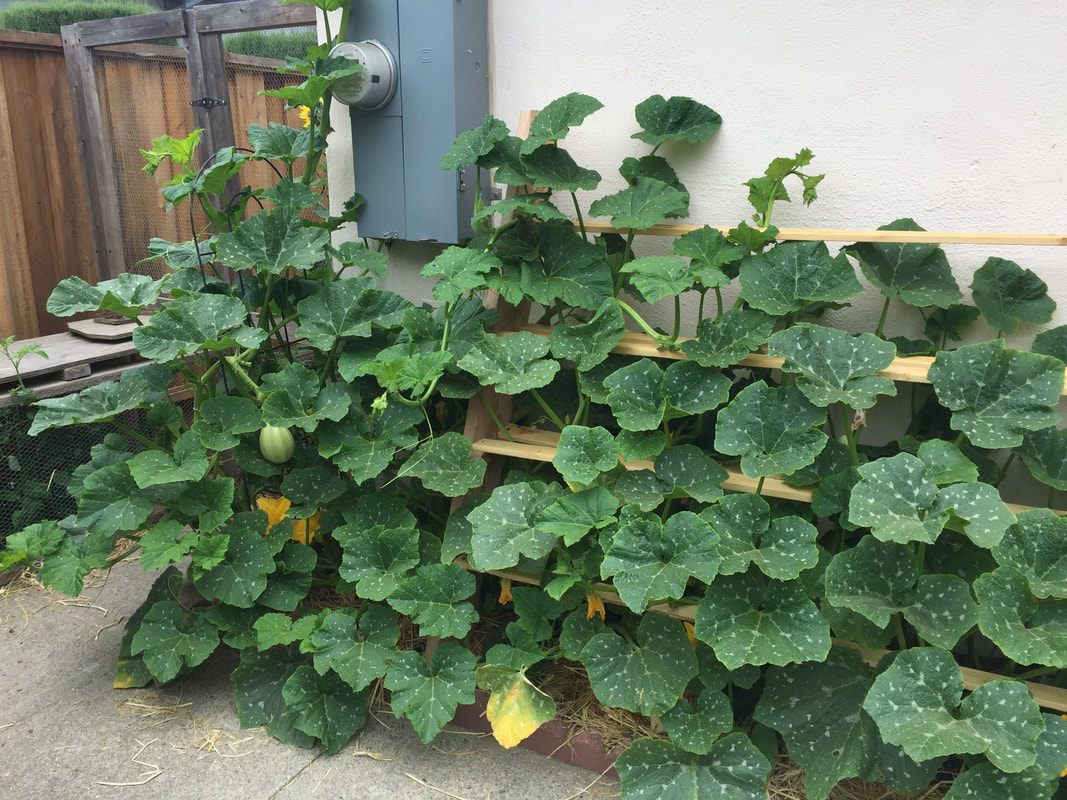 Pumpkins (Kate Russell) 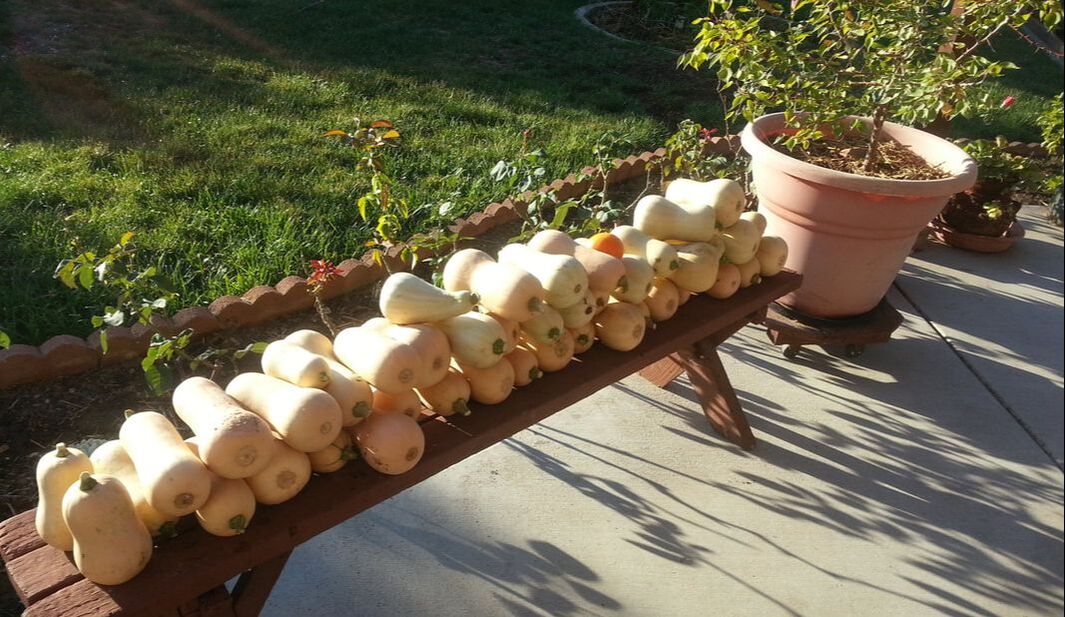 Butternut squash harvest and containerized lemon tree (Kate Russell) Beets, carrots, fennel, onions, parsnips, potatoes, sweet potatoes and other root vegetables are also good choices for a survival garden. 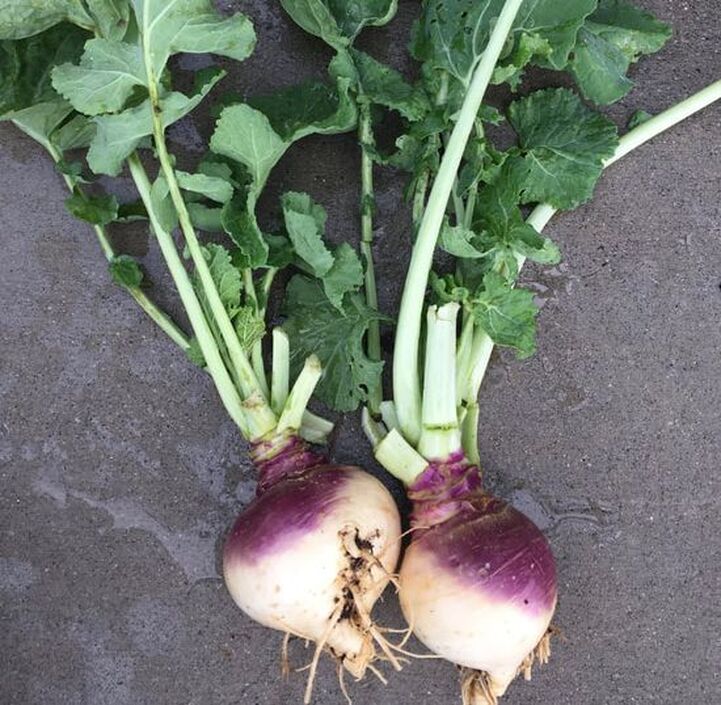 Rutabagas (Kate Russell) Perennials, such as fruit and nut trees, grapes, and raspberry and blackberry canes, take longer to become productive, but they can be game changers in the long run. Other perennials to consider include asparagus and rhubarb. Cereals, such as millet, wheat, rye, and oats, might have a place in your survival garden, as well. You can also grow many common annual (or grown as annual) edible plants, such as tomatoes, peppers, lettuces, chard, garlic, spinach, sunflowers, and kale. As you harvest these crops, always leave some behind, to go to seed naturally. This allows seeds to fall where they will. Very often, these seeds will grow where they are best suited without any effort on your part. Herbs and teas Your food will taste better with the addition of these perennial and/or self-seeding herbs and other flavorings: chives, cilantro/coriander, dill, ginger, horseradish, lemongrass, oregano, parsley, rosemary, sage, summer savory, tarragon, thyme, and turmeric. Some of these aromatic plants also help keep away common garden pests. Even tender basil can be grown and allowed to go to seed. Teas will be the hot beverage of choice in a survival situation, so you will want to add chamomile, licorice, and mint to the mix. You could also use leaves from your raspberry and blackberry plants. Since medicine is beyond my skill set, you would have to talk with someone else about medicinal plants. Making a survival plan Living in earthquake country, my family has a collection of supplies, just in case. A survival garden takes that possibility to an entirely different level. If you believe that a survival situation is possible, it is a good idea to get started right away, to give everything time to get established. Before you can plant any seeds, however, you need to take your soil, local climate, and sun exposure into consideration. Your soil should be tested by a reputable lab first. Many universities offer this inexpensive and valuable service. A soil test will tell you what nutrients are present in your soil, what is needed, and what is in excess. It will also tell you the pH of your soil. Armed with this valuable information, you can amend your soil in ways that will help, rather than hinder your plants. Note: too much of a good thing can be a bad thing.  Apples (Kate Russell) Location Your location will dictate which plants you can grow. Identify your Hardiness Zone. You will also need to determine how much sun each area of your garden gets. Most fruits and vegetables need a full day of sun. Anything less than that and you will have to choose plants based on the available sunlight. Finally, if you decide to plant fruit and nut trees, you will need to determine the number of chilling hours your property gets each winter to ensure you select varieties that will actually produce food. Depending on where you live, almond, apple, citrus, fig, and walnut trees can produce a lot of food that is easy to store. Again, you have to select plants that will grow well where you are. 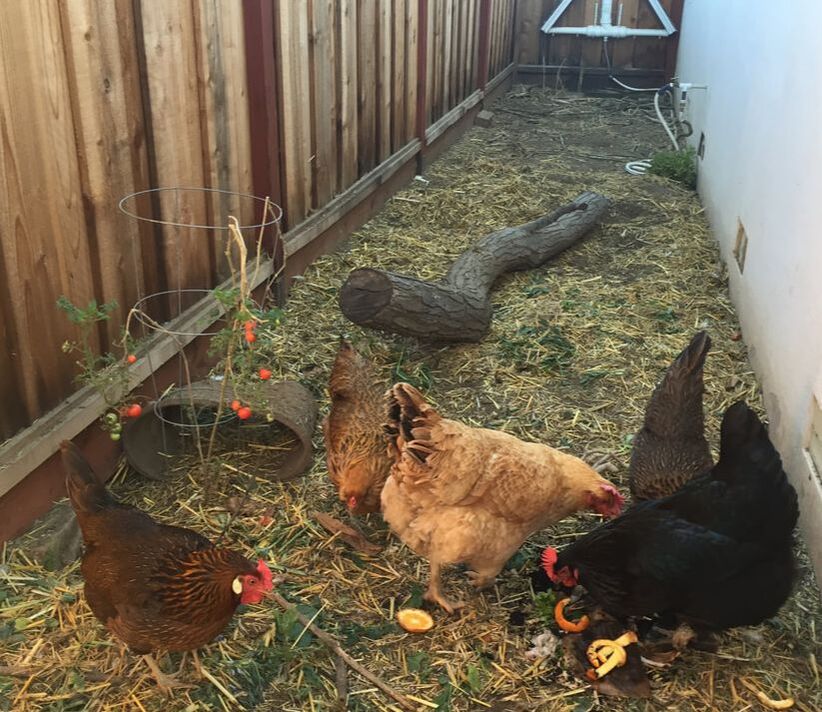 Chickens (Kate Russell) Other considerations for a survival situation include chickens and bees. Horses, sheep, goats, and pigs might also come into play. You should also put some thought into how you will protect these important assets in difficult times. Let’s hope it never comes to this. Unless it does, let’s just call all this farming. 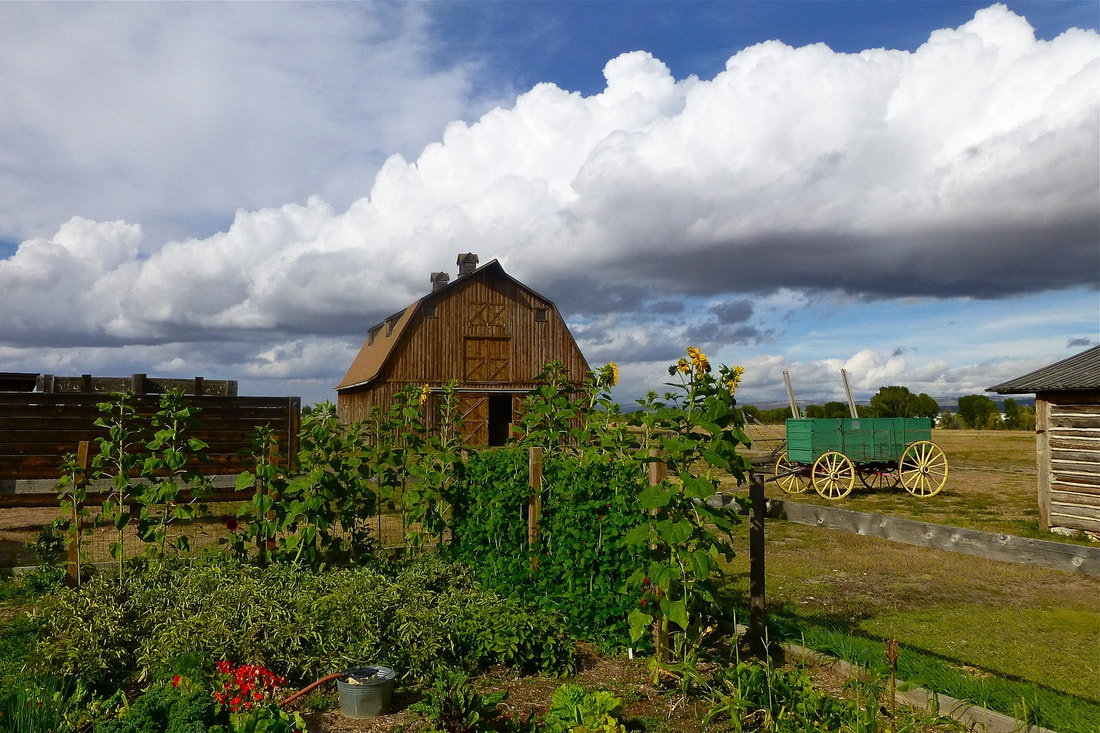 Farm (Mary lee Morgan) Pixabay Check out GreenUpside's article on the best vegetables to grow, featuring yours truly!
If you have a peaked roof, roof gardens may not be not for you. But what about garden plants on your shed, chicken coop, or other flat-topped structure?  Roof garden of Rockefeller Center in Manhattan (Jwilly77) CC BY-SA 3.0 We are not going to get into the details of how to install a roof garden here because that would mean talking about moisture barriers, structural integrity, and a bunch of other topics beyond my skill set or interest level. You can check out this article for more of that information. Instead of learning all the technical stuff needed to safely build a large-scale roof garden, we are simply going to explore roof gardens and learn a little about what they have to offer. Before we get started, we need to clarify the difference between green roofs and roof gardens. Roof gardens incorporate container plantings, seating areas, and outdoor living space, while green roofs are living blankets of plants installed primarily to improve insulation. Sod roofs are a type of green roof. .JPG) Traditional sod roofs (Erik Christensen) CC BY-SA 3.0
 Salad garden on roof of Palais de Tokyo, Paris (Jean-Pierre Dalbéra) CC BY 2.0 Roof gardens and rainwater In cities around the world, rain falls on buildings and concrete, collecting car exhaust, trash, dust, grime, and who knows what else. This polluted water is then carried to our lakes, steams, oceans, and aquifers. Not good. Roof gardens reduce that run-off by absorbing the water and using it to provide for plants.  Paris roof garden (cocoparisienne) Pixabay Roof gardens as habitat Let’s face it - city dwellers rarely have access to enough natural surroundings. Roof gardens can offset that lack. Wildlife benefits in similar ways. Roof gardens provide habitat for a wide variety of native birds, animals, and beneficial insects. A series of roof gardens can also create a corridor for migratory birds and insects  Monaco roof gardens (Elvira Groot) Pixabay Basic roof garden design If you are sold on the roof garden idea and want to move forward, here are things you need to consider:
Rooftop garden plant selection Rooting depth is particularly important when gardening on a roof. Check this list of plants and their minimum rooting depths to help you select the right plants for your roof garden:
Plants that can withstand a lot of wind and sun are also good choices. Succulents and most herbs certainly qualify. Remember, installing a roof garden can reduce summer energy costs by 25% to 80%. Plus you get fresh herbs and vegetables! 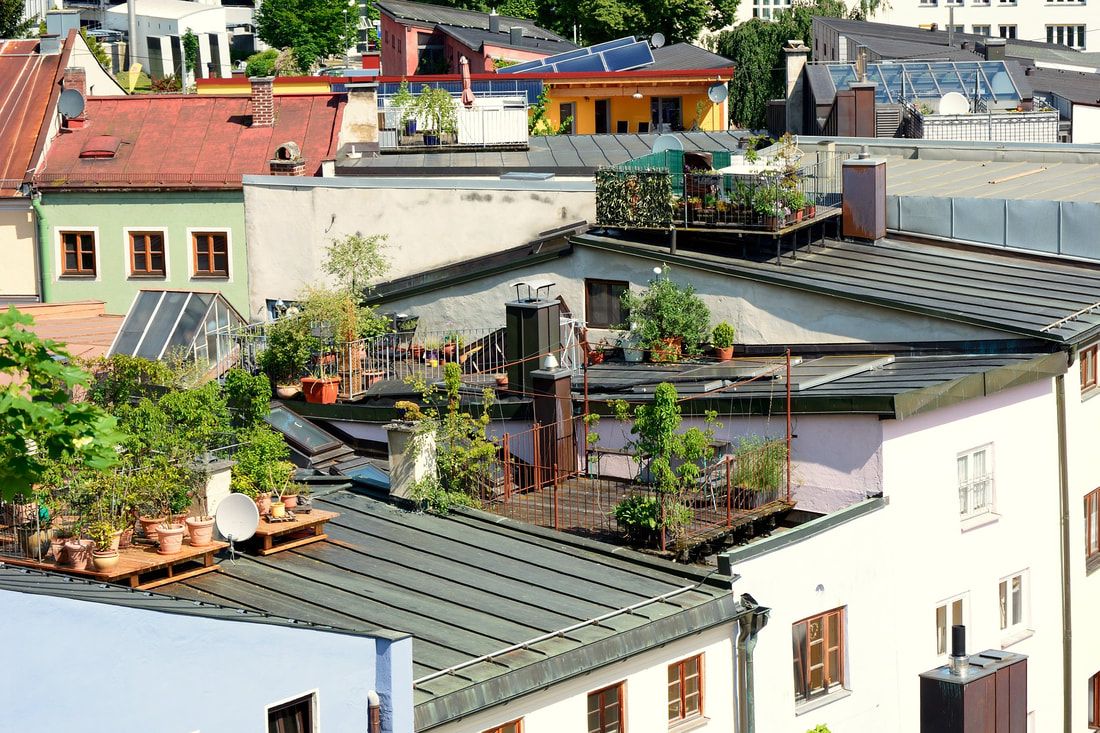 Rooftop kitchen garden (Manfred Antranias Zimmer) Pixabay Put aside images of a serene, manicured Japanese tea garden and imagine growing your own tea instead.  Tea press (Free-Photos) Pixabay There’s nothing like a hot cup of tea to put your mind at ease or boost your spirits and there’s no reason why you can’t grow some of your own. Tea is second only to water as the world’s most popular beverage. Unfortunately, commercially produced teas can contain pesticides, fungicides, and even heavy metals, such as mercury and arsenic. For me, that’s reason enough to start growing my own. Tea plants Traditionally, tea is made by pouring boiling water over the cured leaves of tea plants (Camellia sinensis). Tea plants can be grown outdoors in Zones 8 - 12, or indoors year round. Tea plants are evergreen shrubs native to East Asia. Tea plants can reach 6 feet in height and they have a deep taproot. Tea plants use a lot of water. Their native regions get 50” of water a year.  Women harvesting tea leaves in Darjeeling, India (Benoy) CC BY-SA 3.0 Tea leaves and terminal buds, known as flushes, are typically harvested while young. This is generally done by hand twice a year, up to every week or two, depending on the local climate. High quality teas are picked by hand. Leaves are then allowed to wilt before they are “disrupted” or “macerated”. This process bruises or tears the leaves to allow enzymes to start the oxidation process. Leaves may be rolled between a person’s hands, or crushed by machinery. Finally, the leaves are heated to halt oxidation. There’s more to it than that, but you get the idea. Herbal teas If you love tea, you know that you can also enjoy herbal teas. Herbal teas generally do not contain the caffeine found in regular tea. Many herbal tea plants are lovely to look at and they tend to be pretty resilient. Much of that resiliency is from the essential oils that gives these plants their flavor. Apparently, bugs and pathogens don’t enjoy them the way we do! There are several traditional plants to choose from for your tea garden: bergamot, German chamomile, lavender, lemon balm, and mint. But you might also want to consider blackcurrants, borage, coriander, dill, elderberries, giant hyssop, ginger, hibiscus, jasmine, lemongrass, lemon thyme, licorice, oregano, raspberry and blackberry leaves, rose hips, or rosemary. Most edible flowers and even dandelions can be used to make tea. [And homegrown tea makes lovely gifts!]  Cottage garden (congerdesign) Pixabay Tea garden design You can certainly intersperse your tea plants throughout your garden, grow them in containers on your patio or balcony, or you can create a lovely display dedicated to tea. You can build an elegant parterre, an artistic knot garden, a rustic cottage garden style, or something else entirely. Honestly, that’s one of the things I love most about gardening. You can try just about anything. It won’t always work, but you’re bound to learn something in the process. And you just might discover something amazing about your plants or yourself. Back to the tea. Harvesting and storing tea Fresh tea leaves or herbs should be cleaned of dust and bugs and then hung or laid out to dry, out of the sun. Placing leaves in an old pillowcase laid flat works well. Once they are completely dry, your tea leaves need to be kept away from light, moisture, air, and heat. Air-tight tins and storage jars kept in cabinets work well for storing tea and you can find a great selection at yard sales and thrift stores. How to make a proper pot of tea Being raised in an age of microwaves, take-out, and instant everything, few of us have actually learned how to make a proper pot of tea. Different varieties of tea need to be handled differently, but they all start with a kettle of boiling water. You want to use the water as soon as it starts to boil. Let it go too long and the water will taste flat. While you wait for your kettle to boil, prepare the tea leaves. Generally speaking, one heaping teaspoon per cup is recommended. You can put the leaves into a tea sock, an infuser, or use a tea ball. The trick is to make sure the tea leaves can expand. You can also put the leaves directly into your teapot, but you will want to warm your teapot with some of the boiling water first. This will help keep your tea warm.  Cup of tea with infuser (Couleur) Pixabay Some people prefer their tea strong and dark, while others, like my mother, simply wave a teabag at the hot water. Both are fine. The idea is to soak, or steep, the leaves in the hot water long enough to extract the flavor you prefer. Traditionally, steeping times vary by tea type:
Once the preferred taste has been attained, remove the leaves. If the leaves stay in the water for too long, your tea can taste bitter. Wrap your teapot in a cozy to keep it warm and enjoy! Which plants would you like to include in your tea garden? Your garden can be a bright, cheery, busy place, or it can provide the tranquility, rest, and refuge you need after a stressful day.  Tranquil landscape (Kate Russell) Just as color schemes, lighting, furniture placement, and window treatments all play significant roles in creating an interior refuge, the view outside those windows has a double impact. Whether you are looking at your garden through a window or as you walk through it, a chaotic garden can be anything but tranquil. These tips will help you transform your garden into a tranquil refuge, with minimal effort. 1. Keep it simple Clutter in the garden only adds to your already busy schedule by reminding you of jobs that need doing. Clearing away yard debris is more conducive to rest and relaxation. If you have plants that are not thriving, or that do not add joy to the space, get rid of them. The same is true of outdoor furniture. If it is junk, throw it away. If it is still useable, donate it to charity or hold a yard sale. Use decorations that are simple and pleasant. Leave fences and lawns clean and empty of distractions. 2. Live in the color of calm Reds and yellows are great colors, but they will not help you to relax. Far more calming are blues and earth tones. Design your landscape around blue flowers and various shades of greens and browns, for a beautifully relaxing view. 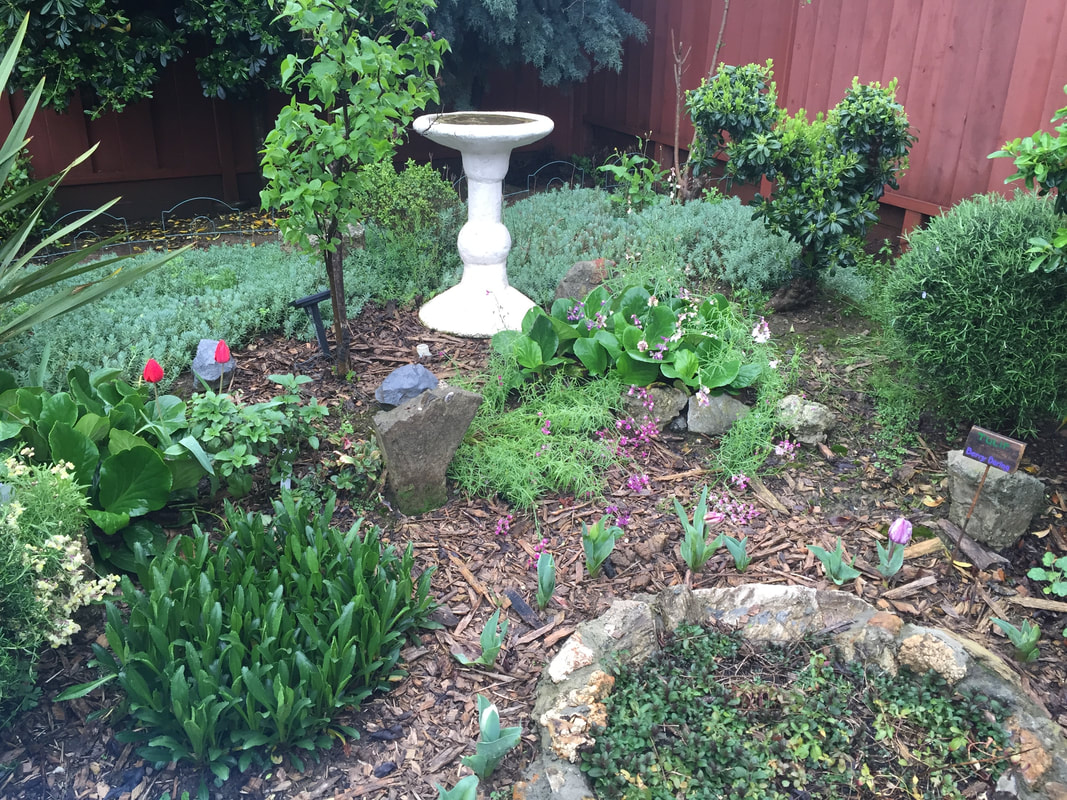 Birdbath, bulbs and perennials (Kate Russell) 3. Just add water The sound of running water has a profound effect on mood. Fountains, waterfalls, even the sound of a bird bathing in a birdbath are sounds that bring us back to nature in the way a campfire does, but without the mess or risks. Water features like these also provide for equally stressed birds, reptiles, and amphibians. Taking the time to watch these creatures in your garden or landscape is sure to improve your mood.
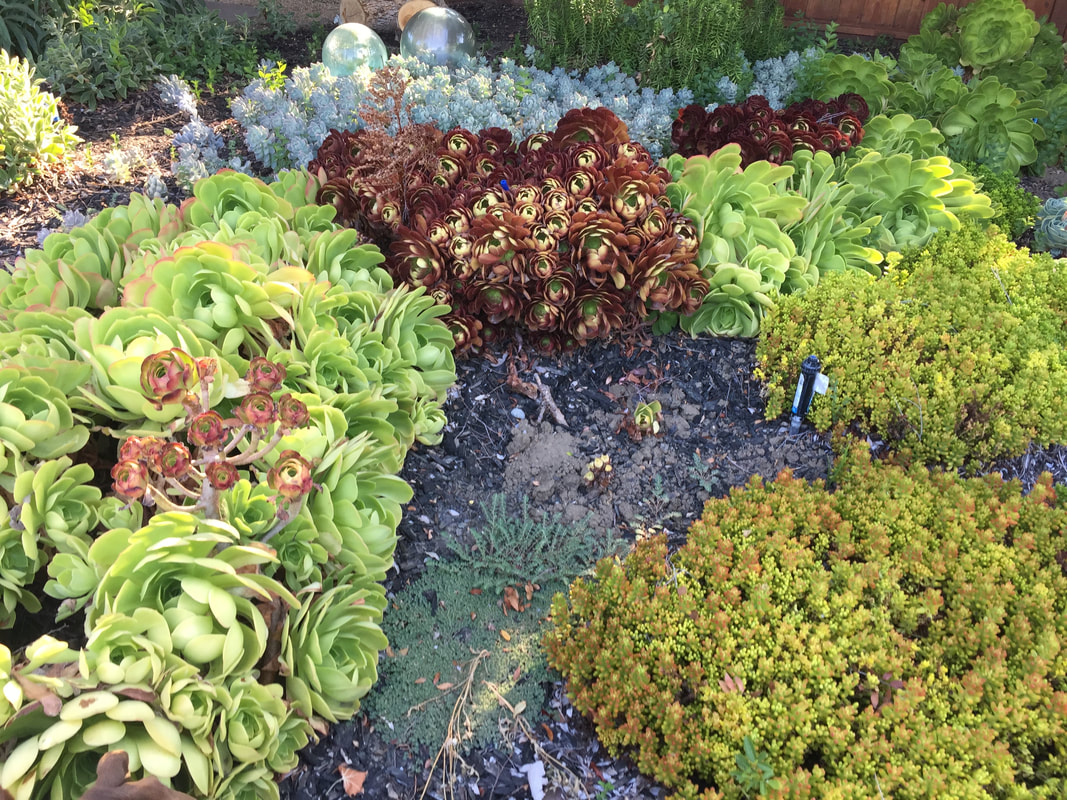 Maintenance-free succulents make gardening easy (Kate Russell) 7. Gentle sounds The sounds of traffic, machinery, and neighbors can destroy the tranquility of your refuge in a matter of moments. You can reduce the impact of these intrusions by planting trees and shrubs around your property line to block the noise. Good fencing can also block sound while adding privacy and security. 8. Create an herb garden Edible herbs require only minimal care and most of them are perennial plants that come back every year. Besides adding flavor to your meals, fresh herbs such as thyme, oregano, and rosemary, add color and fragrance to your garden, while helping deter many common pests. 9. Delightful lighting The way you illuminate your yard can impact the way you feel. Garish lamps and brilliant spotlights will not help you relax. Instead, design for relaxation in the garden by using gentle, soft-colored solar lights along paths, around garden beds, and in seating areas.  Natural colors and materials make a garden more tranquil (Kate Russell) 10. Make the time to enjoy it
One of the biggest problems faced today is our unwillingness to simply make time to relax. Busy schedules, television and social media, obligations to family and friends whittle away at our spare moments until there aren’t any. Schedule some time for yourself to enjoy your garden, without chores and to-do lists. Simply stop and smell those roses. You’ve earned it. Victory gardens were planted during WWI and WWII to reduce demand during war time. Today, we are fighting against physical inactivity, environmental harm, and tasteless fruits and vegetables. Growing a victory garden in your yard can create a win-win-win situation.  American WWII-era poster promoting victory gardens (Morley) Public Domain What are we fighting for? Historically, victory gardens were encouraged to make up for the fact that many farm and agricultural workers were off fighting war. Today’s battles are more insidious but no less important. And they are found on several fronts:
With victory gardens, we can transform our ornamental landscapes into delicious, productive foodscapes that improve air and water quality, the foods we eat, and even the way we feel. 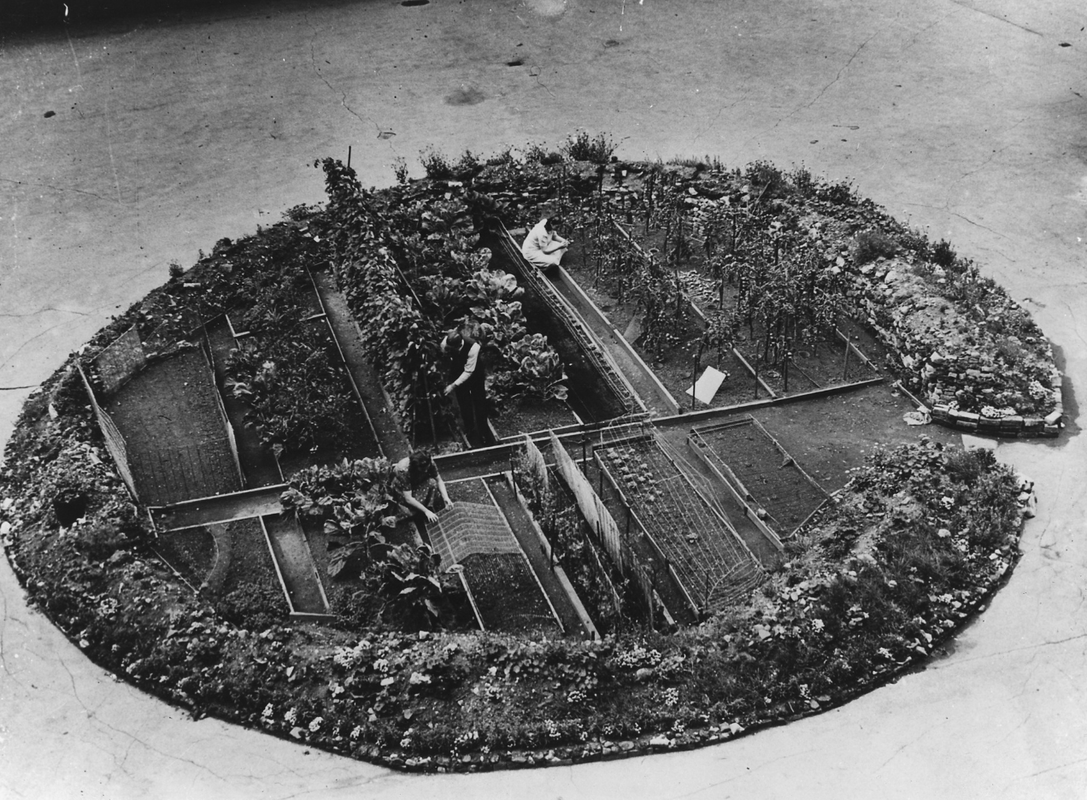 A victory garden in a bomb crater in London during WWII (Office for Emergency Management) Public Domain Get moving with gardening Working the soil and being outside are two of the best ways to improve your health and mood. There are even soil microorganisms (Mycobacterium vaccae) that act as antidepressants, without all the chemical dependency and side effects of drugs (or driving to doctor’s appointments). Gardening is a gentle activity that won’t damage joints, pull muscles, or wear you out. It will get you moving the way your body was meant to move. Reaching, pulling, lifting, and carrying plants and soil in your victory garden will help you be healthier without straining anything. Environmental protection begins at home Clouds of chemicals, extensive paved roads, islands of trash, and toxins in our waterways are not good for anyone’s health. The more we learn, the more we realized that we can use evolution to our advantage in the garden, protecting both ourselves and the environment. Beneficial insects, appropriate plant selection, and no-dig gardening all work to reduce our carbon footprint while providing us with fresher, better tasting fruits and vegetables. Growing food at home also reduces the amount of plastic and other garbage that has to end up somewhere. 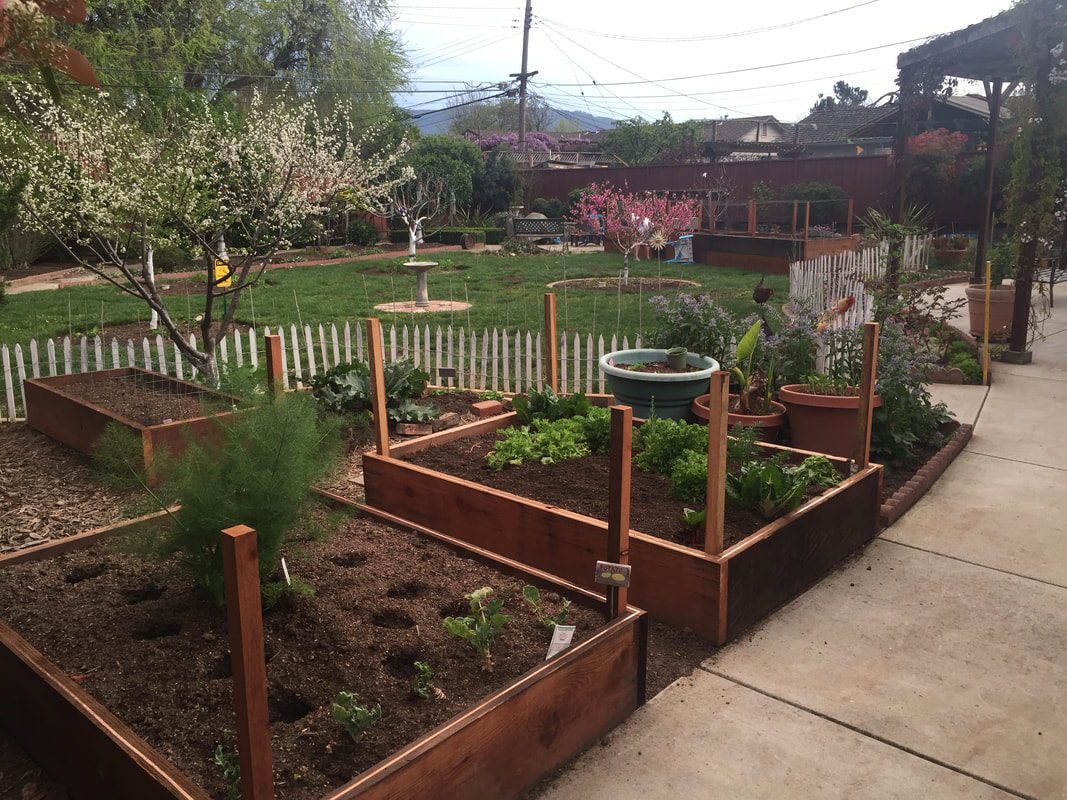 Part of my victory garden (Kate Russell) The home front
When you grow even a small portion of your food, you are reducing the negative impacts of massive monoculture, global shipping, and long-term food storage. I appreciate those services for foods I cannot grow at home and for the billions of people who need to be fed. But, the truth is, I can grow food at home and so can you. Even if it is just a few plants, it makes a difference for you and the planet. Victory garden plant list Victory gardens are planted with foods you eat regularly and will grow in your yard. There’s no point in planting something that won’t grow where you are, Case in point: I love blueberries. I live in California. Blueberries hate alkaline soil and hot summers. I have both. To grow blueberries, I have to work very hard and it is a constant battle. For me, blueberries are not a good choice for a victory garden. [But I do it anyway.] To design your victory garden, start by identifying your Hardiness Zone and getting your soil tested. An inexpensive soil test will tell you what is in your soil and what needs to be added (and avoided). Then look at your grocery list. From there, make a list of edibles that will grow in your yard. You can find lots of information online and through your local Master Gardeners and County Extension Office. You may not be able to grow all your groceries where you live, but I’ll bet you can grow a surprising amount of food in your yard, wherever you are! Popular victory garden plants include:
Interspersing your vegetable crops with flowers, such as marigold, will make it look even nicer and improve pollination. And don't forget fruit and nuts trees. They can produce an astounding amount of food. I just registered my garden as a Climate Victory Garden. Check them out! Other players on the winning team Plants are not the only things that can help you be more active, improve your food supply, and work to protect the environment. Geese will keep your lawn mowed perfectly and guard your house, though they are messy. Chickens can produce both eggs and compost. Raising bees can provide you with honey while improving pollination. And raising worms makes composting even more effective and efficient. Just as wartime victory gardens made civilians part of the war effort, your modern victory garden can make you part of the solution for environmental protection, better tasting food, and your own good health. And the plants do most of the work! And if you don't have space, see if there is a community garden nearby. What are you going to plant in your victory garden? Sprain your ankle or throw out your back and suddenly working in the garden is difficult, or impossible. What if accessibility is a constant issue? A lifestyle? As we get older, all of us will need a little more help getting around. Planning ahead for accessibility will make it easier to continue spending time in the garden. 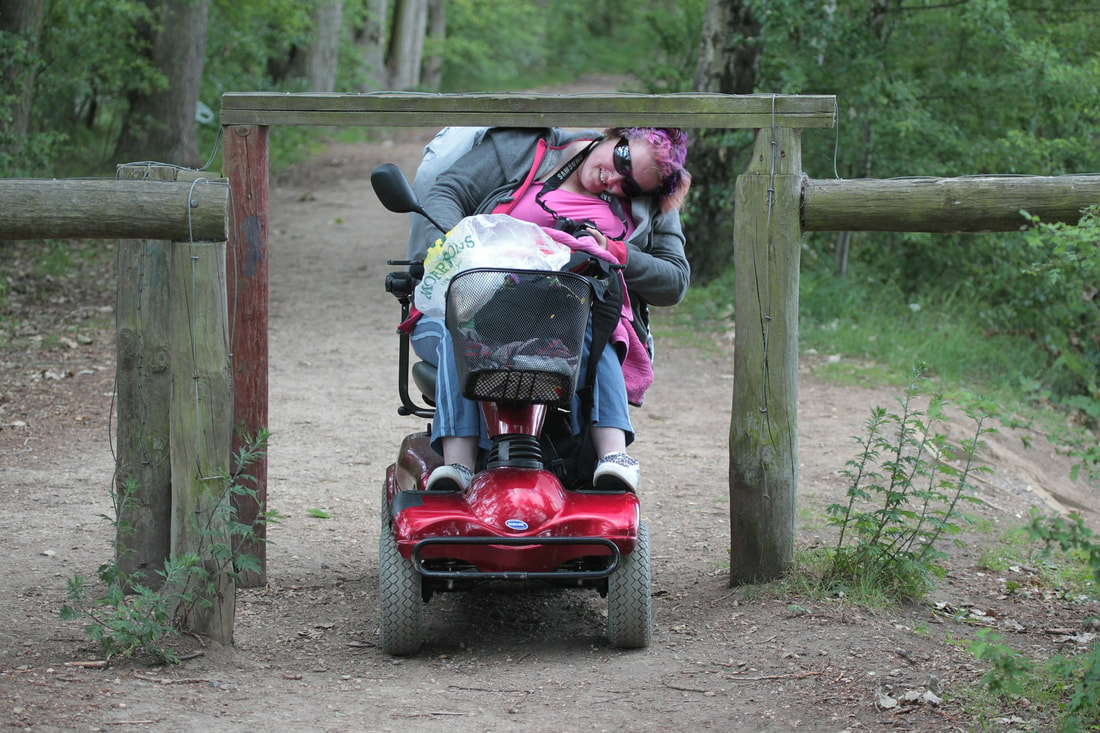 Wheelchair accessibility (makeitsomarketing) Pixabay A few years ago, while at Burning Man, I participated in an obstacle course set up at Mobility Camp. Part of the course had to be completed while on crutches and part in a wheelchair. The simplest tasks, things I normally do without thought or care, suddenly became difficult barriers. It was a good learning experience. Imagine gardening in crutches or from a wheelchair. For many, it is a reality. There are ways that you can make your garden more accessible. Walkways You can’t work in a garden if you can’t get to it. Accessible walkways need to be clear, stable, and wide enough for wheelchairs. Most wheelchairs are 30” wide, so paths should be at least 36” wide and wider is better. Turnaround space and ramps may be needed, as well. The surface should be hard and smooth. An added bonus: wheelchair accessible walkways make using a wheelbarrow easier, too! 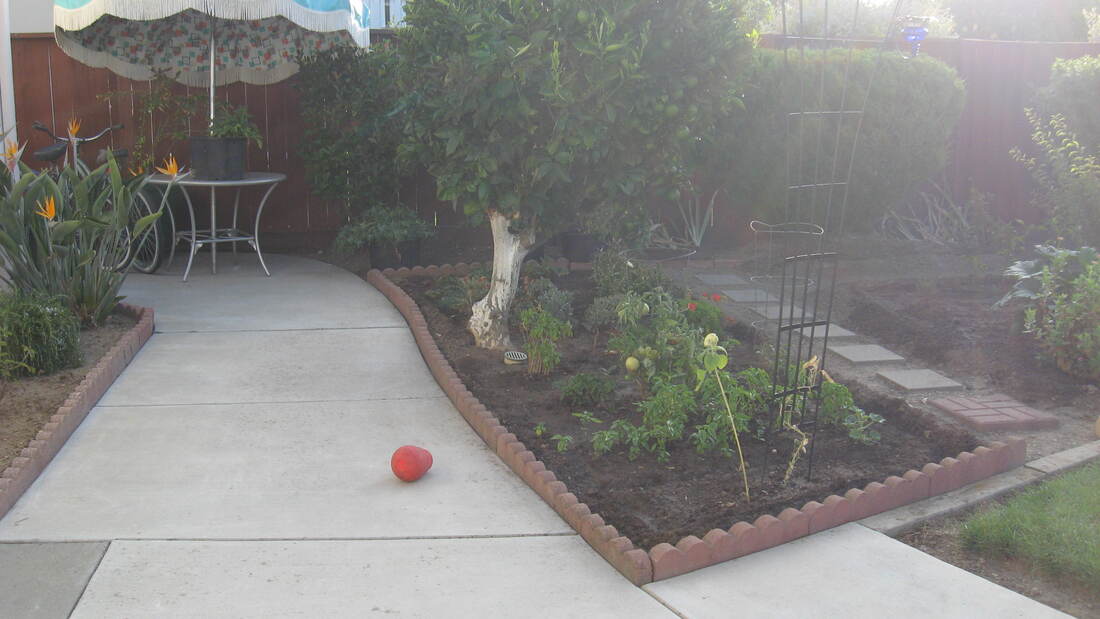 Wide, flat walkways are accessible; uneven, narrow paths may not be (Kate Russell) Tools The tools used in gardening are often cumbersome: shovels, hoes, and rakes can be difficult to manage from a wheelchair and even harder if you are using crutches or have hand problems. Lightweight hand tools can help, as long as they are durable. Tools that telescope can also make gardening more accessible. Make sure garden tools are kept sharp and stored in an accessible location.
Accessible growing spaces Raised beds are an excellent way to make gardening more accessible for everyone and they can support some pretty deep-rooted plants. The height and width of raised beds can be adjusted to suit the needs of the person gardening, reducing or eliminating the need to bend over or kneel on the ground. And they make weeding so much easier for all of us! Just be sure that your raised beds are not so wide as to make it difficult to reach the center. Container gardening, hanging plants, and vertical gardening are other ways to make gardening more accessible for everyone. Pulley systems can be used to raise and lower hanging plants. 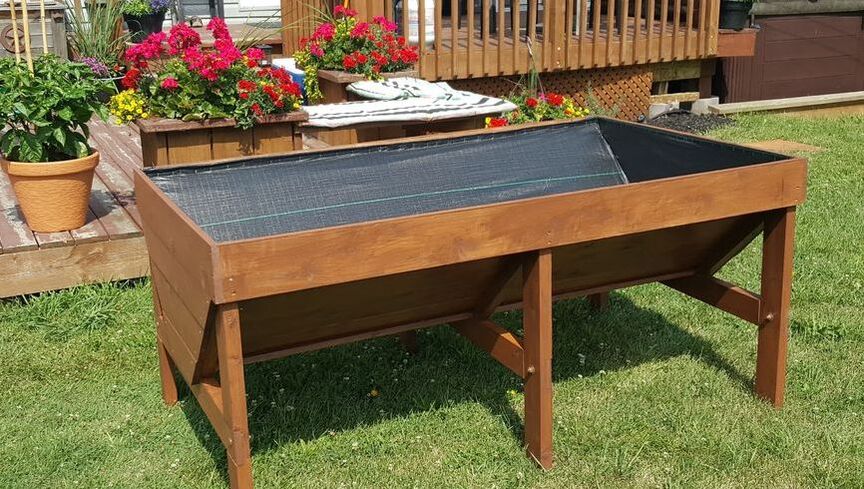 DIY wheelchair accessible planter (Courtesy of KelSnake) Garden tables can make gardening far more accessible for wheelchair-bound gardeners. Garden tables are shallow planting beds raised up on legs. This allows wheelchair users to treat the garden bed like a table, roll up underneath and work with plants at a convenient height. There are also garden tables that feature deeper sides that are still accessible. Low maintenance plants Bending over and kneeling are common activities in the garden, but not everyone can do those things. Low maintenance border plants, such as yarrow, sweet alyssum, or creeping phlox, look nice without requiring a lot of bending over. Other low-maintenance options include native plants, succulents, bulbs, herbs, slow-growing shrubs, such as rosemary and lavender, and edible perennials, such as asparagus and artichoke. These plants add texture and color to a landscape without a lot of effort. Self-seeding marigold and cosmos will come back year after year.
For those times when carrying water, tools, or seedlings is necessary, a towable garden cart can make it all possible.
Gardening is good for you. Making your garden more accessible is good for everyone. Once you start gardening, you will probably find yourself the proud owner of a bunch of seeds. Eventually you will need something to hold all those seeds. That thing is called a seed box. 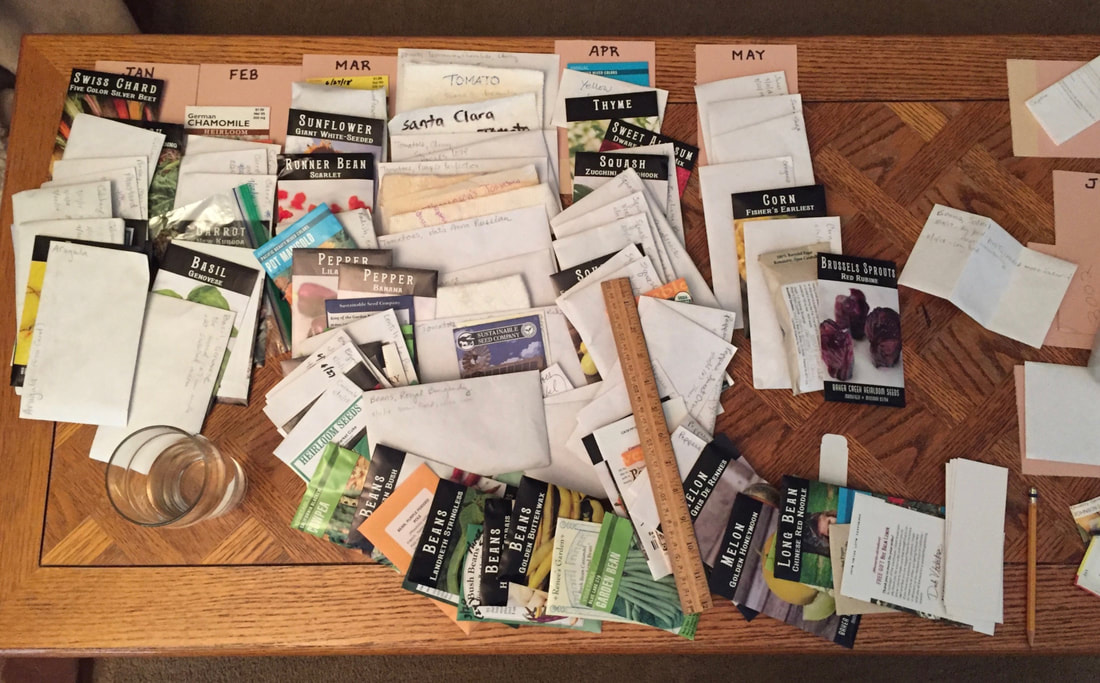 Garden seeds spread out on a table (Kate Russell)
The DIY seed boxes I saw online were made from shoe boxes, cigar boxes, recipe card boxes, curb-scored dresser drawers, discarded library card boxes, tackle boxes, plastic pill boxes, old 8-track cases, photo organizers, antique letterpress printer’s drawers, old filing tins, cash boxes, ziplock baggies, Mason jars, and lidded cardboard shipping boxes. One was even made from an old fashioned metal lunchbox! Clearly, there was lots of inspiration out there, but what would suit my needs? What do seed boxes do? All that variety got me thinking about what seed boxes are for. There’s no point in saving seeds if they get eaten or sprout too soon. Seeds need to be kept in a cool, dry, dark place to avoid germinating before you are ready for them. Plus, you need to be absolutely sure there is no moisture present if your seeds are going to be sealed in something airtight. [If you store your seeds in plastic or glass, it is a good idea to include one of those tiny silica packets you find in show boxes and other products.] I prefer exposing my seeds to as much of the local weather as possible, without getting them wet (or eaten). Also, I am working on reducing my use of plastic, so I decided that my new seed box had to be made out of something else. Since I have a bunch of scrap wood, I decided to take a look in my wood box for inspiration.
How to organize all those seeds? There’s always alphabetical order, but I decided I needed something that I could organize by planting time. Here, in California, that means separate categories for every month. In colder regions, you might be better off organizing your seeds by plant type: tomatoes, peppers, beans, etc., or by season. I used some heavy duty paperboard to create a divider down the middle of my seed box and index-style cards for each month. Then it was a simple matter of looking at my local monthly planting times to file my seed collection. Or so I thought.
Many people love the idea of a garden, but don’t know how to get started. These tips for a beginner’s garden will help you be more successful, wherever you live. 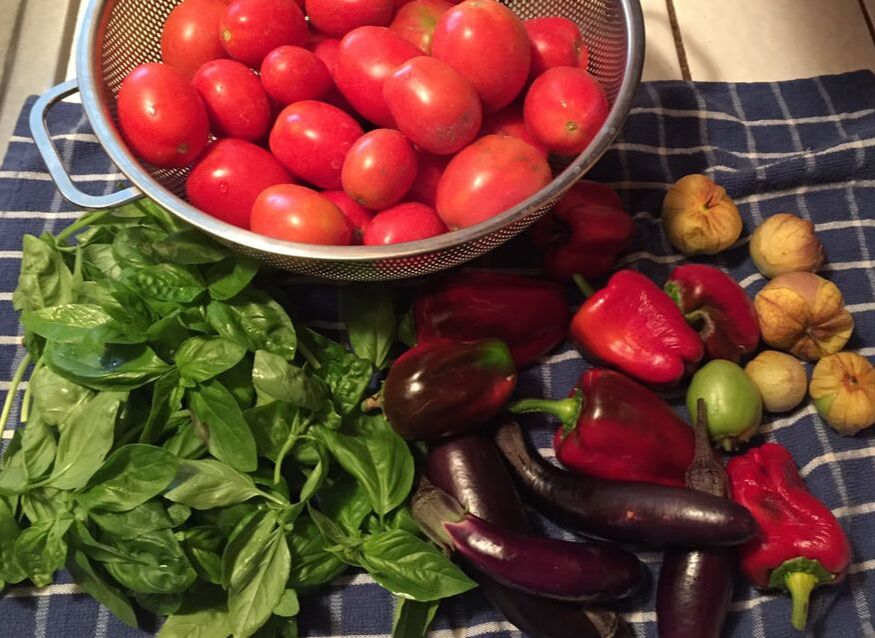 Homegrown tomatoes, basil, peppers, eggplant, and tomatillos Fresh, sun-ripened tomatoes are the most common reason people start gardening, but don’t stop there. With just a little space and water, you can grow your own lettuces, radishes, beets, herbs, and more. But start small. Pick one space, a single garden theme, and just a few plants. Pace yourself. Gardeners are in it for the long haul.
We have also learned that it is far better to encourage beneficial insects than to spray chemicals when fighting garden pests. Instead of poisoning our food and our soil, we now add a few umbrella-shaped flowers and let Mother Nature do most of the work. Will your garden be perfect? Will it look like the cover of a magazine? No, it won’t. Real gardens rarely do. And that’s okay. What I can tell you is that when those first seeds germinate, when you harvest your first tomato, when you gift a friend a jar of home grown dried oregano, you will feel amazing. So let’s start gardening! From the ground up An inexpensive soil test from a reputable lab is the best investment you can make in your garden. And you can forget those colorful plastic tube kits you see in stores. They may look like a great idea but they are not (yet) accurate enough to be useful. Sending out a sample for testing every 3 to 5 years can save you countless hours and dollars by telling you actually what is missing from your soil and what is in excess. All too often, new gardeners create more problems than they resolve by automatically adding fertilizer every time things don’t look the way they do in magazines and seed catalogs. Adding unnecessary fertilizer can create nutrient imbalances that make it difficult for plants to absorb the nutrients they need. A soil test will also tell you the soil’s pH, and that’s important, too. Soil can be acidic, alkaline, or neutral. Most plant nutrients can only be absorbed when soil pH is between 6.0 and 7.5. If you soil is outside of that range, you may need to acidify or lime it. These things are not difficult, but you need to know if they need doing and a soil test will tell you.  Soil pH and nutrient availability (CoolKoon) CC BY 4.0 Set the stage Most plants need 8 or more hours of direct sunlight each day. This is especially true for fruits and vegetables. Find a spot in your yard that gets plenty of sunshine. Then, prepare that space for gardening by getting rid of weeds and other unwanted plants. Until recently, people used cardboard to block weeds because it sounded like a good idea. We now know that it’s a horrible idea. Cardboard and layers of newspaper attract termites and voles.
What lives where you are? Looking at what already grows well in your yard can tell you what will grow easily in your garden. If most of your weeds are clovers, then other legumes, such as peas and beans, should grow well. If your regular weeds are more of the mustard variety, then the cabbage family will love your yard.
Contact your local County Extension Office or Department of Agriculture for recommendations, while you’re at it. They have plant specific growing, pest, and disease information for your region. There’s no sense re-inventing the wheel, right? Plant selection When deciding which plants you want in your garden, you will see notes about sun exposure. This is valuable information and you should use it. “Full sun” means 8 or more hours of direct sunlight every day. “Partial sun” means 4 to 6 hours of sunlight in the afternoon. “Partial shade” means 4 hours of morning sun. Shade means bright dappled sun all day or 2 hours of direct morning sun. Putting plants in the wrong location is a waste of time and money. As tempting as it may be to order everything that looks good from the glossy pages of a seed and plant catalog, don’t do it. Start small. Taking on too much in the beginning can be discouraging. Pick just a few plants to start and learn about what works for you and your garden. You can expand over time, as you learn more. And you will. You may decide you have the space for a fruit cocktail tree or an artichoke bush. Maybe rhubarb and asparagus are better suited to your space.
The possibilities really are amazing! Once you know what will grow in your yard, you can really run with it. But not at first. Taking care of a garden requires effort and water. Speaking of water, avoid overhead watering, as this can translate into many fungal diseases that are difficult to get rid of, once they are in place.
Finally, resist the urge to use grocery store plants and seeds in your garden. While it seems convenient and inexpensive, these plants are not certified disease-free or pathogen-free. They may be safe to eat, but adding them to your garden can introduce pests and diseases that may take years to be resolve. For you experienced gardeners, what plants were in your first garden? What worked and what didn’t? Let us know in the Comments! Bell peppers and chili peppers love the heat, so why talk about them in December? Unless you have an amazing greenhouse, the only thing you can do with peppers this time of year is dream about them - and that’s the point. Dream now, in December, about a productive pepper garden filled with thick-skinned sweet bells and degrees of fiery heat. Red, orange, yellow, purple, and greens of various sizes and shapes can make a pepper garden both attractive and productive.  Thai (cayenne) peppers (Daniel Risacher) CC BY-SA 3.0
When designing your pepper garden, choose a site that gets lots of sunlight. Then, read the plant labels and seed packets to learn the mature size for each variety. This way, you can position your pepper plants so they will not block each other’s sunlight. 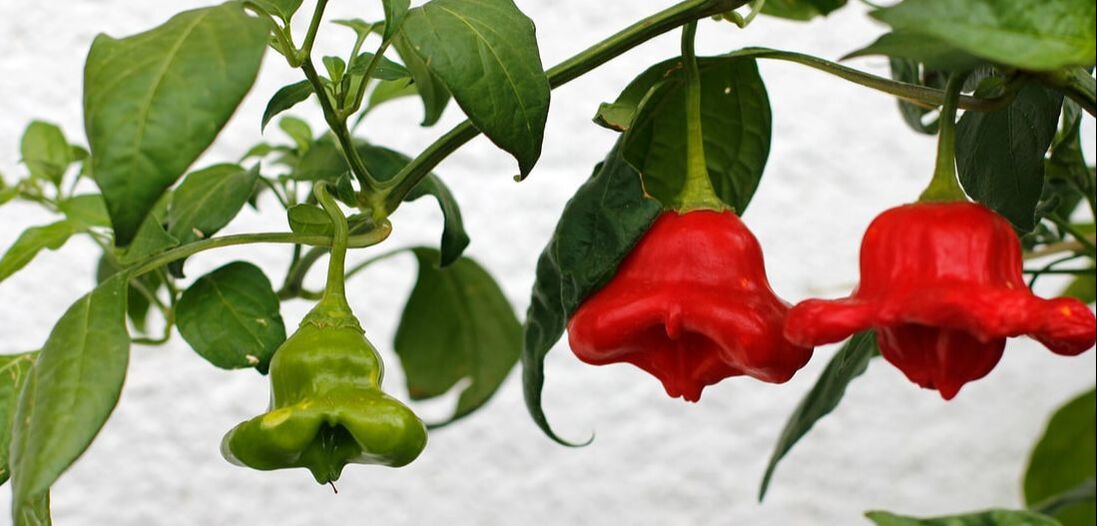 Red and green paprika peppers (Reisefreiheit_eu) Public Domain You can grow peppers in the ground, raised beds, or containers. Peppers perform beautifully in containers as long as they are large enough. Most pepper plants have root systems that can go 24” to 36” deep. One advantage to growing peppers in containers is that it makes moving the plants into ideal temperature ranges an option not available when growing in raised beds or the ground. Our scorching summer temperatures can interfere with pollen viability, causing blossom drop. Sunburn damage and water stress are other common problems. Pepper options Peppers come in a wide variety of shapes, textures, sizes, and colors. You can create a rainbow of peppers, if you want to, or stick with some tried and true favorites. Sweet bell peppers come in several colors (if you leave them on the bush long enough). There are five basic domestic species of chili peppers (and countless variations): • Capsicum annuum - bell, banana, cayenne, and jalapeños chiles • C. frutescens - tabasco and Thai peppers • C. chinense - naga, habanero, Scotch bonnet • C. pubescens - rocoto chiles • C. baccatum - Bishop’s crown peppers There are also miniature varieties available. 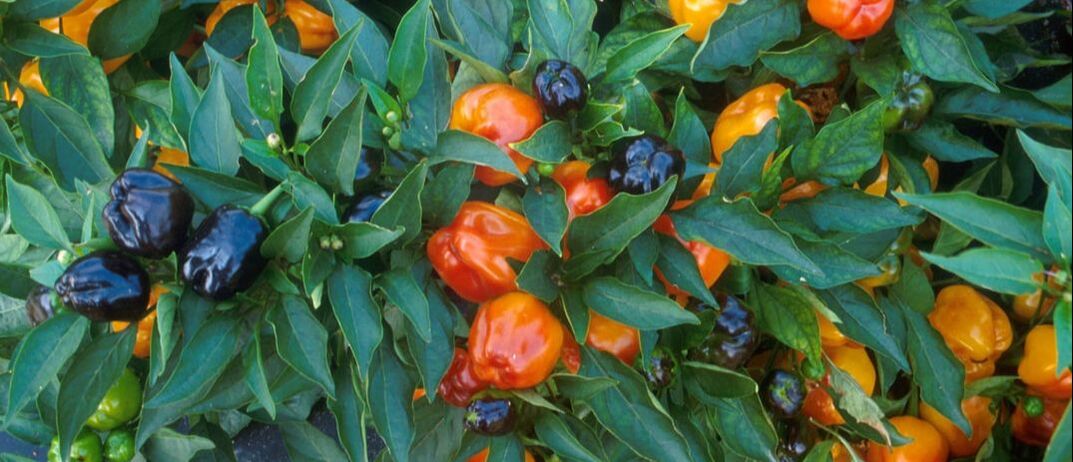 Miniature bell peppers (Jean Beaufort) Public Domain Starting peppers early Peppers take time to mature and they grow the best when temperatures are between 80°F and 90°F. Seeds started too soon will simply not germinate. Even if they do germinate, they will not grow well. Here, in San Jose, California, peppers are generally not started outdoors until May. You can jump-start your pepper garden by using grow lights and specially designed seed heating mats. Choosing varieties best suited to your local climate will allow you to start your pepper plants as early as possible. Pepper plant care Being heavy feeders, peppers perform best when given regular feedings of fish emulsion or other balanced plant food. Peppers without adequate calcium or those which receive irregular waterings often develop blossom end rot. Monitor plants regularly for signs of mottling, bacterial spot, and powdery mildew. Learn about pests and diseases commonly seen on bell peppers and chili peppers to minimize the damage. For example, knowing to keep lambsquarters away from your pepper plants can reduce the chance of beet curly top infecting plants.  Orange chili peppers (marcosonnini0) Public Domain What about the rest of the year? Will your annual pepper plants be lush and colorful all year? No, they won’t. By mid to late autumn, they will look spindly and bare. What can you do to keep the space looking nice through winter and preparing for next year’s pepper plants? Before your peppers are done, install seeds and seedlings that will carry your pepper bed through the winter. If you live in Zone 9, you might add fava beans, cabbages, and cauliflower to the pepper bed well before the peppers are done. This succession planting method allows you to produce food, with the cruciferous vegetables, and grow a green manure with the fava beans. The peppers act as nurse maids, helping the next cycle of plants get started. When your pepper plants are done producing, cut them off at soil level and add the debris to your compost pile. This is a good time to add a layer of aged compost to your pepper bed, improving soil structure and adding nutrients. 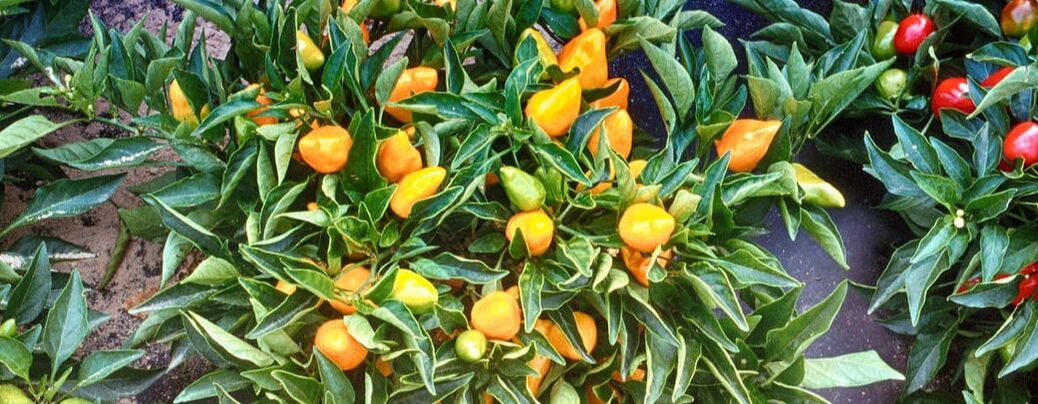 Yellow peppers (TheDigitalArtist) Public Domain
Scent can inspire powerful memories, improve your mood, and make you more productive. Use the power of scent to your advantage with a scent garden. 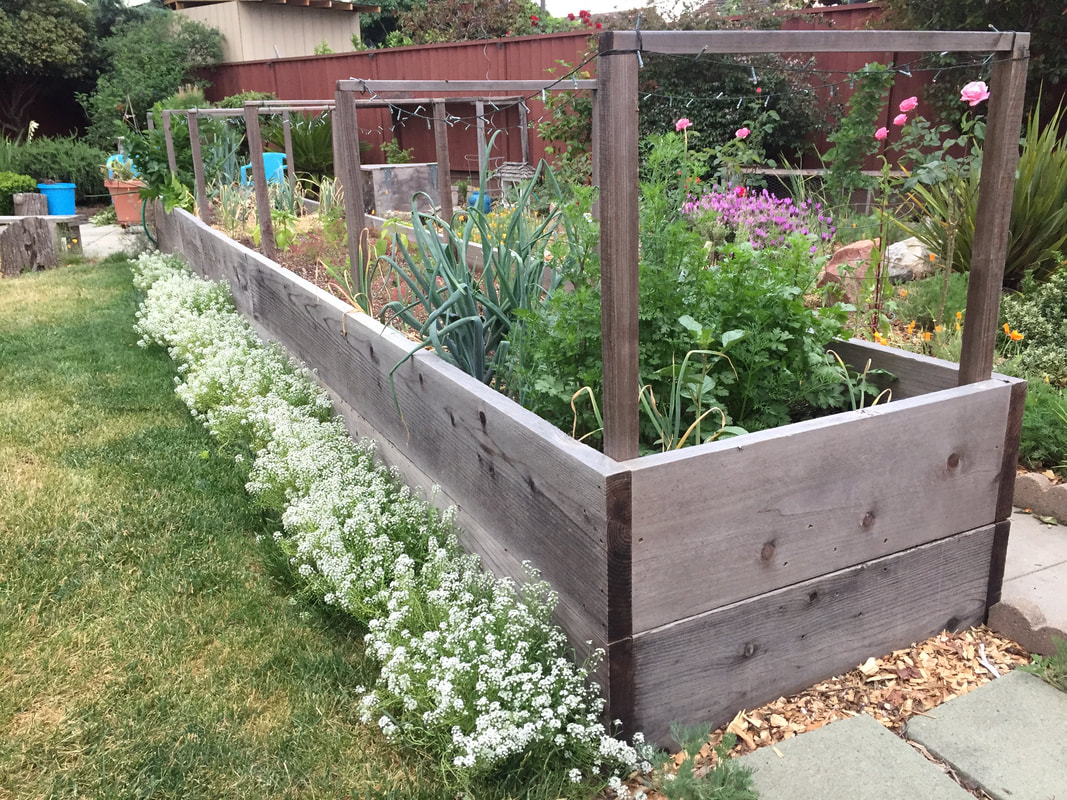 Sweet alyssum growing along raised bed (Kate Russell) The power of scent Scent is the only sense that has a direct connection to our lizard brains. Fragrances are processed by the limbic system and can impact our emotions, behaviors, motivations, and even our long-term memory. You learned to associate smells with certain situations when you were very young. Those memories stay with you for life. Come across the smell of baking cookies or Play-Doh and the memories come flooding back. This is called the Proustian memory effect. This effect depends largely on previous experiences and cultural influences, but there are some generalizations you can use with your scent garden design. Fragrance is a tool you can use to create a garden space that improves your outlook on life. The science of scent Flowers use fragrance to attract pollinators. Those fragrances can be classified as floral, fresh, spicy, or woodsy. Each of those scent profiles evoke a different response. The floral scents of jasmine and gardenia are said to help us relax, while the fresh aroma of citrus, mint, and lavender stimulate and refresh us. The woodsy fragrances of balsam, cedar, and rosemary are believed to improve our thinking processes, while sage, carnations, and roses are said to make us feel more sensuous.
For me, the smell of thyme invokes a sense of warmth and home, while brushing against a rosemary bush lights up a part of my brain that feels strong and calm. Different scents affect people differently. For some, the smell of freshly mown grass stirs up memories of summer and being active, while pine boughs inspire thoughts of the holiday season. Knowing which scents trigger the feelings you want to invoke will help you with plant selection. Just be sure to choose plants appropriate to your Hardiness Zone and microclimate.
Popular scent garden plants Some of the most popular flowers for scent gardens include butterfly bush, catmint, creeping phlox, datura, dianthus, freesia, gardenia, geraniums, honeysuckle, hyacinth, jasmine, lavender, lilacs, lily of the valley, paperwhites, peonies, roses, stock, sweet alyssum, sweet peas, Sweet William, and violas. Other fragrant ornamentals include artemisia, boxwood, and wisteria. Most herbs have pleasing aromas that fit nicely into a scent garden. Anise, basil, dill, lemon balm, mint, oregano, rosemary, sage, and thyme all have wonderful fragrances when brushed or walked on. Balsam fir, cedar, citrus, eucalyptus, linden, and witch hazel trees can add their aroma to your scent garden.
Did you know that researchers have shown that we can smell over 1 trillion scents? It ends up that our 400 smelling receptors, combined with our amazing brains, are just as good as scenting things as dogs. If we take the time to pay attention.
You can create a gift garden specifically for plants to be given as gifts.  Succulent gardens make excellent gifts (pxfuel) Public Domain How many times have you been searching for that just right gift for a friend or co-worker, when a miniature herb garden or succulent garden would have been perfect, but there isn't enough time? This is what gift gardens are all about. We gardeners are an idealistic group. We look to the future each time we plant a seed. Similar to nursery beds, gift gardens help you in the future. Your gift garden can be designed in any size or shape you wish. The important part is looking at your calendar ahead of time to determine which plants you will want, when you will want them, and planting accordingly.
Holiday season Too many times, we shop for gifts out of habit, often at the last minute. Many of these gifts are mass produced and have little to do with us or the recipients. A gift garden gives you the space and reminder to create holiday gifts by your own hand. These gifts can be herbs, bulbs, canned goods, seeds, or seasonal decorations. The important thing is that these gifts are created by you for them. Standby gifts We've all experienced those unexpected moments when a gift would be appropriate, but we are unprepared. It happens. As gardeners, we can maintain a collection of stand-by gift plants, just in case. Miniature herb gardens, flowering bulbs, durable succulents, and perennial edibles can all be welcome gifts that keep on giving. [A potted pineapple, anyone?] A special added touch might be a handmade plant label that includes care directions on the back, for those unschooled in plant husbandry. Seed selections Seed packets contain a lot of seeds. We rarely plant them all and, unless they are stored perfectly, they won’t stay viable. Also, after growing plants in a region for a few years, many gardeners end up with a collection of seeds that work best in their microclimate. You can share all those extra seeds with family and friends. Create unique seed packets and gift to your heart’s content! 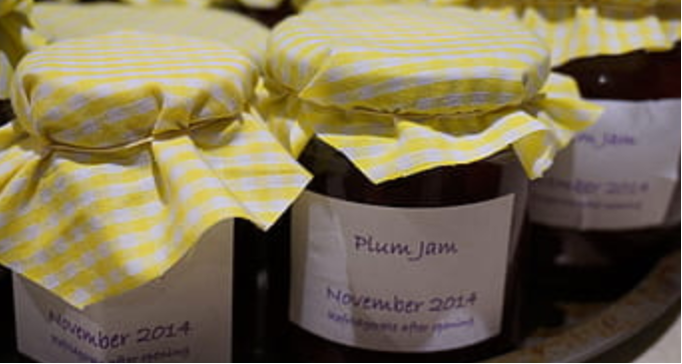 Homemade preserves (pxfuel) Public Domain Preserved harvests
Each year, many of us end up with far more citrus, nectarines, plums, and tomatoes than we could ever eat. Most of these items can be converted in delicious marmalades, jams, and sauces. Herbs can be dried. Nothing say love like something made by your own hand. And you can use inexpensive address labels to mark the contents and canning date of your edible gifts. Be prepared for any gift-giving occasion by planning and installing a gift garden. Imagine, if you will, a circular garden space in spring. At its center, a small tree covered with blossoms. Bees and other pollinators eagerly burrow into the blooms and emerge to repeat the process all day, every day, for weeks. Surrounding the tree, at the outermost edge of this garden space, a hedge of blueberry bushes. Between the tree and the hedge, a covey of potted raspberries, blackberries, currants, and strawberries. Peppering the ground, colorful borage, with its cucumber-flavored leaves and edible flowers, and equally edible Johnny-jump-ups. Imagine all that sweet deliciousness in one place.
Fruit cocktail gardens are designed to provide a variety of fresh and preservable fruits, all in one convenient location. Here’s how you can make it happen in your own yard. Start with the basics There is no sense installing all these plants if they won’t grow in your yard. Microclimate and Hardiness Zone must be taken into account, as with any garden design. You also need to know what is in your soil. Get your soil tested by a lab. It’s inexpensive. It’s important to the health of all your plants. And it makes the job of gardening much easier and more likely to succeed. You will also need to know your garden’s chilling hours. All this information will help you select plants suited to your yard. The fruit cocktail theme Themed gardens pull an area together with a shared concept. This makes plant selection and garden design a lot easier. The fruit cocktail garden theme starts with a fruit tree at its center, surrounds the area with a hedge or border, and fills the space with other fruit-bearing plants. You can also add artistic touches, such as statuary, a birdbath, or a nice bench. Let’s start with your tree. 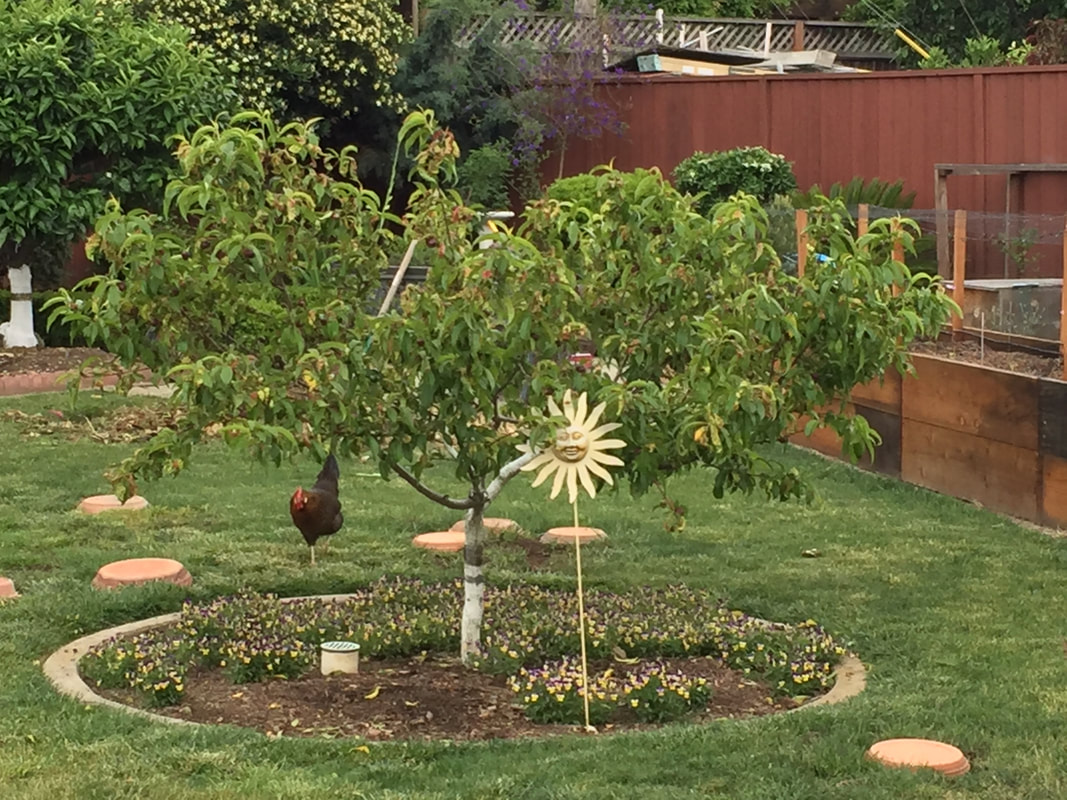 Nectarine tree (Kate Russell) Fruit trees Most modern fruit trees are two different trees grafted onto one another. Root stocks are selected for their ability to produce strong root systems and the aboveground portion is selected for fruit producing abilities, as well as pest and disease resistance. This is why planting seeds from your apple or that peach pit almost never works out the way you expect. This is especially true of apples. Dwarf trees are an excellent choice for backyard gardens. Dwarf trees rarely grow larger than 10’ high and are easier to manage in the home landscape. When selecting a tree for your fruit cocktail garden, be sure to note the chilling hours. Trees are hardwired to go through seasonal changes before setting fruit. If winter temperatures are not cold enough, long enough, your tree will never produce fruit. At the other end of that spectrum, if you opt for a banana tree, you need to protect it from frost damage in winter. While you can select any fruit tree as the centerpiece of this garden, fruit cocktail trees are especially appropriate. Just be sure to use the proper planting depth, or your fruit tree will die within a few short and unproductive years. What are fruit cocktail trees? You may have seen them in garden catalogs. Also known as fruit salad trees and family trees, these mostly dwarf varieties are created by grafting scions, or pencil-thin twigs, from several trees onto a host tree. The scions and host must all be in the same genus for this to work. Popular examples include:
There are also family trees that provide several different varieties of the same fruit on one tree. You may have a single apple family tree that produces Granny Smith, Red Delicious, Gala, Braeburn, and Honeycrisp, all on a single tree. The same can be done with practically any fruit tree species. One particularly impressive fruit cocktail tree produces 40 different fruits. New York artist and professor, Sam Van Aken, creates trees with 40 different types of fruit growing on them. His Tree of 40 includes several varieties of stone fruits, all grafted onto a single tree. Hedge or border? The next step in designing your fruit cocktail garden is to select plants for the outer edge. You can create a hedge out of low-growing blueberries, a border with strawberry plants, or something else entirely. You might decide to encircle your fruit cocktail garden with melon or watermelon vines, a blackberry bramble, or delicious groundcherries. Watch out for those blackberries, though. They are tenacious and they will spread. Another possibility is small raised beds, for easy access and as a way to limit plants with invasive natures. 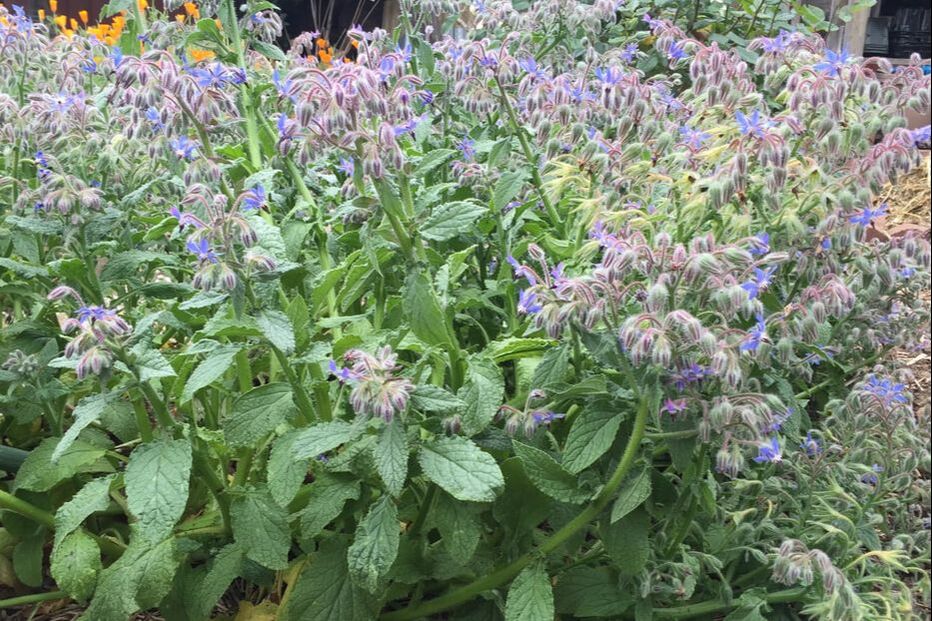 Borage border (Kate Russell) Other possibilities for your fruit cocktail garden
You can put those renegade blackberries into the miniature raised beds or attractive containers. Raspberries and currants can be grown the same way, just be sure to use containers large enough for mature root systems. Raspberry, blackberry, and currant roots spread out more than they dive. Containers need to be at least 20” deep and as wide as possible. Be sure to mulch the spaces between the border, the tree, and the containers with aged compost or free arborist wood chips, providing several inches of bare ground between the mulch and the tree trunk. You can intersperse this area with herbs, such as greens and purple basil, and edible flowers, including carnations (Dianthus caryophyllus), Johnny-jump-ups (Viola tricolor), or primrose (Primula vulgaris). As you design your fruit cocktail garden, be sure to consider the mature sizes of all the plants and their appearance throughout the seasons. You want your plants to have the space they need and you want your garden to look lovely year round. Fruit cocktail gardens can stand alone or be incorporated into children’s gardens. Either way, you are going to love how delicious your new garden space can be! This garden design concept came from a friend of mine, Linda King. It is a method used to recreate a garden, setting, or memory using plants that look similar to, but perform better in your microclimate, than the originals. I call these copycat gardens.  Johnston Gardens, Aberdeen, Scotland (Lizzie) CC BY-SA 2.0 Linda’s Scottish garden Linda was telling me about her Scottish garden and I was intrigued, having never heard of that particular style. Right away, I wanted to urge against this idea, knowing that the mosses, lichens, and liverworts of Scotland would be scorched by our California summers and that our alkaline soil would be wrong for the heaths and myrtles. It ends up, I was wrong in assuming she meant to use the actual plants from Scotland. Instead, she recreated the look and feel of the gardens she saw while traveling in Scotland by using plants better suited to her yard that look like the Scottish natives. Hence, copycat. Garden reconstruction Before we explore copycat garden concept in more depth, let us differentiate between copycat gardens and garden reconstruction. Garden reconstruction refers to larger, more specific architectural and archeological repair and rebuilding of famous, historically significant gardens and landscapes, while maintaining and protecting any existing artifacts. These are restoration projects. Unless you have an archeological dig in your backyard, you will not be taking on a garden reconstruction. What you can do is select a garden that you love, scale it down, and recreate it in your landscape, using plants better suited to your soil, sun exposure, and Hardiness Zone. Which gardens can you copycat? Honestly, any of them. You can recreate the appearance of any garden you’ve ever seen, any scenery you’ve ever enjoyed. The trick is in selecting plants that look enough like the originals to create the same overall appearance and feel. Let’s consider a few possibilities.  Panoramic view of the Keukenhof (Joaquin Maturana Contti) CC BY-SA 3.0 Keukenhof Gardens - The Netherlands Also known as the Garden of Europe, the Keukenhof features millions of bulbs, especially tulips. Carnations, daffodils, hyacinth, iris, lilies, and roses are also present. This garden also features a castle, which might be difficult to add to your landscape. This garden also features winding paths graced with an occasional tree or shrub, with peek-a-boo views into other areas of the garden. Clearly, you will not plant a million bulbs in your landscape or build a full-sized castle. But you can create a Keukenhof copycat garden by identifying and installing a large number of flowering bulbs that perform well in your area, adding some stepping stones that offer new views on your landscape, and maybe even a children’s playhouse shaped like a castle. Did you know that the Keukenhof ensures longer bloom times by planting three bulbs at a time, one on top of the other? I didn’t either. Gardens of Versailles - France Built in the 1600s, the Gardens of Versailles cover nearly 2,000 acres. The scale of these gardens is overwhelming, filled with grottos, immense fountains, labyrinths, and promenades that are far beyond any home gardener’s budget or ability.  Parterre at Waddesdon Manor, not Versailles, by Chris Lacey CC BY-SA 4.0
Canada’s Butchart Gardens are a collection of gardens created by Robert Butchart and his wife. Built on the site of their exhausted limestone quarry, the Sunken Garden is overflowing with flowers, an Italian garden replaced their tennis courts, and a rose garden took over where their kitchen garden once stood.  Butchart Italian Garden (Michael S. Shannon) CC BY-SA 4.0 Fifty-five acres of land, 900 plant species and 50 full-time gardeners is probably not in your budget. But, you can copy the look and feel of these gardens with mounds of flowering plants, a Japanese maple, or something similar, and a meandering path. Get the idea? So, how does a gardener start a copycat garden? Start with a plant list Most historic gardens offer lists of plant species they use. Start with their list. Identify the growing requirements of those plants and see which ones will grow in your yard. Then, look for plants with shapes and colors similar to those unsuitable to your yard, for replacements. Finally, create a generalized layout that matches the original to one degree or another. The nice thing about designing your own garden is that it can look like anything you want it to. It doesn’t have to be exact, or even close. But there is an entirely different type of copycat garden. Your own copycat garden My friend Linda is working on something entirely different. Imagine, if you will, a tabletop aquarium. Colorful fish, bubbling water, and some plants floating around, anchored in a bed of stones. Linda is using that image to create a copycat garden of an aquarium scene. Colorful stone paths and mulch lay the foundation for larger stones, a small fountain, and plants that look similar to those that grow underwater. Who knows, there may be colorful flowers in there somewhere that look like a school of tropical fish! Perhaps a rattlesnake plant (Calathea), or a flying goldfish plant, tucked in among some millet or rhubarb might recreate the look and feel of an aquarium.
Other copycat ideas might include a table covered with sweets, a fairy wonderland, or a medieval cottage kitchen garden, complete with wattle and daub fencing. There really is no limit to what you can create in your landscape, with nothing more than imagination and honest effort. Just remember to select plants for your copycat garden that are suitable to your microclimate.
What sort of copycat garden are you considering? Let us know in the Comments! When it comes to children’s gardens, what child hasn’t dreamt of a pizza garden? And who says grownups can’t have a pizza garden of their own? You can!  Pizza (HoaLuu) Practically every ingredient found on a pizza, besides the cheese and pepperoni, can be grown in your backyard. The sauce, the spices, the toppings, and even the crust can be homegrown and homemade. 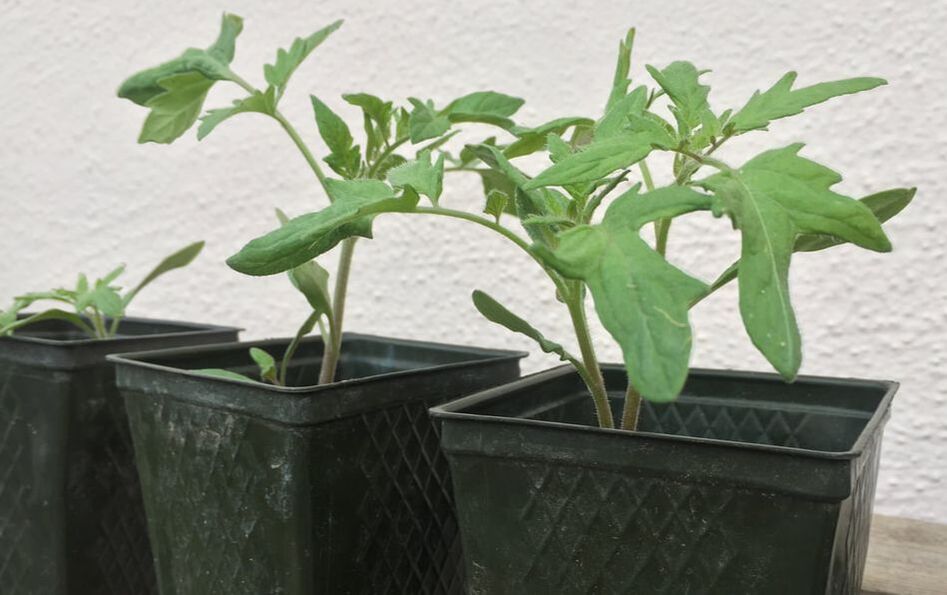 Tomato seedlings (Kate Russell) Start with the sauce Most pizzas start with a tomato sauce. These members of the nightshade family are usually pretty high on a gardener’s list already. The nice thing about tomatoes is they are easy to turn into a sauce that can be canned or frozen for later use. And be sure to plant plenty of garlic in your pizza garden. You will also need some herbs and spices. Pizza herbs and spices Traditionally, my Italian red sauces contain basil, marjoram, oregano, and thyme. You may also want some red pepper flakes from last year’s chili peppers. Parsley and rosemary are nice additions, too. Other herbs you might want to have include chives, cilantro, dill, or summer savory.
Pizza toppings In this case, plant selection is exactly like ordering a pizza. Are you an artichoke hearts, spinach, and mushroom pizza person? Maybe you prefer a rainbow of red, orange, and yellow bell peppers with red, white, and yellow onions. Or, how about a garden variety pizza topped with broccoli, eggplant, and shallots? Other ingredients you might want to consider adding to your pizza garden might include beets, banana peppers, chili peppers, jalapeño peppers, leeks, pineapple, scallions, yellow squash, or zucchini. You may also want to add cherry tomatoes, tomato slices, or sun-dried tomatoes. If you have the space and the time, you can even plant an olive tree, assuming you are in the right Hardiness Zone. Can you think of any others? Let us know in the comments! By the way, I have grown mushrooms from a kit before and was surprised at how easy it was. I will do it again soon and write a post about it. If any of my readers are mushroom growers, I would love to talk with you about the possibility of educating us all…] Pizza crust anyone? Flour is inexpensive and readily available. Converting wheat into flour is labor-intensive. But, if you really want to, planting 9 square feet of wheat should provide 4 cups of finished flour, enough for a single loaf of bread or two medium pizzas. Or, you could grow some cauliflower for your pizza crust.
Planting your pizza garden Raised beds make creating a themed garden easier, but they are certainly not necessary. You can even make your pizza garden a little whimsical by creating it in the shape of a pizza with “slices” of different plantings. This would make a fun keyhole garden. Just be sure that all your plants are in healthy soil, with plenty of sunshine.
If pizza isn’t your thing, pick a different recipe, and create your own garden theme using those ingredients. The possibilities are practically endless: taco garden, beef stew garden, holiday dinner garden...
Have you ever considered creating a garden based on all the plants mentioned in a favorite book? You can create a storybook garden for your reading and gardening pleasure. 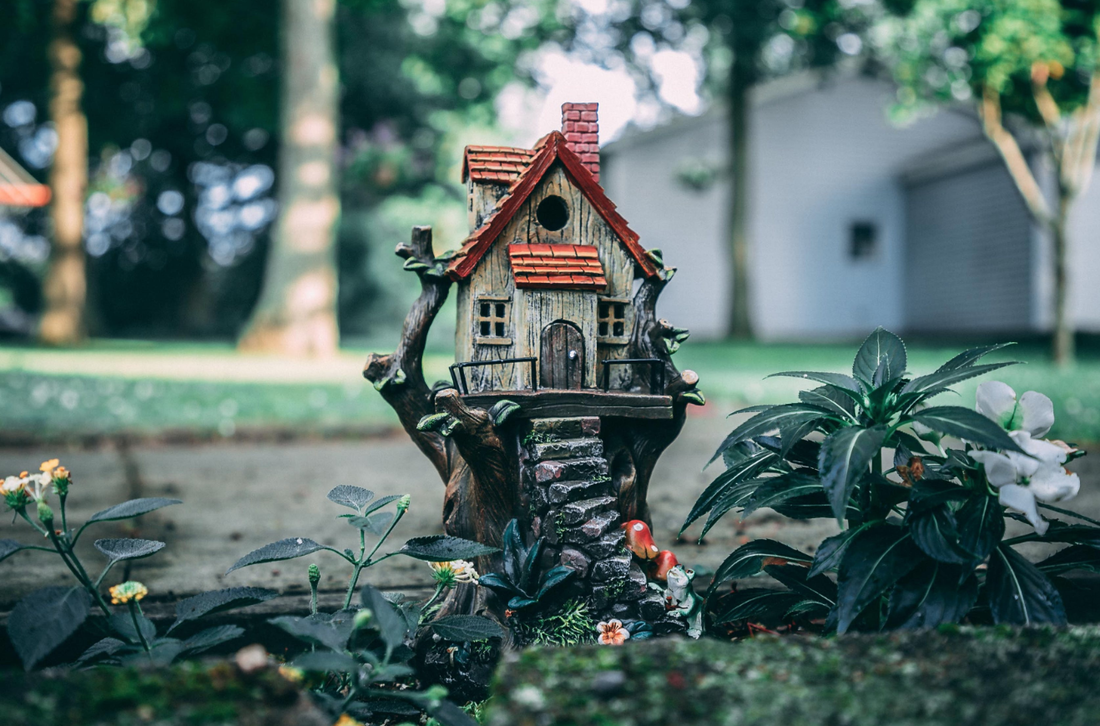 Fairy house in garden (David Gonzales) Public Domain Many people find garden design overwhelming. There are so many possibilities! By selecting a theme, such as a children’s garden, a salad garden, or a storybook garden, plant selection becomes much easier. Also known as literary gardens and bookworm gardens, these garden themes help narrow down all the choices, creating a unified garden from something we already love. Before selecting your theme, however, a quick reminder about the physics of gardening. Garden physics As always, your climate, soil structure, sun exposure, drainage, Hardiness Zone, and soil pH must all be taken into consideration for your plants to thrive. In many cases, you can use copy-cat plants to get the look you want, when the original is not suited to your microclimate. Let’s consider some storybook garden themes.
You can also design a storybook garden based on generalized concepts, such as pirates, fairies, castles, barnyards, or dinosaurs. But storybook gardens are not just for children. Other books as inspiration Unless all of your favorite books occur in outer space, plants are sure to be a part of those stories. Imagine a quiet corner of the yard, dedicated to your favorite novel. A comfortable lounge chair for reading provides the perfect spot from which to surround yourself with the flowers, shrubs, and trees mentioned in your favorite book, or by your favorite author.
Greek mythology If you prefer Greek mythology, you could create a literary garden under and around an almond tree (Prunus amygdalus), sacred to Attis, or an apple tree, favored by Hera and Aphrodite. Demeter’s heavy headed barley, Zeus’ parsley, and Hermes’ saffron crocus are just a few of the lovely edibles that can be used to create a Greek mythology garden. I found an amazing resource for this garden here.
Author gardens Authors, like cooks, builders, and other creators, tend to have their favorites. If you have an author that you enjoy, you can collect the plants featured in all of their books. Daphne du Maurier’s rhododendrons and azaleas, Dean Koontz’ bougainvillea, or Agatha Christie’s poisonous peach pits and digitalis may provide just the inspiration you need.
Start with a favorite book
We all have them - books that call to us, to be read once more, like a favorite bedtime story. As we read the words, we create images in our minds of what each scene might look like. Words within a story will provide generalizations (a wooded path) and specifics (a bright yellow rose). As you read, write these impressions down, along with specific plant names. Eventually, you will have enough plants listed to start creating your very own storybook garden. Just remember to include a comfortable place to sit. You are going to want to spend some time enjoying this garden space! Let us know in the Comments which book might inspire you to create a storybook garden of your own. Fresh tomatoes are one of the most common reasons why people start gardening. But what about planting a stir fry garden? You can grow everything you need for a delicious stir fry dinner right in your own backyard.  Delicious stir fry dinner (Kate Russell) Stir frying (chǎo) is a Chinese cooking style that uses small amounts of “cold oil in a hot wok” to quickly stir a variety of ingredients into delicious, healthful goodness. If you don’t have a wok, you can do much the same thing in a skillet. There are no rules! The nice thing about designing a stir fry garden is anything goes. Whatever ingredients you prefer are the perfect choice. Assuming, that is, the plants are suited to your microclimate. In many cases, you can grow these ingredients in containers on a patio or balcony. 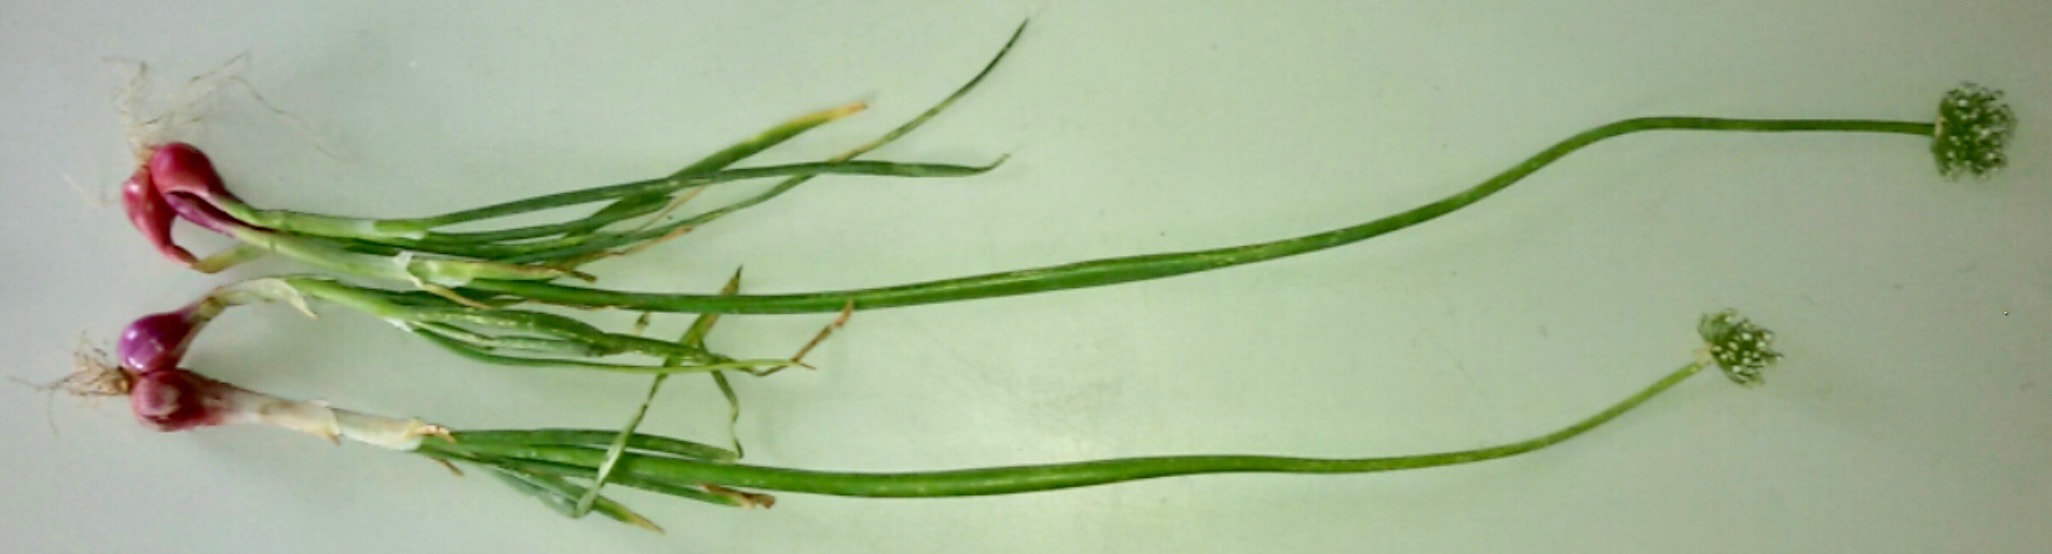 Shallots (Kate Russell) Your stir fry garden design is your own. That being said, raised beds make planting and caring for your stir fry garden much easier. The nice loose soil makes life easier for root systems and you don’t have to bend over quite so far when weeding. Before we start counting our chickens, however, let’s take a look at what you might want to plant in your stir fry garden. Stir fry garden plant selection Everyone has their favorite stir fry recipes. This makes plant selection easy. Simply start with what you like. Then, try adding one or two you’ve never grown or eaten before. Who knows, they may turn out to be new favorites! The most common plants chosen for stir fry gardens include:
Some of these plants grow best in summer, while others prefer California’s wet winter weather. Each Hardiness Zone and microclimate is unique, as far as planting times and days to maturity. You can click on the links above for planting instructions and potential pest and disease problems.
Bon appétit and happy planning! Freshly mown lawns, twittering birds, brightly colored flowers, the crunch of a mulched path under our feet - these garden components create a more enriching experience by waking up our senses. You can make more of your landscape with a sensory garden. 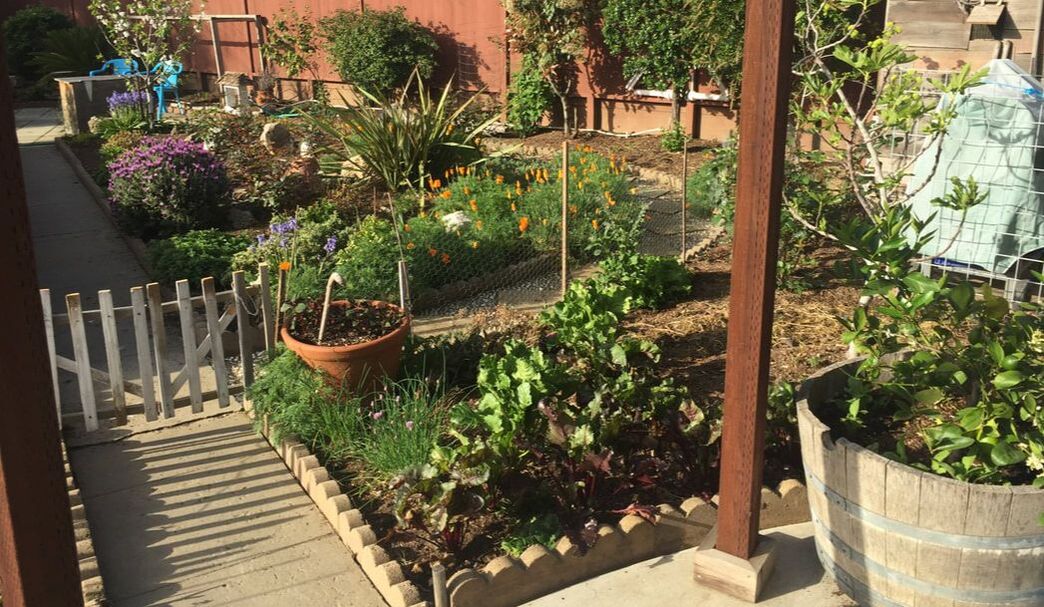 A garden for all your senses Most garden designs are based on visual experiences or crop production. Sensory gardens are designed with the five senses in mind. A fuzzy leaf, a fragrant herb, and plants that attract song birds are just skimming the surface of this sensory garden experience. Gardens and good health Research has demonstrated what gardeners have always known - working the soil, tending plants, and strolling through a garden are good for your health. This is especially true of sensory gardens. They pull us out of our fast-paced, tech-driven lives and back to nature. This is critical for both our physical and mental health. The positive effects of gardens, in general, and sensory gardens, in particular, have been found useful in helping people with autism, dementia, and mental health issues. Public sensory gardens incorporate walkways that are accessible to those using wheelchairs. They also tend to use plant labels with Braille or other interactive plant labels. Disabled or not, we can all enjoy the experience of a sensory garden. 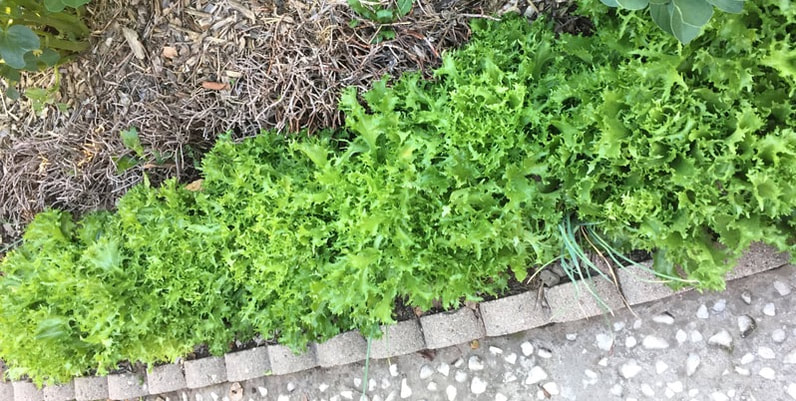 Curly endive border provides edible color and texture (Kate Russell)
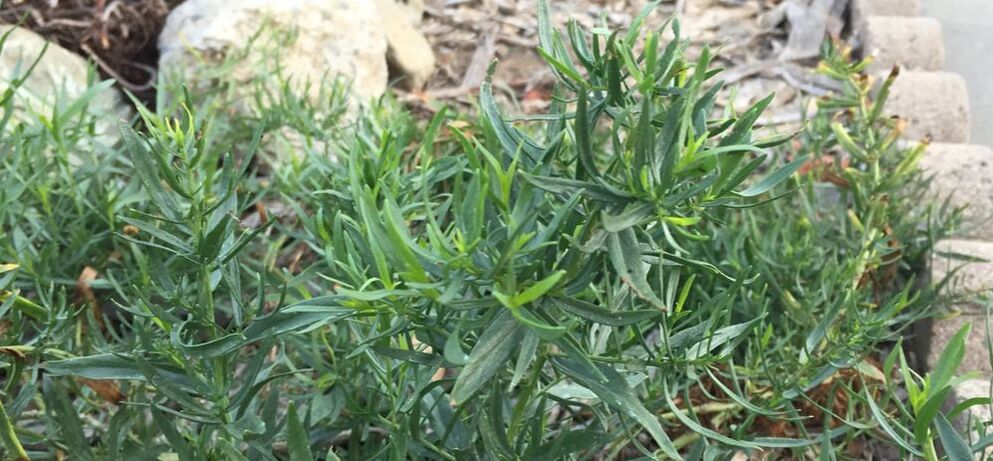 Delicious tarragon will spread! Of course, our senses do not exist in isolation. If you walk across a sidewalk, followed by cobblestones, and then over a pile of pinecones, the sounds, smells, and sights will change with each experience. As you look through seed catalogs and your own seed collection, which plant varieties will be suitable to a sensory garden? Let us explore each of the senses for some ideas. Before we do that, however - a word on native plants. 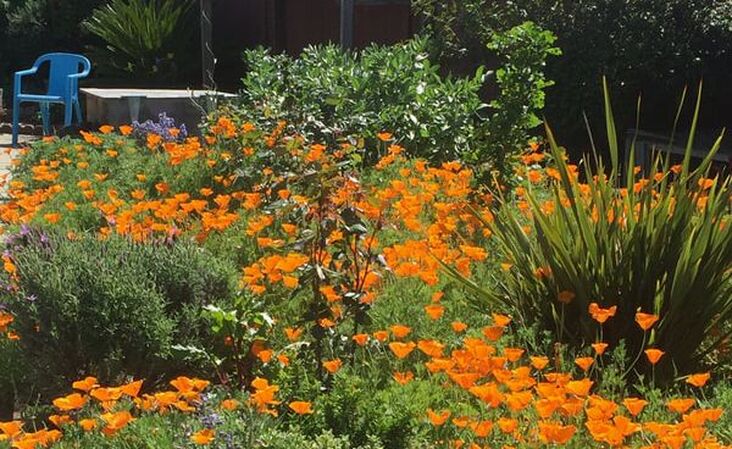 Native California poppies For ease of care and to increase biodiversity, consider native plants for each of your senses. Native plants are already suited to your microclimate and to the local wildlife, reducing the need for irrigation and protection from pests and diseases. Now let’s start planning a sensory garden! Sight Most of us rely very heavily on sight, often taking it for granted. But visual aspects of a sensory garden are more than just brightly colored flowers, leaves, and stems. As with any other garden design project, other visual considerations include lines, shapes, and textures. 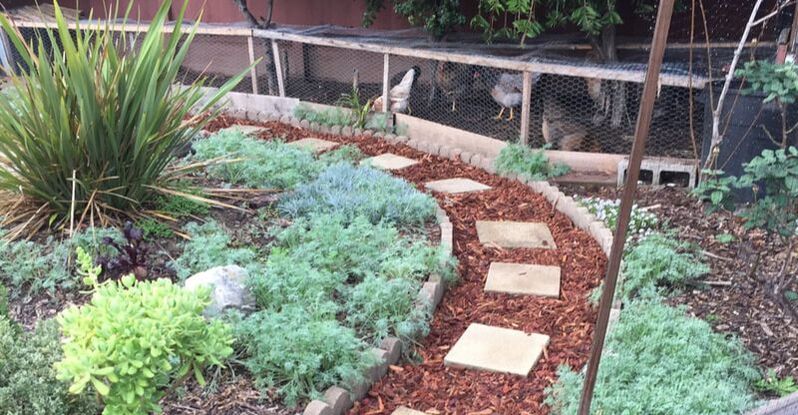 Paths can be textural and inviting Fences, pathways, buildings, and hedgerows create visual lines that the eye will follow. The shapes of plants, raised beds, trellising, and the overall space contribute to the experience. Textures of bark, foliage, flowers, and walkways change how we feel about a space. Garden art, tree cages, furniture, and lighting also impact the visual aspect of a landscape. Some plants that provide bright colors and contrasting shapes include:
Sounds Twittering songbirds, a hummingbird in flight, and buzzing bees can bring a garden to life. Water features, such as a babbling creek, a burbling fountain, or the sound of birds splashing about in a birdbath also add a new dimension to your landscape. So can wind chimes, spinning pinwheels, and rustling stems and seed heads.
Scent can trigger powerful emotions, take us back in time, or lift our mood. Scent is so powerful that entire gardens are designed specifically with scent in mind. These scent gardens are a type of sensory garden. If you brush your hand across a rosemary shrub or rub a tomato leaf between your fingers, there is no mistaking those heady aromas. Think of how tiny white citrus blossoms can fill an area with their sweet fragrance. Many herbs contain essential oils that can fill your sensory garden with a variety of scents. Chamomile, cilantro, dill, lemon balm, mint, and tarragon are just a few of the scented edibles you may already have in your landscape. Other plants with strong aromas include curry plants, lavender, and salvia.
Touch Pet a moss covered rock, stroke the bark of a tree, or hold a ripe orange in your hand. In each case, your finger tips will experience something entirely different. Fuzzy sage, lacy fennel, and ticklish thyme offer unique textures and scents, especially if you close your eyes. Taste Taste is is one aspect of garden design most often neglected. You wouldn’t go to a public garden and think about tasting the plants, unless you were a toddler. Which reminds me, if young children will be participating in your sensory garden, be sure to avoid potentially toxic plants. You also need to make sure that these plants haven’t been sprayed with pesticides and other chemicals, or come into contact with fresh manure. You want the plants in your sensory garden to look and be good enough to eat. Choosing plants for their taste, to nibble them where and as they are, can be a lot of fun. My chocolate mint plant always surprises visitors. Tentative chewing of a raw leaf turns into a look of delight as a peppermint patty appears on their taste buds! 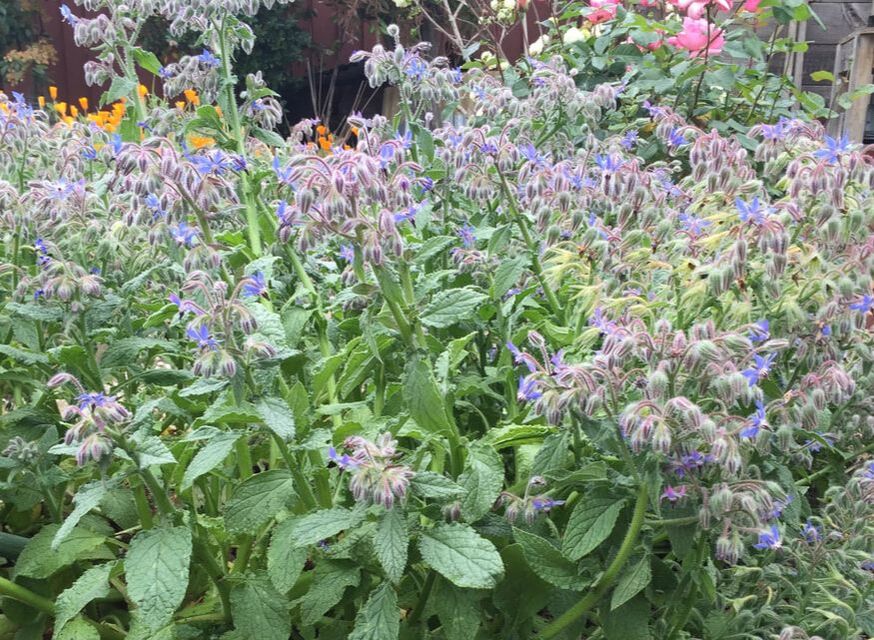 Borage Did you know that borage leaves taste like cucumber? Or that nasturtiums are edible flowers? Basil, cherry tomatoes, chives, mint, and parsley can be enjoyed au natural, fresh from the landscape. Fruit and nut trees provide delicious tastes when in season, plus they offer shade from the sun in summer and textural experiences year round.
The goal of your sensory garden, then, is more than just visual appeal. It is an experience that heightens the senses and makes us more aware of our surroundings while slowing our heart rate, reducing stress, and adding beauty to our lives. I think we could all use more of that, don’t you? There is something about rocks that begs us to play with them. Have you ever considered creating a rock garden? 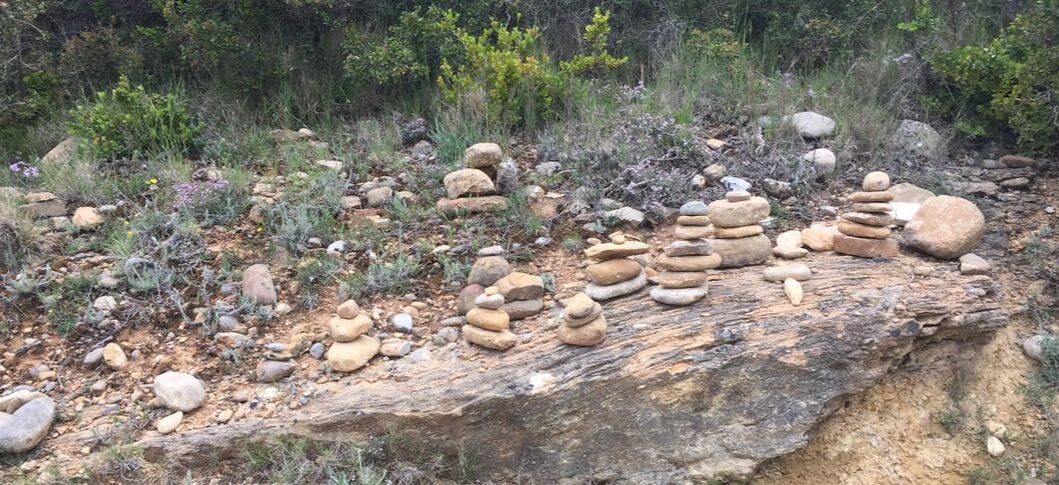 Rocks placed along the Camino de Santiago, Spain Rock gardens, also known as rockeries or alpine gardens, consist of aesthetically placed rocks with plants growing in the gaps. This particular garden design is well suited to drought-prone areas and alpine regions. Rock gardens tend to require very little care, once they are established. If you look closely, however, you will see that rock gardens are busy places.  Alligator lizard A world in miniature Rock gardens create a microhabitat for a wide variety of beneficial insects and animals. All those nooks and crannies create wonderful hiding places for native ground nesting bees, predaceous ground beetles, lizards, soldier beetle larvae, spiders, frogs and toads. Rocks also provide great sunning spots for a wide variety of amphibians and reptiles. These creatures are in need of all the help we can offer. In exchange for providing them with some real estate, many of these visitors will consume a lion’s share of the pests that damage and carry disease to your garden.  Rock garden in Japan (663highland) CC BY 2.5 Types of rock gardens Your rock garden can be designed to look like a dry stream bed, a natural stone outcropping, a Japanese Zen garden, or something else entirely. Stones of different sizes can be used to create pathways or visual appeal. Amphibians are particularly fond of rock gardens with water features. Your rock garden can be very formal or it can simply be a bunch of rocks positioned in ways that you like. There are no rules. 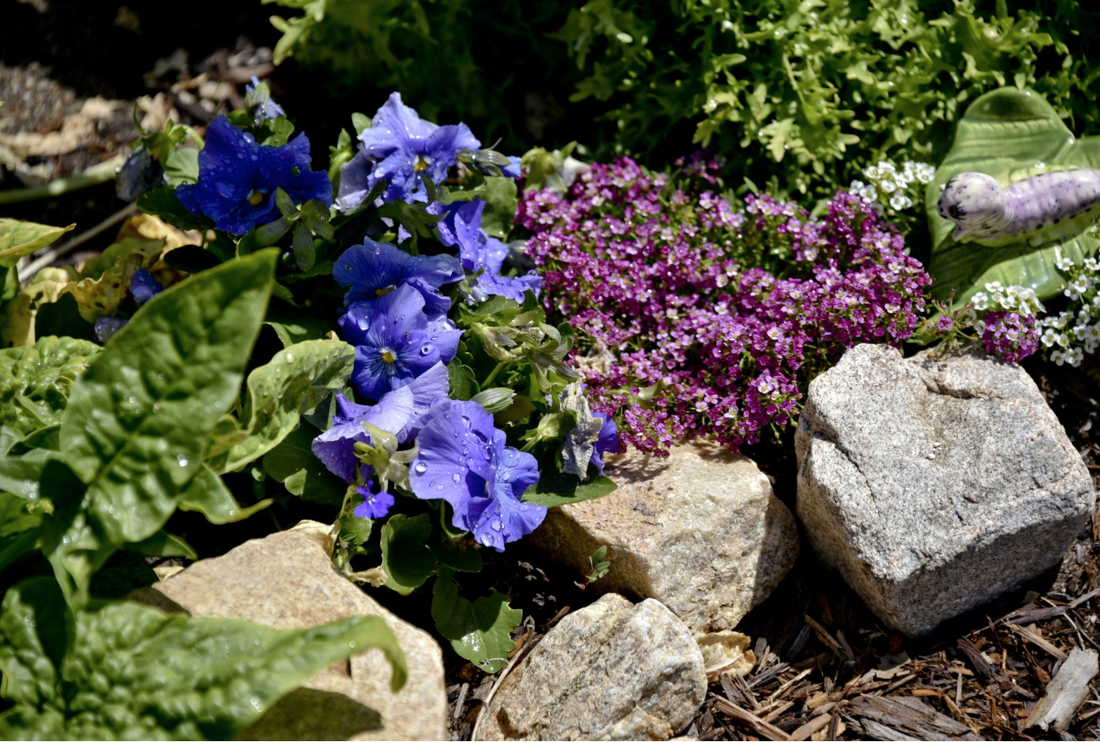 Miniature pansy rock garden (Needpix) Types of rocks Most first rock garden designs are built with rocks and stones that are already present on the property. You can also collect rocks and stones from friends and neighbors, or buy specific rocks, stones, and even boulders. Sometimes, you can get free rocks from construction sites, just be sure to ask permission first. When selecting rocks for your rockery, more porous rocks are better suited than harder rocks. Harder rocks take longer to look natural. Softer rocks look weathered and like they have been there forever much faster. Also, moss grows on it more readily. You can encourage the growth of moss on your rockery by collecting mosses that you like and putting them in a blender, along with some yogurt or sour milk. Puree this strange concoction into a thick slurry, which is then poured over the rocks. Sooner or later, moss will start to grow.  Japanese Zen rock garden (Ivanoff~commonswiki) CC BY-SA 3.0 Site preparation Once you have selected a site for your rock garden, remove all of the existing vegetation. Many of these plants may become too large for your rockery. Next, loosen the soil enough for the largest rocks to be somewhat sunk into the ground. This will make it look more natural and prevent the whole thing from toppling or rolling around. For the best results, create a shape with the largest stones and fill that area with high quality planting soil. Mud in that soil in to reduce large air pockets before adding medium-sized rocks. Repeat the soil addition and mudding in until all of your stones have been placed. Now you can start adding plants. Plants used in rock gardens Rock garden plants need to stay small or your rock garden will disappear. Limited by the lack of deep soil and all those rocks, rockery plants are chosen for their ability to thrive, albeit slowly, in well-drained soil. Plants that can survive in dry environments are called xerophytes. In addition to size, rock garden plants must be able to thrive in your microclimate. Sun and wind exposure, Hardiness Zone, annual rainfall, soil structure, soil pH, and all the other plant selection guidelines still apply, with the addition of small size, slow growth, and drought tolerance. Start your plant search by considering plants native to your area. Native plants have evolution on their side and they support indigenous species. They also tend to require less care and irrigation. When considering plants for your rockery, be careful about installing invasive plants. These can cause more problems than they are worth. Some of the more common rock garden plants include:
 Ireland's Castle Archdale Rock Garden (Kenneth Allen) CC BY-SA 2.0 Much like stumperies, rockeries use natural materials to create spaces that are both beautiful and beneficial. Once your rock garden is in place, make a point of examining it closely for signs of life. Your rockery will end up creating a tiny world all its own.
Pollinator gardens attract insects that pollinate your crops. They also tend to look lovely.  Canadian pollinator garden (Introvert) CC BY 2.5 Similar to butterfly gardens, pollinator gardens use flowers and other plants to attract and provide for pollinators. What are pollinators? Pollinators are mostly insects, such as bees and butterflies, that carry pollen from one flower to another, resulting in fertilization and fruit production. Bats, birds, lizards, and even people can be pollinators, as well. Most pollinator gardens use insectary plants to attract these garden helpers. 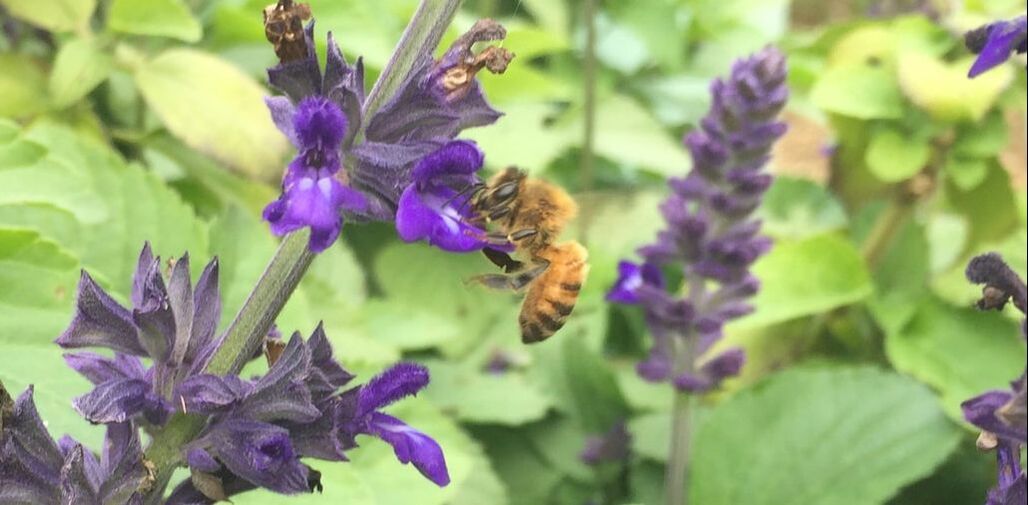 Honey bee on salvia (Stuart Russell) What are insectary plants? Insectary plants are those that provide food, shelter, and/or egg-laying sites for beneficial insects at various life stages. Those beneficials may be predators, pest parasites, or pollinators. The flowers that provide this service are usually globe-shaped, such as chives and onions, umbrella-shaped or flat-topped umbellifers, as in seen in carrot and cilantro plants that have been allowed to go to seed. Depending on your region’s pollinator species, the insectary plants suited to your area may be tall or short or both, but most are brightly colored.
As convenient as generic pollinator plants lists are, you will have a more effective pollinator garden if you take the time to identify pollinators native to your area. You can do this by searching online for “pollinators in [my town/state]”, and by contacting your local native plants society, Master Gardeners, and universities. You can also contact the Xerces Society for Invertebrate Conservation and take other actions to create a more successful pollinator garden. 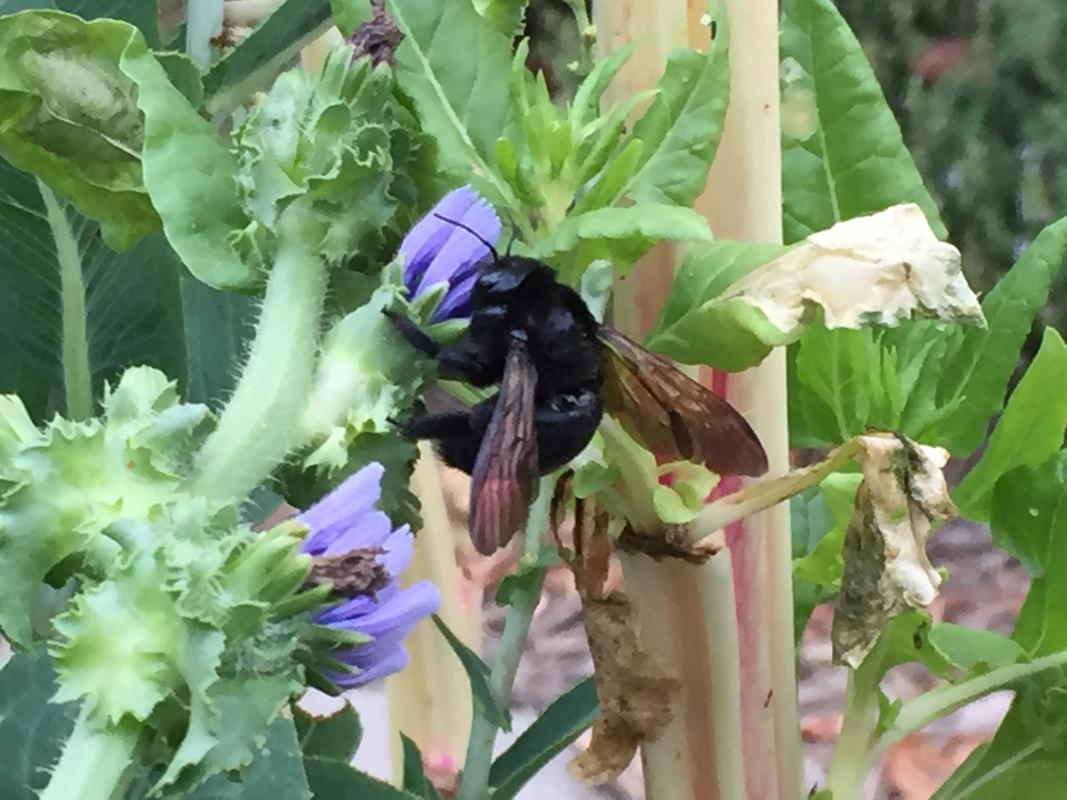 Female carpenter bee on escarole flower (Kate Russell) Salt, anyone? While you generally want to keep salt as far away from your garden as possible, there are exceptions. Using a damp salt lick to provide minerals and moisture for bees and butterflies is one of those exceptions. If you have an area that stays damp, simply add salt or wood ashes to the mud. Otherwise, you can put out a dish of slightly salty water. Sea salt contains more important micronutrients than table salt, but table salt is better than nothing. Just remember that salt will damage nearby plants. Plant for variety Pollinators are active, in most regions, from early spring through late fall. Ensuring that your landscape includes a variety of insectary plants during that time frame will go a long way toward attracting and supporting valuable pollinators. That variety includes clumps of native plants, suited to your microclimate, and some night-blooming plants that provide for moths and bats. I use a spreadsheet that lists months across the top and a rainbow of colors down the side to document what is blooming, throughout the year, in my landscape. I add to it as I notice or add new plants. This way, I can see when there are gaps in flower production. Since those flowers provide pollen and nectar, the more I have, the better off my pollinators will be. [The file is too large to share here, but you can contact me if you would like a copy.] Avoid hybrids Evolution is a relatively slow process. Many of our modern hybrids, especially those with ‘doubled’ flowers, have had their fragrance, nectar and pollen bred right out of them. They may look nice, but that’s all they have to offer. Quit the chemical habit Broad-spectrum herbicides, insecticides, fungicides, and pesticides have no place in your pollinator garden. Even those advertised as “safe” can disrupt the breeding, feeding, and existence of beneficial insects. They are probably not very good for us, either. Instead of chemicals, practice least damage Integrated Pest Management (IPM). If you absolutely must use chemicals, apply them at night, when most pollinators are not active.  fallen tree trunk creates habitat and atmosphere Dead limbs can be good Dead branches and dead trees provide nesting sites for native bees. Stumperies also create habitat and food for a variety of birds and other insects. Just make sure your dead tree does not create a safety issue. Trees are extremely heavy. 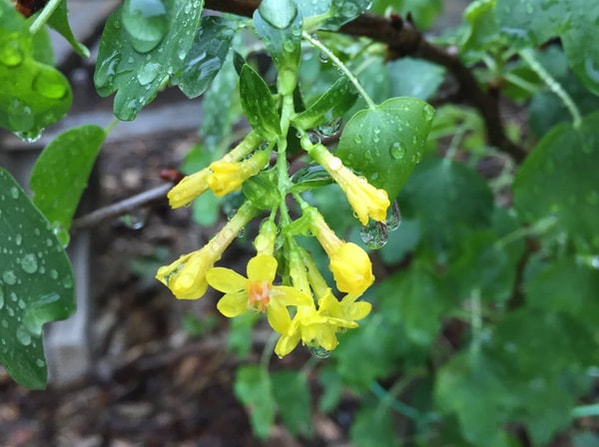 Currant flowers Hummingbird feeders
Your hummingbird feeder provides nectar for far more than just hummingbirds. Chickadees, wrens, and orioles may also enjoy a sweet sip every now and then. And so will many pollinators. The 1:4 sugar to water ratio used in hummingbird feeders is fine for many beneficial insects, too. Just be sure to wash your hummingbird feeder with hot, soapy water once or twice a week to avoid mold and the spread of disease. Setting aside just a little space in your landscape for a pollinator garden can profoundly increase the number of butterflies, native bees, and other beneficials you see each year. And they could really use our help these days. You can instill a love of gardening in your child with a children’s garden. 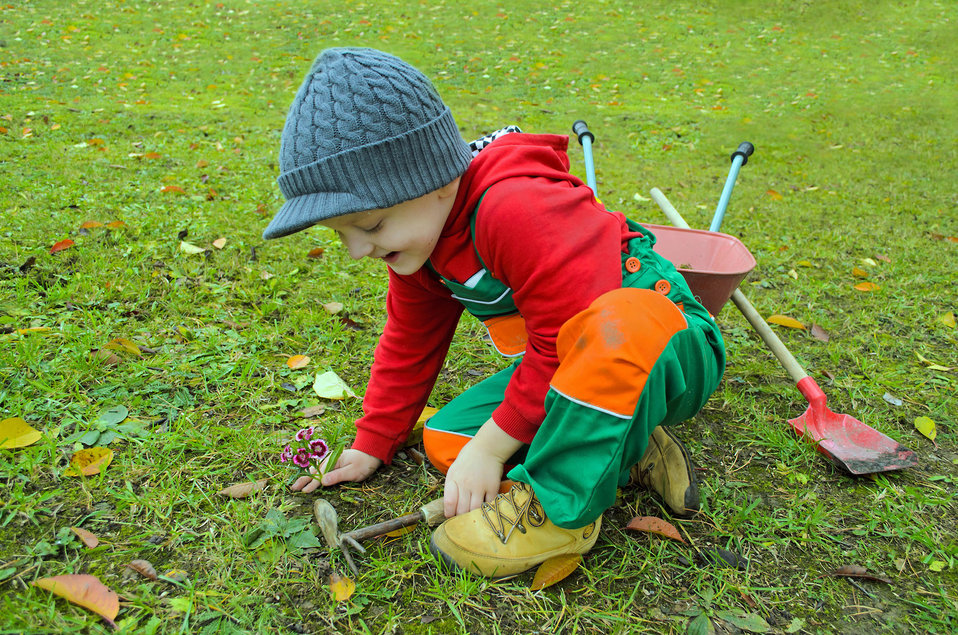 Child gardener (Public Domain) I learned my love of gardening as a child. It all started with a clear plastic cup, a black sponge, and four hard, dry corn seeds. It was an educational toy which had a child insert the sponge into the cup and then push the corn seeds between the cup and the sponge. Each seed was positioned so that it pointed in a different direction. Water was added and the magic of germination began. I was impressed by the fact that the first roots (radicles) always knew to go down, while the first shoots (plumules) always found a way to move upward, even if it took some twisting and turning. The whole process still amazes me and you can let your child in on some of that magic with a garden designed with them in mind. Make it child-sized Adult-sized shovels and trowels can take all the fun out of gardening for a child. So can cheaply made tools that tend to break. Start your children’s garden off right by investing in a well-made child-sized trowel, shovel, hoe, and rake. A small bucket and watering can will be handy, too. 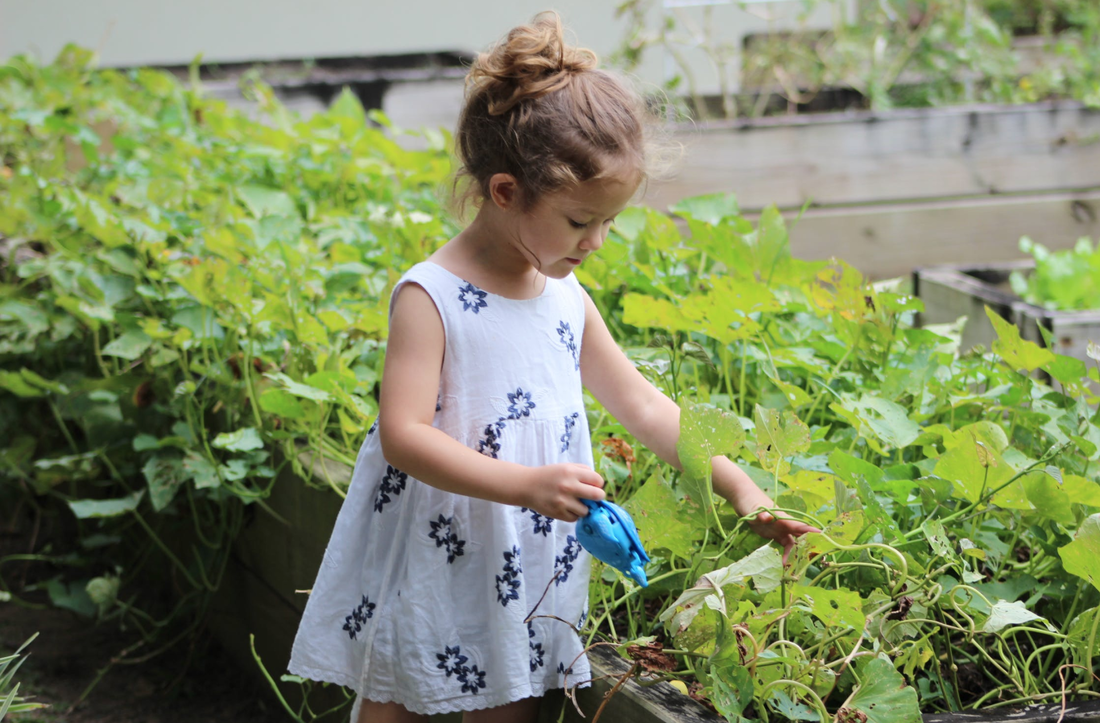 Girl watering garden plants (Maggie Zhao) Create a space You may not want your child(ren) digging around your prized rhubarb or roses, so set aside space just for them and their garden. You can make the space a fun shape, too, such as a triangle, a butterfly, or a series of small circles. This will help create ownership, which will carry your child through some of the more difficult tasks, such as waiting for plants to germinate or flower.  Ask them what they want to grow Do they want to grow their own pumpkin for Halloween? Or, maybe a sunflower fort, a pizza garden, a Three Sisters garden, a butterfly garden, or a pole bean teepee. The possibilities are practically limitless. Head to the library with your child and explore the gardening books section. Check out several and be sure to grab one or two grown-up gardening books geared towards your region or microclimate while you are at it. That way, as plants are selected, you can research the best way to help them thrive. [See, you don't have to know how to garden to help your child create a garden of their own!] Grab a pad of paper and a snack and start exploring all the garden design possibilities with your child. Including them in the planning process is important. As you look through photos and drawings together, have your child create a list of plants they want in their garden (if they are old enough). And you will be there to instill some basic gardening principles and to rule out plants not suited to your area. As much as your child may want their own banana tree, it wouldn’t be a good choice for a beginner. In the beginning, you should keep explanations simple. You can always delve deeper into the information for yourself once they go to bed. Popular children’s garden plants You can’t go wrong with radishes. They grow so fast that things start happening before your child loses interest. Soaring giants, such as corn and sunflowers, are nearly always a good choice. Plants with large seeds, such as beans, melons, and squashes are easy to work with and the edible harvest is a bonus. Climbing plants, such as pole beans or dramatic red noodle beans, can be used to create hanging walls or secret hideaways. Mounding miniature lettuces and spiky shallots look nice and are always welcome in the kitchen. Cherry tomato plants are prolific and they provide healthy snacks as your child works and plays in the yard. Marigolds, snapdragons, and zinnias add color with little effort.  Girl surrounded by sunflowers (Nghĩa Phạm) Include scents and textures Children are very tactile. They like to touch, taste, and smell whatever is around them. This makes many herbs good choices for a children’s garden. Chives, dill, mint, and sage add delicious aromas and an edible harvest. Fuzzy lambs’ ears and ornamental grasses are fun to touch, while English thyme can make a fragrant ground cover. Edible flowers, such as nasturtiums, pansies, and violets are also good choices. Just be sure to educate your child about how not all flowers are edible. Plants to avoid Most edible plants a re a sage bet, but some plants are toxic and should be avoided when designing a young child’s garden. [Especially those marked with an asterisk.] These plants include:
As your child gets older, the risk of toxic plants becomes less of a problem.
Special touches Birdfeeders, pinwheels, crawl-throughs, and other special touches can help make your child’s garden even more engaging and fun. Yard sales are a great place to find a child-sized garden bench and unique garden art without spending a lot of money. You may also want to include a fruit cocktail tree. These trees have been grafted to provide more than one type of fruit on the same tree. If your child is so inclined, encourage them to document their garden. They can create a book of bug drawings, a chart of plant growth, or a photo album of their garden over the seasons. At the end of the day, after you have both washed up and eaten supper, you may want to curl up with a good gardening bedtime story, such as Frances Hodgson Burnett’s The Secret Garden. It sure worked for me! |
Welcome!You can grow a surprising amount of food in your own yard. Ask me how! To help The Daily Garden grow, you may see affiliate ads sprouting up in various places.
You can also get my book, Stop Wasting Your Yard!  Index
All
Archives
July 2024
|
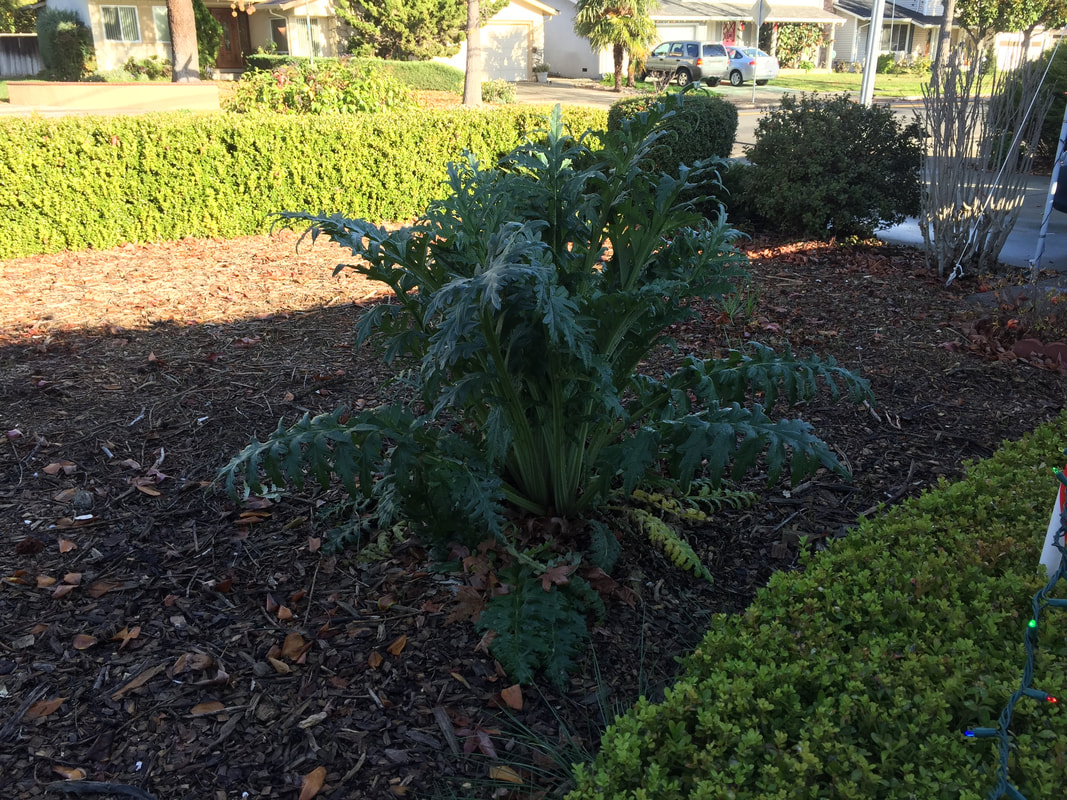
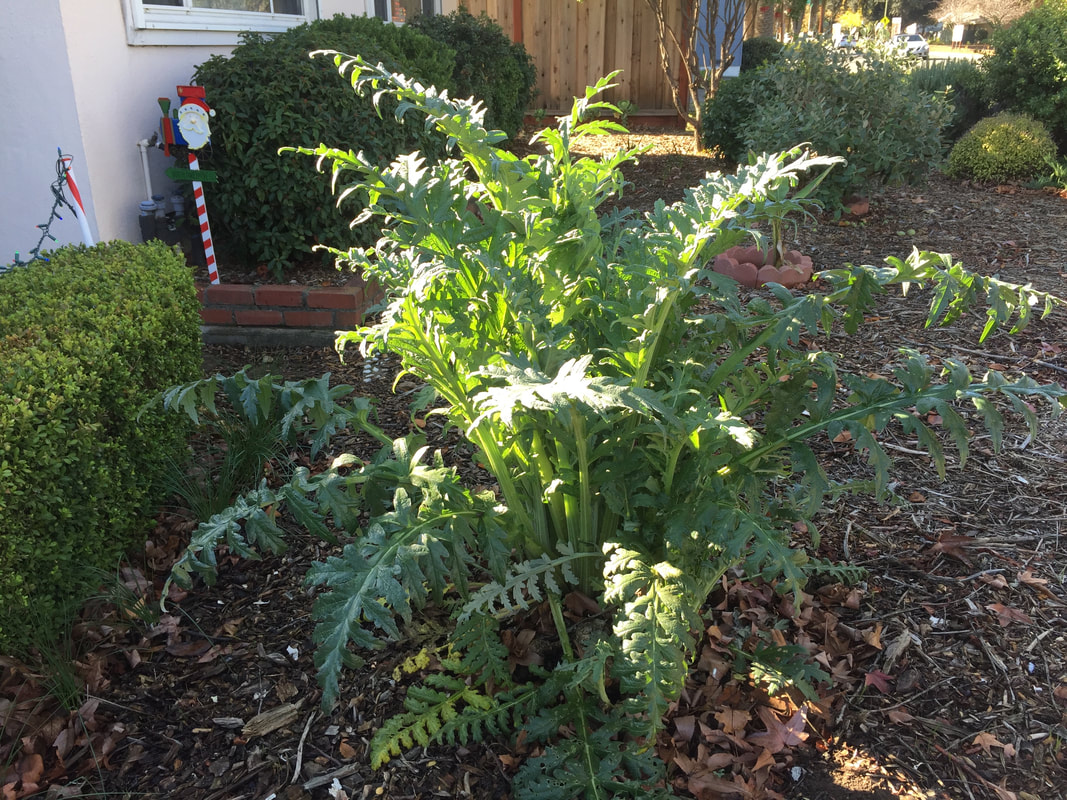

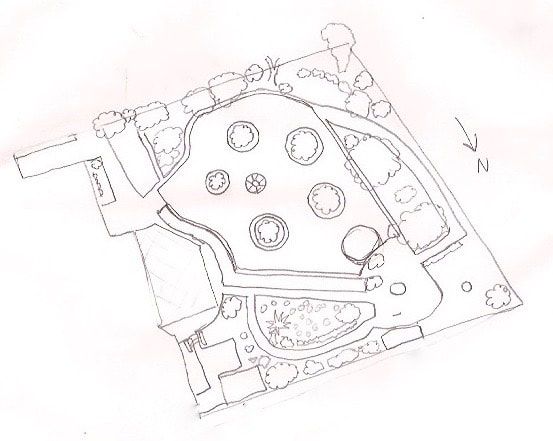
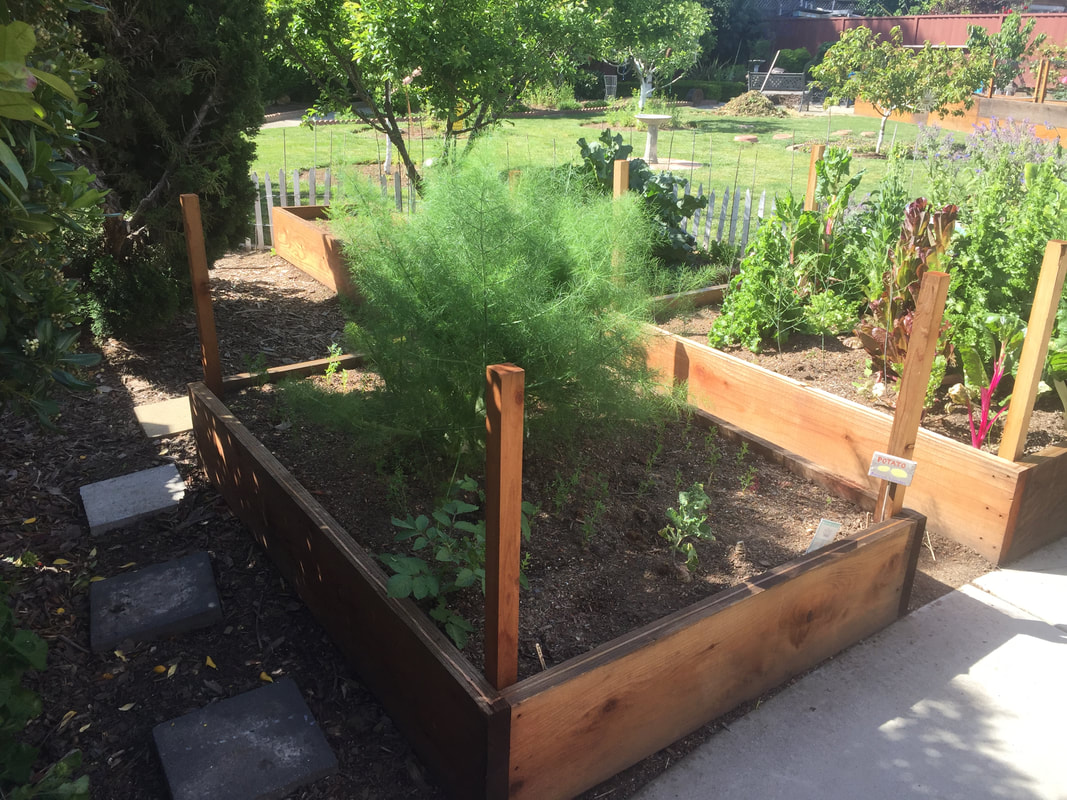
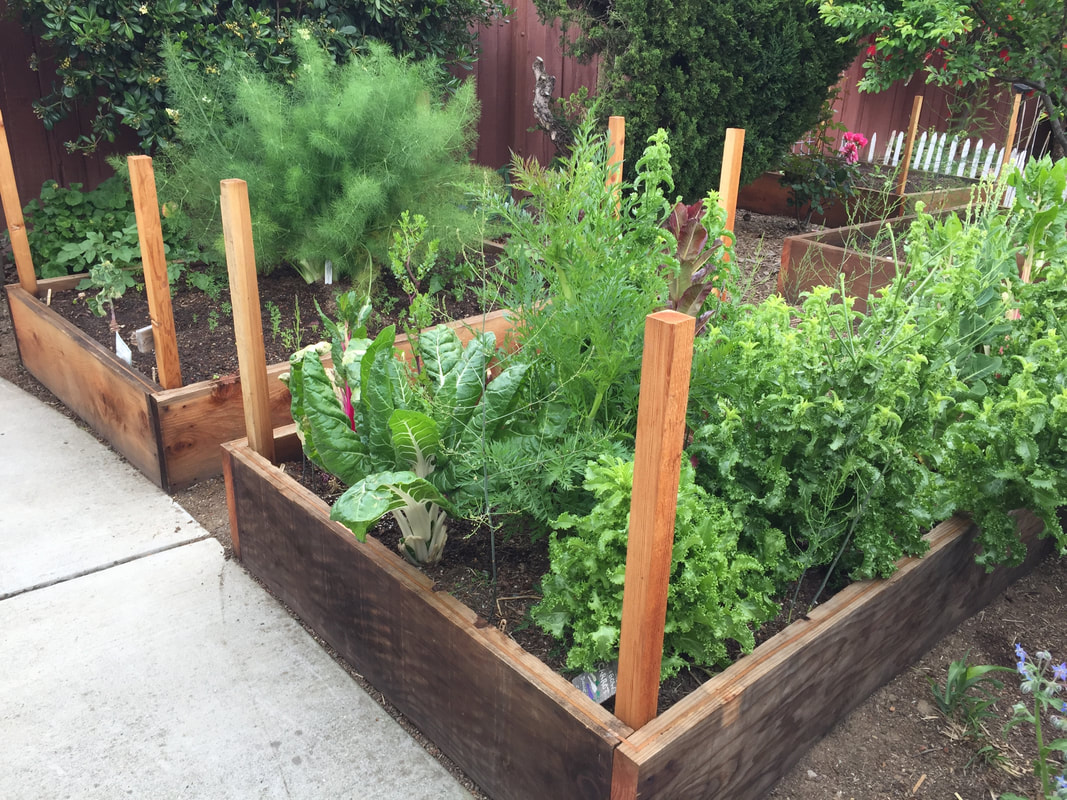
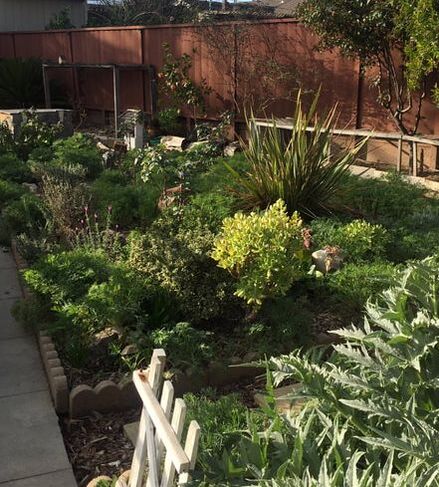
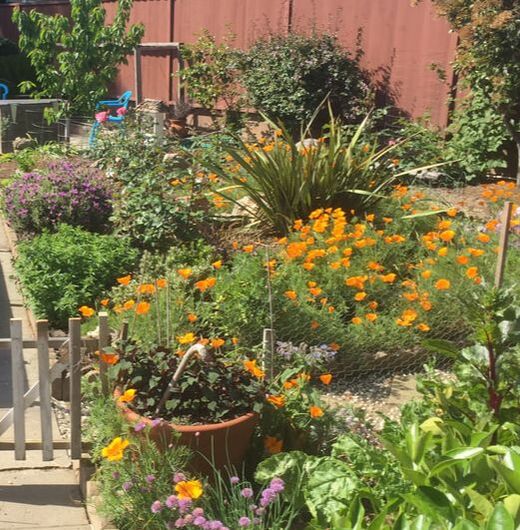
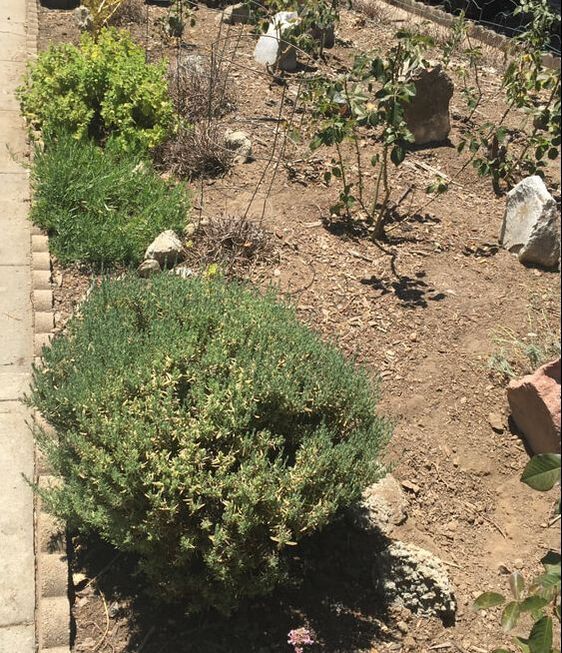

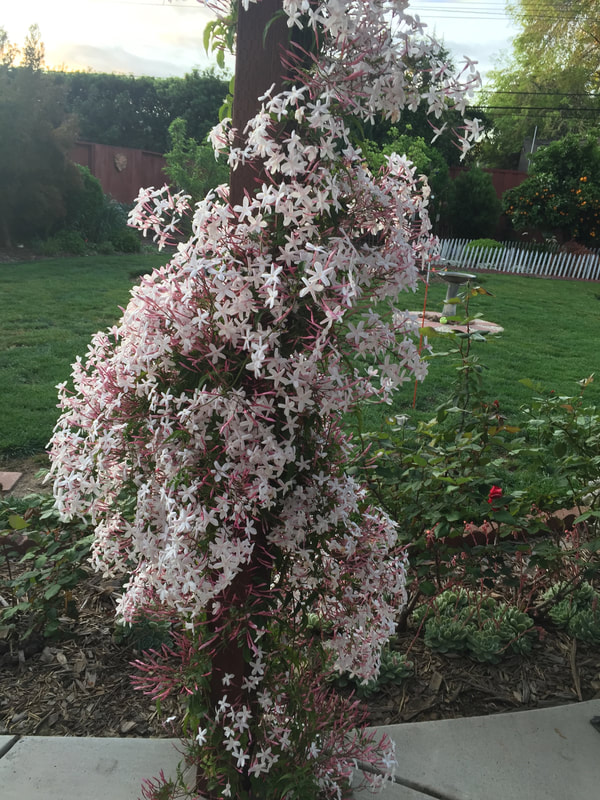
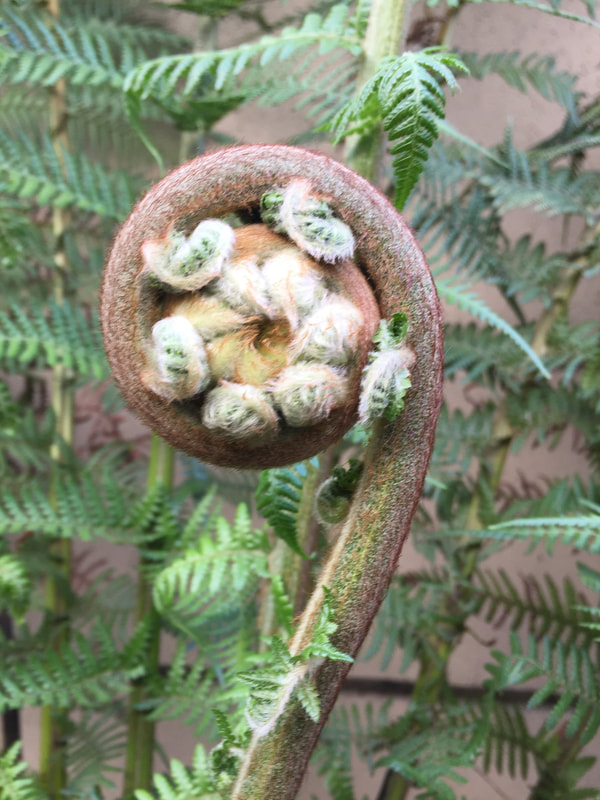
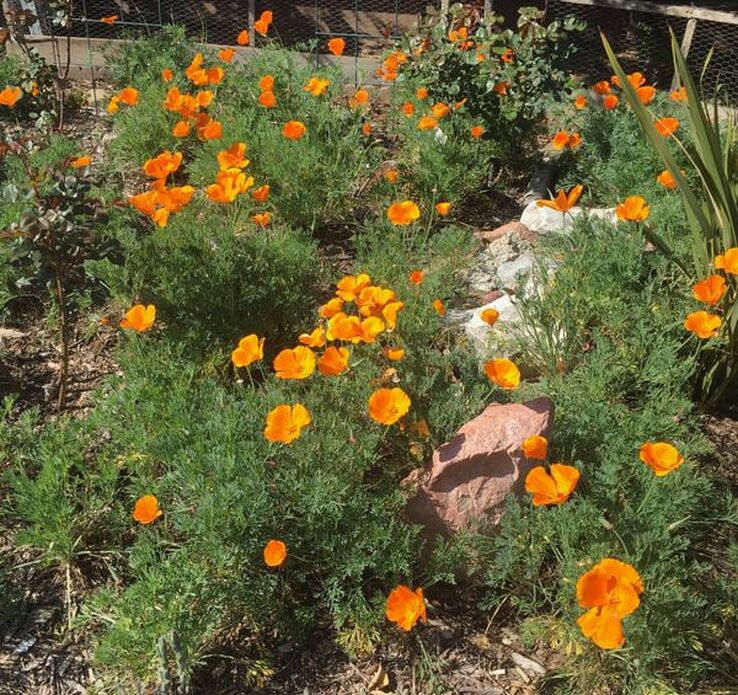


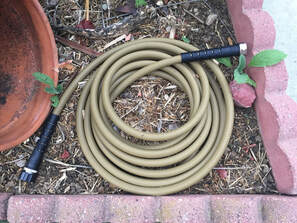
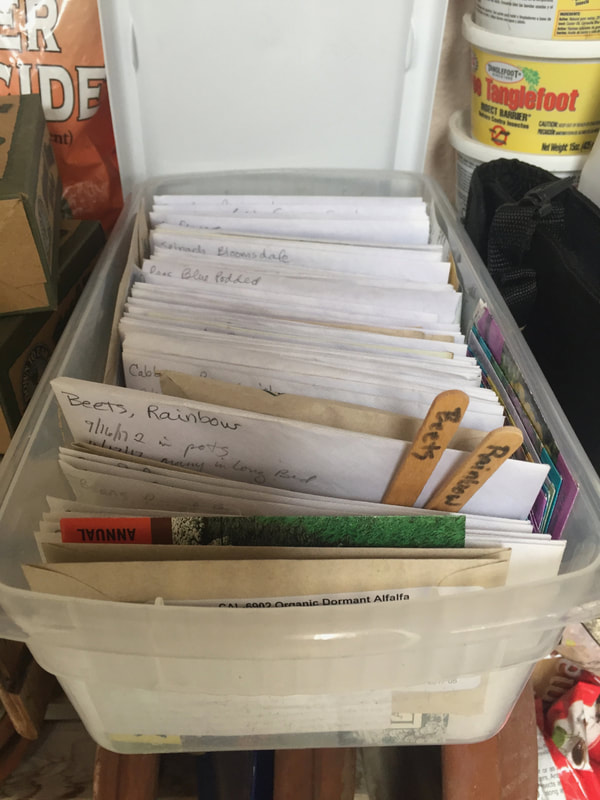
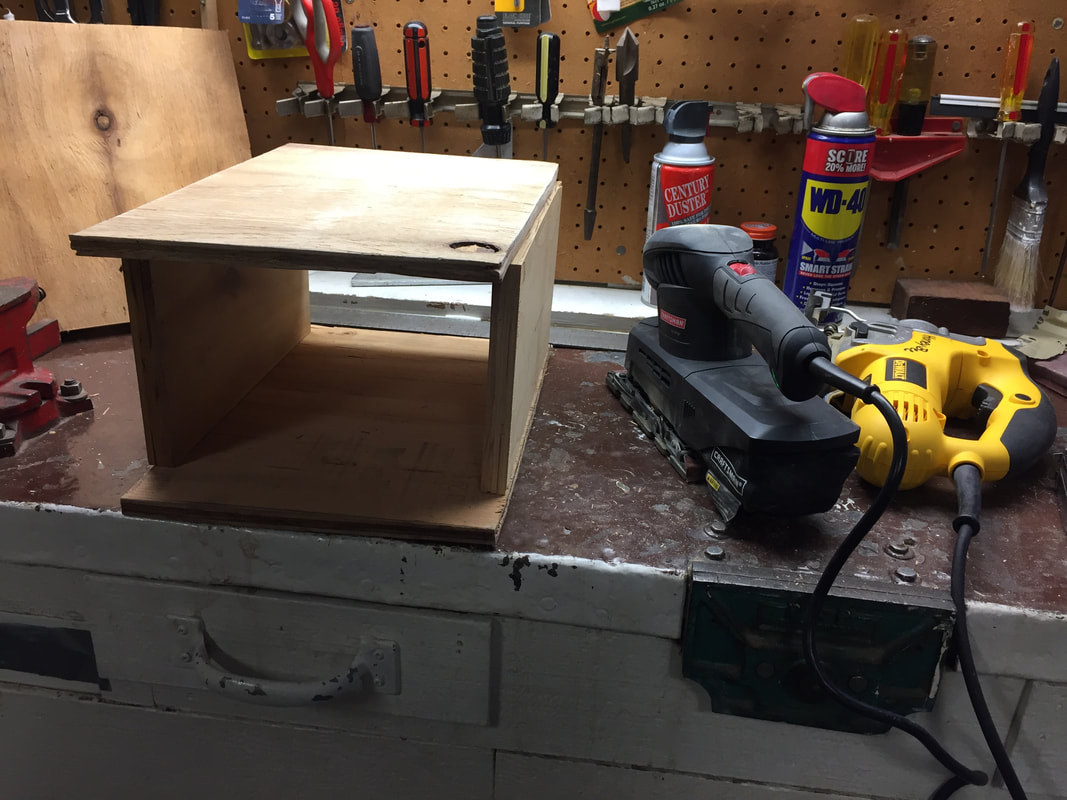
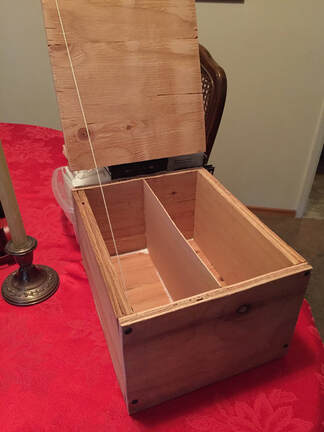


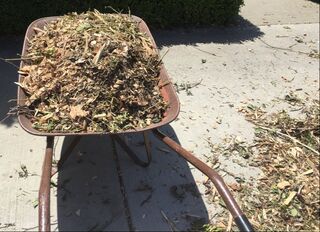

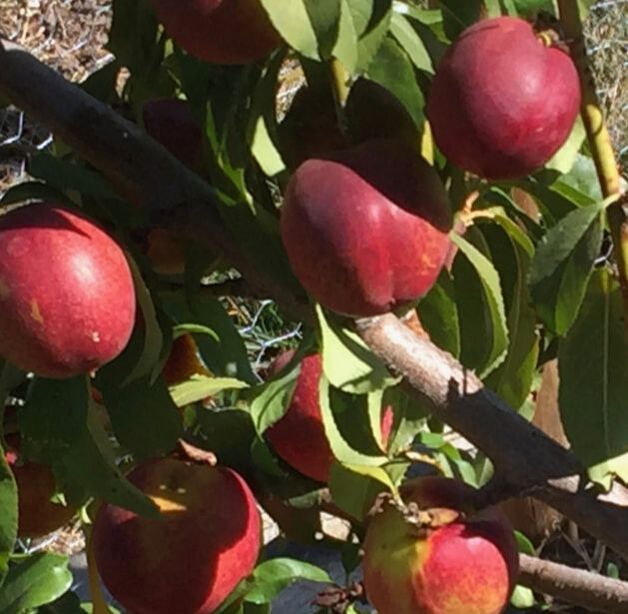
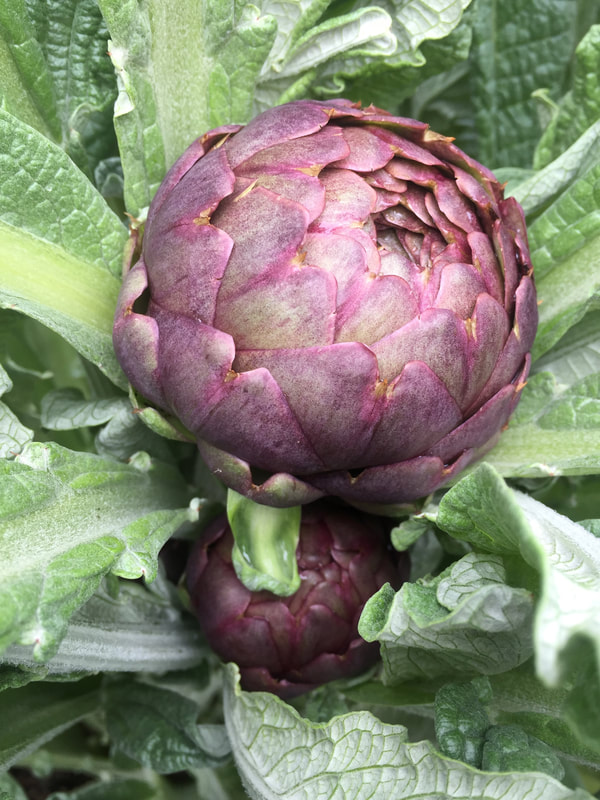


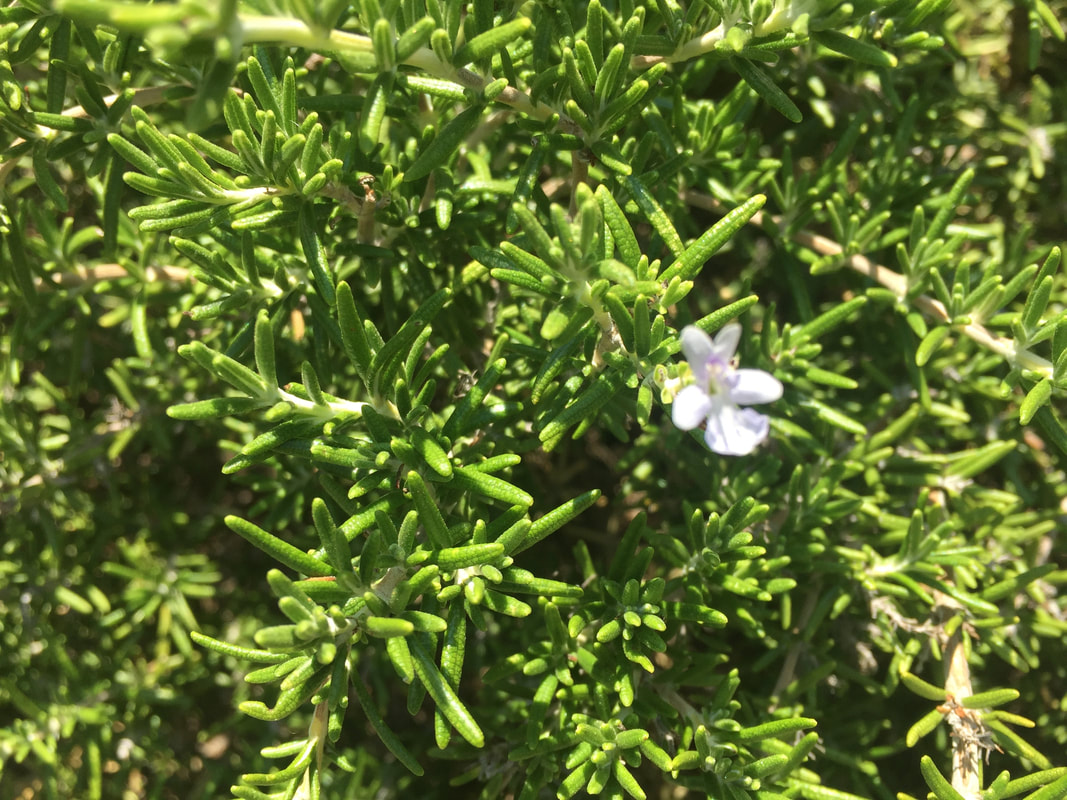
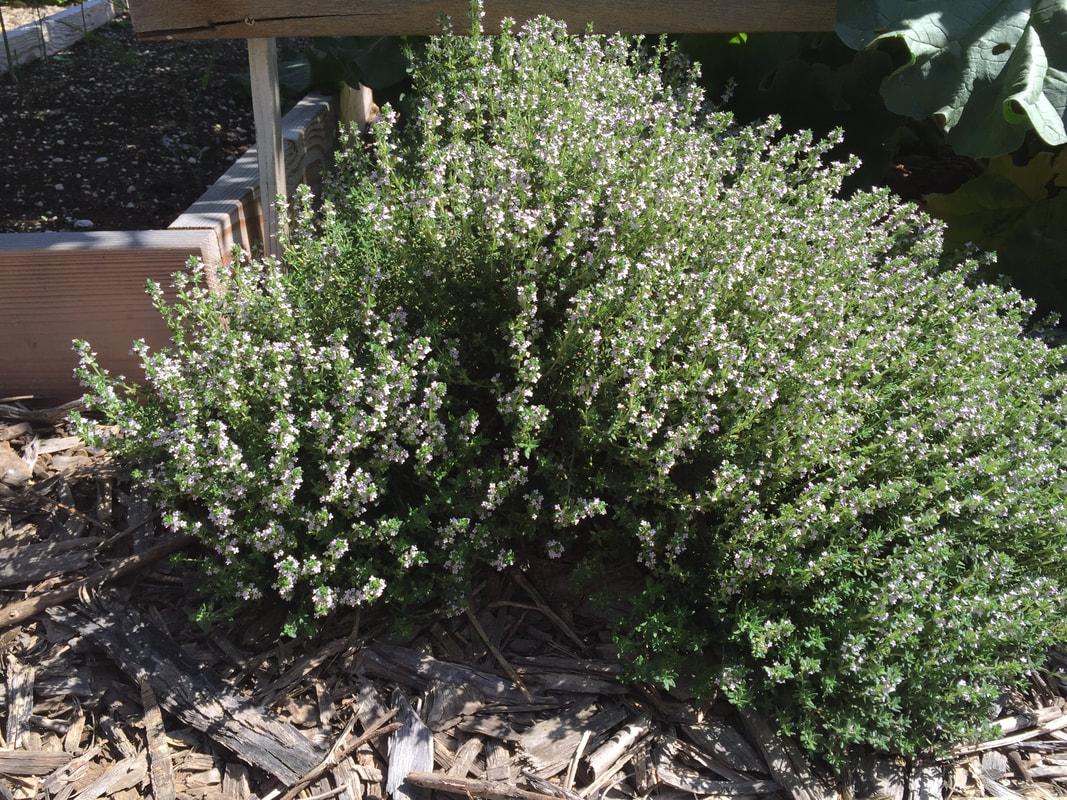

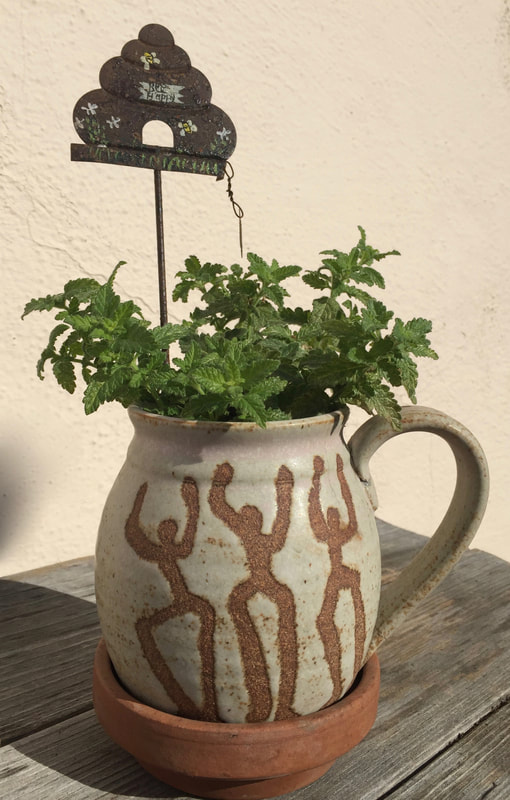
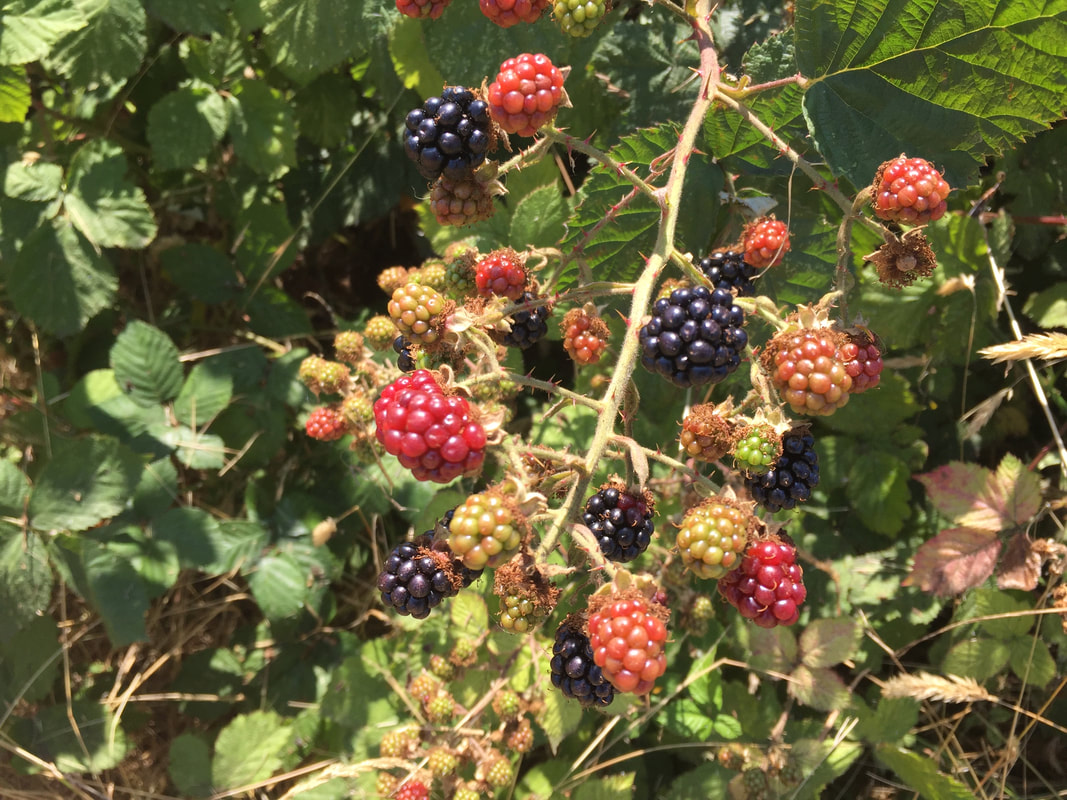
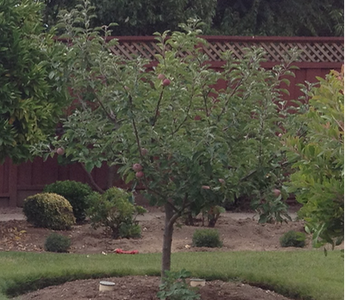

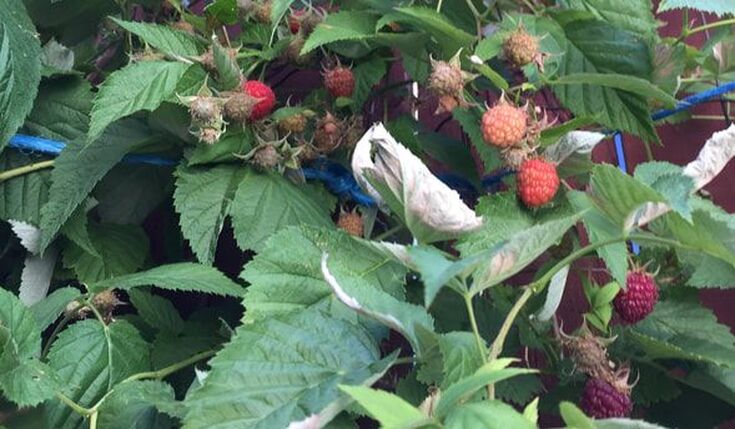


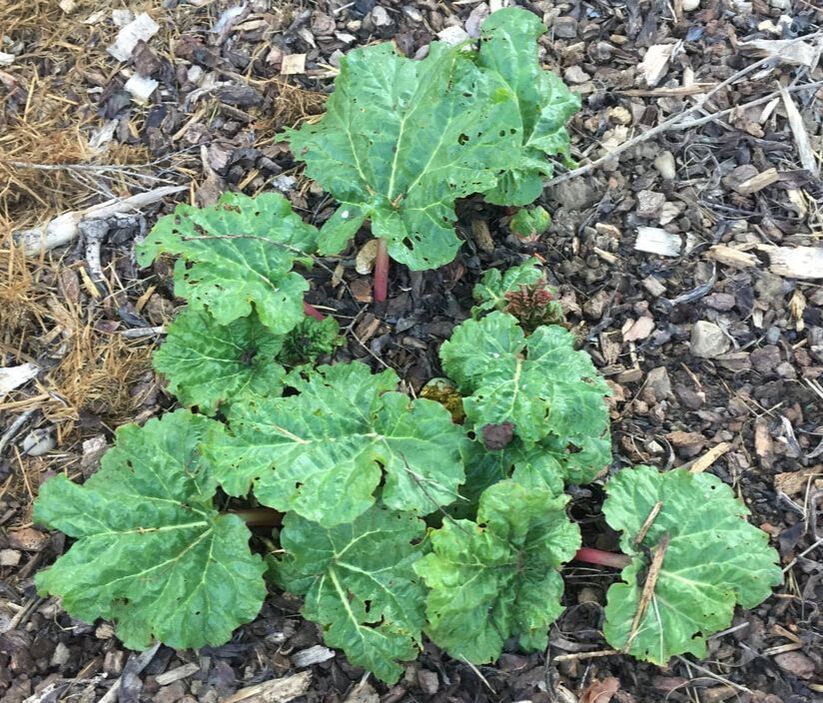

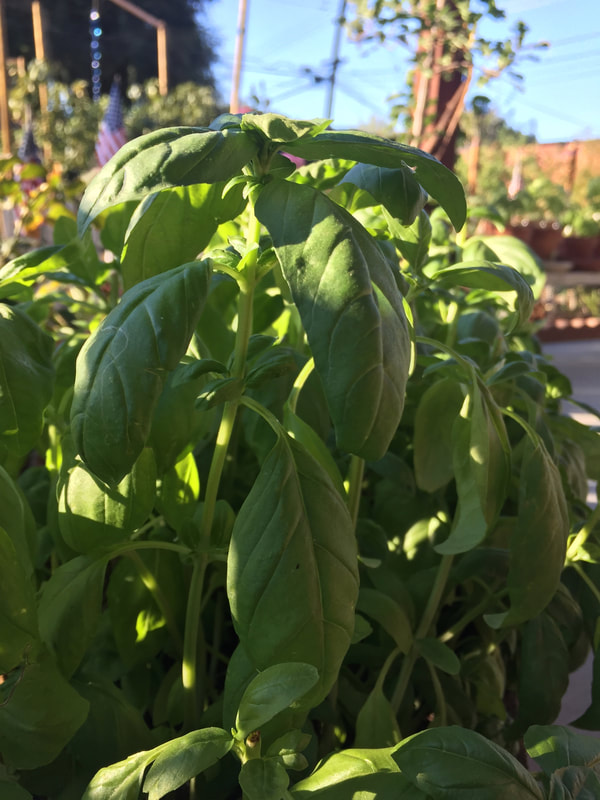

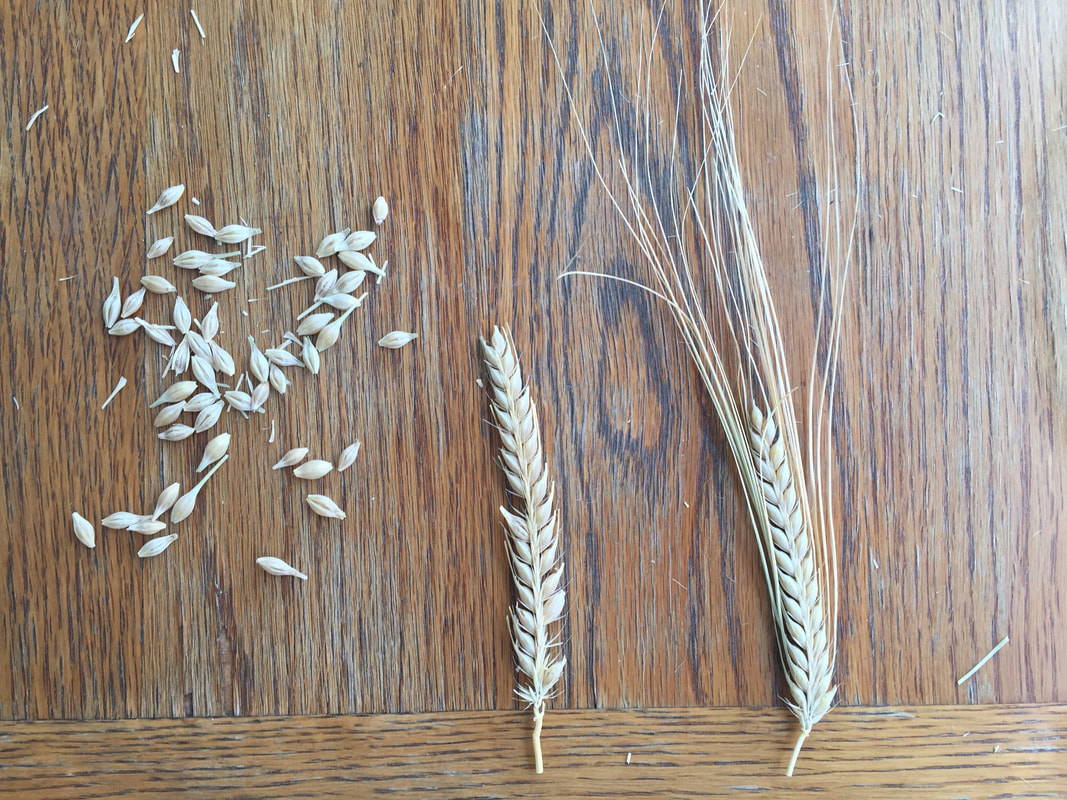


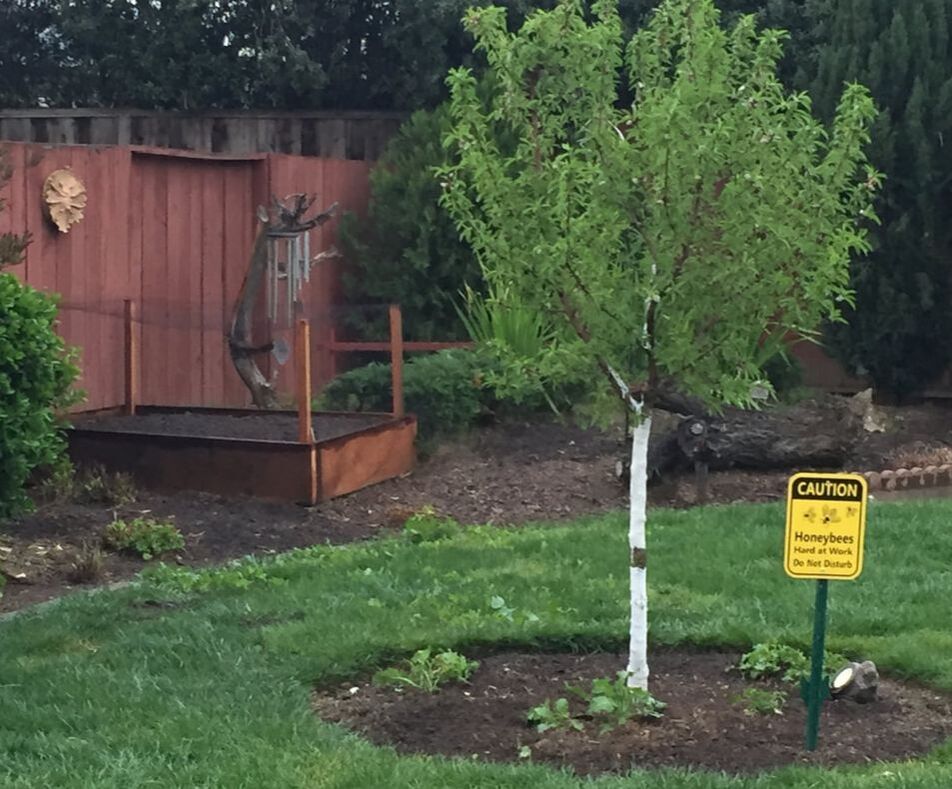

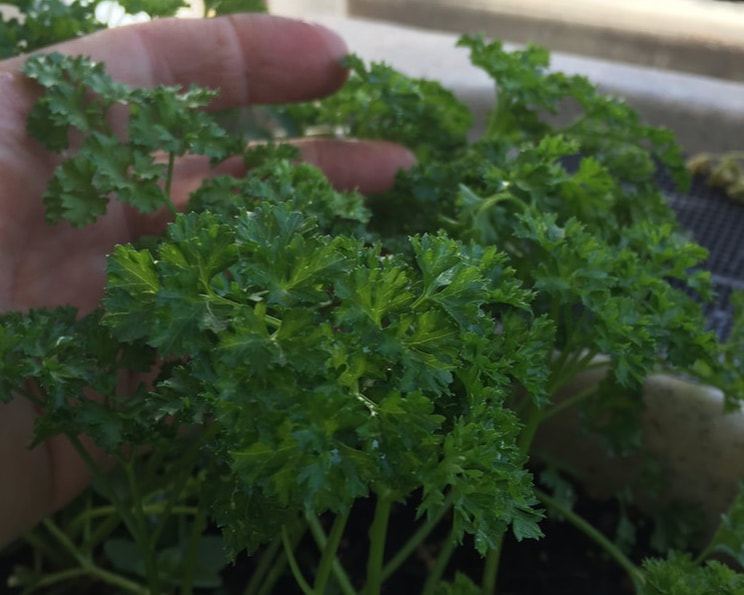


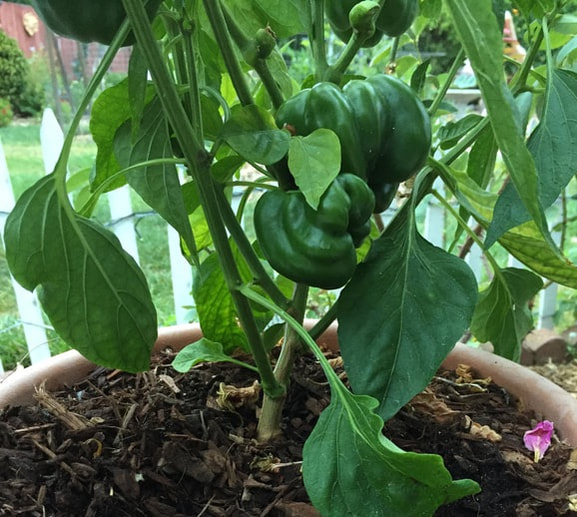
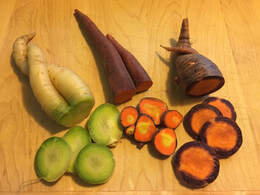
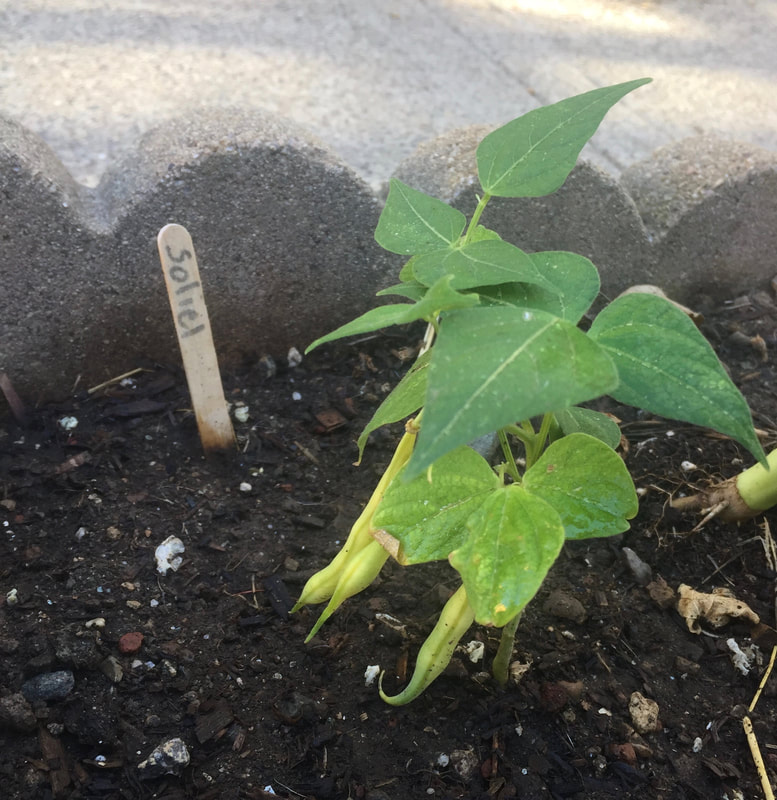
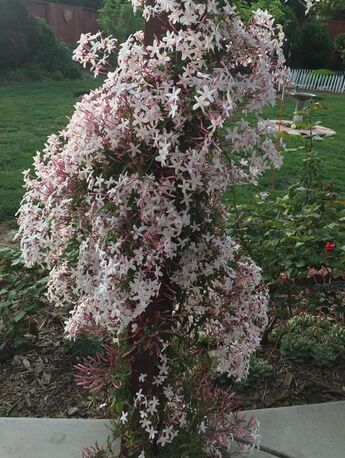
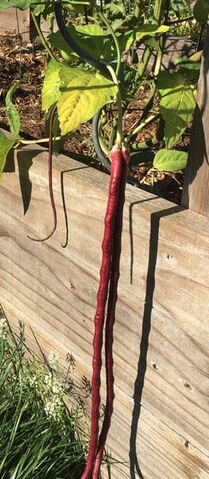


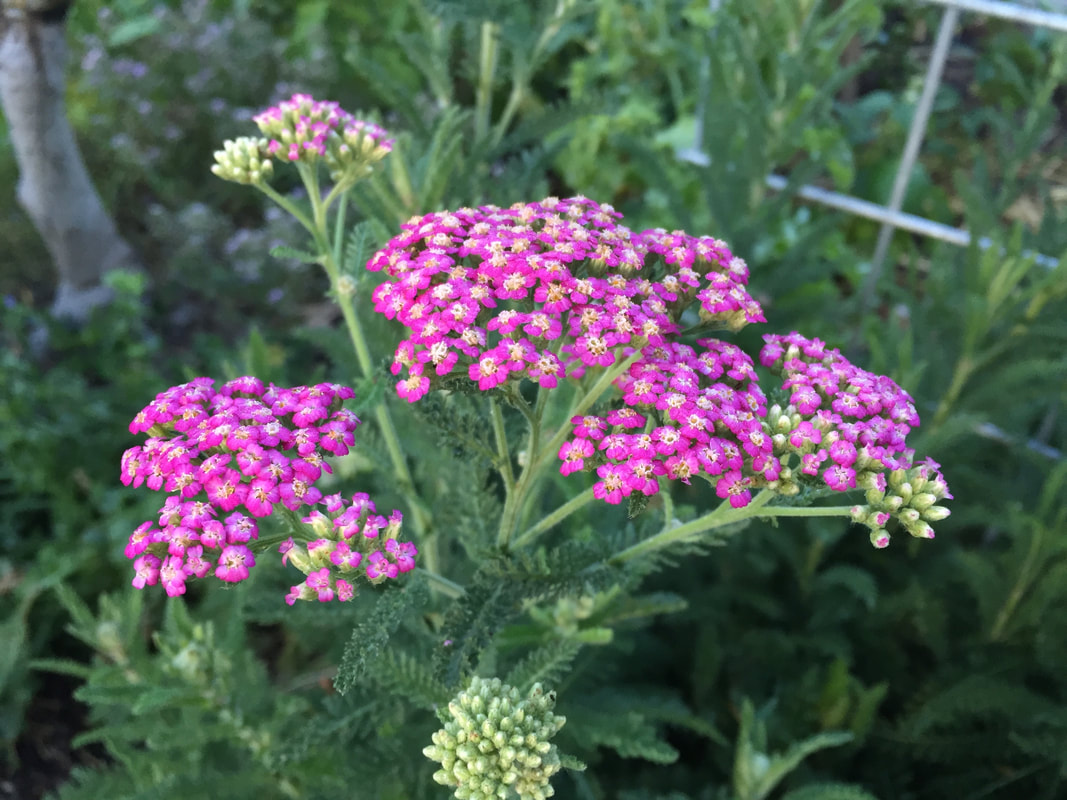
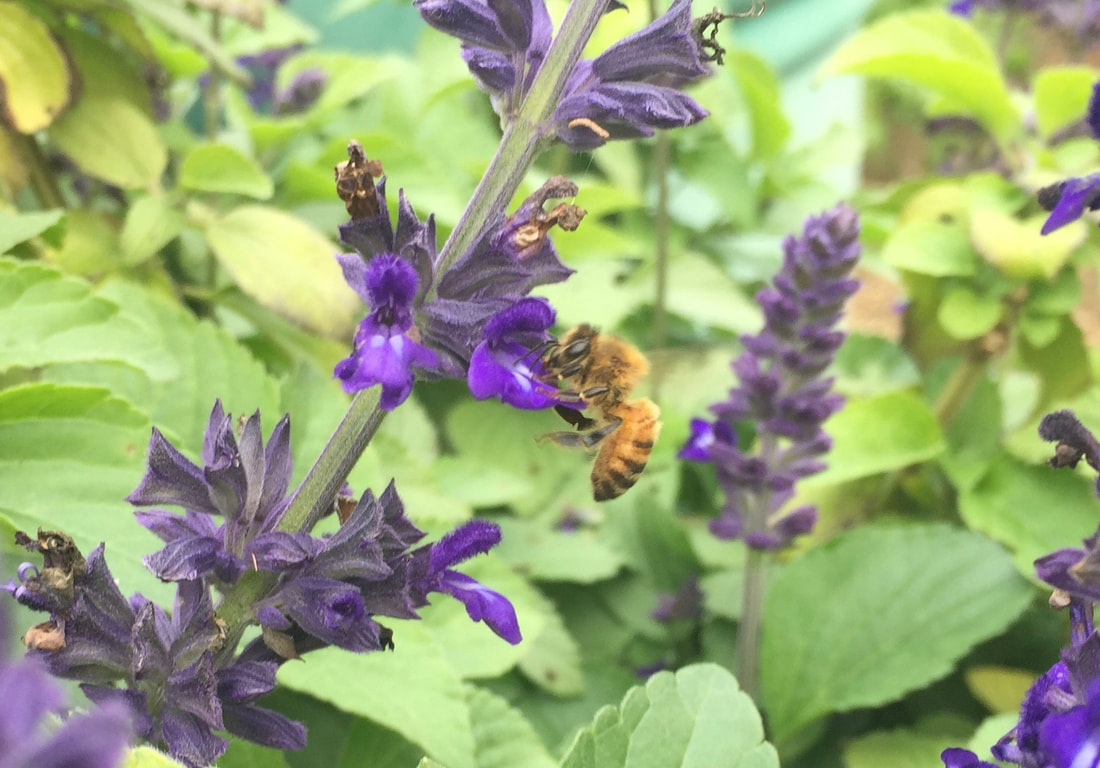

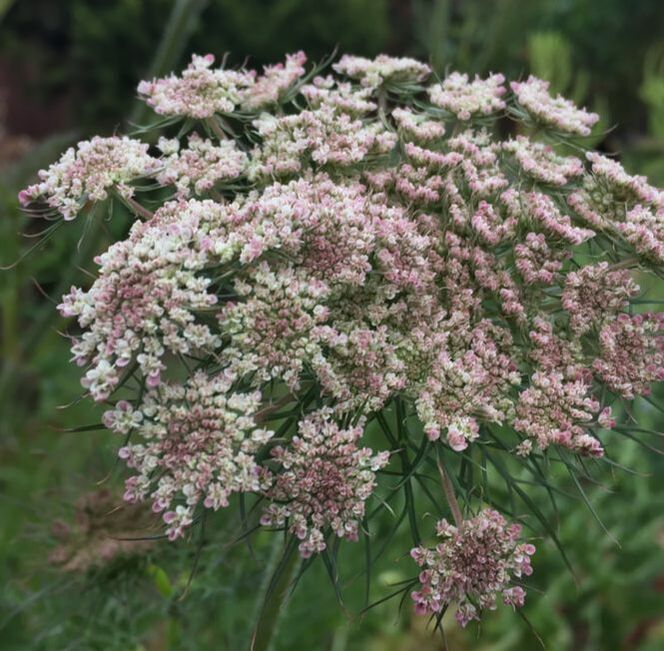
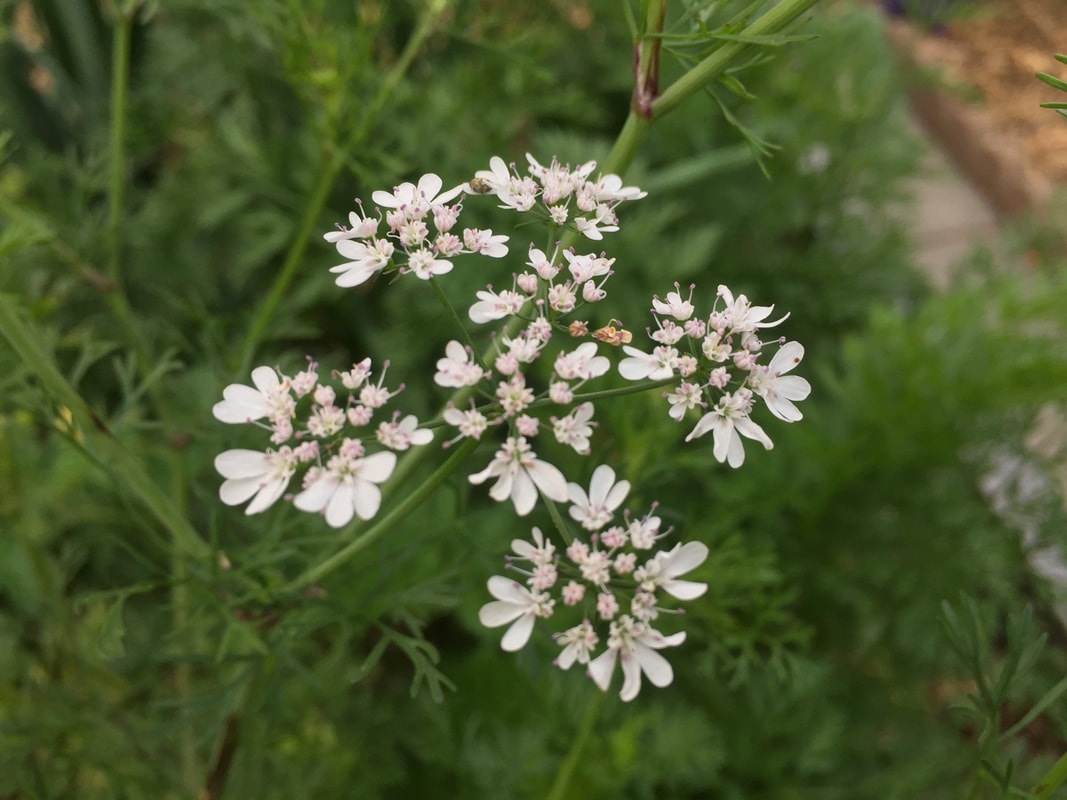
 RSS Feed