|
How many butterflies did you see in the past year? Not very many, right? You can attract a surprising variety of butterflies to your landscape with a butterfly garden. 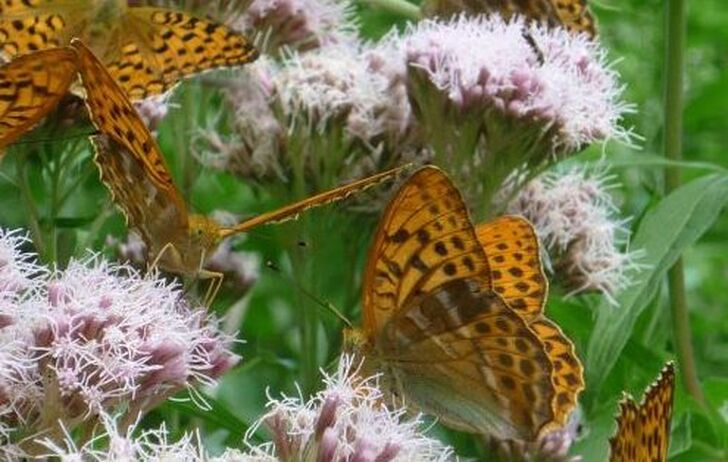 Fritillary butterflies (jurgko, Public Domain) Back in my hitchhiking days (the 1970s), I saw millions of butterflies along the Interstate. They would litter the side of the freeway and create colorful clouds in the air. In my own insect-friendly yard, however, I saw no more than a dozen butterflies last year. What happened? Threats to butterflies Butterflies have been around for 56 million years, but times are hard. Habitat loss, pollution, pesticide use, invasive species, rising temperatures, and interruptions in their food web all make life difficult for butterflies. Butterflies are particularly hard hit because many of them rely on a single plant species as hosts for their eggs and offspring.  Callippe Silverspot (Public Domain) Native populations When I lived in San Jose, California, I learned that there were 144 species of native butterflies. Sadly, that area also has the highest density of endangered butterfly species in the nation. Some of the most threatened California butterflies and their host plants include:
Which butterfly species are native to your neighborhood? How are they faring? Imagine what would happen if everyone added just one butterfly-friendly plant to their landscape.
 Behren’s Silverspot (Public Domain) Host plants Most of the plants used in butterfly gardens are insectary plants. Insectary plants are those with the color, shape, and height that appeal to butterflies and other beneficial insects. Common insectary plants include the following:
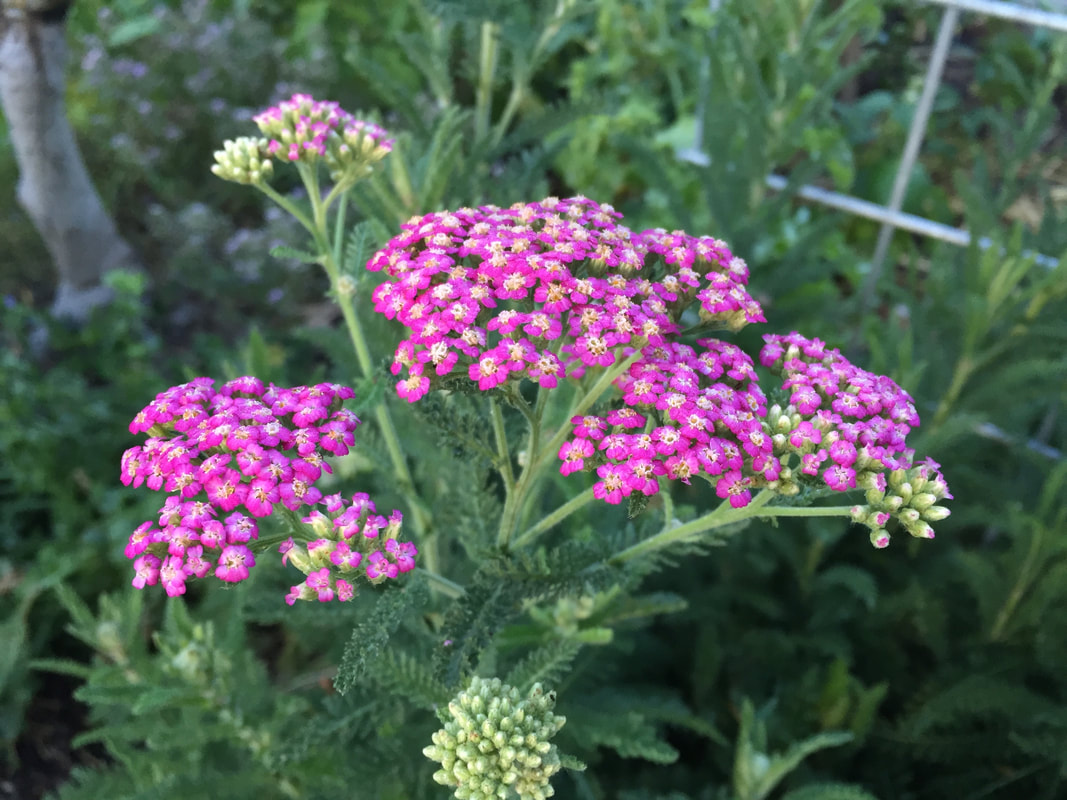 Yarrow is durable, drought-resistant, and lovely Members of the sunflower family (Asteraceae) also make good insectary plants. The problem with these generic lists is that many of these plants are non-natives, which can cause problems. Even though these plants provide nectar and pollen for adults, they can actually devastate local butterfly populations because the adults see food for themselves and lay eggs nearby. When those eggs hatch, the larvae have nothing to eat. Put simply, these might or might not be the plants your butterflies need. Or they might be perfect.  Bee balm (Kate Russell) I cannot tell you which plants, specifically, to include in your butterfly garden. This is because each region has its own indigenous butterfly population. To find out what is native to your area, conduct an online search for “butterflies native to [your town]. The results may surprise you.
Once you have a list of indigenous butterflies, you can track down their host plants. Host plants are those that will provide the pollen and nectar needed by adult butterflies and the leaves needed for egg-laying and caterpillar feeding. Armed with this information, you are ready to design your butterfly garden. Planning your butterfly garden Your butterfly garden doesn’t need to be big or formal to be effective. You can scatter host plants throughout your landscape, if you like. Or you can create an elegant parterre. It’s up to you. Butterflies do use sunlight to warm themselves, so south-facing areas are preferable, as are areas protected from wind. A water feature, such as a bird bath or fountain, can help your butterflies stay hydrated. Rocks, for basking, are always appreciated. There is also nothing saying you have to install plants specifically for endangered species, although it would be nice. The important thing is to get the correct plants in the ground and helping them to thrive. Adding a butterfly garden to your landscape does not take a lot of effort on your part, but it can make a huge difference for the butterflies. It will also increase the biodiversity in your garden, making it a healthier environment. Other beneficial insects will also be attracted to these plants. These beneficial insects might be pollinators, predators, or they may parasitize insect pests. And the flowering plants look lovely. Did you know that some adult butterflies also eat carrion, rotting fruit, and tree sap, while the larvae of some butterfly species eat ants and other insect pests? I didn’t either. Now we know. Rather than rushing to a crowded grocery store at the last minute for holiday meal ingredients, wouldn’t it be nicer to simply walk outside and collect the freshest ingredients possible? You can, with just a little planning.  Christmas dinner party Creating a holiday dinners garden is a form of planting forward. You know ahead of time what you will need, so you estimate which ingredients should be planted and when. That way they will become harvestable as they are needed. And your holiday dinners garden is not limited to edibles. Seasonal decorations, such as flowers and greenery, can be found in your yard just as easily. This planning process may feel overwhelming, at first. Instead of taking on more than is fun, you might want to select one holiday at a time and build on that over time. Either way, it all starts with a calendar.  Planning calendar (Kaboompics) Public Domain Create a calendar Calendars are handy tools, especially for gardeners. You can use printing paper or an inexpensive paper calendar to design your holiday dinners garden. Start by identifying all the holidays you celebrate each year with special meals. In my family, these holidays are New Years’ Day, Easter, 4th of July, Thanksgiving, and Christmas. Mark your family’s holidays clearly on your calendar. Meal planning We all have favorite dishes for each of our holiday dinners. In my house, New Years’ Day would never feel right without hoppin’ john and Easter wouldn’t feel like Easter without a ham surrounded by baby beets and carrots.  Hoppin' john and Schott's Hots (Kate Russell) Whatever your traditional meals include, create generic menus for each holiday dinner. For example:
I do not raise pigs or turkeys in my suburban yard, but including as many of the dishes as I can think of helps me work out the details when figuring out what to plant. Make a list and check it twice Using each of the dishes you want to include in your holiday meals, create a shopping list of ingredients that could come from your garden. Be sure to include the date when the ingredients will be needed. Spreadsheets are very handy for this step because this list can get a little unwieldy. You may want to use a separate page for each holiday. Using my menu for the 4th of July, I would start with this:
As you can see, there is some overlap between dishes. [My son, the cook, recently told me that most people have a flavor profile. Apparently, my profile features potatoes, thyme, onions, and garlic!] My avocado tree is not old enough to produce fruit, so I will not include it in my plan just yet. Perennial herbs Nearly all dishes use herbs of one sort or another, so these mostly perennial standbys can be used to create the framework for your holiday dinner garden. The nice thing about perennials is that they are either actively present, or they have been around long enough for you to have canned or frozen some of their harvest. Common perennial herbs for a holiday dinner might include rosemary, tarragon, and thyme. To make your holiday dinners garden look more attractive and to prevent these frequent members of the mint family from taking over completely, you may want to grow them in containers, placed artfully throughout the garden. Some herbs, such as cilantro, dill, and parsley are not perennials, but they will self-seed once they become established. Others, such as oregano and sage, are perennial in some Hardiness Zones and annuals in others. Once the perennials are in place, you can plan for the annuals. Spreadsheet magic I love spreadsheets. To me, they make it easy to keep track of a lot of information. You may or may not feel the same way, but they are very handy for this step in the garden design process. You can start with just one holiday or go whole hog with all of them. For this example, I am only using my 4th of July BBQ, but I am including the date for when I add other holiday dinners. 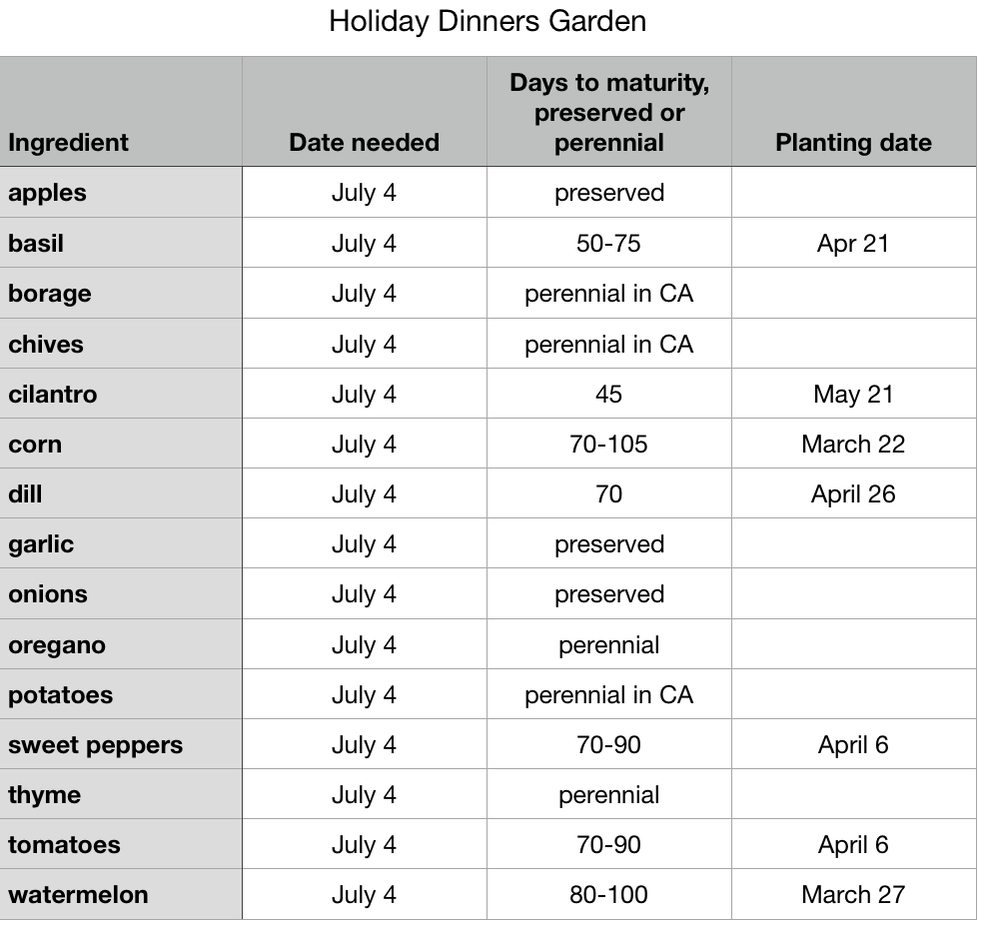 Sample planting plan for July 4th BBQ in California In the first column, list each of your ingredients. In the second column, add the date you want each ingredient to mature. The third column is for a note about whether each ingredient is a perennial, already preserved, or how many days it takes from planting seeds to harvest. Keep in mind that days to maturity found online and on seed packets may be different for your region of microclimate. These numbers are simply averages, but they are still useful.
For each ingredient, count backwards from the holiday the number of days to maturity for a planting date. In the example above, my apples ripen long before July 4th, so I freeze or can them. Then, I see that basil takes 50 to 75 days from planting to harvest, so I count back 75 days from July 4th for a planting date of April 21st. Now, my family loves basil and I plant a lot of it, starting long before April 21st, but I add a reminder in my calendar to plant basil on that date so I know I will have plenty when I need it for that holiday. If your planting date occurs before it is actually warm enough to plant a specific species, you may need to start it indoors, or buy seedlings at a later date. In some cases, like celery, I could plant it but I choose not to. For me, celery is fiddly to grow and is so inexpensive at the store that it is not worth the garden real estate. You might feel the same way about onions or garlic. A lot of this will depend on where you live and how much time and space you have. Even if you only select 2 or 3 ingredients for each holiday meal, you’ll be glad you did. Simply go down the list, counting backwards for each ingredient that needs to be planted. You can add these annual reminders to the calendar in your computer and add alerts in your phone. If you set them to repeat every year, the planning process is done. Before you know it, you will have all the information you need to plant your holiday dinners garden! As you prepare for a change of seasons, it is common to want to clean things up, to make the garden look a little more tidy, and to create less work for yourself in the future. Very often, landscape fabric is part of those plans for an easier, weed-free future. Landscape fabric is easy to use and it works. For a while. And at a price that might surprise you. How landscape fabric is used Landscape fabric is a semi-porous material that is used to create a weed-free area in a landscape. Advertisements claim that water, air, and fertilizer can still reach the soil while preventing weeds from taking hold. Photos make the end result look lovely and trouble-free. To use landscape fabric, the following steps are used:
It’s that simple. Unless there is a slope. Or if you care about pollution. Or if soil or plant health matter. Air flow is important Plant roots and soil dwelling critters need to absorb and release gases to survive. In a healthy environment, oxygen and carbon dioxide move freely between the soil and the atmosphere, allowing for moisture and temperature regulation and other important processes. Without air flow, important soil microorganisms, worms, and plant roots die. Mulch material matters Landscape fabric and mulch allow gases to disperse at different rates. Mulching is an excellent way to stabilize soil temperatures, retain moisture, and block weeds, but the material used makes a big difference in gas exchanges. Recent research has shown that, if you cover the soil with landscape fabric, you will slow those gas exchanges by more than 1,000 times than if you had used wood chips. If you were to use plastic sheeting, the gas exchange rates would be slowed by yet another thousand times. 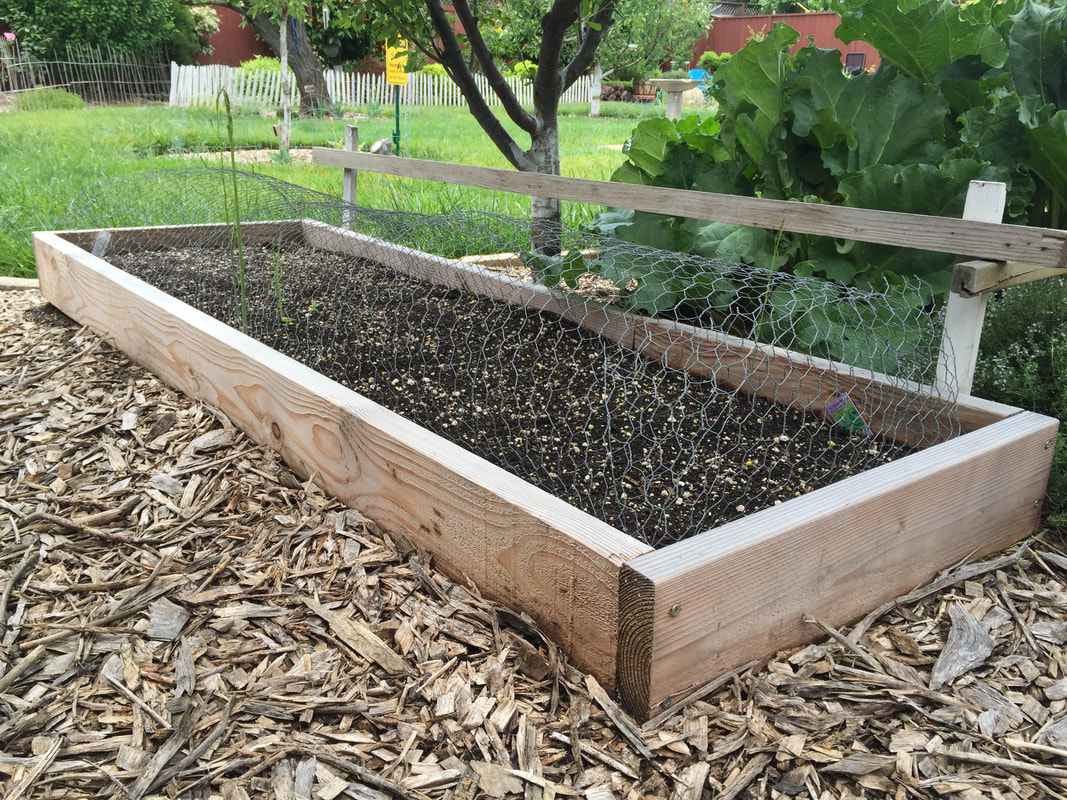 Wood chips block weeds around raised bed Finally, as plant material, soil, and water collect on top of landscape fabric, weeds will grow anyway. Also, landscape fabric, which is actually plastic, tends to deteriorate over time, being exposed to moisture, microorganisms, and foot traffic. These plastic particles end up in creeks, rivers, lakes, and oceans, as well as in our own air supply. As the mulch shifts, areas are exposed, torn, and the whole thing looks messy as weeds, being weeds, take hold once again.
The next time you see an area covered with landscape fabric, take a closer look at the crowns of nearby trees. Are they dying? Are they putting out suckers? These things are happening because the trees are suffocating. Instead of using newspaper, cardboard, or landscape fabric to block weeds, simply contact your local arborist and ask for a load of clean wood chips. A nice 4” thick layer of mixed wood chips does an amazing job at blocking weeds and protecting your soil. For free. Nurse cropping is a form of companion planting in that specific plants are installed to provide one type of protection or another for young crops as they become established.  Oats as nurse crop for alfalfa (Daniel X. O’Neil CC BY 2.0) Nurse crops protect young perennials
In commercial agriculture, nurse crops are fast-growing annuals that are planted along with perennials, such as alfalfa, to help those perennials become established. This gives the long term crop protection from pests as it is getting started. Nurse crops as trap crops Trap crops are installed around or near desirable crops because of the way they attract or repel specific pests. In some cases, trap crops interfere with a pest’s lifecycle or kill it outright. In other cases, the trap crop is “harvested” after pests have appeared to remove them from the garden. Nurse crops are frequently used as traps crops. For example, wireworms are a big problem for strawberries. In one study, strawberries planted alone had a 43% mortality rate, while strawberries planted two weeks before wheat was added had a 27% mortality rate. When wheat was planted 8 days before the strawberries, that mortality rate dropped to 5%. That’s a significant savings in strawberry starts, just by broadcasting a handful of wheat berries a week ahead of time! Pros and cons of nurse cropping Like every other plan of action, nurse cropping has pros and cons. The benefits of nurse cropping include reduced weeds, wind and erosion. Also, perennial seedlings are protected from excessive sun in their first weeks of growth. Oats and other cereals are common nurse crops. As such, another benefit is that the nurse crop can be a harvestable edible in its own right. The potential problems associated with nurse cropping is that the nurse crop does use up water and nutrients. It may also become a type of weed itself. You can use nurse cropping in your garden by starting cereal grains in a bed a week or so before planting something else. If you don’t harvest it, the local birds and other wildlife will appreciate the buffet and more tender plants will benefit, as well. Hollyhocks are probably not your first thought when it comes to edible gardening, but these tall, bold beauties of our grandparents’ time may surprise you. 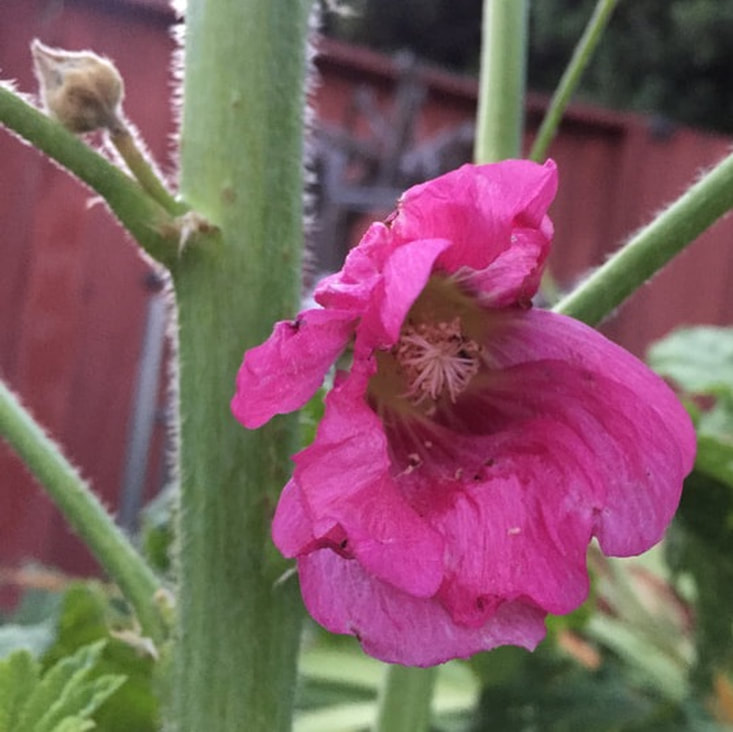 Hollyhock flower First, did you know that all parts of a hollyhock are edible? My chickens may not share that world view, but we frequently differ on menu items. In addition to being edible, hollyhocks are surprisingly useful plants. Hollyhock stems make excellent starter firewood, and the roots have been used for centuries as medicine. While I do not make any medical claims about plants, research has shown that infusions of hollyhock roots may reduce stress. I’ll leave that to you. Let’s see what else we can find out about these durable garden flowers. Hollyhocks are members of the mallow family. Native to Europe and Asia, there are 60 or so species of hollyhock, or Alcea, with Alcea rosea being the most commonly grown. The Alcea genus includes all the hollyhocks, except for one species that is native to the western hemisphere, the streambank wild hollyhock (Iliamna rivularis).  Streambank wild hollyhock (Wikipedia) Public Domain While the streambank wild hollyhock is in a different genus, the blooms are still lovely. For this post, we will be focusing solely on Alcea hollyhocks.
Caring for hollyhocks Hollyhocks are not particularly picky. They grow best in Hardiness Zones 3-8, can be grown in full sun or partial shade, and prefer good drainage. The only thing hollyhocks do not seem to like is dry soil. Here in California (Zone 9b), dry soil is the rule in summer, but a thick layer of arborist chips mulched over the area and planting them in a relatively protected corner of the yard seems to be help enough and they return every spring to fill my summer with gorgeous flowers. Being near a fence or trellis also protects these tall stems from wind damage.  Yellow hollyhock (Pixabay) To keep your hollyhocks healthy, cut stems back to 6” or so above soil level after flowering is completed. Continue to top dress and irrigate the area and new stems will appear throughout the growing season. In winter, cut plants back again and protect with a 6” layer of straw or mulch. Come spring, gradually remove this protective layer to help plants become acclimated. Once spring growth is in full swing, remove the straw and start thinning. By removing the cut stems from the area and composting them, you will interrupt the disease triangles and thwart pests of hollyhocks. 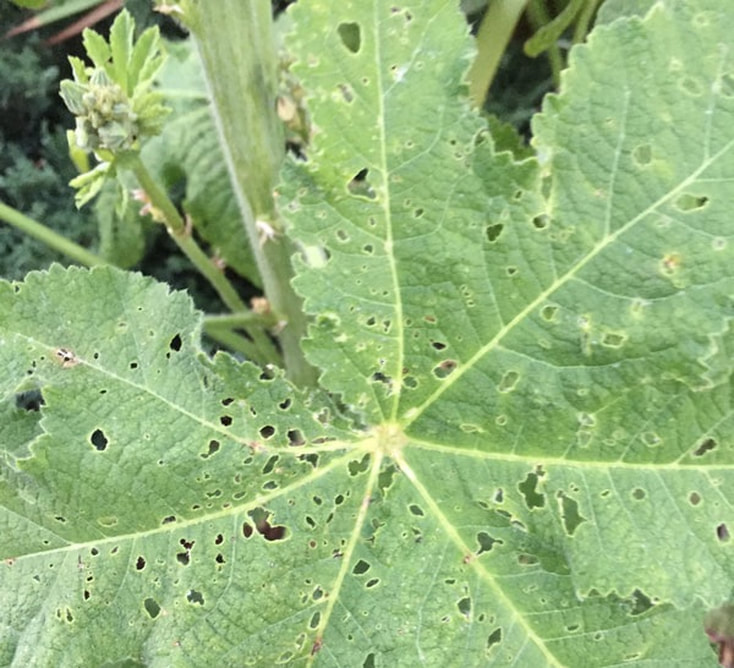 Flea beetle damage on hollyhock leaf Hollyhock pests and diseases
On the downside, like other members of the mallow family, hollyhocks are prone to mildew and rust and will attract weevils, mallow flea beetles, and orange tortrix moths. The caterpillars of a few other moths and butterflies, including painted ladies, will also chew on hollyhock leaves, as will slugs and snails, spider mites, and Japanese beetles. Aphids, capsid bugs, and cutworms may also cause problems. Because they are prone to rust and mildew, hollyhocks should always be watered at ground level. Wet leaves nearly always attract disease. Diseased leaves should be removed and thrown in the trash whenever they are seen. Hollyhocks and children Hollyhock seeds are large and easy to work with, making them a good choice for a children’s activity. Hollyhocks do not like being transplanted, so it is better to sow seeds where you want them. A hollyhock’s long taproot doesn’t like being disturbed, once it begins its downward growth. Traditionally, hollyhocks have been used to create secret garden spaces for children and solitary readers. Simply draw a line where you want you secret hideaway’s walls and plant seeds along that line. Seeds should be planted in groups of 3 or 4, placed 2 to 3 feet apart. Only cover lightly with soil, if at all, and keep the area moist but not soggy until germination occurs. Thin each group by snipping off all but the best one seedling at ground level. They may look tiny and lonely, at first, but these plants get large and need good air flow to stay healthy. Before you know it, you will have a secret garden space of your very own, attended by the many bees, butterflies, hummingbirds and other pollinators that love hollyhocks as much as we do! Sweet alyssum is a lovely, low maintenance flower that attracts butterflies, but it isn’t actually an Alyssum. 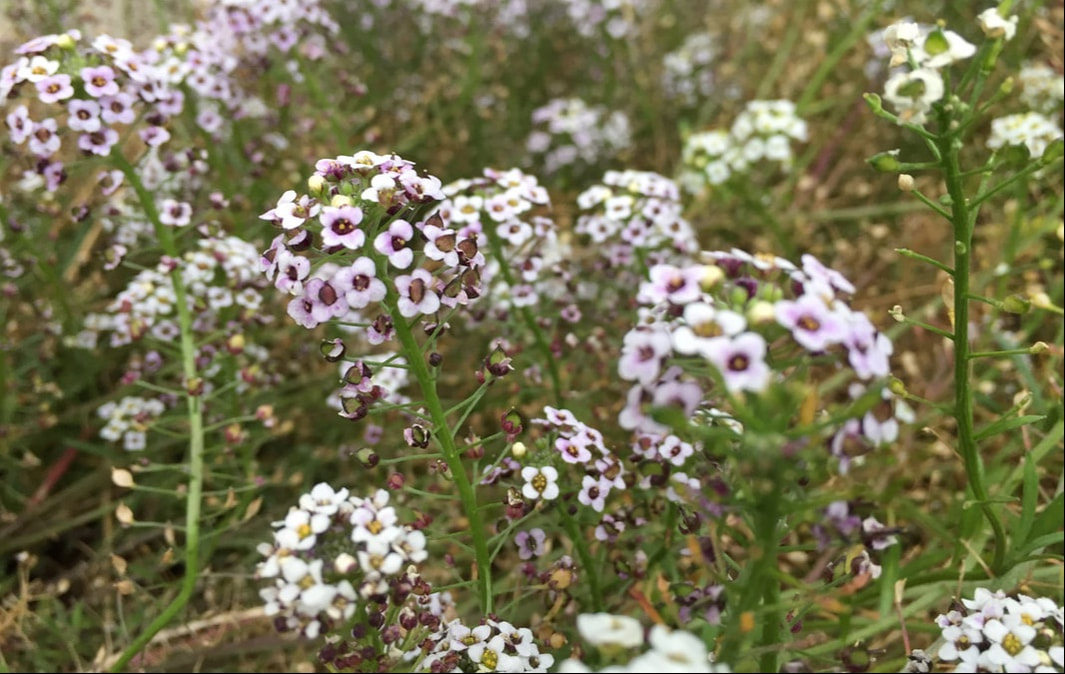 Sweet alyssum Not so long ago, when scientists first started using DNA to sort out plant species and plant families, a number of embarrassing relations and non-relations were discovered. This has lead to upheaval in the world of plant nomenclature. While this doesn’t generally affect us, as backyard gardeners, it can cause some confusion when it comes to plant names. So it is with sweet alyssum. Native to the Mediterranean region, dainty sweet alyssum used to be counted among the Alyssum species. As such, it was known botanically as Alyssum maritima. [Isn't that a lovely name?] We now know that the global sweet alyssum plant is actually a Lobularia species, an equally pleasant name.. Again, this doesn’t make much of a difference for us, as home gardeners. What I was surprised to learn is that, in both cases, sweet alyssum is a member of the cabbage family, which means that it might attract the same pests and diseases as your cabbages, broccoli, and mustards. Before we start ripping out this tiny, durable flower, let’s see what it has to offer. 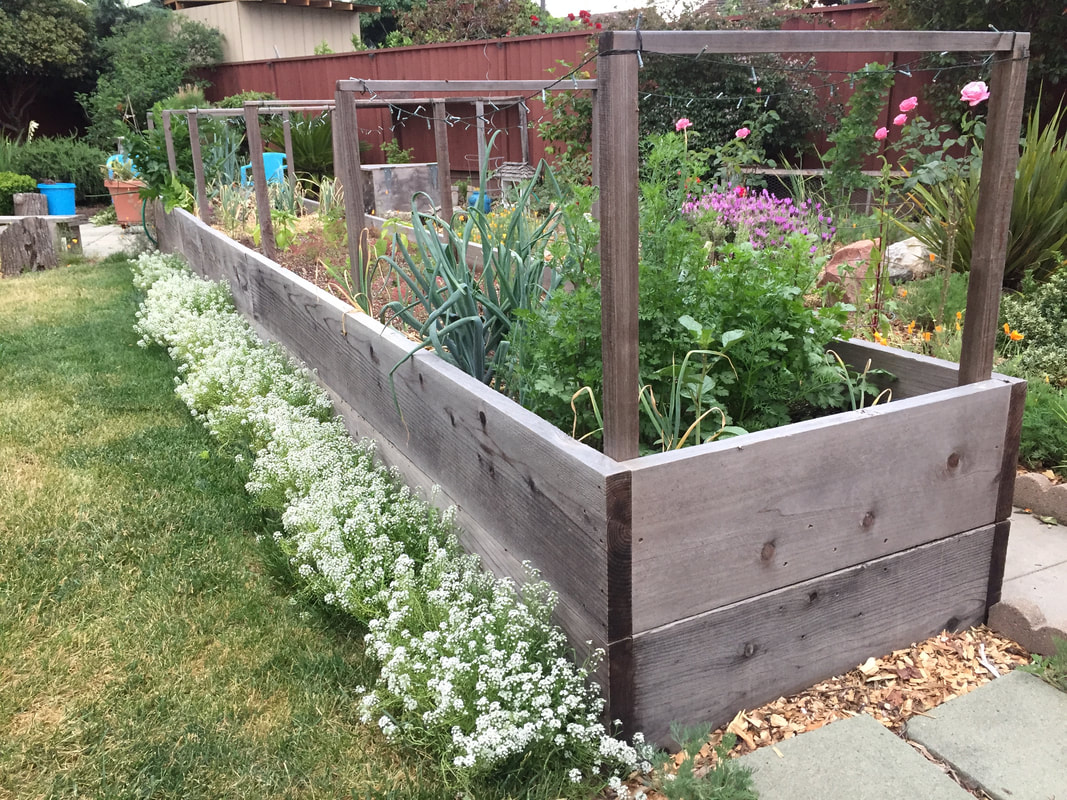 Sweet alyssum growing along raised bed Sweet alyssum description Each sweet alyssum plant grows up to 12” tall and wide. Stems are made up of several branches, each of which has many flower clusters. Most sweet alyssum flowers are white, but you may get an occasional blue, pink, or purple in the mix. These flowers have a honey sweet aroma that bees and other pollinators seem to love. As individual stems near the end of their life, a profusion of fruits, which are hairy elongated pods, like most other members of the cabbage family. Each pod contains two seeds. These seeds spread easily on the wind. And plants can thrive in a number of different locations. How to grow sweet alyssum Sweet alyssum somehow manages to grow in rocky outcrops, on sand dunes, between paving stones, and everywhere else seeds can get a toehold. This is good news. Unlike their perennial Alyssum cousins, sweet alyssum is an annual. If you have it growing already, you know that it readily self seeds.
Sweet alyssum is an excellent choice for softening paths, lining the edges of raised beds, or as a relatively maintenance-free ground cover. I say ‘relatively’ because sweet alyssum plants may get leggy and flop over near the end of their productive lives, leaving them to look somewhat less appealing. You can eliminate this look, and stimulate new flower growth, by occasionally giving plants a trim. I use my weedwacker. Sweet alyssum pests and diseases As far as cabbage family members go, sweet alyssum is rugged. It has very few problems. Diseases that may impact your sweet alyssum include botrytis blight (gray mold), clubroot, downy mildews, and root and crown rots, though I have never seen any of those diseases on my sweet alyssum while the same diseases have, at times, been present on nearby plants. Supposedly, the cyclamen mite and caterpillars of the diamondback moth feed on sweet alyssum. Again, I have not seen this in my garden. The only pest that I have seen hiding out, under the canopy of sweet alyssum blossoms is the dreaded Bagrada bug.
Rather than ripping out your sweet alyssum, just trim it back every once in a while and be sure to take a peek underneath its skirts every once in a while, with an eye for Bagrada bugs.
Get your beans growing skyward with a tuteur. Tuteur is French for ‘trainer’ and pronounced the same as that tutor who helped you through middle school algebra. 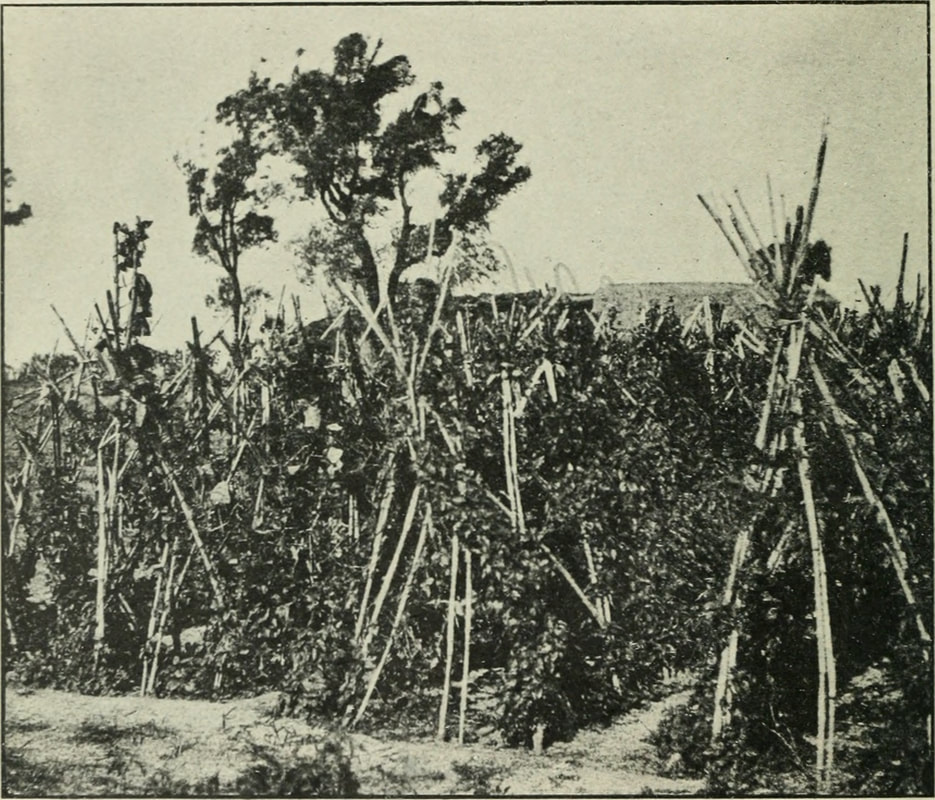 Traditional pole bean tuteurs (Image from page 209 of "Bulletin. 1901-13”) Public Domain What is a tuteur? Tuteurs are 3- or 4-legged obelisk-shaped trellises used to provide a climbing structure for peas and pole beans and other climbing plants. Actually, a tuteur can have as many legs as you like, as long as it is sturdy enough to not topple over. Traditionally, tuteurs were nothing more than a handful of branches lashed together at the top and spread apart at the bottom, teepee-style. Placed over young pea and pole bean plants, these structures provided supports for young tendrils to wrap around as they climb toward sunlight. Like other forms of vertical gardening, tuteurs take up less space while expanding your growing options. They also reduce pod exposure to fungal spores and slugs and snails, and they create interesting focal points in your garden. While you can certainly buy a tuteur, they are very easy to make and odds are good that you already have all the materials you need to make one for free. How to make a tuteur At its most basic level, a tuteur can be nothing more than 4 long poles lashed together near the top, with the legs spread out at the bottom. At the other end of the design spectrum, you can construct an ornate obelisk, complete with gazing globes, wind chime, or whatever strikes your fancy. Whatever design you choose, keep in mind that some plants can become substantial, so you will want your tuteur to be sturdy enough to handle whatever will be using it for support. Of course, once the tendrils do all their winding and climbing, they will add a measure of stability to whatever structure they climb. To create a simple tuteur, you can use bamboo poles, scrap untreated lumber, tree branches, rebar, and many other reusable materials, following these steps:
Calendula officinalis is an edible flower that can add color and attract honey bees to your garden. Believed to be native to Europe, Calendula officinalis has been grown by people for so long and in so many locations, it is hard to tell for sure.  ‘Calendula officinalis’ (Berdan) CC BY-SA 3.0
Pot marigold description Unlike the Tagetes genus of marigold, which have leaves that appear alternately along a stem, pot marigolds have slightly hairy leaves that are arranged in a spiral around the stem. They are short-lived perennials, typically grown as annuals, that grow 18 to 30” tall, with 2” flowers. Flowers are bright yellow or orangish-yellow, with ray florets and disk florets, common to sunflowers. Pot marigold’s curved seeds are actually dried fruits, called achenes.  Calendula seeds (H. Zell) CC BY-SA 3.0 Pot marigold as an attractant In addition to looking lovely as a border plant, or in a parterre, Calendula officinalis will attract important pollinators, such as honey bees to the garden. Unfortunately, they will also attract cabbageworm butterflies, large yellow underwings, an invasive moth of the cutworm variety, and setaceous Hebrew character moths, whose larvae feed on a number of popular garden plants. Pot marigolds as food Pot marigold flower petals have a tangy, peppery flavor. Traditionally added to German soups and stews, pot marigold is also added to herb butters and cheeses, or chopped and used to garnish deviled or scrambled eggs, fish dishes, or steamed vegetables. Pot marigold flower petals add color and tang to salads. If you add marigold flower petals to rice, while cooking, the rice will turn yellow. For this reason, it is also known as Poor Man’s Saffron. Farmers have fed marigolds to chickens for years to make the yolks a deeper yellow. One variety of pot marigold, ‘Mexican Mint’, has the flavor of tarragon. It is also known as Texas tarragon. Pot marigold petals also make a delightful tea.  Pot marigold at the beach (Public Domain) Pot marigolds as medicine Pot marigolds also have medical merit. Research has shown that tinctures of pot marigold are used today to treat skin irritations and burns, to speed healing, and to control bleeding. [I wonder how they would look growing next to some aloe vera - just to keep the medicinals together.] This is not my area of expertise, and I won’t make any personal claims, but it is interesting to see how, every once in a while, those old treatments hold true. That being said, some people are allergic to pot marigolds. How to grow pot marigolds Pot marigolds are easy to grow from seed and they tend to be drought tolerant. Start seeds in small pots, only lightly covered with soil. Keep the soil moist, but not soggy, until germination occurs. Then, move plants to a sunny location with good drainage. Calendula may need protection from scorching summer afternoon sun, and they can be grown in containers, or on windowsills. Marigolds readily self-seed. Calendula pests and diseases While these plants are relatively trouble-free, they may become infected with powdery mildew, root rot, and smut. They are also susceptible to Alternaria leaf spot, aster yellows, charcoal root rot, cottony rot, cucumber mosaic, gray mold, Pythium root rot, root knot nematodes, rust, southern blight, spotted wilt (from the tomato spotted wilt virus), stem rot, and Verticillium wilt. I couldn't find any pests that significantly bother pot marigolds. Many of these diseases can be prevented by providing good drainage and air flow, so top dress soil regularly with organic matter, space plants with mature sizes in mind, and avoid overhead watering. So, do you know if your marigolds are edible or not now? This poem may help:
Every year, there are garden favorites that we plant religiously. Just as consistently, the same pests come, causing damage and carrying disease. What if there was a way to lure those pests away from your garden faves? There is. It’s called trap cropping. 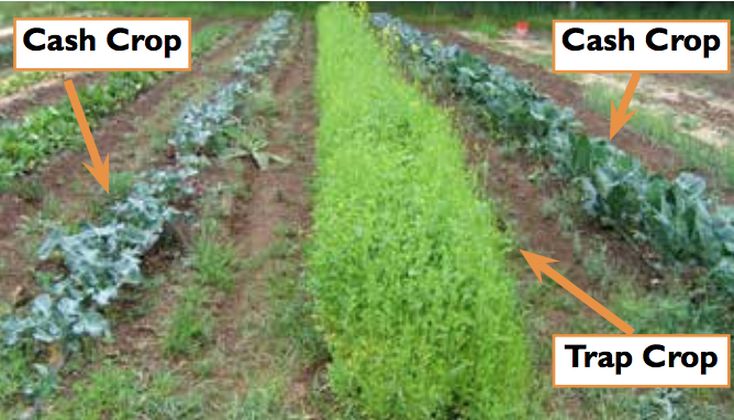 Mature mustard plants lure flea beetles away from young broccoli plants (USU Extension) CC BY 3.0 Trap cropping refers to the purposeful planting of crops known to attract or repel specific pests within and around the crops you are trying to protect. This distraction reduces the damage done by pests. In some cases, the attractant trap crop can interfere with the pest’s lifecycle, or kill it outright. In other cases, as pests start feeding on the trap crop, you harvest it, breaking the lifecycle of specific pests.
Trap cropping is a form of companion planting (better known as intercropping). While mint, garlic, nasturtium, and fennel have often been touted as cure-alls for many pest problems, the science behind trap cropping is still relatively new and I was unable to find enough research geared specifically toward those plants. Fear not, however, as there is plenty of good information you can use to protect your garden plants! How trap cropping works Trap crops distract pests away from food crops. By providing a rich food source for these pests, they are less likely to damage your food crops. Also, heavy pest infestations attract beneficial predators, such as lacewings and lady beetles. Once an infestation occurs, the trap crop can be fed to your chickens, tilled under, or composted. In commercial fields, pests attracted to trap crops are killed off with pesticides or vacuumed off the plants and destroyed. Types of trap cropping There are several types of trap cropping:
Very often, trap cropping methods are used in combination, improving their effectiveness. These methods reduce the need for chemical pesticides, while increasing biodiversity. Which crops have the biggest pest problems in your garden? And how can you use trap cropping to protect them? Let us know in the Comments! Bee's friend is a gorgeous flower that attracts pollinators and other beneficial insects  Bee’s friend (Walter Siegmund) CC BY-SA 4.0 Also known as blue or purple tansy, or lacy phacelia, bee’s friend (Phacelia tanacetifolia) is a popular choice in agriculture as an annual ground cover. It is also grown as an insectary, to attract bees and beneficial predatory insects, such as hoverflies. Flowers remain open for an extended period with very little water, making it an excellent addition to your foodscape.  Field of bee’s friend (Walter Siegmund) CC BY-SA 4.0
How to grow Bee’s Friend
Bee’s Friend seeds can be sown directly in areas that receive direct sun or partial shade, as soil temperatures warm in late spring. Stagger plantings for a more powerful impact. Seeds must be in complete darkness to germinate, so be sure to follow the planting directions on the packet and use an irrigation method that does not push the soil around too much. Misting is a good choice. Bee’s friend is considered one of the top 20 honey-producing flowers. Whether you raise bees or not, that much nectar is sure to bring bees and other pollinators to your garden in abundance! It makes an excellent plant for under or around fruit and nut trees, as a natural way of boosting pollination rates. The flowers are lovely, too! There is something about garden water features that makes everything better. Calming, refreshing, or splashing playfully, water has the ability to improve our mood, create art, and support local biodiversity. And, hey, it looks nice! 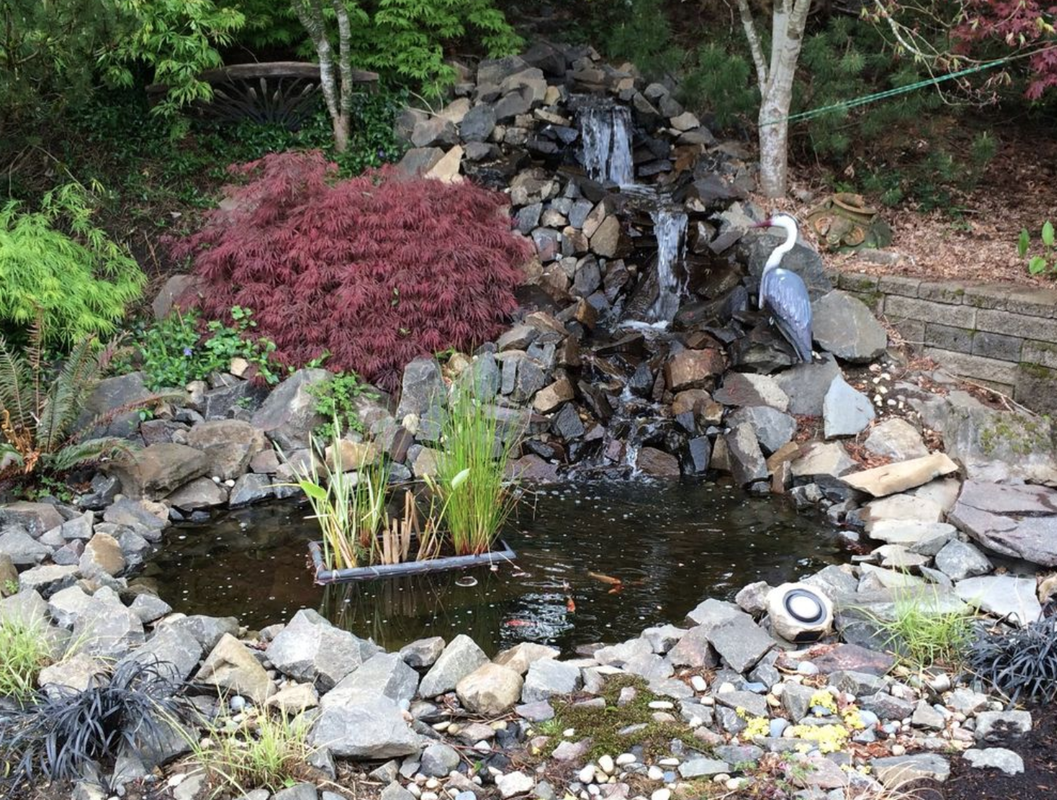 Completed DIY pond (DragonTamer458) Benefits of water features Water features provide many benefits other than the artistic appeal. Water features can provide life-sustaining moisture for hummingbirds, butterflies, other insects, reptiles, and amphibians, many of which are severely threatened these days with habitat loss. You can encourage honey bees and other pollinators to come to your garden when a water feature is present. Water features can suit any style, from rustic to elegant, quirky to traditional. Water features also tend to improve curb appeal and property values, if you are thinking of selling your home. If you are even the least bit handy, you can install your own garden water feature. [Instructables has some excellent ideas!] You can get the necessary information from your local library, or you can buy a kit. Types of garden water features Water features come in all shapes and sizes. They can be birdbaths, fountains, or waterfalls, ponds or pools, or even a creek or stream. Starting with the most simple water feature, and moving through to more complex features, each has its own pros and cons. 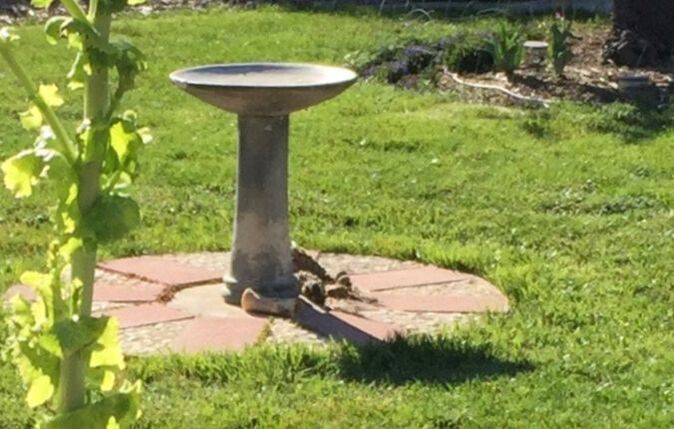 Birdbath Birdbath A simple birdbath can often be found at yard sales and thrift stores. You can also make your own with a wide, shallow bowl, or any other container that has sloping sides. While a birdbath requires regular refilling and cleaning, it is very rewarding to see goldfinches, mourning doves, and jay birds drinking and bathing. Add a pump to a small water-holding container and you have a fountain, or a waterfall.  Water fountain (Dori) CC BY-SA 3.0 US Fountains and waterfalls Fountains and waterfalls are especially good at transforming a space without a huge expense. And you can now find solar pumps to power a garden water fountain. Fountains add water movement and oxygenation to your water feature. This slows the growth of algae and reduces the likelihood of creating a mosquito breeding ground. Also, the sound of falling water can be very soothing, and it can mask less desirable sounds of traffic or noisy neighbors. Moving water also adds moisture to and helps clean the surrounding air, supporting nearby plants and animals, along with your family. You will need to maintain water levels in your fountain, especially in summer. Also, fountains do need to be cleaned occasionally, to keep water flowing through the pump. If you have more room, a pool or pond might make a lovely addition to your garden.  Garden pond with koi and water lilies (Tomwsulcer) Public Domain Ponds and pools While swimming pools have chemicals and steep sides that can prove detrimental to most local wildlife, small ponds and pools take up only a moderate amount of space and can often be self-sustaining. [And who wants the wildlife playing in your swimming pool, anyway?] A small pond can create a shady sanctuary for weary feet, brilliantly colored koi, and overheated dogs, along with local wildlife. You can take a pond idea one step further by using the soil dug out for the pond to create a sloping creek. Creeks and streams Backyard creeks and streams create a magical space in your yard. And these systems are mostly self-contained. Water is pumped from the pond, through a filter, and then up over a small waterfall. Because the water is moving, you get the sights and sounds of running water, the water is oxygenated, and the filtering system reduces the amount of maintenance you need to provide. 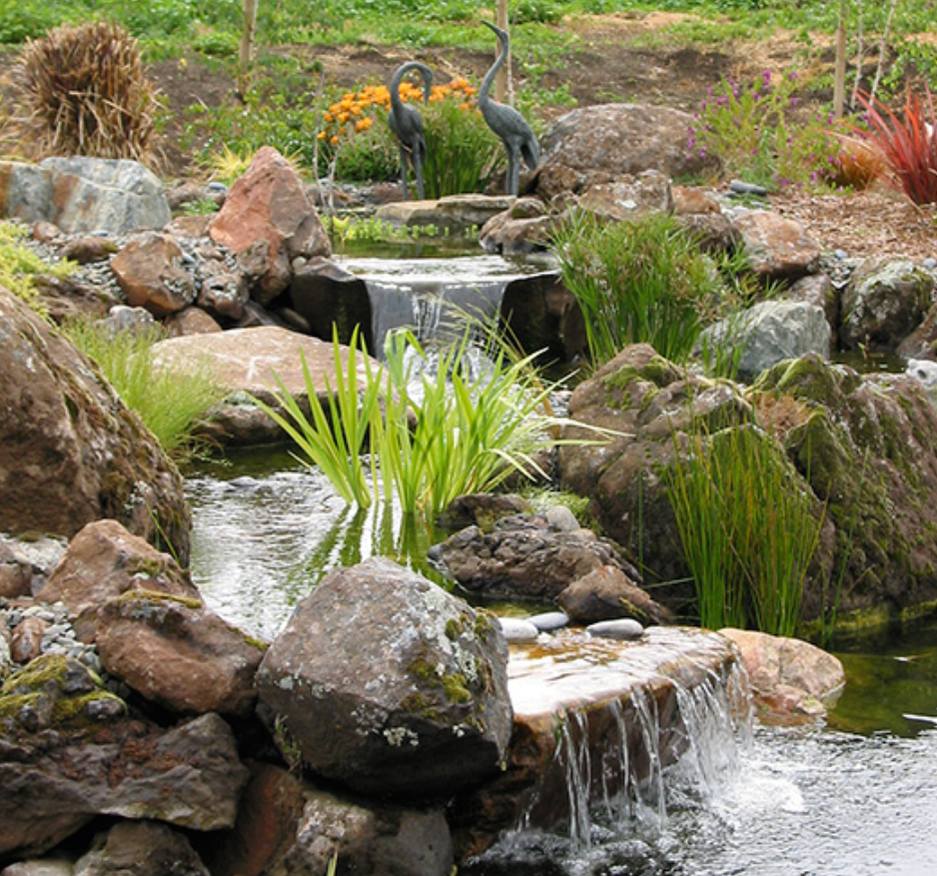 Wetland system (Photo courtesy of Pond Magic) Ponds with creeks also create ideal habitat for shy amphibians and reptiles who will feed on pesky beetles, wasps, and other critters. You can find affordable kits that walk you through the installation, or you can hire a professional.
Garden water features add beauty and value to your home and garden, while improving the quality of life for all nearby living things. Indoors or out, you can create an attractive salad garden that provides fresh, crisp salads practically year round. 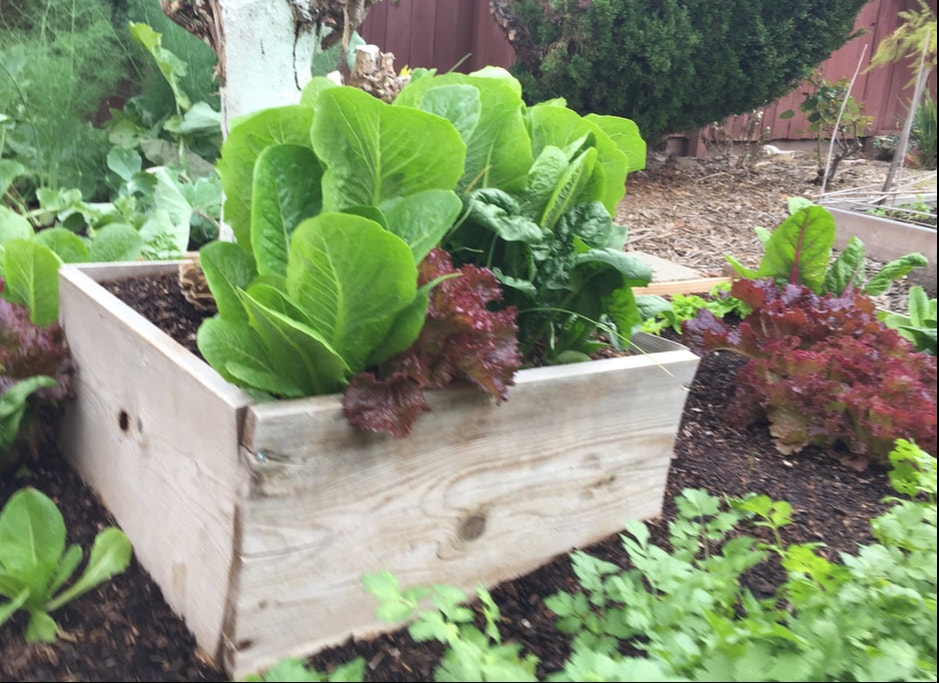 Stacked boxes add depth to a raised bed salad garden Imagine walking over to a container, raised bed, or garden patch with a pair of scissors and snipping off fresh ingredients for a salad. Much like an herb garden, salad gardens can provide a variety of colors and textures to your landscape, balcony, or home, as well as delicious, fresh ingredients for your meals. Where can you grow a salad garden? Balconies, patios, raised beds, windowsills, towers, and containers are all the space you need to create a salad garden. You can also add salad plants in with your other plantings!  Lettuces grown alongside roses You can use a collection of artistic planter pots, or some of those long, narrow planting containers found at yard sales and thrift stores, or you can get really creative, using takeout containers, an old wheelbarrow, or any other food safe container. And that’s really important. Be sure that whatever container you choose is rated for food use - many pallets are sprayed with a cocktail of chemicals, and some ceramic pots are decorated with toxic enamels. Once you’ve made sure your containers are food safe, it’s time to start choosing your plants! 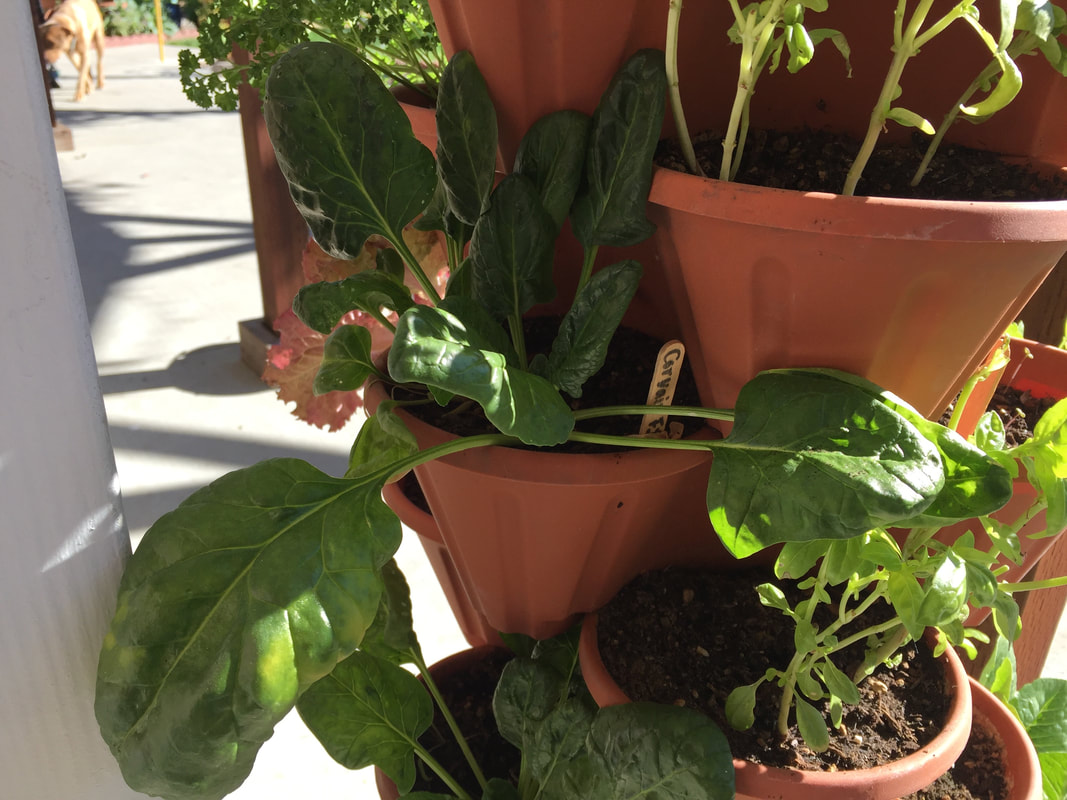 Herbs and salad greens grow well in towers Choosing plants for a salad garden Start your salad garden plant selection with foods you and your family will eat and enjoy. There’s no sense using up valuable growing space on plants you don’t want. To select the best plants for your salad garden, consider the time of year each plant will be able to grow in your area. Check with your local County Extension Office and read those seed packets. You can also get all the information you need right here, online. If you will be growing outdoors, be sure to check with the USDA Hardiness Zone Map to identify your zone. You will also want to identify which plants are perennial, which are annuals, and which are biennials: Salad perennials — chives, patience dock, Malabar spinach, nasturtiums, perennial rocket, sorrel [If you have the space, rhubarb and artichokes provide HUGE, ongoing crops each year] Salad biennials — kale, parsley, Swiss chard Salad annuals -- arugula, bok choy, cilantro, dill, lettuces, mizuna, radish, spinach The perennial plants will serve as year-round anchors in your salad garden, the biennials may take 2 or 3 years before going to seed, and annuals will have to be replaced each year. Or, maybe they won’t. We will get to that in a moment. 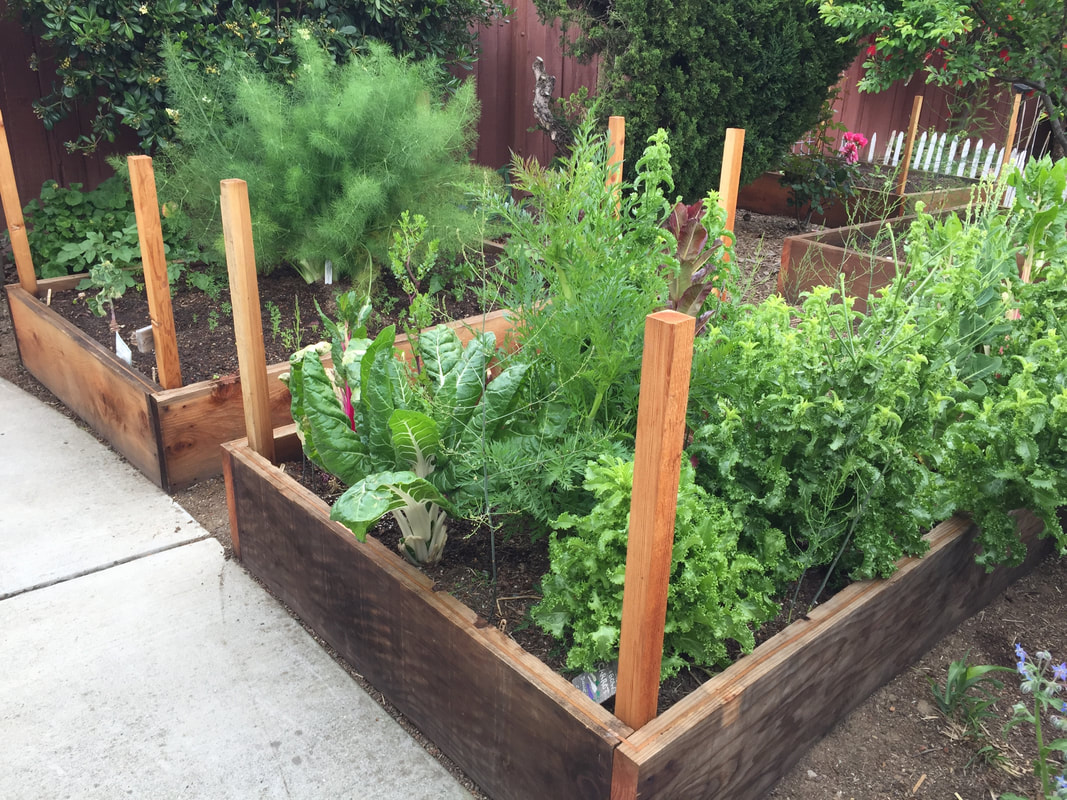 Salad garden grown in a raised bed One tool for helping in the garden design planning process is to get a package of 3x5 index cards and create a card for each type of plant, putting all the relevant growing information on the card. That information would include:
You can spread the cards out on a table and move them around, to create attractive, productive groupings that will play well together. Consider the height and shape of each plant. A deep container that features tall, wispy dill in the center, offset by brilliantly colored Swiss chard, surrounded by a bright green halo of short, mounding lettuces will look lovely and taste good! Keep a lookout for hybrid dwarf varieties of many salad greens that fit better in containers. If you are growing indoors, you may need to add grow lights during winter. Succession planting As your salad garden begins to produce edibles, remember to continue planting new annual seeds every 2 to 4 weeks, whenever the growing conditions are appropriate for each plant. This succession planting will keep you in salad greens practically year round. The important thing about planting a salad garden is to keep planting those seeds! Surprises in the salad garden Some plants don’t seem to play be the rules of botany. Beets, for example, are classified as biennials. This means they are ‘supposed’ to generate a fleshy root in the first growing season, to store nutrients for the next growing season, during which seeds are produced. [By the way, beet seed-bearing stems are lovely - they look like Japanese art.] My seed-producing beets, however, have been providing me with beet leaves and seeds for over 5 years now! I use the seeds to grow new plants, and the baby beet leaves are delicious in salads. You can add a tiny touch of art to your salad garden with ceramic bunnies, glass balls, or tiny metal snails. Will these features help your plants grow? No, they won’t. But they might make you smile! Harvesting your salad garden Many salad greens can be harvested using a cut-and-come-again method. This mean you remove outer leaves, as you need them, and the plant simply generates new leaves from its center. If you allow some of your annual and biennial salad garden plants to complete their lifecycle, going to seed, you will end up with a perpetual motion salad garden that continues to generate new edible plants each year. While most salad greens prefer cooler temperatures, if you plan around your microclimate, you might be able to put together a salad garden that will continue producing throughout most of the year. What do you put in your salads? Stumperies are not Gordian Knots of the pop-quiz world. Instead, stumperies are garden features that use large branches and tree trunks as their anchor points. 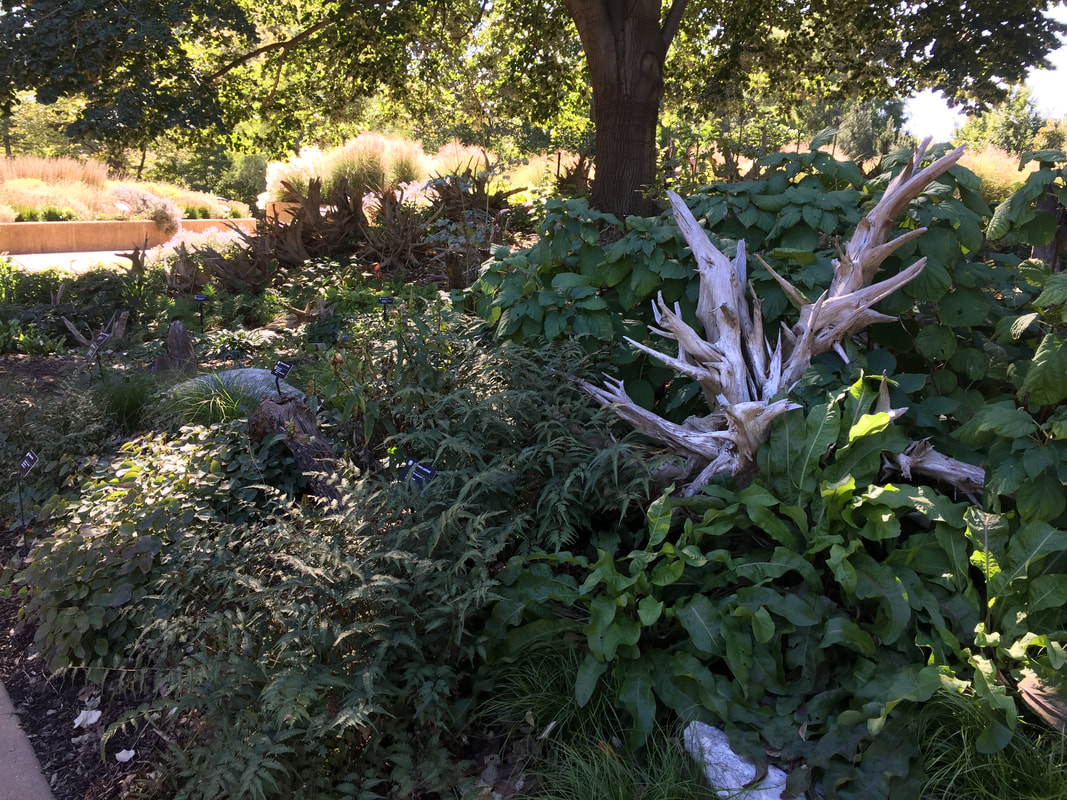 Missouri Botanical Garden stumpery While visiting the Missouri Botanical Garden, I was delighted to discover an entire section of the gardens dedicated to stumperies. Coming around a curve in the path, I was met with a cool, green peaceful bit of gardening that featured logs, branches, sheets of bark, tree trunks, and skyward bound tree roots, surrounded by wispy ferns, colorful lichens, and fuzzy mosses. The effect was soothing and peaceful - and who doesn’t need more of that these days? 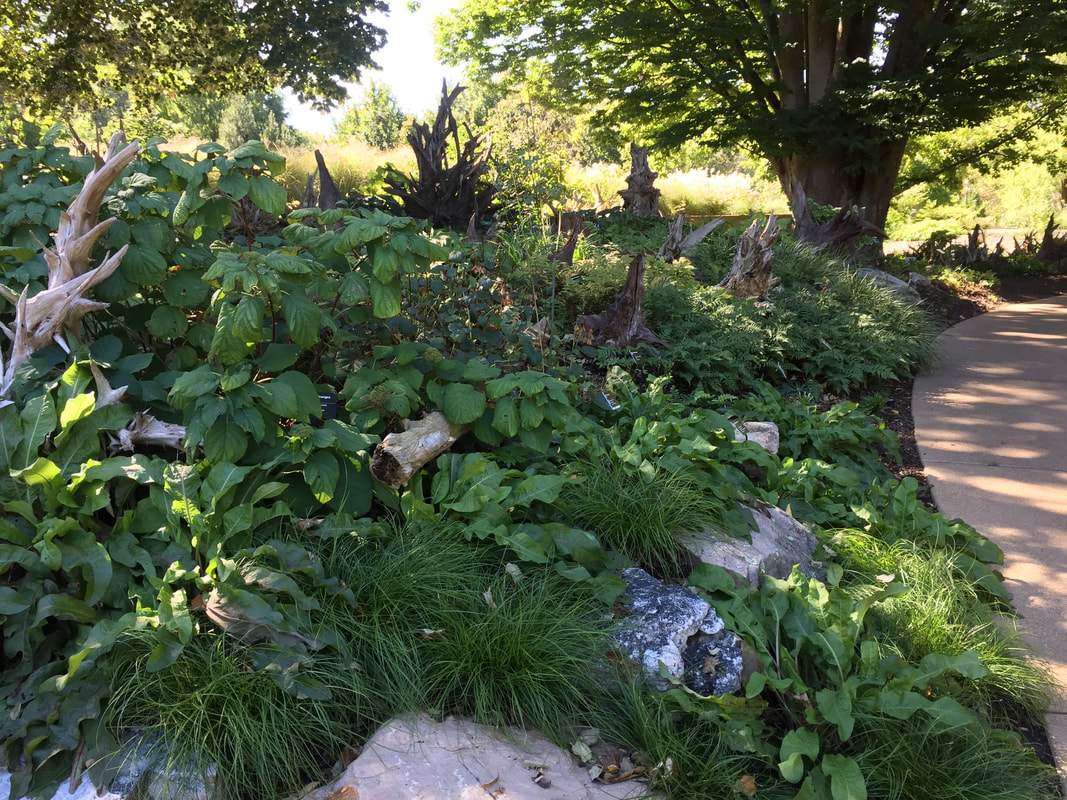 Missouri Botanical Garden stumpery Originally described as a “Victorian horticultural oddity”, stumperies use branches and other large pieces of tree to create habitat for a wide variety of shade-loving plants, growing them more closely together than might otherwise be possible. First created in 1865 England, stumperies often use storm-damaged or diseased trees to create a unique shade gardening space, rather than going to the trouble of disposing of those trees. Personally, I had an ancient apricot tree whose trunk had been regularly sprayed with a sprinkler for years before we bought the property. Rot had taken over the tree and the root system was pretty much nonexistent. Rather than waiting for it to fall over on somebody, we tipped it over and moved it to a corner of the yard, where it now serves as a new growing space and a good place to sit. 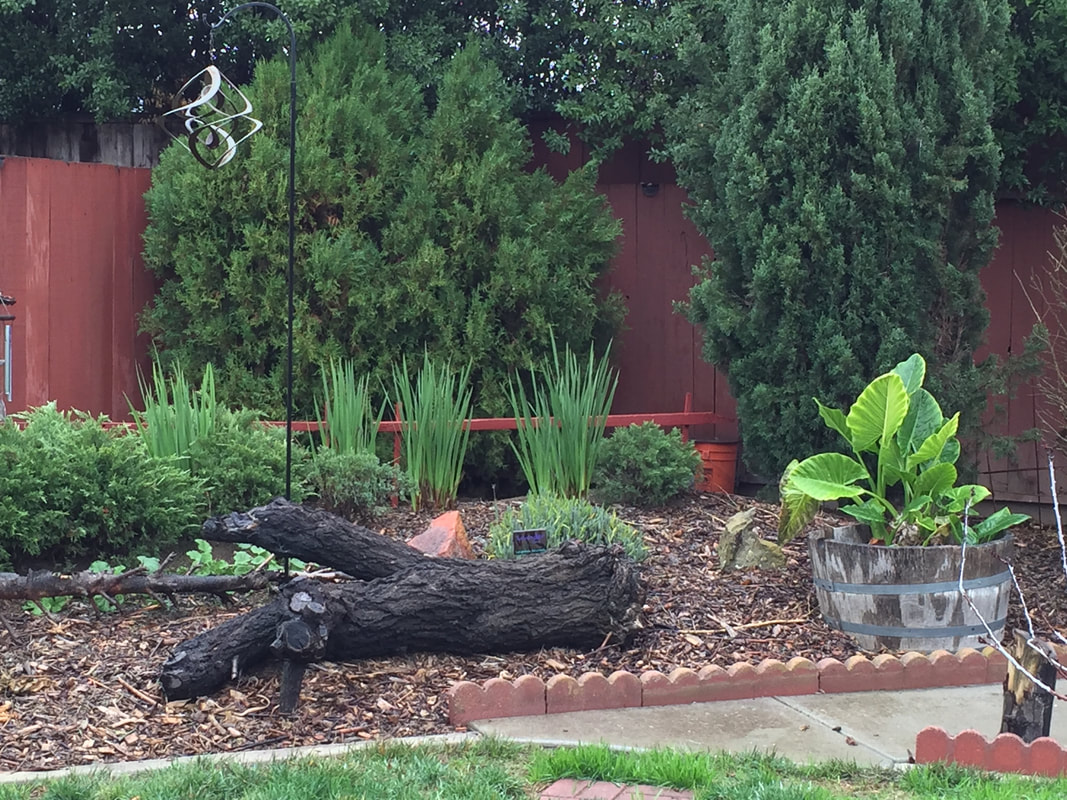 Dead apricot trunk provides the foundation for a future stumpery Stumpery design Stumperies are based on what naturally occurs in a forest. As a tree ages, it eventually falls. When it does, it slowly decomposes, absorbing rain water, improving nearby soil structure, and acting as a ‘nurse log’ to plants that have adapted to growing on rotting wood. To design your own stumpery, you must look at each piece of wood and bark as an artistic component. Try different arrangements until you have achieved something you like. Don’t worry, there are no wrong answers. Here are some tips to creating a healthy stumpery:
Plants used in stumperies The most common plants found in stumperies are mosses, ferns, and lichens. Hostas, hellebores, epimedium, rhododendrons, bleeding hearts, and some bulbs can also thrive in a stumpery.
You can encourage moss growth on logs and stones by smearing them with yogurt [or that carton of soured milk from the back of the fridge]. You can also install shade-loving edibles, such as arugula, basil, blueberries, bok choy, celery, chervil, chives, cilantro, fenugreek, garlic, ginger, kale, lettuces, Malabar and other spinach, mint, mustards, nasturtiums, onion, parsley, potatoes, raspberries, sorrel, tarragon, and tomatillos. The perennials will continue indefinitely, and you can allow some of the annuals to go through their full lifecycle and propagate themselves! Benefits of stumperies Stumperies create micro habitats for local flora and fauna, increasing your garden’s biodiversity. Beetles, toads, and lizards often find sanctuary in all the hidden nooks and crannies provided by a stumpery. Of course, slugs and snails and other pests do, as well. But birds enjoy the extra perches and snacks, so it all balances out. 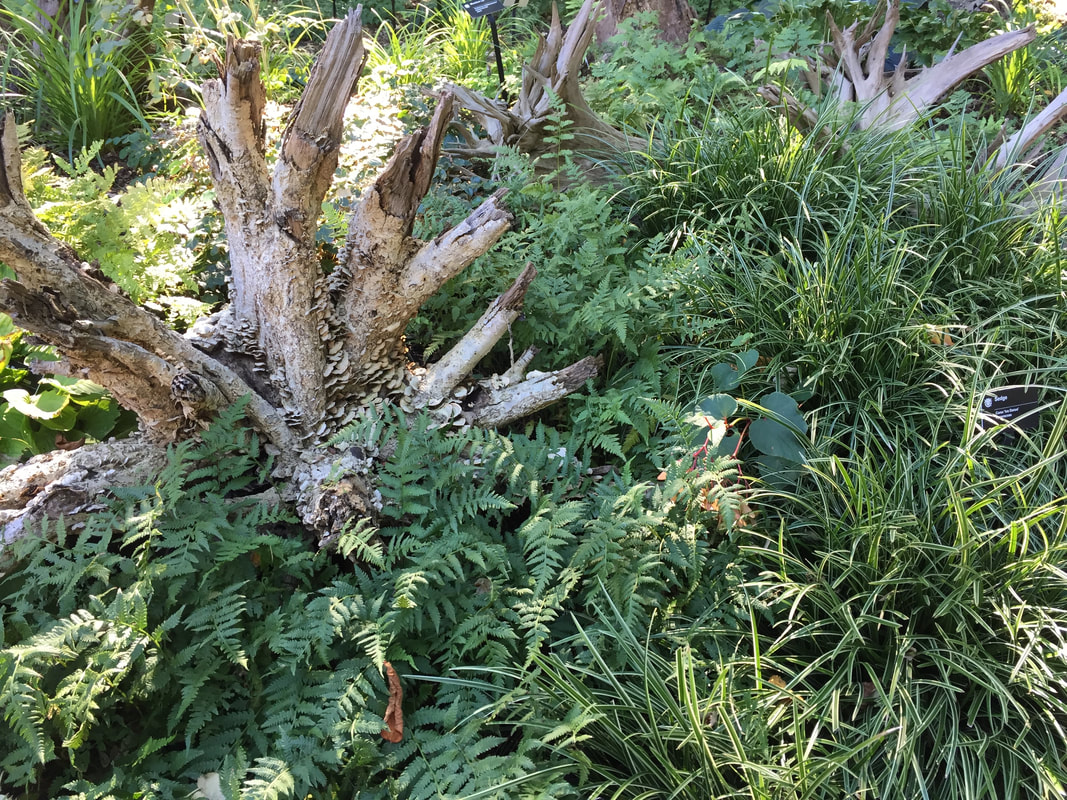 Stumpery in the Missouri Botanical Gardens Stumperies can be a good way to put old wood to work in the garden. They can hide eyesores, make use of neglected corners, and create a whimsical woodland that adds some tranquility to your day. If you don’t have stumps readily available, you can always contact local arborists and construction companies. Very often, they will be happy to provide you with all the material you need for free. [That way, they don’t have to pay to dispose of such large items.] Which reminds me: keep in mind that, eventually, the trees and branches that make up your stumpery will disappear and need to be replaced.
After writing this post, I think I will have to create a more formal stumpery with my apricot trunk. I’ll keep you posted. Hugelkultur is a no-dig gardening method that uses mounds of logs and branches covered with soil to create growing space. Mounds are commonly used when growing pumpkins, melons, and other cucurbits. These “hills” help prevent waterlogged roots, prone to rot. Hugelkultur is something entirely different.  Sketch of hugelkultur (Wikipedia) CC BY-SA 2.5 These mounds start out 3 feet high and wide. As decomposition occurs, the mounds collapse. After being built, mounds are normally left to rest for several months, though some people plant them right away. Since more decomposition is occurring during the first seasons of a hugelkultur’s life, heavy feeding crops, such as melons, squashes, cabbages, potatoes, and tomatoes are grown first, followed by less demanding crops, such as beans, strawberries, and peas, in later seasons. The average lifespan of a hugelkultur is 5 to 6 years. Hugelkultur beds are generally positioned so is to be perpendicular to prevailing winds and slopes. For a more whimsical appearance, you can create hugelkultur in whatever shape suits your fancy, such as spirals or mazes. While enthusiasts claim hugelkultur can be used to redirect stormwater, these mounds do not have the strength or stability required of solid earthworks. Instead of protecting against flooding, hugelkulturs can cause even more destruction as floating logs and branches join the water flow. Problems with hugelkultur Before you get caught up in the hugelkultur fad, understand that there is, as far as I know, no scientific research to verify the claims made by hugelkultur fans. This doesn't mean the claims are false. It simply means that scientific studies have not yet verified the claims. There are some obvious problems, however. Traditionally, hugelkulturs were recommended for counteracting “poisoned layers” of soil. This is a terrible idea. Plant roots will move through the mound and into the soil below. Using raised beds with soil barriers, or container gardening, are much better solutions. Hugelkultur is also said to feed and water nearby plants. In nature, fallen logs do provide water and nutrients to nearby plants. This occurs because they are on top of the soil. As they decompose, they become more porous, storing water and releasing nutrients. These ‘nursery logs’ have long been a source of water and nutrition for young trees and other plants. Hugelkultur logs are underground and do not function in the same way. What is hugelkultur? Hugelkultur was started in Germany as a way to put woody debris to good use when, at the time, it was illegal to burn it. While proponents state that hugelkultur started “hundreds of years ago”, there is no proof to substantiate that claim. The term was first used in 1962 by Herrman Andrä, a German gardener, when he noted the diversity of plants growing on a pile of woody debris at his grandmother’s home. Andrä and others standardized the method, claiming that the rounded mounds increased growing area and nutrient availability, while storing moisture for growing plants. How to build a hugelkultur bed At first, hugelkultur was nothing more than long piles of logs, branches, twigs, and plant waste, such as straw, compost, or sod, covered with soil. In some cases, the design evolved to start with a dug trench or sunken area. The soil removed to make the trench is then used on top of the mound, before planting occurs. The trench method is more commonly used in sandy soils [In another method I found, cardboard, kitchen waste, and old clothing are also incorporated into the mound. Depending on the type of fabric, cotton and wool, as opposed to polyester and rayon, this may or may not be a good idea, respectively.] Other concerns about hugelkultur include the potential for nutrient deficiencies or toxicities. With all that decomposition going on, nitrogen deficiencies may occur. This can happen because the microorganisms responsible for breaking down plant materials use nitrogen as an energy source. (See nitrogen cycle) On the flip side, so much organic material is being used and broken down that nutrient levels can become excessive, creating toxicities within the soil and groundwater.
Witch hazel. While it would be fun to imagine that the name witch hazel has something to do with Halloween and cauldrons, the words actually come from the Middle English wiche, meaning bendable or pliant, and the Germanic hæsel, which can refer to any temperate shrub or small tree. Sorry for popping your bubble, but these trees really do have plenty to offer.  Witch hazel tree in bloom (Keichwa) CC BY 1.0 During my visit to the Missouri Botanical Gardens, I saw lovely, low spreading trees that happen to provide a bonus of striking flowers. In winter! The trees I saw were tucked away under larger deciduous trees, often with a backdrop of evergreens. While generally pruned into the shape of a small tree, I have since learned that witch hazels will also grow into a many-stemmed shrub, and that there is even a weeping variety. But it is the flowers that captured my attention. These are not your garden variety roses or daisies.  ‘Jelena' witch hazel flowers (Meneerke bloem) CC BY-SA 3.0 Witch hazel flowers While we generally focus on edible plants at The Daily Garden, I had to make an exception for witch hazel trees. The winter flowers of witch hazel provide color, nectar, and pollen through the lean winter months, increasing biodiversity, and improving your mood. At a time when everything else is gray, these striking flowers are visual fireworks in an otherwise drab view. Witch hazel flowers can be a buttery yellow color, or they may be a brilliant orange or red. Very often, flower petals have a red or purple base, adding depth to the color.  ‘Diane' witch hazel flowers (SB Johnny) CC BY-SA 3.0 The witch hazel tree The genus name for this group, Hamamelis, means “together with fruit”. This name refers to the way flowers and new stems occur while fruit from the previous year is still on the tree. Very often, flowers will start out yellow, then shift to orange, and end their lives a fiery red before falling to the ground. The fun thing about witch hazel trees, especially with the yellow flowering varieties, is that they look like sunflower trees, in the dead of winter. There are four species of witch hazel, or winterbloom, native to North America: H. mexicana, H. ovalis, H. virginiana, and H. vernalis. Each of these varieties has a pleasant fragrance. There is also one Japanese variety, H. japonica, and one Chinese variety, H. mollis, neither of which have a fragrance. There are also several different cultivars. Pacific Horticulture has an excellent description of the many cultivars available today.  Hamamelis japonica flowers (Kurt Stüber) CC BY-SA 3.0 Witch hazel trees are deciduous. They can reach a height of 40’, but most of them peak out at 10 feet. Witch hazels seem to prefer a lower growth, keeping to the shadows of other, larger trees. Witch hazel trees will not perform well, left exposed to California’s scorching summer sun, but they make lovely understory trees. The fruit is a capsule that contains one or more black seeds. When the fruit is ripe, it splits explosively, ejecting seeds up to 30 feet from the parent tree. [In some areas, these trees are called Snapping Hazels because of this behavior.] Witch hazel trees have thin bark and shallow roots, so it is important to keep newly planted trees well irrigated.
How to grow witch hazel Growing witch hazel requires patience. After they have been cold stratified, seeds take up to a year to germinate. You will want to start them in pots, where they will stay for 2 or 3 years, before they will be ready for transplanting. Flowers do not appear until plants are 6 years old. Native to the northeast and throughout the Appalachian Mountains, witch hazel prefers life on the northern side of everything: the north side of your house, on north facing slopes, that sort of thing. Witch hazel extract These are the trees that provide us with the popular astringent of the same name. Native Americans used witch hazel extract to treat a wide variety of conditions, including inflammations, tumors, and swellings. The Puritans adopted these practices and many medical claims are made about the effectiveness of witch hazel, some of which are true, while others are not. According to WebMD, the leaves, bark, and twigs of witch hazel contain tannins that reduce swelling, which is why it is used to treat bags under your eyes, hemorrhoids, minor bleeding, and mild skin irritations. All the other claims about witch hazel extract are unsubstantiated. Before you go trying to make your own witch hazel extract, you need to understand that the inexpensive plastic bottle of witch hazel available at the drugstore is a distilled version of the original recipe. It’s probably not worth the trouble of trying to make your own, unless you are really into that sort of thing. Also, witch hazel can be toxic, so be careful. Witch hazel lore Forked witch hazel branches are the tool of choice as dowsing or divining rods. Early settlers observed the Native Americans using witch hazel branches to find underground water sources. According to the American Society of Dowsers, “The dowsing rod is a simple instrument which shows the reaction of the human nervous system to certain factors which are unknown to us at this time.” Sounds fair enough. Apparently, the flexibility of witch hazel limbs makes them particularly sensitive and responsive to those as yet unknown reactions. If you have a shady spot in your landscape and need some winter color, witch hazel might be just what you need. Do you have a spot where nothing (but weeds) will grow? Do you have a patch of lawn you’d rather use for growing food? No-dig gardening may be the answer.
Problem areas Digging out a lawn is hard work, and it damages the living things that help soil stay healthy. Areas of ground that regularly fail to support plant life often have poor soil structure and are lacking beneficial soil microorganisms. No-dig gardening uses layers of organic material to create the conditions needed for worms and other invertebrates, plant roots, and soil microorganisms, to transform a barren or compacted piece of ground into a friable, fertile place to grow healthy food. Traditional cultivation No-dig gardening is the opposite of traditional cultivation. For thousands of years, we have drilled holes, cut furrows, and plowed up the land we use to grow food. Traditional cultivation provides many benefits. It hides crop seeds from birds and other seed eaters, removes perennial weed roots, exposes pest eggs and larvae to predators, and it loosens the soil (sort of). Unfortunately, traditional cultivation also has a bad side. All that digging increases topsoil loss due to erosion, disturbs beneficial soil microorganisms, worsens compacted soil, reduces water absorption and retention, and brings dormant weed seeds to the surface, where they then germinate. We counteract these negatives with the addition of fertilizers, herbicides, pesticides, and more water. All those chemicals and disruptions are creating problems, and we need sustainable solutions. No-dig gardening may be one of those solutions. Natural processes Natural processes that have evolved over millions of years rarely result in furrows being dug in the ground. Instead, leaves, seeds, flowers, fruit, blood, urine, feces, and dead insects and animals all fall to the ground and lay on the surface. This mix is then walked on, blown around, and rained on until it is ground into tiny bits. These tiny bits of organic material are then pulled into the soil by worms and other invertebrates, and gazillions of microorganisms, that all convert organic matter into mineral elements plants need to grow and thrive. These processes also create soil with important spaces, called macropores and micropores, that allow the soil to breathe, and make room for water and roots to move freely. This nurtures soil microbes, which generate biologically active enzymes, vitamins, antibiotics, and glomalin (the glue that holds soil particles together). [Did you know that plants release one-third of all the organic matter they generate through their roots, to attract and feed nearby soil microbes? Pretty cool, eh?] So, maybe we don’t need to dig to be able to garden… How to no-dig gardening works Clearly, if you are going to plant a bare root tree, you need to dig a hole. But, if you have a patch of ground that you want to convert into a garden bed, digging is not necessary in most cases. Instead of digging up weeds and existing, unwanted plants, you simply smother them with a 3 to 4” layer of organic material, be it compost, aged manure, wood chips, or whatever you have handy. By blocking the sunlight, most annual weeds will die. In doing so, they and the mulch add nutrients to the soil and improve soil structure and texture. Garden plants are then installed in this layer of nutrient-rich, friable mulch. Over time, more mulch and other organic materials are added on top. This is why no-dig gardening is also called sheet mulching, sheet composting, or lasagne gardening, because organic matter is simply added in layers over time, without digging any of it in. Like other gardening methods, no-dig gardening has its pros and cons. Benefits of no-dig gardening First, let’s face it, digging is work. If your soil is heavy clay, like mine used to be, it’s damn near impossible to break ground in summer without power tools. In addition to saving your back, no-dig gardening leaves the complex world of soil life alone, to do it’s thing. This means beneficial fungi and bacteria, worms, and other invertebrates can go about their business, eating and pooping, unmolested, converting organic matter into plant food, and improving soil structure and texture as they go. This is an excellent way to put those autumn leaves, and all that yard and kitchen waste to good use. Placing all that organic matter on top, rather than digging it in, reduces the number of weeds you have to deal with, and it encourages worms to come up to the surface and grab a bite before heading back down to safety. All that worm traffic helps aerate the soil. No-dig gardening reduces erosion. Every time you dig or plow, you are exposing more soil surface area to sun, wind, and rain, which can lead to erosion. Over time, this exposed area develops a protective crust that repels water, interfering with the absorption of rain and irrigation water. No-dig gardening also reduces soil compaction. Here me out on this: as you rototill, dig, or plough the soil, one layer gets churned up and aerated. Below that level, however, everything gets compressed, potentially creating hardpan, or plow pan, an impenetrable barrier to delicate roots. So, why wouldn’t you want to try no-dig gardening? Drawbacks to no-dig gardening The first downside to no-dig gardening is that a lot of mulch and compost are needed on a regular basis. If you’re like me and raise your own chickens, this is not a problem. Or, if you live near a stable, manure is readily available, just be sure to age it first. If you have seriously compacted soil, no-dig gardening can and will, eventually, improve soil structure and texture enough to make it easier for plant roots, but it will take some time. [One of the easiest ways to reduce soil compaction in the garden is to install designated paths. This is true regardless of what gardening method you use.] Finally, because decomposition is occurring all around your garden plants, you may find that snail and slug, sowbug, and gopher populations skyrocket. While they are there to eat (and breakdown) all that compost, they may find your lettuce and young seedlings irresistible. How to create a no-dig garden patch If you want to try no-dig gardening, start with a small patch. First, water the area well. If there are any large, perennial weeds present, cut them off at ground level and cover the area with a thick layer of coarse wood mulch. Water the area again. Then, cover your patch lasagne-style with layers of aged compost or manure, straw, mulch, and other organic material, water it, and let it settle for a few days. While it may take a year or more for the benefits of no-dig gardening to fully take effect, you can plant large, spreading plants, such as pumpkins or squash in this patch right away, assuming its the right time of year. As the organic matter breaks down, simply add more layers on top and let nature do all the work. I use this method in my raised beds, adding organic material as a repeated top dressing. Once your no-dig garden is established, you can install new plants by simply clearing an opening with a dibble, your hand, or other garden tool, and water around it. No-dig gardening may not be the cure-all to your back and garden problems, but it is certainly worth a try! You’ve heard of raised beds and garden beds, but what about nursery beds? Nursery beds are the perfect place for that “just couldn’t pass it up” seedling, the gift plant with no permanent location, sale priced plants that you haven’t had time to work into your regular garden or landscape, or it can be used as a quarantine station. These are all plants that may need a little extra care or attention, as they settle in. 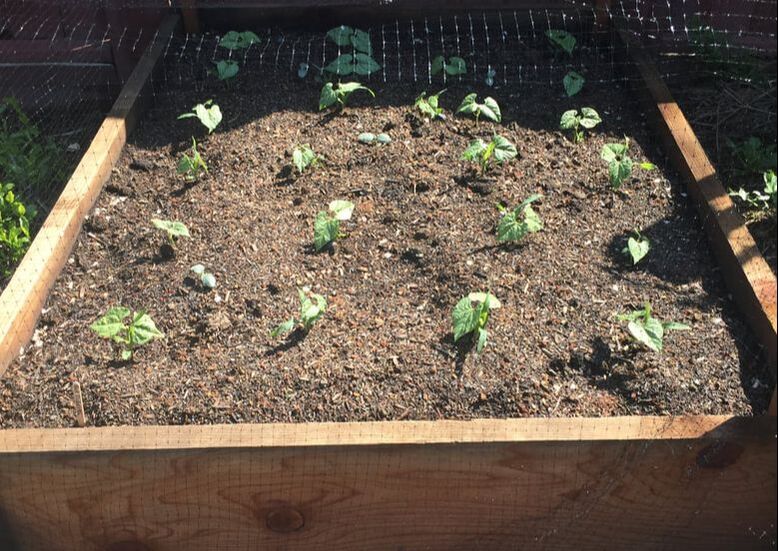 Nursery bed with bean seedlings Maintaining a nursery bed takes up very little time or space, but it can save you a lot of money on plants.
What is a nursery bed? A nursery bed may simply be a plot of ground, tucked away in a corner of the yard. It may be a slightly raised area, walled in with cinderblocks or scrap lumber. Nursery beds do not have to be pretty. They simply need soil, water, and sunlight. If you want to get fancy, you can add corner posts to support protective netting or shade cloth. Again, looks are not important. Start seeds in a nursery bed Vegetable seeds can be started in a nursery bed, and grown there until they are big enough for transplanting. This is an excellent tool for succession planting. As you wait for the current crop to wind down, your next season’s crop is already on its way! Nursery beds are also a great place to start plants that can be used to fill empty spots as they occur. As a tomato plant gives up the ghost, simply cut it off at ground level and install a cheery chrysanthemum in its place! Viola! Transplant recovery in a nursery bed Most gardeners feel frustrated by thinning young seedlings. A nursery bed offers the perfect place to put the removed seedlings, allowing them a chance to recover from the ordeal and, possibly, grow to a large enough size to be moved elsewhere, or gifted to a friend or neighbor. Propagating with a nursery bed If you want to try you hand at vegetative propagation, nursery beds provide an easy starting point for cuttings and divisions, allowing them time to recover and to develop new roots before being moved to more permanent locations. Nursery beds also provide a good location to start parent plants that will ultimately be divided into many smaller plants (for a tiny fraction of the cost of buying all mature plants). Nursery beds for hardening off Delicate seedlings may need a transitionary period before they can handle being planted in the garden. With the addition of shade cloth or old glass windows, cold frame style, you can give these babies a taste of the great outdoors without exposing them to more than they can handle. How to make a nursery bed While you want your nursery bed to be convenient to the rest of the garden (and a hose bib), it can easily be tucked away behind a shed or some shrubs, as long as it gets at least 6 to 8 hours of sunlight each day, and is relatively level. Being sheltered is actually a bonus for a nursery bed, as it helps block strong winds. Use these steps to create your own nursery bed:
Nursery beds are different from raised beds in that they are designated as an unplanned, layover location, rather than a permanent home. Finally, if you have a nursery bed set up and know that you won’t be using it for a while, it makes a great place to age compost. The nutrients left behind will be exactly what all those baby plants need to thrive! Hoophouses are growing in popularity as a way to protect plants from a variety of threats. Traditionally used in commercial agriculture, hoophouses are similar to cold frames, greenhouses, and row covers in that they provide a physical barrier between frost, insect pests, and disease vectors and your crops.  Open-ended hoophouses (Val Vannet) CC BY-SA 2.0 Hoophouses are also known as poly tunnels. grow tunnels, high tunnels, and hoop greenhouses. Hoophouses are typically created from steel frames that are covered with plastic (polyethylene) sheeting. These frames can be square or semi-circular. Hoophouses create heat Hoophouses extend the growing season by several weeks by increasing temperatures. This can be done with mechanical heaters, or with passive solar heat. In areas with extreme cold, smaller hoophouses are placed under larger versions, creating a buffer zone. As the sun’s rays warm the plants and soil within a hoophouse, the plastic sheeting slows heat loss. The heat can come in, warming the plants and soil, but it cannot escape as fast, so temperatures continue to rise. This provides the warmth needed by many sun-loving plants, such as strawberries, raspberries, blackberries, eggplant, basil, and peppers, and As temperatures become too hot, fans and other forms of ventilation are added at either end, along with other helpful equipment.  Commercial multi-span hoophouse (Kattegatt) CC BY-SA 4.0 Hoophouses offer control Another benefit of hoophouses is that they allow growers to manipulate humidity, along with temperature and air flow. Crops prone to fungal diseases can receive extra air flow with the use fans. Hoophouses also provide protection against strong winds, hail, sunburn damage, and sudden, unexpected cold. In areas with too much heat, misters can be installed inside hoophouses to keep the environment conducive to strong growth. All this protection allows fruit and vegetables to develop at a steady pace. It also allows them to be grown during traditionally unproductive seasons, and it helps more sensitive plants overwinter without too much damage. Hoophouses also offer protection against many pests.  Backyard hoophouse (Kattegatt) CC BY-SA 4.0 Pests blocked by hoophouses
Most flying insect pests (and neighborhood cats) are thwarted by the walls of a hoophouse. Not only are the plants harder to see or smell, the plastic wall creates an impenetrable barrier. This protection can extend to birds, rats, and squirrels, but only up to a point. Once these pests realize there is food inside, they will work harder to find a way in. The real protection is against insects that act as vectors for disease. Hoophouses in the home garden Smaller versions of commercial hoophouses are now available for purchase for the home garden, or you can create your own, using PVC or conduit. If you had a hoophouse, what would you grow in it? Netting can be used to protect your fruit and nut crops from marauding birds and squirrels. But, did you know that it can also be used to modify lightwaves from the sun? Read on.  Netted panels protect raised beds from birds People have used nets to protect fruit and nut trees from birds for a very long time. Birds have a nasty habit of pecking a bite out of one fruit and then moving on to the next, and the next, leaving behind a wake of damaged fruit that is prone to rot and infestation. Netting is also used as hail protection, in areas prone to that particular weather pattern, and to reduce seed loss in newly planted areas. This is particularly helpful with pea, bean, and quinoa crops. Pests thwarted by netting Netting is most commonly used to protect fruit and nut crops from bird feeding. Netting can also be used to protect against squirrels, voles, rats, Junebugs, and dried fruit beetles, though that protection is fleeting. I have been able to harvest far more of my almond, apple, grape, blueberry, nectarine, and fig crops with addition of tree cages enclosed with netting. As soon as my young apricot and pear trees start producing fruit, they will get their very own tree cage, for the same reason.  Almond tree protected by tree cage and netting The down-side of netting
As handy as netting can be, it does have a few problems associated with its use. First and foremost, it is made out of plastic and it is not nearly as durable as the advertisements make it out to be. In reality, birds will try repeatedly and with great enthusiasm to get at your fruit crop (or your chicken feed), tearing holes in the netting. Also, netting snags on every twig, nub, and button it comes across, damaging plants, and adding more holes (and a certain measure of frustration). Birds and other wildlife have met with cruel and horrible deaths because of netting that has been allowed to blow on the wind or swish around in oceans, lakes, and other waterways. Finally, birds are not only things that can get caught in loose netting - we had a rat get tangled up in the netting over our chicken run. It was not a pleasant experience for anyone involved. So, if you opt to use netting, you will need to monitor it regularly for tears and trapped creatures, and please, for goodness sake, dispose of it properly. Now, what was I saying about lightwave manipulation? Photo-selective netting Photo-selective netting is the latest in agricultural technology. As the plastic filaments used to make this particular type of netting are manufactured, light dispersive and reflective elements are built in. These elements screen out certain lightwaves and then scatter the light that is allowed through. This spectral manipulation allows farmers to decide which light-regulated physiological responses are promoted. The scattering effect increases the amount of light that reaches the inner canopy. By doing this, farmers can grow bigger fruit with less water. The netting provides wind protection and substantially reduces evaporation. This lowers the likelihood of water stress and water-related diseases. How to use netting If you simply drape netting over your garden beds or trees, birds and other fruit eaters will still be able to reach a large portion of your crop. To be effective, there must be a space between the netting and whatever is being protected. Ideally, the netting is held taut, bouncing birds off the surface, rather than entangling them. This can be achieved with a tree cage, PVC hoop, or other structure. Netting is a simple way to protect many crops from feeding damage, but it has its limitations and needs to be handled responsibly. Whenever possible, hardware cloth is a safer, more durable option. Good fences make good neighbors. Fences in and around your garden can create spaces, cause problems, or they can be sturdy helpers. How do fences impact your garden?  Wooden fence (Wikipedia) Public Domain Fences add perspective While some gardeners (farmers) prefer wide-open, Nebraska-style landscapes, fencing can create manageable spaces. Short fences can line pathways, providing support to a row of tarragon, oregano, or sweet peppers, while a medium-sized fence can block a view of your pool pump and provide afternoon shade for more delicate plants, such as currants. Tall fences create a sense of security and privacy. They also provide structure for vining plants. 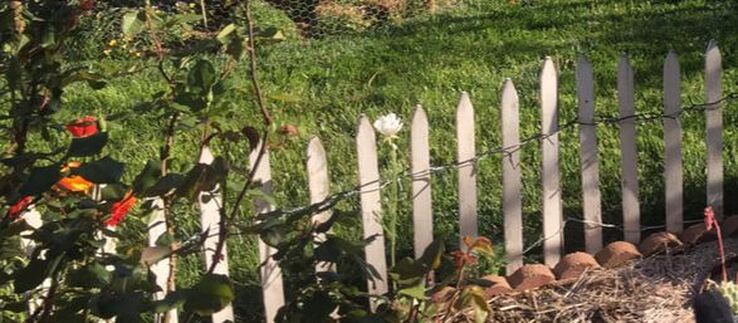 Picket fence Fencing materials have an impact, too. A solid brick or stone fence has a very different feel than a crisp white picket fence, a rustic pole fence, or a cedar plank fence. The materials and the construction method used alter the look and feel of your property and your garden. They also impact the way your plants grow. .JPG) Wattle fence (Lucekbb) CC BY-SA 3.0 Fences as barriers Neighborhood fences are a great way to keep kids and pets safely at home. A good fence can also block garden invaders, such as deer, gophers, squirrels, chipmunks, and rats. Of course, some of those pests will need more than a wattle fence (or a very tall fence, in the case of deer) to slow them down, but fences provide a good starting point. For burrowing pests, such as voles and rabbits, the fencing material needs to go underground a ways to be effective.  Typical urban fence (Wikipedia) Public Domain Fences and air flow A solid fence can provide serious protection against strong winds. Rather than tearing through your garden, leaving broken stems and branches in its wake, the wind is pushed over and around your sanctuary, keeping everything safe. Sometimes that safety comes at a price: poor air flow. In gardens prone to fungal diseases, poor air flow is a liability. If you have a solid fence and fungal problems in your garden, judicious pruning for good air flow and proper plant spacing can counteract these problems.  Cyclone fencing with vines (Shareef Taliparamba) CC BY-SA 2.0 Fences as climbing structures
Fences make it easy to grow vines and other climbing plants. They also provide a great support for espaliered fruit and nut trees. Fences can also be used in tandem with planting containers. A mounted rain gutter with end caps can transform a bare fence into a strawberry wall. Short walls or railings provide the support needed for container plants that a re prefect for growing herbs, lettuces, Swiss chards, spinach, and many other edibles, without taking up extra space. Fences are also a great place to hang garden tools! Fences block sunlight The same fences that offer protection from wind and marauding pests are the same structures that can block much-needed sunlight. Most garden plants need at least 6 to 8 hours of sunlight each day to thrive. If you have fences, it is important that you take the time to see how much sunlight nearby plants actually get. While a west-facing fence may offer respite from scorching summer afternoon sunlight, an east-facing fence will only provide that protection to your neighbor’s plants. Fence care Some fencing materials, such as chain link or stone, require very little care. Other fences, particularly those made out of wood, have some special needs. Since wod can rot, these tips will help your wood fence last longer:
Make the most out of the fences in and around your garden or foodscape. And, if you have the time, do an online search for “unique garden fence ideas.” There are some gorgeous, creative, stunning ideas out there! One of the many attractions of gardening is that you can play with it. We are not limited to the furrowed rows of earlier generations. You can be as creative as local growing conditions and the needs of your plants will allow. Deciding on a theme is one way to pull your garden together artistically or aesthetically.  The White Garden at Sissinghurst Castle Garden, designed by Vita Sackville-West (Pete Chapman) CC BY-SA 2.0 Themes provide a unifying framework, a story, and a uniqueness to your garden, and they can be a lot of fun. They are more artistic than simply how you grow your plants. Garden themes make it easy to decide which plants work best in a landscape, a raised bed, or even a single container, by providing a long-term, broader perspective on that space. You can create a theme based on flower color, leaf shape, or even a particular shade of green. You can create a garden theme that takes advantage of a shady corner, transforming it from a seldom used, mostly wasted space into a storybook hideaway, complete with peek-a-boo elf statues and a reading chaise lounge. [More lemonade, please!] Or, you can create a theme around a favorite book or movie, a sensory garden, or a copycat garden. Garden themes can be whimsical or more practical. Rain gardens are one type of more utilitarian garden theme.  Recently planted home rain garden (BrianAsh) CC BY-SA 4.0 Before you start your garden design, we should consider some garden planning basics. Information you will want to have on hand as you select your plants includes:
Creating a garden plan Planning a garden can feel overwhelming. Sometimes, the best way to start is to select one type of plant, often tomatoes, and grow from there. A single potted tomato, however, will not transform your landscape. You can also go to the other end of that spectrum and learn about landscape design, using boundaries, surfaces, forms, texture, color, art, and lighting to create your masterpiece. Somewhere in between those two extremes is a balance of what you want, what you have the time to maintain, and what plants need to stay healthy. A theme can help pull your garden together. Types of themed gardens Traditionally, themed gardens were classified by geographic location, terrain, or historical prototype. Using a theme narrows your options and pushes you to be more creative. Some traditional garden themes include:
But there is another way of looking at themed gardens. You can create your themed garden to create a favorite dish or holiday meal, or it may be a children’s garden, an herb garden, or an edible storybook garden. Having a theme can help guide you with plant selection. Today, we will look at some common edible garden themes, the plants that might be included in those gardens, and maybe a little garden art, just for fun. Butterfly gardens and pollinator gardens The more pollinators visit your garden, the bigger your harvest will be. You can attract bees, butterflies, honey bees, and many other beneficial insects with brilliant blooms of borage, salvia, and butterfly bush, and by allowing many food plants to go through their complete lifecycle. Carrots, caraway, celery, chervil, cilantro, cumin, parsnips, dill, fennel, and parsley are umbellifers. Umbellifers have umbrella-shaped flowers that beneficial insects love. Allowing lettuces, Swiss chard, and others to go to seed also provides nectar and pollen for these beneficial insects and hummingbirds. These plants will change shape, color, texture, and size over the course of a year, keeping your landscape interesting. Just be sure to provide a water source for all these tiny helpers. A birdbath or small fountain is all that’s needed. Just be sure to clean them every once in a while.
Unique plants, such as golfball-sized Parisian carrots and cucumbers that look like miniature watermelons (Mexican sour gherkins) add whimsy and fun to your children’s garden. Favorites, like strawberries, blueberries, and groundcherries, can create a magical play area filled with delicious, healthy edibles, curving paths, secret hideaways, and storybook reminders. [You may be surprised to discover that most children love the taste of spinach when they have grown it themselves…] Fruit cocktail gardens You may have seen grafted fruit cocktail trees available through garden catalogs. These dwarf trees usually feature nectarines, peaches, plums, and apricots, all on the same tree. You can flesh out your fruit cocktail garden with potted raspberries, blackberries, currants, and strawberries and surround the whole thing with a blueberry hedge. Imagine all that sweet deliciousness in one place! Gift gardens Gift gardens are spaces dedicated to growing gift plants. Flowers, herbs, and succulents all make lovely presents. One type of planting forward, gift gardens provide the space (and reminders) needed to have that perfect gift ready when you need a handy gift. Maintaining a gift garden ensures you will always be prepared for those special occasions.
Herb gardens Herb gardens are attractive, tenacious, and rewarding. Except for basil, most herbs will continue to grow for many years. Rosemary, lavender, and thyme add fragrance, flavor, and beauty wherever they grow. Members of the mint family, oregano, lemon balm, summer savory, marjoram, and sage are best grown in containers due to their invasive behavior. You can add chives, cilantro, and tarragon to an herb garden. You may want to add a nice place to sit and enjoy a good book. It’s going to smell so lovely. You’ll want to stick around. Holiday dinner gardens Nothing says gardener like fresh Brussels sprouts and baby beets at Thanksgiving, fresh greens at Easter, and juicy watermelon on July 4th. If you plan, you can harvest many popular holiday meal ingredients right when you need them. Beans, beets, carrots, fennel, onions, pearl onions, peas, potatoes, sweet potatoes, spinach, and tomatoes are just a few possibilities. Sage, basil, oregano, parsley, and mint can also be grown for your holiday meals. Whatever traditions your family celebrates, your holiday dinners garden can save you a trip to the grocery store and give you full bragging rights.  Pizza (HoaLuu) Needpix Pizza gardens Pizza gardens are fun. Imagine a round garden space, cut into wedge-shaped sections and planted with popular pizza ingredients. Aside from the meat and cheese, you can grow nearly every other pizza ingredient at home. Tomatoes, onions, and garlic make the sauce, along with fragrant herbs, such as basil, oregano, and thyme. You can also grow sweet red, green, orange, and yellow peppers, hot peppers, zucchini and other summer squash, and artichokes for your pizza. If you like, you can even grow an olive tree in a container, and a patch of wheat or cauliflower for the crust. If pizza isn’t your thing, you can pick a different dish and create your garden theme using those ingredients. Stir fry garden, anyone?
Your salad garden can include cucumbers, bell peppers, carrots, artichokes, corn, dandelion greens, mustard greens, fennel, jicama, and kale . You can even add a dwarf almond tree for some slivered almonds on top of that salad. If you prefer vegetables stir-fried, a stir-fry garden makes it simple to throw together a flavorful, healthy, fresh-from-the-garden meal. Carrots, onions, garlic, cilantro, bell peppers, hot peppers, and even your saffron can all be grown at home.
Tea gardens
Put aside images of a serene, manicured Japanese tea garden and imagine, instead, growing your tea. Tea plants (Camellia sinensis) can be grown outdoors in USDA Hardiness Zones 8 - 12 or indoors year-round. But, this traditional black tea is not the only plant grown for its use as a tea. You can also enjoy chamomile, mint, and lavender tea. Other options for a tea garden include lemon balm, jasmine, coriander, bergamot, hibiscus, elderberries, ginger, rose hips, raspberry and blackberry leaves, licorice, lemon grass, blackcurrants, dill, and dandelions can also be used to make tea. Pick a patch of ground today and cover it with aged compost or arborist wood chips. As you select your theme and start choosing plants, worms and microorganisms will be busy working to improve your soil. Before you know it, you will be enjoying the fruits (or vegetables and herbs) of your labor! You’ve probably seen plant labels, seed packets, online information, and comments in gardening books about hardiness zones, but what are these zones, and how can they help you in the garden?  Plants cannot migrate to warmer climates each winter or hide under an umbrella in the peak of summer. They are stuck where they are. Plants must get the sun exposure, nutrients, appropriate soil pH, and rain they need where they are. Planted in the right location, they can grow and thrive. Life can become much more difficult if there are not enough favorable conditions. And the ambient temperature is one of those critical components of plant health. Choosing plants suited to your local climate can make all the difference in whether or not they thrive or die. The USDA Plant Hardiness Zone map can help. History of the Hardiness Zone map To help farmers and gardeners select the best plants for a particular geographic area, the U.S. Department of Agriculture created the Plant Hardiness Zone map in 1960. More accurate measurements and expanding heat islands (cities, roads, and urban development) have led to revisions in that map in 1965, 1990, 2012, and 2023.
How to use the USDA Hardiness Zone map
The 2023 Hardiness Zone map is available online. All you have to do is enter your zip code. Under the search field, you will see your zone. You can also look at a static state map that has more detail. But you need to know your yard. Your microclimate may be warmer or colder than local weather reports suggest. Those differences will dictate which plants you select, where you put them, and how much irrigation they need. Try hanging a thermometer in your garden to fine-tune the information you get from the USDA Hardiness Zone map.
Step 1: What are you already growing? Before you add something new, it helps to identify what you already have. Established perennials, sun exposure, and soil health will often dictate the conditions available for new plants. Trees and shrubs that are already in place need to be taken into account. They may provide the perfect protection for a collection of shade-loving plants, while sun-loving varieties would wither in theat shade. Speaking of shade, just how much sun does each area of your garden get each day? It changes with the seasons. Knowing just how much sun each area gets can help you select plants more likely to thrive. Most garden plants need 6 to 8 hours of full sunlight each day to be healthy. Also, keep in mind that some plants use a form of chemical warfare, called allelopathy, to reduce competition from neighboring plants. Learning a little about allelopathy can increase the likelihood that your plants will thrive. I’ve said it before and I’ll say it again: Take a soil sample and send it to a local, reputable lab. [Over-the-counter soil tests, with those little plastic tubes, are not accurate enough to be useful.] The results of your soil test will help you prepare better for those new arrivals, as well as help your established plants. Wood chips, mulch, or a ground cover may be just what is needed. Here, in San Jose, California,, acidification is often recommended for many popular plants. Step 2: What do you want from your garden or landscape? For me, the answer to that question is simple - I want edible plants that my family will enjoy eating. Your reason for gardening may be something entirely different. Do you want an herb garden? A flower garden? Do you want maintenance-free plants that will look good year round? Taking the time to decide what you want from your landscape or garden design through each season will help you select the best plants. I use my shopping list. If I write a fruit or vegetable on my shopping list with any frequency, I ask myself if it is something I can grow at home. Nearly always, it is, so I do! [If you are at a loss on this one, take a look at the list of garden design prompts, below.]  Step 3: Zones, pathogens, and cultivars
Before shopping for plants, you should also consider your region. If you live in the United States, you can use the U.S. Hardiness Zone map. This tells you which growing zone you are in. Growing zones are based on average annual winter temperatures and they help you select which plants will thrive in your location. You should also check out resources from your local County Extension Office. They can often provide you with information about common pests and diseases, specific to your area. You can use this information to select cultivars that are resistant to the pathogens common to your area. Also, avoid installing non-native invasive plants. While reputable plant sellers are taking these plants off their shelves, not all sellers care. Step 4: Start shopping and planting! Finally! Now that you know what you are working with, what you want, and what will grow well in your area, you can finally start shopping for or collecting your new plants! Remember, catalogs and garden centers are not your only source for plants:
When shopping for new plants, watch for signs of pests or disease. You don’t want to introduce a new problem along with the plant. Many plant pests and diseases are brought in on contaminated soil and plants, which is why a quarantine period is such a good idea. It allows you to break the disease triangle before it affects the rest of your garden. Garden design prompts Sometimes, we just don’t know where to begin. I think this is especially true when we have an overwhelming number of options. If you have absolutely no idea what you want to do with your landscape or garden design, see if any of these themes spark inspiration:
Rather than grabbing the first plant that catches your eye, taking the time to learn about what your microclimate has to offer and deciding what you want from your landscape or garden design can help ensure that the plants you actively choose to add will be appropriate, rewarding, and healthy. Native plants have evolved, over thousands of years, to live in relative balance with local soil, climate, plants, animals, and insects. These are not plants from other regions or other continents. They are often not even plants native to nearby towns or counties. These are not plants that were developed in a laboratory. 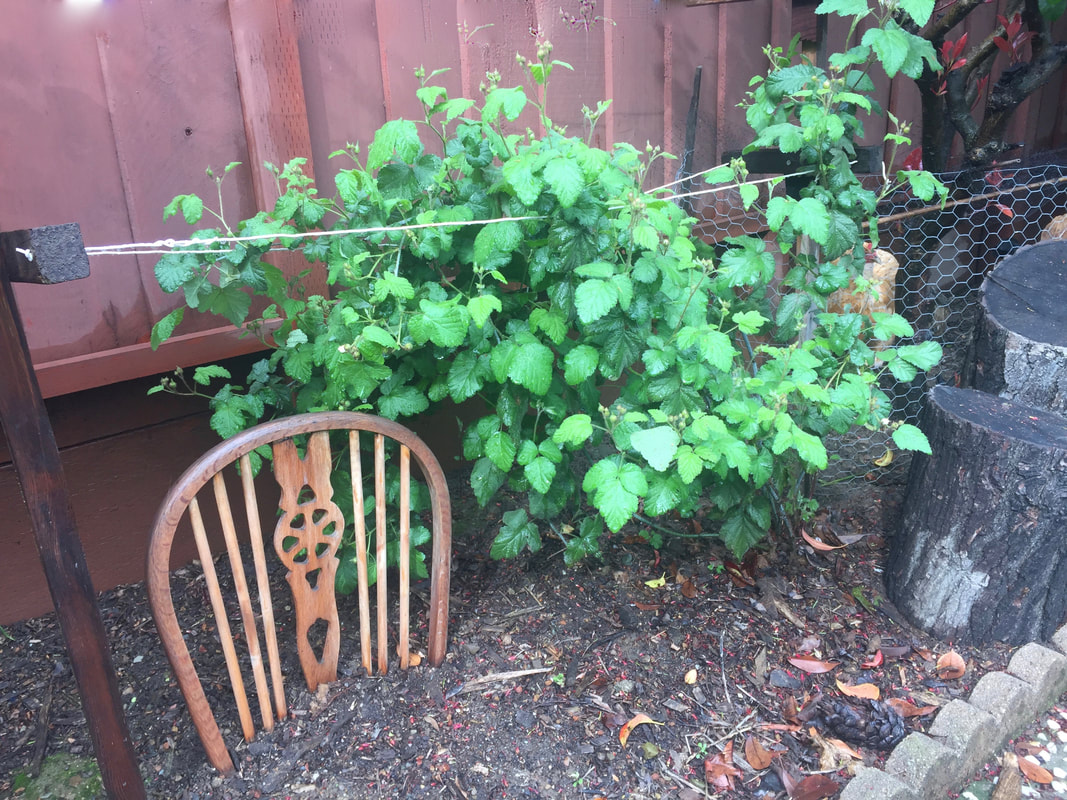 Blackberries need very little help once established Benefits of native plants Native plants are perfect for busy (or lazy) gardeners and homeowners. They are naturally suited to your soil texture, Hardiness Zone, and soil pH. Once installed, these plants already have everything they need in a landscape:
Installing native plants reduces your workload and promotes a healthy environment over the long haul. While non-native plants may look appealing, they often require more work, water, and other resources. So, how does a gardener go native? 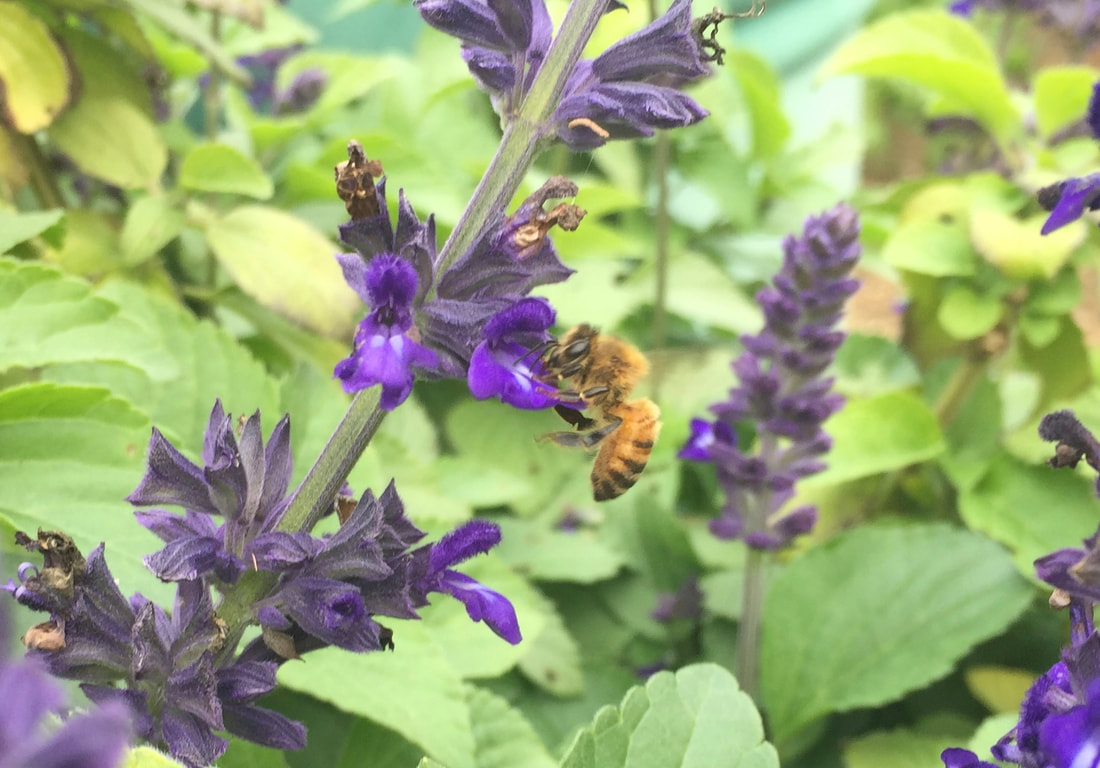 Salvias grow easily in many regions and honey bees love them (Stuart Russell) Going native Going native doesn’t mean you have to stop growing your grandmother’s heirloom tomatoes or patches of delicious basil. It simply means using native plants as your first choice. Hardcore enthusiasts insist on growing nothing but natives. Personally, I find that level of commitment too limiting. Instead, I look for a workable balance. You can find information about native plants from your County Extension Office and local native plant societies. Here are some tips for gardeners looking to add native plants:
Many times, native plants are free for the taking, if done responsibly. 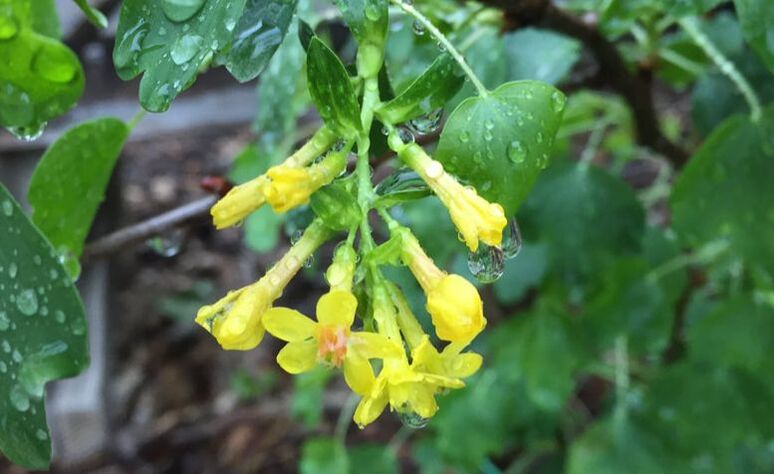 Delicious golden currants Water conservation
Around the world, drought is never far from our thoughts. Water-hungry plants may consume more than they are worth. Native plants have evolved natural water conservation methods. You can also add native plants to a rain garden or swale to create a natural watershed that slows the absorption of rainwater. This allows more of it to stay in the soil for later use. Even if you grow native plants for no reason other than water conservation, you will be doing yourself and the environment a favor. While blossoms and blooms and weeds and new seedlings have been telling us for days or even weeks, it is finally official. Spring has arrived! [Or, autumn, if you live in the southern hemisphere.] Spring equinox is the moment when the Sun passes the Earth’s equator, moving from south to north, with no apparent tilt to the Earth axis. Planetary tilt Normally, we feel the Earth’s tilt as different seasons. Half of our trip around the sun is spent tilted slightly away from the sun (colder weather) and the other half is spent with a similar tilt toward the sun (warmer weather). Today, because we see the sun passing our equator, day and night are the same length. Sort of. That is why it is also called the spring equinox. I say ‘sort of’ because the day will actually be longer than the night. This is because of the sun’s light being refracted through the atmosphere before and after it has risen and set. If you want to know more about the Earth’s tilt and seasons, check out my post on winter solstice.  Spring equinox (Przemyslaw "Blueshade" Idzkiewicz) CC BY-SA 2.0 Spring fever So, you’ve been waiting for months, browsing seed catalogs and dreaming of all the plants you want to try this year, along with some old favorites. Spring is a busy time in the garden, to be sure, but don’t be hasty. Don’t let all those visions of a summer harvest cloud your view. While the Bay Area’s last frost date was nearly a week ago, I woke to see frost all over my garden only yesterday morning. Nature does not obey our rules. We must keep our eyes and ears open and be aware of what is happening in our microclimate. That being said, it is now time to start planting! Or, is it? Before you start planting…. Speaking of frost, what about those plants that were damaged by frost over the winter? All that damaged plant tissue should be removed now to reduce rot in the garden. It makes things look nicer, too. But are your tools sharp enough for the job? A quick fix with a file or sharpening tool makes the job so much easier, and a little 3-in-1 oil will protect those tools from moisture damage. And are your planting beds and containers actually ready for plants? Adding some aged compost before you start planting will do your plants and your soil a world of good for the upcoming growing season. While you’re outside, take a look at your citrus trees. Do they need pruning? Now is the time to do it. And, while you’re at it, keep a look out for mummies. These fungal factories can contain millions of spores. This is also the time to watch for things like mummy berry and black spot. Recent rains make this a time of fungal growth. Slugs and snails like it, too, so be prepared!
Seeds, starts, and transplants
Your garden is finally ready for planting! You can still plant winter crops, such as beets, broccoli, cabbage, carrots, cauliflower, chard, lettuces, spinach, bok choy, fennel, kale, mustard greens, parsnips, and turnips. And it’s not too late to start that asparagus bed! You can now plant herbs, such as cilantro, dill, and parsley, but hold off on basil, until things warm up. You can now plant potatoes and radishes, too. More delicate plants, such as tomatoes and peppers can be started in pots, but only if you have a place where they can be protected from nighttime temperatures. Hold off on beans, corn, cucumbers, melons, squash, sweet potatoes, until April or even early May. Be sure to use plant markers, as you start seeding your garden. Things can quickly get out of hand, if you forget where you put everything! If you have some spare time on your hands, as it rains, use that time to study up on your plants: what are their thinning requirements, sunlight needs, estimated mature size, irrigation and fertilizing needs? That sort of stuff. Talking about rain… A word on drought While San Jose and northern coastal California areas are not currently under drought status, many other parts of the state, and an estimated 32 million residents, are. And, let’s face it, the days of wasting water are over. If you haven’t yet, use today’s spring equinox as a turning point in how you look at water. Turn off faucets. Inspect irrigation systems. Use a bucket to collect shower water as it heats up. Install drought resistant native plants. Stuff like that. For the next three months, each day is going to give you just a little more daylight ~ what will you do with yours? |
Welcome!You can grow a surprising amount of food in your own yard. Ask me how! To help The Daily Garden grow, you may see affiliate ads sprouting up in various places.
You can also get my book, Stop Wasting Your Yard!  Index
All
Archives
July 2024
|


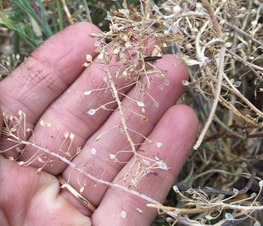

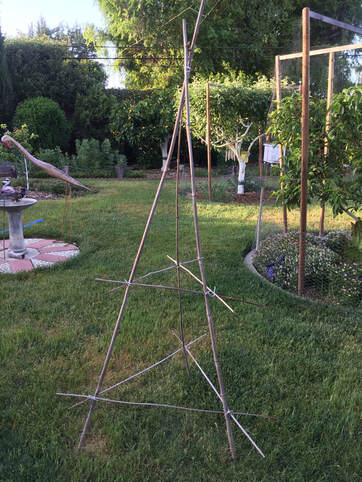


.jpg)


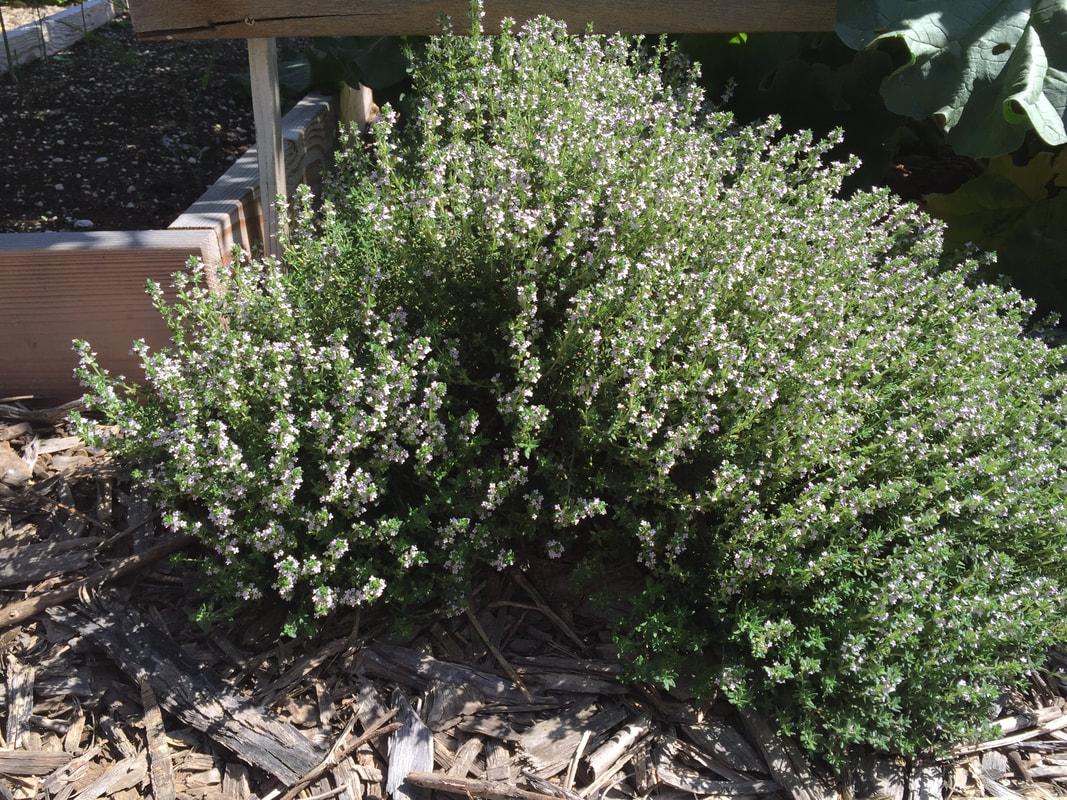
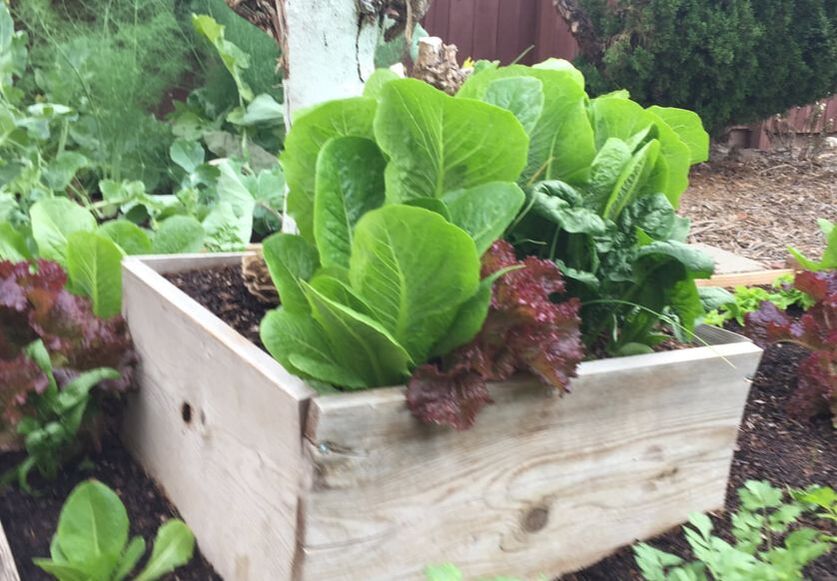
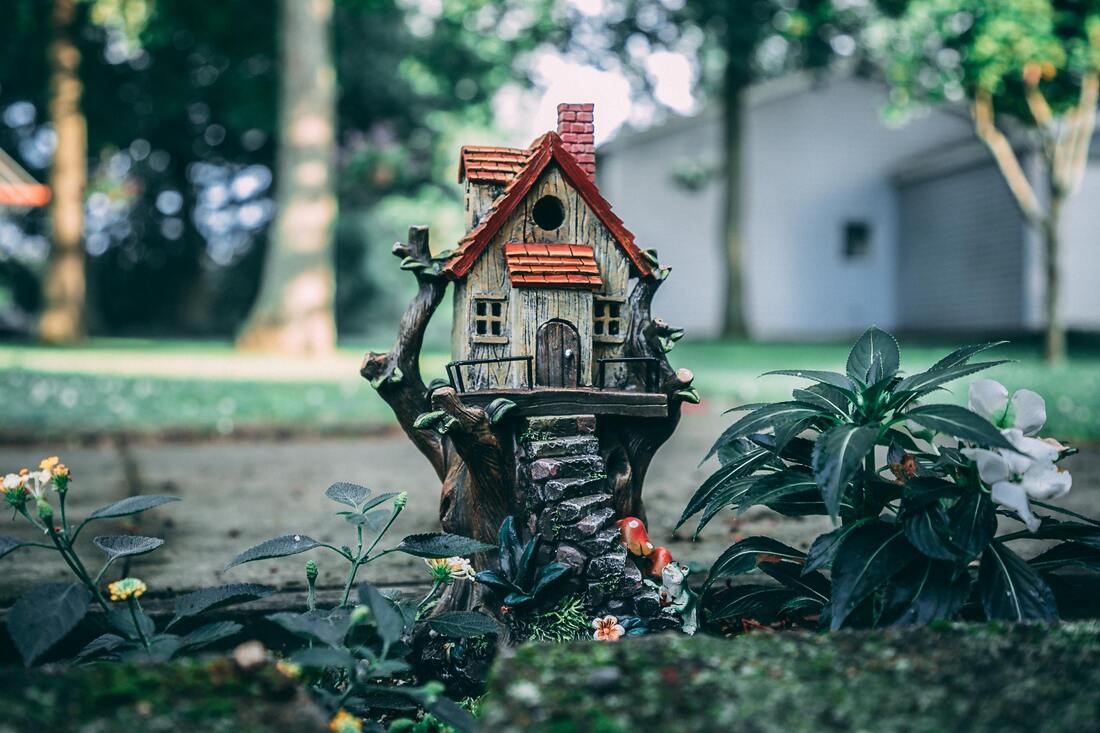


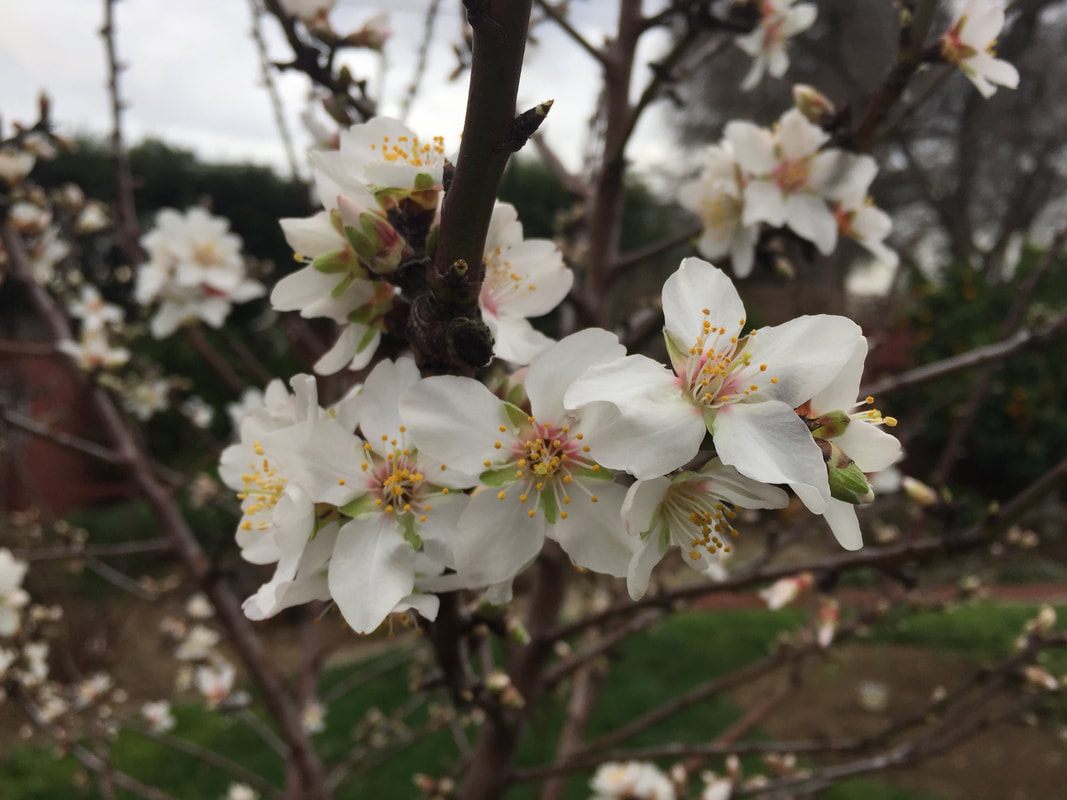
 RSS Feed