|
The maple syrup on your French toast and those yummy maple syrup candies seen around the holidays are tree sap. .jpg) Sugar maple leaves (Superior National Forest) CC BY 2.0 Sugar maples (Acer saccharum) are related to soapberries and lychee. These deciduous hardwood trees create glorious fall foliage before winter sets in. As temperatures rise, trees convert the starches stored over the winter into sugary sap. That sap starts rising through the phloem to feed new growth. That’s where we step in.  Sugar maple tap and bucket (Wagner2005) CC BY 3.0 DEED Many years ago, in Stafford, Virginia, I opened a private K-12 school called Children’s Academy. We had a silver maple tree on the property, so we decided to try our hand at tapping it. Tapping trees refers to the way we get to the sap. Taps, also known as spiles or cask pegs, used to be hand-carved wooden tubes, but modern taps are metal. Taps are hammered into the tree to reach the phloem, just under the bark, where the sap flows. Maple description Most of us are familiar with hand-shaped, pointy maple leaves. These trees can get quite large, growing 80 feet tall or more. The bark is a lovely pale gray. The greenish-yellow flowers do not have petals. Instead, they grow in several panicles, clustered together, usually after 30-55 growing degree days. The fruit grows in winged pairs that most of us called ‘helicopters’ because they spin as they fall. Those fruits are called samaras, and they contain maple seeds.
Other maples Sugar and black maples (Acer nigrum) are the primary sources of maple syrup, but our silver maple did well enough. Other maples, including our silver, have lower sugar levels and produce a cloudy (but still delicious) syrup. Norway maples are quickly taking over suburban streets because of their ability to withstand air pollution and weather fleck better than sugar maples. Unfortunately, they are not good sources of sap. One way to tell which maple tree you have is to look at the sap in a leaf petiole. Sugar maple sap is clear. Norway maple sap is white. How maple trees grow Maples love cold winters and are best suited to USDA Hardiness Zones 3-5. They take 30 years to reach seed-bearing age and live 200 years or more. These trees are very shade-tolerant. They are best planted as saplings in the spring or fall in well-draining soil. They prefer slightly acidic soil but can grow in soil pH levels of 5.0—7.0. .jpg) Sugar making in Montreal, October 1852 by Cornelius Krieghoff (artist); Sarony & Major (engraver) Public Domain How to make maple syrup
Sap was traditionally boiled over an open fire for a very long time to get rid of the excess water. But it takes, on average, 40 gallons of sap to make one gallon of syrup. Collecting sap is very labor-intensive, and all that cooking uses a lot of energy, so now you know why maple syrup is so pricey. Compounding that problem is the maple tree’s sensitivity to air pollution. Maple tree decline Starting in the 1950s and culminating 40 years later, a drastic decline in Canadian sugar maples was considered a serious threat to the species (and global maple syrup supplies). Acid rain was killing all the sugar maples in Canada and the northeast US. So Canada and the US created The Canada – United States Air Quality Agreement in 1991. By 2023, the actions outlined in that agreement resulted in a significant decrease in the chemicals responsible for acid rain and sugar maples started to recover. [See what we can do when we work together?] Did you know that the samaras can be soaked, boiled, seasoned, and roasted (without the wings) for a yummy snack? I didn’t either. Now we know. The warm heat of curry dishes can all be grown in your garden. Curry plants, however, are often mislabeled and misunderstood. Before we really dig in, what does the word curry actually mean?  Curry (Buenosia Carol, Public Domain) Curry ingredients We think we know what curry means. The dictionary tells us that curry is “a dish of meat, vegetables, etc., cooked in an Indian-style sauce of strong spices and turmeric and typically served with rice.” But curry is more of a colonial grab bag name for a wide variety of regional dishes that can be prepared with a complex assortment of herbs, spices, and other flavorings, depending on the region of origin. These ingredients may or may not include: And curry leaves. There are two distinctly different plants sold as “curry plants”. One is the real deal. The other is not. Fake curry plants Helichrysum italicum, sometimes listed as H. angustifolium, is a pale green European herb with yellow flowers that grows well in dry, rocky soil. This plant smells a lot like curry, hence the name, but it does not taste like curry. Also known as Italian strawflower and immortelle, young shoots are sometimes used in Mediterranean dishes for their bitter, sage-like flavor, and never in curry.  ‘Helichrysum italicum’ (Ericsteinert) CC BY-SA 3.0  'Helichrysum italicum’ flowers (Júlio Reis) CC BY-SA 3.0 True curry plants True curry plants are trees. The curry leaf tree (Murraya koenigii) is a member of the rue family, along with citrus. Being tropical to subtropical, curry leaf trees grow best in Hardiness Zones 9 - 12. They are very sensitive to frost damage. They can grow from 6 to 15 feet tall and 4 to 12 feet wide. There are three types of curry leaf tree: regular, dwarf, and gamthi. Dwarf trees are shorter and wider than regular trees and the leaves are narrower. Gamthi varieties grow very slowly and they produce thicker leaves with the strongest aroma. Curry leaf trees will produce berries that will open up into fragrant white flowers. You can increase leaf production by removing those berries before they open.  Fragrant curry tree flowers (Muhammad Mahdi Karim) CC BY-SA 2.5 How to grow curry leaf Curry leaf plants can be started from seeds, suckers, or stem cuttings. Only fresh, ripe berries contain viable seeds and the husk must be removed before planting. The seeds contained in dried berries will not germinate. Containerized curry trees Curry leaf trees can be grown in containers, as long as they have nutrient-rich potting soil and good drainage. They need to be moved to slightly larger containers every few years. By the time your curry tree is 10 years old and at its mature size, it should be in a 30-gallon container.  Ripe and unripe curry tree berries (Chang, Public Domain) Caring for curry trees
These trees prefer full sunlight but can grow in partial shade. Scorching summer sunlight can sunburn the leaves. If grown indoors, grow lights may be needed. If grown outdoors, your curry leaf tree will need to be brought indoors in winter if you live in Hardiness Zones 1-8. It will also need protection from wind. In either case, be sure to allow the soil to dry out completely between waterings to avoid root rot. Curry trees should be fertilized once a month, March through October. Also, curry trees use a lot of iron, so iron sulfate should be added every other month, or so. Curry tree pests and diseases Mites and scale insects are the two most common pests of curry trees, along with aphids and citrus mealybugs. Asian citrus psyllids may also be present and this poses a serious problem. Asian citrus psyllids can carry a fatal disease called huanglongbing. Infected trees must be destroyed. Before accepting curry tree seeds or cuttings, make sure they are not from a quarantine zone. Leaf spot is another disease that may occur in curry leaf trees. If you love curry, starting your own curry leaf tree is one way to enjoy the very freshest ingredients. Sweet, juicy persimmons are easier to grow than you might expect. _-_October_2017_(1).jpg) Persimmon tree (Shamus7792003) CC BY-SA 4.0 There are many good reasons for growing your own persimmon tree, the first of which is they are not particularly fussy about soil and they are nearly pest-free. You don’t need to worry about chilling hours as much as with other fruit trees, and they bloom late enough in the season to avoid frost damage. Persimmon is a tropical tree that grows best in Hardiness Zones 7 to 10, and they are large. Mature persimmon trees can grow from 15 to 60 feet tall and 20 feet across, with a lovely rounded canopy. Leaves are both glossy and leathery on top, with a brown, fuzzy undersurface. These leaves will fall off in autumn, being deciduous, but that makes it easier to prune and manage the tree during dormancy.
The North American native persimmon (Diospyros virginiana) tends to be smaller and seedier than its more popular Asian cousin (D. kaki). The Oriental, or Japanese persimmon is further divided into two groups: astringent and non-astringent. That astringency [read ‘pucker factor’] is caused by tannins. Those tannins can make your mouth feel as though you just washed your mouth out with witch hazel, which I do not recommend. Generally speaking, the astringent varieties need to be fully ripe and soft before becoming sweet and delicious. With over 2,000 cultivars of fruit-producing persimmon trees, you have several to choose from, including:
Native and Oriental persimmon trees will not cross-pollinate.
How to grow a persimmon tree
If you want to grow a persimmon tree from seed, you will need to put it in the refrigerator for a couple of months. This is called stratification and it mimics the effects of winter weather. Unlike other fruit trees, which are pretty much companionable to a wide variety of root stock grafts, persimmon trees are not as amenable. You are probably best off buying bare root stock from a reputable seller. Just be gentle with your young tree. The immature taproot breaks easily. Persimmon trees perform best in soil with a pH of 6.0 to 6.5, which may be more acidic than is present in your soil. Keep in mind that altering pH is an uphill battle that requires constant attention and effort. If you are determined, you can acidify your soil to make things more hospitable for your persimmon tree. Your persimmon tree will benefit from good air flow, but the wood tends to be brittle, so provide protection from strong winds. When planting a young persimmon tree, it is critical that the tree is planted at the proper depth. Then, cut the aboveground portion down to 3 feet in height and mud it in well. You will also want to provide sunburn and herbivore feeding protection. Deer, rats, squirrels, birds, and gophers will gnaw roots, stems, bark, or fruit, depending on the species. Even coyotes enjoy the occasional persimmon. Select a location with plenty of sunlight, though partial shade will work, too. California Rare Fruit Growers, Inc. suggests keeping persimmon trees away from eucalyptus trees. I’m sure there is a good reason, I just don’t know what it is. Regular irrigation will improve fruit size and quality, though the trees are somewhat drought tolerant. Mature trees will need 36 to 48 inches of water each year. Persimmon trees do not need a lot in the way of feeding. In fact, if you give them too much nitrogen, they will drop their fruit! Over-feeding, over-watering, and too much boron in the soil can cause blossom drop and young fruit drop. Top dressing with aged compost and some mulch is probably a better way to go, unless a lab-based soil test tells you some important plant nutrient is missing. Pruning persimmon Persimmon fruit forms along the sides and at the tips of long, current year stems. If those stems are too long, the branches are likely to break. During the dormant season, train your persimmon tree into a modified central leader or open vase system, removing any dead, diseased, or rubbing branches. Each year, you will want to perform light to medium pruning for size, structure, and air flow. Persimmon can also be pruned into a lovely espalier. Heavy fruit loads can cause branch loss, so fruit thinning is a good idea. Persimmon pests and diseases While relatively pest-free, persimmons may occasionally be attacked by root nematodes, mealybugs and scale insects. If you see ant trails, look more closely for signs of scale infestation. You can use sticky barriers to eliminate the protection provide by ants. Other minor pests include whiteflies, thrips, and mites. The diseases most likely to impact a persimmon tree include armillaria root rot, gray mold, leaf blight, leaf spot, and Phytophthora root and crown rot. Fusarium dieback may also occur. More commonly, nutrient deficiencies can cause a number of symptoms. Low iron cause cause leaf bleaching, while insufficient calcium leads to leaf curling, and magnesium deficiencies cause brown spots on leaves. Sunburn damage is common, so whitewash exposed areas and keep trees well irrigated during the peak of summer. You can speed ripening and reduce astringency by storing persimmons in paper bags. This traps the ethylene gas that make fruits ripen close to the fruit, at higher concentrations. Eaten fresh, in baked good, as jam, or dried, the only down side to growing a persimmon tree is the super abundant crops that you will have to deal with each autumn. Exquisite nuts or toxic leaves, how much do you know about the cashew family?  Cashew nuts still attached to the tree (Vinayaraj) CC BY-SA 3.0 Expensive, delicious, and nutritious, cashews (Anacardium occidentale) are treat that you just might be able to grow at home. Before you start planting, however, there is more to the cashew family than meets the eye. Cashew fruits and nuts In most cases, these trees, shrubs and vines have female and bisexual flowers while others have male and bisexual flowers. If you want to grow your own, you will probably need two or more plants, with one of each gender. Did you know that those delicious cashew nuts are not really nuts at all? Instead, they are drupes, much like the pits found in stone fruits, such as almonds, cherries, and peaches. In the same way that those trees, fig trees, strawberries, and pineapples produce accessory fruits, cashew trees do, too. The only difference is that cashew nuts hang underneath their accessory fruits, known as cashew apples. Cashew apples are used to make sweet, astringent drinks and liquor.  Young cashew fruits (Vinayaraj) CC BY-SA 3.0 If you start taking a cashew drupe apart, you will find that the seed coat is very thin and that there is little or no endosperm, also like a strawberry. [You can think of a seed using endosperm to grow the same way we would use a peanut butter sandwich, while accessory fruits are more like drinking juice - both cases provide nutrition, but in different ways.] Before you try this, be sure to don some rubber gloves. More on that in a minute.  Ripe cashew apples (Abhishek Jacob) CC BY-SA 3.0 Members of the cashew family There are hundreds of members of the cashew or sumac family. Along with delicious cashews, the cashew family includes some favorite edibles, and a few you may not have heard of before:
Here, in North American, smooth sumac (Rhus glabra) and stag horn sumac (R. typhina) are used to make a drink called “sumac-ade”. The cashew family also includes mastic trees (Pistacia lentiscus) and varnish trees (Toxicodendron vernicifluum), which are the trees that give us varnish, lacquer, and useful oils. Natural varnish is made from tree resin. Like many other families, there is heated debate about who belongs and who does not. Not too long ago, pistachio plants were brought into the cashew fold, but there are still discussions about this in scientific corners. Cashew family taxonomy includes dozens of genera, most of which are not edible. Watch out, though - some of them might try to hurt you! Cashews - beware! Did you know that raw cashews are poisonous? They are. They contain the same chemical found in poison ivy, poison oak, and poison sumac. That’s because they are all in the same family! The sap of all cashew family plants, called urushiol, is something to be reckoned with as it can be highly toxic. Just under the bark, these plants have resin canals filled with the stuff.
If that weren’t bad enough, the seed coat of cashew drupes contains a toxic oil that is acidic enough to burn your skin. If you are still interested in growing your own cashews, read on. If not, read on anyway! Who knows what you’ll learn? How to grow cashews Being native to tropical and subtropical places such as India, Thailand, Sri Lanka, and Papua New Guinea, cashew tree might be difficult to grow, depending on your Hardiness Zone. If you are determined, however, it can be done. Keep in mind, before you get started, that mature, full-sized cashew trees can grow to nearly 50 feet in height. Dwarf varieties are far more manageable at only 20 feet. Cashew trees prefer loose, sandy soil with plenty of sun and excellent drainage. Do not try using grocery store seeds - they are not viable. You will need to get seeds from a reputable supplier. Viable seeds should be planted 4 inches deep and about 30 feet away from each other. These plants can handle temperatures as high as 122°F, but cold and damp will be the death of them. Heavy, soggy clay soil nearly always causes root rot in cashew trees. They don’t handle wind very well, either, so be sure to provide tree supports while trees are young and do not plant them in windy areas. Keep your young tree properly irrigated and feed trees twice a year using a mix determined appropriate by your soil test results. Generally speaking, cashew trees use a lot of nitrogen, phosphorus, and zinc. After 3 or 4 years, you should be able to harvest your first crop of cashews. You will know your crop is ready to harvest when the cashew apple is either red or yellow and the drupe shell has turned gray.
 Cashew tree (MJEHermann) CC BY-SA 4.0 Before you start nibbling, however, remember that the seed coat of cashew drupes contains a toxic oil. You will need to roast those nuts in a covered container at 375°F for 10 to 20 minutes. Traditionally, they are roasted covered in sand. Apparently, the toxins released as fumes during this process will ruin your cookie sheet or whatever lid you opted for, so choose accordingly and be sure to ventilate the area as you work. Since the oils within cashew shells is extremely acidic, it can burn your skin, so wear long sleeves and eye protection. Next, shake the nuts in a sieve, if they were roasted in sand, and then wash them in soapy water to remove any residual toxins. Crack open your priceless cashews now and use a knife to remove the thin seed hull. Finally, saute your cashews in oil at 300°F for 5 minutes or so to neutralize any last bits of toxins. Did you know that cashew shells have been used to make lubricants, paint, and military arms? I didn’t either. I think I’m beginning to understand why cashews are so expensive… For anyone unlucky enough to have a chance meeting with poison ivy (Toxicodendron radicans), Pacific poison oak (T. pubescens), Atlantic poison oak (T. diversilobum), or poison sumac (T. vernix), you know all too well how those plants can make you devastatingly uncomfortable. Believe me, I speak from experience. "Leaves of three, let it be; berries white, take flight; root hairs red, recoil"
[I made up that last bit.] Kumquats are members of the rue, or citrus family. Native to south Asia, kumquats have been cultivated since the 12th century. Unlike oranges, or their giant cousins the grapefruit, kumquats are closer in size to olives. These somewhat tart fruits can be eaten whole, candied, chopped into a relish, fermented into a liquor, or cooked into a delicious marmalade.. These somewhat tart fruits can be eaten whole, candied, chopped into a relish, fermented into a liquor, or cooked into a delicious marmalade.  Kumquat fruit cross-section (Sergio) Public Domain Kumquat description Kumquats are small, cold-hardy citrus trees. They grow slowly and can reach 8 to 14 feet in height. Glossy evergreen leaves provide excellent color and shade. Fragrant white flowers appear each year, but watch out for thorns. Similar to many other citrus trees, kumquat trees protect their fruit with sharp thorns. Each tree can produce hundreds or thousands of fruits every year.  Kumquat flower (Thanh Nam Nguyen) CC BY-SA 2.0 Types of kumquats Scientists are still sorting out kumquat classification, arguing over whether different types of kumquats are cultivars or species, but we can all agree that there are round kumquats (Citrus japonica), oval kumquats (Citrus margarita), and bell-shaped kumquats (Citrus obovata). There is also a variegated kumquat that features more fruit, less peel, and no thorns. All kumquats are self-pollinating, so you only need one tree. Growing kumquats Unlike oranges, kumquats can tolerate temperatures as low as 19°F, right along with scorching hot summers, making them an excellent choice in San Jose, California. Before you try planting a kumquat tree from seed, you need to know that that generally doesn’t work out well. Instead, kumquats are usually grown from cuttings, layering, or other vegetative propagation method.  Ripe kumquats (Abaddon1337) CC BY-SA 3.0 Kumquats can be grown in containers. Container grown kumquats can grow to 6 feet and produce fruit, if they are fertilized regularly.
Kumquat pests and diseases Asian citrus psyllid is the most serious threat to citrus trees, as they can carry huanglongbing, a fatal disease. The diaprepes root weevil may also become a problem. Leaf miners, aphids, scale insects, and whiteflies are far more likely. Citrus diseases, such as armillaria root rot, alternaria rot, anthracnose, brown rot, citrus blast, exocortis, and phytophthora root rot may occur. Kumquats tend to be resistant to citrus canker and most citrus trees thrive in the Bay Area. Consider adding kumquats to your foodscape this year for a lifetime of fragrance, color, and Vitamin C! If you have fruit and nut trees, you can prune those trees to improve both the quantity and quality of your crop, or you might eliminate production altogether. 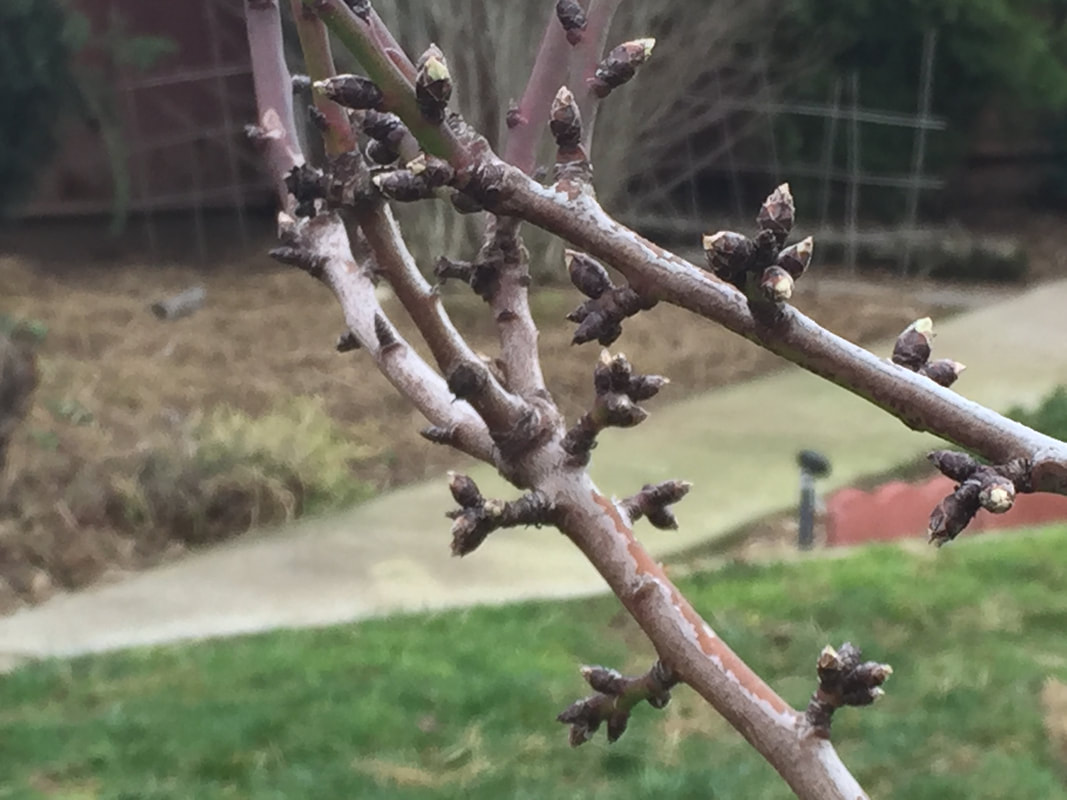 Lateral spur buds of almond Normal pruning Normal annual pruning involves removing dead, diseased, and rubbing branches. It also means training trees for shape, size, structure, and air flow. This is normally done while trees are dormant, in winter. There is also renewal pruning, done in autumn, which stimulates new growth the following spring. But, did you know that you can also prune for better fruit production? It’s true! How fruit happens Fruit and nut trees produce buds. When those buds are fertilized, they can grow into fruit or nuts. [Assuming the tree of healthy enough and old enough.] But some trees produce fruit on new growth, while others produce fruit on old growth. If you keep cutting off productive wood, you won’t have much of a crop. Where do trees produce fruit? Depending on the species, trees produce fruit either on long shoots or on stubby spurs. That fruit can be arranged laterally, along the sides, or at the terminal end. Take a look at the chart below for information about your trees. 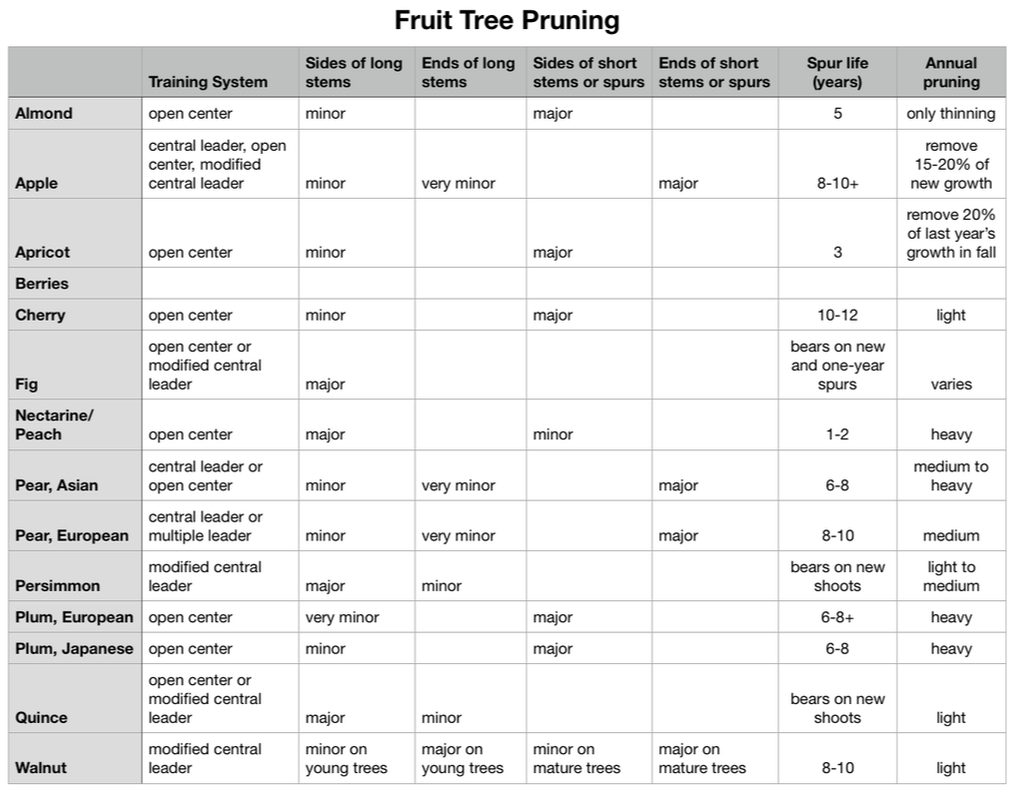 This may seem like too much information to be useful, but let’s walk through a few examples together, so you can see how to better prune your trees. Almonds You can see that almond trees produce the majority of their fruit on lateral spurs, and some fruit along lateral shoots. You will also see that each spur is good for 5 years, that very little pruning is needed, and that almond trees are best trained in the open center system. So, what does all this mean to the owner of an almond tree? First, snipping the tips off of anything on an almond tree won’t harm nut production. Of course, if you snip too much, the tree will have to put energy into healing, rather than filling your hopper with delicious almonds. The open center system is exactly what it sounds like - the center of the tree is left clear of major branches in the middle, creating a bowl shape which allows for plenty of sunlight and air to move through. Apples Looking at the information for apples, you can see that snipping off the ends of all the spurs would leave you without much of an apple crop, but cutting off the ends of long shoots would only have a very slight impact. Persimmons Now look at persimmons. All of the fruit production occurs on long shoots of new wood. Cutting out all of your new growth would hamper fruit production. The same is true for quince. Figs are produced on new wood and one-year old shoots. 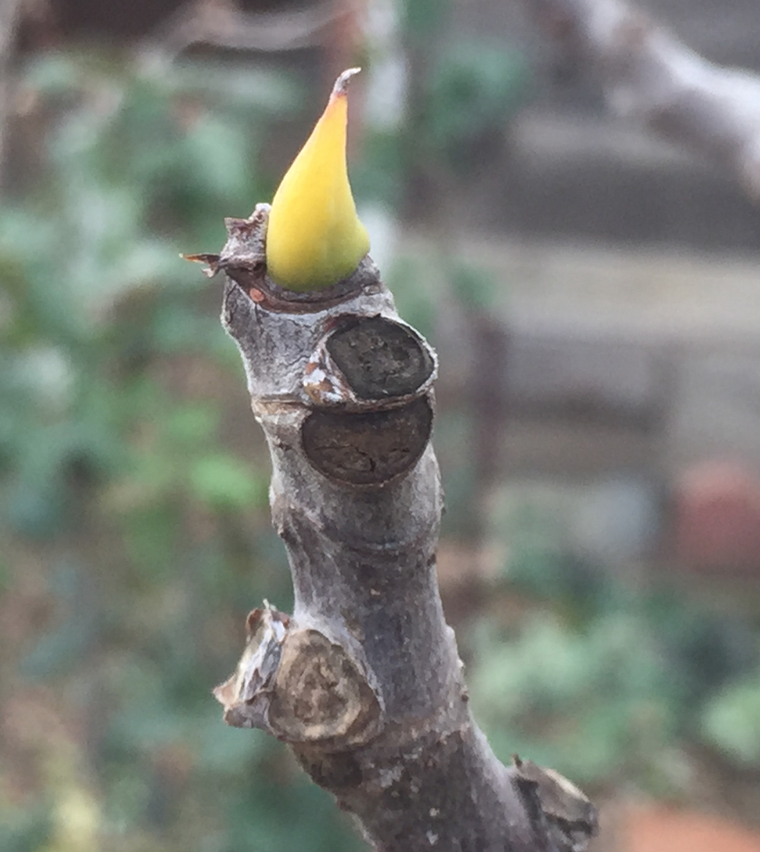 Terminal shoot bud of fig Generally speaking, citrus trees do not need to be pruned to improve fruit production.
If you sort the chart by location of major fruiting buds, you have:
Armed with this information, go outside, sanitized pruners in hand, and see where you can prune your fruit and nut trees for improved overall health and a significant increase in production! Imagine a container plant that grows a lush 6 feet tall and produces delicious, soft-skinned, seedless tropical fruits. Introducing… the babaco tree. Also known as mountain papaya, babaco is cousin to that other sweet tropical fruit of mammoth size. Commonly eaten fresh, or used in fruit salads, smoothies, and ice cream, babaco (Carica pentagona Heilborn) is believed to be a naturally occurring hybrid from Ecuador. People have been eating babaco fruit since the 1500s, but I had never heard of it until recently.  Babaco tree (Pixabay) Babaco description These herbaceous shrubs feature thick, mostly unbranched trunks that are covered with leaf scars, similar to other members of the Carica genus. The healthier the plant, the thicker the trunk. Large, palmate leaves, with prominent veins and long petioles, make this an attractive house or patio plant. Flowers are all female and fruit is generated parthenocarpically. That’s a big word which means without seeds. And it’s the fruit that should make babaco worth considering for those of us who prefer growing our own food. Five-sided babaco fruit is large, reaching 12” in length and 8” wide. Said to taste like a combination of strawberry, papaya, and pineapple, the fruit is somewhat acidic and not overly sweet. The skin is also edible. How babaco grows Babaco performs best in cool subtropical climates. Too much sun exposure can result in sunburned fruit and immature fruit drop. While it prefers coastal areas, babaco can be grown it semi-protected areas throughout California and other Mediterranean regions. While babaco can withstand brief exposure to freezing temperatures (>28°F), they are best brought indoors or put in a protected place during the coldest part of winter to avoid root rot. Babaco plants can easily be grown in containers and they thrive in greenhouses (or warm, moist homes). How to grow babaco Since babaco do not produce seeds, they are propagated vegetatively, or asexually. To do this, one foot diagonal segments are taken from an existing trunk, after fruit production is completed. These segments are first washed with a fungicide and then the bottom (rooting) side is dipped in rooting hormone. Segments are then stored vertically in a location where they can dry out and form calluses, much the way we treat pineapples. In time, roots and shoots will begin to appear and the segment of trunk is planted 8” below soil level. In just a little over a year, your babaco will be producing fruit!  Babaco fruit (Siegert) For the best fruit production, prune out any additional trunks as soon as they appear, except for one trunk, sometime around September, every year or two. This new trunk will replace the existing trunk. Trunks are only productive for a year or two. Babaco can also be propagated from cuttings, but with less success.
Babaco grows best in light, well-drained soil. They require frequent irrigation and nitrogen feeding during fruit production. Mulching with composted chicken bedding will help your babaco tree thrive. Pests and diseases of babaco Babaco leaves are susceptible to fungal diseases, such as powdery mildew. Phytophthora root rot can also become a problem. Certain mites, specifically the two spotted mite and the strawberry mite can become problematic, as can snails and slugs, and deer. Add a touch of the tropics to your home or patio with a delicious babaco! In many gardening catalogs, you can find trees that boast multiple types of fruit. This is done by grafting twigs from various trees onto a parent tree.  Apple tree grafting (Karelj) Public Domain A man named Sam Van Aken created a tree with 40 different types of fruit growing on it. His Tree of 40 includes almonds, cherries, nectarines, peaches, and many other stone fruits, all grafted onto a single tree. Grafting is an excellent way of making the most out of a small gardening space and it can look pretty amazing. Grafting is an old technique used to join two plants together. A newer version, called budding, does the same thing, but in a different way. How does grafting work? The top half of a graft is called the scion and the lower portion is called the rootstock. Grafting works because plant hormones, called auxins, allow the vascular cambium tissues of both the scion and rootstock to merge. This allows water and sap to continue moving through the xylem and phloem. Before you jump on the grafting bandwagon, however, keep in mind that grafting is tricky. It takes practice. You also need to know that, after a graft is completed, even though a protective callus has formed, and the vascular tissues have fused, the wood does not. This means that graft unions should always be considered structurally weak. You should also know that the fruit and nuts produced on grafted trees contain seeds that hold the genetic information for the scion wood only, and not that of the rootstock. Also, if you have a plant that is putting out suckers, keep in mind that these are from the root stock, and not the productive aboveground portion of your plant.
Advantages of grafting It is pretty safe to assume that nearly all fruit and nut trees available today are grafted combinations of hardy, pest- and disease-resistant rootstock and highly productive scions. Grafting speeds up production because young scions can be grafted onto older rootstock. This is called precocity and it allows growers to skip the 5- to 12-year juvenile phase, when trees are focusing on root system development, rather than fruit production. Grafted trees can also selected for size. Simply graft a scion from a full-sized tree onto dwarf rootstock and you get a dwarfed tree that produces more fruit. In many cases, grafting is used to imbue a tree with pest or disease resistance. This method is also used on watermelon, tomato, eggplant, cucumber, and other vegetative plants for the same reason. Grafting for the garden Let me say this up front - grafting requires skill. It easy to do incorrectly. There are several factors that contribute to successful grafts, and all of them are important:
Tools used in grafting Having your tools ready ahead of time will increase your odds of successful grafting. The last thing you want is for plant tissue to dry out before you are done. [Many gardeners hold scions in their mouth as they work, to keep the plant tissue moist.] You will need sharp, sanitized pruning clippers, stretchable, biodegradable grafting tape, a sharp grafting knife, and sanitizer. You may also want to have some tree sealant or grafting wax handy.
There are several different types of grafts:
In rare cases, graft hybrids, called chimera, will occur. This happens when rootstock tissues grow into the scion wood. This can lead to trees that produce flowers of both plants, plus strange combination flowers. Chimera are almost impossible to reproduce. Whichever method you decide to use, grafting or budding, be sure to seal the area completely, either with grafting tape, tree seal, or grafting wax. This will protect against desiccation, pests, and disease, while providing some structural support, as well. Problems associated with grafting Grafting can provide you with added control over plants, making them more suitable to your garden theme. It can also make your foodscape healthier and more productive. But grafting requires skill and is labor intensive. Also, it is important that the proper rootstock is selected for your scions. Incompatibility may not kill the tree until several years of watering, fertilizing, and pruning have passed. Check with your local County Extension Office or rare fruit growers club for more information on compatibility before you get started. When you first try your hand at grafting, don’t be surprised or discouraged when the alignment and pressure are insufficient, or the graft union dries out before the scion “takes” to the rootstock. This happens to beginners all the time. If your graft works, make sure you plant your new tree at the proper planting depth. This is critical to its health and longevity. Placing graft unions below soil level invites fungal diseases, such as crown rot. The interaction between rootstock and scion wood can be pretty amazing when it comes to plant hormones. Check out my post on photoperiodism. Assuming you have already collected, labeled, and kept scions cool and moist, you are now ready to begin. [If not, read my post on scions first.] Did you know that you can graft a tomato plant onto a potato plant and get food from both? Now you know. Most fruit and nut trees available today are actually two different plants that have been grafted together. Where those two plants come together is called the graft union, or graft collar.  Grafted tomato plant (Caryrivard) CC BY-SA 3.0 Graft unions are usually easy to spot. They tend to be lumpy, raised areas. The shape of the graft union depends on the type of graft used to merge the two plants. Grafting People have been cloning plants with grafting for thousands of years, and this method of plant propagation is not limited to trees. Your store-bought tomatoes and other vegetables may also have been grafted. Grafting is done by inserting a shoot or twig, called the scion, into a slit cut into the trunk or stem of another plant, called the rootstock. This allows the vascular bundles of the two plants to merge, allowing water and nutrients to move between the two. Grafting allows us to take advantage of one plant variety’s strong root system and another plant’s heavy fruit, nut, or flower production. Grafting allows us to select plants for their combined characteristics of size, hardiness, growth habit, growth rate, disease and pest resistance, and flavor. The name of the plant you buy usually refers to the aboveground portion of the graft, though you may also see mention of the rootstock. Grafting is what allows you to have a tree that produces multiple varieties of fruit. These graft unions are found higher in the tree canopy.  Cherry tree with a V-graft (Kobako) CC BY-SA 2.5 Bare root trees
Bare root trees commonly start appearing in garden centers in January in the Bay Area. If you shop from knowledgable, reputable growers, the plants they have available will be suited to the local climate. If you are shopping bulk discount stores, well, you may be getting something else entirely. Wherever you get your fruit and nut trees, be sure to inspect the graft union for signs of damage, disease, vine mealybug nymphs, and other insects. Graft unions are delicate, vulnerable areas. Until relatively recently, it was suggested that the graft union be positioned below soil level. We now know that this is a really bad idea, leading to several problems. Graft union problems Improper planting depth is currently the primary reason why trees fail. Part of this is due to bacterial and fungal diseases entering the tree through the graft union, causing root rot, crown gall, and phytophthora root and crown rot, among others. These problems can be avoided by ensuring that your plants are installed at the proper depth. This generally means that the graft union will be 2 to 4 inches above the soil level, or more. [The higher the graft union, the smaller the mature tree will become.] If stem growth starts occurring below the graft union, it is called graft union suckering. Graft union suckering Graft union suckering occurs when the graft is less than successful. These suckers start growing out of the root stock portion of the stem, which may sound fine for the root system, but it is bad for the overall plant. Very often, rootstock plants are highly susceptible to aboveground pests and diseases, and they rarely produce desirable crops. If graft union suckers appear, remove them as close to the branch collar as possible, without damaging the collar. Take a closer look at the trees, shrubs, and other plants in your garden. Do you see any graft unions? Are they above the soil line? I hope so! Planting trees too deeply has become the Number One reason why trees fail. 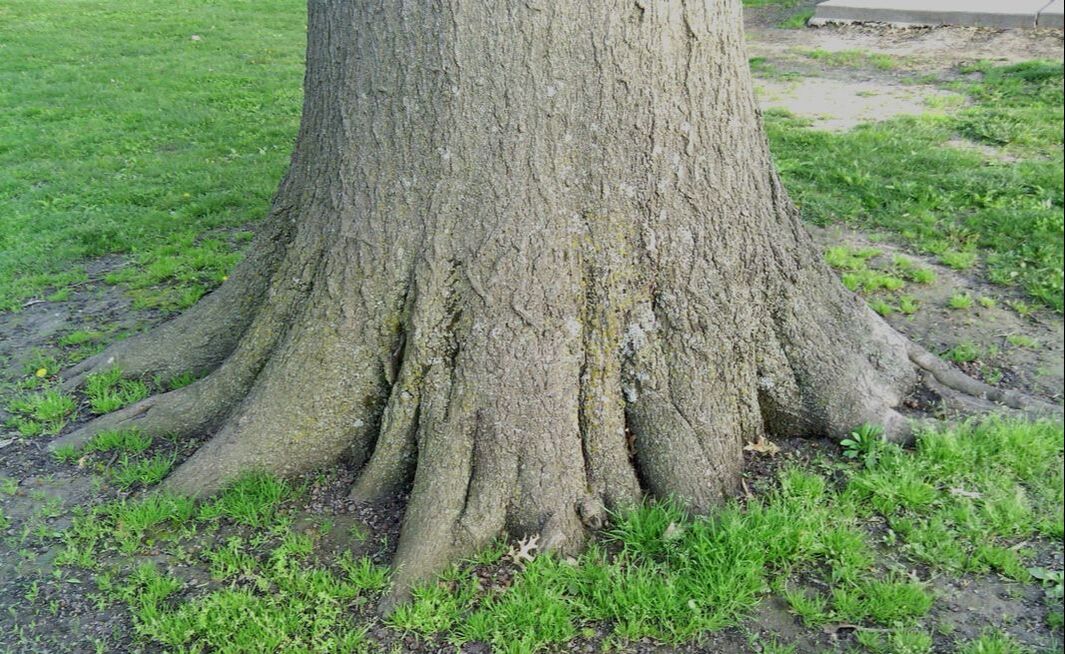 Mature tree with visible flare (PxHere) Public Domain Is your tree failing to thrive? Does it seem overly susceptible to fungal diseases and pests? Are leaves smaller, scorched, or otherwise discolored? Has seasonal leaf color change started occurring earlier? Are wilting, early leaf drop, or twig dieback been occurring? Are you seeing more water sprouts and suckers? Have you noticed less new twig development? It may be that your tree is planted at the incorrect depth. Even heavy fruit production can indicate a problem. Confused? Don’t be. Producing fruit is a tree’s way of continuing the species. If the tree is dying, it will put everything it has into ensuring a big crop of potential future generations. A properly planted tree shows a flare at the base of the trunk. If your tree looks more like a fence post, it is probably planted too deeply. In the world of botany, a tree planted too deeply is said to be planted ‘below grade’. Trees with exposed roots were planted too shallowly and are ‘above grade’. 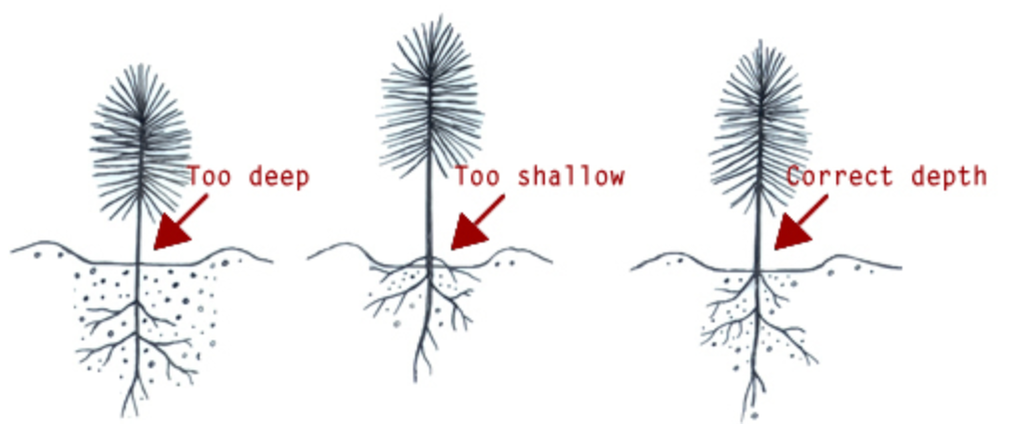 Proper planting depth (USDA Forest Service) Public Domain Knowing how to plant a tree at the proper depth (or how to correct the problem once it occurs) is the best way to keep your trees healthy and productive. Start your trees better When you first buy a young tree, it is usually in a container or the roots are balled up in a burlap bag. In both cases, the young tree has 5 to 20% less feeder roots than a similarly sized tree growing in the ground would have. As a result, these young trees dry out more easily and are easily stressed. If that weren’t problem enough, putting that stressed tree in the ground at the wrong depth can kill it, though it may take a few years. The goal of planting is to get your tree in the ground in such a way that new roots can grow quickly and properly. Proper planting depth The majority of a tree’s roots are in the top 18 to 24 inches of soil. They spread out horizontally and vertically from the center, well beyond the drip line, in their search for food, water, and air. [The drip line is the outer circumference of the tree canopy, where rain water drips to the ground.] To plant a tree at the proper depth, use these tips:
Ultimately, you want at least two structural roots to be in the top 1 to 3 inches of soil. Planting too deeply The roots closest to the surface are responsible for a large portion of a tree’s respiration. Tree respiration is not the same thing as human breathing. Tree respiration refers to the process by which a tree performs the gas exchange used to generate or release energy. If a tree is planted too far below grade, those surface roots will still grow horizontally and be unable to get at the air they need. Planting too shallowly The primary vertical roots of trees planted too shallowly (above grade) will not grow out into the air. They simply dry up and die. This reduces the water and nutrients available to the growing tree. These upper roots may also try growing into the mulch, where there is limited food and water, or they will simply go around in circles, becoming root bound in the planting hole. This is one way that girdling roots occur. 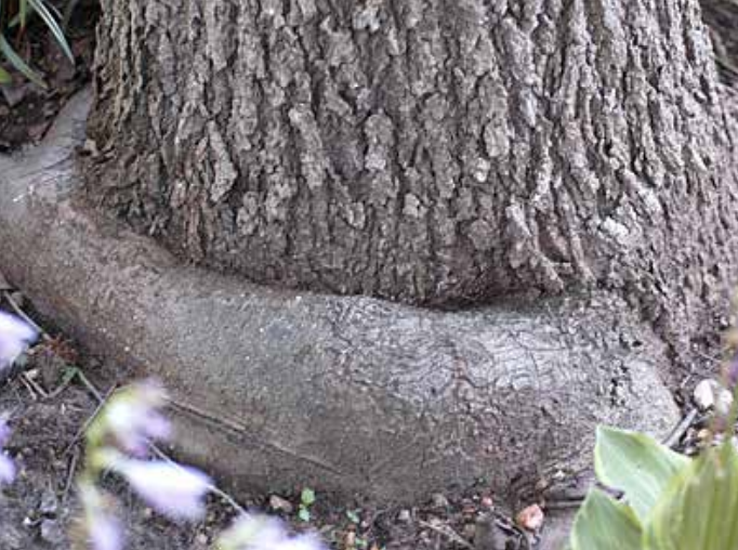 Girdling roots can kill a tree (cultivar413) CC BY 2.0 Girdling roots
Girdling roots are those lateral roots found just below the surface that have, for one reason or another, started growing in circles around the tree. This is common with trees kept in containers for too long. Another common way girdling roots occur is when the roots are ‘spun’ into the planting hole, rather than spread out horizontally. Make sure that your planting hole is wide enough to allow those important roots to spread out the way they were meant to grow. Girdling roots can also occur in compacted soil. If the surrounding soil is compacted, young roots simply cannot penetrate, so they go around and around, looking for a path in their search for moisture, minerals, and air. Curbs, large stones, and building foundations can have similar effects. Girdling roots will kill your tree in 5 to 15 years. It won’t matter how well you fertilize or irrigate your tree. Speaking of irrigation, be sure to avoid standing water around the trunk of your tree. This can lead to crown rot and other fungal diseases. Instead, use soaker hoses or build an irrigation ring at the tree’s drip line. Are your trees planted properly? The easiest way to tell if a tree is planted properly is to dig down an inch or two, with your fingers, next to the trunk. You should come across 4 to 11 substantial roots. If all you find are delicate feeder roots, your tree is planted too deeply. If the roots are visible from the surface, it is too shallow. How to correct planting depth errors Trees planted too deeply (below grade) should be dug up, the roots inspected, and then replanted at the proper depth. Trees planted above grade need more soil added around the trunk. First rake the area under the tree to loosen the existing soil. Then add a layer of soil to the proper depth, gently sloping away from the trunk. Proper planting depth is critical to your tree’s health. Trees planted above or below grade will never thrive. Believe me, it is much easier to do it right in the first place. Juicy, delicious mangos are one of my favorite tropical fruits. Mango trees have been around for about 50 million years. This means mangos were around for the mass extinction of the Cretaceous Era, through the extreme climate changes and carbon cycling seen at the end of the Paleocene Era, and again today. Hopefully, mangos will continue to thrive.  Mangos (Shutterbug75) Pixabay Native to South Asia, mangos (Mangifera indica) were part of the spice trade of the 15th and 16th centuries. They were brought to the colonies in the 17th century but, because refrigeration was unavailable, those mangos were pickled. Due to poor communication, other pickled foods, such as sweet peppers, were also referred to as mangos. For a time, the word mango was a verb that meant “to pickle”. But I digress. Types of mangos You may be surprised to learn that there are over 500 mango cultivars. In commercial mango orchards, these cultivars are often interplanted to improve pollination. The current market leader is the ‘Tommy Atkins’ variety, due to its nice appearance, productivity, disease resistance, and shelf life. Other, less resilient cultivars, such as ‘Alphonso’, are said to provide better eating enjoyment. With so many cultivars to choose from, home growers can afford to be picky. And those mangos you buy in the store? Many of them (like many other fruits) are picked unripe, so they will never attain the rich flavor of a tree-ripened mango. These climatic fruits do continue ripening after leaving the parent plant, but their flavor is never quite what it could have been. [Keep in mind, when you buy mangos at the store, each fruit is picked by hand, then washed, polished, and stickered by people working in warehouses.] The mango tree Mangos are stone fruits, right along with apricots and cherries. And that large flat seed - it’s a drupe. Like legumes, pineapple, sorghum, and sweet potatoes, mangos have evolved alongside a helpful bacteria (Gluconacetobacter diazotrophicus) that fixes atmospheric nitrogen, making it available to to the plant and its neighbors, until it goes to seed. 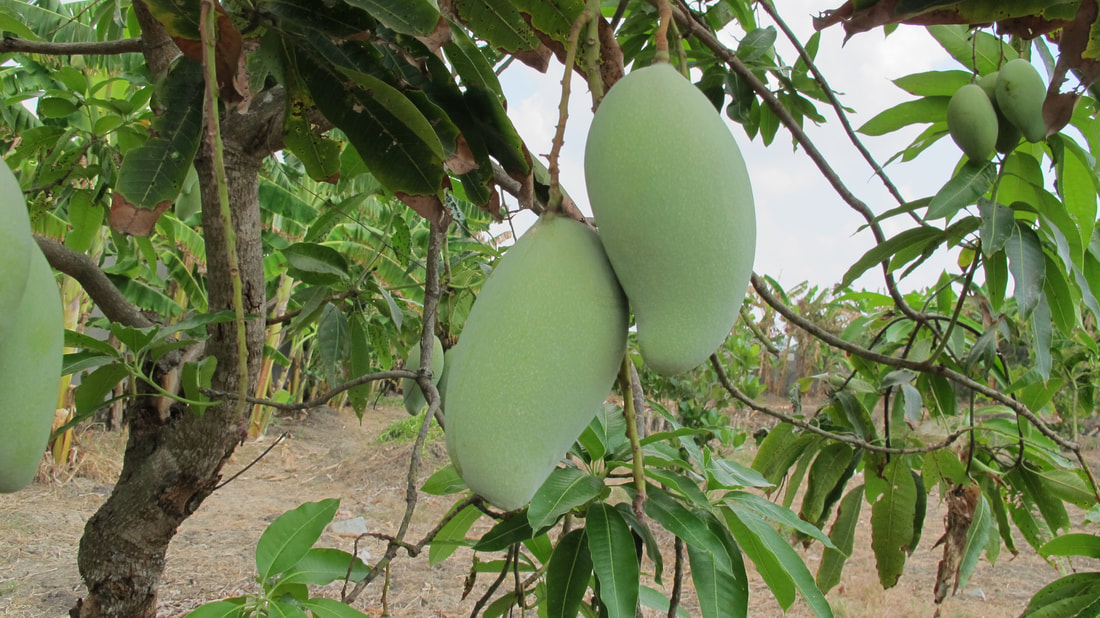 Mango tree and fruit (Trang Pham) pxhere Mango trees are big. When I say big, I mean that they can reach heights of over 130 feet. The crown can be 30 feet across and these trees can produce fruit for more than 300 years. [For comparison, the standard, commercially grown nectarine tree is only expected to produce fruit for 15 years.]  Mango tree (ABHIJEET) CC BY-SA 3.0 Before you let that size scare you off, know that most commercially grown mango trees are pruned to more manageable sizes, and you can, too. Mango trees have an extensive root system. They produce a taproot that may go down 20 feet and abundant feeder roots that spread out both horizontally and vertically.  Mango tree root system (Aaron Escobar) CC BY 2.0 Mangos are evergreen trees with large, broad leaves that start out orangish-pink, and then turn dark shiny red before maturing to dark green. Mangos produce small, white, fragrant flowers in clusters, called panicles. These flowers are pollinated by insects, but it is estimated that less than 1% of the flowers produced by a mango tree will every mature to form a fruit. It takes 4 to 5 months to go from flower to harvestable fruit. And you know that red blush on mango fruit? It has nothing to do with ripeness or sweetness. Instead, it is an indicator of how much sun that side of the fruit was exposed to as it grew.
Inside that delicious fruit is a drupe that fights being removed with every fiber of its being. The reason for this is because mangos, along with avocados, lychees, and cocoa seeds cannot tolerate being dried out or too cold. This type of seed is called recalcitrant. Recalcitrant seeds, also known as unorthodox seeds, lose their viability when stored. Other orthodox seeds can tolerate varying degrees of cold, dryness, and storage time. [Note, the stories about seeds from King Tut’s tomb germinating are bogus.] If you want to grow a mango tree from a pit, your odds will improve significantly if you start it right away. Most commercially grown mango cultivars and bare root stock are grafted onto sturdy rootstock. Before you start growing your own mango tree, you may want to find out if you are sensitive to the oils found in mango stems, sap, and leaves. Some people are sensitive, while others can be severely allergic. Also, mango trees are killed by extended exposure to temperatures below 30°F. If your microclimate receives substantial frost, you may need to protect your tree in winter. If you enjoy snowy winters, you may want to try growing a dwarf mango indoors and pollinating it by hand. Commercially grown mango trees are often girdled by professionals to increase the sugar content of the fruit, but I advise against this practice, as it can kill your mango tree if done incorrectly. Mango pests and diseases Sadly, mango trees are susceptible to a wide variety of pests and diseases. This list is so long that I encourage you to skip it (unless you are really into this sort of thing). If you own a mango tree, you should familiarize yourself with each of these conditions and their treatments. According to Wikipedia, bacterial diseases of mango include bacterial fruit rot, crown gall, and bacterial canker. Fungal diseases of mango include alternaria leaf spot, anthracnose, black banded disease, black mildew, black mold rot, black rot, blossom blight, blue mold, branch canker, branch necrosis, ceratocystis wilt, charcoal fruit rot, charcoal root rot, crown rot, crusty leaf spot, curvularia blight, felt fungus, fruit rot, galls, gray leaf spot, hendersonia rot, leaf blight, leaf spot, macrophoma rot, fusarium dieback, mucor rot, mushroom root rot, phoma blight, phyllosticta leaf spot, pink disease, powdery mildew, Rhizopus soft rot, various root rots and seed rots, scab, sclerotinia rot, shoestring rot, sooty blotch, sooty molds, stem canker, stem end rot, stem gall, stemphylium rot, stigma leaf spot, tip dieback, transit rot, trunk rot, twig blight, verticillium wilt, white sooty blotch, wood rot, and various forms of dieback. Fixed copper sprays are the most common treatment for many of these fungal diseases. If that weren’t enough, dagger, lance, and sheathed nematodes, vine mealybugs, guava fruit flies, Mexican fruit flies, melon flies, polyphagous shothole borers, and Oriental fruit flies will attack mango trees, as will an algae that causes red rust, along with a parasitic lichen. Copper, zinc, and boron deficiencies can also cause problems, while too much nitrogen combined with not enough calcium can cause a condition known as soft nose. It’s a wonder we get mangos at all! Mangos, like most other tropical fruits, produce significant amounts of ethylene gas, a ripening agent. If you need to speed ripen an avocado for guacamole, put it in a paper bag with a mango. Did you know that mangos are related to cashews? Now you know. Growing up in Southern California, I was lucky enough to attend a childcare program that was built on the grounds of a former walnut grove. Scattered throughout the property, there were dozens of ancient walnut trees, great for climbing, tire swings, and more delicious walnuts than any of us kids could possibly have eaten. But we sure tried!
People have been growing walnut trees longer than any other food tree. Nearly 10,000 years ago, in ancient Persia, walnuts were grown for members of the royal family. Traded along the Silk Road, and then via sea trade, Persian walnuts made their way to Rome, where they were called Jupiter’s royal acorn, and to England, where the name was changed to English walnuts, even though they were not being grown commercially in England at that time. In the 1700s, missionaries brought walnuts to California. Types of walnut trees There are actually several different trees that qualify as walnut. They are all members of the Juglans genus. The familiar English walnut is only one of four types of walnut tree:
The walnut tree Walnut is a deciduous hardwood. It is also one of the few trees with a true taproot. [Most tree roots are fibrous.] Walnut trees can take 5 or 6 years before they produce fruit. When selecting a site for a walnut tree, keep in mind that a mature walnut tree can reach 40 to 80 feet, in both height and width, and it can live 50 to 250 years! Walnut trees, like avocado trees, are monoecious, which means they produce both male and female flowers. Male walnut flowers are catkins that look like hanging cat tails. The female flowers are spiky and short. If you slice open a walnut twig, you will see a series of tan chambers, called pith. This is different from the white pith found in citrus rinds. Fruits of the walnut tree Unlike chestnuts, which are both botanical and culinary nuts, the common walnut isn’t a nut at all. You may be surprised to learn that walnuts are actually a type of stone fruit. [I know! I was surprised, too!] This means that the walnuts you enjoy eating are a form of fleshy fruit, known as a drupe. Almonds are also drupes. Surrounded by a thick, green rind, the walnuts you see in the grocery store are not what they look like when they are still hanging in the tree. That rind is actually the fruit of a walnut tree, but you wouldn’t want to eat it. It’s nasty.  Walnut fruit (George Chernilevsky) Public Domain Walnut trees, like citrus and many other fruit and nut trees, tend to produce heavy crops one year and a light crop the following year. Known as alternate bearing, these fluctuations allow trees to recover from heavy production years.
Toxic walnut You have probably heard that walnut trees put out toxins that make it impossible to grow other plants nearby. This is only partly true. Many plants use a type of chemical warfare, called allelopathy, to reduce competition. Walnut trees produce do produce toxins that can cause some other plants to wilt. Tomatoes, potatoes, eggplant, peppers, blackberries, raspberries, blueberries, and asparagus do not grow well when planted near a black walnut tree, according to the University of Illinois Extension. At the same time, according to the PennState Extension, onions, beets, squash, melons, carrots, parsnips, beans, yarrow, stonecrops, and corn can all be grown near a walnut tree without any problems. In fact, in commercial walnut groves, a type of agroforestry, called alley cropping, is used to plant other crops, such as corn, between the rows of walnut trees. Propagating walnut trees While you can certainly buy a bare root walnut tree, there are other ways. You can plant a raw walnut in the ground, or, if you know of someone with a walnut tree, you can use air layering. Layering is a form of vegetative propagation. Strawberry runners are an example of layering. The nice thing about air layering is that the parent plant continues to feed and care for the newly developing plant, since they are still attached to one another. To air layer a walnut, pull a stem down until it touches the ground at what would have been a leaf node. Instead of developing into a leaf, that bud will start putting out roots. Pruning walnut Walnut trees can produce nuts on the same spurs for several years. Because of this, mature walnut trees do not require renewal pruning. The only pruning needed is occasionally thinning branches to maintain overall shape and good health. Young walnut trees are trained using the modified central leader system. In this method, a single, strong shoot is encouraged up the central line of the tree. Two or three lateral branches, spread evenly around the tree, both vertically and horizontally, are allowed to grow. All other branches are removed. Eventually, there can be five to seven lateral branches in place before the central leader is removed. Walnut pests and diseases Walnuts are susceptible to an astounding number of pests and diseases. Luckily, walnuts are rugged trees that rarely need assistance in fighting off these foes. It’s still a good idea to know what your tree might be up against. Many varieties of scale insects, including walnut scale, frosted scale, European fruit lecanium scale, San Jose scale, Kuno scale, and Italian pear scale may be found on walnut. Walnut husk flies, aphids, southern fire ants, walnut twig beetles, fall webworms, Pacific flathead borers, navel orangeworms, false chinch bugs, redhumped caterpillars, American plum borers, and Mediterranean fruit flies prefer walnut, as do tortricid moths, such as the light brown apple moth, which can cause leaf roll of walnut. A type of eriophyid mite, called the blister mite, will also attack walnut trees, as will European red mites and webspinning spider mites. Codling moth larvae will burrow into the nut meat of English walnuts, starting in April. You can monitor your trees for many of these pests by using pheromone traps. Diseases, such as crown gall and walnut blight can be prevented and treated with Bordeaux mixture or fixed copper. Walnut trees may also become infected with anthracnose, armillaria root rot, phytophthora root and crown rot, branch wilt, and several canker diseases. If that weren’t trouble enough, squirrels, voles, pocket gophers, rats, and deer will try to get at as much of your walnut crop as they can. While many trees are treated with horticultural oils during dormancy, oils should not be used on walnut. Dormant oils are phytotoxic (poisonous) to walnut trees. Like apricot trees, walnut trees are also susceptible to Eutypa dieback. This fungal disease can kill a tree. The easiest way to avoid it is to only prune your walnut tree during summer, when there are no rains expected. Also, make sure that your sprinklers are not hitting the tree’s trunk. Walnuts contain high levels of oils that can turn rancid. To keep walnut meats fresh, they are left in their shells and placed in cold storage. If you buy walnuts from a store and plan on using them within one month, store them in your refrigerator. Since walnuts can absorb odors, be sure to keep them away from fragrant foods, such as cabbage, broccoli, and fish. Longer storage should be done in the freezer. Walnut trees can make a magnificent addition to your foodscape, providing decades of delicious nuts and welcoming shade from the summer sun. Plant a chestnut tree today for decades of meaty, delicious nuts. American chestnut trees are majestic. While young, the bark is a smooth, reddish-brown. As the tree matures, the bark becomes darker and deeply furrowed. Their mature height of over 100 feet equals 1/3rd of a football field. Try picturing that in your yard! 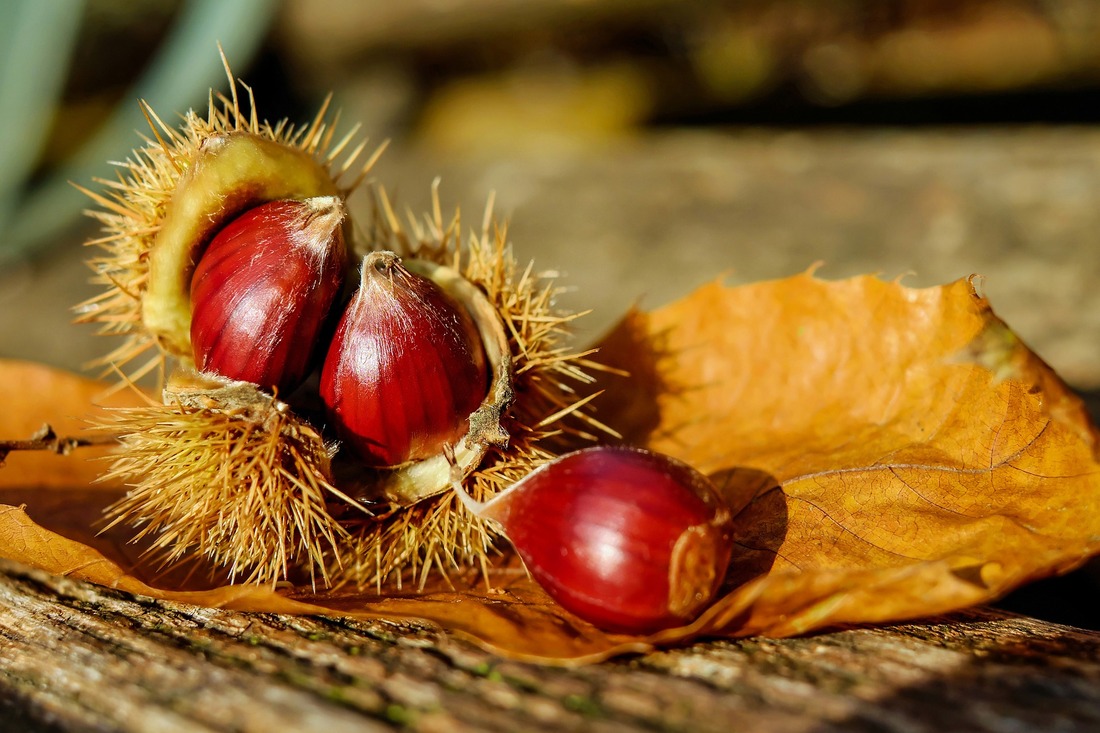 Ripe chestnuts (Couleur) Pixabay Cousin to beeches and oaks, the roasted chestnuts of holiday fare fame should not be confused with horse chestnuts, which are mildly poisonous, or water chestnuts, which are aquatic tubers. No, chestnuts, or Sardian nuts, as they were called in their native Asia Minor, or Jupiter’s nuts, from the Roman Empire, have been cultivated since 2,000 B.C., and they have a rich, delicious history. Chestnuts as food Brought to Europe by Alexander the Great and the Roman Empire, chestnut trees thrive in the Mediterranean climate, providing a high carbohydrate food to the masses. Unlike most other nuts, chestnuts are not particularly high in protein or fat. Nutritionally, they are closer to grain or potatoes than nuts, containing 40% carbohydrates. Chestnuts were a primary food source for much of southern Europe, until the potato was introduced. From the 1500s through the 1700s, Genoan landowners were required to plant four trees each year: olive, fig, mulberry, and chestnut. As a result, that area has rich, productive forests and farmland. [Imagine how productive your yard could be if you plant 4 food-producing trees each year!] Being high in calories and carbohydrates, chestnuts were often ground into a flour to make a type of flatbread [chestnut flour does not rise, as it does not contain gluten]. Unfortunately, this earned it a reputation as a poor man’s food, which lead to a decline in interest. This was unfortunate, because chestnuts are a highly nutritious food. Across the pond, Native Americans enjoyed local chestnut species long before Europeans arrived. Regions of the Appalachian Mountains were fully one-fourth chestnut trees. Since a mature American chestnut tree can produce 50 to 100 pounds of fruit each year, that ends up being a lot of food. Epic chestnuts There have been some impressive chestnut trees. The Tortworth Chestnut, also known as the Great Tree of Tortworth, found in South Gloucestershire, has been around since Stephen, King of England (1092-1154). This beast has a circumference of 50 feet! [If any of you have a photo of this tree, please share it in the Comments!] Even larger, the Hundred Horse Chestnut grows on Italy’s Mt. Etna and is believed to be the oldest living chestnut tree, at approximately 4,000 years. Chestnut species There are 8 or 9 different deciduous trees and shrubs that are called the chestnuts. These are placed into one of four groups: American, Chinese, European, and Japanese, for obvious reasons. Each species has distinct characteristics. 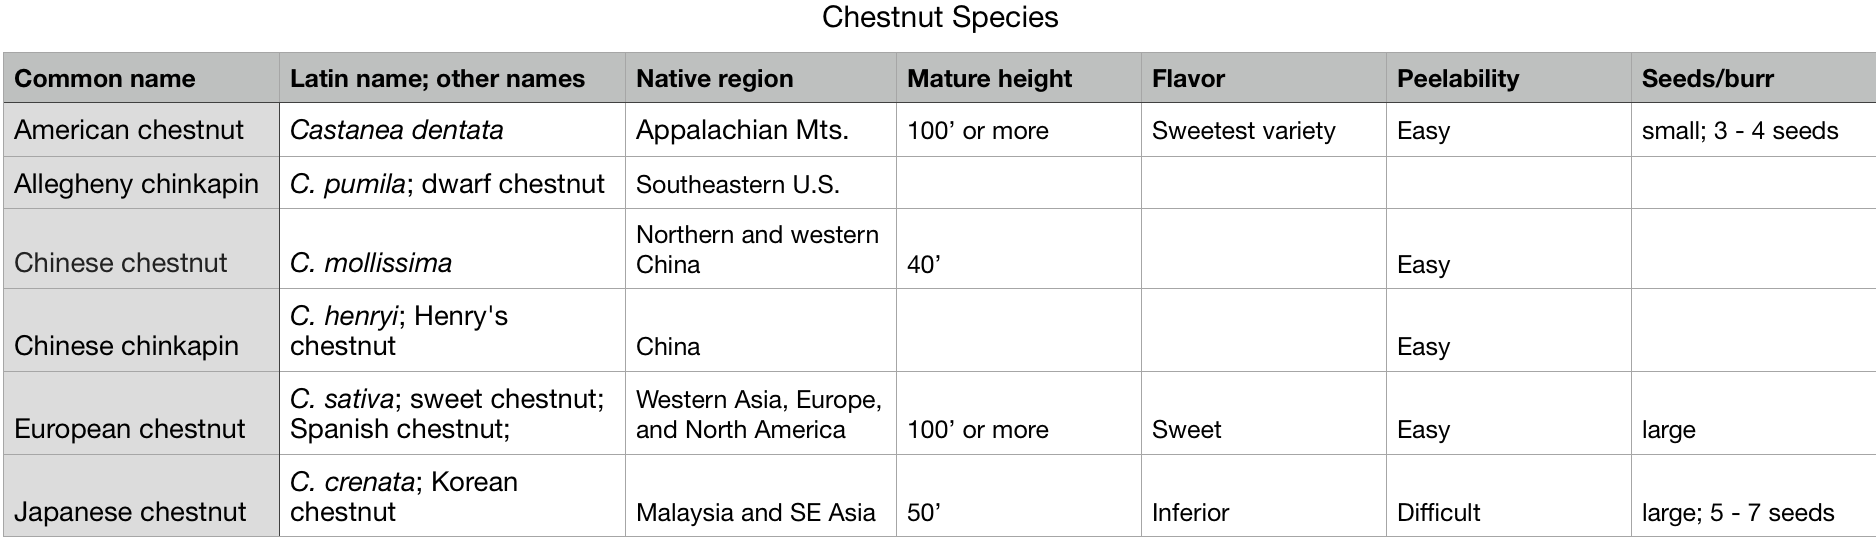 European and American chestnuts tend to grow more tree-like, with a single erect trunk, while the Asian varieties tend to be multilayered and more spread out. Also, the former varieties offer stunning fall foliage. There are hundreds of chestnut varieties to choose from. UC Davis offers an excellent list of chestnut trees suitable for growing in California. Chestnut flowers Like avocados, chestnuts have both male and female flowers. Chestnuts are not self-compatible, which means you will need at least two trees or shrubs to produce fruit. Flowers appear in late spring and early summer. Male (staminate) flowers are shaped like a cat’s tail and are called catkins. Catkins mature before the female flowers, and the pollen has a rich, sweet aroma. The female, fruit-producing (pistillate) flowers grow together in groups of 2 or 3, which end up forming a prickly, 4-lobed structure called a calybium. The calybium is what ultimately develops into the hull that protects the fruit. Pollen is moved predominantly by wind, though beneficial insects also perform some pollination. 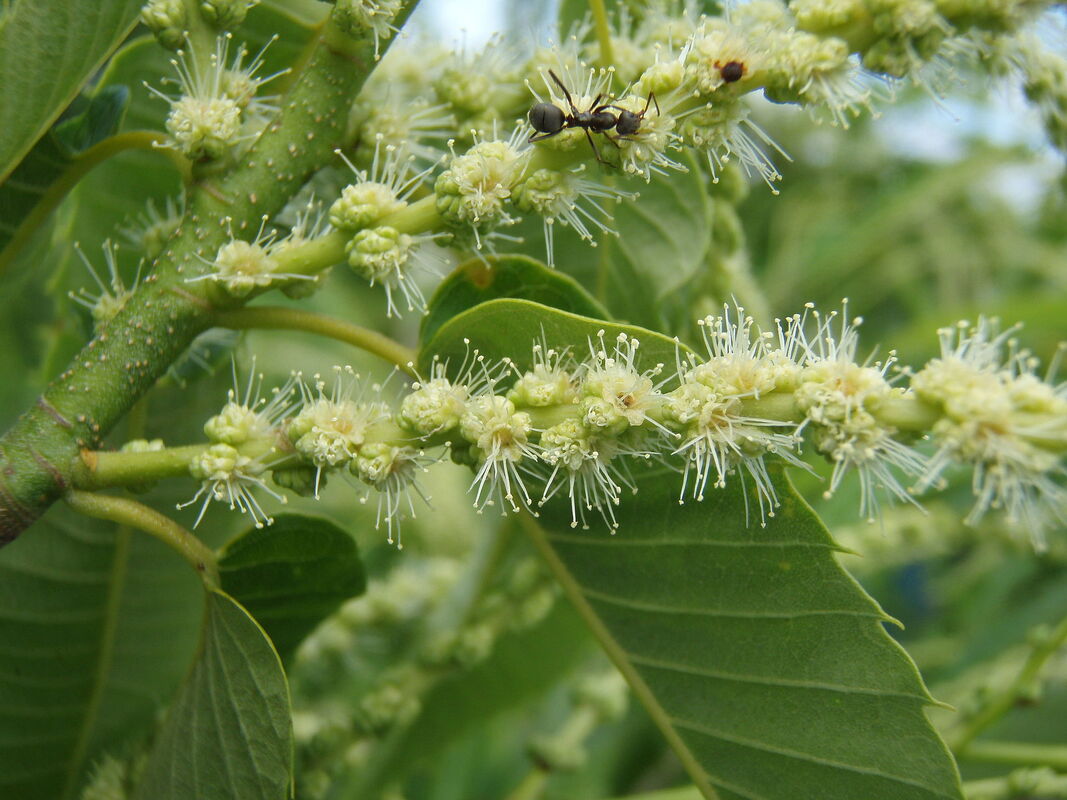 Male chestnut flowers (Apple2000) CC BY-SA 3.0 Chestnut fruit The fruit of chestnut trees is held in sharp, pokey burrs, called cupules. These burrs tend to be clustered. The burrs of some varieties each contain one nut, while other varieties can hold up to severn. Burrs turn yellowish-brown and split open as the fruit matures. Each fruit has a pointed end, called a flame, and an attachment scar end, called the hilum. Chestnut fruit has two skins: the hard outer pericarpus, called the heel, and an attached, thinner skin, called the pellicle or episperm. Chestnuts are both culinary and botanical nuts, unlike almonds, peanuts, cashews, and walnuts. Chestnut lumber Chestnut lumber is lovely, but larger pieces tend to split. Most chestnut lumber is now produced through coppicing. Young chestnut lumber is more durable than oak of the same age. Both species contain high levels of tannins. Chestnut wood was a common source of natural tannins for tanning leather.  Chestnut branch (Vassil) Public Domain How to grow chestnuts
Chestnuts are in high demand and the supply is limited. This keeps prices high, and is a good argument for growing your own (assuming you are not in a hurry). Going from bare root sapling to mature, productive tree takes about 10 years. Chestnuts need specific chilling hours to produce flowers and fruit. If the dormant period does not get cold enough, you will still have a beautiful tree, but no homegrown chestnuts. Also, if two chestnut trees are planted such that their canopies touch, they produce no fruit. We don’t know why. Allowed to fall to the ground, chestnut seeds germinate right away. You can start them in a cold frame, container, or seedbed outdoors, where they will experience winter temperatures. Seedlings require protection from squirrels and other rodents. Chestnut trees prefer full sun. They need good drainage and regular irrigation (31 inches per year). Once established, chestnuts are drought resistant. They do not grow well in heavy clay or alkaline soil. Chestnuts prefer a soil pH of 5.5 to 6.0. If you live in the Bay Area, where alkaline clay is pretty much the rule, don’t despair. Chestnut scions can be grafted onto oak rootstock! Chestnut trees are managed much the way walnut trees are grown. Chestnut trees should be trained into a modified central leader scaffold system for the best sun exposure and overall health. Chestnut pests and diseases Squirrels, rabbits, deer, wild boar, livestock, and birds can all take a bite out of your chestnut harvest. You may want to consider a tree cage, at least while the tree is small. Chestnut gall wasps (in southeastern states), some moths, the oak roller weevil, oak aphid, filbert worm, oak leaf mining moth, shot hole borers, and the chestnut weevil are common pests of chestnut, depending on where you live. In 1904, some Asian chestnut trees that had been planted on Long Island, were found to be infected with chestnut blight (Cryphonectria parasitica, formerly Eudothia parasitica). Over the next 40 years, 4 billion chestnut trees died, nearly wiping out the American chestnut. Reforestation efforts, started in the 1930s, using seeds from the few remaining living stumps are giving this majestic tree a new lease on life, but it’s a slow process. There are now blight-resistant cultivars. Chestnut trees are also susceptible to Armillaria rot. On the other hand, chestnuts are believed to be naturally resistant to oak rot fungus. You can protect your chestnut tree against sunburn by whitewashing the trunk, and help it stay healthy by mulching under the canopy (but not touching the trunk). Roasting chestnuts Chestnuts have been candied, soaked in wine, and roasted as a holiday tradition throughout Europe for a very long time. To early Christians, chestnuts symbolized chastity, while in modern day Japan, they symbolize both good times (mastery) and bad times (strength). You can roast your own chestnuts at home in the oven. Start with raw, unpeeled, chestnuts. Cut an X on the rounded bottom of each nut. Some people soak their chestnuts in water for 30 to 60 minutes before baking, others use wine, and still others don’t soak at all. You decide. If you do soak them in water, drain and pat dry before roasting. Spread the nuts out on a baking sheet. Bake for at least 15 to 20 minutes, or until the skins have pulled away from the cuts and the nutmeats have softened. Take them out of the oven and let the nuts rest for a few minutes. Peel and eat! Did you know that chestnuts are the only nuts that contain vitamin C? Now you know. Native to South and Central America and the Caribbean, delicious guava fruits are the epitome of tropical flavor. But guava trees can become invasive. Are you up to the challenge?  Ripe guavas (Sakurai Midori) CC BY-SA 3.0 Cousin to clove, allspice, eucalyptus, and evening primrose, guava trees (Psidium guajava) are a low maintenance, drought tolerant, highly productive tropical fruit tree. If you enjoy eating guavas, growing your own is certainly worth some thought. Guava plant description Guavas are an evergreen tree or shrub with shallow roots. Under ideal conditions, trees can reach 12 to 20 feet in height. Elsewhere, they remain more shrublike. Guavas grown in containers will remain small. Attractive, one inch flowers are white. Leaves are thick and fragrant. Fruits generally have green or yellow skin and white flesh, but there are cultivars with red skin, and pink or red flesh. Fruits can range in size from 2 to 5 inches in diameter. .jpg) Apple guava flower (Ton Rulkens) CC BY-SA 2.0 Types of guava There are many varieties and cultivars of guava. You may have heard of apple guava, strawberry guava, and pineapple guava. While the first two are actually guava varieties, pineapple guava is a different species altogether. In the world of guavas, plants are sorted by fruit skin and flesh color, skin thickness, and sweetness. To find the best variety for your microclimate, contact your local County Extension Office.  Strawberry guava (Forest & Kim Starr) CC BY 3.0
Guavas are extremely drought tolerant, but plants require up to 39 inches of water each year to produce a good crop. Feeding roots only go down 9 inches, so top dressing with aged compost is an excellent way to keep guava trees fed.
Guava pests and disease Guava wood is naturally resistant to insects and fungal disease. They are, however, susceptible to attack by weevils, mites, and guava fruit flies, and they are a host to the Caribbean fruit fly. Many moth and butterfly caterpillars will also feed on guava leaves, and the Erwinia psidii bacteria can cause rot diseases. Guavas contain a lot of pectin, so it is easy to make guava jams, jellies, and marmalades. Wrapping your trees to protect against winter cold sounds like a good idea, but it probably isn’t. For decades (centuries?) people have wrapped their trees to protect against frost cracks, winter sunscald, and other forms of cold weather damage. While this sounds like a great idea, it ends up that those wraps can actually cause more harm than good. The theory behind tree wraps Winter tree and plant damage can occur in several ways: flat out freezing; temporary warming, followed by freezing; and cracks caused by the water within the plant freezing, expanding, and pushing its way out. When you get down to it, it is rapidly fluctuating temperatures that cause the most damage to trees in winter. Types of tree wraps Tree wraps, also known as tree guards, or tree liners, can take many forms. Commercially available tree wraps include white plastic guards, white adhesive tape, foil-backed fiberglass panels, capillary mats, landscape fabric, reflective greenhouse insulation, and watering bags. DIY growers have used paper, bubble wrap, burlap, cardboard, shredded newspaper, foam, and I have a neighbor who knitted sleeves for her trees! 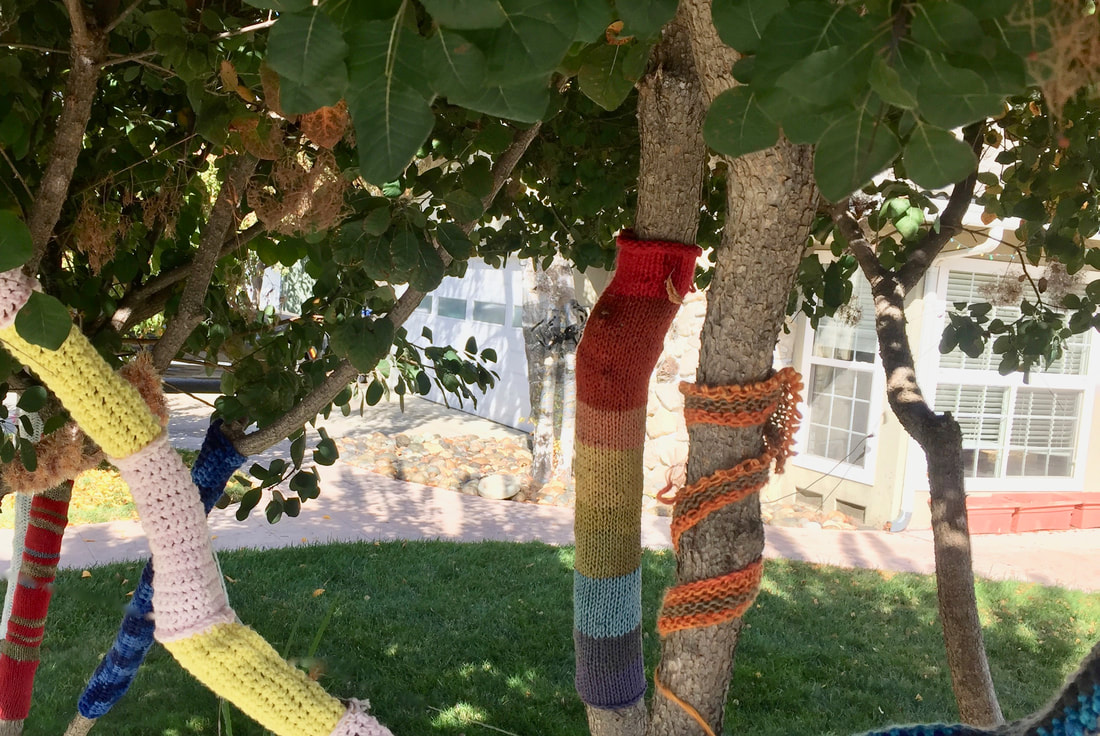 Knitted tree wraps (Kate Russell) It's very colorful, and I like to think that the good airflow allows moisture to evaporate enough to keep the trees healthy.
Some people make their own tree wraps by creating a tube of chicken wire fencing around the trunk and filling the space in-between with shredded leaves. All of these methods require frequent inspections to avoid becoming problematic. Problems with tree wraps According to the International Society of Arboriculture (ISA), studies have shown that tree wraps do not actually prevent temperature fluctuations. In some cases, temperature variations are even worse with the wraps. Also, tree wraps provide protection for many wood-boring insects, wasps, and earwigs, just to name a few. This is especially true with snugly fitting wraps. Manufacturers and many gardening sites suggest that tree tubes be left on young trees for several years, until they are well established. They claim that tree tubes insulate the trunk against winter sunscald and shade it against summer sunburn. These tubes may also prevent a tree from swaying in the breeze so much that it fails to get strong, through a process called thigmomorphogenesis. [How’s that for a cool garden word?] Wrapped too tightly, tree wraps can interfere with normal growth, causing girdling. Depending on the material used, it may cut into the bark, causing points of entry for pests and disease. Often bare root stock and young trees are sold with tree wraps in place. These wraps can provide protection during digging and shipping, but they can also hide injuries, insects, and improper pruning. Wrapping your trees may reduce mechanical damage and rodent feeding, but it is more likely to result in insect damage and fungal disease. And it will not protect your trees against frost cracks or winter sunscald. Personally, I prefer whitewashing, mulch, and proper irrigation to prevent cold weather damage. The truth about nuts may surprise you. While you probably already know that peanuts are not nuts (they’re legumes), many of the other foods you have come to know as nuts are not true nuts at all. Let’s begin by learning the botanical definition of nuts. 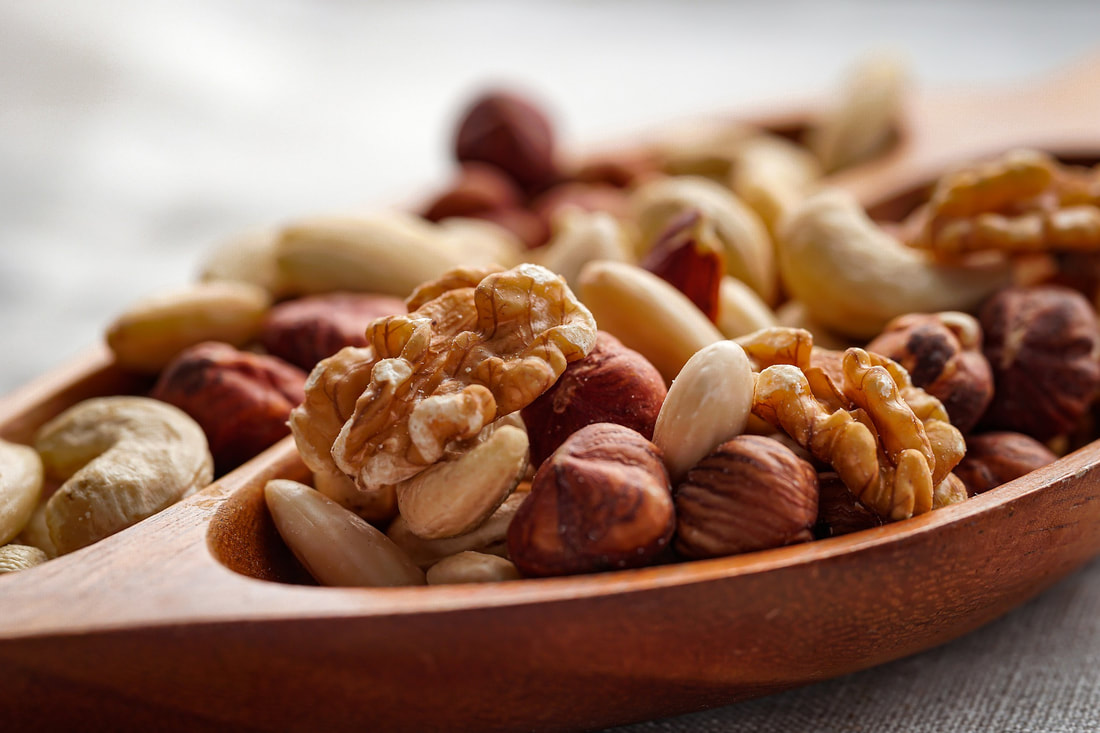 Raw mixed nuts (Kai Reschke) Pixabay True nuts are hard-shelled, inedible pods that hold both the fruit and the seed of a plant. These pods do not open of their own accord, which means they are indehiscent. The pod, or shell, of a nut is made from the ovary wall, which hardens over time. Hazelnuts, chestnuts, and acorns are true nuts. So are kola nuts, which gives “cola” soft drinks their signature flavor.  Immature hazelnuts (Thomas Molnar, Rutgers University, Dept. of Plant Biology and Pathology) CC BY-SA 2.0 [Did you know that small nuts are called ‘nutlets”? To me, that sounds like the perfect name for a little chihuahua.] So, when is a nut not a nut? A nut is not a nut when it is a fruit seed. Fruit seeds can be angiosperm, drupe, or gymnosperm seeds:
These not-nut nuts are commonly referred to as culinary nuts. [Did you know that cashews are the seeds of an accessory fruit, which means they share characteristics with strawberries and poison ivy. Isn’t botany amazing?] Ripe cashew apples with seeds hanging below (Abhishek Jacob) CC BY-SA 3.0 Of course, you can call any of these delicious morsels "nuts" whenever you want to. True nut or culinary nut, many of these yummy snacks find their way into our gardens and foodscapes. Which ones are you growing?
If you live in a hot, sunny place growing lemons is a no-brainer. Native to Asia (we think), lemons evolved out of a cross between bitter orange and citron during the times of Ancient Rome. Lemons did not become popular until they were introduced to Persia and Egypt around 700 AD. Christopher Columbus brought lemon seeds to Hispaniola (modern day Haiti and Dominican Republic), but lemon trees were seen as medicinal and ornamental plants at that time. Though they didn’t know about Vitamin C back then, James Lind discovered that adding lemon juice to the diet prevented scurvy in 1747.  Lemon leaves, blossom, and fruit (Elena Chochkova) CC BY-SA 4.0 Lemon fruits Lemons are a type of fruit called hesperidium. Hesperidium are berries with a leathery skin and fruit that forms in sections, called carpels. Within each carpel are hundreds of juice-filled sacs, called vesicles. Lemons contain citric acid, which is what makes them taste sour. Lemons are only a little more sour than limes, but they can be almost twice as sour as grapefruits, with five times the bite found in orange juice. The lemon tree Lemon trees (Citrus limon) are evergreen, which means the leaves stay green all year. They do not, however, handle cold temperatures very well. Mature trees can handle occasional light frosts, but young trees need protection in temperatures below 45°F. Lemon leaves and fruit both have waxy coatings that reduce moisture loss. You can grow a lemon tree in a sunny spot in your yard, in a container, or even on a balcony. The blossoms smell heavenly!  Lemon flowers (Jon Sullivan) Public Domain Lemon varieties
Most grocery store lemons are ‘Eureka’ lemons. This variety is also known as ‘Four Seasons’ because of its continuous production. This is also the most commonly available variety as bare root stock. There is also a pink-skinned variety of ‘Eureka’ that features green and yellow variegated skin. Thinner skinned and seedless “Bonnie Brae’ is grown in San Diego County, CA. If you want to make your own limoncello (lemon liquor), you will want to plant a ‘ ‘Femminello St. Teresa’, also known as ‘Sorrento’ lemons. Contrary to popular opinion, ‘Meyer’ lemons are actually a cross between citron and a mandarin/pomelo hybrid. Other lemons-that-are-not-lemons include:
Caring for a lemon tree Lemon trees are relatively trouble free, when grown in an appropriate location. Lemon pruning is normally limited to the standards of removing dead, diseased, and crossing branches. You will also want to remove vertical water shoots. Lemon tree trunks and the upper surface of exposed branches benefit from whitewashing, to prevent sun scald. Regular feeding will help your lemon tree stay healthy and productive. Each of the dosages listed below should be divided into 2 or 3 separate feedings: 1st year - 3 tablespoons of nitrogen per tree 2nd year - 1/4 pound of nitrogen per tree 3rd year - 1/2 pound nitrogen per tree 4th year - 3/4 pound nitrogen per tree 5th year and on - 1 pound nitrogen per tree Understand that 1/4 pound of nitrogen is not the same thing as 1/4 pound of packaged fertilizer. Assume, for example, that your 5 pound bag of fertilizer has an NPK of 10-5-2. This means that out of the 5 pounds, 10% of the bag is nitrogen, 5% is phosphorus, and 2% is potassium. [The rest is filler.] This works out to 1/2 a pound of nitrogen, a 1/4 pound of phosphorus, and 1/10 of a pound of potassium. In all likelihood, your lemon tree will not need those other nutrients, so they are best left out of the equation (especially until after you get a soil test). An easier way to feed your lemon and other citrus trees is to use blood meal or ammonium sulfate. Blood meal contains 13.25% nitrogen, 1% phosphorus, and 0.6% potassium. To equal one pound of nitrogen, you would need to apply 7-1/2 pounds of blood meal. Five pounds of ammonium sulfate will give you the same amount of nitrogen. Just remember that these feedings are totals for the year and that they should be spread out over three different feedings, ideally in April, June, and August. Lemon trees also benefit from a top dressing of aged compost. Lemon pests and diseases The biggest insect threat to your lemon tree (and lemon trees across the country) is the Asian citrus psyllid, which can infect your tree with a fatal disease called huanglongbing, or HLB, for short. Leaf miners will burrow tunnels in citrus leaves, but the damage is mostly cosmetic, unless it becomes extensive. Other lemon pests include aphids, katydids, citrus cutworms, several varieties of mites, mealybugs, glassy-winged sharpshooters, Fuller rose beetles, hoopla beetles, leafrollers, snails, thrips, whiteflies, and nematodes. Several varieties of scale insects are attracted to lemon trees, including, black scale, brown soft scale, California red scale, citricola scale, cottony cushion scale, and purple scale. Lemon tree diseases include alternaria rot, armillaria root rot, anthracnose, brown rot, citrus blast, exocortis, phytophthora-related diseases, and the Tristeza disease complex. Like other citrus trees, many lemon trees will follow an abundant year with a year of reduced production. This does not mean that anything is wrong. Lemons are very easy to grow and they can produce an astounding amount of fruit. Get yours today! Don’t let the green skin fool you. Greengages are sugary sweet dessert plums. While most plums tend to be purple to black, and sometimes yellow, with an edge of tang to their flavor, greengage plums are green, and as sweet as candy!  Greengage fruit (Mark Stimson) CC BY-SA 3.0 Greengages were first brought to Europe from Iran in the 1700s. George Washington and Thomas Jefferson both grew greengages on their farms, but greengages seem to have fallen out of favor since the 1800s. I do not know why, but I like to think that they are on their way back. Botanically, all plums (Prunus domestica) are members of the rose family. If you want a cultivar that is descended from the original green Iranian plum, you will need to look for a label that reads Prunus domestica subsp. italica var. claudiana. Greengage description Greengages are round or oval pale green to yellowish fruits with smooth-textured, pale green flesh. Greengages are freestone fruits. You may see some varieties with a pale blue blush. Greengages are smaller than mirabelle prune, or cherry plums, but larger than most other plum varieties. There are also some crossbred greengages that may be reddish-purple. Greengage blossoms (Mark Stimson) CC BY-SA 3.0 How to grow greengages
Unlike most modern fruits, greengages grow true from seed. This means, if you can find one, you can plant a tree of your own. The original cultivar, now called Reine Claude Verte, remains nearly unchanged from its ancestor. Not all greengages are self-fertile, so you may need to plant two trees to get fruit, depending on the variety. You can grow greengages outside in USDA Hardiness Zones 5-9. Like other plums, greengages love our hot, California summers, and cool, moist winters. You can start a seed indoors any time of year, but bare root trees should be planted January through March. If you don’t have a lot of room, greengages can also be espaliered along a fence. Caring for greengages Greengages should be given nitrogen in spring and fall. Amounts vary, depending on tree age, health, and soil. Trees should be pruned while they are dormant, in winter, and again just after fruit is harvested. Thin fruits to 4 to 6 inches apart, for the best quality and to reduce the chances of pest damage or disease. Greengage pests and disease Aphids and scale insects are the most common plum pests. Brown rot and shot hole fungus are the most common diseases. Fruit is ready for harvest June through October, depending on the variety. It is not uncommon to have a bumper crop year followed by a more sparse crop, similar to many citrus trees. They simply do not have the energy or resources to crank out huge crops every year. See if you can make room for these delicious fruits in your foodscape! Fresh, sweet cherries are delicious, but cherry trees can be difficult to grow. According to UC California Backyard Orchard, “cherries are the most difficult trees to keep alive.” If you are still determined, let’s see what we can learn about these trees. People have been enjoying cherries since prehistoric times. Cherries are stone fruits, which means the fruit is a drupe. There are two types of cherry trees: sweet (Prunus avium) and sour (Prunus cerasus). The two cannot cross-pollinate with each other. Both types are native to Europe and western Asia. Sweet cherries are also known as wild cherries or gean.  Prunus cerasus (Diako1971) CC BY-SA 4.0 How to grow cherry trees
Cherry trees cannot tolerate soggy ground and they need a lot of sunlight. Excellent drainage is critical. So much so, that cherry trees are generally planted on mounds, or berms. Trees should be spaced 14 to 20 feet apart, and you are going to need at least two because most sweet cherry varieties require cross-pollination to bear fruit. Sour cherries, the type used in pies and preserves, are self-fertile and do not require cross-pollination. While installing bare root stock is preferable, you can grow a cherry tree from a pit. The pit will need to be exposed to cold temperatures (stratification) before it will germinate. When selecting a cherry variety for your landscape, be sure to choose one with a chilling requirement that matches your microclimate. The tree will set fruit in 3 or 4 years. Seasonal care for cherry trees Each winter, you will need to prune out 10% of the previous year’s growth, as well as any dead, damaged, diseased, or crossing/rubbing branches. You will also want to apply dormant oil. An application of fixed copper can help reduce bacterial canker (gummosis). In spring, as blossoms appear, apply a fungicide, such as Bordeaux mixture, to control brown rot, and feed each tree 2 lb. of urea or 70 lb. of aged manure just before a deep watering. Birds will enjoy your cherries long before you do if you do not protect your crop with netting or a tree cage. Trees will need to be drip irrigated every day in summer, or given 3 to 5” of water every 2 or 3 weeks. After harvesting your cherry crop, feed each tree with 2 lb. of urea and irrigate right away. Keep trees irrigated regularly until September, then stop watering altogether. This will help prevent root rot. Cherry pests and diseases It is astounding to learn how many diseases and insect pests can interfere with growing cherries. If birds, squirrels, and pocket gophers weren’t bad enough, cherry trees are are regularly attacked by a wide variety of insect pests:
Black cherry aphids, cherry slugs, earwigs, green fruitworms, western flower thrips, nematodes, and cribrate weevil can also be added to that collection. And the list of cherry diseases is no less daunting:
Cherries are also susceptible to a genetic disease, called leaf crinkle, and a couple of mysterious diseases, called cherry necrotic rusty mottle and cherry stem pitting, that occur when grafting scions. Applying sticky barriers to the trunks of trees can block crawling insects, but it does nothing against flying insects. Bottom line: cherries are probably best left to the professionals. Hopefully, this information will help you appreciate just how much effort goes into providing these delicious summer treats. If you decide to give cherries a try, please share your experience with us in the comments! Plums, nectarines, apricots, cherries, peaches, and almonds are all stone fruits. But, so are olives, coconuts, mangoes, pistachios, and black pepper! So what, exactly, are stone fruits?  Nectarines
Prunus plants The Prunus genus is part of the rose family, making plums, almonds, and all the rest distant cousins to loquats and soapnut trees. [Did you know that almonds, nectarines, and peaches are the same species? I didn’t either.] There are both edible and ornamental stone fruits. Hawthorn, flowering cherries, and cherry laurels are ornamental stone fruits, but I much prefer investing time, water, and garden space on plants that produce food. When that food happens to be summer sweet peaches and apricots, well, all the better! The fruit of Prunus can be loosely or firmly attached to the seed, hence the terms freestone or cling varieties. Most stone fruits contain compounds which, when chewed up, generate hydrogen cyanide, but don’t let that scare you off. This is mostly true of the seeds, not the fruit, and the amounts are too small to do anything but fuel sensationalists. Propagating Prunus If you plant the pit from a grocery store stone fruit, you probably won’t get offspring that looks, behaves, or tastes the way the first fruit did. This is because most bare root fruit and nut trees available today are a hardy rootstock grafted onto a productive, flavorful fruit producer. Many of these plants are propagated by twig scions and cuttings taken from adventitious roots, to create clones. Because all of these fruit trees are members of the same genus, they can be grafted onto one another and produce edible fruit. One variety of grafted tree, in particular, boasts 40 different types of stone fruit on the same tree! These botanical masterpieces are created by New York artist Sam Van Aken. He calls them Tree of 40 Fruit. You can find similar stone fruit trees, with 4 or 5 types of fruit, available in garden centers and catalogs. These are a great way to make use of a small space. How stone fruits grow Members of the Prunus genus are all perennial trees and shrubs descended from a Eurasian ancestor. As such, these trees are best suited to northern temperate regions, or climates with four seasons. If you want grow these productive, rewarding trees, be sure to select a variety that has a chilling hour requirement that matches your microclimate, otherwise, you might not get any fruit. Adding a stone fruit tree to your landscape is a lovely way to enjoy spring blossoms and summer fruit. There are many dwarf and semi-dwarf varieties that don’t take up a lot of room, and some can even be grown in large containers. Caring for stone fruits When you first get a bare root tree, you will need to select a site with lots of sunlight and good drainage. Dig a hole slightly wider than the spread out roots and as deep as the roots go. There is no need to dig any deeper or wider. If your soil is heavy clay, be sure to rough up the edges of the hole a bit, to make it easier for young roots to penetrate. Cover the roots with soil, making sure that the soil level is exactly the same as it was before, relative to the tree’s trunk. Covering the graft area or trunk with soil can lead to rot and death of the tree. Water it in well, gently tamping down the soil to remove large air pockets that would allow the roots to dry out. It is a good idea to provide a tree support for your young tree. The first year or two, you can improve long term production by removing spring blossoms. This frees the young tree to focus its resources on developing a strong root system. As the tree becomes better established, it is still a good idea to thin fruit for better size and flavor.
It is not unusual for a protective gummy sap to appear at pruning cuts and other wound sites. While these trees are dormant in winter, they are sprayed with dormant oil, to break the disease triangle of many common pathogens.
Corking (dried out fruit) can be prevented by making sure that the soil contains enough boron and calcium. Before adding soil amendments, be sure to get a soil test from a local, reputable lab. Over-the-counter kits are not yet effective enough to be useful. Properly maintained, Prunus trees are classified as low flammability plants, making them a fire safe addition to your landscape. Pests and diseases of stone fruits While each species has its own set of problems, most stone fruits must deal with attacks by aphids, mites, caterpillars, shot hole borers, glassy-winged sharpshooters, San Jose scale, Eutypa dieback, peach twig borers, naval orangeworms, mealybugs, and cucumber beetles. Diseases of stone fruits include cane blight, shot hole fungus, crown gall, brown rot, bacterial spot, peach leaf curl, and bacteria blast. Stone fruit trees use idioblasts to protect themselves, and you can apply fixed copper, sulfur, or Bordeaux mixture (Bt), each in their own way and time, to aid in protecting your stone fruit trees. [Never use sulfur on apricots.] Netting and tree cages can help protect the fruit from birds and squirrels, and sticky barriers are an excellent way to thwart crawling insects. The shear volume of fruit that a single stone fruit can produce makes them an excellent choice for the home garden. When harvesting your crop, remember than these fruits produce ethylene gas, which which ripen everything nearby. Add stone fruits to your foodscape for years of sweet summer deliciousness and beauty. Loquats are delicious, highly productive, broadleaf evergreen trees. Loquats, also known as Japanese plums, are native to Asia. These easy-to-grow trees are members of the rose family. 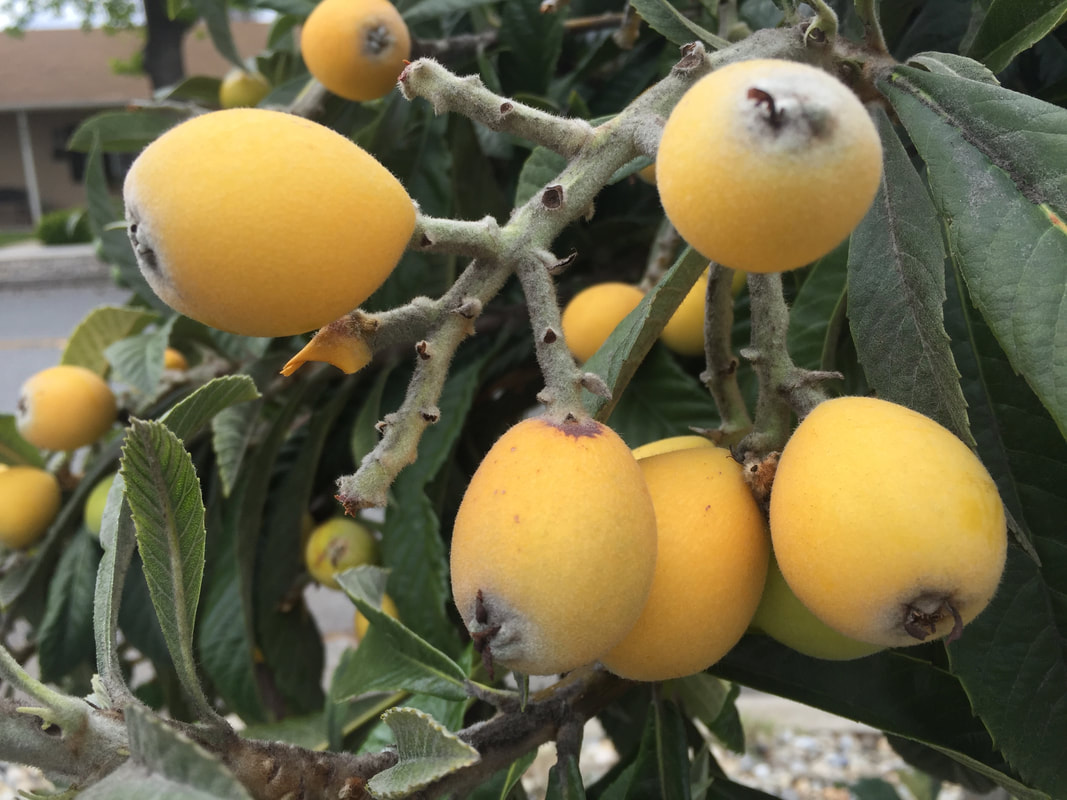 Loquats Loquat tree characteristics Loquat trees (Eriobotrya japonica) can reach 10 to 25 feet tall and across. Most specimens are smaller than that. In some cases, they look more like a spreading shrub. They offer lovely, fragrant white blooms in November and December, and can handle temperatures as low as 28°F. Leaves are elliptical, wrinkled, leathery, and toothed around the edge (margins). They are darker on top and lighter underneath. Smooth or slightly fuzzy yellow to orange fruits ripen in spring. These fruits contain one or more very large seeds and the fruit is delicious. These trees can make a bit of a mess when fruit drop time comes around. Loquat trees have a shallow root system, so care should be taken when digging nearby, and regular irrigation is helpful during the peak of summer. On the flip side, they cannot tolerate standing water.
Pests and diseases of loquat The loquat tree is resistant to most pests and diseases. Fireblight, various rots, cankers, blights, and leaf spot may occur. Aphids, caterpillars, fruit flies, and scale insects may feed on your loquat tree. This attractive, rounded tree provides beauty at a time when many plants are sleeping through winter. The fruit can be eaten fresh, or used to make jams, jellies, or pies. I’m ordering mine today! UPDATE: Loquat seed toxicity
It was recently brought to my attention that loquat seeds can be toxic to dogs and other animals. I did some research and this is what I learned:
So, once again, too much of a good thing can be a bad thing. If your dog eats a few loquats, the worst thing that will happen is a little stomach upset. If your dog is crazy in love with loquats, you should probably limit their access to the fruit. Nothing says summer like a sweet, juicy, sun-warmed nectarine. The good news is, you can probably grow a nectarine tree in your yard, along a fence, or even in a large container. 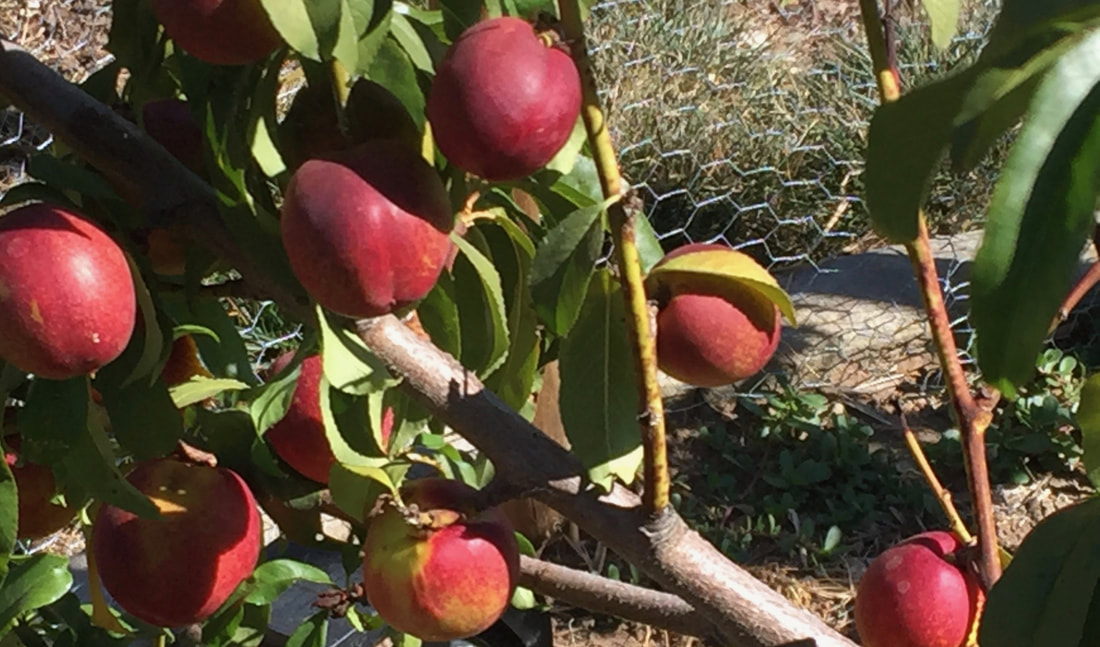 Nectarines Nectarines are delicious fresh, stewed, baked, and sautéed. They freeze well and make excellent jam. Nectarines (and peaches) are so useful and tasty, that they have been cultivated for thousands of years. First grown in China, nectarines and peaches have been around for 2.6 million years! What’s the difference between nectarines and peaches? Fur. The only difference between a nectarine and a peach is a single gene that produces fuzzy skin (dominant) or smooth skin (recessive). A nectarine (Prunus persica var. nucipersica or var. nectarina) is simply a peach without the furry skin (trichomes). Nectarines and peaches are both members of the rose family, along with apples, pears, blackberries, raspberries, and strawberries. Nectarines and peaches, like apricots, cherries, plums, and almonds, are stone fruits. There are both cling and freestone varieties, and you can find yellow and white peaches and nectarines. [Yellow fruits are more acidic than white fruits.] Peaches and nectarines are also in a group of plants that use specialized cells for storage, manufacturing, and as weapons. These cells are called idioblasts. Don’t worry, though, they can’t hurt you. 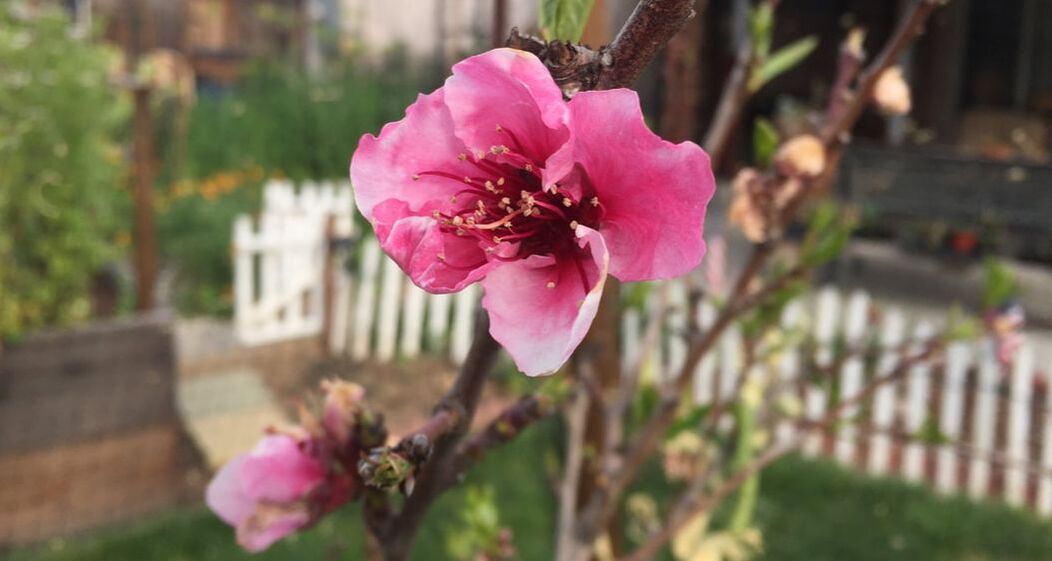 Nectarine blossom Nectarine characteristics The main reason you do not see nectarines in the store year round is because they do not ship and store well. While nectarines are usually smaller, firmer, and more aromatic than peaches, they also bruise more easily. [All the more reason to grow your own!] A standard nectarine tree can reach over 30 feet in height, semi-dwarf varieties reach 12 to 15 feet tall and wide, while dwarf nectarine trees are only 8 to 10 feet and they can be pruned for an even smaller size while still producing a good crop. Nectarines can also be espaliered, if you only have a narrow space along a wall or fence. Each spring, your nectarine tree will produce lovely pink blossoms, followed by a delicious crop of fruit, and then all the leaves fall off (making dormant pruning so much easier!). Before you jump on the nectarine bandwagon, however, that yummy fruit can only occur if enough chill hours are accumulated each winter. Nectarines and chill hours Chill hours are an accumulation of temperatures between 32°F and 45°F. Somehow, trees keep track of this information. I have no idea how. If enough chill hours are not accumulated, nectarine flowers and buds will not form properly, which means you might not get any fruit. Different nectarine varieties have different chill hour requirements, so it is important that you select a variety appropriate to your location. Do not trust your local box store to sell you the right one. Most nectarine trees need 650 to 850 chill hours. You can learn your own chill hours on my chilling hours page. Nectarine site selection Once you have found a variety that matches your garden’s chill hours and your personal tastes, you will want to select a site with excellent drainage and plenty of sunshine. Also, nectarines prefer a soil pH of 6.5. In areas with alkaline soil, acidification may be needed for the best results. Nectarines, like peaches, are self-fruiting, so you do not need multiple trees for pollination. While you may be tempted to grow a nectarine tree from a pit, think twice about that. Most commercially grown nectarines are actually from two different trees: a root stock and a fruit producing tree. These two trees are grafted together to take advantage of the benefits provided by a strong root system and good fruit production. Your store bought nectarine pit may never produce fruit at all. Or it might. You are far better off buying bare root stock from a reputable producer. Nectarine trees can also be started from twig cuttings called scions. How to plant a nectarine tree Bare root trees are best planted in winter and early spring. Examine the root system for signs of disease or damage. These bits should be cut out. If your bare root tree is not going to be planted right away, it should be soaked in a bucket of water for 6 to 12 hours, but no longer. [Plants can drown, too, you know!] When you are ready to plant, dig a hole that allows the roots to spread out freely. If the soil is heavy clay, be sure to rough up the edges of the planting hole. Containerized and balled trees should be given a hole slightly larger and the same depth as the container or root ball. In any case, it is very important that the soil level remains the same. Add soil around the roots and water thoroughly. This removes air pockets that can dry roots out before they ever get a chance to grow. Mulch around your new tree and water regularly until the root system has become established. The first 2 or 3 years, flowers should be removed, to encourage a strong root system. I know it’s hard, but you’ll thank me later. Feeding and watering nectarines Nectarine trees use a lot more nitrogen than other fruit and nut trees. You can use blood meal, ammonium sulfate, or commercial 10-10-10 fertilizer to feed your nectarine tree. Young trees will need a total of 10 to 15 lbs. of manure or 1/4 lb. of urea, spread out over the months of spring and summer. Mature trees should receive twice that amount. If your nectarine tree doesn’t get enough nitrogen, you will start seeing red areas on the leaves. Nectarines are shallow-rooted trees, so they are susceptible to water stress during the summer. You can protect your tree with deep irrigation and a thick layer of mulch, just make sure that the mulch does not actually touch the tree trunk. If your nectarine tree becomes too water stressed, it will develop a condition called bitter fruit which is exactly how it sounds. The problem is, once bitter fruit occurs, the tree will forever after produce fruit that is bitter. If you keep your nectarine tree properly irrigated throughout the growing season, you can improve the taste and sweetness of the fruit with deficit irrigation, just before harvest. Another technique used to improve both the quantity and quality of fruit is called cincturing, or scaffold girdling. This is not the same thing as girdling your nectarine tree with the weedwacker. Get help from an experienced arborist, rather than trying this on your own, as it can kill your nectarine tree. Nectarine pruning and thinning Nectarine trees perform best when they are trained in what’s called an open center system. This is exactly what it sounds like. Each winter, you will want to remove 50% of the previous year’s new growth. This will stimulate fruit production and maintain a reasonable tree size. One problem that commonly occurs with nectarines and peaches is that trees produce more fruit than they can support. This can mean broken branches. Proper pruning and fruit thinning can save your tree. Thin fruits to 6 inches apart when they are the size of a marble. If you think there is too much fruit on a branch, you can always prop it up with a board or other support until after the fruit is harvested, and then prune and thin more heavily next year. Nectarine pests and diseases The most common diseases faced by nectarine trees here, in San Jose, California, are peach leaf curl and brown rot. Nectarine are also susceptible to crown gall, bacterial blight, citrus blast, bacterial spot, stem blight, and shot hole disease.
Peach twig borers are a common pest of nectarines. Peach twig borer infestations often appear as dead twigs, called flags or shoot strikes. Luckily, many beneficial insects, such as braconid wasps, mealybug destroyers, and tachinid flies love to eat peach twig borers, so avoid using broad spectrum pesticides. Armyworms, earwigs, eugenia psyllid, Japanese beetles, mealybugs, San Jose scale, green fruit beetles, Mediterranean fruit fly, armored scale, eriophyid mites, katydids, and birds are also common pests. [Who can blame them?] You can use tree cages to protect your crop from birds in summer. Kaolin clay can be applied to individual fruits to protect against some pests.
In fall, after harvesting your delicious crop and before the first heavy rain, apply fixed copper to control shot hole fungus, fertilize plants one last time, and give your tree a deep watering. After all the leaves fall, move them away from your nectarine tree. Destroy or compost the leaves to prevent the spread of apple scab. As always, remove mummies as soon as they are seen. Bordeaux mixture, dormant oil sprays, and fixed copper sprays should be used in fall and winter to protect against San Jose scale, shot hole disease, and other fungal diseases. You can prevent brown rot with a spring fungicide application. Crawling pests can be blocking from reaching fruit by wrapping the tree trunk with a sticky barrier. Harvesting nectarines Nectarines are ready for harvest when they come away from the tree easily with a gentle twisting motion. The fruit will bruise easily, so be gentle when handling ripe nectarines. If you install a nectarine tree this spring, you can expect to have a tree for 7 to 20 years, depending on where you live. Since each nectarine tree can produce up to 65 lbs. of fruit each year, or approximately 200 nectarines, you will have plenty of delicious fruit to go along with a lovely tree. Plant one today! You can grow fruit and nut trees in surprisingly small areas using a method called espalier. Espaliered trees are trained to grow in a two dimensional form, usually along a fence or wall, on a trellis, or between support wires.  Pear tree espaliered into a candelabra (Matthew Trump) CC BY-SA 3.0 We get the word espalier from the Italian word spalliera, which means ‘something to rest your shoulder against.’ This was back when the word referred to the structural framework used to support the initial growth of the tree. Now, we say that a tree trained in this way has been espaliered. Espalier basics Put simply, a tree is espaliered by cutting it back to a specific height, usually 18 inches, and then retaining only two or three buds. As these buds grow out into branches, they are trained along a trellis, fence, or support wires, while still flexible. As these branches mature, they become rigid. Buds on these branches are selected for the next level of growth and all other buds are rubbed off. Over time, a simple or complex structure can emerge that takes up very little space, but that can produce a surprising amount of food.  Belgian fence espalier in winter (Andy VanCleve) CC BY-SA 3.0 Benefits of espalier tree training Tree training, in general, provides several benefits to the trees and to homeowners. Dead, diseased, and crossed branches are removed, the tree is opened up for better air circulation and sun exposure, and the likelihood of broken branches due to an overly heavy crop is reduced with proper tree care. Espalier training takes it a step further by controlling the size and location of where a fruit or nut tree can be grown successfully. A mature standard sized fruit tree can get quite large. Standard apple trees are 30’ across and 30’ tall, semi-dwarfs reach 20’ high and 20’ across, and even dwarf trees will grow to 15’ tall and 15’ wide unless they are pruned for size. Many homeowners simply do not have that kind of space available. This is where espalier training is particularly useful. In addition to keeping trees healthy, espaliered trees offer additional benefits:
How to espalier a tree The first step in espaliering a young tree, shrub, or woody vine, is to transplant it 6 to 12 inches from a wall, fence, or trellis. This spacing is important for air flow and pest control. You can then install eye bolts into masonry joints, galvanized eye screws into a wooden fence, or build a trellis to support and train your tree. Starting while the tree is small, prune it to create a central stem (trunk). As branches emerge, only paired horizontal branches are retained. All other new buds are pruned away or rubbed off. These paired branches are trained to grow along the same horizontal plane, normally along an support wire or wooden framework. Grapes have been grown in this way for thousands of years.
There are several variations on the espalier theme:
Which trees can be espaliered? There are many different edible trees, shrubs, and woody vines that be trained into an espalier. These plants include almond, apple, Asian pears, crabapple, citrus, fig, loquat, nectarine, olive, peach, pear, and plum. Many different ornamental plants, such as yew, privet, magnolia, winter jasmine, and camellia can also be espaliered.  Free-standing stepover espaliered fruit tree (Graham Bould) Public Domain Espaliered trees can be used as hedges, walls, or yard art. With skill and patience, free-standing espaliered trees can create a big impact.
Tree hugging may be a popular way of protecting old growth forests, but tree rubbing is probably the easiest way to remove new growth before you need to break out the pruners. Which buds should you keep?
Each spring, trees and shrubs put out new dozens, hundreds, or even thousands of new buds. Some of these buds will produce new branches that will result in fruit or nuts. And some of those buds will grow into branches that are structurally unsound, or that reduce air flow, increasing the likelihood of fungal disease. To decide which buds to keep, you need to look at the overall structure of the tree or shrub, with an eye for its mature size. The type of tree training you use will depend on the tree species, your microclimate, and your own preferences. When to remove unwanted buds? Life has a way of growing rampantly wherever it can, leaving the excess to die off. You can allow your fruit and nut trees to grow at will, but that will reduce your harvestable crop and increase the odds of pests or disease occurring. Since each spring bud uses water and nutrients, the longer you leave them on, the less resources your tree has for other areas of growth. It also means putting more effort into pruning unwanted growth later in the season. Pruning vs. rubbing These tiny new shoots are very delicate. If any of those buds are in locations where new branches would be inappropriate, you can wait for them to grow, or you can simply wipe them off with your hand. Rubbing your hand up and down the trunk easily knocks off all that new growth. You can also use this time to check around the trunk for suckers, and remove them, too. So, each spring, have a stroll through your garden or landscape and give your trees and shrubs a good rub down. You’ll be glad you did, come summer! Why do people paint their trees white? Is it a rural fable? A picket fence prank? Or, is there real science behind the idea of painting tree trunks white? 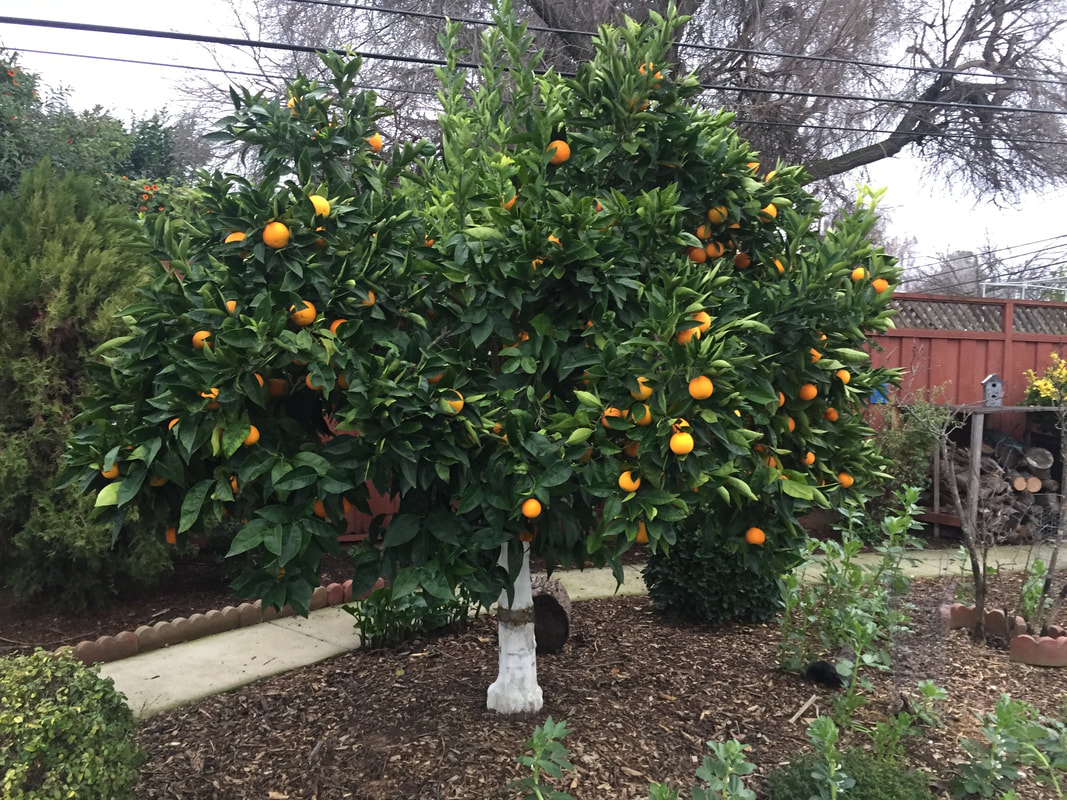 Valencia orange tree protected with whitewash and sticky barrier. It ends up, there are very good reasons for painting both the trunk and the upper sides of exposed branches with a certain type of white paint to protect against sunburn, pests, and disease. Benefits of whitewashing An annual application of whitewash reduces sunburn damage by reflecting sunlight away from the tree. Sunburned bark frequently splits and curls, providing easy access for numerous pests and diseases. This is especially true for borers, such as shot hole borers and flathead borers, as well as moth larvae, beetles, and horntails. Whitewashing has also been found to discourage rodents, such as voles, mice, and rabbits, from gnawing on the trunk. The paint also helps protect against frost damage. What type of paint should be used? Whitewashing is one of those ‘too much of a good thing is a bad thing’ situations. Using enamel (the wrong paint) can kill young trees. So can using latex (the right paint) if it is undiluted. Traditionally, whitewash was made from slaked lime and chalk. It was a poor man’s paint that tended to rub off onto your clothing if you brushed against it. While this material has mild antibacterial properties, mixing it can be messy. When you head to the paint store, or go digging around in your garage, make sure that you only use interior latex, and not enamel or exterior latex. Exterior paint may contain harmful additives. The important thing to look for is the "VOC" - these letters stand for "volatile organic compounds". These compounds can be dangerous to trees and humans. Paints listed as being VOC-free or being low in VOCs are better choices, health-wise. Whitewashing should only be done with interior latex paint that has been diluted with water. Use a mixture of half water and half interior latex paint. 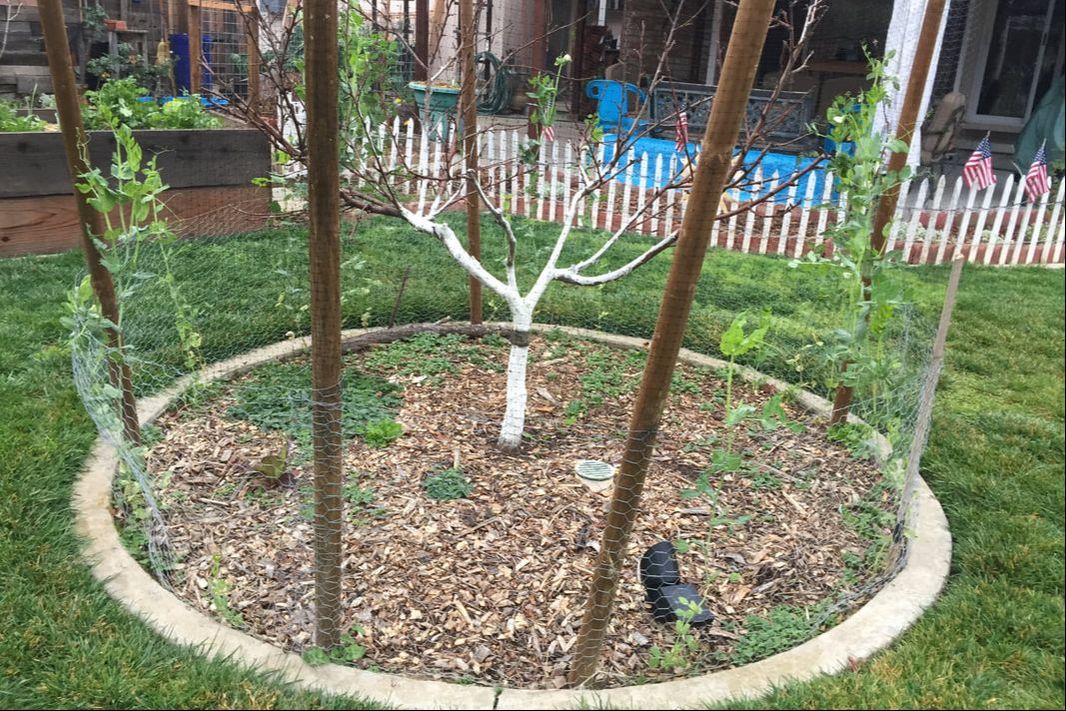 Whitewashed nectarine tree How much of a tree should you paint? Newly planted bare root trees should be painted completely. To protect mature trees, pull the soil away from the trunk to a depth of 2 inches and paint the entire surface to a height of 2 to 4 feet, depending on the tree. After the paint has dried, put the soil back in place. The upper surfaces of branches that are exposed to sunlight should also be painted.
When should I whitewash my trees? Whitewash is applied after dormant pruning and dormant oil spraying are complete. This is usually in January or February, but you can whitewash your trees at any time that will allow the paint to dry. After it has dried, you can give your trees added protection from crawling pests with a sticky barrier.  Unmaintained whitewash and sticky barriers are useless. (Kate Russell) The paint and the sticky barrier will need to be reapplied each year, to maintain their usefulness.
|
Welcome!You can grow a surprising amount of food in your own yard. Ask me how! To help The Daily Garden grow, you may see affiliate ads sprouting up in various places.
You can also get my book, Stop Wasting Your Yard!  Index
All
Archives
July 2024
|


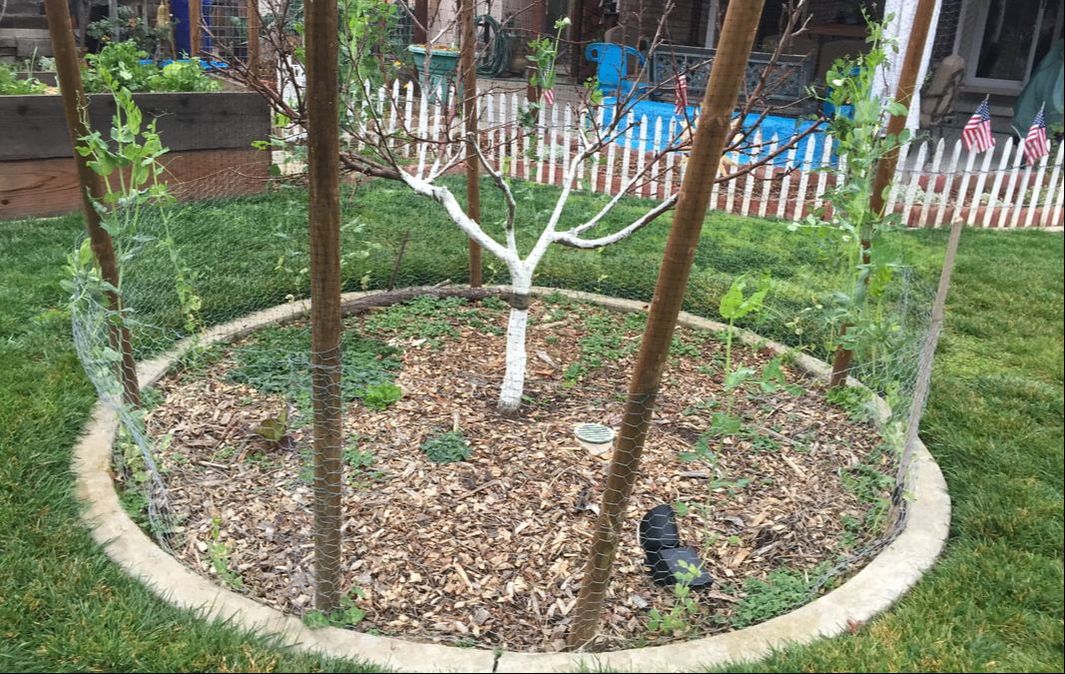
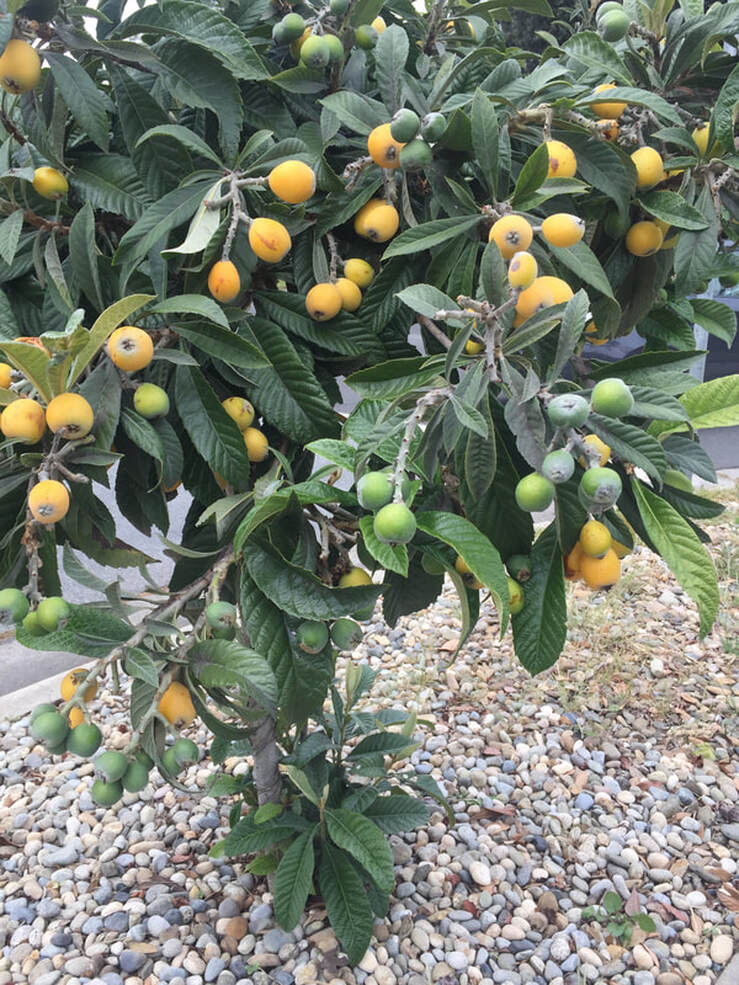
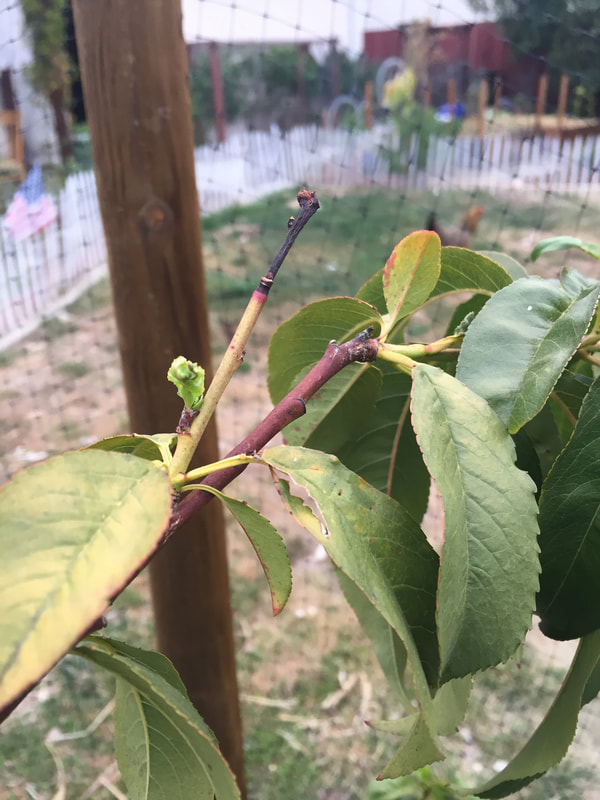
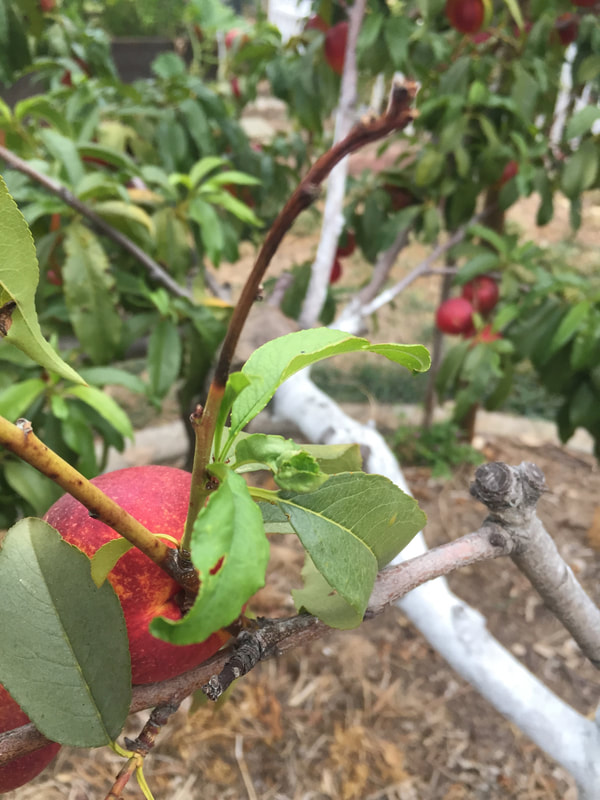
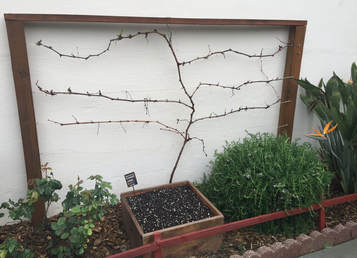
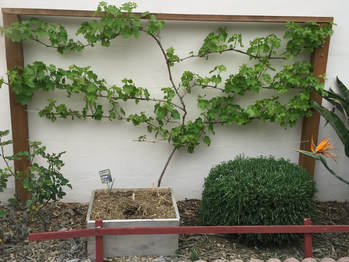
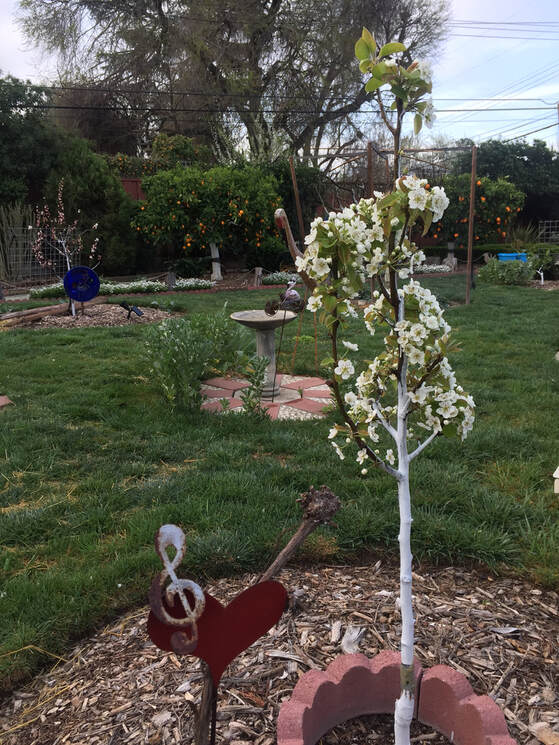
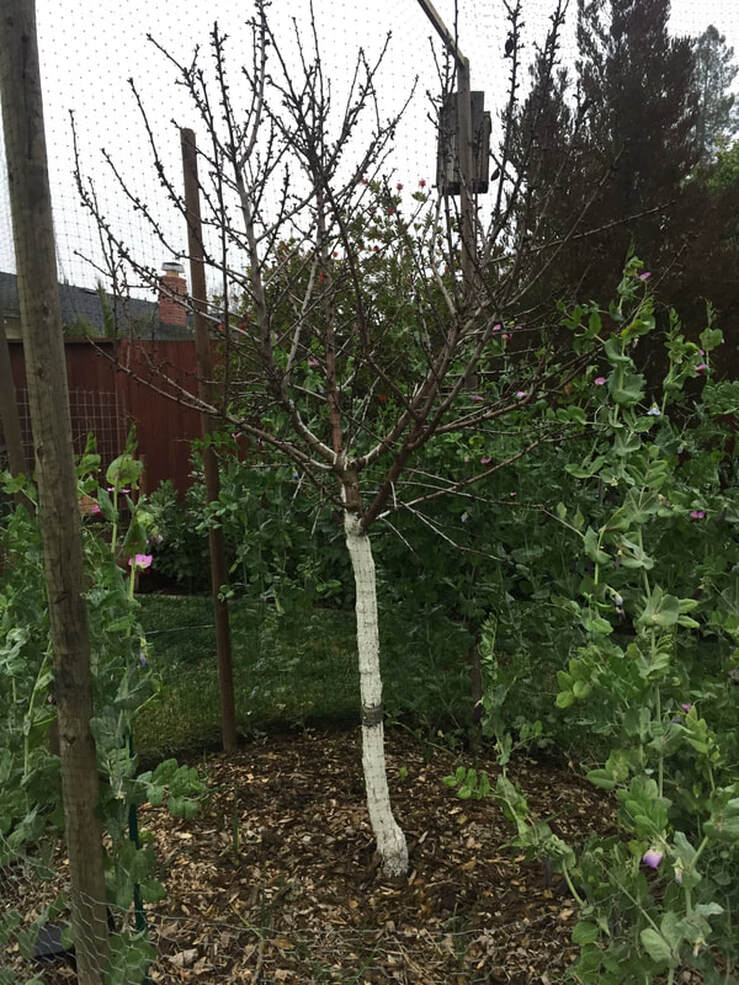
 RSS Feed