|
In light of the 2016 $1 million potato photo sale, I thought I would share the amazing story of potatoes. 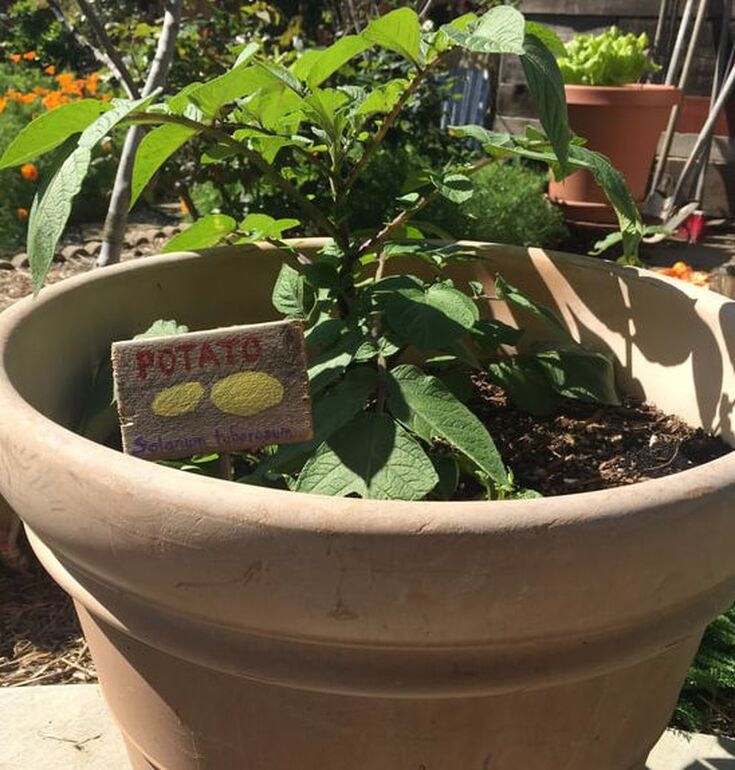 Potatoes growing in large container Food storage and geophytes Potatoes are tubers. Tubers are are type of geophyte. Geophytes are plant organs used to store food and water. They are also used in asexual reproduction. There are several types of geophytes: bulbs, corms, and everything else. That “everything else” is what we call tubers. Potatoes and yams are stem tubers. Stem tubers can emerge from modified stems. These stems can start out as stolons or rhizomes. Stolons are stems that grow at or just below the soil surface as “runners”. These “stems” are converted into adventitious roots at the nodes and what would have been a bud above ground becomes a spud below. Rhizomes are 'runners' that connect a parent plant to its offspring. A modified stem The “eyes” seen on a potato are actually stem nodes. Within each potato, you will find the same plant cells you would find above ground: vascular bundles, pith (spongy tissue), and cortex (outer tissue). Now here’s the funny part. While our standard spud grows from stem tubers, sweet potatoes grow from root tubers. The internal cell structure is very different. Root tubers have no nodes. That is why sweet potatoes have a more elongated form. At one end, you will find crown meristem tissue, which grows into stems and leaves. At the other end, called the distal end, the tuber produces roots. But enough of that, let's start growing some potatoes! Commercial potato farming Growing potatoes is surprisingly easy and I urge you to give it a try. In his book, The Botany of Desire, Michael Pollan describes how one potato farmer would not feed what they had grown commercially to their family, due to all the fungicides, herbicides and pesticides that are applied to commercial crops. That was a little misleading, since those chemicals are heavily regulated and rarely last long enough to be found on the food we eat. The real reason behind growing an untreated patch of potatoes was so they could enjoy the potatoes whenever they wanted them, rather than having to wait for the chemicals to dissipate. Personally, I don't use chemicals. How to grow potatoes While potatoes can can certainly be grown from spuds bought at the grocery store, this is a bad idea. Foods bought in the store are safe for human consumption, but they are not guaranteed to be free from common garden pests and diseases. You are far better off buying certified “seed potatoes”. The easiest way to grow potatoes is in a barrel, raised bed, or in a tower. If potatoes are planted in the ground, you will be finding rouge spuds for many years. Also, digging them up from the ground is, let’s face it, work. Growing potatoes in containers makes harvesting significantly easier and they make nice summer patio plants! To begin, fill the bottom of the container(s) with 4" of loose, moistened soil. Cut seed potatoes into 2 inch chunks, making sure that each chuck has several eyes (small seed potatoes can be planted whole). Place the chunks 6" apart and cover them with 3" of moistened soil and repeat the process until the container is filled. Water lightly and be sure to place planters where they will get lots of sun. To build a tower (which works nicely for strawberries and herbs, too), simply take a section of chicken wire or hardware cloth and create a cylinder. Landscape cloth can also be used, but it may fall over. You can also grow potatoes indoors, near a window, if it gets enough light. Potatoes need loose, well-drained soil and frequent, light watering. Never let potato plants sit in water, they will rot. Potatoes use a lot of nitrogen and potassium, and they prefer acidic soil (as low as 4.8 pH). At first, it will look as though nothing is happening. As a gardener, you know the value of patience. With time, water and sunlight, tubers will send out roots and stems that will pull nutrients from the soil and create carbohydrates out of sunshine. (Don’t you just love photosynthesis?) Before long, the container will be filled with lush, green growth. Aside from occasional watering and feeding (aged compost works great!), that’s all you have to do until it completes the season’s life cycle. Harvesting potatoes Eventually, the lush above ground growth will start to die off. When it starts looking ragged, dump the contents of the container out on a tarp and remove the mature potatoes. Now comes the really cool part: mix the remaining soil with some aged compost and do it all again with the immature spuds! I have been growing potatoes from the same batch of seed potatoes since 2011. To me, homegrown potatoes taste far better than store bought spuds. Pests and diseases of potato We’ve all heard about the Great Potato Famine. Over one million people died and another two million abandoned Ireland, all because of potato blight. Potato blight causes the tuber to rot in the ground. Other potato diseases include charcoal rot, corky ringspot, cucumber mosaic, curly top, fusarium wilt, leafroll, pink rot, sclerotium stem rot, cankers, verticillium wilt, and white mold. Many of these diseases can be prevented with good drainage and proper spacing between plants. Common potato pests include aphids, beet leafhoppers, cutworms, flea beetles, potato psyllids, potato tuberworms, silverleaf whiteflies, Colorado potato beetles, Jerusalem crickets, and wireworms. But don’t let these threats stop you from creating your own potato patch. 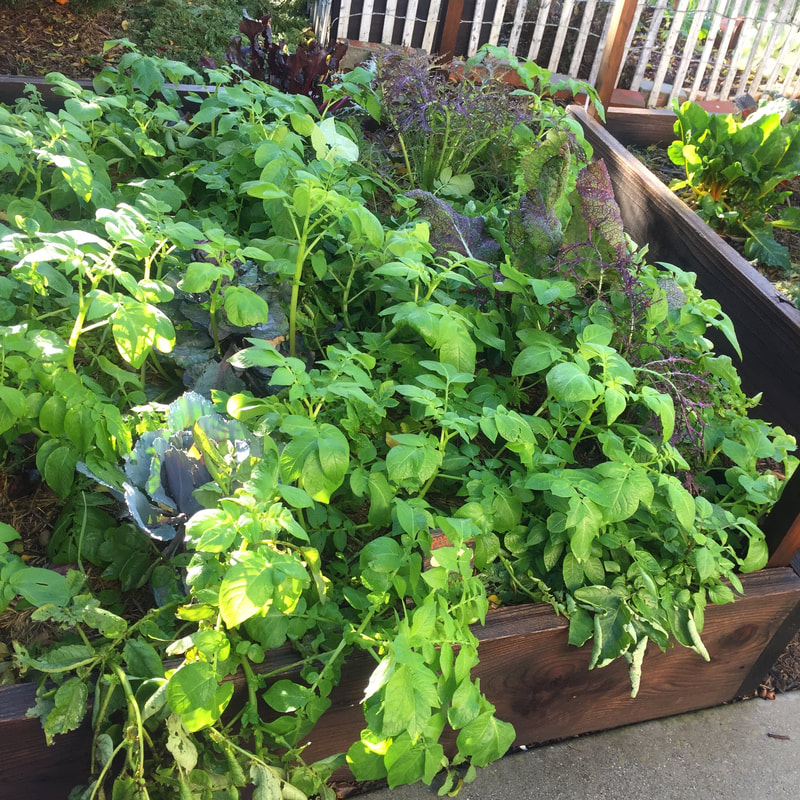 Potatoes grown in a raised bed with various mustards and a couple of cabbages Start your own potato patch today!
With a name like bottom rot, you know it won't end well. Bottom rot is a fungal disease of lettuce and other leaf vegetables caused by the Rhizoctonia solani fungi. This is the same fungus that causes damping off. It lives in the soil and can be a big problem in warm, moist conditions. Plants affected by bottom rot In addition to lettuce, bottom rot can wipe out your Chinese cabbage, escarole, broccoli, radish, collards, Brussels sprouts, cauliflower, and turnip crops. The Rhizoctonia solani fungus also attacks potatoes, onions, beans, and corn. _bolrot.jpg) Early signs of bottom rot on iceberg lettuce (Rasbak) CC BY-SA 3.0 CC BY-SA 3.0 Symptoms of bottom rot
At first, all you may see is some wilting of outer leaves. Closer inspection will show reddish-brown, sunken lesions on the midribs of leaves touching the soil. Brown or white fungal tissue may be visible, and lesions may discharge a light brown ooze. Leaf spots and brown lumpy bits may also be present on the plant. The fungus grows inward, toward the center of the head or body of the plant. The damaged plant tissue then becomes susceptible to other soft rots, causing a total collapse of the plant. Controlling bottom rot Fungicides are ineffective against bottom rot, so prevention is your only option. These tips will help protect your leafy bottoms:
As with all bottoms, keep them dry, and they will be happy. If you have never tasted a stevia leaf, you probably won’t believe the level of sweetness this herb provides. It just doesn’t seem possible. A single, delicate green leaf placed on the tongue does nothing. Start chewing and you’d swear you just downed a spoonful of sugar! Let’s find out if this is a plant you can add to your garden or foodscape.  Stevia (Robert Lynch) Public Domain Native to Paraguay and the surrounding tropical regions, stevia (Stevia rebaudiana) is also known as sweetleaf. Stevia is the model used to create several ‘natural' sweeteners, except that most of them are not what we gardeners would think of as natural. The majority of these stevia plants are grown in China and the leaves are so highly processed that there is little left besides the sweetness. [Being 200 times sweeter than sugar, stevia packs a powerful sweetness punch, processed or not.] Using the unprocessed leaves as a sweetener, on the other hand, adds several different compounds, called glycosides, plus antioxidants, and we all need those! The stevia plant Being a tropical member of the sunflower family, stevia loves the heat. This tender perennial prefers USDA Zones 9 - 11, and is grown as an annual elsewhere. Stevia grows best under the same conditions as basil. Like basil, stevia needs some protection from the high heat of our California summer. Plants can reach 1 to 4 feet high and wide, depending on temperatures and the local microclimate.  Flowering stevia (Ethel Aardvark) CC BY 3.0 How to grow stevia
Stevia plants can be grown from seed, but results are hit-and-miss, as germination is tricky. If you decide to try your hand at seed starting stevia, begin indoors, 8 to 10 weeks before your last frost date. Seeds germinate best at temperatures between 68 and 75°F. Fill pots with a light potting soil or peat mixture. Press seeds into the soil and cover with perlite. This will protect seeds from the air and help the soil retain moisture, but provide seeds with the light they need to germinate. To avoid flooding seeds into the corners, water by misting heavily, at first. Like peppers, stevia plants benefit from the use of a waterproof germination mat. This gives them the heat they need to get started. Cover the pots with plastic and check twice a day to ensure that the top 1/2-inch of soil remains moist until germination occurs, which should take 10 to 15 days. Stevia needs well-drained soil. This makes them an excellent choice for large containers or raised beds, where high quality potting soil provides plenty of macropores and micropores in the soil. During summer heat, these plants need almost daily watering. Allow the soil to almost go dry before watering again. If you allow your stevia plants to go to seed, you can collect seed heads or let them grow where they fall. If you collect the seeds, discard light-colored specimens, as they are probably not viable. Most often, new plants are started from rooted cuttings. Stevia pests and diseases Outside of greenhouses, cutworms and sugar addicts are stevia’s only serious threats. In close quarters, aphids, whiteflies, and thrips can can become a problem. Harvesting stevia You can use stevia leaves fresh from the plant or you can harvest and dry them for later use. The sweetness remains unchanged in either case. Leaves are at their sweetest just before flowering. Once the plant flowers, leaves do not taste as good or as sweet. Each plant can provide you with approximately 1/2 pound of dried leaves each year. Using stevia Stevia is used to sweeten teas and other beverages, fruits, yogurt, custards, salad dressings, and many other liquid-based foods. Stevia can be used to replace some, but not all, of the sugar in baked goods. [Sugar has certain chemical properties that are needed in baking that stevia cannot provide.] Before adding even more sugar to your diet, how about adding stevia to the garden, instead? Earworms. Those songs that get caught in our mind and play over and over and over… These are not those earworms, but they can be just as annoying. You don’t grow corn, you say? Don’t think that your garden plants are off the hook, just yet. The larval form of the corn earworm (Helicoverpa zea) goes by several names, such as cotton bollworm and tomato fruitworm. Tomato?!!? Yes, this is the dreaded tomato fruitworm. And these innocuous-looking moths can migrate as far as 400 km (or nearly 250 miles) to get at many favorite garden plants, including melon, beans, spinach, soybeans, peas, okra, squash, and sweet potato.  Corn earworm feeding on corn (Jack Dykinga) Public Domain Corn earworm description Adult moths are a little more than an inch across, and pale tan to light brown. The front wings can have various markings, and the hind wings are dirty white with a dark gray band at the tip. These moths are often found early in the worming, crawling in the lawn, as they get warm enough to start moving. [If seen, stomp on them!] Eggs are spherical and slightly flattened, with ribbed lines running from end to end. They look a lot like cabbage looper eggs.  Corn earworm moth (Wikipedia) Public Domain Larva start out a creamy white color, with a dark head. They have distinct, sparse hairs (tubercles) with dark spots. As the larva feed, the color changes to greenish-yellow to nearly black, depending on the food supply. Fine white lines can be seen along the body. The hairs and the spots remain. On some individuals, stubby bristles or spines can be seen with a hand lens. Corn earworm lifecycle Tiny pale green eggs turn creamy white, and then yellowish or gray. They are laid singly on upper and lower surfaces of leaves, leaf hairs, and on corn silk. They develop a reddish-brown ring within 24 hours. Eggs darken in color just before hatching, usually less than 72 hours after being laid. Larvae go through 4 to 6 instars, or developmental stages, all the while feeding heavily. In fact, corn earworm larvae are a brutal bunch. In addition to attacking your tomatoes, they will also attack and feed on other insets, especially butterfly and moth larvae, including their own kind. After 12 to 16 days, the larvae enter a pupal stage. If the soil is moist enough and temperatures are warm enough, an adult moth will emerge to begin the cycle again. A single adult female corn earworm moth can lay up to 2,500 eggs in her lifetime. .jpg) Corn earworm eggs (USGS Bee Inventory and Monitoring Lab) Public Domain Corn earworm damage Adult moths feed on nectar and pollen, but they are not the problem. It is the larval stage that causes all the damage. Being polyphagous, corn earworm larva eat many different things. And you won’t even know they are there until it is too late, unless you look very closely. The larvae feed inside the fruit, so it’s not until you cut into it or take a bite that the pest is discovered. Yuck! Also, larvae may move from fruit to fruit, leaving behind a wake of squishy, watery digested insides filled with frass and shed skins.  Corn earworm eating unripe tomato (Flex) CC BY-SA 3.0 Damaged fruit tends to ripen prematurely and the feeding action makes plants susceptible to other problems, including fungal diseases and mold growth. Because the larvae are inside the fruit, control is difficult. Controlling corn earworms Protected within fruit, corn earworms are tough to get rid of. Making matters worse, these pests have developed a resistance to our chemical arsenal. This means that integrated pest management must be used instead. Integrated pest management (IPM) is an approach that uses many sustainable methods to provide the least amount of damage. IPM practices that reduce the damage caused by corn earworms include:
Monitoring plants regularly for signs of eggs of young larvae can help you protect your tomato, corn and other garden plants.
Did you know that plants use the saliva of their attackers to figure out which defense chemicals to produce? Young sunflowers track the sun across the sky, reaching new heights with every passing day - except, sometimes they don’t. Sometimes, a small injury can become infected and a black rot spreads around the base of the flower, finally engulfing it in a black goo that dries and hardens into a smelly shadow of what might have been. What causes this, and can it be prevented?
Head rot, also known as pin rot, is a disease of sunflowers, lettuce, and broccoli, caused by the Pectobacterium carotovorum, subsp. carotovorum and P. atrosepticum bacteria. Symptoms of bacterial head rot The first symptom of bacterial head rot is nothing more than a small, brown, greasy or water soaked looking area on the surface of a cluster of unopened flowers or leaves. These lesions are usually seen at the sight of mechanical injury caused by bird and insect feeding, hail, or falling twigs. Bacteria enter the damaged tissue and that’s where the infection begins. Affected areas turn from brown to black as the infection spreads into surrounding plant tissue. There is a distinctly bad smell, similar to rotten potatoes, but it is rare for secondary fungal growths to occur when head rot is present. If the bad smell is absent and other bacterial and fungal infections are present, the infection is more likely to be caused by Alternaria fungi. Bacterial head rot prevention and control Cool winter and spring temperatures combined with prolonged periods of rain, fog, and dew provide the perfect medium for bacterial head rot pathogens. This means good air circulation between plants can go a long way toward preventing this disease. That’s a good thing, because chemical sprays and other treatments have not been consistently effective in preventing bacterial head rot. The best way to prevent this problem in your garden is to start with resistant cultivars, such as broccoli with dome-shaped heads, space plants properly, and avoid overhead watering. A cloche can protect young plants from cold, wind, heavy rain, and many small pests. Similar to the women’s hat of the same name, a cloche is generally bell-shaped, but it doesn’t have to be.
Solid-bodied cloches can provide protection for tender plants against caterpillars, snails, aphids, and many other pests. For a cloche to be effective against chickens, squirrels, and other larger pests, it has to be very sturdy and anchored in a way that can withstand repeated attacks. DIY Cloches While there are many sizes and shapes of cloche available for purchase, you can easily make your own. The most common DIY cloche suggestion is to use soda bottles or milk jugs by cutting off the bottom of the jug and using the lid to ventilate the cloche. The only problem with these ideas is that they add even more plastic to your garden soil.
Heat-loving plants, such as tomatoes, peppers, basil, and eggplant, get a much better start when protected with a cloche early in their development. Seeds or seedlings can be placed under a cloche after the soil has been watered. Most of the moisture will stay trapped in the cloche, but occasional waterings will still be needed as the plant grows. Because a glass cloche holds heat and air within, it can get too hot and too humid for your young plant.
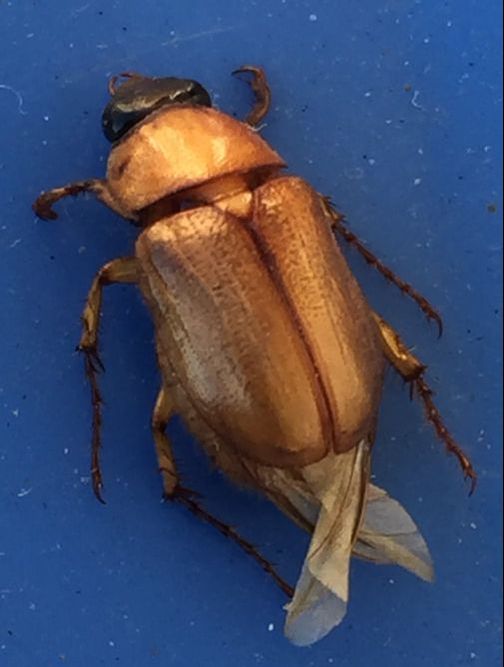
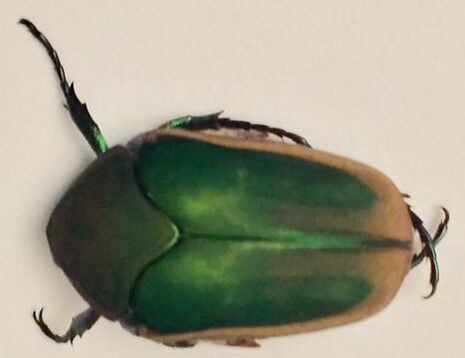
Occasional venting is necessary. To do this, simply slide a piece of wood or a rock under one edge of the cloche to increase air flow. In the evening, before temperatures start to drop, remove the prop and allow the cloche to sit flat on the ground again. If your cloche is made with fabric, venting is not needed. Once the plant outgrows the cloche, simply store it for another season or use it on another, smaller plant. Cloches can also be used to help sensitive perennials make it through winter. Whether you call them June beetles, Junebugs, or May beetles, these small, reddish-brown, clumsy flyers can be annoying. They get their name because of when they emerge. In some regions, these pests come out in June, while other places get them in May, hence the difference. 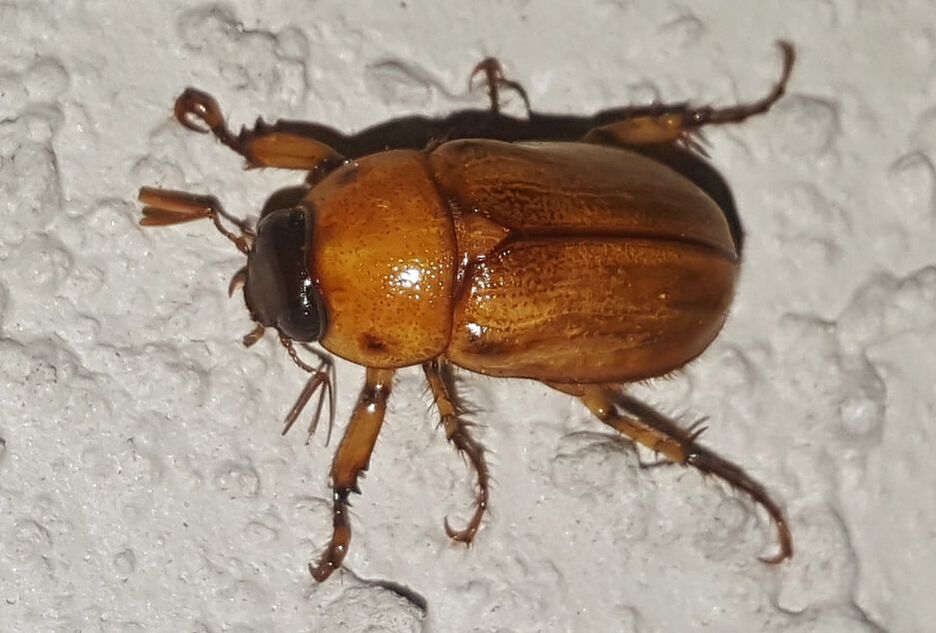 Junebug (Brett Hondow) Pixabay
Junebug damage
Adult Junebugs feed on leaves. They fly in from weedy areas to feed at night. During the day, they tend to hunker down in a shady spot or burrow into the soil until dusk. The damage they cause is similar to Fuller rose beetles, earwigs, and snails. Grasshoppers and caterpillars may also cause similar damage. The only way to be sure is to catch them in the act. The more insidious damage occurs underground as Junebug grubs feed on the roots of your lawn, especially ryegrass and bluegrass. Symptoms of infestation include brown, dying patches. If things get really bad, you can actually roll up patches of turf because it is no longer attached to the ground! Large numbers of Junebugs can defoliate a young tree in a matter of days. This is especially true for avocado trees, which may need to be protected with netting. Controlling Junebugs Commercial growers use blacklight traps when Junebug infestations cause too much damage. This is not recommended for home growers because the trap may attract more Junebugs than it captures. Heavy infestations are treated with an application of entomopathogenic nematodes. For the most part, home gardeners can’t do anything besides hand pick them whenever they are seen. Junebugs really are clumsy flyers, so it’s not hard to catch them. They are attracted to lights at night and often bump into windows and screens. When I catch them, I feed them to my chickens, who are very happy to help with Junebug control. If you have children, you can always gift them a butterfly net and offer a bounty on every Junebug they catch! Sometimes the best thing to do is to do nothing. Allowing land (or a garden bed) to go fallow means giving it a period of rest. It sounds right, doesn’t it? Rather than digging, planting, irrigating, fertilizing, and harvesting, simply allow the soil a season to itself, to recover from the demands we place upon it every day. Like most things we discuss here at The Daily Garden, it really isn’t that simple.  Raised bed allowed to go fallow for a season The truth is, soil never rests Fallow soil does what soil has always done. It provides structural support to root systems, it sequesters carbon, mineral nutrients, gases, and water. It also plays host to gazillions of chemical reactions and microscopic life forms. And the countless, amazing processes that take place in soil never actually stop and rest. [Unless, that is, it reaches sub-zero temperatures, and, even then, there’s probably still stuff going on!] Worms, insects, arthropods, mollusks, bacteria, fungi, algae, oomycetes, and chemical reactions continue, whether you plant tomatoes or not. Allowing soil to go fallow does, however, have certain benefits. Benefits of fallow ground Fallow ground enjoys uninterrupted natural processes that have evolved over billions of years. We know a lot, but we don’t know everything about everything. I like to believe that allowing soil to go fallow every once in a while gives time to life processes that we are not yet aware of, or that we do not fully understand. There are benefits to allowing land to go fallow that we do understand:
Different ways of doing nothing There are different ways of allowing land to go fallow. First and easiest, you can completely leave it alone. Second, and my favorite, is to top dress the area with aged compost and then leave it alone. You can plant a cover crop that will be used as a green manure. This is called green fallow. You can till the soil (to control weeds) but plant nothing. This is called black fallow. [Doesn’t that sound like a movie title? Black Fallow Returns!] But I digress. Cover crops on fallow land Cover crops, such as fava beans, vetch, oats, barley, or rye can be grown on fallow land as a soil amendment, rather than a crop. These plants are left to their on devices and are treated as a green manure at the end of their normal life cycle. This returns all the nutrients to the soil, along with some excellent organic material that improves soil structure. This is especially beneficial if you have compacted soil or heavy clay. Cover crops have the added benefit of converting some nutrients into forms more usable by the next season’s crop. Having plants growing on fallow land also reduces erosion and provides food and shelter for beneficial insects. Although, ground-dwelling bees would really appreciate a small patch of bare ground, and chickens are always happy to do their part against the resident insect population! 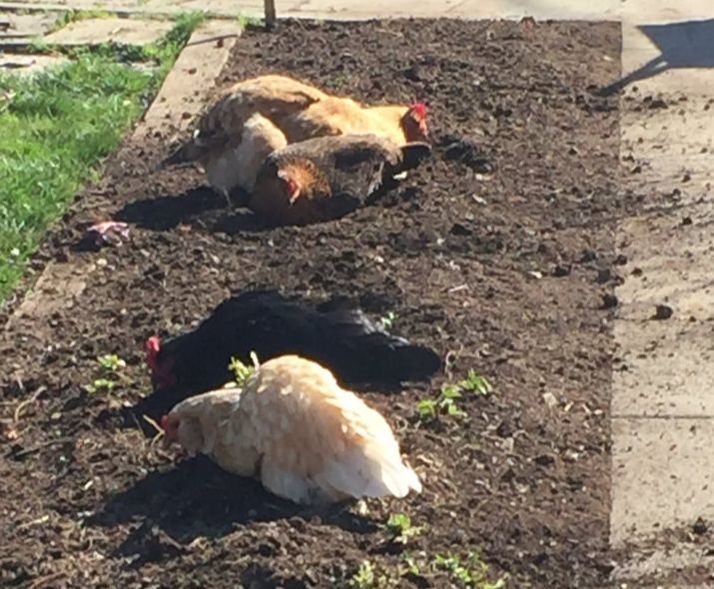 Hens dust bathing and hunting insects on fallow garden bed A form of crop rotation Allowing soil to go fallow should be part of your crop rotation or succession planting plan. Succession planting simply means sowing seeds in such a way as to constantly have something growing in a space, much the way plants grow naturally. Crop rotation allows you to keep a patch of ground as productive as possible, while switching up the crops being grown. This interrupts the lifecycle of certain soil pests, such as darkling beetles, nematodes, weevils, and wireworms. It also breaks the disease triangle for dieback, root rot, white rust, and other soil borne diseases. Incorporating a fallow year or season into the crop rotation cycle makes good sense for the health of your soil. This idea is not new “Six years you shall sow your land and gather in its produce, but the seventh year you shall let it rest and lie fallow, that the poor of your people may eat; and what they leave, the beasts of the field may eat. In like manner you shall do with your vineyard and your olive grove.” Exodus 23:11 Allowing something to grow naturally on your fallow ground is an excellent way to hand over some of your garden tasks to natural processes for a season. If you watch closely, you may be surprised to learn something new about the way things grow in your garden!
Heliotropism refers to a plant’s ability to track the sun’s movement. For many centuries, it was believed that a plant’s tendency to follow the sun as it crossed the sky was a passive action caused by water loss on the side of the plant exposed to sunlight. Now, we know that there is far more to it than that.  Sunflower Growing toward sunlight Instead of passively shrinking to one side as the sun’s harsh rays boil away a plant’s bodily fluids, we now know that plants actively grow toward (or away from) sunlight. [When a plant grows away from sunlight, it is called skototropism.] Experiments conducted in the 1800’s demonstrated that plants will respond to any type of light: street lights, grow lights, or sunlight. When plants are attracted to this light, it is called phototropism. Phototropism is a function of the hypocotyl, or individual cells found in the same region. Hypocotyls are the embryonic stem found below the seed leaves (cotyledons) and directly above the root. You can easily see examples of phototropism when seedlings first emerge and they don’t get enough sunlight - they become leggy and lean toward whatever light they can. This is phototropism. In heliotropism, not any old light source will do. It is only radiation from the sun that causes the reaction. And the mechanical causes of these two types of movements are very different. Mechanics of plant movements When plants move in response to the position of an external stimulus, it is called a tropic [TRO-pic] movement. If a plant’s movement is independent of the stimuli’s position, it is called a nastic movement. In phototropism, plant hormones (auxins), found in the meristem tissue of leaf and stem tips, photoreceptors, and multiple signaling pathways are used to direct a plant to grow more rapidly toward sunlight. In heliotropism, a structure called the pulvinus is used to direct movement. The power of pulvinus The pulvinus is an amazing, fluid-controlled joint found at the base of a plant leaf stem (petiole) or just below a flower.  Pulvinus of 'Oxalis rosea', from: Charles Darwin (1880): The Power of Movement in Plants. Public Domain The pulvinus causes movement by altering fluid pressure in the surrounding plant tissue. These changes in fluid pressure start when sucrose is moved from the phloem into the apoplast. The apoplast is the conjoined spaces between plant cells. As sugar is pumped into the apoplast, potassium ions are pushed out, followed by water molecules. This changes the pressure within the affected cells, causing movement. This is called turgor-mediated heliotropism. But not all heliotropic flowers have a pulvinus. Those that do not are still able to move by permanently expanding individual cells. This is called growth-mediated heliotropism. Pulvini are also used in response to nyctinastic and thigmonastic movements.
Heliotropic flowers Heliotropic flowers face the sun from dawn to dusk. Slowly tracking the sun’s path across the sky, these flowers are believed to use heliotropism as a way to improve pollination, fertilization, and seed development. Heliotropic flowers often have five times as many beneficial insects present, due to the added warmth. [Many tropical flowers exhibit a modified form of heliotropism in which flowers maintain an indirect tracking of the the sun. This is believed to reduce the chance of potential overheating.] Beans, alfalfa, sunflowers, and many other species turn their blooms to follow the sun’s path across the sky each day. But sunflowers only use heliotropism in their early development, in the bud stage. Once a sunflower head emerges, it may track the sun for a short time, as an expression of phototropism, until the flower head reaches full size. The majority of sunflowers found in the northern hemisphere nearly always end up facing east. Leaf heliotropism Like floral heliotropism, leaf heliotropism is the method by which plants focus their leaves perpendicularly to the sun’s morning rays (diaheliotropism), or parallel to midday sun (paraheliotropism). Diaheliotropism allows leaves to capture the maximum amount of energy from the sun, while paraheliotropism protects plants from overheating and dehydrating. How do your plants move during the day? What bottle of wine would be complete without its cork? The same is true of most trees. Everyone knows that trees and woody shrubs are made of wood, surrounded by bark. But there’s a lot more going on in those outer layers than meets the eye. #/media/File:1-Arraiolos-0050.jpg) Cork oak (Sallyofmayflower) CC BY 3.0 The bark you see protecting the living wood of a tree is made up of dead plant cells. This layer is called the rhytidome. The reason these cells are dead is because the cork layer cuts them off from the tree’s resources. Components of bark Bark is made up of three basic layers. The inner layer, or phloem, is a living part of a tree’s vascular system. Manufactured sugars ‘flow’ down the phloem to feed the rest of the plant. The middle tissue, or cortex, is made up of porous tissue that stores and transports carbohydrates, tannins, resins, and latex. The outermost layer of bark is called its periderm. #/media/File:Tree_secondary_components_diagram.png) Tree cross section diagram (Brer Lappin) Public Domain Periderm
The periderm is also made up of three layers: the cork, cork cambium, and phelloderm. Cork (phellem) is produced by a specialized layer of cambium tissue, known as the cork cambium, or phellogen. This cork cambium layer is only one cell thick and the cells divide in parallel (or periclinally) toward the outside of the tree. In some trees, the cork cambium layer also produces cells towards the inside of the tree. These inner cells are the phelloderm layer. Function of cork Cork keeps wine safe from the elements because it is impermeable to gases and water. Because of the cork, your wine stays where it is and (as long as the cork remains intact) will only grow better with time. The cork of a tree also blocks air and water. Cork is able to keep trees and wine safe from the elements, along with insects, bacteria, and fungal disease because it contains suberin. Surberin is a waxy material that creates a protective barrier. This barrier also blocks water and gas exchanges between the outermost layers of the tree killing the epidermis, cortex, and secondary phloem. This is the bark you see. Trees and shrubs also use cork to cut off an unwanted body part (leaf, diseased twigs, mature fruit) from the rest of the plant. This is called abscission. Most fruits hang in their own singularity: apples, oranges, and apricots are common examples. Other fruits, such as grapes, form clusters. Still other fruits are formed when a group of flowers merge to create a fruit. Soroses are that type of fruit. 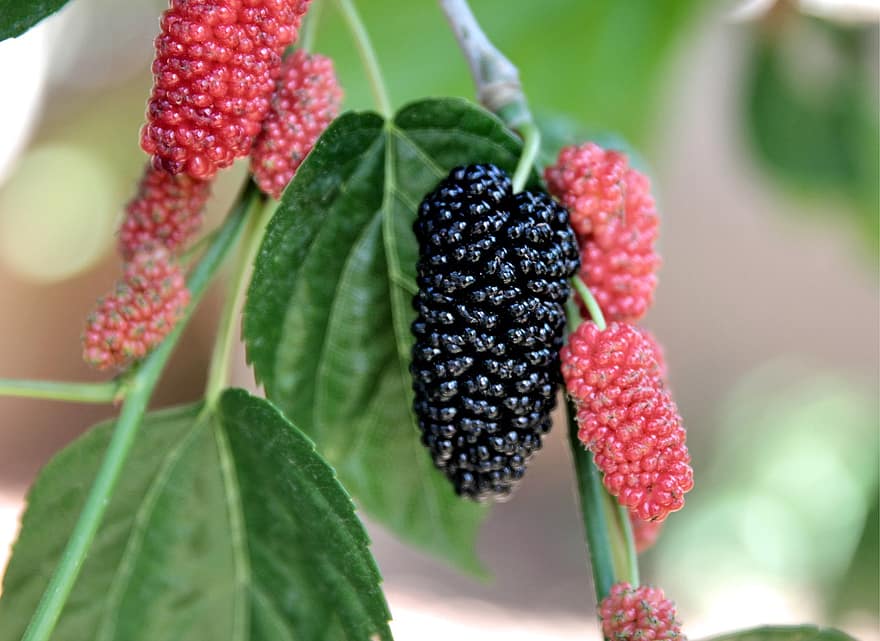 Mulberry fruit (Pikist) What is fruit? Fruit is the fertilized ovary of a flowering plant (angiosperm). After pollination and fertilization occur, two new structures are produced: seeds (fertilized ovules) and pericarp (thickened ovary walls). In the case of apples and oranges, one flower produces one fruit. Sometimes, multiple flowers can fuse together to create a fruit. There are three different ways that this can happen:
In nearly every piece of literature you see, pineapples are listed as a common example of sorosis, but this is incorrect. I don’t know why they do this. How a sorosis fruit develops If you look at a mulberry flower cluster, you will see several flower buds held tightly together. Each of these individual flowers open up, awaiting pollination. #/media/File:Mulberryflowerbud3000px.JPG) Clusters of unopened mulberry female flower buds (Fastily) CC BY-SA 3.0 If you look closely, you can see tiny fruits at the base of each flower. Each of these fertilized fruits will develop around the stem that they emerged from in the first place. This is unlike pineapples, which include the receptacles and flower parts in their fruit development. #/media/File:Black_Mulberry_Female_Flowers.jpg) Close-up of a mulberry flower cluster (JJ Harrison) CC BY-SA 3.0 Berries vs. soroses While mulberries may appear to have the same structure as blackberries and raspberries, botanically, they are quite different. Raspberries and other members of Rubus are made up of several drupes (a type of fruit) that are clustered around and attached to a dry thalamus. All of the drupes in a single fruit are made from a single flower. In mulberries, and other soroses, each rounded bit is its own fruit, formed from its own flower. #/media/File:Unripe_white_mulberry.jpg) Unripe white mulberry ( Petru Dimitriu) Public Domain It won’t make any difference, as you enjoy a fig, some pineapple, or a mulberry, but now you can impress your friends with this fascinating word!
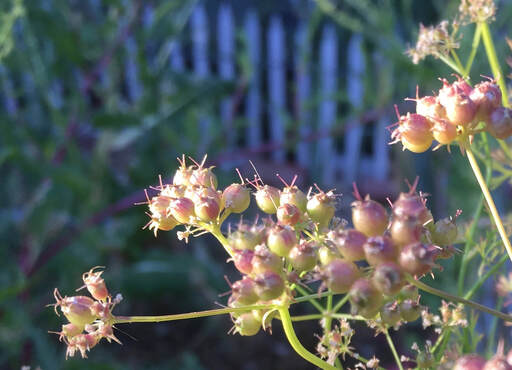
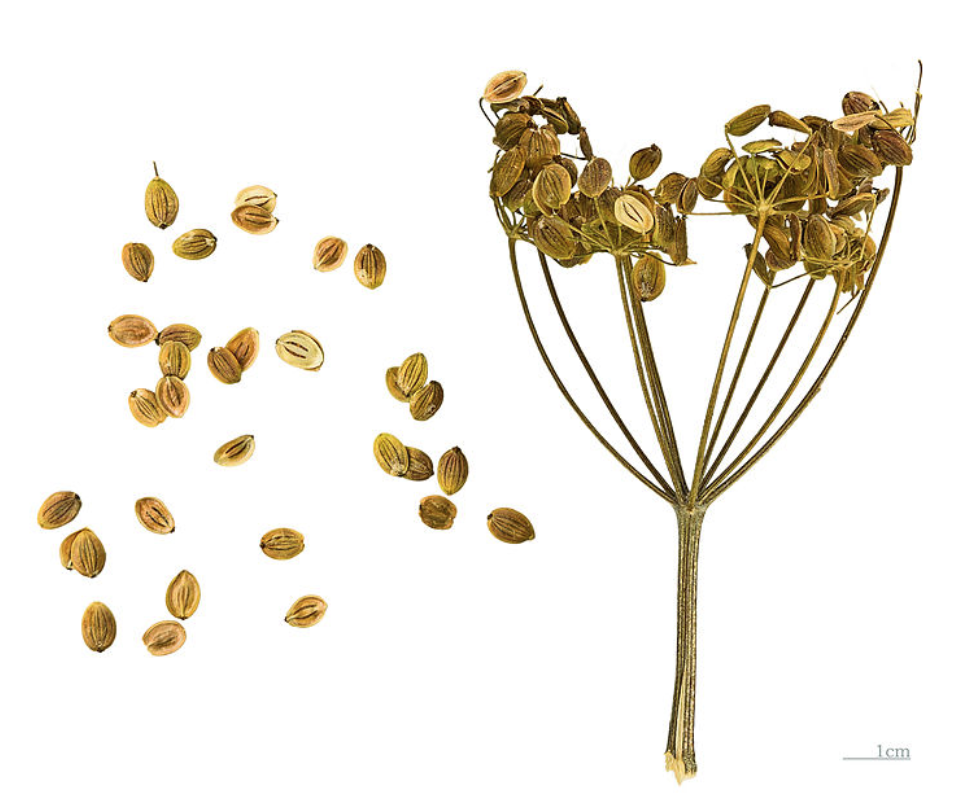
Some garden words are fun to say. Schizocarp [ˈskitsōˌkärp] certainly qualifies. A schizocarp is a type of dry fruit that splits into single-seeded parts, called mericarps, when ripe. Each mericarp is made from its own carpel. [A carpel is the female reproductive parts of a flower, including an ovary, stigma, and usually a style.] Mericarps can be dehiscent, which means they split open when ripe, or indehiscent, which means they stay closed. 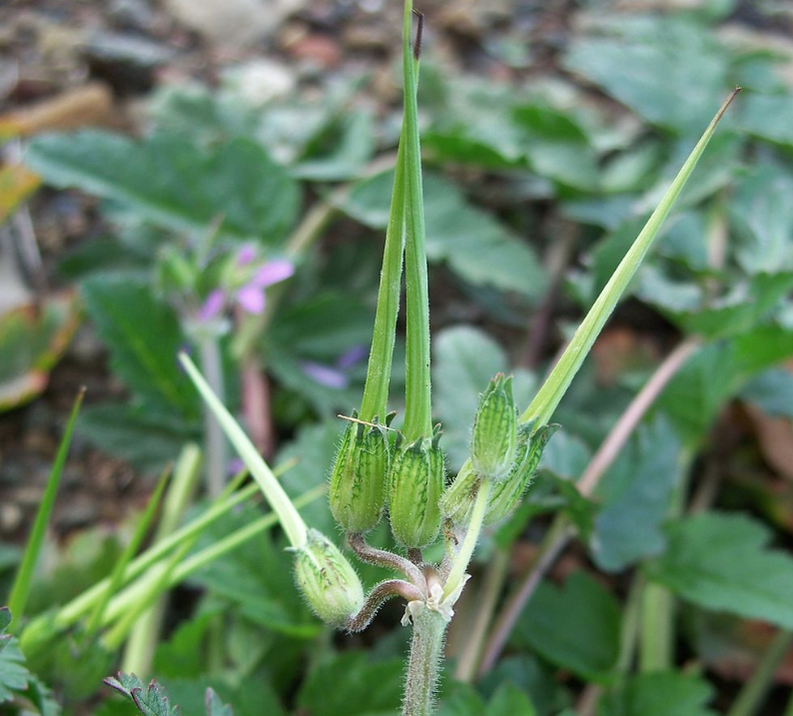 Musk stork’s-bill or whitestem filaree ‘Erodium moschatum’ (Eugene Zelenko) CC BY-SA 4.0 Indehiscent schizocarps The seeds of carrots, celery, coriander, anise, dill, parsnip, and other umbellifers are all indehiscent schizocarps. Hibiscus (Malvaceae), mallows and cheeseweeds (Malva), false mallows (Malvastrum), and wireweed (Sida acuta) fall in the same category.
Dehiscent schizocarps Members of the Geranium genus produce dehiscent schizocarps. [These are not the garden variety geraniums, which are another genus altogether (Pelargonium). I know, I know, it gets confusing.] True Geranium species include the cranesbill, horns’ bill and filaree plants that produce needle-shaped schizocarps that twist and gyrate into the soil (and were fun to play with, when we were children).
Maple trees produce winged schizocarps, called samaras.
Unlike the juicy fruits we enjoy each summer, or the dried caryopsis of cereal grains, plants that produce schizocarps have found that procreation works best when each flower produces a number of independent seeds protected by a dried fruit coating. Now you know. Clay soil is common in many different places, and it can feel like concrete on a hot day. In fact, clay particles have electrical charges that hold them tightly to their neighbors.  Electron microscopic view of clay (Wikipedia) Public Domain The science of clay Clay is just one type of soil. Soil is made up of varying combinations of sand, silt, clay, air, water, minerals, microbes, earthworms, and more. All those ingredients are arranged into soil structures called aggregates, which contain solids and spaces. [This is different from soil texture, which refers to the percentage of sand, silt, and clay found in a sample.] The particles of various minerals found in soil are measured in micrometers (μm), or microns [one micron equals one-millionth of a meter]: [For my Burner readers, playa dust can be 0.3 μm, or three-tenths of one one-millionth of a meter. That's why you will never get it out of your car or your tent.] The spaces between soil particles are called macropores and micropores. Macropores are greater than 0.08 mm and they hold air and water. Because the spaces are larger, water moves passively, pulled by gravity. Micropores are less than 0.08 mm and mostly hold air. Macropores are so small that the surface tension of water molecules means active suction must be used to pull the water out of these tiny spaces. Clay soil has far more micropores than macropores, so water and nutrients are held tightly, which means it is less porous. Porosity, or permeability, refers to the ability of air and water to move through soil. Soil that is rich in organic material tends to have better porosity. Porous soil allows roots to find water and nutrients, and allows for healthy gas exchanges. Being flat, clay particles lie on top of each other like a deck of cards. This is why clay soil is so susceptible to compaction. Clay and soil compaction Compacted soil can create a barrier to roots seeking water, nutrients, and stability. It can even alter nitrogen, making it unavailable to plants (denitrification). This is especially true next to streets, driveways, buildings, and other heat islands. [If your unimproved clay soil ever feels spongey, it may indicate a masked chafer infestation.] On the other hand, leaching of nutrients is far less common in clay soil. More often, we end up with a super abundance of certain nutrients that creates an imbalance for our plants. Clay soil and plant nutrients Clay is made up of many negatively charged secondary minerals. That negative charge loves to attract and hold on to cations, or positively charged particles, such as potassium, zinc, and nitrogen. [That’s why most San Jose soils have an abundance of potassium.] This attract-ability gives clay soil a high cation exchange capacity (CEC), which is a fancy ways of saying clay can hold onto 6 to 8 times more water and nutrients than sand. If you get a soil test (and I urge you to do so), you will also see a base saturation figure. To illustrate, CEC can be seen as the number of electrical outlets in your home, while base saturation is the number of those outlets currently being used. On average, sand has a CEC of 5-15, silt has a CEC of 8-30, and clay has a CEC of 25-50. In the same volume of soil, clay has 100,000 times more surface area than sand, so there are plenty of places for attachments to occur. You can improve your clay soil’s base saturation by monitoring and correcting soil pH. Alkaline soils may need acidification, while acidic soils may need the addition of lime to bring the pH into a range suitable for plant growth (6.0 to 7.0). A proper pH can make important nutrients, such as iron, available to your plants. Safety note: When planting trees around your home, keep in mind that root systems of plants growing in clay tend to be smaller, because so many more nutrients are available closer to the tree. This can result in a smaller in-ground support system for your tree, which makes it more likely to fall. Just sayin’… Clay and drainage When soil is extremely dry, it can’t absorb water because it becomes hydrophobic. Like a dry sponge, the water simply rolls off. Clay soil can act the same way. The rate at which water can enter soil is called its infiltration rate. Infiltration rates are given as millimeters of water absorbed per hour:
 Pooling water under nectarine tree indicates drainage problem in clay soil Because clay drains so slowly and can hold so much water, poor drainage can lead to fungal disease. This is particularly true for beans, stone fruits, and cucurbits. Proper irrigation of plants grown in clay soil means watering slowly and gently. Overwatering clay soil can drown your plants. Also, to avoid smooth dinnerware-like edges and compaction, avoid walking on or working wet clay soil or mud.
In areas prone to heavy rains, rain gardens can be used to offset the risk of flooding and fungal disease. Rain gardens divert excess water into sunken areas, away from buildings and vulnerable plants, filtering that water and allowing it to be absorbed slowly, without causing runoff or pollution. Transplants and bare root trees Because clay particles fit together so tightly, your soil can become as hard as a piece of pottery, making it difficult or impossible for transplants and bare root trees to get established. When installing stone fruit crops, such as nectarines, almonds, and apricots, you will need to be sure to rough up the edges of the planting hole to make it possible for new roots to work their way into the surrounding soil. In fact, roughing up these edges is a good idea for all your transplants. Plants that must have good drainage to avoid fungal problems, such as crown rot, are often planted in mounds. This added elevation keeps moisture away from the crown. This practice is common when installing avocados, olives, squash, and melons. Improving clay soil Mulching and composting are the best ways to improve the structure of heavy clay soil. As the organic materials break down, they increase the number of spaces between the clay particles. This allows air, water, and roots to move through the soil more easily. It also improves drainage and permeability. Other ways to improve soil structure include aeration, sprinkling coffee grounds on the soil, incorporating perlite, and cutting plants off at ground level, rather than removing them, roots and all. Those roots play host to millions of soil microbes that help maintain healthy soil. As you work to improve your clay’s structure, you can still garden using raised beds, vertical gardens, keyhole gardens, and containers. Whatever you do, do not add sand. The Sand-Clay Myth Our intuition tells us that we can lighten heavy clay soil by adding sand. It sounds right. Sand has plenty of spaces, right? Putting the two together should give us a nice, happy medium, right? Wrong. Instead, the tiny clay particles fill in all the spaces around the sand grains, creating a soil that is even heavier than before! Clay and plant choice While dandelions' taproots seems able to penetrate concrete, many plants have a difficult time getting established (ecesis) in compacted clay soil. Some plant families, such as the sunflower family, need a regular top dressing of aged compost to perform well in clay soil. These plants include artichoke, lettuce, and tarragon. Other plant families, such as the parsley family, simply cannot thrive in clay and are better grown in containers. This group includes carrots, celery, parsnips, and fennel. The allium family of onions, garlic, and chives can be grown in clay soil, but the addition of organic material will help them thrive. The same is true for lilacs, and members of the mint family, such as lavender and salvia. Beets and Swiss chard prefer loose soil, but can be grown in amended clay soil. Berries are shallow-rooted plants that really prefer loose soil. If you have clay soil and want to grow blackberries, raspberries, blueberries, or strawberries, you will want to work a lot of aged compost into the soil before planting. Some plants are so rugged that they can help break up compacted clay soil. These plants include cilantro, cowpeas, and fava beans. Other plants, such as germander, yarrow, and sage, seem to barely notice hard-packed clay soil, as long as they get a little water during the peak of summer, which makes them excellent ground covers. Olive and plum trees, like many herbs, seem to thrive in less than ideal soil. The “other” clay The finely textured clay used to make porcelain, called kaolin clay, can be used to protect many crops from damage by insect pests such as codling moth, stinkbugs, cucumber beetles, squash bugs, cabbage loopers, aphids, cutworms, and armyworms, just to name a few. Apparently, insects don’t like getting kaolin clay on their feet, so they go elsewhere. Your watermelons, apples, and peaches will thank you! Did you know that clay, sand, animal dung, and straw are used to plaster woven stick fences? It’s called pleaching! It is normal and healthy for the pruned tip of a twig to dry up and seal itself off from pests and disease. When that death keeps moving inward, there’s a problem. This creeping death is called dieback. Dieback can be from environmental conditions, insect feeding, or disease.  Hot wind and poor irrigation can cause twig dieback and shade tree decline (Kate Russell) Physical dieback It is not understood why, but delayed leafing out seems to be associated with dieback. The same environmental conditions that cause delayed leafing out and dieback include winter drought, extreme cold, or insufficient chilling hours. This form of dieback is common in blackberries and raspberries. Other causes of dieback include poor irrigation and hot, dry winds, potassium or zinc deficiencies, phosphorus toxicity, insect feeding by shot hole borers, black scale, wooly aphids, and mealybugs. Also, when the raspberry horntail, a tiny wasp, lays its eggs in a raspberry or blackberry cane. Dieback by nematodes Nematodes are microscopic, eel-like roundworms that live in the soil. Some nematodes are beneficial predators, and some are plant-eating, disease-carrying parasites. Nematode feeding can cause reduced plant vigor, wilting, smaller fruits and leaves, and twig dieback. Fungal dieback Several different fungi can cause dieback. Each pathogen has its own set of symptoms and host plants:
Viral dieback Lettuce is susceptible to viral dieback caused by the lettuce necrotic stunt virus. This pathogen causes stunting, leathery, dark inner leaves, and rotted areas on outer leaves. Bacterial dieback Apple, citrus, pear, and stone fruits are susceptible to bacterial blast, blight, and cankers, all caused by Pseudomonas syringae. This pathogen kills flower clusters and nearby leaves, along with twig tips. Fireblight is another bacterial infection that causes twig dieback. This disease is easy to spot because the dead twigs curl into a shepherd’s crook shape. Watch for fireblight in June. Huanglongbing, a deadly citrus disease, includes twig dieback as one of its early symptoms.  Fireblight of apple How to prevent dieback
Healthy plants can often protect themselves from dieback. These tips can help reduce the risk of dieback in your garden and landscape:
There are many causes of dieback. Determine the reason behind dieback to find an effective treatment. Too much water can result in a lack of vigor or sudden death by Phytophthora root and crown rot. Phytophthora is Greek phytón (plant) and phthorá (destruction), so the name means the plant-destroyer.  Raspberry plants showing symptoms of Phytophthora root and crown rot (H. J. Larsen) CC BY 3.0 US What is Phytophthora root and crown rot? Phytophthora [Fie-TOF-ther-uh] is a family of water molds called oomycetes. Oomycetes fall somewhere between fungi and algae in the web of life. There are many different types of Phytophthora molds. They generally attack stems and roots. Stem damage occurs at or just above the crown, at the soil line, though it can appear elsewhere on a plant. These molds cause many plant diseases, including sudden oak death, potato blight, damping-off disease, and crown rot. Phytophthora root and crown rot can kill a tree or shrub if the soil remains wet for too long or when planted too deeply. [Moist soil around the trunk is never a good idea.] Host plants Nearly all fruit and nut trees, including cherries and kiwifruit, are susceptible to Phytophthora root and crown rot. But so are members of the nightshade and cabbage families. So, tomatoes, eggplant, and potatoes are vulnerable, as are cauliflower, Brussels sprouts, and cabbage. And all because of too much water. Symptoms of Phytophthora root and crown rot Plants affected by Phytophthora root and crown rot look drought stressed. Unfortunately, because the natural response is to provide more water - the last thing you want to do when Phytophthora is present. Symptoms start in just one branch or area of the affected plant before spreading. Leaves may turn purple or reddish. Plants may die suddenly or linger poorly for years before dying. Symptoms can vary greatly, depending on the type and age of the plant, the plant’s genetic resistance to infection, overall health, soil temperatures, and moisture levels. The bark around the crown and upper roots of infected plants is dark. A dark sap or gum may ooze from damaged areas. Using a sharp knife, cut away an area of bark. Infected plants will show reddish-brown streaks or patches. Water-soaked areas on roots may also be visible. If white threads are visible between the bark and the inner layer or around the root system, it is Armillaria root rot. Preventing Phytophthora root and crown rot infestation Proper water management is the best way to prevent and control Phytophthora root and crown rot. Never allow standing water to remain around tree and shrub trunks. Also, don’t let sprinklers hit tree trunks. These other tips can help you manage Phytophthora in your garden or landscape:
You may be able to maintain an infected plant with proper irrigation and good cultural practices, but it will never be the same. Phytophthora can stay in the soil for many years, so prevention is far easier than control. NOTE: One new-to-us variety, Phytophthora tentaculata, is on the Dept. of Agriculture’s watch list. If it appears in your garden or landscape, contact your local Cooperative Extension Office. They may have helpful advice to protect your plants and need to know where this disease is spreading.
Ginger’s sweet bite makes it an excellent addition to many favorite foods, and it can be candied for a special treat. And you can grow it at home!  Ginger rhizome (Frank C. Müller) CC BY-SA 3.0 The ginger plant Ginger was one of the first spices to be exported from the Orient and it is a fascinating plant. As a plant family in its own right, ginger (Zingiber officinale) is cousin to turmeric and cardamom. The ginger we eat is not actually a root. It is a rhizome. Rhizomes are modified, underground stems that put out lateral shoots and adventitious roots. Ginger plants do not have aboveground stems. Instead, they grow much like the grass in your lawn, with leaves rolled together at the base of the plant to form pseudostems, except that they can grow to three or four feet tall! Equally tall floral stems emerge directly from the rhizome. Flower buds start out green and then turn white and pink before opening up into mature flowers. Mature flowers can be pale yellow, deep purple, or brilliant red, depending on the variety.  Ginger flower bud (Venkatx5) CC BY-SA 3.0 How to grow ginger Ginger needs loose, nutrient-rich soil, so it is best grown in containers. This makes it easy to bring indoors as temperatures drop in winter, as well. Most grocery store ginger ‘roots’ are treated with chemicals that prevent them from sprouting, but not always. While I normally warn against planting grocery store foods, due to the potential risk of introducing a safe-to-us-but-bad-for-plants disease, your ginger will, most likely, be growing in a container, so it’s not really an issue. Rinse off the ginger and place it in a container filled with potting soil, just under the soil line. Keep the soil moist but not soggy to encourage growth. Being from the tropical rainforest, your ginger plant will need lots of warmth, moisture, and protection from intense sunlight. [Under the canopy, jungles are actually pretty dark!]  Ginger flower (Fordito) Pixabay Harvesting ginger While you can harvest ginger rhizomes at any time, it is best for the plant’s long term health if you wait until the aboveground portion withers, similarly to garlic. The desired portion of the rhizome is cut off and the rest of the plant can be returned to its container. The cut off portion is then scalded to prevent it from sprouting. The older ginger gets, the tougher and drier the rhizome becomes. Ginger is a perennial plant, which means it keeps on growing. It may look as though it dies in winter, but don’t be fooled. Unless your region is too cold for ginger, it will come back year after year. Each little nub on a ginger rhizome is a potential new plant.
Seeing unripe fruit or nuts on the ground, under your tree, can be normal or may indicate a problem. Fruit drop, or June drop, is a natural process that allows a tree to get rid of more fruit than it can support. Fruit drop is common to citrus, apple, avocado, almond, tomatoes, and many other crops. Earlier in the growing season, some trees will rid themselves of unwanted blooms (blossom drop) for the same reason. Some trees, such as loquat, can be messy during this time. Manual fruit thinning works the same way, reducing the quantity of fruit but improving its quality.  Citrus fruit drop after petal fall is normal Fruit drop can also indicate insect pests, disease, or adverse environmental conditions.
Fruit drop caused by insects Black scale feeding weakens the tree, leading to wilting, twig dieback, stunting, and early fruit drop. Mealybug feeding can cause early fruit drop, chlorosis, and sooty mold. Feeding by mites can also reduce a tree’s ability to support a crop, causing fruit drop. Finally, while weevils are better known for burrowing into beans, cotton bolls, and cereal grains, they will also feed on roots, stems, buds, flowers, leaves, and fruit. Often, the first sign of a weevil infestation is leaf wilting, scalloped leaf edges, and early fruit drop. Fruit drop caused by disease Trees will frequently abort diseased or malformed fruit rather than invest water and nutrient resources in fruit that won’t reach maturity. Fruit drop caused by environmental conditions Sudden cold or extreme heat can cause fruit drop, especially in young trees. Strong winds can blow unripe fruit from trees. The most common environmental cause of excessive fruit drop is insufficient irrigation or unbalanced soil nutrients. Almonds and tomatoes are particularly sensitive to feeding and irrigation fluctuations. Pollination and fruit drop Fruit drop can be the result of insufficient pollination. Some trees need genetically compatible neighboring trees they can use for cross-pollination. It can also mean there are not enough pollinators in your area. You can attract more pollinators to your garden by avoiding the use of broad-spectrum pesticides and by installing a wide variety of flowering plants. Or, you can start raising honey bees. Honey bees take up surprisingly little space, boost pollination of nearly all your crops, plus you get honey! Fruit drop and pruning Heavy pruning can leave a tree unable to support the initial crop, resulting in fruit drop. Unless necessary, it is better to leave pruning and tree training for the dormant season. Fruit drop and the soil Low magnesium (Mg) levels in the soil can cause fruit drop, as can high potassium (K) or boron (B) levels. You can’t know what your soil’s nutrient levels are without a soil test from a local, reputable lab. While they look convenient and appealing, over-the-counter soil tests are not yet accurate enough to be useful. The type of soil can also have an impact on fruit drop. Sandy soils are far more prone to fruit drop than heavy clay soil. Don’t panic if your orange tree drops dozens or hundreds of tiny green fruits in May or June. It is normal. Just pick them up and add them to your compost pile. If you notice heavy insect infestations, signs of disease, chlorosis, or wilting, track down the cause and correct it. Remove fallen fruit and mummies to avoid creating a disease triangle or a hotel for pests. Plants cannot be green without magnesium, but too much magnesium in the soil can turn plants yellow. How can this be? Magnesium is essential for plant health. Magnesium stabilizes cell membranes, making plants better able to withstand drought and sunburn. Magnesium is found in enzymes that plants use to metabolize carbohydrates. Most important, magnesium is contained in the chlorophyll molecules that convert the sun’s energy into food. This process, the Calvin Cycle, is what makes photosynthesis possible. Clearly, magnesium is important to plant health. But too much magnesium can interfere with the absorption of other plant nutrients.  Magnesium deficient tomato leaf (my own) CC BY-SA 3.0 Plant nutrients Plants use 13 dissolved minerals as food. There are three primary macronutrients (nitrogen, potassium, and phosphorus) and three secondary macronutrients (calcium, sulfur, and magnesium). Plants use large amounts of these macronutrients to grow, thrive, and produce. Seven other nutrients, used in smaller amounts, are called micronutrients. Fertilizers claim to provide all the food your plants need, but it’s not that simple. [Is it ever?] The chemical interplay, taking place in the soil, that allows plants to absorb nutrients, is a delicate balancing act. Too much, or not enough, of one nutrient can create a domino effect that causes starvation for plants that are surrounded by a banquet of nutrients. What is magnesium? Magnesium is an elemental metal. Pure magnesium (Mg) is too stable of a molecule for plants to absorb. The less stable, cation form of magnesium (Mg2+) is a dissolved salt that plants use for food. To be able to attract and hold those positively charged molecules, plants also need negatively charged molecules (anions), such as nitrogen, phosphorus, and sulfur. The ability of soil to perform this balancing act is called its Cation Exchange Capacity (CEC). Without a soil test from a reputable, local lab, you cannot know your soil’s CEC or nutrient levels. For example: My first soil test found magnesium levels of 798 parts per million (ppm). The ideal range is 50 to 120ppm. Clearly, before I moved in, someone was applying an awful lot of fertilizer. The problem they were probably trying to correct was not insufficient nutrients, but a nutrient imbalance. Without a soil test from a local, reputable lab, you simply do not have enough information. Base saturation and magnesium Soil test results also include base saturation figures for potassium, calcium, and magnesium. Base saturation is the percentage of available connections being used. [Think of it as how many grocery bags you can carry in from your car.] The optimal range for magnesium base saturation is 10 to 30%. This means that soil particles, because of their electrical charge, will ideally hold on to 10 to 30% of the magnesium in the soil. It takes the right absorption percentage and the right volume of magnesium in the soil for plants to be healthy. My soil’s magnesium base saturation was 32%. That sounds close enough to the 10 to 30% optimal range, right? The problem is, with seven times the amount of magnesium needed in the soil, my plants were getting 32% of too much.  Magnesium toxicity in cabbage (Alandmanson) CC BY 4.0 Magnesium levels
Too much magnesium in the soil makes it difficult for plants to absorb calcium and other anion nutrients, which can lead to blossom end rot, bronzing, and many other problems. This is a common problem in areas with alkaline soil. The opposite is true in areas with acidic soil. Insufficient magnesium symptoms look very much like potassium toxicity symptoms: older leaves, at the bottom of the plant, start turning brown, between and alongside the leaf veins, working upward through the plant. Magnesium deficiencies in stone fruits often start out as slightly brown areas along leaf edges (margins) that expand inward, causing cracking, necrosis, and leaf loss. Magnesium deficiency in California is extremely rare. Stabilizing magnesium levels Reaching and maintaining ideal mineral levels in soil for healthy plant growth is both science and art - mostly science. To start, get a soil test from a local, reputable lab. Unfortunately, over-the-counter soil tests are not yet accurate enough to be useful. Once you have your results, you can take these other factors into consideration:
Finally, schedule regular soil tests for your garden and landscape. Look at these tests as an annual physical for the living skin of your property. The information in these tests will help you make informed decisions about the magnesium in your soil. If older leaves on cucumber, melon, or squash turn yellow and leathery, they may have cucurbit aphid-borne yellows.
The cucurbit aphid-borne yellows luteovirus (CABYV) causes this viral disease. Luteoviruses are a genus of viruses that use plants as hosts. Aphids carry this disease and spread it to plants as they feed. Symptoms of aphid-borne yellow virus Early symptoms are chlorotic (yellow) areas on lower leaves. These spots expand to include the entire leaf, leaving the large veins bright green. The affected areas become leathery and brittle. Stunting and fruit drop are common symptoms as the plant struggles. Before genetic testing, gardeners thought this was plant aging (senescence), nutrient deficiencies, or other diseases, like cucurbit yellow stunting disorder. How the disease spreads As the name suggests, aphids carry this disease. As aphids pierce plant tissue to feed on sap in the xylem, they spread infection. Once infected, the aphid will continue to spread the disease as it feeds on squash family plants. Lettuces, beets, and many weeds can also become infected. Controlling aphid-borne yellows There is no way to control the virus, but you can reduce the presence of aphids in your garden with these tips:
Remove and destroy infected plants to prevent the disease from spreading to nearby plants Fresh, sweet cherries are delicious, but cherry trees can be difficult to grow. According to UC California Backyard Orchard, “cherries are the most difficult trees to keep alive.” If you are still determined, let’s see what we can learn about these trees. People have been enjoying cherries since prehistoric times. Cherries are stone fruits, which means the fruit is a drupe. There are two types of cherry trees: sweet (Prunus avium) and sour (Prunus cerasus). The two cannot cross-pollinate with each other. Both types are native to Europe and western Asia. Sweet cherries are also known as wild cherries or gean.  Prunus cerasus (Diako1971) CC BY-SA 4.0 How to grow cherry trees
Cherry trees cannot tolerate soggy ground and they need a lot of sunlight. Excellent drainage is critical. So much so, that cherry trees are generally planted on mounds, or berms. Trees should be spaced 14 to 20 feet apart, and you are going to need at least two because most sweet cherry varieties require cross-pollination to bear fruit. Sour cherries, the type used in pies and preserves, are self-fertile and do not require cross-pollination. While installing bare root stock is preferable, you can grow a cherry tree from a pit. The pit will need to be exposed to cold temperatures (stratification) before it will germinate. When selecting a cherry variety for your landscape, be sure to choose one with a chilling requirement that matches your microclimate. The tree will set fruit in 3 or 4 years. Seasonal care for cherry trees Each winter, you will need to prune out 10% of the previous year’s growth, as well as any dead, damaged, diseased, or crossing/rubbing branches. You will also want to apply dormant oil. An application of fixed copper can help reduce bacterial canker (gummosis). In spring, as blossoms appear, apply a fungicide, such as Bordeaux mixture, to control brown rot, and feed each tree 2 lb. of urea or 70 lb. of aged manure just before a deep watering. Birds will enjoy your cherries long before you do if you do not protect your crop with netting or a tree cage. Trees will need to be drip irrigated every day in summer, or given 3 to 5” of water every 2 or 3 weeks. After harvesting your cherry crop, feed each tree with 2 lb. of urea and irrigate right away. Keep trees irrigated regularly until September, then stop watering altogether. This will help prevent root rot. Cherry pests and diseases It is astounding to learn how many diseases and insect pests can interfere with growing cherries. If birds, squirrels, and pocket gophers weren’t bad enough, cherry trees are are regularly attacked by a wide variety of insect pests:
Black cherry aphids, cherry slugs, earwigs, green fruitworms, western flower thrips, nematodes, and cribrate weevil can also be added to that collection. And the list of cherry diseases is no less daunting:
Cherries are also susceptible to a genetic disease, called leaf crinkle, and a couple of mysterious diseases, called cherry necrotic rusty mottle and cherry stem pitting, that occur when grafting scions. Applying sticky barriers to the trunks of trees can block crawling insects, but it does nothing against flying insects. Bottom line: cherries are probably best left to the professionals. Hopefully, this information will help you appreciate just how much effort goes into providing these delicious summer treats. If you decide to give cherries a try, please share your experience with us in the comments! Neonicotinoids are a class of insecticides.
When neonicotinoids first came on the market in the 1980’s, they were touted as a cure-all for garden pests around the world. Since neonics affect certain receptors in an insect’s nervous system, humans and other mammals, birds, and fish would be perfectly safe, they said. That sort of marketing should have been a warning from the beginning. What quickly followed were massive bee die offs, and threats by the EU to regulate this class of chemicals, but it's not that simple. To understand the pros and cons of this insecticide, we need to know more about how it works. What are neonicotinoids? Neonicotinoids, or neonics, as they are more conveniently known, are a class of insecticides that are chemically similar to nicotine. This class of chemicals includes several ingredients you may see on a bottle of insecticide:
After the disaster of DDT, other chemical insecticides were tried. Organophosphates and carbamates were the most common, but these are far more toxic than the neonics. By 2013, according to YaleEnvironment360, 95% of the U.S. corn and canola crops, most of the cotton, sugar beet, and sorghum crops, and a “vast majority of fruit and vegetables, including apples, cherries, peaches, oranges, berries, leafy greens, tomatoes, and potatoes, to cereal grains, rice, nuts, and wine grapes” were sprayed with neonics. How do neonics work? Neonicotinoids work by interrupting an insect’s nervous system. Since insect nervous systems are so different from other living things, these chemicals are generally safe, as far as poisons go. Initially, plants and seeds were sprayed with neonicotinoids. Neonics are systemic, which means they can be sprayed on seeds or plants, or watered in. Sprayed seeds grow into plants that contain the insecticide. Sprayed plants absorb the chemical, which is then spread throughout the plant via the xylem. When an insect comes along and takes a bite, or grabs some nectar or pollen - WHAM! They’ve been poisoned. Problems associated with neonics The initial problems with neonics occurred when seeds were sprayed with the chemical and then put through a seed spreader that created clouds of neonicotinoids, killing tens of thousands of honey bees. Also, sprayed insecticides tend to go all over the place, causing overspray damage to nearby plants, waterways, and air. Of course, all this made the news and got everyone excited, but those particular problems have been resolved in most countries. Now, neonics are more commonly applied as a drench, which is poured into the soil, to be absorbed by the roots. This eliminates overspray. Treated seeds are now managed in ways that prevent the pneumatic seed dispersal issue. Currently acceptable application rates seem to only be causing minimal harm to honey bee colonies, but they are still devastating to native bee populations. Does your garden really need chemicals? Individuals impact the amount of chemicals found in the environment by thinking before buying:
As we have learned in the past, spraying chemicals all over the place ends up causing unexpected problems. These chemicals start building up in our ground water and soil. Also, insects evolve much faster than we do. It is common for insects to develop a resistance to the poisons we spray on them, while we remain vulnerable. Neonicotinoids may or may not be the next DDT. The truth is, we don’t know. What we do know is that there are better ways for home gardeners to care for their plants than to inundate the environment with chemicals. |
Welcome!You can grow a surprising amount of food in your own yard. Ask me how! To help The Daily Garden grow, you may see affiliate ads sprouting up in various places.
You can also get my book, Stop Wasting Your Yard!  Index
All
Archives
July 2024
|


 RSS Feed