|
Edaphology is the science of how soil impacts living things. It also looks at the ways we use soil and how that use alters a soil’s ability to support life. 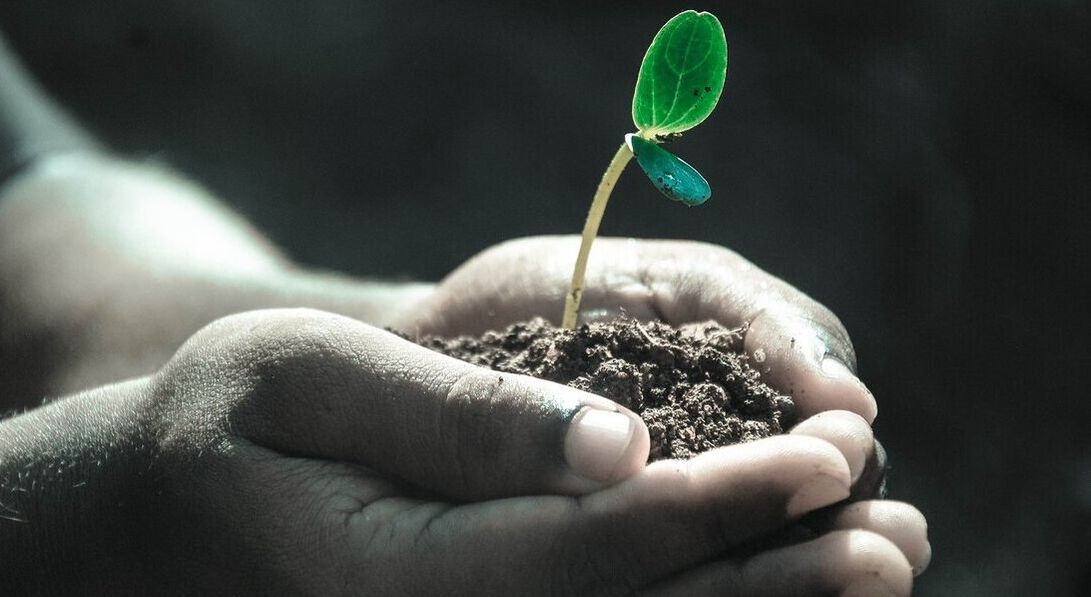 Soil husbandry (Pexels) Pixabay There’s no denying that a lot is going on under our feet. Within the soil, one might find worms, spiders, tiny beetle eggs, or a colony of ground-dwelling bees or ants. You might also find billions of bacteria and trillions of fungi and other microorganisms. But it is the condition of the soil that makes life possible for all those living things. Edaphology is the study of how soil is used in agriculture (agrology) and how soil impacts the local environment (environmental soil science). As gardeners, we are all amateur edaphologists, to one degree or another. Soil chemistry By studying soil biology, physics, and chemistry, edaphologists have learned a lot about how soil can be used and improved for growing food and other plants. Soil chemistry refers to the mineral nutrients found in the soil that are used by plants as food. Levels of these nutrients, and their availability, often dictate which plants can be grown and how they will perform, as well as what needs to be added or reduced. It also refers to the presence of toxins, such as lead. Only a lab-based soil test can give you that information. Drainage and irrigation Agricultural edaphology also looks at irrigation and drainage. Different soils hold and release different amounts of water at different rates. While sand holds very little water, drainage is excellent. Clay holds tightly to a significant amount of water, but drainage tends to be poor. For plants to really thrive, a middle ground is ideal. 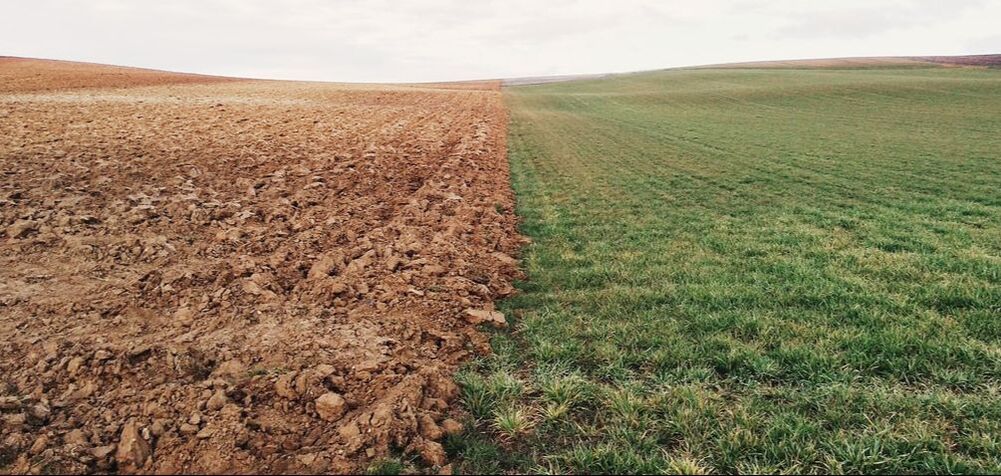 The way soil is used determines its productivity (Free-Photos) Pixabay Erosion
Edaphology studies ways to reduce erosion and soil degradation. Bare earth is vulnerable to erosion. Ask anyone who lived through the Dust Bowl of the 1930s. Wind, water, animals, tools and equipment can all degrade or erode soil, one way or another. Soil degradation also refers to the depletion of water-soluble nutrients used by plants. Climate and vegetation play major roles in soil degradation. As temperatures rise (or fall), different sets of plants, microorganisms, and other life forms thrive or suffer, impacting your soil. Soil amendments Edaphology has found ways to improve soil fertility and structure, along with its cation exchange capacity and its water holding capacity by adding soil amendments. Soil amendments include fertilizers and soil conditioners. Soil conditioners are used to improve or rebuild damaged soil. Bone meal, blood meal, coffee grounds, compost, manure, and vermiculite are just a few of the soil amendments used to improve soil quality. These materials help reduce soil compaction and improve nutrient levels and accessibility. Adding organic materials, such as aged compost, can significantly improve water retention and drainage. Soil husbandry Edaphologists have researched the various properties of soil in relation to plant production. Their research has taught us better soil husbandry methods. Soil husbandry is the art and science of caring for soil so that it can continue to be used to grow the plants we want. Soil husbandry includes protecting soil from erosion and degradation with mulch and cover crops, improving soil with soil amendments, and employing green manures and crop rotation to keep soil healthy. Whatever is growing on top of a soil has a profound impact on the health, structure, and fertility of that soil. The bottom line for gardeners is that edaphology teaches us how healthy soil creates healthy plants and healthy plants help maintain healthy soil. Now we know. Stop getting rid of soil mites! There are certainly plenty of bad mites: dryberry mites, Eriophyid mites, plum bud gall mites, and two-spotted spider mites are just a few. But not all mites are bad. Like their predatory cousins, European red mites, soil mites are your helpers.  Electron scan micrography of thistle-eating rust mite. Photo by Eric Erbe; digital colorization by Chris Pooley, USDA, ARS, EMU) Public Domain Soil mites are extremely beneficial when it comes to releasing nutrients into the soil and controlling pest populations. Conduct an online search for ‘soil mites’ and you’ll see dozens [millions] of sites telling you how to get rid of these pencil-point size arachnids. But getting rid of them is the last thing you should do. So, what’s so great about soil mites? Let’s find out! What are soil mites? Mites are arthropods. This means they have an external skeleton, a segmented body, and jointed legs. They are also arachnids, like ticks and spiders, but very tiny. If you were to take a sample of soil that weighed about the same as a bar of soap, 100 g give or take, you might have 500 mites from 100 different genera in that sample. These buggers are really tiny. With the naked eye, they might look like nothing more than little brown or white dots. But these little guys are important. While there are over 20,000 known soil mite species, with an estimated 80,000 total, it is easier to categorize soil mites by what they eat. They can be herbivores or carnivores. 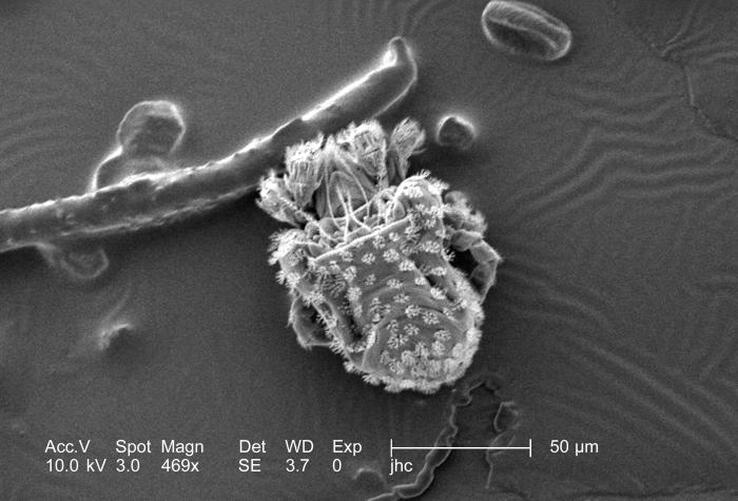 Algae-eating soil mite ‘Nanorchestes’ (William L. Nicholson, Ph.D., CDC) Public Domain Plant-eating soil mites
To something as small as a ballpoint pen tip, fungi make a great meal. So do bacteria and lichen. These scavengers are abundant in most soils and they help plants gain access to nutrients. As these soil mites graze on the fungi and bacteria that grow on root surfaces, they poop out those meals in the form of plant food. They also shred decaying plant material as they feed on the bacteria and fungi clinging to those plant surfaces. Fungal feeding mites (Oribatei) look like little orbs. Also known as turtle mites, moss mites, and beetle mites, these soil mites are very tiny. Let’s call them moss mites. Moss mites range in size from 0.2 to 1.4 mm long. This means you could fit 10-90 of them across a dime, end-to-end, depending on the species. Insect-eating soil mites Other soil mites are predators. Predatory soil mites feed on microscopic garden pests, such as nematodes, fungus gnat and thrips pupae, springtails, other mites, and the eggs and larvae of other insects. Most predatory soil mites are 0.5 mm long, brown, and found in the top 1/2” of the soil. [Unfortunately, I could not find any freely available photos of predatory soil mites.] While not all mites are good, soil mites are your friends in the garden. Let them be, and be glad they’re around! Growing leafy greens and other edibles in toxic soil can make you very sick. In some cases, it can kill you. Toxic soil contains heavy metals and other poisons. Often found under landfills, junkyards, and factories, toxic soil is increasingly found in urban areas. 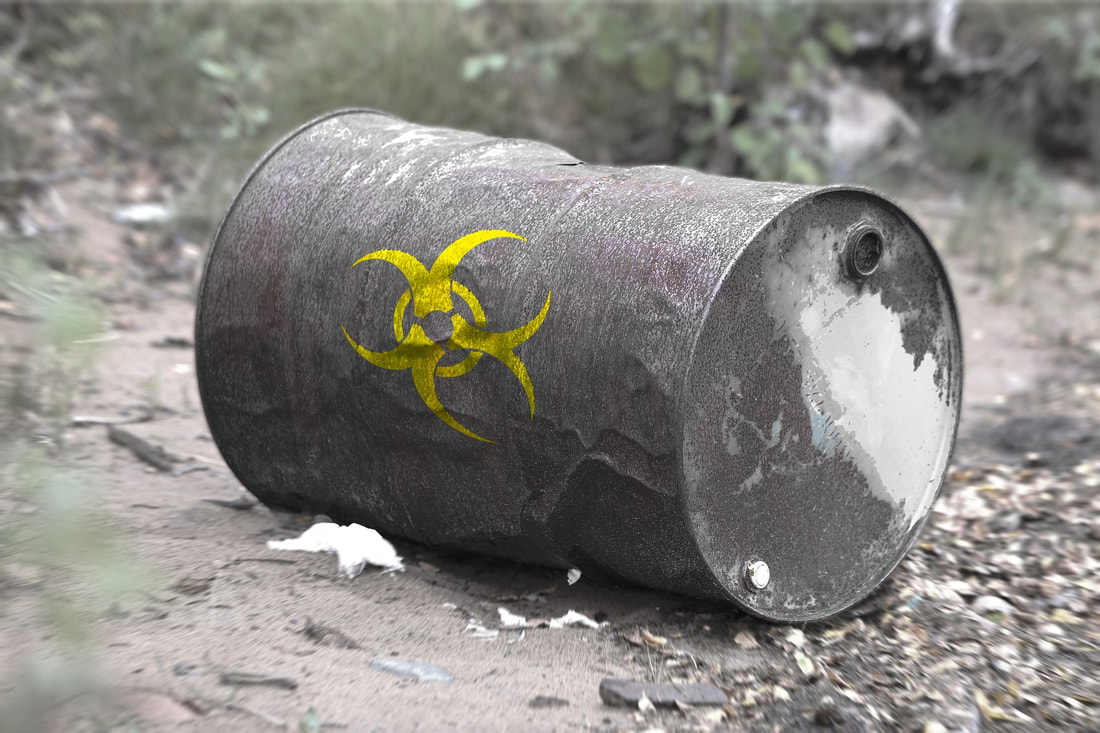 Toxic waste barrel (Elias Sch.) Pixabay What makes soil toxic? Healthy soil contains a balance of organic matter, air, water, and minerals that plants use as food. Some of those helpful minerals, such as boron or molybdenum, can reach toxic levels in the soil. Heavy metals can also make soil toxic. So can organic pollutants, such as creosote, excessive fertilizer, herbicides, industrial solvents, pesticides, explosives, and petroleum products. In some cases, radioactive materials, such as radon and certain forms of plutonium, can be in your soil. It ends up that fill dirt used to be brought in from questionable locations when building homes. [Hopefully, that doesn’t happen any more.] The problem is, without soil testing, you don’t know what you have. Soil is the earth’s filtering system. Like our kidneys, it can only handle so much. Heavy metals and other toxins in the soil often leach into groundwater. They can also become part of the dust that you inhale and the foods you eat. Toxins can be absorbed through your skin and may even coat produce you grow or buy at the store. [Always rinse off your leafy greens and root vegetables, and wash your hands frequently, just in case.] Is your soil toxic? The first step to learning whether or not you have toxic soil is a soil test. Not those cheap plastic things. A real, lab-based soil test. They are inexpensive and extremely valuable. Especially if your soil is toxic. If your soil test results indicate heavy metals, such as lead contamination, or other toxins, there are steps you can take to remove those dangerous materials. Traditionally, that meant simply digging up the toxic soil and burying it somewhere else. Today, many researchers are looking to plants for a solution. Put plants to work! As plants absorb water and nutrients, they also take up nonessential elements, such as cadmium, lead, and mercury, which can contaminate soil. Using plants to remove toxins from soil is called phytoremediation. Phytoremediation uses plants to contain, remove, or render toxic contaminants harmless.  Phytoremediation processes (Townie) CC BY-SA 4.0 Phytoremediation plants can be classified as accumulators or hyperaccumulators. Accumulators (A) are plants that pull toxins out of the soil and up into their aboveground tissues. Beets, for example, will absorb and accumulate radioactive particles found in the soil. Hyperaccumulators (H) collect toxins particularly well, absorbing up to 100 times the toxins of accumulator plants. Sorghum is a hyperaccumulator of arsenic.  (Rona.fawzy19) CC BY-SA 4.0 How does phytoremediation work? Accumulators and hyperaccumulators can reduce toxins in the soil through several different processes:
There are advantages to using plants to clean toxins from soil: it’s inexpensive; it doesn’t harm the environment; and it preserves valuable topsoil. The disadvantage is that this is a slow process. It can take years.  (Rona.fawzy19) CC BY-SA 4.0 Several studies have demonstrated that specific varieties of certain plants are very good at dealing with toxic soil. While I understand that Latin plant names can feel tedious at times, different cultivars behave differently, so getting the proper plant makes a big difference. For example, not all willow species are useful at cleaning soil. Studies have shown that Salix matsudana and S. x reichardtii are far more effective than other willow species. Many trees, including American sweet gum, larch, red maple, spruce, Ponderosa pine, and tulip trees are able to accumulate radioactive particles (radionuclides), such as radon and plutonium. Uptake and dispersal of contaminants by phytovolatilization (Rona.fawzy19) CC BY-SA 4.0 Which plants remove which toxins? I created the chart below from information provided by several studies on toxic soil and phytoremediation. 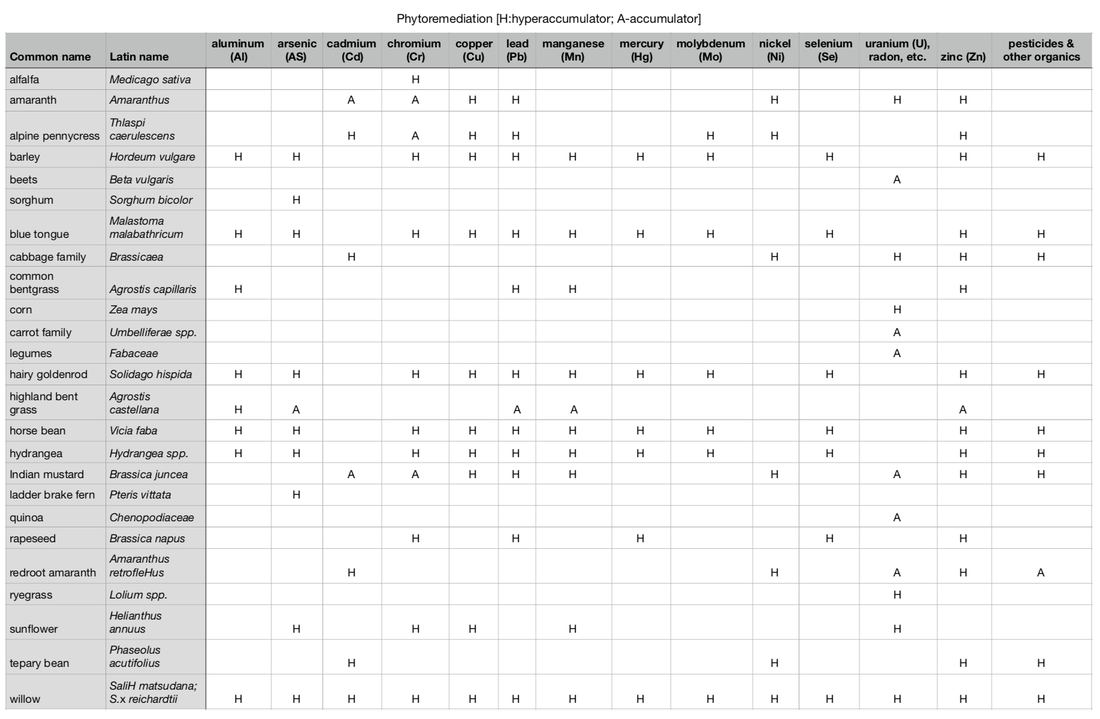 You can contact me if you would like a larger version of this chart,
Keep in mind that, just because a plant will absorb toxins, does not mean it is something suited to your garden or your region. Some nasty invasives have become firmly established that way. Did you know that some companies extract these toxic and sometimes valuable minerals from plants? This is called phytomining. Now you know. Healthy soil is teeming with microscopic life. Most soil organisms are beneficial, but some of them carry diseases.  Hands holding soil and seedling (Pexels) Pixabay The biggest problem with soil-borne diseases is knowing they are there. You can’t see the pathogens, so damage can occur before you know anything is wrong. Also, symptoms of soil-borne diseases can look a lot like nutrient imbalances, chemical overspray, and poor environmental conditions. Fungi and nematodes are behind most soil-borne diseases, but other conditions are at play, and some discoveries are new. Nematodes Nematodes are microscopic, unsegmented worms. Some of them are beneficial, and some carry diseases. Beneficial nematodes kill cutworms and corn earworm moths. Disease-carrying nematodes include needle nematodes, root-knot nematodes, and stubby root nematodes. The real problem with nematodes is that there are so many of them. For every person on Earth, there are approximately 60 billion nematodes. [Thank goodness they aren’t all bad!] _penetrates_a_tomato_root_-_USDA-ARS.jpg) Juvenile root-knot nematode penetrates tomato root (William Wergin, et al) USDA CC BY 2.0 Bacterial diseases Bacterial diseases are less likely to be soil-borne because it is difficult for bacteria to survive in the soil. Also, they need a wound or natural opening to get inside your plants. The following soil-borne diseases can occur in your garden:
 Bacterial wilt of muskmelon (Eeshie) CC BY-SA 3.0
Oomycetes Oomycetes used to be considered fungi but are now a separate class. Oomycetes cause soil-borne diseases such as damping off, downy mildews, late potato blight, some root rots, and sudden oak death.  Oomycete responsible for late blight ‘Phytophthora infestans’ (Matteo Garbelotto, et al) CC BY 2.5 Phytomyxea
There is another class of soil-borne disease carriers called Phytomyxea [FI-toe-muh-kia]. Scientists used to think they were a type of slime mold, but genetic testing and electron microscopes have taught us that they are a unique group. Phytomyxea are plant parasites that can cause clubroot in cruciferous vegetables and powdery scab in potatoes. Viral diseases Soil-borne viral diseases are rare. In most cases, nematodes and certain fungi carry these pathogens. Lettuce necrotic stunt and wheat mosaic, which causes stunting and mosaics in wheat, barley, and rye, are two common soil-borne viral diseases. How to prevent soil-borne disease In nature, plant diseases rarely get out of hand. Plants’ defense mechanisms and other organisms keep most pathogens in check. But, when we select plants, spray chemicals, and disturb the soil, we interrupt those natural processes. The primary cause of soil-borne diseases taking hold is an imbalance in soil populations. Reduced biodiversity gives pathogens the upper hand. One way to reintroduce that biodiversity is by top dressing with aged compost. Research has shown that top dressing with compost is very effective at suppressing soil-borne diseases in greenhouses, though less so in the field. There is a direct correlation between how much compost was applied and its effectiveness. Interestingly enough, sterilized compost is less effective. I think we can assume the effect is at least partially biological. As with most diseases, three factors must be present for a problem to occur: the host plant, the pathogen, and the right environmental conditions. Remove any one side of the disease triangle, and the disease is prevented or controlled. Crop rotation is an excellent way to break this disease triangle. Your rotation schedule will vary depending on the plants and pathogens in your garden. While you can sometimes apply treatments directed toward specific pathogens, they don’t always work. Most of these treatments consist of other microorganisms that prey on the pathogens. These only work if your soil already has everything the introduced microorganisms need. The funny thing is, if all those things were already there, so would the predators. Biodiversity. Mycorrhizal fungi (good guys) often create protective mats containing antibiotics and pathogenic toxins around plant roots. They also help plants absorb nutrients. Use these tips to prevent soil-borne diseases in your garden:
Finally, as tempting as they may be, chemical treatments are rarely a good choice for backyard gardeners. Pathogens are developing resistance to these treatments. Increasingly powerful chemicals are applied, resulting in a dangerous escalation. Whenever possible, use some other method of controlling soil-borne diseases. For every acre of garden, there is the equivalent of two mature cows, by weight, of soil bacteria living there. Ponder that a moment.  Biofilm of ‘Desulfovibrio Desulfuricans’, a soil bacteria believed to reduce toxic metals in soil and groundwater. Courtesy of Pacific Northwest National Laboratory. Your average cow weighs about one ton. Two cows weigh about the same as a car. That’s a lot of soil bacteria! For a different view, you could fit 15 trillion bacteria into a single tablespoon, if nothing else was there. What are all those one-celled creatures doing in your soil? Bacterial behavior Truth be told, much of your garden soil is made up of dead bacteria. Affectionately known as ‘bio bags of fertilizer’, soil bacteria are important players in nutrient cycling and decomposition. While still alive, their excretions improve soil structure by binding particles together into aggregates. This improved soil structure results in better water infiltration rates and it increases your soil’s water holding capacity. As bacteria breath, they release carbon dioxide into the soil. Plants love carbon dioxide. Soil bacteria are most commonly found in the film of water that coats soil particles. Bacteria can’t move very far on their own. They generally move with water, though they sometimes hitchhike on passing worms, spiders, and insects. This is called phoresy. Under ideal conditions, a single bacteria can produce 16 million copies of itself every 24 hours, doubling its population every 15-30 minutes. Conditions are rarely ideal, so bacteria reproduce as much as they can, whenever they can. There are four basic groups of soil bacteria: decomposers, mutualists, lithotrophs, and pathogens. Most soil bacteria are beneficial. Pathogens are the troublemakers. Beneficial decomposers The majority of soil bacteria are decomposers that break down plant and animal debris into simple compounds which plants and other living things then use as food. This makes soil bacteria an important part the soil food web. Some decomposers can break down pesticides and pollutants. Decomposers also store a lot of nutrients in their bodies. When they die, those nutrients become available to your tomato plants. [Soil bacteria are 10-30% nitrogen.]  SEM image of bacterial biofilm on the surface of a sand particle. (Anthony D’Onofrio, et al) Public Domain Mighty mutualists Mutualists have working arrangements with plants that benefit both sides of the equation. The most commonly known mutualists are the rhizobia bacteria which convert atmospheric nitrogen into a form useable by plants. Very often, these mutualists live on or in the roots of legumes, such as peas and beans. Other mutualistic soil bacteria are able to convert atmospheric nitrogen without the help of plants, but the plants still benefit. Lithotrophs You don’t hear much about lithotrophs, but this group is unique in that they don’t eat carbon compounds, the way other bacteria do. Instead, they manufacture their own carbohydrates, without photosynthesis, and feed on chemicals, such as hydrogen, iron, nitrogen, and sulfur. This group is also known as chemoautotrophs. These soil bacteria help break down pollutants and are an important part of nutrient cycling. 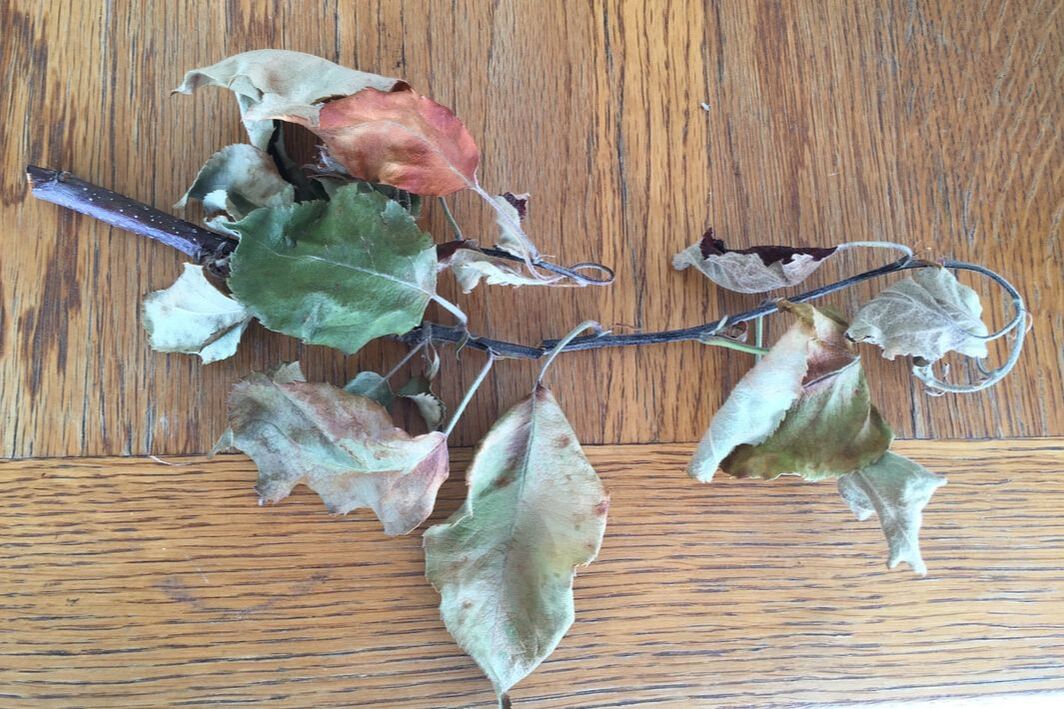 Apple twig infected with fireblight (Kate Russell) Pesky pathogens These are the disease-causing bacteria. They can cause fireblight, bacterial wilts, cankers, galls, and soft rot. The beneficial soil bacteria are always at war with these germs, competing for food, space, air, and moisture. Killing bacteria is difficult. Most often, if conditions become difficult, a bacteria will simply enter a dormant stage. This is why many Quick Fix treatments don’t work. They don’t kill the bacteria, they just send it on a temporary hiatus. There are some soil bacteria (Streptomycetes) that actively protect plants from bad bacteria. 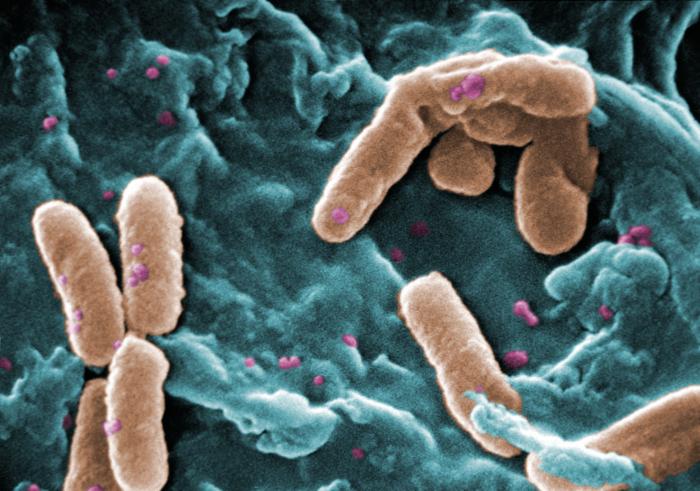 Pseudomonas aeruginosa, which causes soft rot in plants (Janice Haney Carr, CDC) Public Domain Why do soil bacteria matter to gardeners?
Most soil bacteria are valuable members of your team. They provide a huge benefit to your soil and plants. And you need to know what the bad bacteria look like when they start to set up housekeeping. The earlier you break those disease triangles, the faster your can return to harvesting your delicious crops. Most bacteria are aerobic, which means they need oxygen. This is why turning your compost pile makes everything decompose faster. You are providing the decomposer bacteria with the air they need. If you don’t, the anaerobic, non-air breathing bacteria take over. Those are the ones associated with rot and purification. [Ew!] Did you know that soil bacteria will consume more water than they can hold, causing their bodies to burst? Yet another argument against over-watering... Sand slips through your fingers. Clay clods defy your shovel. And somewhere in-between is the sweet spot with bits and pieces of soil just the right size for plant roots. Whatever the size, these chunks are called soil aggregates. 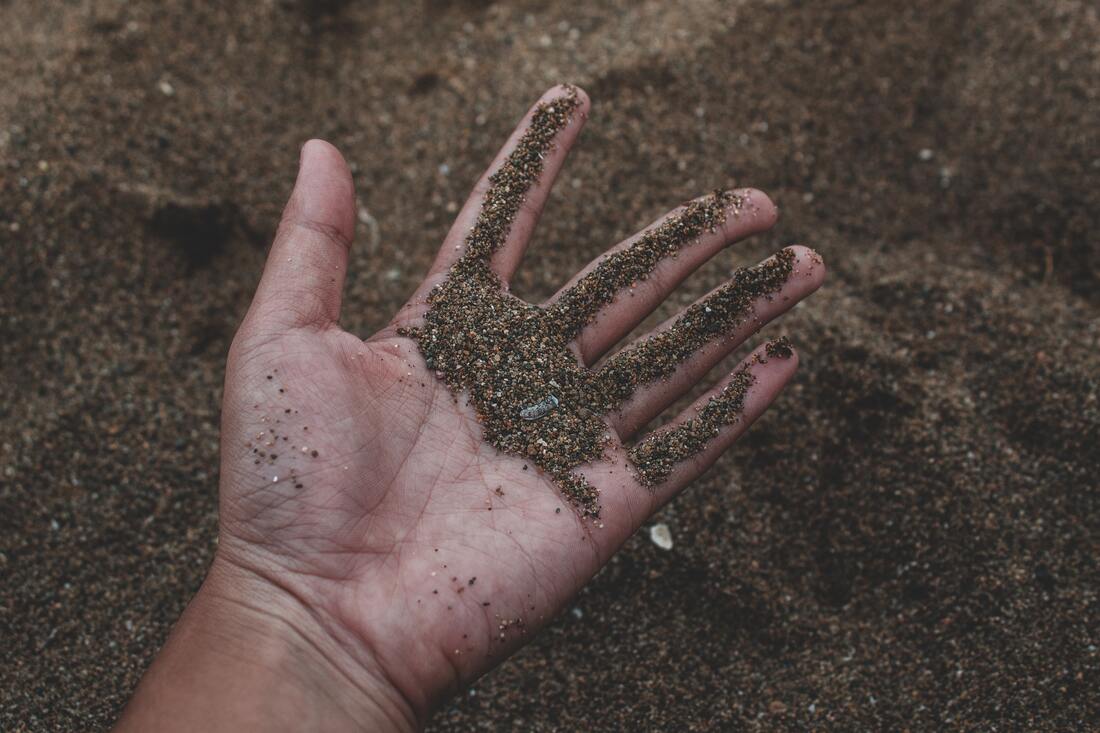 Sand (Kenneth Carpina) Pexels To learn about soil aggregates, you will need a scoop of dry soil from your garden. Put the soil in a bowl. Are there a lot of different sized pieces or are they mostly the same? If you look closely at the photo below, you can see a clear line between the old clay layer and all the decomposing mulch and compost that I have been putting on top. Over time, those organic materials work their way down, into the clay, reducing compaction and improving drainage. These improvements will occur because of soil aggregates. 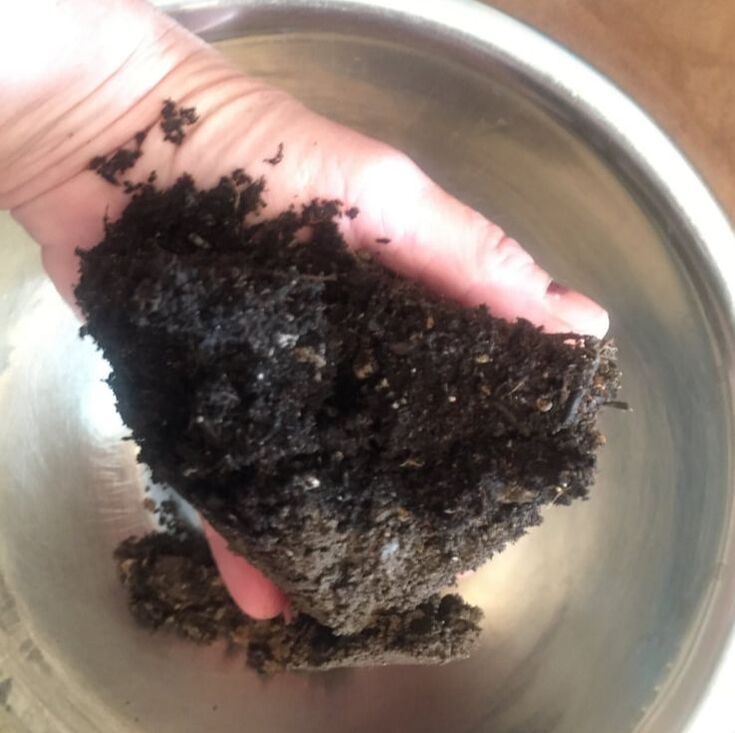 Soil sample showing clay layer under decomposed mulch layer (Kate Russell) Take another look at your soil. Stir it around a bit. Pick some of it up and roll it around in your hand. Rub it with your fingers. Does it feel gritty? Or powdery? Do the clumps mostly hold together? Do they crumble completely or do they feel like rocks? Soil aggregates, also known as ‘peds’, are the clumps that tend to stay together when you work the soil. Why do soil aggregates matter? Healthy soil has a variety of aggregate sizes, with plenty of large spaces (macropores) between the aggregates and tiny spaces (micropores) inside the aggregates. These spaces are used by roots and gases to move through the soil. These spaces are also what allow water to soak in, increasing your soil’s water holding capacity. And plant nutrients stick to these clumps. In some cases, aggregates are not as important. Sand, for example, has no aggregates, but there are so many spaces between grains of sand that plant roots, water, and gases have no trouble moving around. [Hanging on to water and nutrients is something else altogether!] Soils with low bulk density are another case where aggregates don’t matter as much. For the rest of us, the soil aggregates in our gardens have a huge impact on plant health, especially tender seedlings. If your soil’s aggregates are unstable, seedlings can suffocate. 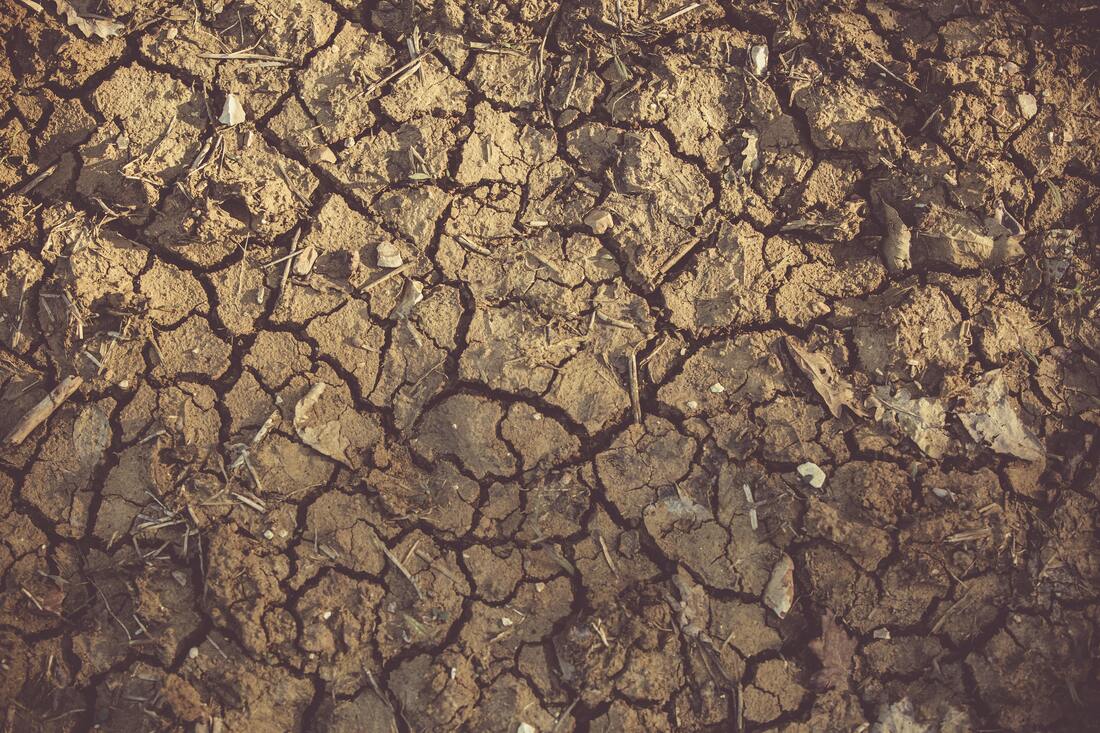 Crusting clay (James Frid) Pexels Aggregate stability Aggregates are described according to their stability. If your soil crumbles into dust, you probably have a lot of clay or silt and that can mean your soil has low aggregate stability. Low aggregate stability increases problems with erosion, gas exchanges, root development, and permeability. More immediately, as rain, irrigation, or sprinkler water strikes the soil surface, flimsy aggregates can be broken. Those tiny broken bits clog the spaces in the soil, making life difficult for plant roots, worms, and soil microorganisms. It also causes crusting which can kill seedlings before they get a chance to grow. How do soil aggregates form? Healthy soil aggregates are held together by clay, organic matter, and glomalin. Glomalin is a protective fungal excretion that helps the fungi feed your plants and binds soil aggregates together. Bacteria have similar excretions which are not as effective. 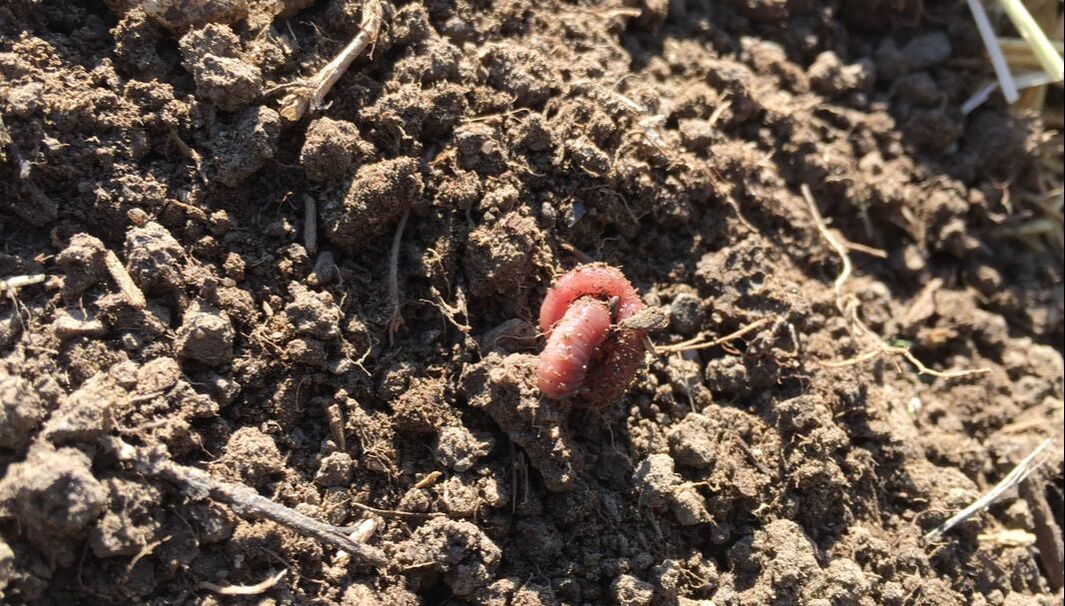 Healthy soil aggregates and worm (Kate Russell) Organic materials in the soil usually mean decomposition is taking place. Decomposition means fungi, worms, bacteria, and microorganisms are present. Those life forms excrete coatings and other materials that help soil aggregates form and stabilize. Finally, as clay particles become moist, they act as a cement, holding molecules and particles together into aggregates. Test your soil for aggregates Returning to your soil sample, select a few particularly large clods and gently set them aside to dry completely. Once they are really dry, dip them into a glass of water. If they break up quickly it means your soil has low aggregate stability. If the clods retain their shape for 30 minutes or more, your soil’s stability is high. Because my soil contains so much clay, it pretty much dissolves immediately. As more organic material is incorporated, my soil will breath better, hold its shape better, and provide plenty of pores for roots, water, and microorganisms. How can you improve the aggregates in your soil? Start by taking a look at your soil test. If your soil contains a lot of calcium or iron, it probably already has good aggregates. If your soil holds too much salt, aggregates are harder to come by. The biggest indicator of good soil aggregates is the amount of organic matter found in the soil. By mulching and top dressing your soil with manure and aged compost, you are encouraging all the life forms that help soil build healthy aggregates. This is why no-dig gardening has become so important. We learned that excessive digging, plowing, and rototilling disrupt the soil dwelling populations that create and maintain good soil aggregates. 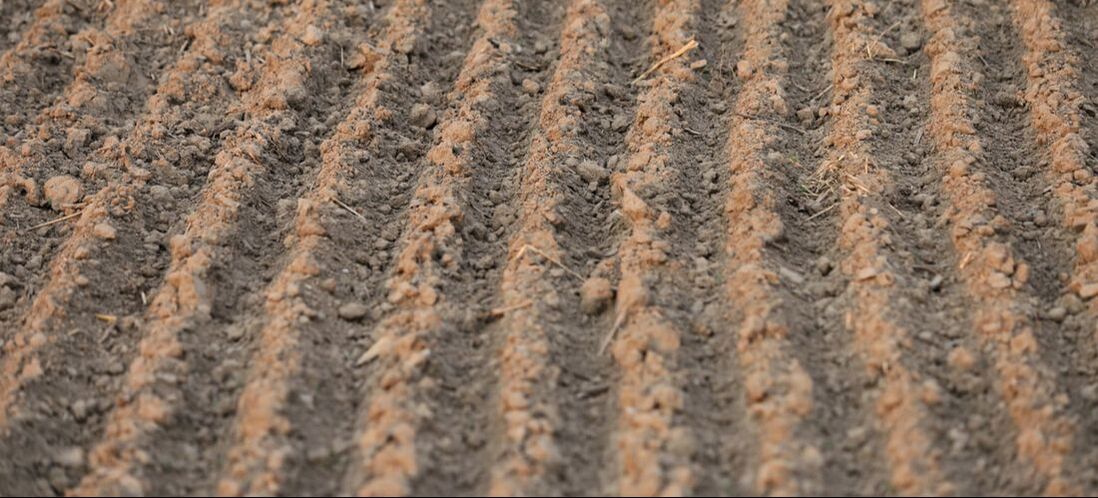 Plowed soil (Goran Horvat) Pixabay If your soil aggregates are unsatisfactory, use these tips to encourage better soil structure in your garden and landscape:
How did your dip test turn out? Let us know in the Comments! Why is beach sand mostly white and tan while rich farmland is practically black? What does soil color tell you about your soil?  Soil comes in a variety of colors. Image courtesy of State of Victoria (Agriculture Victoria) CC BY 4.0 Soil occurs in many different colors. Iron-rich soil tends to be reddish orange or green, while peat can be practically purple! Go outside and collect a handful of your soil and put it in a clear container. Shake it around a little bit. Is it wet or dry? What color is it? Brown? Maybe. But I’ll bet it’s not that simple. What does soil color tell us? Each layer of your garden soil has a unique color. The deeper you dig, the lighter those colors tend to get. Soil color tells us which minerals are present and the level of decaying organic material. It can also tell you how old a soil is, which processes are occurring, and about local water behavior. We are not going to explore soil age or the chemical processes that take place in soil, but you can use soil color to make better decisions about irrigating and fertilizing your garden. Soil moisture levels We all know that soil looks darker when it is wet. But soil color can tell you how long the soil stays wet. Soil that does not drain well and stays wet for much of the year tends to be a dull yellow or gray. Wet soil contains less oxygen than dry soil. Oxygen causes some minerals to oxidize, or rust. Iron-rich soil that contains a lot of moisture most of the time will turn gray or greenish, while drier soils expose iron to more oxygen, turning the soil red or yellow. 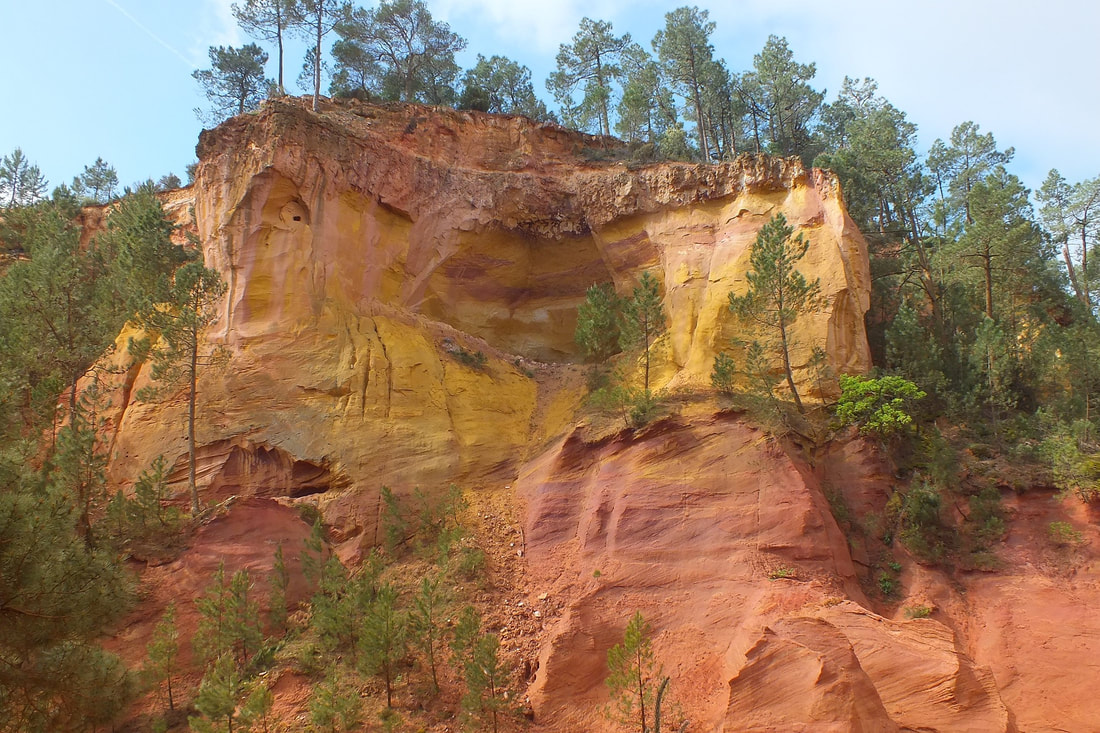 Arid iron-rich soil. Image by Catherine NONET (Pixabay) 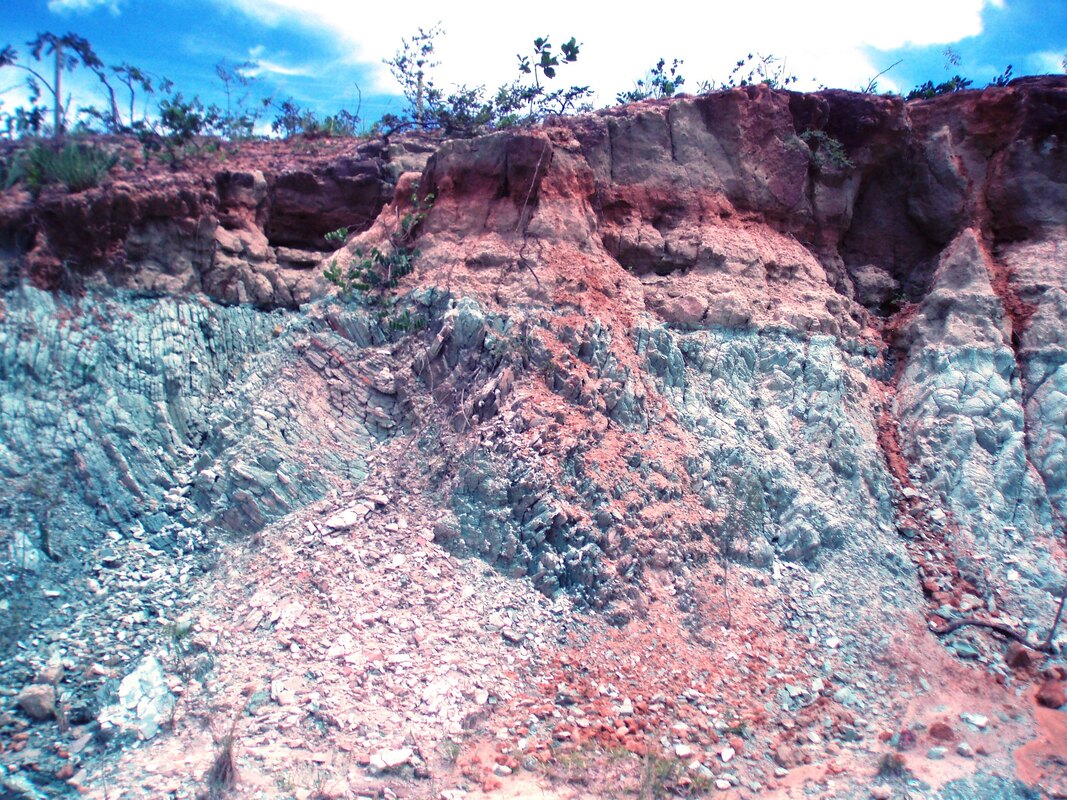 Green soil or sand indicates high smectite and glauconite levels (Verde Fertilizantes) CC BY-SA 4.0 Soils that stay wet often have more complex color patterns, while arid soils are more uniform. If your soil colors are uniform, you know that the water table is lower and you will probably have to irrigate more often. If your soil is reddish, you will probably never need to amend with iron. Remember, the minerals found in soil are plant food. Minerals make a difference Other minerals in your soil can also affect its color. Knowing what these colors mean can help you select the best soil amendments and irrigation schedules.
What color is your soil? Take a closer look at your soil sample. What do you see? Is it yellowish-brown or dark brown? Or something else entirely? When we first moved to our San Jose, California house, the soil was a pale, tan color and as hard as concrete. For many of us, identifying a specific color can be tricky. Brown is brown, right? But soil can be all sorts of shades of brown, along with a bunch of other colors. To help you get really specific information about the color of your soil, you may want to go to the library and check out their copy of the Munsell soil color book. Munsell’s color book Soil color is so important that a system of soil color classification has been developed. This classification method is called the Munsell soil color system. A Munsell book is the gardener’s equivalent of a paint chip book, containing 199 color chips. Its pages are heavy card stock and they are organized by color. Underneath each color chip is a hole in the card stock that lets you hold a soil sample underneath for comparison. On the opposite page tells you the universally accepted name for that color. This is a coding system used around the world by soil scientists, farmers, and gardeners like you! You artists out there know a lot more about this than I do, but let me give it a shot. According to my Munsell book, colors are described using hue, value, and chroma. Hue is the wavelength we see as color. Munsell’s book gives codes for red (R), yellow (Y), green (G), blue (B), and purple (P). Those wavelengths are measured in graduations of purity, ranging from 2.5, 5. 7.5 and 10. A pure hue is rated at 5. Numbers above 5 indicate the presence of other hues. Value indicates lightness or darkness. A value of zero indicates pure black, while 10 is white. Finally, chroma refers to a color’s strength or intensity, ranging from grayed out (/0) to full intensity (/14). A Munsell soil color rating is written with the hue letter first, followed by a space and then the number value, a forward slash (or virgule), and then the chroma number. Decimals can be used to provide greater clarity. 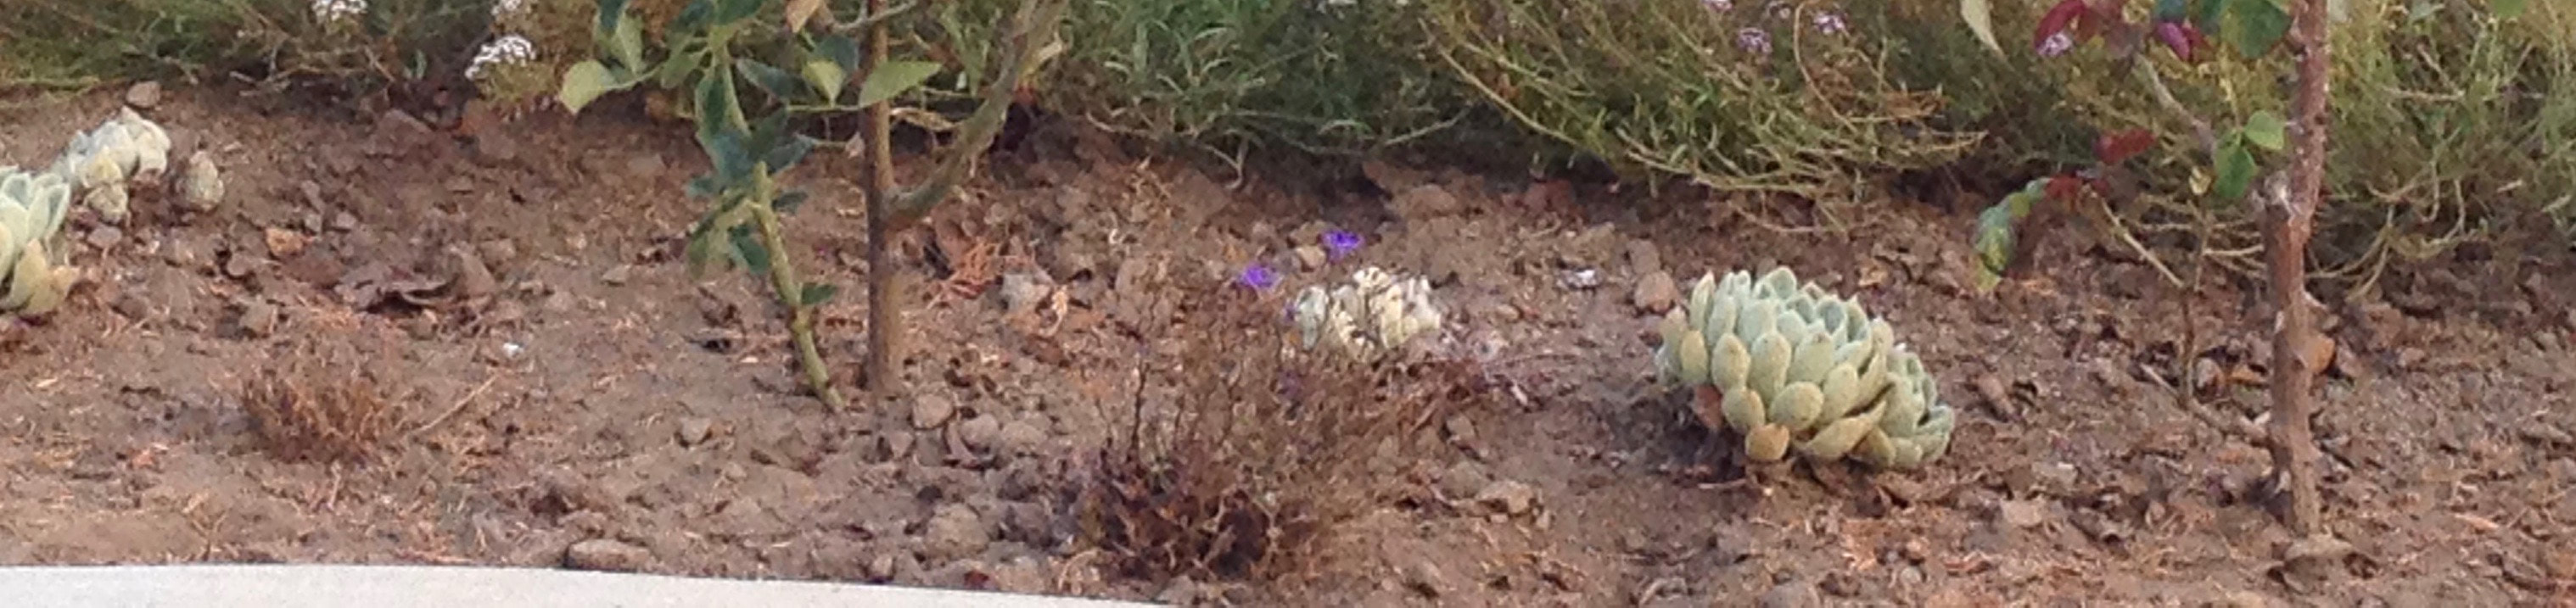 My 2012 soil (Kate Russell) Looking at a photo of my soil when we bought our place in 2012, I see that the color most closely matches 5YR 7/1. According to Munsell, that soil would be called 'light gray'. As noted earlier, this indicates high calcium carbonate, gypsum, magnesium, sand, and/or salt levels. It can also indicate too much moisture. Funny thing, the previous owner loved to apply fertilizer and overwater the property. According to my 2015 soil test, soil organic matter was at 3.5% and all the nutrients, except iron, were through the roof! Iron was extremely low. 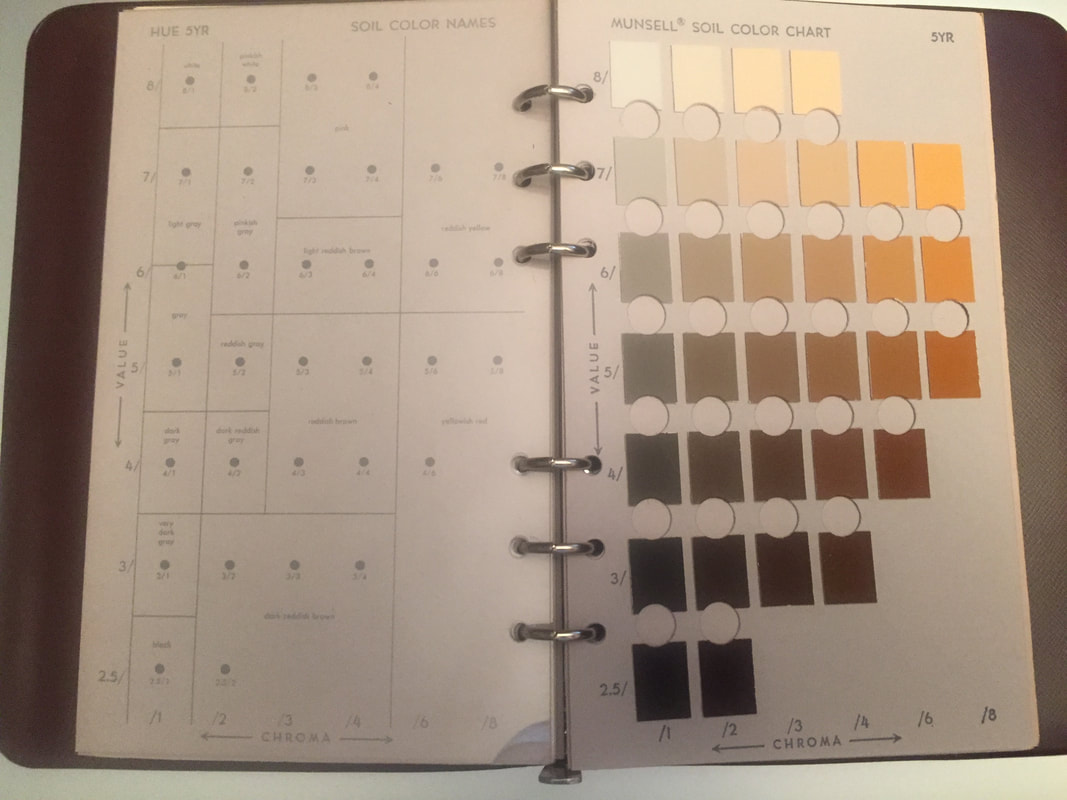 Munsell 5YR 7/1 (Kate Russell) Seven and a half years later, after adding lots of mulch and compost, a little nitrogen, appropriate watering and nothing else, my soil has been transformed to 2.5YR 3/0, with 7.6% organic matter and nutrient levels (slowly) dropping to where they should be. [These changes never happen overnight. When they do, beware! Something is very wrong.] 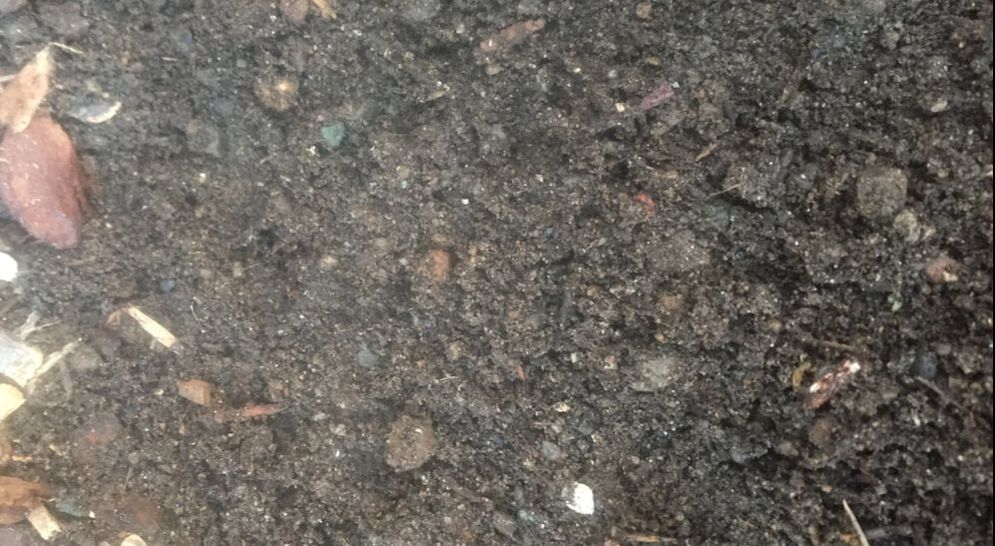 My 2020 soil (Kate Russell) The new color is 'very dark gray' which goes along with all the chicken bedding, wood chips, and other organic materials I've been adding. And my iron levels are still way too low, which is why the chroma numbers have stayed low. 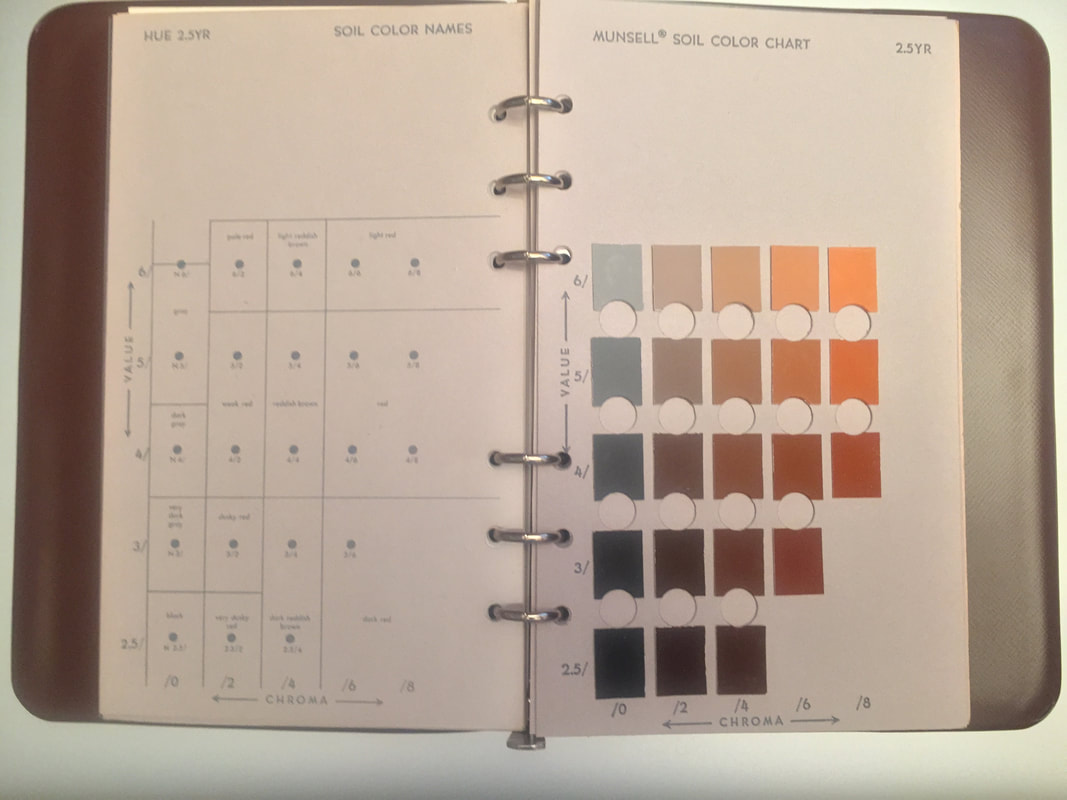 Munsell 2.5YR 3/0 (Kate Russell) So, take another look at your soil sample. Does it tell you more than it did? If you live nearby, feel free to bring a soil sample by so we can take a look in my Munsell book together. If not, head to the library.
Did you know that carpet manufacturers use the Munsell soil color system to match local soil colors with carpet dyes so that their carpets will look cleaner longer? Now you know. When your house was built, the soil was significantly altered. Construction soil can be severely compacted and rocky. This problem persists for many years, long after the bulldozers have moved on. What can you do to transform construction soil into friable garden soil?  Construction compactor (Public Domain) What is construction soil? When a house is built, no one wants it to fall down. Around 500 B.C., a man named Pythagoras figured out the correct angle for walls to be built to reduce the likelihood of collapse. Well, the soil under those walls is equally important for building stability. Building sites are scraped flat, removing much of the nutrient-rich topsoil, and then mechanically compacted. This is great for your house and terrible for the soil. And if the local soil isn’t stable enough for building, nutrient-poor fill dirt is brought in, mixed in and compacted, until builders have the surface they need. [You can learn more about different types of construction soil at Barclay Earth Depot.] After construction is complete, sod is installed, a few trees and shrubs popped into place, and a cosmetic planting of annual flowers makes everything look lovely. But that appearance can be misleading.
The soil under new construction is reeling in shock. Heavy equipment, trucks, materials, and foot traffic have been crushing the soil, plant roots, microorganisms, insects, and worms for weeks or months of building. Simply adding an attractive top dressing of plants does not correct the problems. What can you do about construction soil? Of course, over time, most plants and lawns manage to push roots into the soil and grow. But they could be far healthier and easier to care for if the construction soil they are trying to grow in was transformed into something loose, nutrient-rich, and populated with helpful microorganisms. 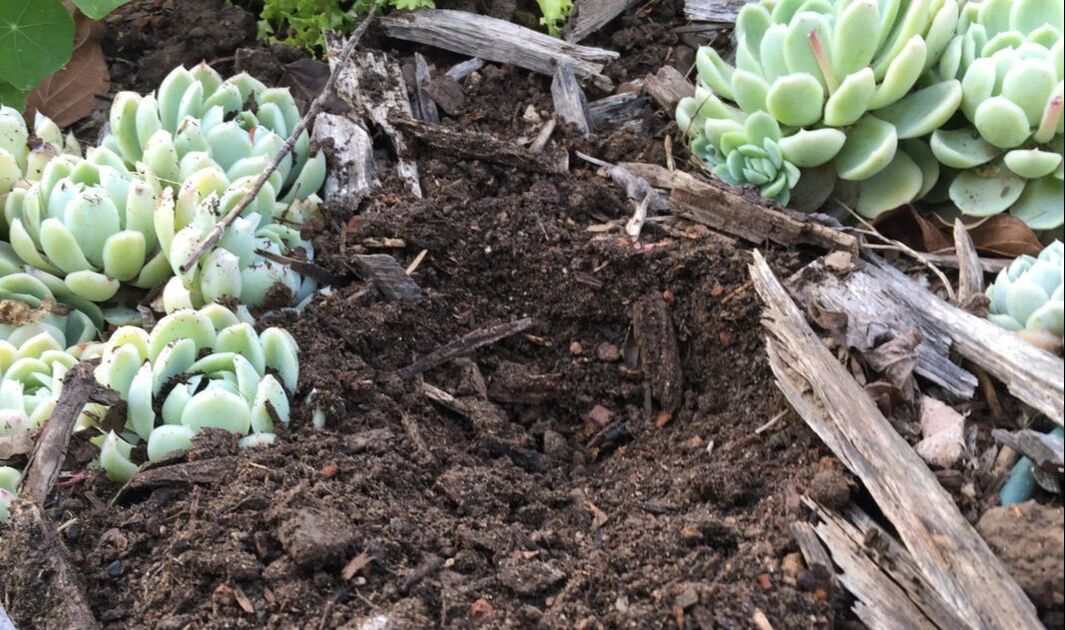 Decomposed wood chips and succulents (Kate Russell) You can make that happen with these tips:
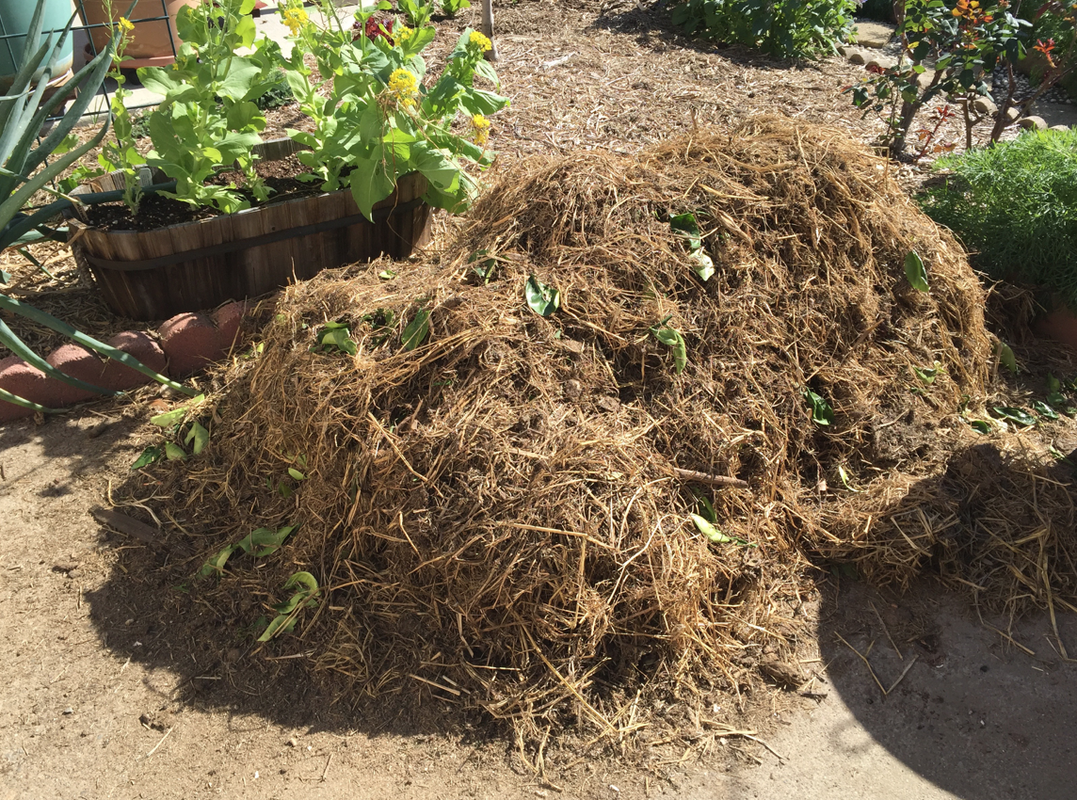 Compost pile (Kate Russell) If you do not currently compost kitchen and yard waste, you can easily start a compost pile wherever your least healthy soil is. Simply drop equal parts brown and green materials into a pile, water it and flip it every few days, and within a few weeks (depending on the season) you will have a nice batch of aged compost and that spot will be super-charged with nutrients, microorganisms, worms, and other soil beneficials. If you have a few chickens, adding their bedding and manure to the pile makes it even better!
Finally, get your soil tested by a local lab. Over-the-counter kits are not accurate enough to be useful. Inexpensive lab-based soil tests tell you which nutrients are needed, which are present in excess, and if you have lead-contaminated soil. Even if you have lived in your home for decades, the effects of construction soil may still be present. Creating healthy soil means that your plants will be better able to defend themselves against pests and disease, along with frost and drought damage. In other words, healthy soil gives you more time to relax! The government might know more about your soil than you do. Did you know you can access the USDA’s soil map of your property? You can and I am going to show you how. 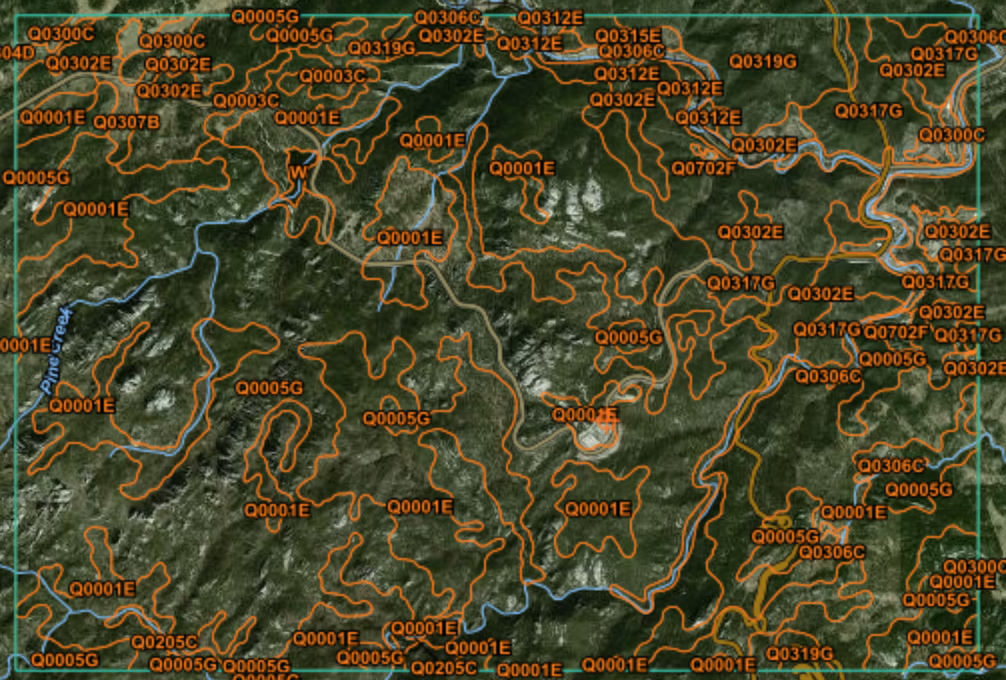 Soil map of Mt. Rushmore National Park, South Dakota What are soil maps?
Soil maps, also known as soil surveys, are used by architects and engineers to determine a soil’s ability to support roads or structures. Farmers use soil surveys to help them decide the best use for their land and you can, too. Your soil map can help you with plant selection, irrigation, and other gardening decisions. Soil maps are the combined information collected by various government agencies on different types of soil. Soil surveys used to be printed in book form by every county. We don’t do that anymore. [Thank goodness!] Now, all the information is found online. How to access a soil survey All of the information the U.S. government has about your soil is available at the USDA’s Web Soil Survey page. Because this page isn’t exactly intuitive to use, we will work through it together. Once you open the webpage, click on the green Start WSS button to begin. Once you are in, you will see five tabs. Those tabs are:
You will automatically be on the Area of Interest page. This is where we will begin. Area of Interest Before you can access any useful information, you have to set an area of interest (AOI). To do that, follow these steps:
*If your AOI is too small, you will get a warning. If this happens, make sure you are on the AOI tab, under Area of Interest and AOI Properties, and click the Clear AOI button and start again at step #7, using a larger area. Soil Map Your map will have orange lines and reddish-orange numbers and letters marking various soil series, which will be listed on the left. You can click on the soil type links for a surprising amount of information, including:
If you need help, as I did, with some of the terminology, try the USDA Soil Glossary. Now we get into the nitty gritty information. Click on the Soil Data Explorer tab. Soil Date Explorer This tab has sub-tabs you can investigate. Under Intro to Soils, you can get the equivalent of a college education on soil, free for the reading. The next sub-tab, Suitabilities and Limitations for Use, returns you to your map with a ton of informational categories on the left. While you probably don’t care about Building Site Development, you still might find it interesting reading. If you are short on time, go straight to the Land Management heading and click on the double arrows to expand that category. [Be sure to check out some of the other headings, as well.] A list of several sub-categories will open up and you can expand any of them. For each of these sub-categories, you can click on View Description or View Rating. In many cases, you may see “Not rated”. I have to assume that means it is either not relevant, or that it has not been considered worth the investment. Speaking of investments, were you surprised to learn that our tax dollars are spent on this sort of information collection? Download Soils Data The next tab is labelled Download Soils Data. While you can certainly try using it, I had no luck. Apparently, I do not have the proper software to open the downloadable files. Shopping Cart (Free) This tab allows you to download a 30-page or so document with all the general information about your soil, if you want it. Personally, I find just playing around on the website gives me more of the information I can use in my garden than the report. If you want your report, click on the Check Out button and then decide if you want it now or later, and click OK. Since most of this information is collected for farmers, builders, emergency response, and military use, it can be far more than you need in the home garden. But it sure makes for some interesting reading! Silt refers to minerals larger than clay and smaller than sand. Silt is commonly moved by water and deposited as sediment. Silt is what makes the alluvial soil surrounding rivers so fertile. Silt is also fine enough to be carried surprisingly long distances on the wind as dust.  Silt deposits forming along river (USDA) Public Domain How silt is formed As rocks and regolith are eroded by weather, frost, and other processes, larger particles are ground down into smaller, rounded bits. Those smaller pieces become silt. Silt typically measures 0.05-0.002 mm and is usually composed of quartz and feldspar. Because silt moves so easily in water, construction and clear-cutting often result in silt levels that pollute waterways. This type of pollution is called siltation. In home gardens, over-watering can cause similar leaching problems and urban-drool. But silt is good for your plants. Silt in garden soil Sandy garden soil loses water and nutrients too quickly, while clay soil holds on too tightly. Loamy soil, in the middle, is ideal for garden plants. Loam consists of 40% sand, 20% clay, and 40% silt.  Dams built where the Mississippi and Atchafalaya Rivers meet facilitate agriculture in silty soil (U.S. Army Corps of Engineers) Public Domain Silt particles tend to be round, so they can retain a lot of water. This high water holding capacity is made even better because silt particles cannot hold on to the water very tightly. The same is true for mineral nutrients. Roots and microorganisms have an easy time pulling water and food from silty soil. Silt can be beige to black, depending on how much organic material it contains.
Silt is prone to compaction, but not nearly as much as clay. If your soil feels slippery when it is wet, it contains a lot of silt. Your soil is filled with positively and negatively charged bits of plant food. The percentage of that food being held by soil particles is called its base saturation.  Crystalized magnesium (CSIRO) CC BY 3.0 Of course, it’s not that simple. The chemical reactions going on in soil are enough to make a chemist’s head spin. But we are here to simplify and understand, so let’s get started! Electrified plant food Plants use electrically charged mineral bits, called ions, as food. The negatively charged bits (anions) are usually found floating around in water. The positively charged bits (cations) attach themselves to soil particles, which are negative charged. Those soil particles have a certain number of electrical charges that can attract minerals. That number is referred to as its cation exchange capacity. The number of those attachments being used is its base saturation. Playing the percentages There is some crazy math and lab work involved with calculating base saturation, but we can leave that to the experts. Most soil test results will list separate base saturation percentages for calcium, magnesium, and potassium. Don’t be confused by the fact that these numbers do not add up to 100%. Hydrogen and sodium have been omitted. But what do these percentages tell you? Balancing act When the charges of soil nutrients are out of balance, plants cannot absorb what they need to thrive. It doesn’t matter if a nutrient is present if the net electrical charges are wrong. If most of the nutrients in your soil are negatively charged, all of the positively charged bits will be able to connect, leaving many negative bits hanging in isolation. Those leftover minerals impact soil pH. Base saturation and soil pH Base saturation measures the number of non-acidic, positively charged bits in a soil sample. That’s why it is called “base” saturation. There are also acidic positively charged bits. Soils with a high base saturation have lots of those acidic, positively charged bits lying around unattached. The more loose acidic bits laying around in the soil, the lower the soil pH. 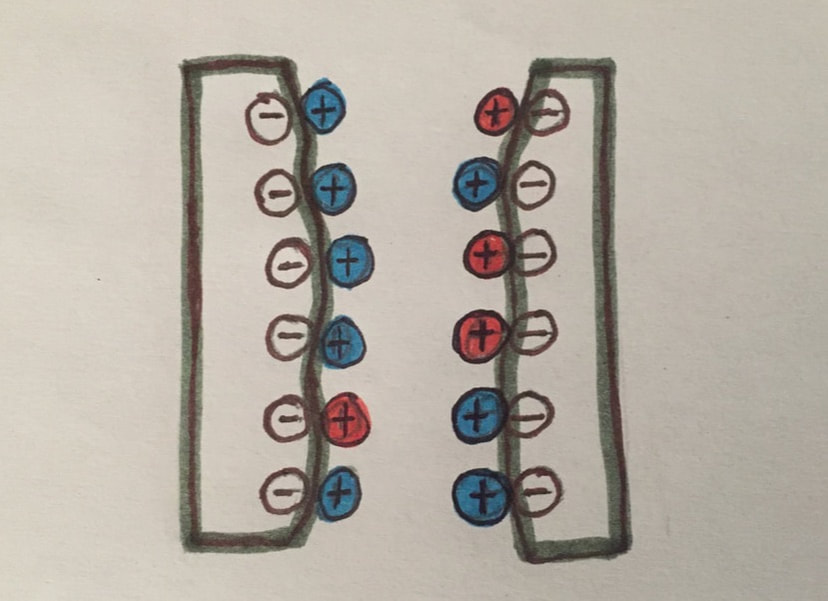 Negatively charged soil samples with high base saturation (left) and low base saturation (right), due to variations in acid cations (orange) and base cations (blue). Drawing by Kate Russell. Using base saturation numbers
Soil test results will tell you how much of each plant nutrient is present and base saturation percentages. One thing you might see is an excessive amount of a nutrient but a normal base saturation percentage. How is this possible? Again, it goes back to electrical charges. Say you have a ton of calcium, a positively charged mineral, but the calcium base saturation is normal. This happens because other charged particles are also present. They can block the excess bits from connecting with anything. Or, there may not be enough negatively charged soil particles available. You need to use both the actual mineral levels and the base saturation percentages when deciding on whether or not to add fertilizer. This post is an oversimplification of an extremely complex topic, but it is accurate enough to help you get the most out of your soil test results. Soil tests cost around $25 and are worth every penny. Your soil has a characteristic known as bulk density. 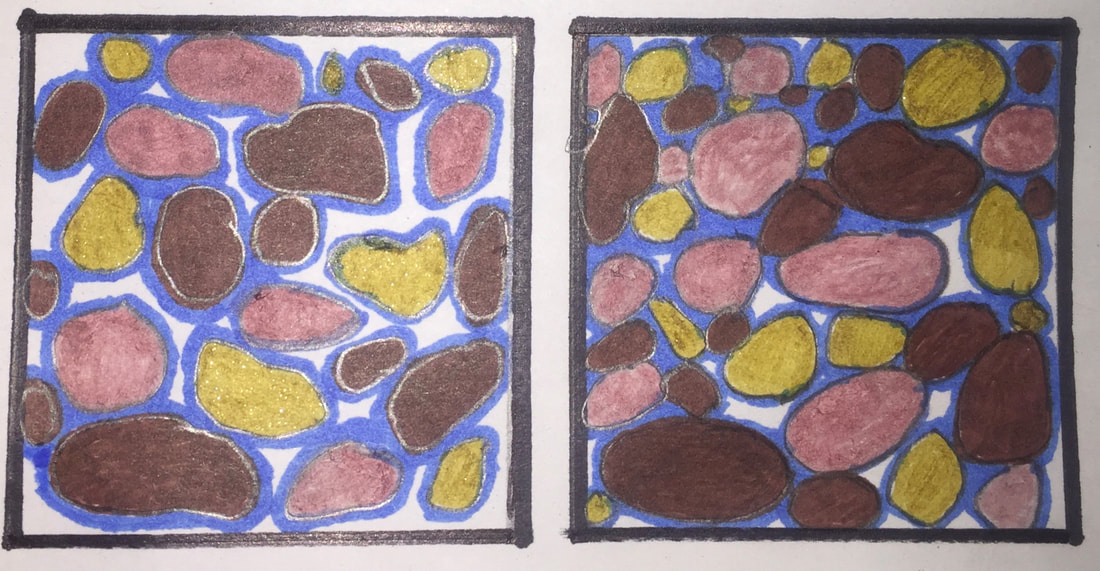 Water (blue) sticks to soil particles, leaving adequate space (left) for air and roots, or not (right) based on bulk density. Drawing by Kate Russell. Put simply, if you take a scoop of soil, it will weigh something. If you take a scoop of different soil, it will have a different weight. Those weights are a measure of the material held in that space. No surprise, right?
Also known as scoop density, this measurement tells you how tightly your soil is crammed into a space. It also tells you a lot about your soil’s permeability (ability to drain), infiltration (rate of drainage), porosity (the number of macropores and micropores), soil texture (sand, silt, and clay), and soil structure. This is important information for plant roots. Another non-surprise: soil is heavy. The weight of the top soil pushes down on the soil below it. That layer pushes down on the layer below that, and so on. This means that soil becomes more and more dense, the deeper you go. This is one reason why so many plants keep their roots near the soil surface. What’s normal? Bulk density is measured in grams per cubic centimeter (g/cc). Bulk density generally ranges from 1.0 to 1.25 g/cc. Sandy soil tends to have high bulk densities (1.3-1.7 g/cc), while clays and silts normally have moderate densities (1.1-1.6 g/cc). Soils that contain more organic matter tend to have lower bulk density values. Lower bulk densities allow for proper drainage, reducing the chance of fungal disease and helping plants overcome the negative effects of mud and drought. Too much stuff If a soil’s bulk density is higher than 1.6 g/cc, your plants are going to have a hard time. Compacted soil restricts the free movement of roots, air, and water. High bulk densities can also prevent germinating seeds from making it to the surface with enough energy to thrive. What is your soil’s bulk density? The USDA provides instructions for a DIY bulk density test, but I have to warn you, your kitchen will stink after you bake or microwave a soil sample. A far easier and more pleasant method is to send a sample to a lab. For the price of a bag of fertilizer, your can learn a lot of good stuff about your soil. Soil tests tell you about nutrient levels, the cation exchange capacity, pH, and base saturation numbers, along with bulk density. Case in point In 2015, my soil’s bulk density was 1.18 g/cc. By 2019, it had changed to 0.95 g/cc. What happened? In 2015, my soil test indicated an extreme overabundance of every nutrient, except iron, and compacted clay. [The over-fertilizing was done by the previous owner.] To counteract the compaction and the lack of iron (a nutrient needed by plants to help them consume other nutrients), I applied foliar sprays of chelated iron and mulched the heck out of every soil surface with aged compost and chicken bedding. The iron sprays allowed my plants to make use of and extract the abundant nutrients, bringing them closer to normal, balanced levels. The composted manure and other organic materials created more spaces between soil particles, making it easier for roots, gases, and water to move around. Four years later, all of my plants are growing better and my soil organic matter (SOM) levels went from 3.5% to 7.6%. If your soil is too dense, your plants can’t thrive. If you know your soil’s bulk density, you can take action to improve it. Have you ever noticed how the larger bits come to the surface when you shake a container of soil? This is called the Brazil nut effect. I have no idea why. The soil under your feet and in your garden is [or should be] teeming with life. Worms, roots, microorganisms, and insects call the soil home. The insects are called arthropods and they play a major role in soil health and plant vitality. 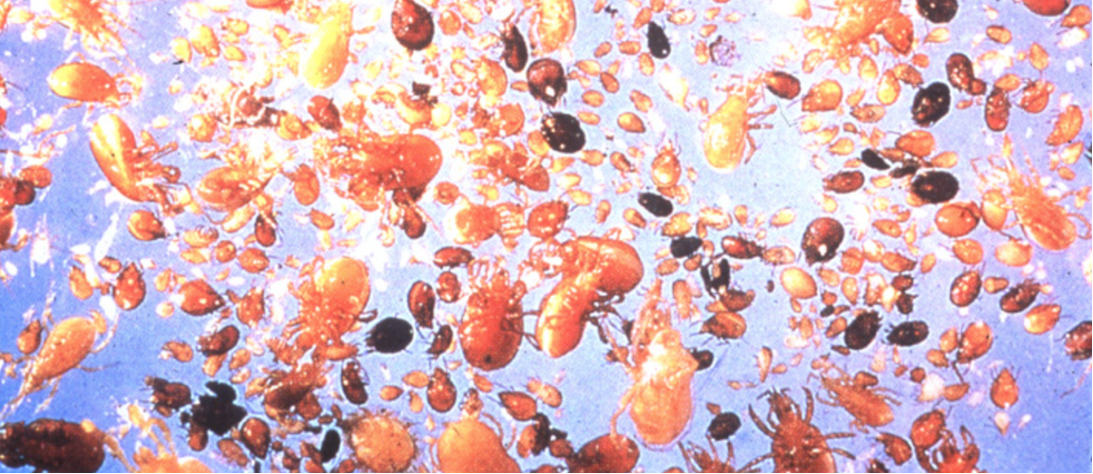 200 microscopic mite species from 1 sq. ft. of the top 2” of forest litter and soil (USDA, Public Domain) In a single square yard of topsoil, there may be 500 to 200,000 individual arthropods. What are arthropods? Arthropods get their name because they have paired, jointed (arthros) legs (podos). Arthropods are invertebrates, which means they do not have a backbone. Instead, they have a hard outer covering, known as an exoskeleton or cuticle, made from chitlin. Arthropods range in size from microscopic to a few inches long. As they outgrow their exoskeleton, it is shed by molting. 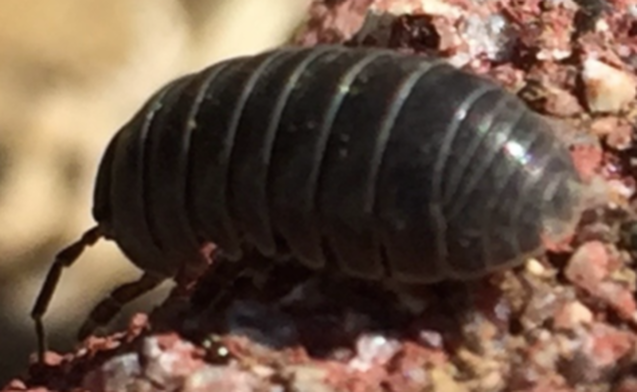 Sowbug Soil arthropod species There are four types of arthropods with many familiar members:
Arthropods are commonly grouped according to their feeding habits. There are fungal-feeders, herbivores, predators, and shredders. Fungal feeders Arthropods that feed on fungi and bacteria include silverfish and springtails, and a few mite species. As they feed, they scrape the fungi and bacteria from the surface of plant roots. As these microbes graze and poop, they make many mineralized nutrients available to plants. Fungal feeding arthropods and the fungi they feed on tend to keep each others' populations in check. 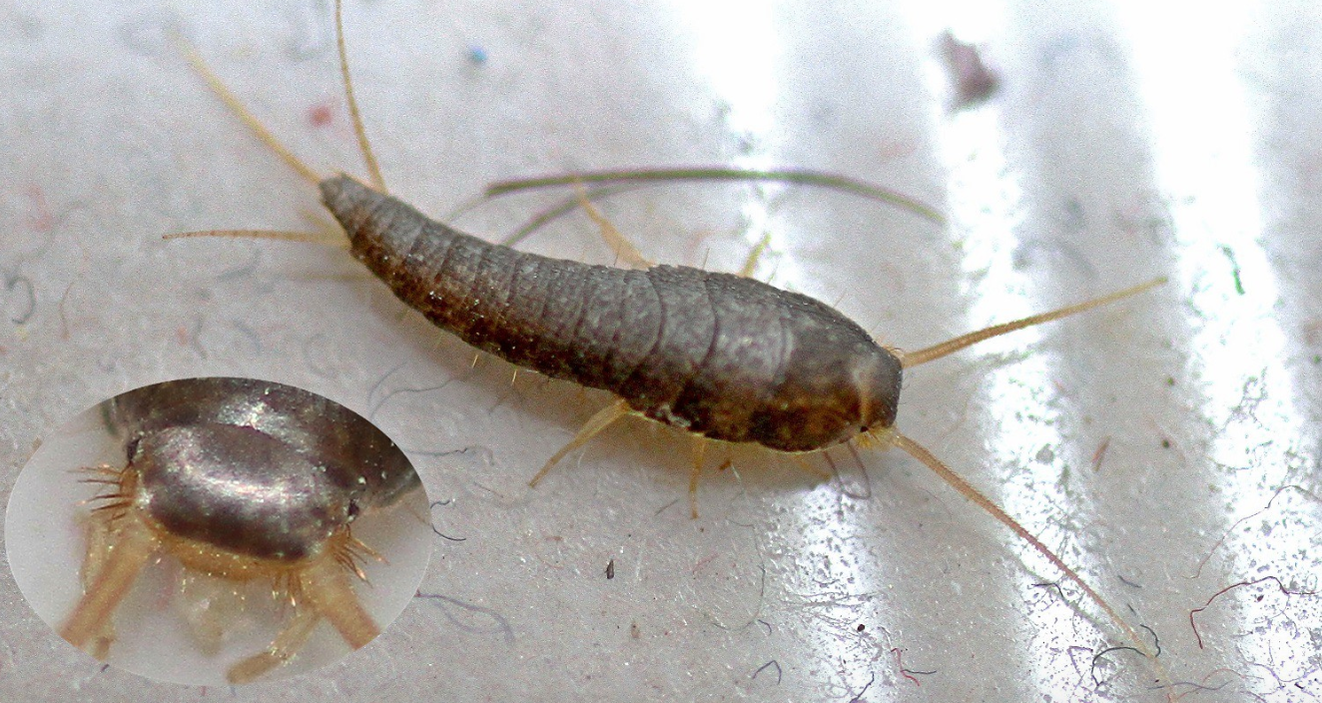 Silverfish (Barb Sendelback, Public Domain) Herbivores Cicadas, mole crickets, root maggots (anthomyiid flies), rootworms, and symphylans (garden centipedes), feed on plant roots and can become major pests. .jpg) Garden centipede, a pseudocentipede (Soniamartinez) CC BY-SA 4.0 Predatory arthropods Predatory arthropods can be generalists or specialists, eating many types of prey, or only one. Ants, centipedes, ground beetles, pseudoscorpions, rove beetles, scorpions, skunk spiders, spiders, and some mites can be predators, feeding on nematodes, springtails, other mites, and insect larvae.  Rove beetle (Daniel Ullrich) CC BY-SA 3.0 Shredders Shredders tend to be larger and may be seen on the soil surface. They feed on decomposing plant material and the fungi and bacteria growing on those dead plants. As they feed, they shred the plant material, increasing its surface area and speeding its decomposition. This group includes millipedes, roaches, sowbugs, termites, and some mite species. When dead plant material is not available, shredders can become pesky root-eaters. 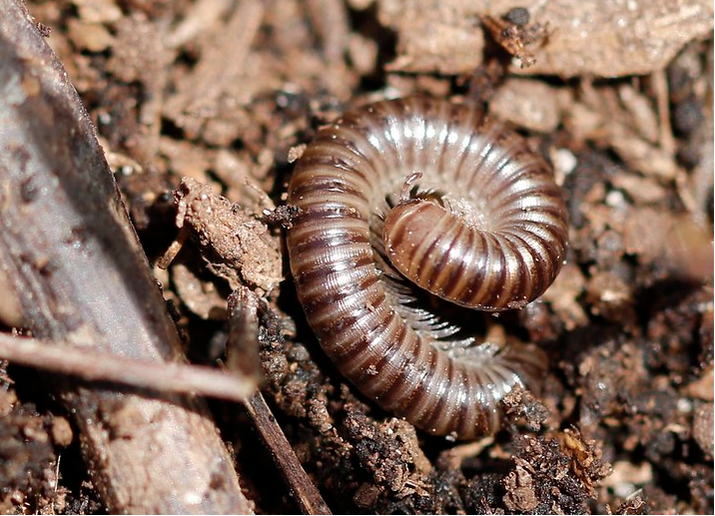 Millipede (Gillian Floyd, Public Domain) Beneficial arthropods As arthropods feed and burrow, they provide many benefits to soil health. Moving through the soil, they aerate and gently churn it, improving porosity, water infiltration rates, and bulk density. As they feed, they shred organic matter, speeding decomposition. And when they excrete waste products, they release mineralized plant nutrients and enhance soil aggregation because their waste is coated with mucus. Their feeding also curbs the populations of other soil organisms and opens the way for a wider variety of other, smaller decomposers. Arthropods often carry around beneficial microbes, in a method known as phoresy, on their exoskeletons and in their gut. These microbes end up helping decompose far more organic matter than they might have, left to their only very tiny devices. You can help beneficial soil arthropods in your garden by avoiding the use of broad-spectrum pesticides, employing no-dig gardening methods, and installing a wide variety of plant species. Since most soil arthropods live in the top 3” of the soil, the use of stepping stones, stumperies, rain gardens, and water features will all help provide the food, shelter, moisture, and biodiversity needed for healthy arthropod populations.
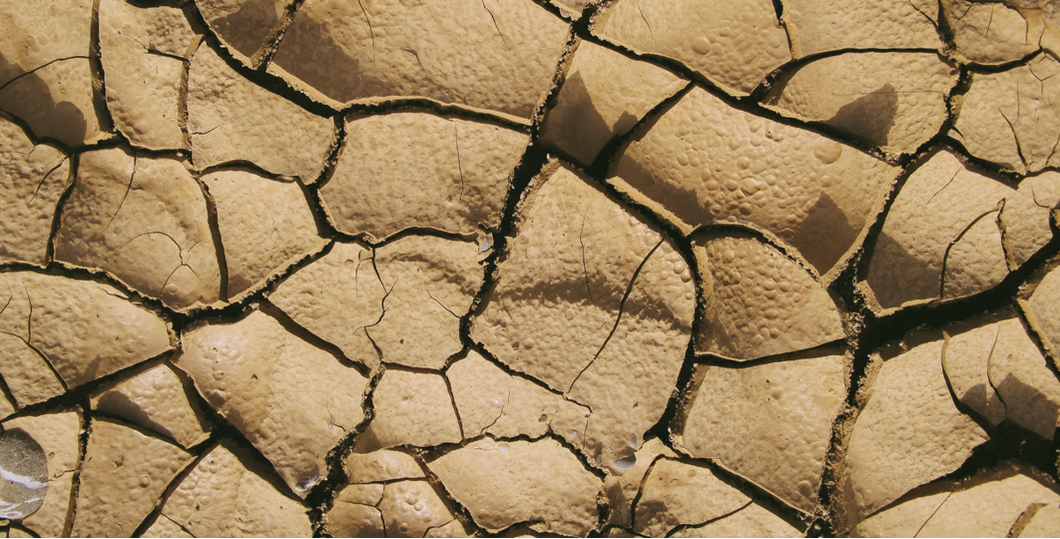 Crusted soil (Francesco Ungaro, Public Domain) When we say soil is compacted, we are referring to all of it. When compaction occurs below the soil surface, it is called hardpan. When the problem is at the surface, we call it crusting. Healthy soil is lumpy. These lumps are called soil aggregates. Soil aggregates are made up of different sized minerals, bits of organic matter, and spaces, called macropores and micropores. Those spaces are critical to soil and plant health, as they provide pathways for air, water, and roots. 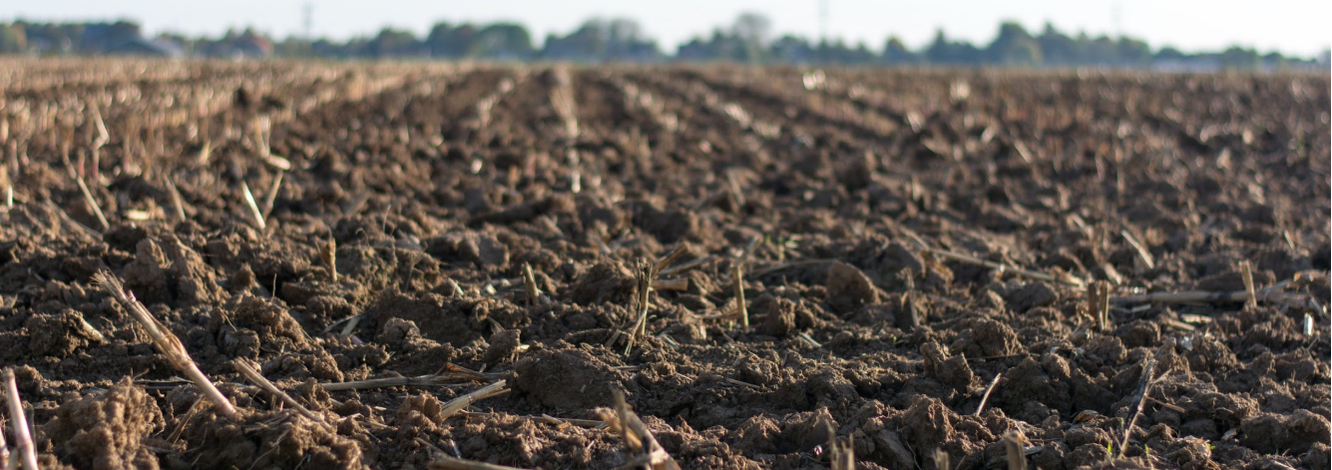 Healthy soil (Jan Kroon, Public Domain) When surface aggregates are broken into smaller and smaller bits, the soil particles shift around, dry out, and realign into a smooth, plate-like structure, called a crust. As that crust dries out even further, cracks commonly appear. These cracks are nearly always at 120° or 90° angles.
Physical crusts may be structural or depositional. Depositional crusts are the result of fine soil particles carried in runoff being deposited over an area. Structural physical crusts are more likely to occur in the home garden. Crusting is particularly common in clay soils because the particles are already so tiny. Flat clay particles average less than 2 μm and are attracted to one another by electrostatic forces. Silt is boxier and 2 to 50 μm, while sand particles are larger than 50 μm. Neither silt or sand particles are attracted to one another electrically. If your clay soil contains high levels of magnesium and/or sodium, the odds of soil crusting are even higher. [What does your soil test say?]
What causes structural crusting? Rototilling and rain are the two most common causes of crusting. Frequent digging or rototilling disrupts microorganism populations and breaks up soil aggregates. Those aggregates are needed to allow air and water to move through the soil. Soil microorganisms are partly responsible for maintaining those soil aggregates and for feeding many of your plants. As heavy rain (or sprinkler water) falls, each drop hits the topsoil and breaks up soil aggregates into smaller and smaller particles. These smaller particles are more prone to compaction and surface crusting. Problems with crusting Compacted soil makes it difficult for water, air, and roots to move through. It also slows soil gas exchanges and drainage. Crusty soil slows water infiltration and makes life very difficult for germinating seeds and young seedlings. In fact, crusting can stop germinating seeds from getting to sunlight altogether. Crusting also increases the chances of runoff and urban drool. If the soil below has reached its watering holding capacity, crusting can prevent evaporation, causing roots, worms, insects, and microbes to drown. Soil crusts are rather fragile. As they are damaged, they tend to break apart, allowing the soil to erode very quickly. [My Burner readers know what I mean. Pre-event, the Black Rock Desert crust is firm and dust levels are relatively low. As traffic picks up, the surface crust is damaged and dust storms can become rather impressive. For you non-Burners, just think of the Dust Bowl of the 1930s.] Correcting crusty soil Patches of crusting can be corrected by lightly breaking up the soil surface and planting cover crops, green manure crops, or cereal grains. You can also top dress the area with aged compost or manure, or reduce damage by mulching. How to prevent crusting Rather than rototilling or digging, use mulch to encourage worms and soil microorganisms to do the work for you. Also, after harvesting an area, cover it with straw, mulch, or a fast-growing cover crop to absorb rain droplets and prevent erosion and compaction. Soil organic matter (SOM) is a category found in soil test results and it is critical for good soil health. 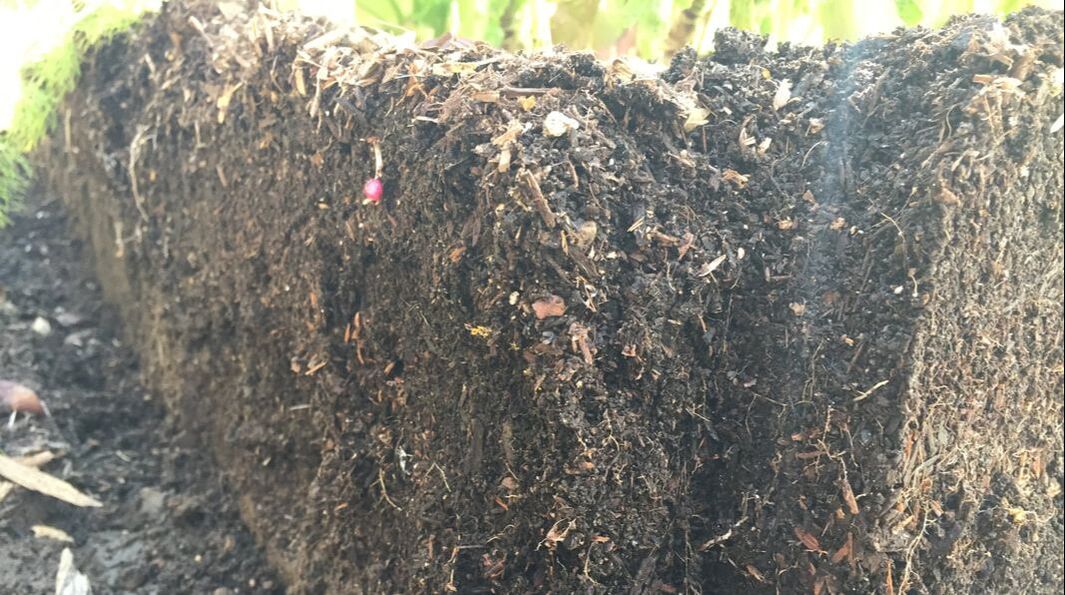 Healthy soil contains a variety of organic matter Soil organic matter levels can range from practically nothing to as much as 90%. Deserts are at the low end of the scale, while low lying, wet areas (think peat bogs) are at the high end. Most topsoils range from 1% to 6% soil organic matter. Soils containing 12% to 18% organic matter are called histosols. Histosols tend to be acidic, low in nutrients, and have poor drainage.
Components of soil organic matter
Soil is made up of minerals (45-49%), water (25%), air (25%), and things that were or are alive. These lifeforms can be insects, plants or animals, in various stages of living or decomposing, microbes, and any substances created by those living things. These lifeforms, both alive and dead, and their secretions and exudates, are what make up soil organic matter. Soil organic matter is approximately 5% living things, 10% fresh residue, 33-55% stabilized organic matter, and 33-50% decomposing organic material. Organic matter and soil health Maintaining healthy soil is a big part of the Integrated Pest Management (IPM) practices that allow us to grow plants with a minimum of chemical interventions. Healthy levels of soil organic matter provide biological, physical, and chemical benefits to your soil. Sufficient soil organic matter improves soil structure and water retention and infiltration. It also increases soil aggregation, or clumping, which increases the number of macropores and micropores through which water, air and roots can move. Organic matter improves soil biodiversity, and the absorption and retention of pollutants, while reducing soil compaction, crusting, and urban drool. Organic matter also creates a buffer against changes in soil pH. Organic matter and plant health As plants, animals, and insects decompose, a variety of compounds become available to plants, increasing soil fertility and nutrient cycling and storage. These compounds include carbohydrates (sugars and starches), fats, lignin, proteins, and charcoal. As these compounds are broken down further, or mineralized, they increase your soil’s cation exchange capacity. This means plants are better able to absorb atoms and molecules of plant food through root hairs. Insufficient soil organic matter can cause mottling and other signs of nutrient deficiency. Soil organic matter also acts as a carbon sink, reducing the amount of carbon in our atmosphere. As a major player in the carbon cycle, soil organic matter is believed to hold 58% of the Earth’s carbon. We can help keep it there (and out of our air) with no-dig gardening and cover crops. How to increase soil organic matter Before increasing anything in your soil, send a sample to a lab for testing. There is no other way of knowing what, exactly, is present without a soil test. It would be rare for most soils to have a problem with increasing organic matter levels, but it’s better to be safe than sorry. Plus, then you’ll have all that other great information! You can increase organic matter levels in your soil with these tips:
Remember, soil organics matter! Eating lead-based paint is a bad idea. You don’t want it in your garden soil, either. But how do you know if it is there and what can you do about it if it is?  Person pouring white paint (Bidvine, Public Domain) Lead is a soft, heavy metal that has been used to make paint, pipes, bullets, batteries, pewter, leaded glass, and in gasoline. Lead is still used to make high voltage power cables, lead-acid batteries, solder, and wicks for cheap tea lights. Damage caused by lead Lead is a neurotoxin that accumulates in bones and soft tissues, causing brain, kidney, liver, reproductive system, digestive system, and nervous system damage. It also reduces intellect and is believed by some to be associated with increased rates of crime and violence. Many historians attribute the Fall of Rome to the fact that their pipes many of their food containers were lined with lead. Most countries have banned the use of lead in products that might cause exposure, but not all. Countries such as China, India, and Indonesia still use lead in many products which is why it is important to verify that planting containers, coffee cups, and other food-related items are safe to use. Red and yellow ceramics are the most likely to contain lead. Where does lead come from? Lead was added to gasoline as an anti-knock agent in 1921. By the 1970’s, over 75% of the U.S. population had elevated lead levels in their blood. That number dropped to just over 2% twenty years later, after lead was removed from gasoline. All those fumes, spewing forth for over 50 years, contained lead. That lead settled on roads, yards, gardens, and fields. Rain and irrigation water leached some of that lead into rivers, lakes, and oceans. Lead can also find its way into your garden soil by sanding, chipping, or sandblasting lead-based paint from older buildings, or when old lead pipes, roof flashing, or lead-batteries are allowed to sit on the ground and break down.  Field of tilled soil (Jan Kroon, Public Domain) How much lead is in your soil? Lead occurs naturally in the soil. While there is no safe level of exposure, natural concentrations range from 10 to 30 parts per million (ppm). Areas where leaded gasoline was still in use in 2014 were found to have lead levels of 100 to 1,000ppm. Homes painted with lead-based paint that were located near high traffic roads could have had lead levels as high as 3,000ppm. Until you get your soil tested, there is no way of knowing how much lead is there. I use the UMass Extension Soil Testing Lab. My soil test lists anything below 22ppm as acceptable. My results were 2.1ppm in 2015 and 2.0 in 2019. Lab-based soil tests are inexpensive and they provide valuable information both for your plants’ health and your family’s health. 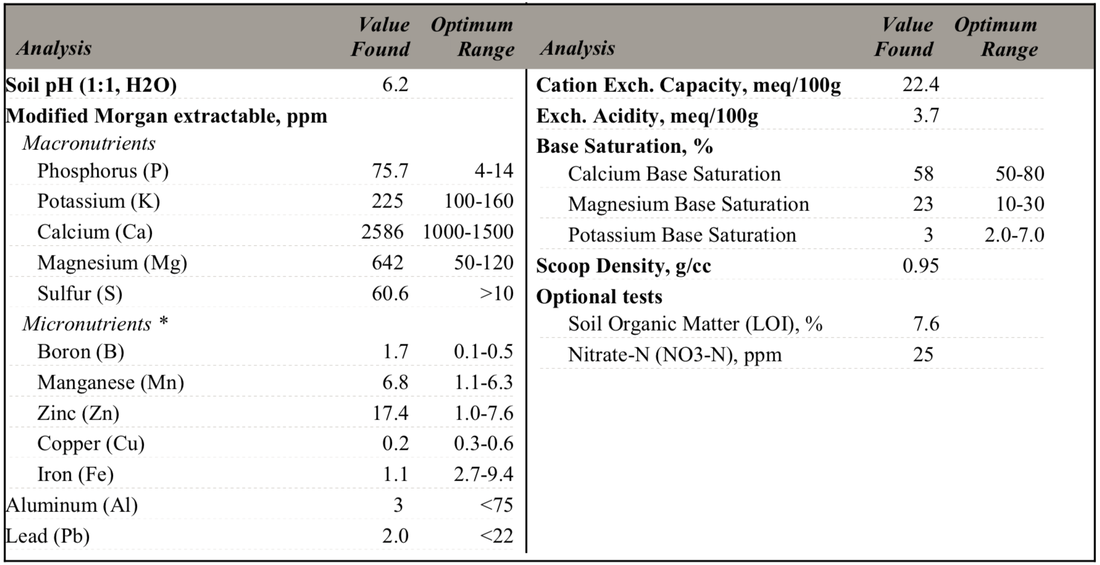 How to manage lead contaminated soil
If your soil is contaminated, your biggest health risk is breathing in dust that contains lead. One of the easiest ways to reduce the risk of inhaling lead dust is to grow cover crops or mulch over the area. You can also cover the contaminated area with 4” to 6” of clean soil, to reduce the risk of dust. You can also use certain amendments that bind to the lead, making it less likely to be absorbed by plants or released into the air via dust. Lead will bind to organic matter, such as aged compost, but this treatment needs to be repeated as the compost breaks down. Depending on your soil’s phosphorus levels, the addition of more phosphorus may improve the binding action. Too much phosphorus is bad for plants, so check your soil test results before using this method. As soil pH increases, becoming more alkaline, plants absorb more lead. Maintaining a soil pH of 6.5 to 7.5 is ideal, both for plant health and to reduce lead absorption. Can I grow edible plants in lead contaminated soil? Plants can grow in soil with lead levels as high as 500ppm. Lead moves very slowly through plants, staying mostly in the roots. According to the University of California Department of Agriculture and Natural Resources, “Fruits such as tomatoes, peppers, melons, okra, apples, and oranges and seeds such as corn, peas, and beans generally have the lowest lead concentrations and are the safest portions of the respective plants to eat [when] grown in lead-contaminated soils.” Crops that should never be grown in lead contaminated soils include leafy greens, such as chard and collards, and root vegetables, such as beets, carrots, potatoes, and turnips. These crops are better grown in raised beds with clean potting soil. Also, if you know your soil contains high levels of lead, be sure to wash all produce thoroughly to remove any lead dust that may be present. Finally, pencil leads have never been made from lead. They are made with graphite. Now you know. Chlorine in your plants? Yes. Well, sort of.
Before you go grab a jug of bleach, you need to know that laundry bleach most commonly refers to a dilute solution of sodium hypochlorite. This is NOT something you want anywhere near your plants. In fact, high concentrations of chlorine are fatal to all living things. It was even used in World War I as the first chemical warfare agent. We are not quite ready to throw the book at chlorine, however. We need to know that chlorine is an element, much like copper or nitrogen, used by plants as food. You don’t hear much about it because plants only need it in tiny amounts. Once called trace elements, minerals used in such small amounts are now referred to as micronutrients. The form of chlorine used by plants is called chloride (Cl-). Forms of chlorine Chlorine is a highly reactive element. As such, it rarely occurs naturally by itself. Instead, it binds to other, nearby elements. In fact, chlorine will pair with practically every other element in the Periodic Table. Those parings occur because chlorine most commonly exists as an anion, or negatively charged, somewhat unstable atom, called chloride. To stabilize its outer electron field, chloride shares electrons with other elements, creating molecules. Some of these more familiar ‘binary chlorides’ include:
We all know ‘salting your fields’ ends badly for plants. Unfortunately, it can be difficult to know just how much chlorine is in your soil. Most soil tests do not include chlorine results. If your soil test indicates excessive levels of other anions, such as sulfur and boron, it may be difficult for your plants to absorb the chlorine they need. Only a lab-based soil test can tell you what those levels are and how they are changing over time. If you see signs of chlorine toxicity, you may want to limit the use of calcium chloride and potassium chloride. How plants use chlorine Chlorine aids plant metabolism during photosynthesis. It is necessary for osmosis and fluid balance within plants, working in tandem with potassium ions to open and close the stoma. As an anion, chlorine binds with many cations, or positively changed ions, helping to transport them throughout a plant. Chlorine also appears to have antifungal properties which are currently being explored. Chlorine toxicities and deficiencies Chlorine is a relatively mobile nutrient, which means it moves around freely within a plant, going wherever it is needed. This means that deficiencies are most often seen in older growth. Chlorine deficiencies appear as wilting, leaf mottling, and a highly branched but stubby root system. [Cabbages that are grown in chlorine deficient soils do not smell like cabbages.] More often, chlorine toxicities occur close to swimming pools and in areas with hard water. [San Jose tap water ranges in pH from 7.0 to 8.7.] Symptoms of chlorine toxicity appear as scorched leaf margins, excessive leaf drop, reduced leaf size, and reduced overall growth. Too much chlorine can also interfere with nitrogen absorption, causing chlorosis, or yellowing, but that might not always be a bad thing. We know that new growth tends to be more susceptible to disease than older growth. It ends up that chlorine’s interference with nitrogen uptake may be a method of reducing disease severity. As a disease occurs, plants absorb more chloride anions, blocking nitrogen uptake, and reducing the amount of vulnerable new growth being produced. Now you know. There are many claims about gypsum in the garden, but how many of them are true?  Gypsum from Poland (Elade53) Public Domain Used to make sidewalk chalk, plaster of Paris, and sheetrock, gypsum (CaSO4) is a soft mineral (along with silica and other minerals) that coats everything and everyone who attends Burning Man. Before we decide whether or not it is beneficial in the garden, let’s learn a little more about gypsum.  Gypsum crystals are plastic enough to bend under pressure of the hand (Rama) CC BY-SA 3.0 fr Gypsum description Gypsum, also known as calcium sulfate, is a salt that forms crystals. These crystals are particularly sharp. In Old English, it was known as “spear stone”.  Gypsum crystals in the Cave of the Crystals in Mexico. Note person for scale (Alexander Van Driessche) CC BY 3.0 Unlike other salts, gypsum becomes less water soluble as temperatures rise. Gypsum can take a variety of forms and, depending on the presence of other minerals, it can take on many different colors.
Gypsum in the garden
Gypsum is made of calcium and sulfur, two nutrients important to plant health. In the early 1800’s, gypsum was considered such a fertilizer miracle that smugglers battled local authorities in what became known as the Plaster War. At that time, gypsum was also known as sulfate of lime or lime sulfate. Plants use calcium to maintain cell walls. Calcium in the soil helps build healthy soil structure by binding tiny clay particles into larger clumps called aggregates. Sulfur is an important component of proteins used by plants. As such, gypsum can be beneficial in the garden, but not always. False claims about gypsum Like most other quick fixes, many of the claims about gypsum are based in fact, but taken too far.
Applying gypsum unnecessarily can cause leaching of aluminum, iron, lead, manganese, potassium into local lakes, rivers, and underground water stores. It also interferes with the beneficial soil microorganisms responsible for helping plants absorb nutrients. Applying gypsum to sandy soils can slow the transport of copper, phosphorus, and zinc. Benefits of gypsum All that being said, there is one situation when gypsum can be helpful in the garden. This only occurs when clay soils contain high levels of salt or, more accurately, sodium. These sodic soils can benefit from gypsum applications, in moderation. High salt levels in clay compound poor drainage, often causing heavy crusts to form. Adding gypsum in this situation allows the calcium to bind to the clay, replacing the salt, which is then leached out of the soil over time through cation exchange. Ultimately, this improves soil structure and drainage and reduces salt levels. Adding gypsum to clay without high sodium levels is a bad idea, as it can make alkaline soils even more alkaline. In most cases, plants need a soil pH of 5.5 to 7.0 to thrive. Rather than simply adding gypsum because you heard it was a good idea, get your soil tested, determine your soil structure, and mulch everything with coarse wood chips to improve your soil and help your plants grow. If you happen to find a large, fine-grained seam of gypsum, you are in luck. Because that particular form of gypsum is more commonly known as alabaster. Now you know. The soil food web is what makes it possible for plants to grow. Soil is not simply ground up minerals. We now know that there are gazillions of living things breathing, growing, moving, and reproducing beneath our feet.  Soil food web (USDA) Public Domain The living things found in soil are mostly smaller than you can see, with only a few exceptions. As these tiny life forms move through the soil, they reduce erosion, impact water and nutrient availability, and aid in decomposition of manure, plants, and pesticides. Algae Algae are single-celled organisms that can form substantial chains. Algae are classified by color. [Did you know that kelp is a type of algae? I didn’t either.] Algae convert sunlight into energy through photosynthesis. They can also fix atmospheric nitrogen. There may be 10,000 to 100,000 algae in a teaspoon of soil. Algae aid in nutrient cycling and help prevent erosion. 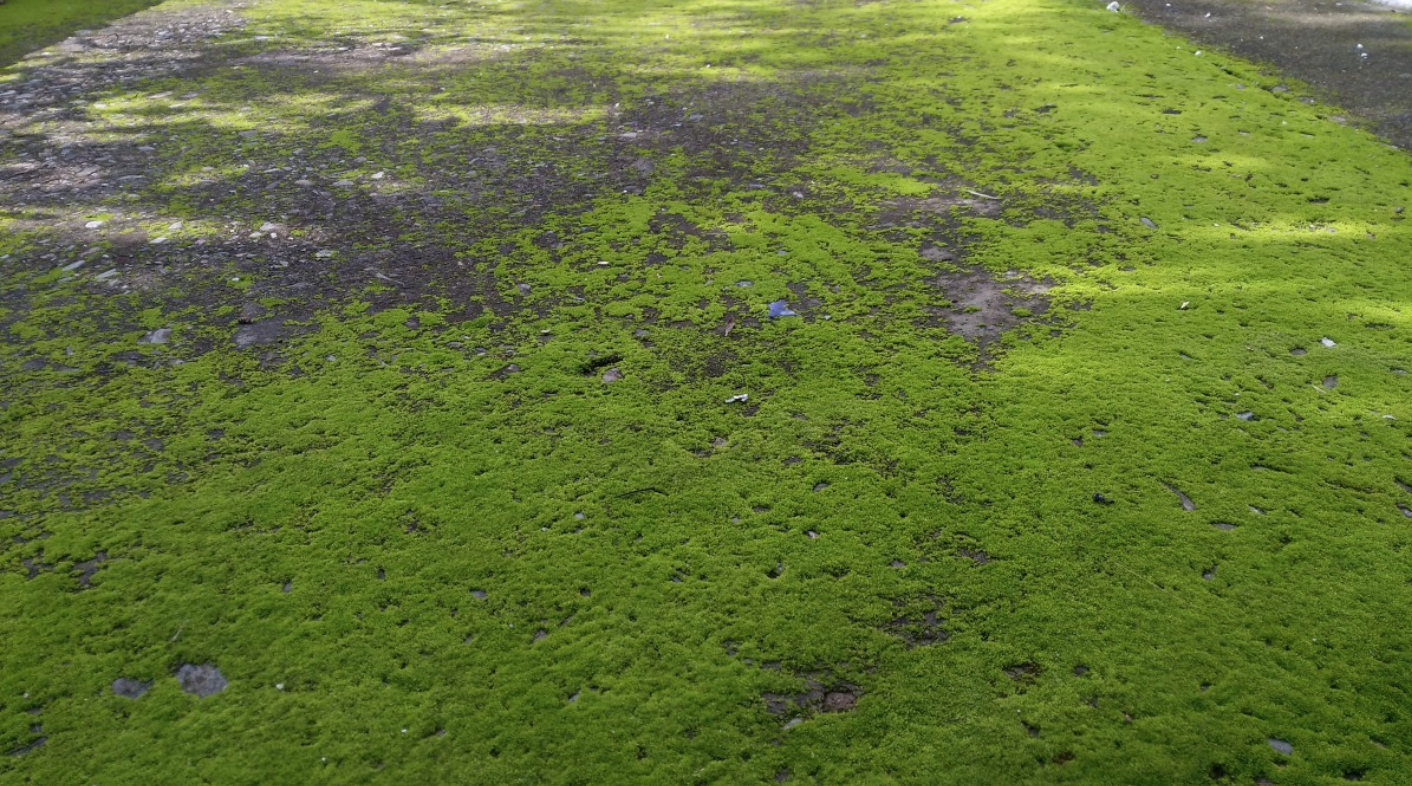 Damp soil encourages algae growth (Anuragi Neri) Public Domain Arthropods Arthropods are bugs. Bugs do not have backbones. Instead, they have exoskeletons. Arthropods include insects, crustaceans, and arachnids. Common insects include ants, beetles, and springtails, while sowbugs are crustaceans. The arachnids include spiders, mites, and millipedes. Arthropods eat a variety of foods. Some types feed on fungi, while others prey upon worms and other arthropods, and yet others are herbivores. As they feed, arthropods aerate the soil, aid in decomposition, and keep other populations in check. At the same time, arthropods can damage root systems. 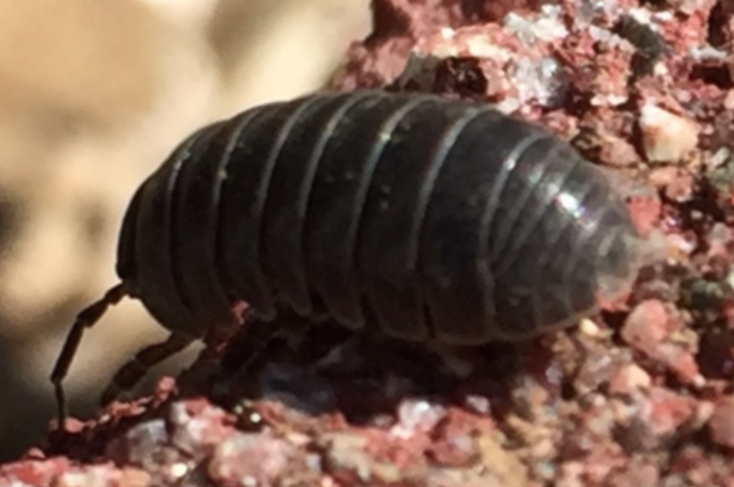 Sowbug Bacteria Bacteria are one-celled organisms. They are so tiny that they can enter a plant through a broken hair, or trichome. It is estimated that there is one ton of bacteria in every acre of soil. That’s the weight of two adult cows, or half of your car. A teaspoon of productive soil may contain anywhere between 100 million and 1 billion bacteria. Most bacteria are decomposers that prefer more tender fare. As they breakdown carbon-based life forms, they make those nutrients available to plants and improve soil structure. Other bacteria are mutualists, which means they work together with plants to everyone’s benefit. This group includes the bacteria which convert atmospheric nitrogen into a form available to plants. Another group of bacteria, called lithotrophs, break down hydrogen, iron, nitrogen, and sulfur compounds, rather than carbon, making those nutrients available to plants. The fourth group of bacteria are pathogens. This group includes Erwinia (fireblight) and Xymomonas diseases, and gall-forming Agrobacterium. Recent research has shown that a certain soil bacteria, Mycobacterium vaccae, improves mood and reduces stress. See, gardening really is good for you!  Digitally-colorized scanning electron micrograph (SEM) of bacterial biofilm (light blue) with amoeba (red) and a microorganism (yellow). Public Domain Earthworms Earthworms are popular decomposers, improving soil structure as they feed on organic matter and move through the soil. Earthworm poop, or casts, is a fermented batch of plant material, bacteria, and fungi that forms nutrient-rich soil aggregates. Earthworms improve soil structure, porosity, infiltration and drainage, as well as make life a lot easier for plant roots. Earthworms are also credited with reducing erosion and runoff. 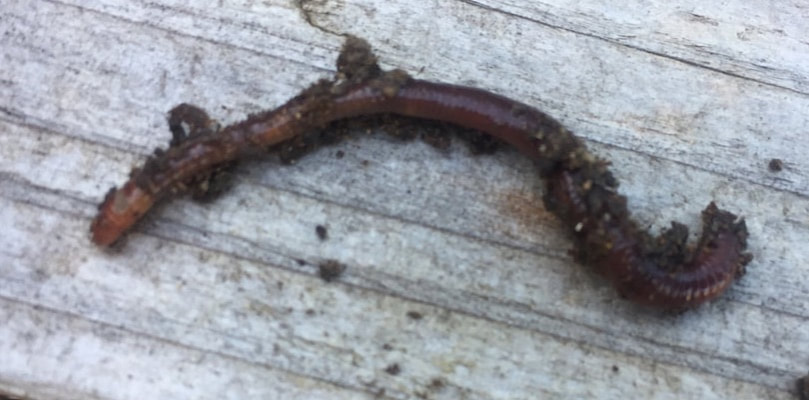 Earthworm Fungi Fungi are single and multi-celled organisms that grow as long threads, called hyphae. Those hyphae may cluster into groups called mycelium. Yeast is a fungi. So are mushrooms and dog vomit mold. Fungi help bind soil particles together, improving soil water holding capacity and infiltration rates. Most fungi, called saprophytic fungi, are important decomposers that can break down harder materials than bacteria can, such as tree trimmings, and hold those nutrients in the soil, rather than allowing them to be lost to the atmosphere through erosion and runoff. Other fungi (mycorrhizae) are mutualists that live on and in plant roots, bringing soluble nutrients to your plants. Plant roots can only come into direct contact with approximately 2% of the surrounding soil. With the aid of fungal threads (hyphae), those roots then have access to all the water and nutrients found in 20% of the soil. There are pathogenic fungi, such as Pythium, which cause blackleg, seed rot, and cavity spot, Rhitozoctonia, and Verticillium, which cause Verticillium wilt, among others. Parasitic fungi feed on insects and nematodes. 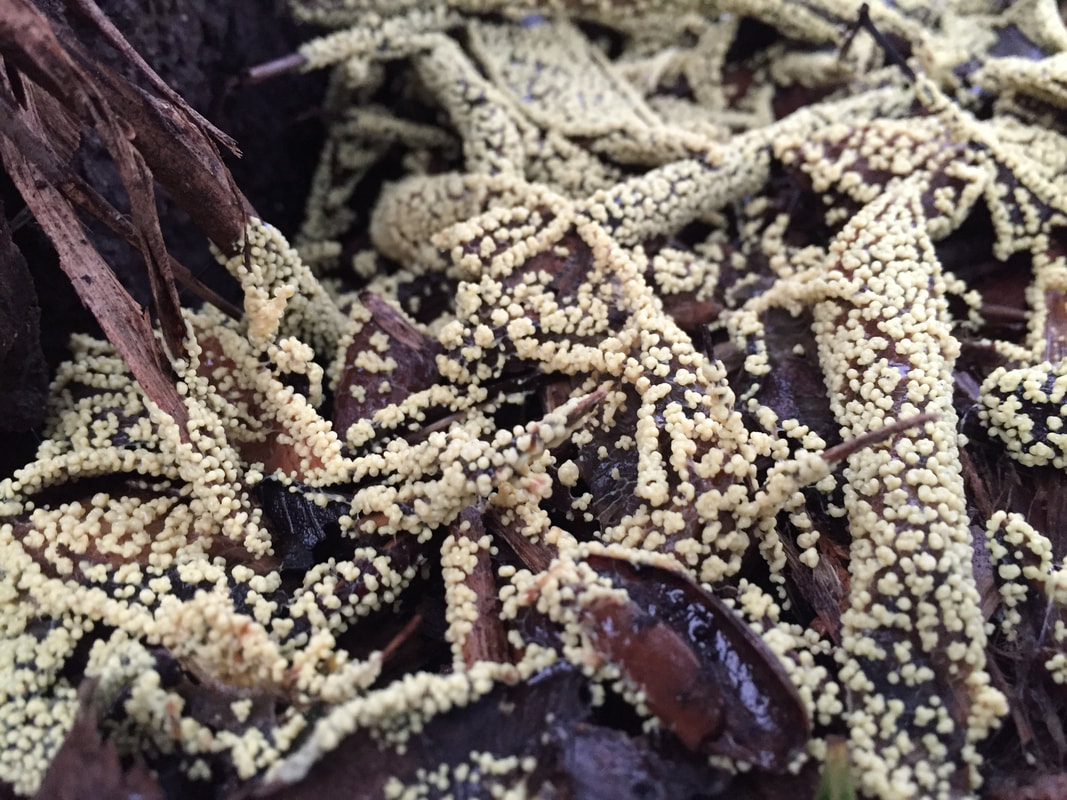 Slime mold on tree trimmings Nematodes Nematodes are worms without segments. Some are large enough to see, at 1/20”, but most are smaller than that. We know surprisingly little about beneficial nematodes. Most research has focused on root feeding omnivores that parasitize our plants. In the world of nematodes, life is hard. There are nematodes that feed on bacteria, fungi, and other nematodes and protozoa, while those same creatures prey upon and parasitize the nematodes. This whole process can either spread or control disease, depending on who wins that particular fight. Nematodes benefit plants by releasing excess nitrogen into the soil, like protozoa. As bacterial and fungal feeders, nematodes keep those populations in check while, at the same time, expanding their ranges by carrying microbes with them. There are usually 100 nematodes per teaspoon of soil.  Colorized electron micrograph of soybean cyst nematode (Heterodera sp.) and egg (USDA) Public Domain
Small vertebrates Small animals, such as gophers, moles, rabbits, snakes, and voles are the giants of this microscopic world. As amphibians, birds, mammals, and reptiles scratch at and burrow through the soil, they help reduce compaction. They can also destroy plant roots. While both predators and prey aid in nutrient cycling, some are more beneficial to your garden than others. In my opinion, snakes, lizards, and toads are preferable. That’s just me. 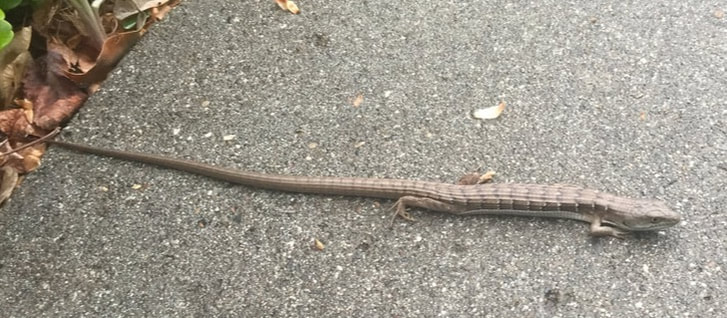 Alligator lizard Bottom line, like any other food web, everything gets eaten by something else. Your soil is no different. As things are eaten, the elements that make them up get broken down into smaller bits. These smaller bits get eaten by something else until, ultimately, plant roots absorb those nutrients to help them grow.
The Earth’s crust is a living, breathing entity whose health dictates our own. Do right by your soil, and your garden will thrive. The greater biodiversity in your soil, the healthier we will be. If you have access to a microscope, I urge you to collect some samples of your garden soil and take a closer look at what is supporting life in your yard. What life forms can you see in your soil? How would you like to transform your soil from compacted concrete (or lifeless sand) for free? You can, with tree trimmings!
Tree trimmings, also known as arborist chips or Tahoe chips, consist of coarse, medium, and fine wood chips, pine needles, twigs, leaves, and bark. It isn’t the pretty, uniform stuff you buy in bags from the garden center. This is what’s left over after a hard day’s work of trimming trees. Professional arborists chip everything they cut off a tree into bits. These tree trimmings either go to a landfill or civic composting center, for a fee, or to someone’s driveway, for free. 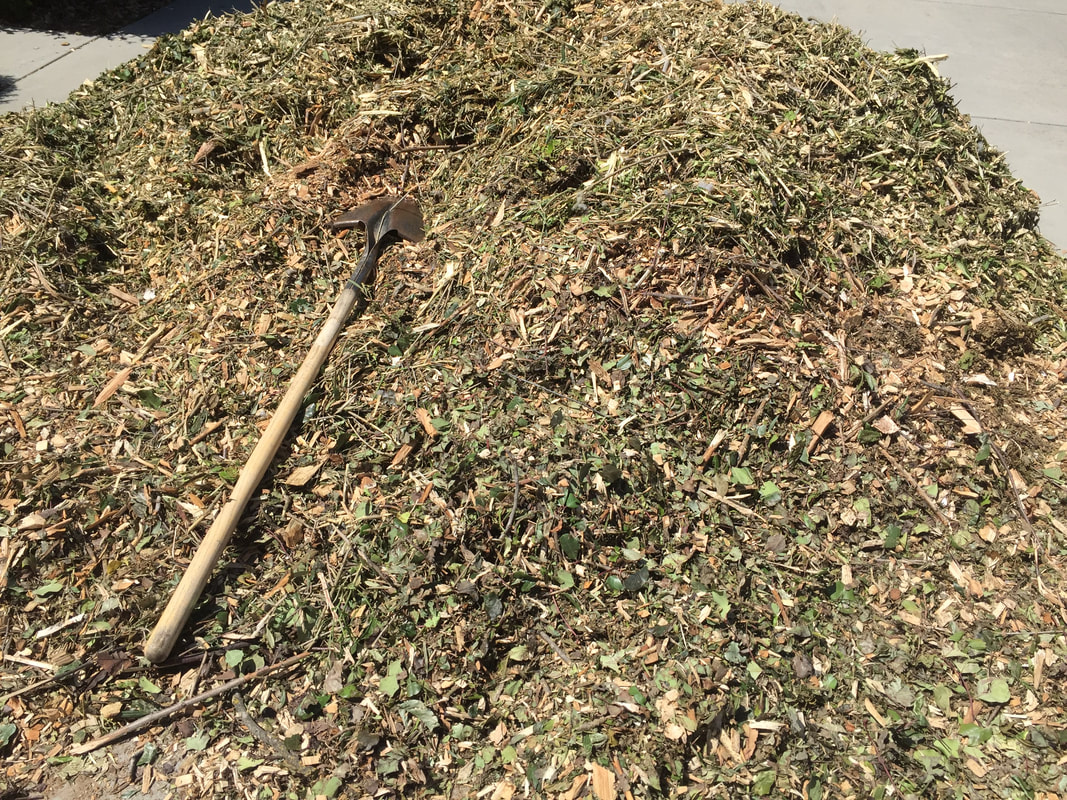 A mountain of free wood chips! Benefits of mulching with tree trimmings Tree trimmings make an ideal mulch. The green leaves and new buds break down quickly, while medium-sized twigs and stems break down a little more slowly. Coarser pieces take longer to breakdown. This process creates a time-release of nutrients and organic material that provide a wealth of benefits, including:
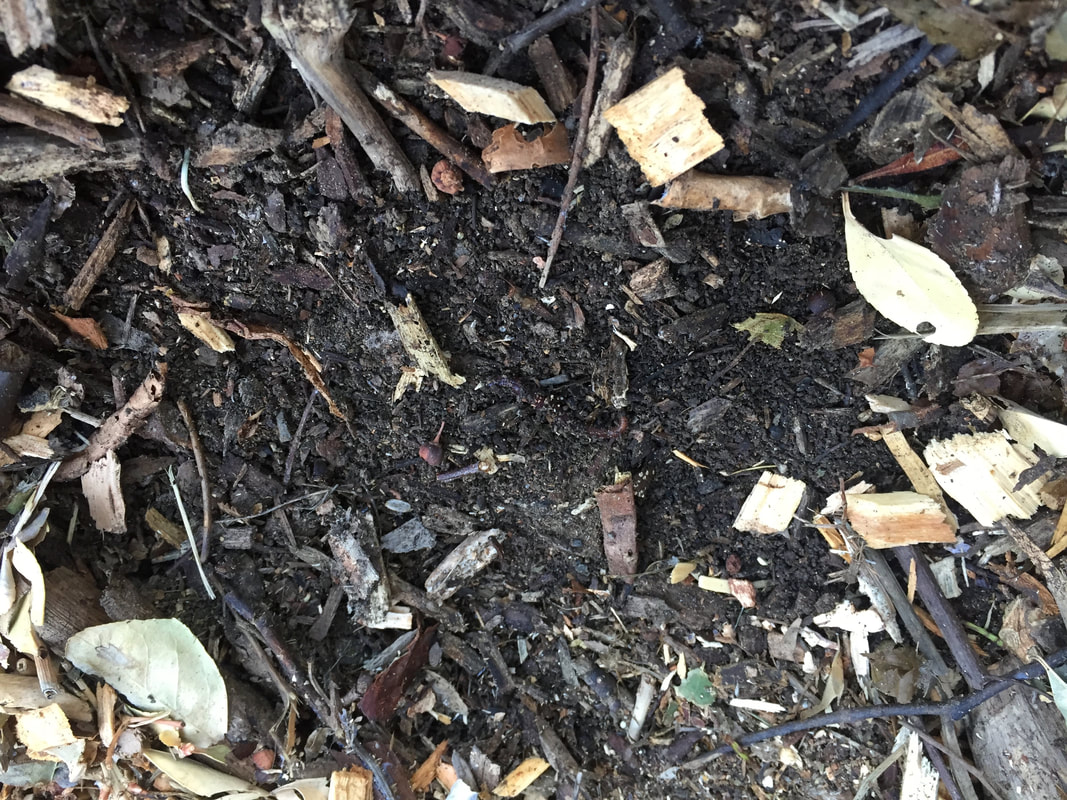 Dark, moist, rich soil created and protected under mulch of tree trimmings But, what about toxins or disease? Let’s learn the truth. Toxic wood chips You have probably heard rumors about the way certain types of wood chips are toxic to garden plants, preventing germination or killing them outright. In nature, this form of chemical warfare is called allelopathy and black walnut is usually the first to come to mind. It is true that black walnut trees produce a compound, called juglone, that can kill off competitors. But juglone only affects some shallow-rooted plants and black walnut is too valuable as lumber to end up chipped. Other commonly accused chips include cedar, redwood, and Douglas fir, but there has been zero scientific proof that trimmings from these trees negatively affects other plants. They do, however, inhibit some fungi and bacteria, and repel or kill clothes moths, termites, cockroaches, ants, and carpet beetles. What to look out for Before accepting a load of wood chips from your local arborist, be sure to ask if the load contains any palm tree trimmings. New palm trees can grow from these pieces. This is not what you want in your garden. Believe me. Here in California, we call palm trees ‘rat hotels’ for good reason. If the load contains palm tree, let it go somewhere else. Many people are concerned about diseases and pests being transferred through tree trimming loads. For the most part, this fear is unwarranted. In nearly all studies, pathogens such as Verticillium, Cytospora, Thyronectria, were found unable to move from the mulch layer, into and through the soil to plant roots. They simply couldn’t do it. So don’t worry about tree trimmings bringing disease to your landscape, unless you make the mistake of digging the chips into the soil. It is far better to just dump them on top of the soil and let nature do all the work. [Note, most pathogens are already present. They become a problem when plants become unhealthy enough to be susceptible. Mulching with tree trimmings helps your soil and plants be healthier, and less prone to disease.] Speaking of work, moving wheelbarrows full of tree trimmings from your driveway to your landscape is work. It’s not backbreaking, but be sure to wear sunscreen, a hat, and gloves. You can skip the gym. 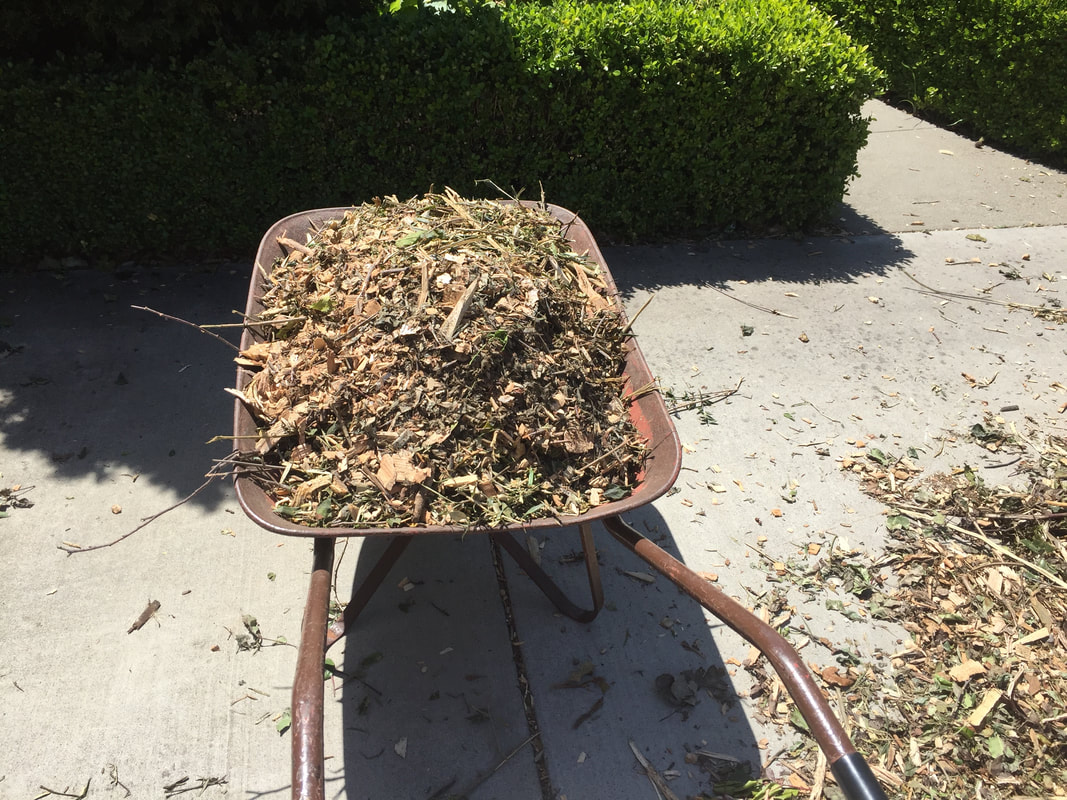 Wheelbarrow filled with tree trimmings Tree trimmings and nitrogen loss
As mulch of any type breaks down, the microorganisms responsible for decomposition consume nitrogen. This makes nitrogen temporarily less available to nearby plants for 6 to 8 weeks. This is only true for the most shallow-rooted plants and has no effect on deep-rooted, established plants. You may need to add a little extra nitrogen during this time if you apply tree trimmings near vegetable plants. In the long term, as the wood continues to break down, it will add nitrogen and other nutrients to the soil. And if you happen to see white fungal threads spreading through your tree trimmings, fear not! These fungi are a blessing to your soil and should be celebrated for the good health they bring to your plants. Tree trimmings and fire safety Some mulches are more flammable than others. If you want to improve soil structure, retain moisture, and reduce weeds, tree trimmings are your best choice. A group of fire and gardening professionals got together in Nevada to test various types of mulch for fire safety. The material you are most likely to get from an arborist is rated with moderate flames and spread, compared to shredded rubber, which burns the hottest (630°F) and flames the highest (over 3 feet), and composted wood chips, which is the only material that did not “demonstrate active flaming combustion”. So, as your tree trimmings break down, they will go from low risk to no risk. How to get tree trimmings Most arborists are happy to give away full or partial truckloads of perfectly good mulch. Simply give them a call and let them know you are interested. They will put your name on a list and call you when they have a load available. Then, park your car somewhere else for a few days and get ready to transform your landscape! And be sure to gift your friendly, neighborhood arborist with the fruits of your garden labor. You will want another load in a few years! Spread those tree trimmings 4 to 6 inches thick and let the magic happen. As always, keep mulch several inches away from trunks and stems to avoid diseases, such as crown rot. Now, go call your local arborist! Cardboard and newspaper have long been touted as excellent tools to block weeds, protect raised beds, and in sheet mulching. We were wrong. 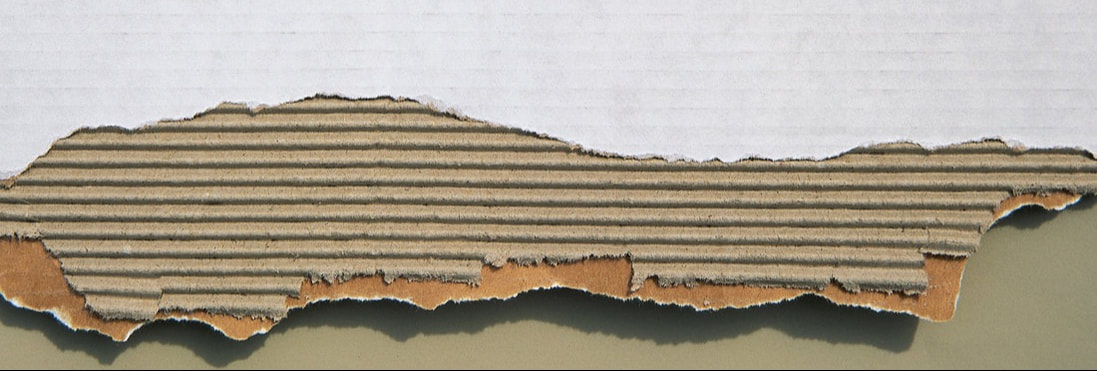 Cardboard (Pixabay) It is true that cardboard and newspaper block weeds. What we have found is that cardboard and newspaper do not always breakdown the way we expect. Without sufficient moisture, cardboard and newspaper can create durable barriers that attract a couple of serious pests. Cardboard and vermin It ends up that termites and voles love cardboard. By putting a layer of cardboard under your raised beds, you are putting out the vole and termite welcome mat. If you have voles, forget the cardboard and use sturdy hardware cloth instead. Cardboard and sheet mulching The use of cardboard and newspaper in sheet mulching restricts water and gas exchanges. This means nearby plants have a harder time getting the air and water they need. Depending on the soil structure and other conditions, the soil may become so dry that it is hydrophobic, leaving installed plants to die of thirst and weeds around the edges of the cardboard to enjoy the runoff it creates. Cardboard and newspaper can also slow evaporation and aeration, setting the stage for fungal disease and root rots. Newspaper, if kept moist, will break down. If it is not kept moist, it becomes a barrier. Sheet mulching only works successfully as a temporary weed control measure. Long term use of newspaper or cardboard actually creates more problems than it prevents. What to do if the cardboard is already in place? If you already have cardboard and newspaper in place, inspect it for signs of termites and voles. If signs of either are visible, remove it completely, bag it, and throw it in the trash. Then, inspect the soil underneath for signs of life. If the sublayer looks like hardpan or mud, you will need to treat it accordingly. Hardpan layers need organic material. Mud needs to dry out. Unless roots have grown into the cardboard layer, it is better to remove it completely. If it cannot be removed, poke holes in it and water it until it decomposes. Once you have corrected the problem, cover the area with a healthy layer of coarse wood chips and let it go fallow for a while. The wood chips will reduce weeds while feeding important soil microorganisms. 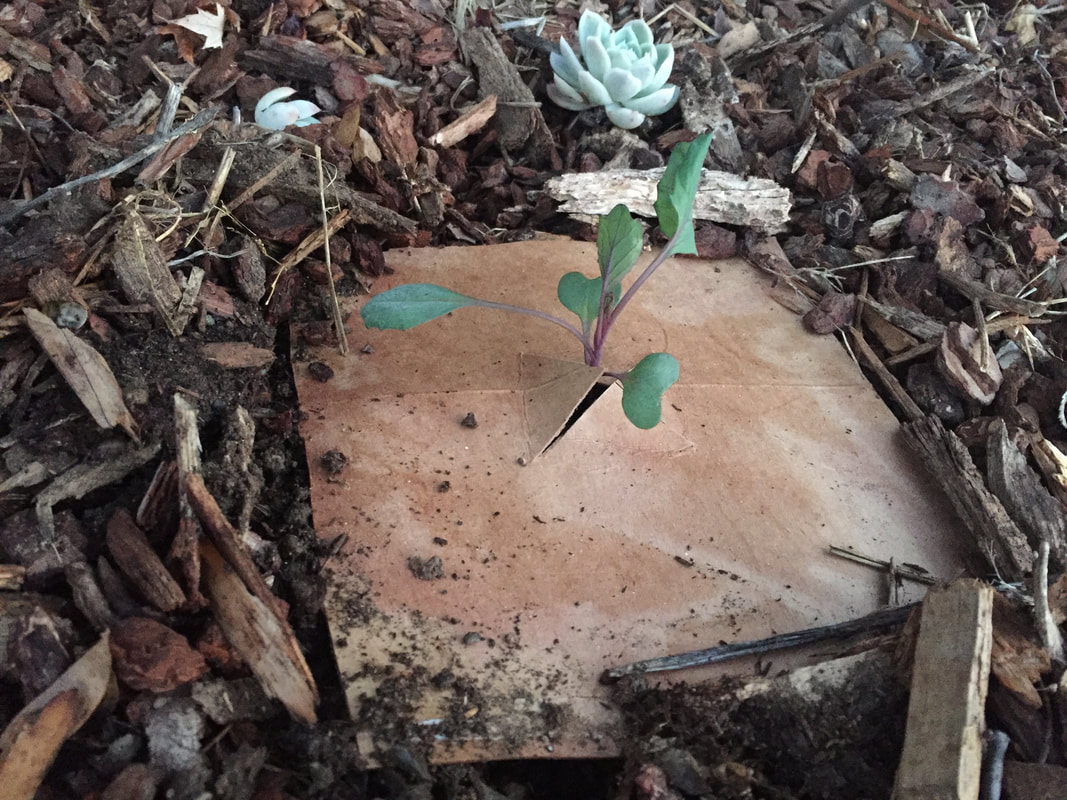 Brassica collar Cardboard still makes an excellent brassica collar or earwig trap. Beyond that, send it to the recycling center.
Adding manure to the garden provides a wealth of plant nutrients, right? Yes, it does! It can also make you very, very sick. 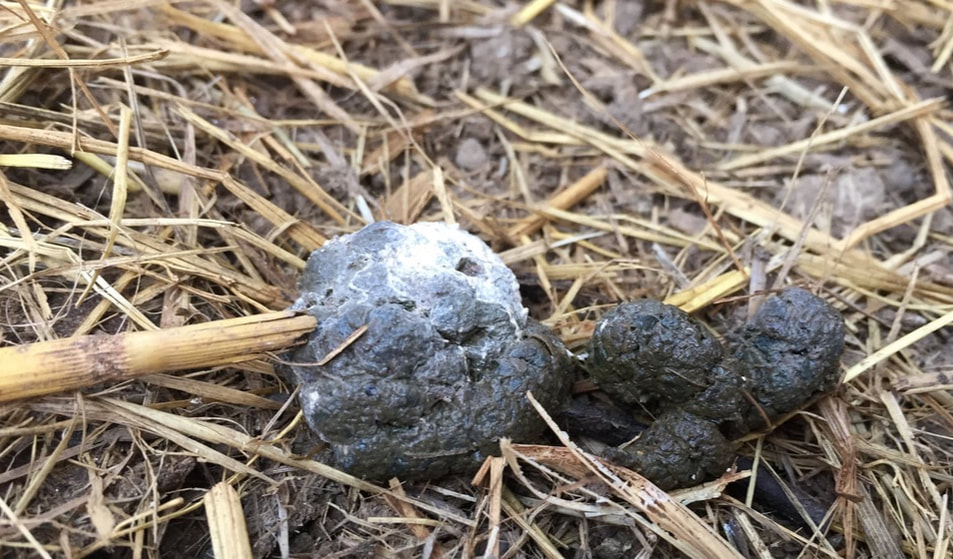 Chicken manure and straw Improper management of manure in agriculture is what leads to those massive recalls of grocery store lettuce and salad mixes. Yes, it can kill you. But don’t panic, there are steps you can take to make it safe. Chicken bedding, rabbit droppings, horse manure, and cow patties are filled with valuable plant nutrients. Rather than allowing those resources to go to waste [Sorry, I couldn’t resist], you can put them to good use in the garden by following some simple safety precautions. Benefits of manure Plants don’t care what you feed them. To them, an element is an element, wherever it came from. Instead of buying fertilizer, you can grow great soil by adding organic material such as manure. Animal manure provides far more than chemical nutrients. It is the slow-release vitamin plants need to grow and thrive - 700 million years of evolution can’t be wrong! In addition to nutrients, manure contains undigested feed and bacteria that improve soil structure, increase water and nutrient retention and water holding capacity, reduce erosion, and supports important soil microorganisms. Incorporating manure into your garden soil improves its tilth, making it far easier to work. Nutrient content of manure Sadly, animal manure does not contain as much nitrogen as you might have hoped. Nitrogen occurs in two forms in manure: organic and inorganic. Organic nitrogen (N) is a slow release nutrient. Inorganic nitrogen occurs as ammonium (NH4+) and nitrate (NO3–) and is immediately available to plants. But you need to act quickly, when it comes to nitrogen. Nitrogen is a highly volatile element. Left to sit on the surface, nearly 100% of the nitrogen is lost to the atmosphere in a process called volatilization. If manure is incorporated into the soil right away, only 20% is lost. If you are a fan of no-dig gardening, composting will be your only option. Manure contains high levels of potassium and phosphorus, which your soil may or may not need. I’ve said it many times: get your soil tested by a reputable lab before adding anything. to avoid creating toxicities (and wasting money). Manure also contains many important micronutrients. Varying levels of calcium, copper, magnesium, manganese, sulfur, and zinc may also be present in animal manure. But not all manures are created equally. Even within a species, nutrient values can vary. Still, there are ranges of nutrients found in most manures and beddings that make them a valuable asset to the home gardener. Did you know that broiler chickens produce a different manure than roaster chickens? I didn’t either, but you can look at a chart from the Clemson University Extension if you want to learn more. 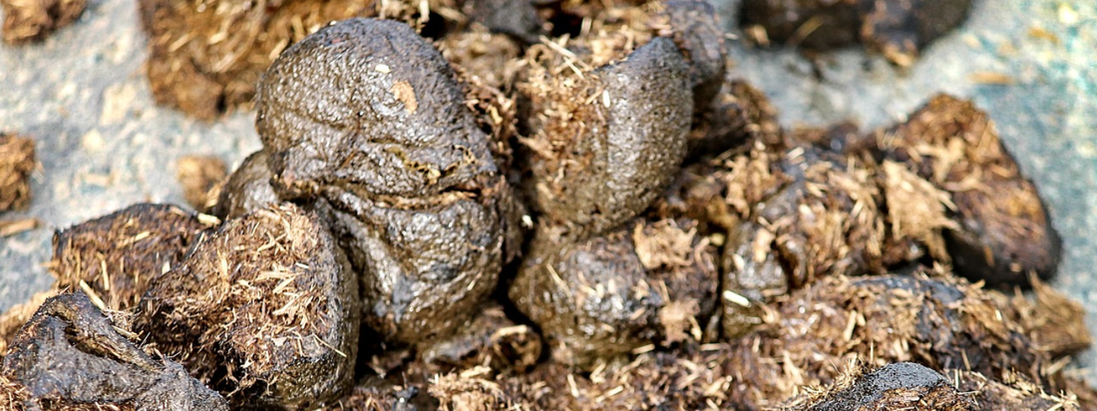 Horse manure (Pixabay) Raw manure
Raw manure should never be applied to the soil while plants are growing. If it is, be sure that the manure does not touch the plants. After manure is applied, plants that come into contact with the soil (lettuces, melons, squash) should not be harvested for 120 days. Crops that do not touch the soil (tomatoes, corn, pole beans) should not be harvested for 90 days. But you can’t wait that long, you say? What about composted manure? At what point does it become safe to use? Composted manure Simply allowing manure to sit in a pile until it looks done is not adequate to protect your family’s health against disease. Many pathogens can survive for years in a pile of poo. Research has shown that manure must be composted for at least 45 days, 15 of which must be at temperatures between 131°F and 170°F, and turned at least 5 times to be safe to use. Assuming it hasn’t been recontaminated by air-dropped bird poop or other pathogens. How certain are you that those temperatures have been reached? Seriously. If you are using manure in your garden, you need to be out there with a thermometer and a pencil, documenting those temperatures. You can get a soil/compost thermometer for around $10. Compared to trip to the emergency room, it’s worth it. Manure sources As many of you already know, I raise chickens for eggs and compost. Poultry manure has a high nitrogen content and, mixed with straw bedding, makes for an excellent soil amendment. I only feed my hens organic laying pellets, organic treats, and mostly organic kitchen waste, so I feel safe using it after it has been properly composted. Before you accept a truck load of cow or horse manure from the local farm or stable, keep in mind that you have no control over medications being used on those animals, or on any pesticides, herbicides, or other chemicals that were used on their feed and which can pass through their digestive systems. Signs of toxic manure include poor germination rates, seedling death, distorted leaves and fruit, and smaller harvests. Also, horse and cow manure tends to be high in salt, which is fine once in a while, but it can build up to toxic levels if used too frequently. Many people worry that using manure will make their garden smell bad. Properly aged manure smells more like rich earth. Mushroom compost, as my Gilroy neighbors know, has a much more pungent aroma. Now you know. Odds are pretty high that you are walking around your garden each spring, removing spent stems and frost damaged twigs and leaves, shaping shrubs, deadheading spent blossoms, and curbing rampant growth. All of those snips, trims, and cuts are then taken to the compost pile, where they are watered and flipped repeatedly, until the mixture is ready to be spread out as plant food and soil amendment. That’s fine, but, in many cases, you can simply chop and drop, right where you found the plant in the first place. 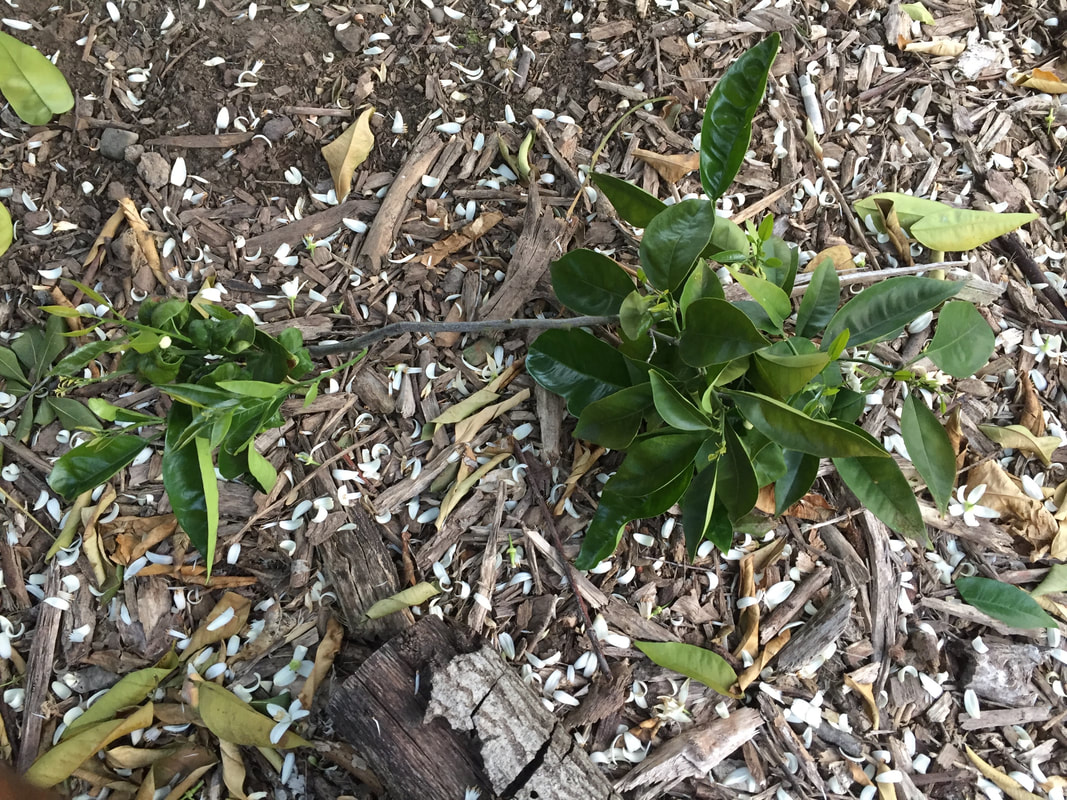 Valencia orange branch pruned from the tree (Kate Russell) Stop fighting natural cycles Moving materials around is often unnecessary. Instead, copy the natural cycles that have evolved over millions of years. Simply chop plant material where you find it and drop it on the ground. This saves a lot of time and energy, while still putting all that organic matter to work for you in the garden. Insects, animals, microbes, rain, and foot traffic will move that chopped plant matter into the soil, improving soil structure and adding important nutrients, just as it has since plants arrived on the planet’s surface. No wheelbarrow required. Benefits of mulch Mulch, of practically any sort, creates a buffer against erosion and temperature extremes. It also makes weeding a lot easier. While I am a huge proponent of coarse wood chip mulch, you can use the same idea to simplify your spring garden work: trim off bits of plant, chop it where you stand, and let it fall. Using a plant’s own material to create instant mulch puts the nutrients that plant needs to grow and thrive within easy reach. Of course, you should still get your soil tested every 3 to 5 years, to make sure there are no deficiencies or toxicities. Levels of effort In one school of thought, the chopped material is simply dropped to the ground after the first snip. This green manure will, over time, break down. Obviously, woody stems will take far longer than green leaves and new growth, but they will break down eventually. Personally, I take a slightly more active role and chop the removed plant parts into smaller pieces, just as I do at the compost pile. 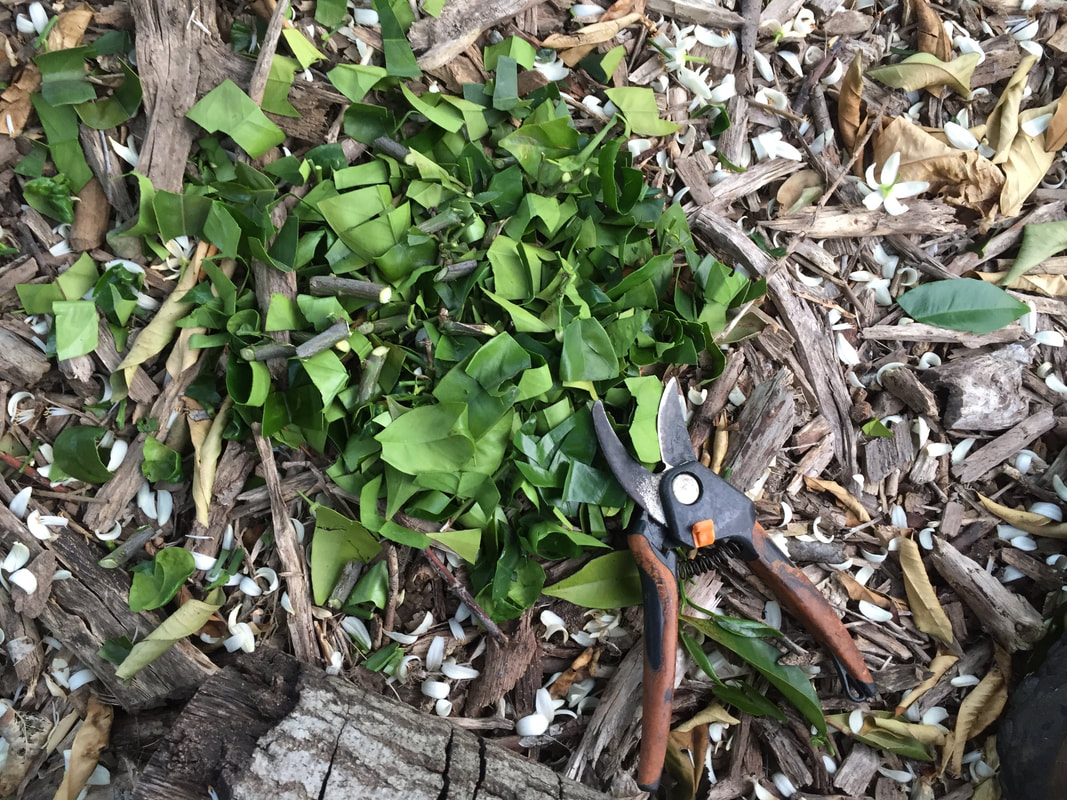 Valencia orange branch chopped and dropped as mulch (Kate Russell) Recycling plant material
Chopping plant material speeds the decomposition process. Dropping it where you found it puts nutrients back where the plant can reuse them. This is the same idea behind grasscycling, which is when you mow the lawn without the bag attachment, allowing the clippings to fall right back on the lawn. Yes, you will be more likely to track snipped blades of grass around on your shoes for a day or two, but the nutrients and soil structure improvements are worth it. Come autumn, when leaves start falling, leave them where they fall, unless they fall on your lawn. In that case, mow them where they fall, or blown them into flower beds and around shrubs and trees, where they will create a winter blanket of protection that is transformed into food in spring. Some claims are made about plants containing especially high levels of nutrients, making them excellent green manure crops, perfect for chop and drop mulching. These ‘dynamic accumulators’ are mostly hype. The truth is, plants contain a wide variety of elements used to help them grow. Some produce more volume, or biomass, than others. That’s all. A word of warning While chopping and dropping is an excellent way to save time while improving soil health, you don’t want to drop heavily diseased or infested plant material where reinfection or re-infestation can occur. By throwing diseased plant material in the trash, you are breaking the disease triangle for that pathogen on your property. In most cases, infestations by insects can be added to your compost pile. In both cases, you can also go ahead and drop everything, allowing natural predators to kill off most of the pests. Most disease pathogens do not last long in green manure, with the exception of fungal diseases, such as peach leaf curl and rust. When those diseases are present, I toss leaves in the trash. Chop and drop weeding Unless they have gone to seed or are spread by runners, weeds can be pulled, chopped, and dropped where they are. Weed plants with seeds and those that spread using runners are fed to my chickens, or you can add them to your compost pile. [Compost piles are still great to have for kitchen waste and to process chicken or other animal bedding. As you move through your garden, pruners at the ready, snip off unwanted stems, spent blooms, and the like, chop them where you stand and let them fall to the ground. If you think it looks messy, you can chop while standing behind the plant instead of in front. In a surprisingly short period of time, you will forget they were even there as natural cycles take hold and transform yard waste into valuable plant food and soil amendments. For free. Glomalin [GLO-ma-lin]. You cannot see it, smell it, or taste it, but glomalin is the glue that holds soil together and the path by which nutrients move from beneficial fungi to plants. 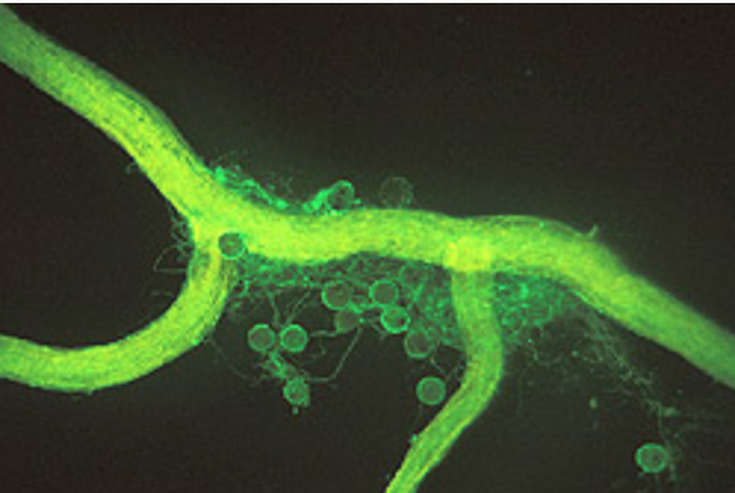 Mycorrhizal fungus growing on a corn root. The round bodies are spores, and the threadlike filaments are hyphae. The substance coating them is glomalin, revealed by a green dye. (Sara Wright) USDA, Public Domain Mycorrhizal fungi When most of us think of fungi, we usually think of mushrooms or disease. Mycorrhizal fungi are an entirely different critter. These beneficial fungi live in soil, and in and around plant roots. They are responsible for helping over 70% of the Earth’s plants get the nutrients they need from the soil. They do this with glomalin. Glomalin is found on the tiny hairs, or hyphae, of mycorrhizal fungi. This coating helps the fungi to retain water and nutrients as they interact with local plant root systems. Soil Soil is made up of 45% minerals, 1-5% organic matter, 25% water, and 25% air, on average. Soil structure tells us the size of the mineral particles, which can be sand, loam, or clay. Air and water are found in tiny spaces, called macropores and micropores. The chunks of organic matter and minerals are called soil aggregates. Those aggregates are held together with glomalin. Soil aggregates improve water infiltration, drainage, nutrient cycling, root penetration, and water retention near roots. They also help counteract soil compaction. What is glomalin? Glomalin is a tough, resilient glycoprotein that contains significant levels of iron. It does not dissolve in water and it is resistant to decay. Also known as glomalin-related soil proteins (GRSP), glomalin stores carbon and nitrogen, and binds mineral particles together, coating them with the same protective barrier used to protect the fungi. It is now believed that up to 30% of the carbon sequestered in undisturbed soil is held specifically by the glomalin. This is one of the reasons behind no-dig gardening, in that it reduces the negative impact on the fungi responsible for creating glomalin and helping soil hold onto that carbon. How does glomalin improve soil quality? Glomalin was discovered in 1996 by Sara F. Wright, a USDA Agricultural Research Service scientist. She discovered that soils depleted of mycorrhizae and their glomalin, whether through exploitation, solarization, or fungicide use, had significantly reduced crop sizes. Glomalin helps hold organic matter in place, improving soil aggregate stability. Soil aggregate stability is a measure of the combined physical, chemical, and biological properties of a soil sample, as well as its ability to resist degradation and erosion. Without glomalin, every drop of rain and every gust of wind would grind and disperse soil in a global Dust Bowl. Glomalin is also what gives soil its brown color. Removing glomalin from soil leaves it a gray, rocky color. 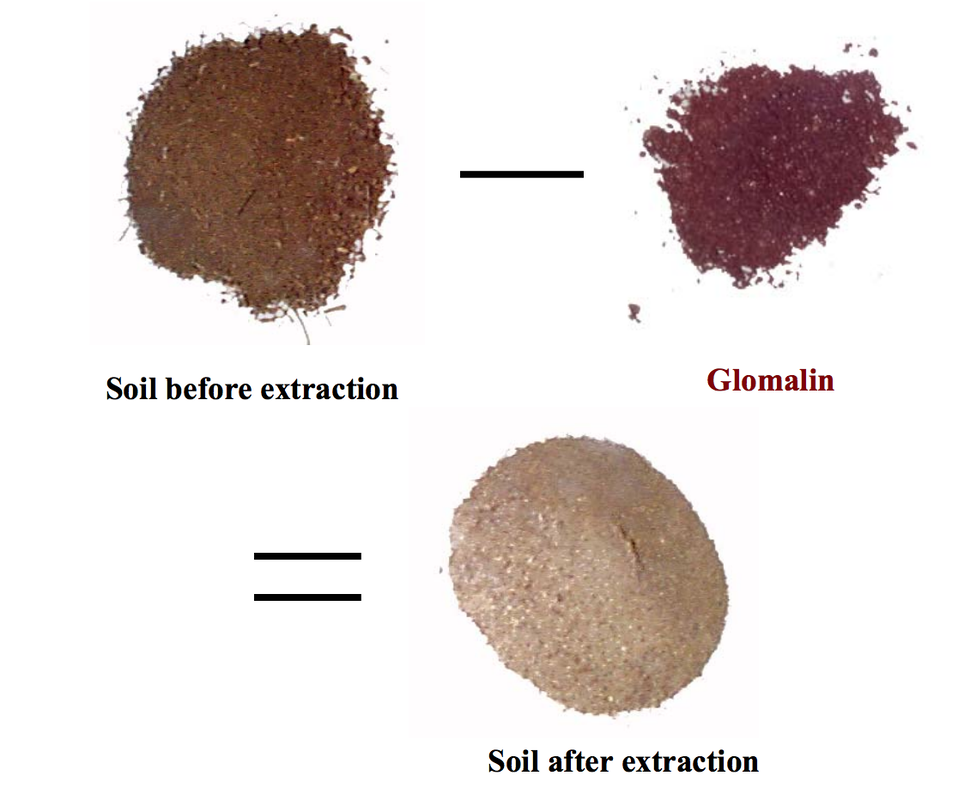 Glomalin extraction (USDA) Public Domain So, what’s glomalin to you?
Recognizing the importance of mycorrhizal fungi and glomalin to soil health, you can improve plant and soil health with these tips:
By keeping your soil healthy, the natural processes needed by your plants to acquire nutrients and fight disease can continue. How can digging both cause and correct hardpan? Before we can answer that question, we need to know what hardpan is. 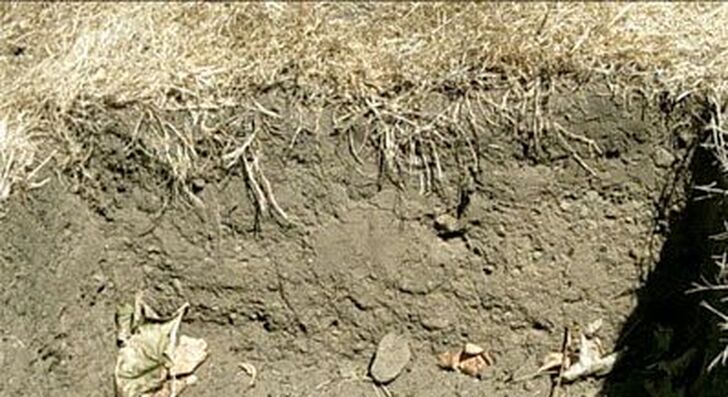 Hardpan stops roots in their tracks (steevo2005) Hardpan is a layer of soil so dense that air, water, and roots can barely move through it, if at all. Think of it as a saucer under the teacup of life. Unlike compacted soil, which is a general condition of not enough macropores and micropores, hardpan is a distinct layer, usually found 4 to 40 inches below the surface, that reduces or halts drainage, roots, and gas exchanges altogether.
Causes of hardpan Plowing, digging, or rototilling to the same depth every year can compact the underlying soil so much that it becomes hardpan. In addition to digging and plowing, there are several other things that can cause hardpan to develop:
Hardpan can also occur naturally when layers of silica, iron oxides, salt, or calcium carbonate fuse and bind soil particles together. Glaciers can cause hardpan, by compressing layers of those minerals. Soil pH and soil structure are major factors in the development of hardpan. Acidic soils are far more likely to cause calcium and iron to form hardpan layers, than alkaline soil. Soil structure is another important factor. Clay particles are very small and already tend to become compacted. In clay soil, rain or irrigation followed by high temperatures can also create hardpan. However it occurs, plant roots don’t like it. Do you have hardpan? Poor drainage is the first sign of hardpan, followed by a general failure to thrive. If you have a soil tester, you can take a few 2 or 3 foot deep samples of your soil, to see if there is a hardened layer. If you have a post hole digger, you can basically do the same thing, with more soil and more effort. The important thing is to look at the layers of soil as you bring them up. If you reach a layer where all the plant roots start growing horizontally, you have hit hardpan. Managing hardpan Once a layer of hardpan has formed, it takes brute strength and proper soil amendments to correct the problem. Basically, you can either dig down into the hardpan layer, breaking it up, or add significant amounts of organic matter and let nature takes its course. If you opt for the brute strength method, you will have to wait for the soil to be dry. [Digging wet soil is never a good idea.] You can use a digging fork, spade, or broadfork to break through the hardpan layer. As you do this, you will want to make sure that the subsoil is not brought up and mixed with the topsoil. To prevent compounding the problem by even more digging, it is important to add significant amounts of organic matter, in the form of aged compost or manure, or peat, to improve the soil structure, as you dig. Earthworms and other soil dwelling creatures will, over time, break through a thin layer of hardpan, but only if enough organic material is added to the soil. Treating acidic soil with lime can help break up the chemical bonds that hold a hardpan layer in place. This is not an option in regions with alkaline soil. You can also top dress an area repeatedly with organic matter to treat hardpan, but it may take years before you see results. |
Welcome!You can grow a surprising amount of food in your own yard. Ask me how! To help The Daily Garden grow, you may see affiliate ads sprouting up in various places.
You can also get my book, Stop Wasting Your Yard!  Index
All
Archives
July 2024
|
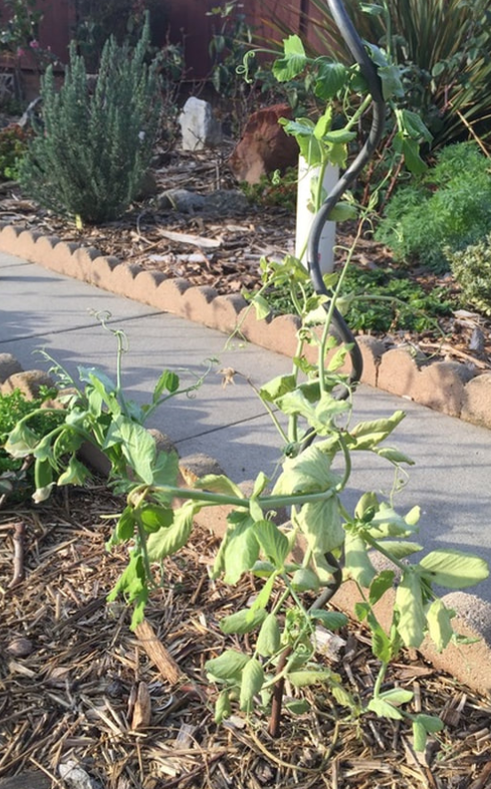
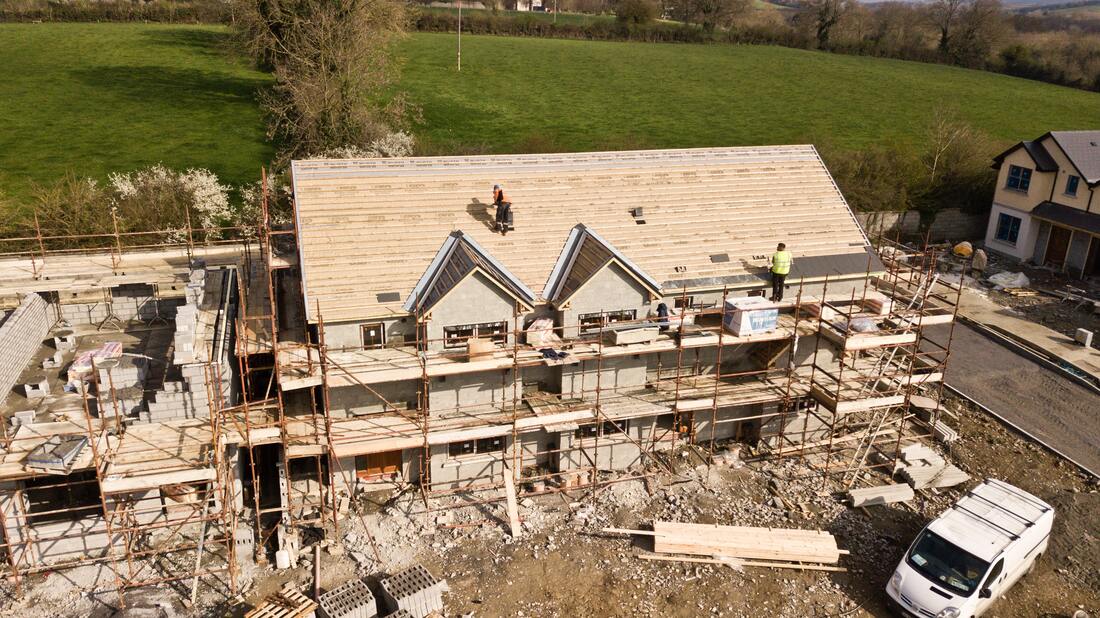


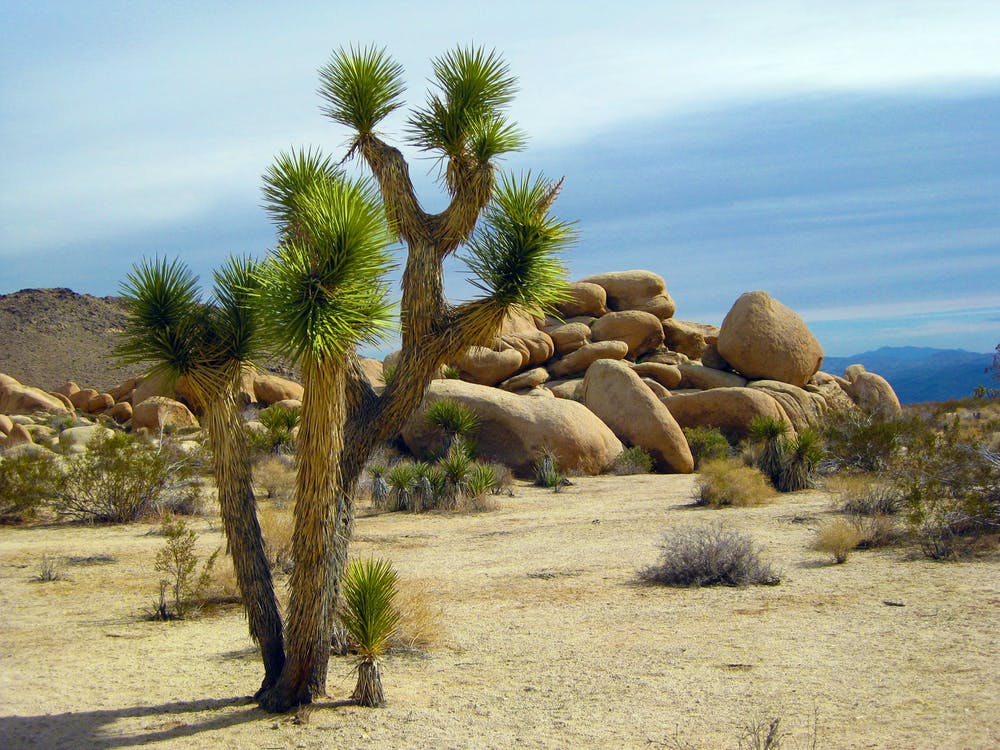


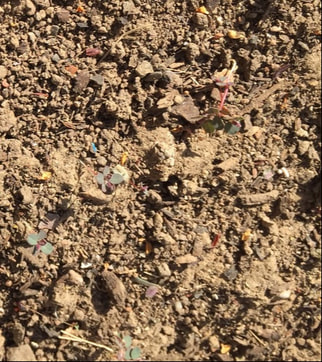
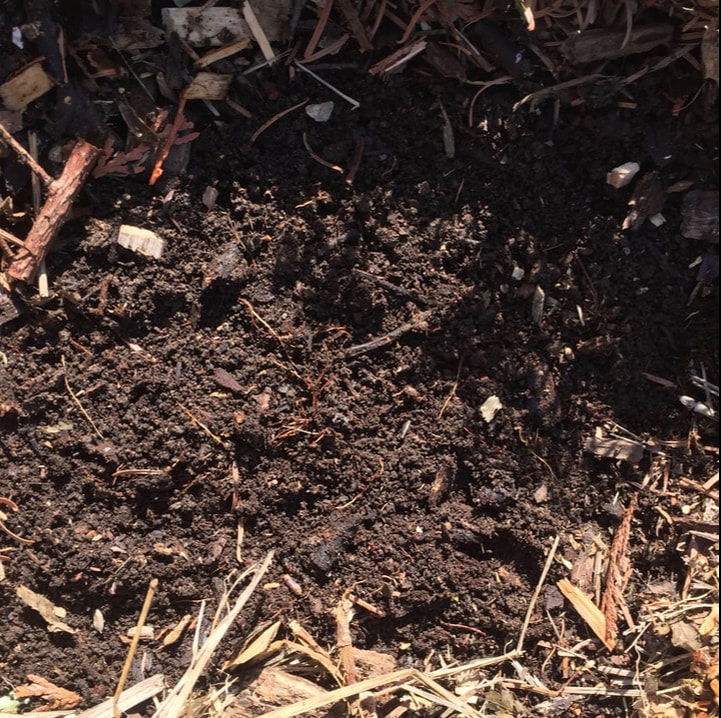
 RSS Feed