|
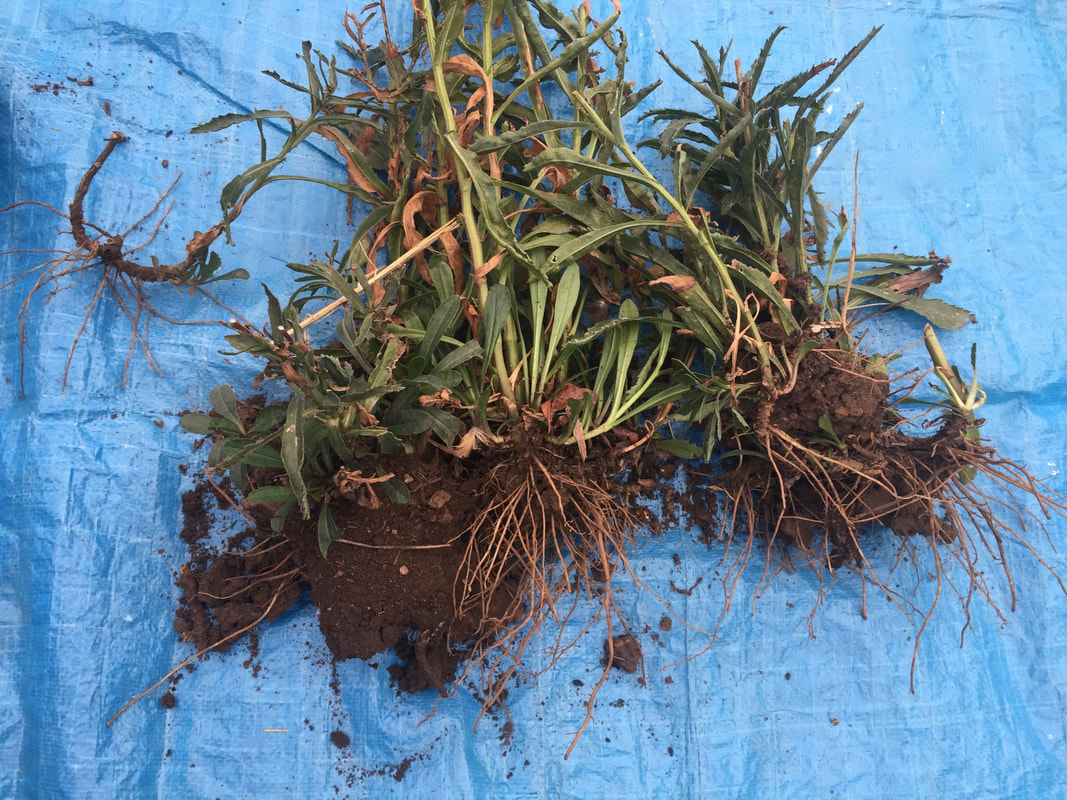
Correct overcrowded roots with division. Not the chalkboard variety, but by digging plants up, cutting them apart, and replanting. Do my plants need dividing? If production is down among your perennial plants, it may be that the roots have become too crowded. You can fix that with division. Division is a form of asexual propagation used on perennial plants. Annuals and biennial plants do not live long enough to make this method worthwhile. Signs that your perennials need dividing:
Why divide plants? There are many perennial plants that benefit from dividing every few years. Plants that grow from rhizomes, such as bunch grasses, asparagus, and ginger, can be divided simply by digging up a section of the underground stem and cutting between the established plant and new growth, and planting the cut end someplace else. Many other perennial plants grow from corms and bulbs. These plants reproduce underground by creating offsets and bulbils, respectively. In either case, over time, it gets crowded down there! Which plants need dividing? Some plants, peonies and hostas, for example, never need dividing. Others, such as iris, Shasta daisies, and coreopsis should be divided every 2 or 3 years. Daylilies, evening primrose, and bergenia generally need dividing every 5 years or so. Many other garden plants vary in their need for division, depending on soil health, plant age, climate, and more. It’s generally a case of being observant and noticing when plants look like they need some breathing room. Artichokes commonly need dividing, as do many flowers, including chrysanthemum, delphinium, germander, lamb’s ears, penstemon, scabiosa, and yarrow. When should plants be divided? Autumn is generally the best time to divide plants. Autumn-blooming plants, such as saffron crocus, should be divided in spring. In both cases, temperatures are neither too hot not too cold, and plants will have time to recover before winter’s chill slows growth to a halt, or the summer sun bakes everything to a crisp.
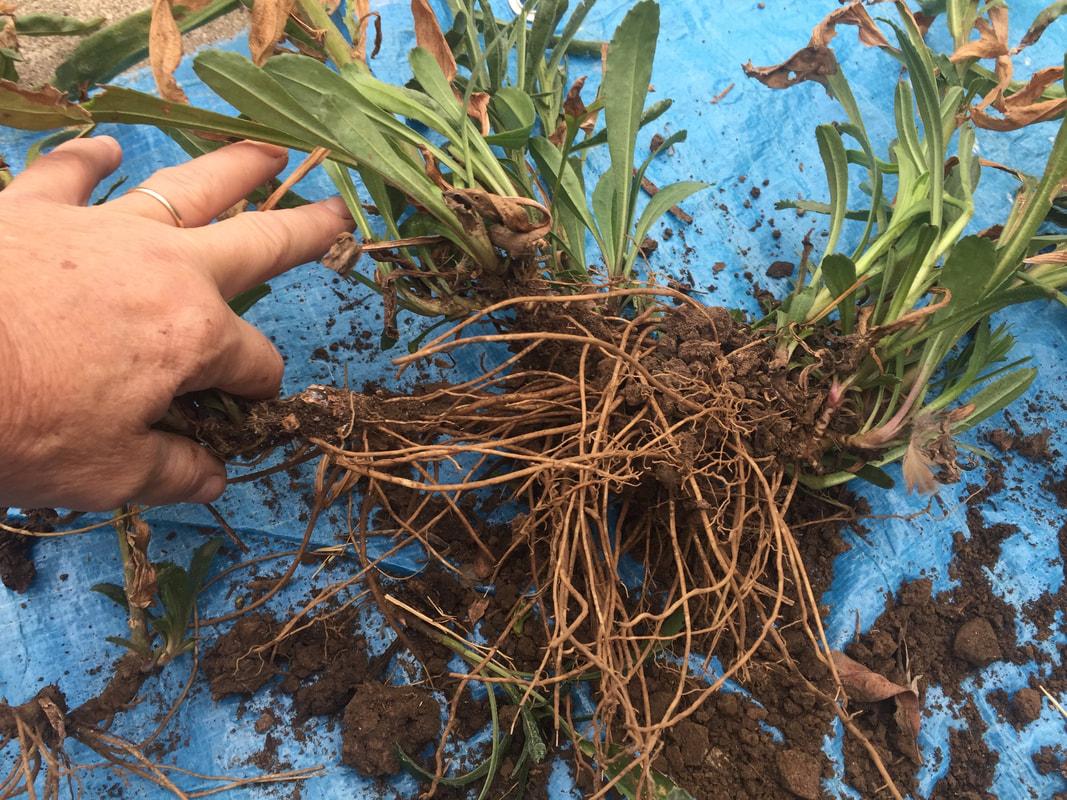
How to divide perennial plants
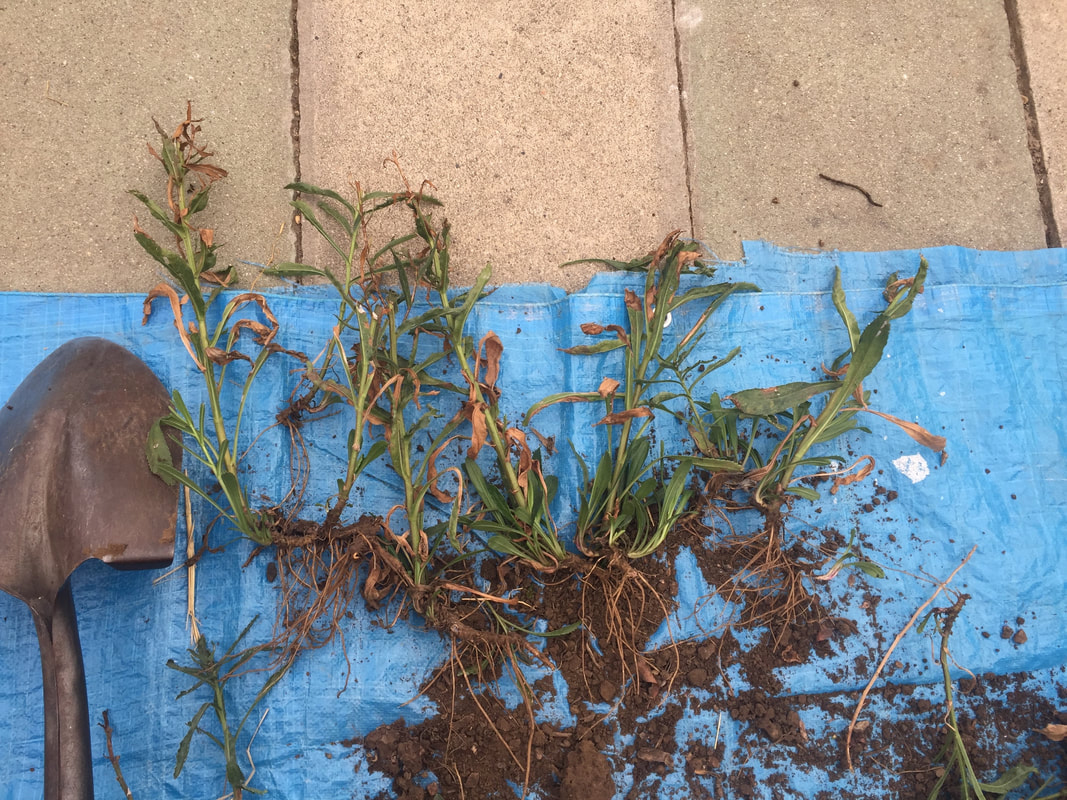
Don’t be afraid to try dividing your plants. They will be far healthier and more productive once they reestablish themselves. Follow these steps to divide the perennials in your landscape:
Help your perennial plants reach their full potential by periodically dividing them. By dividing, I transformed my overcrowded, unhealthy, and unhappy Shasta daisy into 15 separate plants that now have room to grow and thrive and bloom! Hoverflies, or syrphid flies, are one of the most beneficial insects you can attract to your garden. 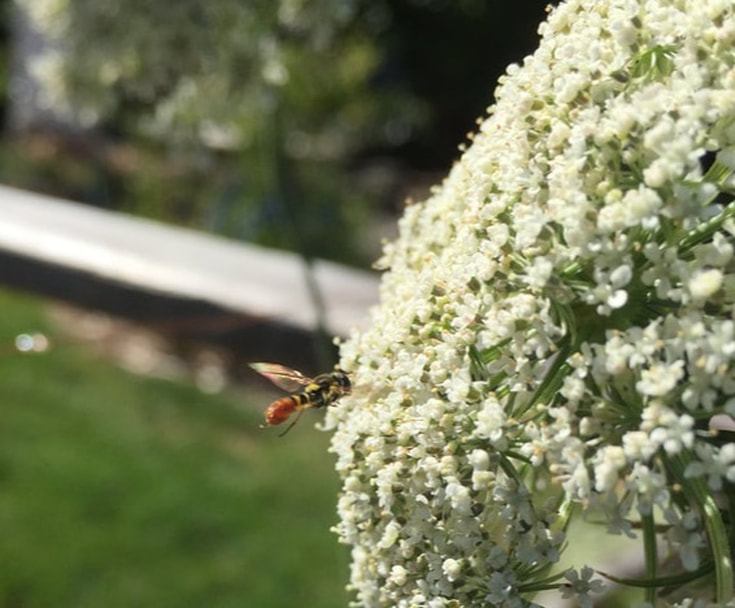 Hoverfly on carrot flower Hoverflies are members of the Syrphidae family. There are over 6,000 species worldwide and 300 on the West Coast. Many of them mimic bees and wasps to discourage predators, but they are harmless to humans. Hoverflies mimic bees and wasps in other ways, too, as both predators and pollinators. 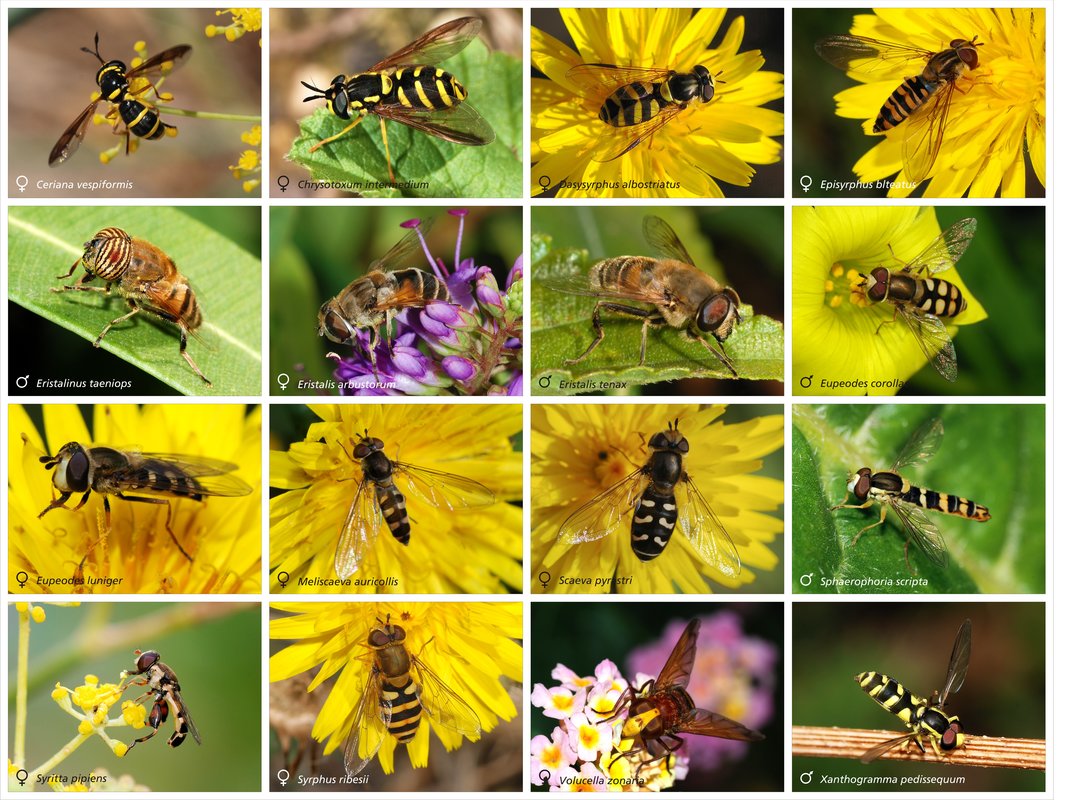 Poster of hoverflies (Alvesgaspar) CC BY-SA 3.0 Hoverfly description With so much variety, there is no one description that covers all hoverflies (also spelled hover flies). They can be as large as 3/4” long or so small that you won’t notice them. They can be black or colorful, spotted, striped, or plain. What they all have in common is the fact that they tend to hover over their favorite flowers. There are some bee flies that also hover, but they are equally beneficial as both pollinators and predators, so you don’t really need to know the difference* between the two species. * If you really need to know the difference, hoverflies have shorter legs, a prominent beak, and a line along the back of their wings, while bee flies have longer legs, a sloping face, and clear wings. Also, bee flies are more likely to be hairy. There. Now you know. Hoverfly larvae are blind and deaf. They are only 1/32 to 1/2 of an inch in length. They may be green, brown, yellow, or nearly transparent. They may have a white longitudinal stripe.
Hoverfly behavior Not all hoverflies behave in the same way, but there is enough variety to safely assume these are bugs you want in your landscape and garden. Some hoverfly larvae are saprotrophs, which means they each decaying plant and animal matter in the soil. This improves soil structure and makes nutrients available to plants. Other hoverfly maggots are powerful predators, devouring a lion’s share of aphids and other plant-sucking pests. Hoverflies as predators Most hoverfly species larvae will eat aphids, thrips, mealybugs, mites, scale insects, and leafhoppers. That’s a good thing, because these pests spread several diseases, including curly top, powdery mildew, black spot, rust, and sooty mold, just to name a few! Other hoverfly larvae prey on caterpillars, slugs, and codling moth larvae. In my book, there are no bad hoverflies. Hoverflies as pollinators As adult hoverflies feed on nectar and pollen, they also pollinate many of your garden crops. In fact, hoverflies are second only to bees when it comes to pollination. Unlike bees, which tend to prefer specific species, hoverflies are generalists, landing wherever the picking looks good. Attracting hoverflies There are several insectary plants that attract hoverflies. Most of these plants provide pollen and nectar to the adult forms. Hoverflies prefer plants that have shallow or umbrella-shaped flowers. These plants are often members of the Umbelliferae or Apiceae family. Adding the following plants to your landscape is sure to attract these beneficial insects:
Research has shown that hoverflies prefer yellow and white flowers over other colors. Since organic pesticides, such as spinosad, also kill beneficial hoverflies, you may want to think twice about when you spray. Once flowers are in bloom, you may want to hold off.
Orchid trivia - One type of orchid, Epipactis veratrifolia, emits chemicals that mimic the alarm pheromones used by aphids. This attracts hoverflies, resulting in pollination. Stuff like that makes me wonder what else is going on that we never notice. Legumes are nitrogen-fixing plants that produce many of the foods we eat. Peas and beans are common legumes. Peanuts, chickpeas, alfalfa, clover, lentils, vetch, mesquite, carob, tamarind, lupins, wisteria, and soybeans are also legumes. The unique behavior that makes legumes so valuable is that most of them are able to convert atmospheric nitrogen into a form that is usable by other plants. Nitrogen Over 80% of our atmosphere is made up of nitrogen. Plants are greedy for nitrogen, but they can’t use atmospheric nitrogen. Some plants, our beloved legumes in particular, have developed mutually beneficial relationships with certain bacteria that live on or in their roots. These bacteria are able to combine atmospheric nitrogen with hydrogen to create ammonia, which is then converted into a usable form of nitrogen. This is called the Nitrogen Cycle and is what makes legumes an important part of crop rotation and cover crops. Some people claim that marigold plants interrupt the nitrogen-fixing ability of legumes, but I have not found any research to support those claims. 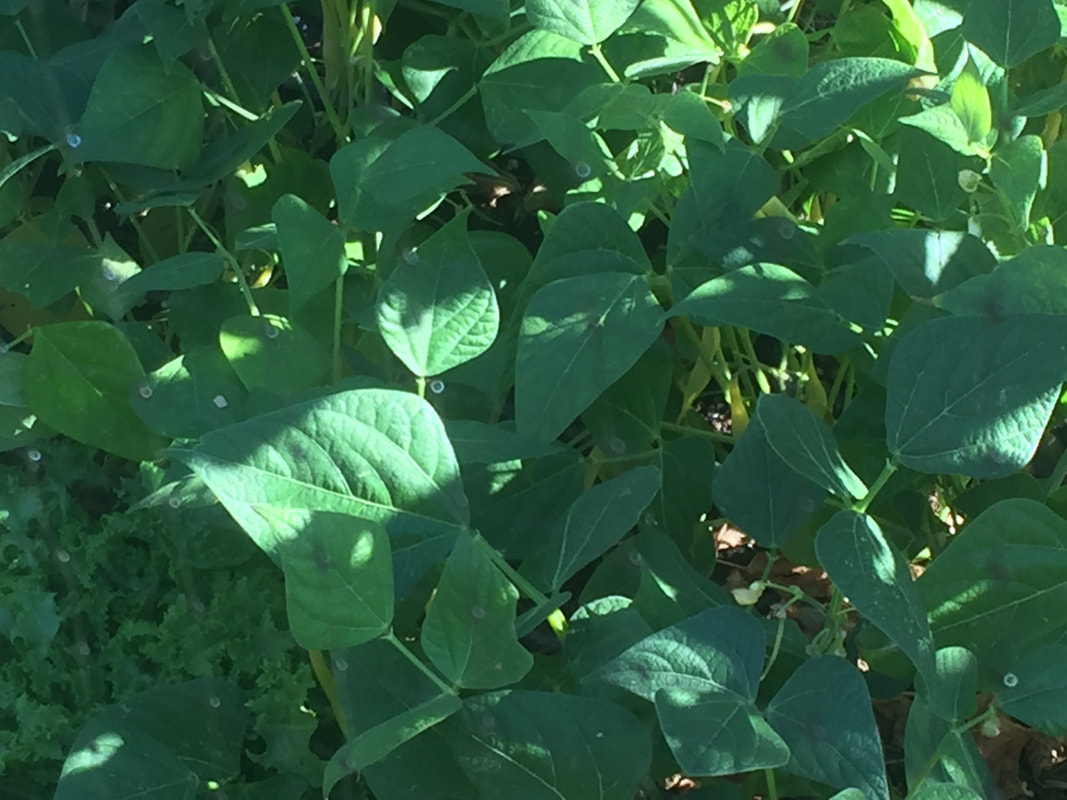 Wax beans Legume plants With so many family members, it should come as no surprise that there is plenty of variety. Some legumes grow low to the ground in a spreading habit, while others vine, and other stand upright. All legumes are dicots, which means they produce two seed leaves before true leaves appear. It also means that the seeds tend to be made up of two halves. The fruit, nut, or seed of legumes is technically called a pulse. Pulses are grain seeds held within a pod, or simple dry fruits, that develop from a single carpel. Most legume seeds have a “zipper” along one side that opens up when the seed is ripe. This behavior is called dehiscence. These seeds are often rather large and fast-growing, making them an excellent choice when gardening with children.  Freshly dug peanuts (Pollinator) CC BY-SA 3.0 Legumes as soil amendment Legumes can be used as a green manure, cover crop, or an edible harvest. When used as a green manure, plants are allowed to reach the flowering stage and are then cut and left where they fall to decompose. This returns valuable nutrients to the soil and improves soil structure. Other legumes are grown as a cover crop to prevent erosion. Most legumes have strong, deep roots that help aerate compacted soil.  Legume selection (USDA) Public Domain Legumes as food
Legumes are a high protein, high fiber food source. Fava beans, wax beans, lentils, lima beans, and wheat are all just a few of the legumes we eat on a daily basis. Pests and diseases of legume crops While the pests and diseases of most legumes are more species specific, nearly all legumes are susceptible to Fusarium wilt. Bean mosaic and powdery mildew are common bean and pea diseases. Stinkbugs enjoy legumes and, what makes them worse is that they can also transmit tomato bacterial spot. Weevils and treehoppers are common pests of legumes. Adding legumes to your garden or landscape can improve the soil, feed nearby plants, and they provide a delicious harvest. Give legumes a try! Growing the same plants in the same place each year can be a bad idea.
You can break the life cycle of many soil borne pests and diseases by growing plants from different families in the same beds, at different times, in a process called crop rotation. Intercropping is similar to crop rotation, except that intercropping refers to growing different plants in the same area at the same time. Many false claims have been made about the “companion planting” concept, but the benefits of crop rotation have withstood the tests of time and science. Benefits of rotating crops While it may be convenient to grow the same plants in the same place each year, in a method called monoculture, many soil borne pests and root diseases can be thwarted by moving crops around. Also, growing different types of crops in an area can reduce nutrient depletion, and sometimes, growing nothing at all is the best choice. Going fallow In agriculture, allowing land to rest is referred to as going fallow. This means nothing is grown - no crops, no weeds, nothing. This period of inactivity starves out many agricultural pests. And, honestly, we all need a break now and then. Having a fallow period is an important aspect of crop rotation. Traditional crop rotation In Biblical times, farmers were urged to leave an area to its own devices every seventh, or Sabbatical, year. Other methods have also been tried:
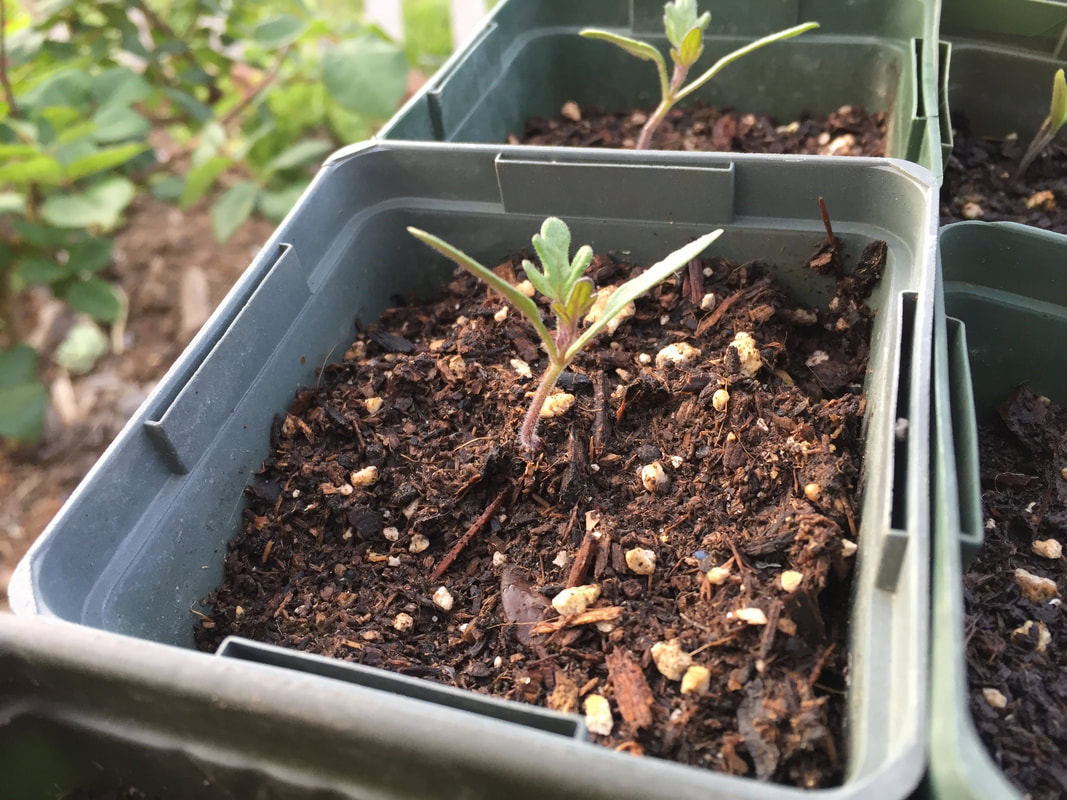
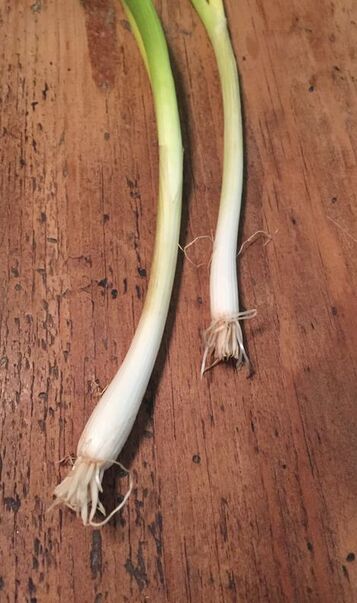
Modern agriculture uses chemical supplements to replenish lost nutrients and counteract soil pests, but this method has its own drawbacks, as many of those chemicals then find their way into our food and water supplies. Crop rotation goals The goals of crop rotation are to break the life cycle of soil borne pests and diseases, to control weeds, to increase the amount of nitrogen in the soil, to improve soil structure, and to add organic material to the soil. Depending on what you are working with, different crops will help you reach those goals. The first thing you need to do is to identify the soil borne pests and diseases in your garden. Common soil pests and diseases Verticillium wilt and downy mildews are the most common Bay Area soil borne diseases. Phytophthora tentaculata is a new threat to many garden plants. Root maggots and many destructive nematodes, such as root knot nematodes, are the most common pests. Take the time to find out which pests and diseases are affecting your plants. Then, look those troublemakers up and learn what you can about the plants they prefer, which plants are unaffected, and which plants can help eliminate the problem. For example, research has shown that Verticillium wilt, which commonly attacks tomatoes, can be reduced by planting broccoli in the same bed, in the following winter. In the same way, root knot nematodes may not impact corn and onions, but they can devastate berries, grapes, and many fruit and nut trees. Growing members of the cereal grain family, such as wheat or barley, in an affected area can reduce nematode populations. Planning the right rotation for your garden The simplest way to incorporate crop rotation is to think of why each crop is being grown. Are you harvesting roots, leaves, or fruits? Simply switching up the type of harvest can be enough to break the disease triangle, just be sure to add in a legume crop for the nitrogen in this most basic rotation. For a more science-based crop rotation, you will need to put on your thinking cap. First, identify each unique planting area. Then, list all of the plants you normally grow in a year. Next, label each plant as nitrogen adding or depleting, also biomass adding or depleting. You will also want to add notations about any particular pests or diseases that affect each plant. Personally, I am a visual learner, so I break out a pad of graph paper and some colored markers for this exercise. I use slips of paper for each plant, and then add color-coding to represent each of the different conditions. Then, I move the slips of paper around on a sheet with each of my planting areas roughly drawn on it. Your method may be very different from mine, but it is worth the effort to find a way that works for you. Successful crop rotation can result in harvests that are 10-25% larger than crops grown in a monoculture system. While scientists have not yet figured out why this happens, they have named it “The Rotation Effect” and you can put it to work in your garden today! Thinning young plants gives them the room they need to grow bigger and stronger. And most people have a hard time with this common garden task. When to thin seedlings? While most plant thinning occurs in spring, as new tomato, pepper, eggplant, and other seedlings emerge, the Bay Area is lucky to have a second growing season, filled with salad greens, broccoli, and cauliflower, so the need for thinning comes around again each fall. A difficult task For many gardeners, the idea of removing perfectly healthy plants does not come easily. Images of lush, ripe tomatoes, peppers, and melons offer so much potential, that we find reasons not to thin our garden plants. Of course, by not thinning, we compromise the health of all the plants. Thinning eliminates competition, leaving plenty of food, water, and sunlight for the remaining plants. This allows them to reach full size and produce larger crops. Proper thinning also provides good air flow, preventing many fungal diseases. Thinning basics Thinning used to mean yanking unwanted plants out of the ground by their roots. This is no longer the case. Soil science has taught us how important tiny soil microbes are to plant health. Pulling plants out by their roots removes the microbes, as well. This makes it difficult for the remaining plants to get the nutrients they need. Pulling plants out also disturbs the roots left in place, which also slows growth. Instead, thinning is done with pruners or scissors, cutting pants off at ground level. This leaves the remaining root systems undisturbed. Plus, it allows the microbes from the thinned out plant to relocate and assist the plants left in place. Snipped off seedlings can be added to the compost pile or fed to the chickens. Just keep in mind that not all crops are thinned in the same way. Just how much thinning is needed? Onions and other root plants need frequent thinning. Other plants, such as leeks and beans, perform better without thinning at all. Large, spreading plants, such as pumpkins, need to be thinned out leaving a single plant every 2 or 3 feet! To understand the best way to thin each type of plant, check your seed packets. That information is usually printed on the label. Use it. They know what they’re talking about. If the seed packet is no longer available, look it up online or ask me in the Comments section. You can often calculate spacing needs based on the expected mature size of each plant.
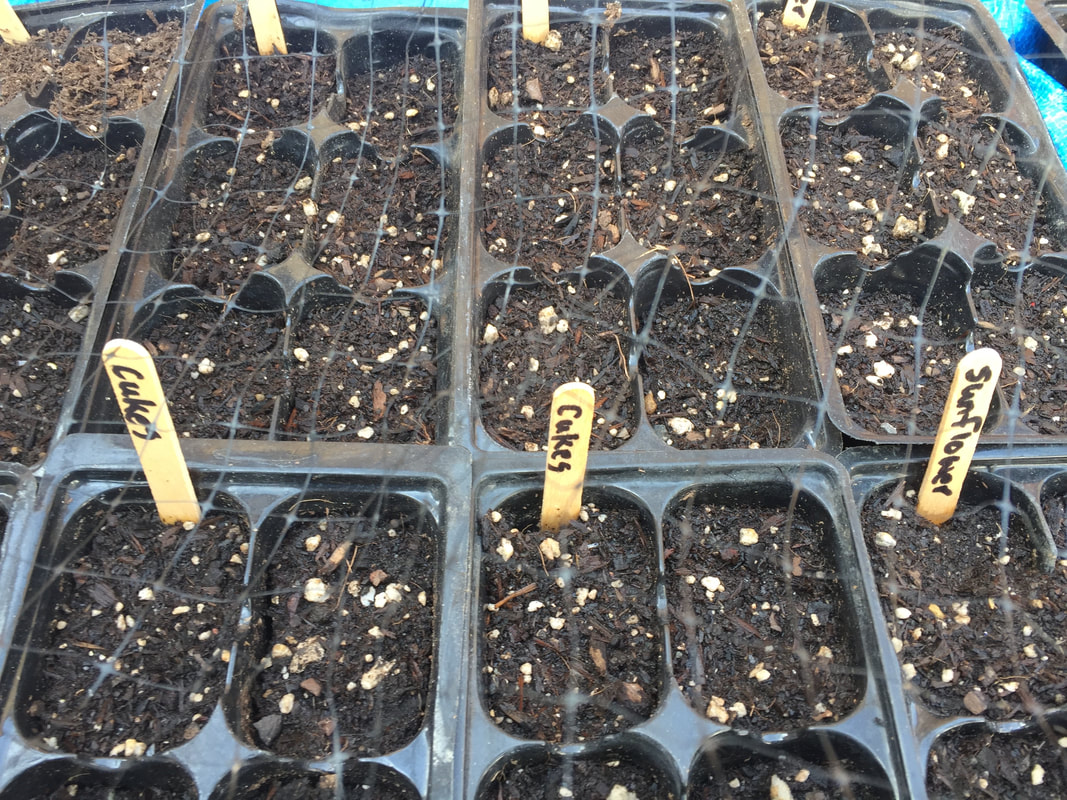
If you really can’t bring yourself to toss out healthy seedlings, you can always plant individual seeds in peat pots, cell trays, or any other item that will hold a small seedling until it can be transplanted. Of course, this method means extra work in other ways, but it does eliminate the need for thinning.
Do your garden plants a favor and don’t procrastinate thinning! You can grow these tasty nuts in your own backyard, if you have room and patience. The delicious flavor of pistachios doesn’t come cheap. They are not inexpensive and they require effort to pry from their shells. That being said, pistachios have a protein-rich flavor that begs us to eat just one more, and another, and another.  Immature pistachio cluster (Paolo Galli) CC BY-SA 3.0 What are pistachios?
The meat of a pistachio (Pistacia vera L.) is not technically a nut. Like apricots, olives, cherries, coconuts, and mangoes, pistachios are drupes, or stone fruits. Pistachios are the edible seeds held within a hard shell. When these seeds ripen, the shell pops open with an audible pop. In the world of botany, the thing that makes a drupe a drupe is that the fruit develops from a single ovary. How do pistachios grow? Pistachio trees need long, hot, dry summers and gentle winters to produce those hard-shelled nuts. Pistachio trees can tolerate a lot of salinity as long as they get hot, dry summers. Soggy soil will kill your pistachio tree, so good drainage is critical. Pistachios are a slow-growing, alternate bearing, deciduous tree that needs 600 to 1500 chill hours, depending on variety, to produce fruit. Those chill hours can be hard to come by in many warmer regions, but the trees are lovely and some varieties can be very productive. A healthy, mature pistachio tree can produce 110 pounds of seeds every other year. That’s a lot of pistachios! Pistachio varieties The following cultivars have been shown to produce well in the warmer regions:
Pistachio pollination Pistachio trees are dioecious. That means there are both male and female trees. You only need one male for up to 10 females for successful pollination, but these trees get rather large, so you probably won’t have room for more than one of each. Mature trees can reach 33 feet in height and should be spaced 20 feet apart. How to grow pistachios Plant pistachio rootstock from January through early May. Be sure to provide support by inserting a large, heavy stake next to the root ball. You will want the wind to push the tree toward the support for the best development. Irrigate the root ball immediately and follow with regular waterings until the root system is established. This may take several months, so be patient. Your pistachio tree will also need to be fertilized regularly. During the first dormant season, cut the top of the main shoot off, just above leaf buds. This heading cut will promote a solid structure later on. Pistachio pests and diseases A disease called panicle and shoot blight, caused by the Botryosphaeria fungi, kills flowers and young shoots of pistachio trees. In 2011, 50% of the Australia pistachio harvest was lost to anthracnose. Verticillium wilt can also be a problem. Severe drought has also reduced commercial production in many areas. Common pistachio pests include leaf-footed bugs, mealybugs, nematodes, and late season navel orangeworms. Harvesting pistachios After waiting for 5 to 7 years, you will finally be able to harvest your very own pistachios. Like almonds, this is done by shaking the tree. Ripe nuts fall and are collected from the ground. If you see any nuts with mold, toss them in the trash. That particular mold is carcinogenic. Also, be sure to dry your pistachios out completely before storing - they have been known to spontaneously combust. Don’t let all those problems discourage you or scare you off. These beautiful trees can produce an edible crop for decades, if cared for properly. Onions are not roots, even though they grow underground. The layered sphere we call onion is a bulb. Edible onions form when shortened underground stems are surrounded by fleshy leaves, called scales. People have been growing onions for 7,000 years. Onions are members of the Allium family, which includes leeks, chives, and garlic. All of these crops are best planted late summer and early fall. One of the nicest things about growing your own onions is that they can be eaten at any stage of development. Early green shoots are called scallions, or spring onions, while mid-stage development crops are called summer onions. Onions are a cool weather crop. Hot weather will cause onions (Allium cepa) to go to seed, or bolt.  Mixed onions (Colin) CC BY-SA 3.0 Onion varieties There are three common varieties of onion: white, yellow, and red. White and yellow onions are commonly sautéed or caramelized. This releases sugars that make onions taste sweet. Red onions are more often used fresh, in salads and when grilling. Onions are also classified according to the number of day-hours it takes to trigger the development of a bulb:
Some onions have been bred to be smaller. These are called boiler, pickler, or pearl onions. The term “pearl onion’ is incorrect because pearl onions are an entirely different species. True pearl onions are more closely related to leeks, than to common onions, and they do not have layers, more similar to garlic.
How to grow onions Onion seeds are relatively short-lived, when compared to other seeds. You are better off planting transplants or onion ‘sets’. Onion sets are seeds that were sown in early summer, but so close together that they could not continue their development at that time. As a biennial, these sets are more likely to bolt, rather than creating onion bulbs. Transplants are one or more seasons older than sets and usually available in garden stores in October and November. If growing seeds, cover them only lightly with soil. If seeds are started in small pots in September, they should be ready for transplanting in 2 months. Frequent thinning is necessary for a good harvest. Onions are heavy feeders, so it’s a good idea to add aged compost to the planting area a couple of weeks ahead of time. You can expect to harvest mature onions in 12 to 18 weeks, usually in June. Successively planting more onion seeds can ensure an ongoing crop of fresh, tasty onions. Generally grown as an annual, this biennial edible can reseed itself in your landscape indefinitely, given the opportunity, so choose a well drained spot that gets plenty of sun. Onion pests and diseases Onions are susceptible to attack by onion maggots, onion flies, and onion eelworms. Leafminers, bulb mites, thrips, and nematodes can also cause problems. Most onion diseases are related to excessive moisture. These include bacterial soft rot, downy mildews, garlic mosaic, rust, pink root, white rot, basal rot, and several botrytis infections. Proper irrigation and allowing the soil to dry out between waterings are your best defense. Curing onions Onions are mature when the tops die back naturally. When the top half of mature stems has turned brown, stop watering. When the lower stem begins to turn yellow, carefully dig them out of the ground. After mature onions are dug up, they need time to cure, or dry. This reduces the risk of rotting. Harvested onions can be braided, laid out flat, or placed in nets for several days to dry out properly. Foodscaping with onions Due to their ability to self-propagate, onions and other alliums make useful foodscape plants. Using mature sizes, mixed plantings of alliums can be lovely and useful. Mature onion plants can reach 3 feet in height, with impressive spherical flowers that attract hoverflies and other beneficial insects. Wide-leafed leeks are slightly shorter and can stay in place for several months before they must be harvested. Narrow-leafed garlic is more seasonal, providing green spikes for several winter and spring months, followed by browning that some find messy. The browned tops can be bent over and hidden from view behind spiky, clumping chives that tend to stay green year round, offering up miniature versions of the onion flowers. 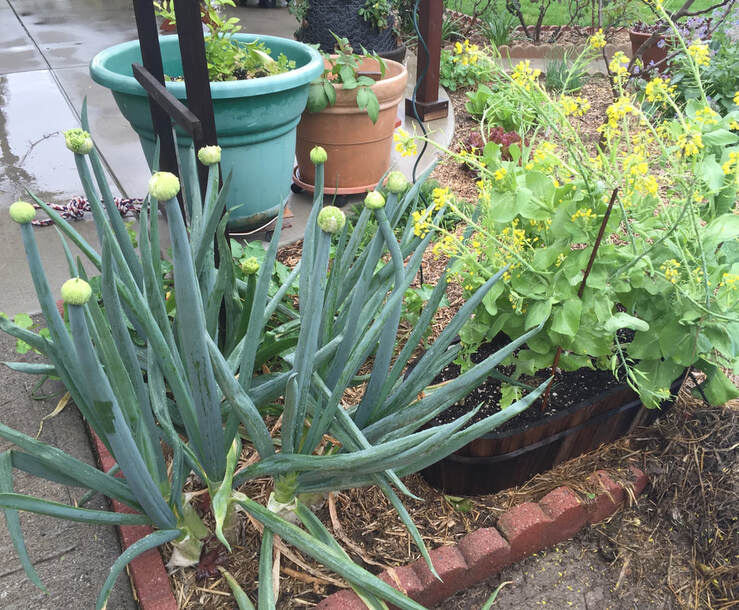 Onions about to flower next to radishes in full bloom Why do onions make me cry?
Onions contain protective enzymes that are released as an acid gas when cut. That’s what burns your eyes and causes you to tear up when cutting onions. And you can ignore all those great ideas about how to avoid the burn: bread in your mouth, sunglasses, lemon juice… none of them work. If you really need respite from onion burn, freeze or refrigerate your onions before cutting, or cut them under or in front of a fan. Miner’s lettuce is native to many areas, grows without human intervention, and makes a tasty addition to your salad. It can also be cooked the way we cook spinach, with a similar taste. Miner’s lettuce (Claytonia perfoliata), also known as winter purslane, spring beauty, and Indian lettuce, is rumored to have gotten its name because Gold Rush miners used to eat it to prevent scurvy. I don’t know if this is true, or not, but it sounds good and it makes sense. The leaves are high in vitamin C and can be quite abundant in late winter through late spring.  Miner’s lettuce (glmory) Public Domain Miner’s lettuce identification
Miner’s lettuce is a fleshy annual with petite white and pink flowers. It grows in a rosette form with several erect, slender, spreading stems. The leaves are bright green and can be football-shaped, triangular, diamond- or kidney-shaped. The easiest way to identify miner’s lettuce is the tiny white or pink flower stalks that appears to grow out of a round, cup-like bract that surrounds the stem. Flowers bloom February through May. Growing miner’s lettuce Miner’s lettuce should be planted starting a couple of weeks before the first frost. Miner’s lettuce can be grown in full sun or partial shade. Seeds should be planted 1/4-inch deep and spaced 4 inches apart. Keep the soil moist until germination occurs. While this annual does die off in our summer heat, it reseeds prolifically and will return each year, making a nice edible ground cover. Miner’s lettuce does contain oxalates, which can accumulate in older leaves and can be mildly toxic in large quantities. Miner’s lettuce also provides food for our native mourning doves and quail. 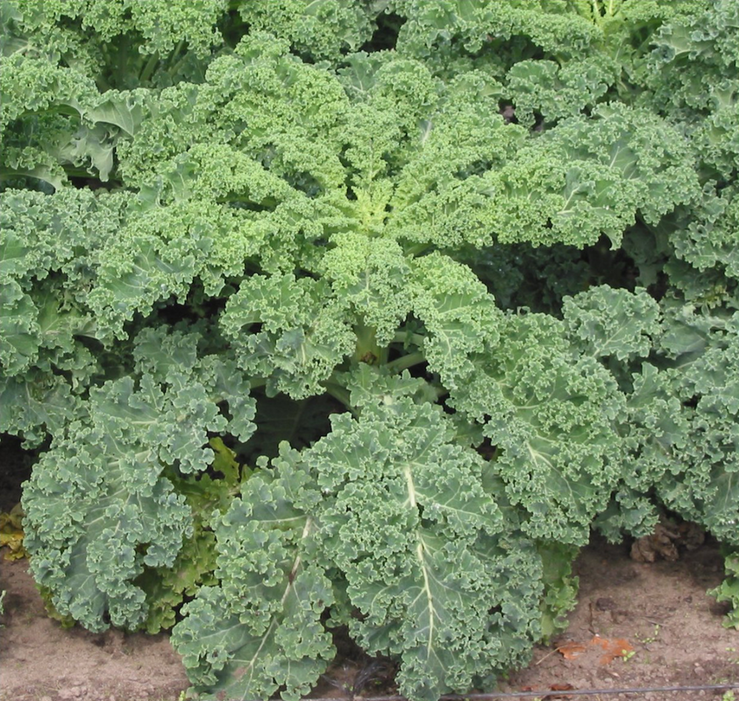 Mature curly leaf kale plant (Rasbak) CC BY-SA 3.0 Edible kale, or leaf cabbage, is the wild cousin to other members of the brassica family, including broccoli, collard greens, rutabagas, watercress, Brussels sprouts, Romanesco broccoli, and cauliflower. Kale was once the most commonly eaten green vegetable in Europe. [Probably because it is easy to grow and stores well.] Nutrient-dense kale Each serving of kale contains many times the daily dose of Vitamin K. Vitamin K is used by the body to coagulate blood, strengthen bones, and reduce calcification of the arteries. Kale also contains a lot of Vitamins C, B6, folate, and manganese, and many other important nutrients. If you enjoy eating kale, your body will thank you. How kale grows Kale loves cold weather, which makes it an excellent winter garden plant in San Jose, California. Kale can tolerate occasional temperatures as low as 5°F below zero, and if plants happen to be touched by frost, they taste even sweeter! Kale is a biennial plant, which means it generally only grows leaves in its first year, and then produces flowers and seeds in its second year. A period of cold weather is what triggers seed production. This is called vernalization. Kale comes in many different sizes, shapes, and textures. Plants can be compact or reach 6 feet in height, depending on the cultivar. It’s green or purple leaves are used to classify different types of kale:
Kale can grow in a wide range of environments. It can also get by in partial shade, making it a good choice for shade gardens. In warmer regions, kale can be planted in September and October, and then again in January, February, and March. How to grow kale While direct seeding is the way to grow kale in colder climates, our scorching hot summers and autumns make starting seeds in small pots a better idea. Seeds should be planted 1/2 inch deep and the soil kept moist until germination occurs. You can reduce the amount of water needed (and time invested) by covering pots with a 1/4 inch layer of vermiculite. Vermiculite reduces evaporation and can hold many times its weight in water, but tiny seedlings can easily push their way through. As your seedlings are growing, use that time to prepare planting beds. Kale prefers loose, loamy soil, so incorporating aged compost will improve the flavor of your kale. Two months before the first frost date, seedlings can be transplanted into their garden locations. When transplanting kale, bury the plants up to the first set of leaves. This encourages a stronger root system. Be sure to mulch around each plant to conserve moisture, reduce competition from weeds, and provide a nutrient boost. You can also side dress plants halfway through their growing season for the best production. Side dressing simply means placing aged compost around the base of each plant. Watering and critters will get the nutrients down into the soil, where the plants can use it, without the disturbance and damage caused by digging. 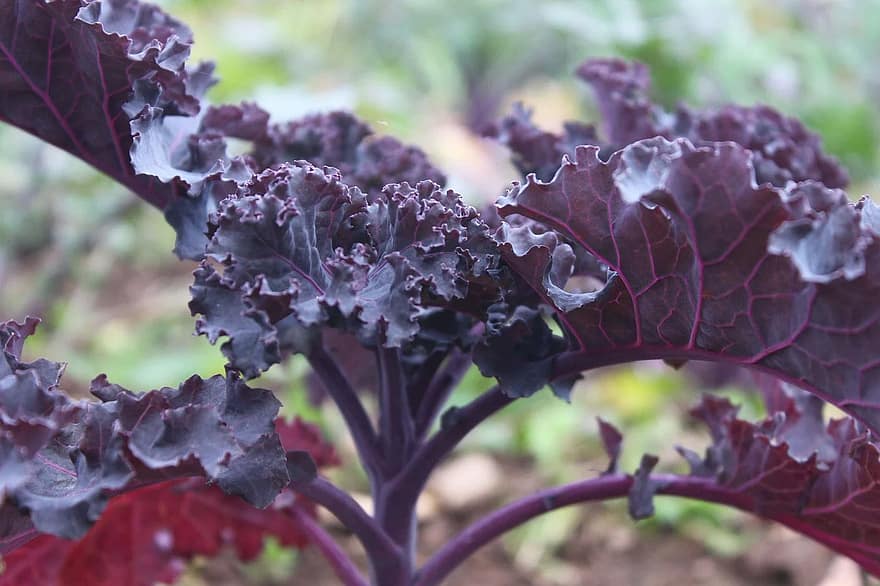 Purple kale (Pikist) Kale pests and diseases
As with all growing things in San Jose, California, aphids, cutworms, nematodes, leaf miners, leaf rollers, whiteflies, and wireworms are common pests. Random, round holes in kale leaves are a sure sign of imported cabbageworm infestation. Damage seen on the underside of leaves indicates cabbage loopers. Flea beetles, cabbage maggots, and darkling beetles may also enjoy feeding on your kale plants. Row covers can protect your plants from many of these pests. Powdery mildew, downy mildews, clubroot, black rot, bacterial blight, alternaria leafspot, fusarium yellows, phytophthora root rot, verticillium wilt, and white rust are the most common San Jose kale diseases. Most of these diseases can be avoided with proper irrigation, good drainage, and regular crop rotation practices. Harvesting kale Your kale plants can produce edible leaves for many months if you harvest leaves from the outside first. The plants will continue to produce new leaves from the center, creating an ongoing harvest. Because kale grows so well in our winter climate, the plants make lovely landscape additions into areas that would otherwise be able through the winter. Kale has a strong flavor, but it packs a powerful nutritional punch and is easy to grow in California winters. Give kale a try. You may find that the fresh, tender new leaves are just what your body has been craving! Tiny brown spots on your apples? It might be bitter pit. Bitter pit is a disorder of apples. It is related to low calcium levels. Also known as blotchy cork and Baldwin spot, this disease can also affect quince and pears.  Early signs of bitter pit on lower left apple (Paebi) CC BY-SA 3.0 Causes of bitter pit Much like blossom end rot, bitter pit occurs when there is not enough calcium in a fruit. Calcium deficiencies are almost unheard of west of the Rocky Mountains. Insufficient or irregular watering can make it hard for plants to move calcium to where they need it. Calcium is a low-mobility nutrient. It takes a lot of water to move calcium around once absorbed. Inadequate irrigation means newer leaves may look burnt or die due to a lack of calcium, regardless of how much is in the soil. The optimal range is 1000 to 1500 ppm.
How to control bitter pit
Many commercial growers spray trees with calcium, while others dip fruit in a calcium solution, but these methods are unrealistic for the home grower. Regular irrigation is the best way to avoid bitter pit in your apple crop. Applying too much fertilizer, thinning fruit too early, and thinning too much can increase the odds of bitter pit. Removing excessive vegetation without over-pruning can help reduce the likelihood of bitter pit. Maybe removing some foliage means more calcium for the rest of the tree. That's my guess, anyway. Bottom line: those spongy little dead spots won’t hurt you. But they create points of entry for pests and diseases that create more work for you later. You know, one of those ounce-of-prevention situations. Keep your trees healthy and treat them right to make your job easier. Green manure probably isn’t what you think. Not a manure at all, green manure refers to certain fast growing cover crops. Green manure crops are grown to be cut down while they are still green or just after flowering. Traditionally, green manures were plowed into the soil, but it has been discovered that this damages networks of root fungi (mycorrhizae) that help plants absorb nutrients. Like animal manures, green manures provide many benefits to the soil. _%E3%83%99%E3%83%8B%E3%83%90%E3%83%8A%E3%83%84%E3%83%A1%E3%82%AF%E3%82%B5_DSCF0668.jpg) Crimson clover (松岡明芳) CC BY-SA 4.0 Nitrogen banking Some green manure crops are grown to add nitrogen to the soil. These plants include alfalfa, fava beans, cowpeas, sweet clover, Egyptian (or berseem) clover, crimson clover, lana (or woollypod) vetch, and hairy vetch. These plants are all members of the legume family. Legumes have a working relationship with certain soil bacteria (Rhizobia) that allow them to ‘fix’ atmospheric nitrogen and convert it into a form usable by other plants. Growing these plants as a green manure can increase the amount of nitrogen available to the next crop by 40 to 60%. That’s like dumping 40 to 200 pounds of nitrogen on an acre of land! Other nutrients In the same way as nitrogen banking, other nutrients are returned to the soil as green manure crops are broken down by soil microorganisms. These important nutrients include calcium (Ca), phosphorus (P), potassium (K), magnesium (Mg), and sulfur (S).  Hairy vetch (Kristian Peters) CC BY-SA 3.0 Acidifiers As green manures break down on (or in) the soil, they tend to lower soil pH. This is because acids are formed in the decomposition process. In San Jose, California, where we tend to have heavy, alkaline clay, this acidification can benefit many acid-soil loving crops, such as blueberries, raspberries, potatoes, and parsley. Soil structure As soil microbes, worms, and other critters go to work on a cut green manure crop, fungi and slime add their efforts at getting a portion of the banquet. As they all feed (and poop), the amount of organic matter, or biomass, increases and the soil is aerated, increasing the number of macropores and micropores that carry food, water and air. This also improves water infiltration and retention, and makes it easier for tender, young roots to reach the water and nutrients they need to thrive. Medic, berseem clover, and woollypod vetch are good choices for improving soil structure. Deep rooted green manure crops, such as mustard, drought-tolerant alfalfa (Medicago sativa), and alsike clover (Trifolium hybridum), can also help break up compacted soil and pull nutrients closer to the surface for your garden plants to enjoy in the next growing season. Attract pollinators and predators If a green manure crop is allowed to flower before being cut, those flowers can attract and feed a wide range of pollinating insects. Phacelia (Phacelia tanacetifolia) is particularly effective. Green manure crops can also provide habitat and protection for many beneficial predator insects. This can lead to a reduced need for insecticides and bigger harvests.  Alfalfa (Victor M. Vicente Selvas) Public Domain Weed suppression Since green manure crops tend to be fast growing, they often block common weeds from getting the sunlight, water, and nutrients they need to thrive and reach seed-producing status. Buckwheat (Fagopyrum esculentum), fenugreek (Trigonella foenum-graecum), sorghum, and sweet clover are especially good at blocking weeds. Erosion control Cover crops and green manures can be used to reduce erosion. Plant roots stabilize slopes and protect the top layer of soil from sun and wind damage. White clover, barley, rye, and ryegrass are especially good as erosion control. These crops can also help prevent runoff and urban drool. Pest management Sorghum, crimson clover (Trifolium incarnatum), and rye provide habitat and food for many beneficial insects. If nematodes are problem in your landscape, you can grow a green manure of white mustard (Sinapis alba) and radish (Raphanus sativus). Nematodes hatch and are attracted to the roots of these plants. After burrowing into the plants’ roots, the nematodes are unable to reproduce. Populations of beet cyst nematodes and Columbian root knot nematodes can be reduced by as much as 70 to 99% using this method. If you have citrus trees, planting bell beans, woollypod vetch, Austrian winter pea, or New Zealand white clover will attract a predator mite (Euseius tularensis) that attacks citrus thrips. Problems with green manures Like everything else in life, there are downsides to green manures. First, these crops must be cut before they start reproducing. Legumes stop adding nitrogen to the soil once they start their own reproductive cycle. If any green manure crops are allowed to go to seed, they may overtake an area. Also, all that green, shady moisture can attract slugs and snails. Another potential problem is the bacteria that cause clubroot in members of the brassica family (cabbages, broccoli, turnips, mustards, and cauliflower) may also be encouraged by the presence of green manures. A slightly trickier aspect of growing green manures is the carbon to nitrogen ratio. Carbon-nitrogen (C:N) ratio A healthy compost pile* will have a C:N ratio of 20:1 to 35:1. This means it contains a mass that is 20 to 35 parts of carbon to one part nitrogen. [Ratios greater than 35:1 will slow the composting process.] Farmers use a 24:1 ratio for simplicity sake. Healthy soil has a similar ratio. So do the microorganisms in soil that break down all that organic matter. These microbes maintain that ratio with the food they eat. If there is too much carbon available, say, if you mulch an area with straw, soil microbes will devour all that straw and then eat all the available nitrogen, leaving nothing for your plants! But don’t panic. When the microbes die, they return all that nitrogen to the soil, it just takes some time. *Generally speaking, carbon is in the brown stuff, while nitrogen is in the green stuff. That isn’t exactly accurate, but it will help you to understand how to maintain a healthy compost pile. Since plants are made up of both, aim to provide your compost pile with equal parts green and brown. Carbon content Non-legume plants have higher carbon contents than the legumes. Also, carbon content changes as a plant ages. You can avoid this problem by planting a mix of green manure crops at certain times of the year and ensuring that they are mowed or cut before they start producing seeds of their own. [For you science nerds, the average adult human body has a C:N ratio of 54:1.] Here is a list of C:N ratios for many green manure crops (animal manure tends to be 20:1): How to grow green manure crops
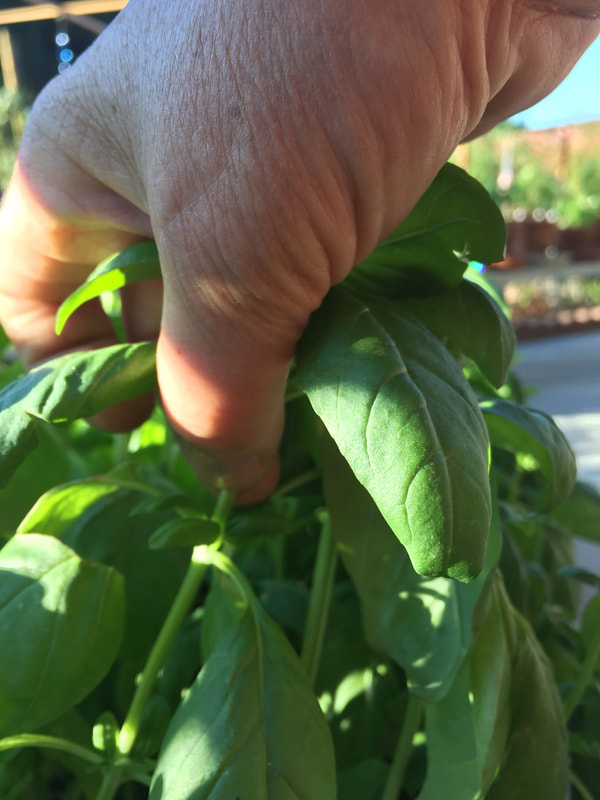
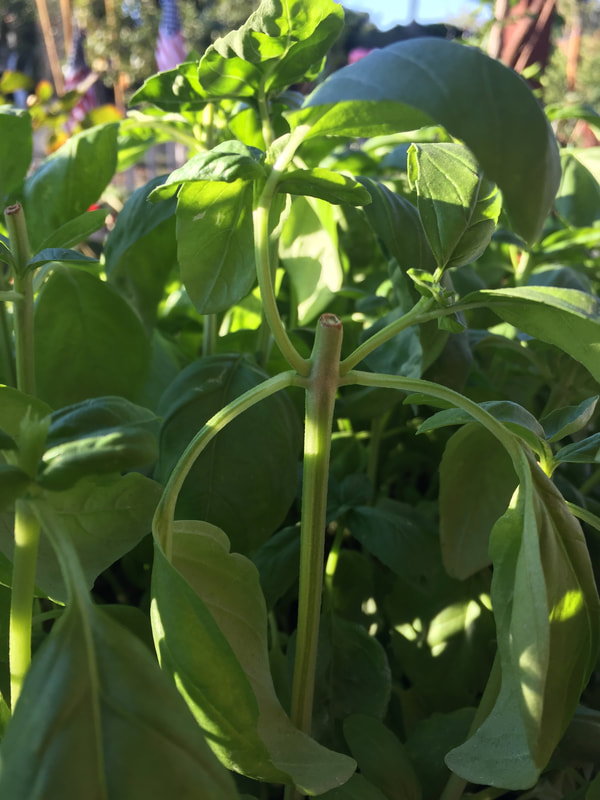
Cool season green manures are planted in late summer and allowed to grow through winter before cutting. Summer manure crops are best used for weed suppression and erosion control. To maintain a healthy C:N ratio, plant a mix of low carbon crops, such as clovers, fava beans, peas, mustard, canola, turnips, radish, with just a few high carbon crops. High carbon crops include alfalfa (Medicago sativa), sunflowers, winter rye (Secale cereale), and millet. You can plant green manure crops in rows, the same way you would for many other crops, or you can simply broadcast seeds over an area and rake them in. Just be sure to keep the area moist until the seeds germinate. Then, simply allow them to do what they do best, until they are just about to go to seed. That’s when you break out the lawn mower, weedwacker, or scythe, and chop your green manure crop down to the ground. Leave the plant material where it falls and allow it to return to the soil the way nature intended. As you can tell by the photos, these beneficial plants also add beauty to your landscape. Trying adding a few to yours today! No, we are not talking about those epic childhood battles in the back of the station wagon. Pinching back is a way to redirect a plant’s growth and nutrients to where they will best be used. How to pinch back Take careful aim, tensing thumb and forefinger... Wait, no. That's not what we're talking about here. Pinching your sibling is probably a bad idea. Pinching back your plants can be a good idea. After a young plant has several pairs of true leaves, you can use your thumbnail to severe the stem just above a leaf node. Leaf nodes are the place where leaves grow out of a stem. It is important that you do not damage the tiny buds that are tucked between the leaf and the stem. This space is called the internode and the tiny buds are made of meristem tissue that can grow into new stems. Pinching back stimulates two stems to emerge at the nodes, increasing lateral growth. This doubles the number of stems, making a plant fuller. In only a few days, you will see these buds swell and new stems emerge. You can pinch back these new stems for even bushier growth after they have a few pairs of new leaves. Do not pinch back below where you have already pinched. Plants don’t respond well to that treatment.
Pinching back vs. deadheading
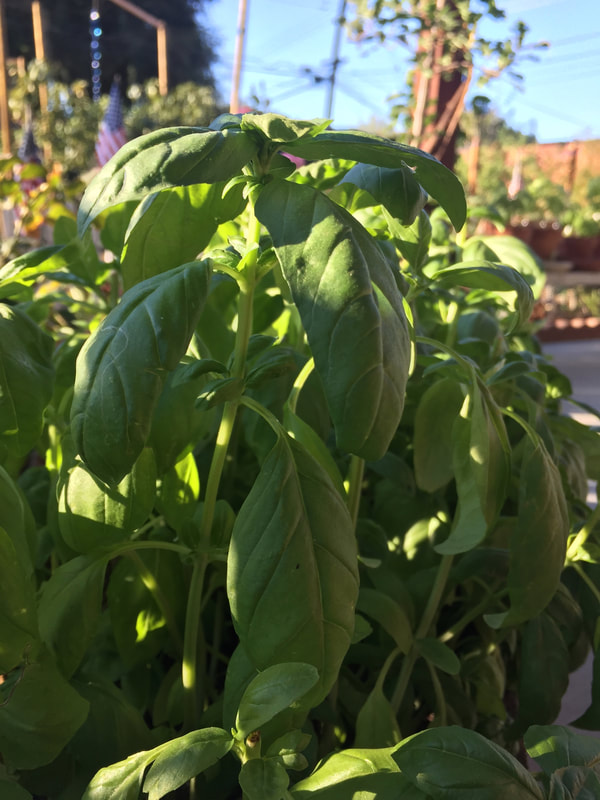
Deadheading refers to the removal of spent blossoms. This is done to stimulate new flowers to grow and the method is very similar to pinching back. In both cases, stems are cut just above leaf nodes, but for slightly different reasons. If a flowering plant believes that it has completed its reproductive cycle, it has little reason to produce more flowers. [Producing flowers is hard work for a plant.] Removing nearly spent blossoms triggers the plant to create new ones. Pinching back is done to stimulate lateral stem growth, rather than specifically for flower production. Tipping vs. topping Pinching is generally performed on herbaceous, or soft-stemmed, plants. Pinching back woody plants, such as trees, is called topping and can harm or even kill the plant, unless performed at the proper time of year and in the right way. Topping trees is best left to professional arborists. Pinching back for structure Some plants tend to get too tall, falling over just when they are covered with flowers or produce. My borage does this every year. Pinching the central stem slows that upward growth and stimulates growth out toward the sides. Of course, this does mean you get a few less flowers, at first, but it can extend the total growing time, weather permitting. Creating a bushier structure with herbs, such as basil, also gives you far more of the fragrant leaves you grew the plant for in the first place. You can think of pinching back as pruning, only in miniature! Pinching back for production Many plants, such as tomatoes, produce far more side shoots than the main stalk can support. That’s why tomato cages are so popular. You can significantly improve fruit quality by pinching back many of these side shoots. Pinching back is also very useful near the end of the growing season. Removing any flowers that will take too long to mature before the first frost dates forces the plant to focus its sugary energy on the remaining fruit. Don’t be afraid to pinch back new growth on your soft-stemmed plants. You can help them to be healthier and more productive with this simple task. It also gives you an up close and personal look at the health of your garden plants. Buttoning is one of the ways cole crops respond to stress.
Many types of stress can cause buttoning:
These stress factors trigger plants to start reproductive efforts before they are ready, causing smaller leaves, stunted overall growth, and distorted flowers. These conditions also increase the likelihood of pests and diseases over the winter months. Buttoning in cole crops Buttoning in broccoli and cauliflower means smaller heads. Since buttoning of cole crops is more common among transplants, direct seeding may be a better choice. Mature plants can tolerate the cold, but young plants and seedlings exposed to a few days of 35°F to 50°F temperatures can alter the vegetative growth, leading to buttoning. Cabbage is not prone to buttoning. How to prevent buttoning Select varieties suitable to your microclimate and plant at the proper time to avoid buttoning. Maintain a regular watering and feeding schedule and mulch around plants to keep them strong enough to handle short-term stress. Broccoli is the flowerhead of a member of the cabbage family. As a brassica, broccoli is cousin to kale, collard greens, rutabagas, watercress, Brussels sprouts, Romanesco broccoli, and cauliflower. Native to the northern Mediterranean region, modern broccoli is the result of centuries of careful breeding that started in the 6th century BC. 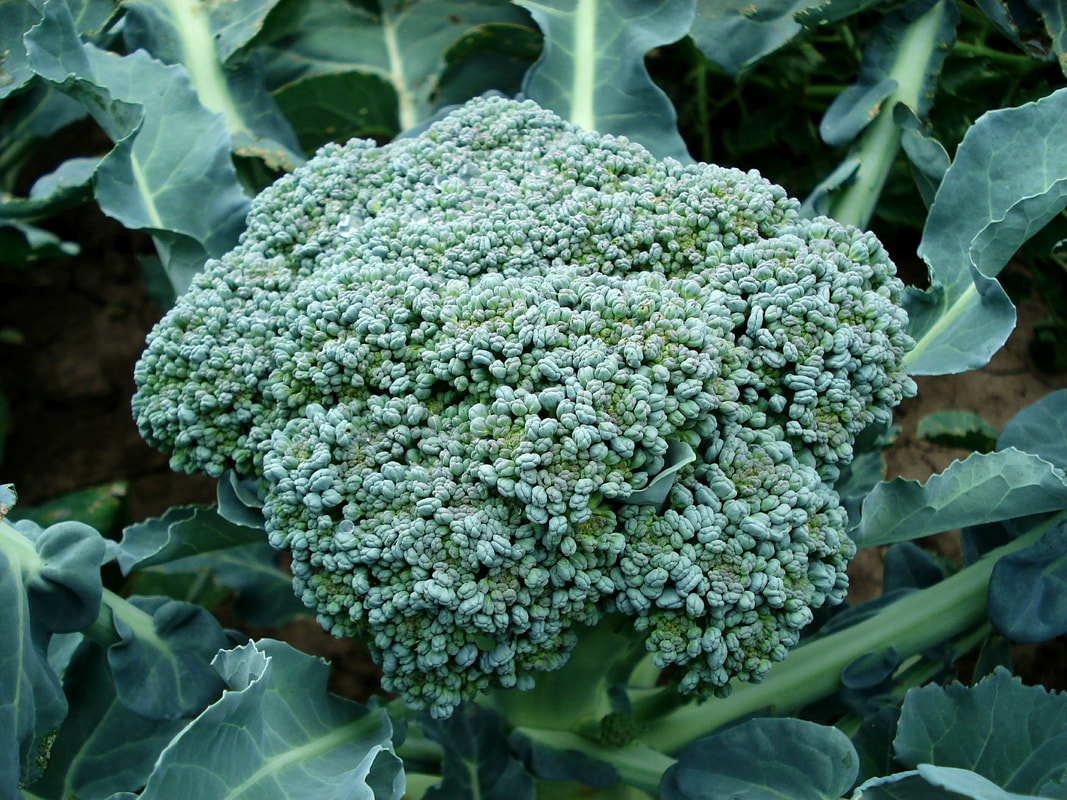 Broccoli (artverau) Pixabay Broccoli (Brassica oleracea) has been dreaded by children for decades. This is often due to overcooking and freezing. “Eat your trees!” Mothers have cajoled for generations. The truth is, broccoli contains bitter compounds and some people are more sensitive to them than others. There is no sense fighting over genetics. What you can do, for those family members on the broccoli fence, is to offer fresh, tender broccoli shoots, steam broccoli lightly, and there is always the cheddar cheese trick. [Cheese makes everything taste better, right?] How to grow broccoli Broccoli is a slow grower. It can take 3 months or more, from seed to harvest. In warmer regions, broccoli can be started from seed twice a year. For a summer harvest, plant in February, March, and April. For a late winter, early spring harvest, you can plant broccoli in August and September. Some years, you can plant as late as October. Broccoli loves cold temperatures and will bolt in hot weather. Also, heat stress can cause bitterness. Broccoli prefers full sun, but your spring crop can be grown in partial shade, to avoid heat stress, but it will benefit from strong morning sun. Broccoli prefers slightly acidic soil, so your plants will thank you if you perform a little acidification before planting. Seeds should be planted 1/2 inch deep. It is best to start plants in small containers and then transplanting when they have three or four true leaves. Plants can be placed in the ground slightly deeper than the soil level when transplanting. These plants get large, so be sure to provide plenty of growing room. They usually need a 2-foot square space, or more, per plant. Broccoli roots are shallow, so avoid digging around plants. To reduce weeds, mulch heavily. Broccoli needs a lot of water, so irrigate consistently, without getting the heads wet. Broccoli varieties There are three basic types of broccoli. The common grocery store variety is Calabrese broccoli. Sprouting broccoli has many small heads on thin stalks. Purple broccoli looks more like its cousin, cauliflower, with an occasional purple tint to flower buds. Not exactly a true broccoli, broccolini is a cross between standard broccoli and Chinese kale, or gai lan. 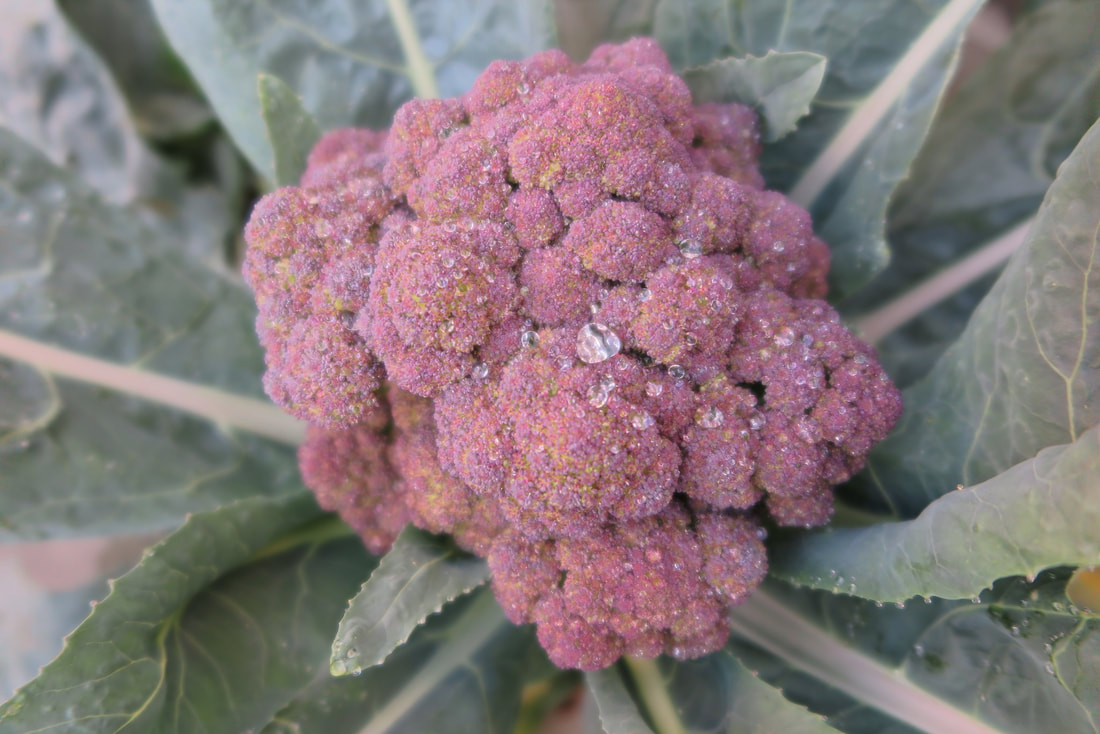 Sicilian purple broccoli (涼母 閒妻) Pixabay  Romanesco broccoli (Jon Sullivan) Public Domain Broccoli pests and diseases
Downy mildews, bacterial leafspot, clubroot, damping off, powdery mildew, phytophthora root rot, and ringspot are common diseases of broccoli plants. Most of these are caused by poor irrigation practices. As for pests, well, we’re looking at all the usual suspects: aphids, whiteflies, bagrada bugs, crickets, earwigs, armyworms, leafminers, slugs and snails, thrips, and wireworms. You will also have to watch for cabbage loopers, cabbage maggots, cabbage aphids, and imported cabbageworms. Bacillus thuringiensis (Bt) sprays can help protect against some of theses. Imported cabbageworms will probably cause the most damage. The larva of an erratically flying white butterfly match the color of leaves and often are not seen until significant damage occurs. Row covers can protect against this particular pest. Since the moths fly, they can always come back to lay more eggs. Personally, I have trained my dogs to chase them away. Once in a while, they actually catch one! Braconid wasps will also help fight off some of these pests, so avoid using broad spectrum pesticides. Environmental conditions can also interfere with a successful broccoli crop. Early stress can cause plants to flower too soon, creating tiny heads. This is called buttoning. Too much heat can cause brown bud - it’s not pretty. Heat (and insufficient boron) can also cause hollow stem. Too much nitrogen in the soil can cause broccoli plants to produce lots of (edible) leaves, but no flowers. [Have I mentioned getting your soil tested?] Harvesting broccoli As flower heads develop, use a sharp knife to cut the stem an inch or two below the head. Delicious fresh, broccoli can be stored in the refrigerator for a short time, or frozen for longer storage. Broccoli is especially susceptible to the ripening effects of ethylene gas, so keep your broccoli away from foods such as apples and bananas. After you have harvested your broccoli, cut plants off at ground level and chop up the remainder, spreading it out over any areas in the garden prone to Verticillium wilt. There are chemicals in broccoli that harm the fungi. Young broccoli sprouts, cauliflower, and mustard greens all contain a chemical called glucoraphanin, which is converted into substances that fight infection, arthritis, and cancer. They can also ‘retune’ metabolism. So, eat your trees! And start planting! Summer savory is an herb that deserves more attention. It has a unique earthy flavor similar to marjoram, thyme, and mint. It is commonly used in bean, fish, pork, barbecues, and poultry dishes. Summer savory is also a primary ingredient in herbes de Provence. The ancient Greeks believed that satyrs lived and frolicked in fields in savory. You may or may not see any satyrs in your savory patch, but it is still worth adding to your foodscape. Summer savory is an annual cousin of (and sweeter than) perennial winter savory. It tends to grow to one foot in height and drapes nicely from containers. When your summer savory plants die off in winter, fear not! Summer savory readily self-seeds. Native to southeastern Europe, summer savory is slow to germinate, but worth the wait. I grow summer savory in a tower. It also grows well in small containers and on sunny window sills. Bees and other pollinators love the tiny white and lilac-pink flowers and the flower heads end up tasting pretty amazing in meatballs! 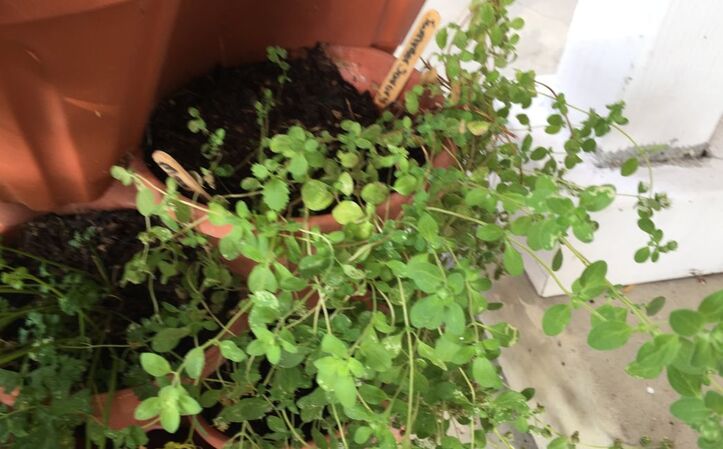 Summer savory How to grow summer savory
Summer savory (Satureja hortensis) prefers at least 6 hours of full sunlight, well drained soil, and a daily drink of water. If the soil dries out too much, the plant will bolt and go to seed. Seeds need a little light to germinate, so only cover lightly with soil and use a mister to water until seedlings emerge. That should take two weeks. Place plants one foot apart. They can withstand light frost and will produce well into winter with just a little protection. Harvesting summer savory Summer savory leaves can be used fresh or dried. Simply snip off what you need during spring and summer. As the growing season winds down, you can cut the plant off at ground level, hang it upside-down in a shady, dry space and allow the leaves to dry. Pillow cases work well. Well, there you have it. Yet another easy to grow plant that you can add to your landscape You already know what evaporation is, right? I’ll bet there’s more to it than we know, so let’s find out!  Hillside mist (StockSnap) Pixabay Okay, so what is evaporation? Technically, evaporation is the process of turning a liquid into a vapor without forming bubbles. As soon as bubbles happen, we call it boiling. There shouldn’t be any boiling in the garden, but you can bet there’s a lot of evaporation going on! But how does the liquid actually turn into a gas? It ends up, at the molecular level, as something is heated, all those molecules move around more. Then they start banging into each other. Eventually, they start to fall apart, transforming into a gas. That’s evaporation. Plants and evaporation If you’ve been reading The Daily Garden for a while, you may recall a post called evapotranspiration. If not, give it a read. It’s really short. Okay, so plants absorb water through their roots and move it around in the xylem, and then lose water through tiny holes on the underside of leaves, called stoma. This process is called transpiration. You may be surprised to learn that plants only hang on to 2 or 3% of the absorbed water. The rest is lost to evaporation through transpiration and guttation. [Think of guttation as sweating.] 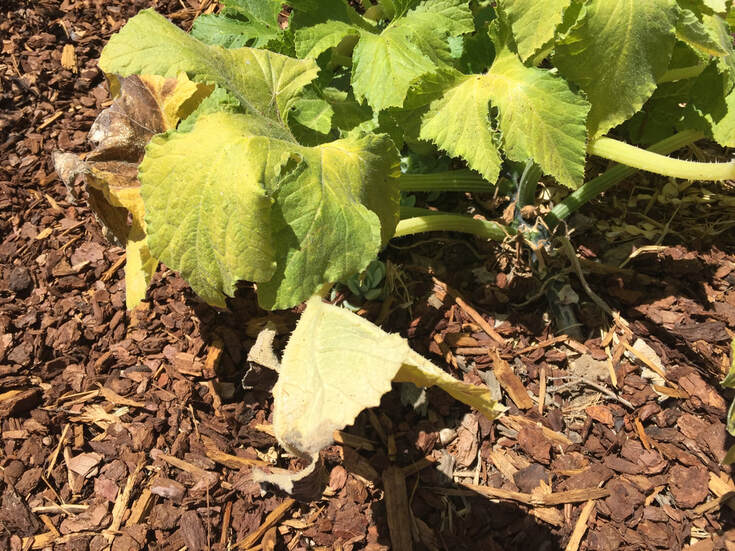 Wilting summer squash Evaporation and irrigation
The bulk of water loss through evaporation happens to the soil around your plants, leaving them high and dry. Farmers use complex equations involving rates of evapotranspiration to decide how much water to give their crops. We don’t have that much technology in our gardens or landscapes, but we can use what we know about evaporation to reduce water loss and water waste. Here’s how:
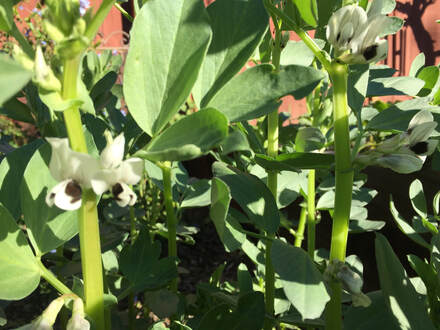
Just because a plant wilts during the hottest part of the day does not mean you need to run outside and turn on the hose. Wait to see how the plant is able to recover in the evening. If it stays wilted, then water it. If it perks back up, then it has not lost too much water through evaporation. Don’t get your hopes up. Chocolate spot is a fungal disease that attacks fava and other broad beans. Chocolate spot is caused by the Botrytis fungi, a family of fungi responsible for gray mold on practically everything. Chocolate spot, in particular, is caused by Botrytis fabae.  Chocolate spot on fava beans (Rasbak) CC BY-SA 3.0 Chocolate spot symptoms
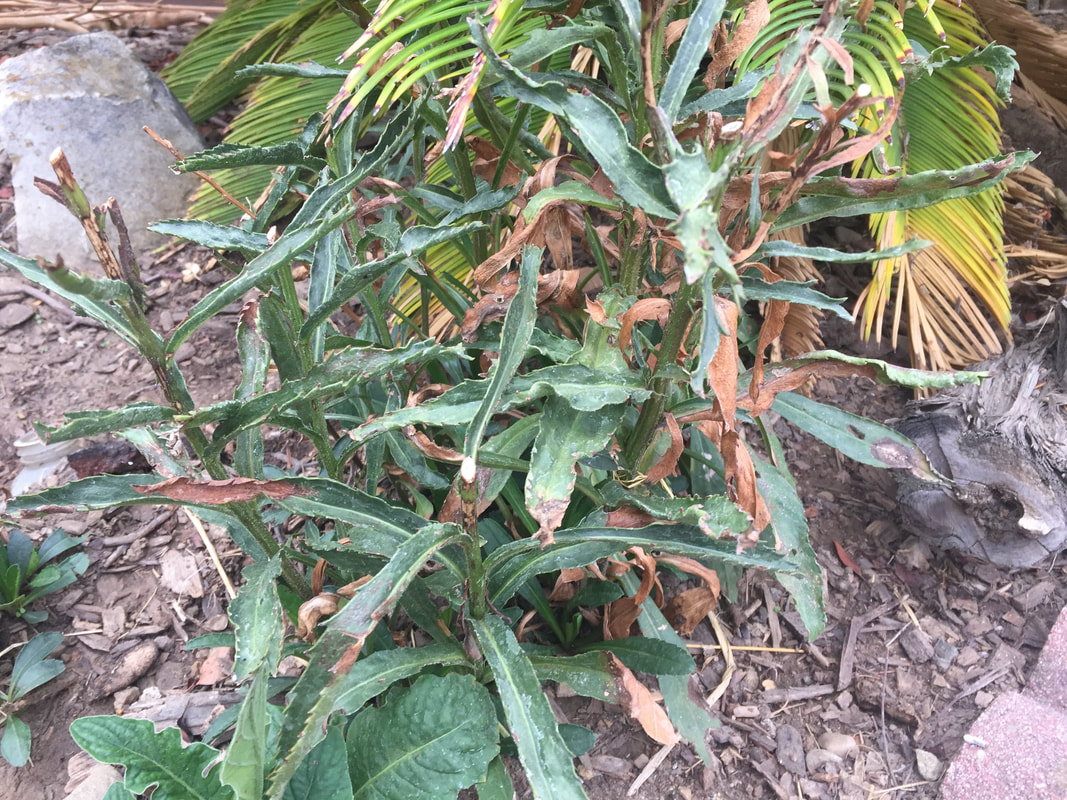
Moist conditions cause small reddish-brown spots to form on leaves and pods. These spots expand, leaving a dead, gray center. The fungi can spread so much that leaves and pods are aborted. And they certainly don’t look very appetizing! How to control chocolate spot As always, avoid overhead watering on plants susceptible to fungal disease. Black aphids are suspected carriers of the fungi that cause this disease, so controlling aphid populations may help. These fungi can overwinter in the soil and on decaying plant debris. Be sure to remove any infected plant material completely from the garden to avoid spreading the disease. Fungicides have been used to control chocolate spot, but timing is critical. Carrot beetles are insidious little pests that can transform a healthy plant into a dead plant overnight. Carrot beetle description These pests are reddish-brown and 1/2 an inch long, as adults. The larvae are bluish-white and can be 1-1/4 inches long. Larvae have a dark head. 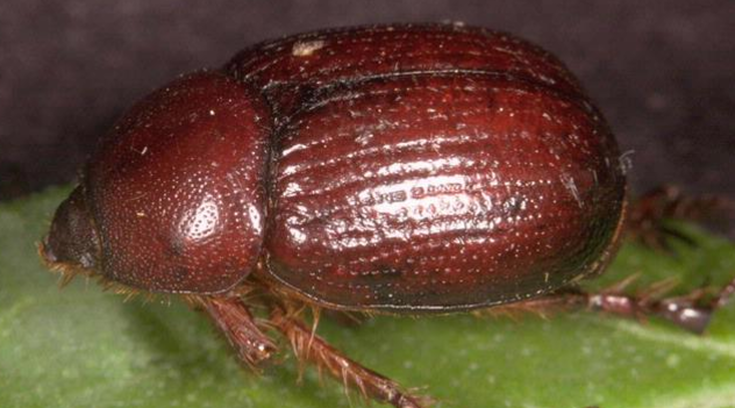 Carrot beetle (Frank Peairs, Colorado State University, Bugwood.org) CC BY 3.0 US Carrot beetle damage
Carrot beetles (Ligyrus gibbosus) feed both above and below ground. They attack sunflowers, carrots, lilies, iris, and dahlia. Taproot feeding causes yellowing foliage (chlorosis), stunting, plant collapse, and death. Feeding damage may also be seen on lower (basal) leaves and stems. Carrot beetle control Adult beetles fly at night and are attracted to lights. You can reduce infestation by using row covers and keeping the garden unlit at night. You can also reduce hiding places by keeping mulch and decaying plant matter away from susceptible plants. Insecticides have not been effective at controlling these pests. Does your lawn have yellow patches that turn brown and die? It may be southern chinch bugs. Chinch bug damage Southern chinch bugs (Blissus insularis) love to eat your lawn, especially St. Augustinegrass. They gather in large groups and feed voraciously, draining the sap from your grass plants, causing them to wither and die. Damaged areas can be irregular or circular in shape, similar to masked chafer damage. Unlike many other insects, chinch bugs thrive in hot weather, becoming especially active when temperatures are above 90°F, when your grass plants are already stressed.
Southern chinch bug description
These pests look a lot like beneficial big-eyed bugs. Both have a dark body and light wings that fold over the back in a similar shield-like pattern. The only difference is that big-eyed bugs have a wide head and bulging eyes. Chinch bugs do not. These pests can be seen on grass blades and near the crown. Chinch bugs can be purple, black, brown, or reddish, but they tend to be black and are usually around 1/5 inch long. Expose pests with a drench test If you are not sure what is causing your lawn damage, you can conduct a drench test. Follow these steps to force underground pests to the surface:
If more than 135 bugs, or 15 nymphs are found, you will need to treat the area with an insecticide. Chinch bug management You can reduce the damage done by southern chinch bugs with these handy tips:
Personally, I find that my chickens do an excellent job of eradicating bugs from my lawn! The calyx is the part of a flower that holds the petals, but it also provides hiding places for many fruit rotting fungi. .jpg) A. flower with calyx B. Underside of calyx C. Topside of calyx (Pearson Scott Foresman) Public Domain Calyx as flower part Calyx is another word for sepal. Sepals are the green petals at the base of a flower that are modified leaves. The calyx is also the green leafy area at the top of a strawberry fruit. Sometimes, the calyx is the same color as its flower. In most cases, once a plant is done with the flower, the calyx is discarded. Tomatillo plants retain the calyx as a thorny protection. In other cases, the calyx begins to grow in earnest after the flower is fertilized, creating a protective bladder-like enclosure. The sepals of Hibiscus sabdariffa turn into an edible accessory fruit.  Edible accessory fruit from the calyx of Hibiscus sabdariffa (Mbopar) Public Domain Calyx as hiding place
Many fungi, such as botrytis cinema, love to hide under the calyx, waiting for a splash of rain or irrigation water to start breeding gray mold and feeding on your berries and other garden produce. Sometimes the calyx falls victim to the very pathogens it protects, along with the fruit, as in the case of stem-end rot. In some cases, such as calyx blight, only the calyx becomes infected and the fruit remains fine. How many different types of calyx are in your garden? Ammonium sulfate is a good source of iron for your plants, even though it doesn’t contain any. How can that be? Read on!
Ammonium sulfate (AS) is the oldest form of manufactured nitrogen fertilizer. Chemically, ammonium sulfate [(NH4)2SO4] is a salt that contains 21% nitrogen and 24% sulfur. What’s in the fertilizer bag? Most people know that plants use nitrogen to grow. If you buy a 10-pound bag of 5-5-5 fertilizer, that means you are getting 5% of each of the primary nutrients - nitrogen (N), phosphorus (P), and potassium (K). This works out to 1/2 pound of each nutrient and 8-1/2 pounds of filler. If you buy a 10-pound bag of ammonium sulfate, you get 2.10 pounds of nitrogen, 2.40 pounds of sulfur, and 5.5 pounds of filler. Now, don't think that those fillers simply take up space, though sometimes that’s exactly what they do. Mostly, these fillers are sand or granulated limestone. Whether or not those are good for your soil depends on your unique situation. Personally, I prefer less filler and more substance. Also, in many regions, gardens often don’t need anything besides nitrogen for plant growth. You can't know without an inexpensive lab-based soil test. The soil at my old house had nearly 10 times the optimal amount of phosphorus, twice as much potassium and calcium, and 8 times more magnesium than my plants needed, the last time I had it tested. Adding more would be a complete waste of money. My problem was iron. I had less than one-third of the optimal amount. And my plants couldn’t even get to what little there was because of soil pH. Ammonium sulfate and soil pH In areas with alkaline soil, sulfur acts as an extremely mild acidifier. If you want to grow acid-loving plants, such as blueberries, artichokes, or potatoes, lowering the soil pH can seriously improve your harvest and the overall health of your plants. Ammonium sulfate has a pH value of 5.5 and the sulfur it contains will provide a tiny bit of help. The real pH reduction occurs when soil microbes convert the ammonium into nitrate, in a process called nitrification. If your soil has a pH of less than 6.0, you should not use ammonium sulfate. Soil that is too alkaline (or too acidic) make it difficult for plants to absorb nutrients and thrive. Ammonium sulfate and food safety Unlike many fertilizers, which can be dangerous, ammonium sulfate is a food additive. The U.S. Food and Drug Administration lists ammonium sulfate as “generally recognized as safe”. [I still wouldn't eat it out of the fertilizer bag!] It is commonly added to flours and breads to regulate acidity. It is also added to many vaccines to improve their effectiveness. Ammonium sulfate is hygroscopic, which means it absorbs moisture from the air, so be sure to keep the bag tightly closed. Applying ammonium sulfate As with any soil treatment, read the label and follow the directions. Seriously. When applying ammonium sulfate to your lawn or garden, be sure to water or work it into the soil right away. If it sits on top of everything, much of the ammonia (nitrogen) will be lost to the atmosphere. Ammonium sulfate and iron So, how can ammonium sulfate provide your plants with iron if it doesn’t contain any? Here’s the rub: soil pH dictates the absorbability of many nutrients. Slightly acidic soil makes it easier for plants to absorb the available iron. Of course, if your soil is low on iron, all the ammonium sulfate in the world won’t help. Get your soil tested so that you KNOW what you are working with. And if you live in an area with alkaline soil, ammonium sulfate can be an excellent way to add nitrogen and reduce soil pH for healthier plants. |
Welcome!You can grow a surprising amount of food in your own yard. Ask me how! To help The Daily Garden grow, you may see affiliate ads sprouting up in various places.
You can also get my book, Stop Wasting Your Yard!  Index
All
Archives
July 2024
|

_(3).jpg)

.jpg)

_(14595410147).jpg)
 RSS Feed