|
Magenta Spreen may sound like a great steampunk name, but this edible annual weed is probably already in your garden!  Magenta spreen growing tips (Zoey Kroll) CC BY-SA 3.0 Also known as purple goosefoot, tree spinach, and giant lambsquarters, this local weed can reach 8 feet in height and takes practically no care. The fresh growing tips provide the best flavor (and they look amazing in a salad) but even the larger leaves can be steamed, the same way as spinach, and the seeds are edible, as well. Like rhubarb, spinach, parsley, and chives, magenta spreen contains relatively high levels of oxalic acid, but not enough to worry about.  'Chenopodium giganteum' The magenta spreen plant
Believed to have originated in India, magenta spreen made its way to China and then to other parts of the world, where it has long been a food plant. [In the 1500’s, magenta spreen lost out to spinach in the popularity race.] Cousin to chard, beets, and quinoa, magenta spreen (Chenopodium giganteum) is a chenopod that tastes like what you’d expect from a cross between spinach and asparagus. Like other chenopods, magenta spreen has triangular leaves, somewhat akin to a goose’s foot. Overall, the plants are green, but they feature iridescent, hot pink growing tips and new leaf edges. Magenta spreen can grow equally well in full sun or partial shade. If allowed to go to seed and flourish, it can be used as both an edible crop or as a green manure. It has no major pest or disease problems. How to grow magenta spreen If you live in the Bay Area, you have probably been pulling this plant out as a weed for years. Rather than ridding yourself of this visual and edible treat, simply let it grow! You don’t have to buy seeds, unless you’ve never seen it in your garden. In that case, plant seeds 1/2-inch deep in succession, starting in early spring or late summer. If plants bolt, let them. The seeds will provide you and your family with even more plants. They transplant easily, in case you don’t like where they start growing, or if you’d like to share with friends. Did you know that you can grow your own quinoa? Just don’t do what I did, which was to start it as summer temperatures were reaching 100°F! Let’s learn more about this high protein, ancient grain, so that you can add it to your foodscape. What is quinoa? Quinoa (Chenopodium quinoa) is a member of the amaranth family, along with beets and spinach. Quinoa is grown for its high protein seeds. Unlike most cereal grains, quinoa is not a grass plant, so its seeds are classified as a pseudocereal. People started farming quinoa 4,000 years ago in the Peruvian Andes, but it has been a food staple for as long as 7,000 years. One of the things that makes quinoa so special is that it contains all eight essential amino acids used by our bodies to make a complete protein molecule, plus it is gluten-free, for those suffering celiac disease.  Quinoa plant before flowering (Christian Guthier) CC BY 2.0 The quinoa plant Quinoa is a self-pollinating dicot, which means its seeds split in half and its flowers have petals that are in multiples of four or five. Unlike many other plants, quinoa flowers are green. Quinoa plants have deep taproots that make them drought resistant. Its leaves are broad, with tiny hairs (trichomes), and lobed. Plants can grow from 18 inches tall to over six feet. The central stem may be green, purple, or red, depending on the variety. Quinoa seeds can be black, tan, white, pink, red, or purple, depending on the cultivar. All quinoa seeds are coated with saponins, which taste bitter. This protects developing seeds from birds and other seed eaters, but the coating needs to be rinsed off before cooking and eating your quinoa. [In parts of Africa, those saponins are collected and used as a laundry detergent!] While young quinoa leaves are edible, they do contain high levels of oxalic acid, which can cause respiratory and kidney problems. But you’d have to eat an awful lot of quinoa leaves to have a problem. How to grow quinoa Quinoa plants are pretty rugged. They can be grown from sea level all the way up to the highest mountain tops (13,000 ft.), just give them plenty of sunlight. You will want to select a variety that is suited to your microclimate and elevation. Quinoa grows best in loose, sandy soil. If that's not what you have, you can either grow your quinoa in a raised bed, or you can incorporate a lot of aged compost into your quinoa bed before planting. This will provide nutrients and improve drainage. Do not try growing quinoa in containers - it needs more underground space than a container can provide. Quinoa prefers a soil pH of 6.0 to 8.5, so our alkaline soil isn’t a problem. Seeds should be planted 1/4 of an inch deep and watered very gently, to avoid washing seeds away before they get a chance to germinate. Quinoa plants prefer temperatures from 25°F to 95°F. This means you can start growing your quinoa in autumn. That way, your plants will be harvested long before the summer heat kicks in! Quinoa plants take 90 to 120 days to mature, so plant accordingly. Freezing temperatures will sterilize quinoa pollen, so frost that occurs during flowering can be problematic. These plants grow very slowly during their first two or three weeks, so snipping off weeds at ground level is the best way to reduce competition without disturbing the soil. Depending on the variety, plants only need 10 to 39 inches of water during the growing season. Quinoa plants should not be watered once they start going to seed. Quinoa pests and diseases While quinoa seeds protect themselves with saponins, many birds will still feast on your crop. You can use netting to reduce losses. Other pests include flea beetles, caterpillars, aphids, armyworms, and the recently discovered quinoa plant bug (Melanotrichus sp.). Bacillus thuringiensis can be used to control caterpillars. According to a report from Perdue University, there are no pesticides cleared for use on quinoa. Quinoa is prone to several fungal diseases, which is why good drainage is so important. Damping off disease, downy mildews, fusarium wilt, seed rot, leaf spot, and brown stalk rot can all affect your quinoa plants.  Quinoa field in Bolivia (Michael Hermann) CC BY-SA 3.0 Harvesting quinoa
You will know it is time to harvest your quinoa crop when the leaves turn yellow, red, or purple, and start to drop off. The difficult part about harvesting quinoa is separating the seed from the rest of the plant. Similar to harvesting stone pine nuts, this is a labor intense process. Start by snipping off as much non-seed containing plant material as possible, and allowing the seed head to dry completely. You will want to protect these seed heads from moisture, because seeds will begin to germinate within 24 hours of being exposed to water. You will know the seeds are completely dry when you cannot leave a dent in one with your fingernail. Once they are completely dry, you can gently rub the seed heads against a colander or strainer to knock the seeds loose. Even if you don’t harvest your quinoa, adding this plant to your garden or foodscape can increase biodiversity and, hey, it’s a strikingly beautiful edible plant! Chenopods include edibles such as California goosefoot, amaranth, and quinoa. Until recently, chenopods were considered a distinct plant family. Genetic testing has altered that status forever. Chenopods are now recognized as members of the amaranth family (Amaranthaceae). The Chenopod tribe Russian thistle, waterhemp, pigweed, and kochia are all chenopods. Plants in this group can be annuals or perennials. They may be herbs, shrubs, or even trees. And they may grow in an erect or prostrate manner. In other words, chenopods have evolved in many different ways. Collectively, chenopod branches are alternate (which means they take turns up a stem), the leaves have petioles (tiny stems) and are shaped like a goose’s foot; hence the name ’cheno’, which means goose, and ‘pod’ which means foot. Young leaves and stems are often covered with tiny hairs (trichomes) or a white mealy dust, a condition called farinose. Many chenopods, such as common lambsquarters, are considered severe agricultural weeds, and the pollen from all of these plants can cause an allergic reaction for some people. Flowers generally bloom from spring through fall, but we can enjoy the benefits provided by some of the more benign varieties without adding invasives into our gardens and landscapes. Humans have been eating chenopods for over 6,000 years. Below are some of the more common chenopod edibles.
Quinoa Quinoa (Chenopodium quinoa) has taken grocery store shelves by storm as a high-protein, gluten-free grain. Quinoa oil is also now recognized as a high quality oil. To grow your own quinoa, simply wait until summer’s scorching heat has passed, and plant seeds in rows, 1/4 inch deep. Plants will need to be thinned to 8 to 12 inches apart. Water gently, at first, to avoid washing seeds away, and you may need to protect them against birds, in spite of the seeds’ bitter saponin coating. Keep the soil moist until seedlings are well established, then they are very drought tolerant. Quinoa reseeds itself nicely. Quinoa field in Bolivia (Michael Hermann) CC BY-SA 3.0 Amaranth Did you know that you can pop amaranth the same way you pop popcorn? It’s true! You get itty-bitty kernels, but it’s fun to watch and it tastes good. The leaves are also edible. Different varieties of amaranth work better for seed production (Amaranthus caudatus, A. cruentus, A. hypochondriacus, A. retroflexus), while others are better suited for producing leafy greens (Amaranthus cruentus, A. blitum, A. dubius, A. tricolor, A. viridis). Growing your own amaranth is pretty much the same as growing quinoa: the soil must be warm and kept moist, and seeds are only covered with a little soil.  Amaranth (Hardyplants, Public Domain) Chenopod pests and diseases
Birds enjoy eating the seeds, but these plants continue to survive and thrive, so the damage can’t be all that significant. The same holds true for apple stem grooving virus, tobacco necrosis virus, and the cowbane mosaic virus. They try to slow these plants down, but generally cannot. Find a sunny spot in your garden or landscape for these colorful edibles! Spinach isn’t just for cartoon sailors! This delicious member of the amaranth family can hold its own in your garden, on a window sill, or growing on a balcony. Cousin to beets, quinoa, and chard, spinach lives up to its reputation as a nutritional powerhouse, but not for the reason you think. Cartoonists weren’t exaggerating when they showed how spinach pumped up our beloved sailor man, but iron isn’t the reason. A single cup of fresh spinach provides 56% of the RDA for Vitamin A, 15% folic acid, 14% Vitamin C, 13% manganese, and 181% Vitamin K, and all for less than 7 calories. Spinach only contains 5% of the RDA for iron, but it does provide high levels of carotenoids, which helps prevent cataracts, and many other important nutrients. 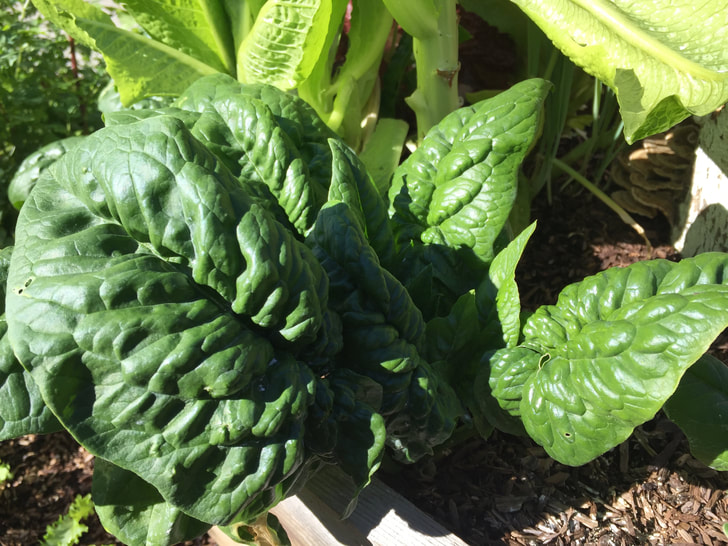 Spinach As children, many of us cringed at the mere mention of spinach. Part of that was due to canned and frozen varieties being cooked into a stringy, slimy, green ooze. It also reflected the fact that a child’s taste buds are more sensitive to bitterness that an adult’s. Now that we are older and wiser, however, we can truly enjoy the crisp, refreshing, delicious flavor of a spinach salad. And freshness is the key. In fact, while working as a USMC Family Childcare Provider, I overheard a conversation that no one expects to hear: one toddler admonishing another toddler to not eat so many spinach leaves because it would damage the plant! You can read more about that here. Spinach seeds & leaves Much of the spinach sold in American grocery stores is the light to dark green, smooth, oblong- or triangular-shaped leaf variety. There are also varieties with distinctly crinkled leaves. This characteristic earns them the name ‘savoy’, after a cabbage with similar tendencies. Savoy spinach varieties produce thicker, more rounded leaves. There are also crosses between the two, called semi-savoy. Now, if you have ever planted spinach, you know that the seeds are rather large, especially when compared to other greens. Spinach seeds come in two forms: prickly and smooth. You might expect the smooth seeds to produce smooth leaves and vice versa, but it’s just the opposite. Smooth seeds tend to produce crinkled (savoy) leaves, while prickly seeds tend to produced smooth leaves. Spinach lifecycle Spinach (Spinacia oleracea) is an annual that tends to bolt, or go to seed, as soon as temperatures rise. Bolting makes the leaves lose their flavor, but it can also provide you with seeds for your next spinach crop. You can collect your own seeds, as long as you do not plant hybrids. [Hybrids generally do not produce plants that look or taste like the parent.] You can also let them fall where they will, as I do. They always seem to find the spots that suit them the best.
Spinach pests & diseases
Spinach is susceptible to many fungal diseases, including downy mildews, rust, fusarium wilt, and Pythium. The Rhizoctonia parasite can also attack your spinach plants. Aphids, crickets, earwigs, flea beetles, cutworms, darkling beetles, bulb mites, leaf miners, loopers, nematodes, seedcorn maggots, slugs and snails, wireworms, whiteflies, rabbits, and chickens can also wreak havoc on your spinach plants. Personally, I conduct a weekly leaf inspection of my spinach and beet plants. A quick peek under each leaf makes it easy to wipe off whitefly eggs before they can hatch. These eggs look like clusters of tiny white rectangles. How to grow spinach Spinach can be added to flowerbeds, next to walkways, at the base of peas and other climbing plants, and anywhere else these fast growing greens will look nice. As a cool season crop, spinach can be started directly in the ground anytime between late August through April in warmer regions. Spinach prefers sunny locations during cooler weather and some shade protection during hotter months. You can also grow it indoors, in containers, year round, if you have a sunny window or grow lights. Containers should be at least 8” deep. Seeds should be planted 1/2” deep and kept moist until germination occurs. Seedlings should be transplanted at a time when they are most likely to survive, which means when temperatures are not scorching. Transplants should be spaced 8 to 10” apart. The same is true for seeds sown directly in the ground. You can make your soil more conducive to spinach by topping dressing the bed with some aged compost ahead of time. Spinach favors lighter, sandier soil than we tend to have here and it is a heavy feeder. You can add nutrients by side-dressing, which means placing aged compost around and next to plants once they are in place. As you water, the nutrients will leach into the root zone and be absorbed by the plants. Spinach prefers a pH of 6.5 to 7.5. Spinach plants have shallow roots, so be sure to water regularly, especially as temperatures begin to rise. Some varieties of spinach perform better when grown in the fall, while others prefer spring. I keep seeds of several varieties handy so that I can maintain a constant supply of fresh spinach throughout most of the year. Be sure to read the packet before you start planting. Spinach substitutes Since spinach only grows successfully in hot regions during during the cooler months, you can grow other plants during the summer that provide similar taste and nutrition. These plants are:
Spinach history & trivia Spinach was first grown in Persia, around 500 B.C. The “Persian vegetable”, as it was called, was brought to China in the 7th century. Two hundred years later, spinach seeds made their way to Italy. Florence’s Catherine de’ Medici loved spinach so much that foods served on a bed of spinach became known as “Florentine”. Another five hundred years pass before spinach has a home in western Europe, appreciated for appearing in early spring, when food is scarce, and by not breaking any religious food rules. Spinach was even included in the first known English cookbook in 1390! The name may be odd, but this nutritional powerhouse is easy to grow, even in heavy clay (though it prefers lighter soil). 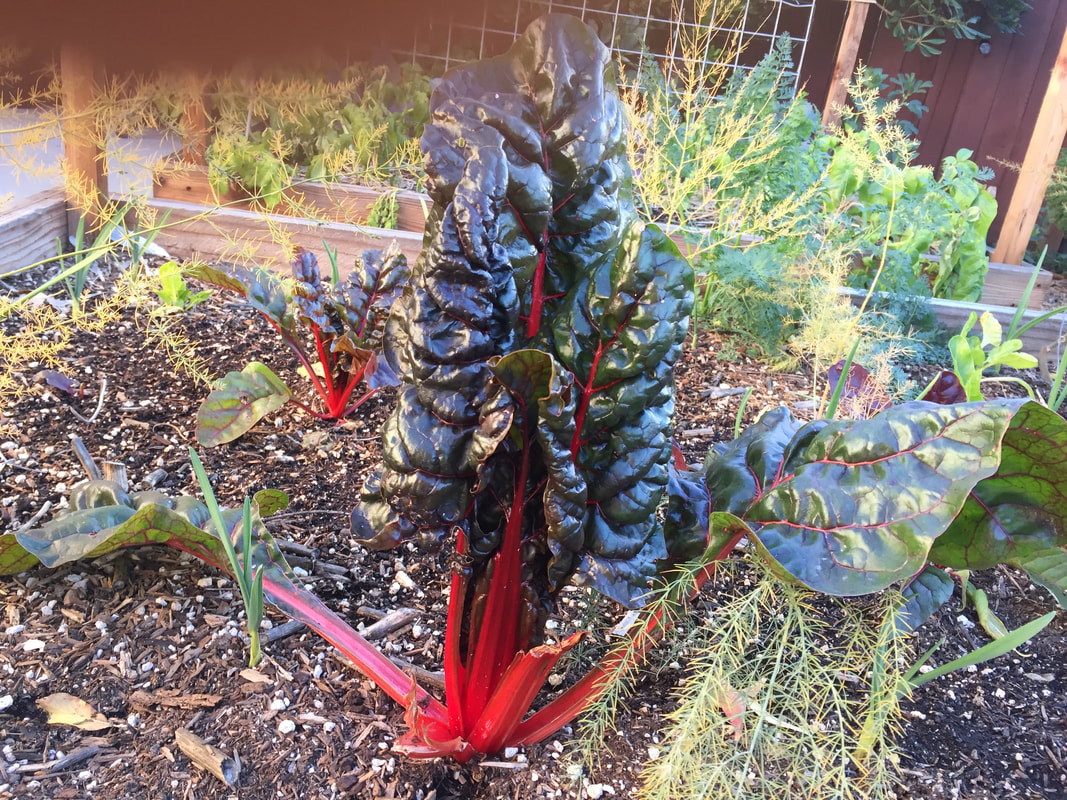 Colorful and delicious Swiss chard Swiss chard (Beta vulgaris vulgaris) is actually a beet that doesn’t develop the fat round root. Both plants, beets and chard, evolved (with some help from humanity) from the sea beet (Beta vulgaris maritima). Swiss chard is also called chard, spinach beet, silver beet, mangold, seakale beet, and bright lights. The bright lights name is a reference to the brightly colored leafstalks (petioles), that can be red, yellow, orange, purple, pink, or white. They look as amazing in your salad bowl as they do in your garden! One of the nicest things about growing chard is that outer leaves can be removed frequently and the plant simply produces more inner leaves, creating a long term supply of easy to grow, highly nutritious food. Chard is so nutritious that just under half a cup of fresh chard provides 122% of the Daily Value of Vitamin A, 1038% of Vitamin K, and 50% of Vitamin C, and all with only 19 calories! Research has also shown that Swiss chard provides tons of antioxidants and even type 2 diabetes protection. If that weren’t reason enough, the brightly colored petioles of Swiss chard make it a lovely addition to your edible landscape and these plants are relatively drought-resistant. Like parsley, chard is a biennial plant. While it can tolerate light frost, exposure to too much cold will trick it into thinking it has experienced a winter and can cause bolting. How to grow Swiss chard Chard can be grown as a summer or winter crop. In areas with scorching hot summers, Swiss chard will perform better as part of your shade gardening plan. Chard seeds should be planted 1/2 to 1 inch deep when temperatures are between 40 F to 95 F. Mature plants can be spaced 6 to 12 inches apart, with rows 15 inches wide, but keep in mind that the plants will grow 1 to 3 feet tall, with a spread of 1/2 to 2 feet wide. Mulching around each plant with aged compost will help stabilize soil temperature and add nutrients to the soil. Pests and diseases of Swiss chard Swiss chard is a durable plant that has few pest or disease problems. You may find that an overabundance of harvestable chard is your bigger problem, but you can always cook and freeze or gift the extras. That being said, aphids, leaf miners, and flea beetles will cause the most leaf damage, while leaf spot, powdery mildew, downy mildews, and beet curly top can infect Swiss chard plants. Row covers can be used to block these pests and proper plant spacing, feeding and irrigation can reduce the likelihood of disease. 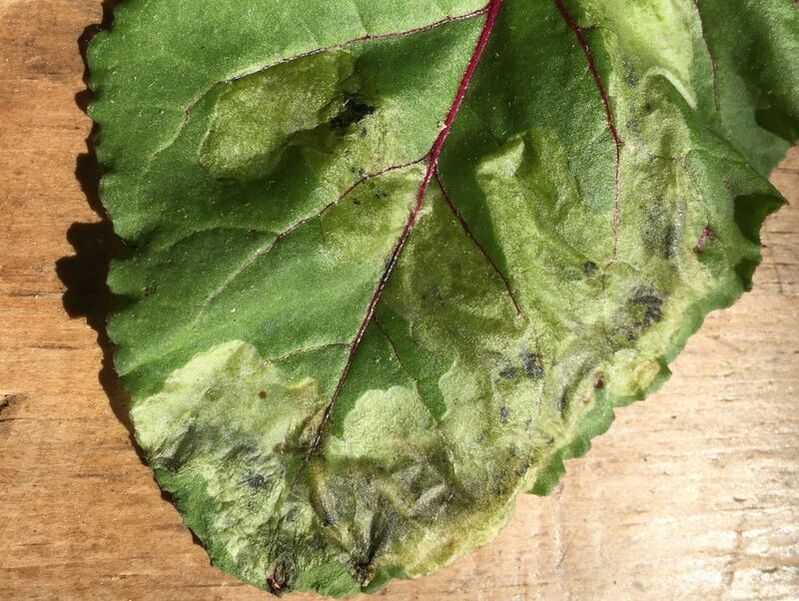 Leaf miner damage on Swiss chard (Kate Russell) How to harvest Swiss chard
Chard is a very satisfying plant to grow. Germination occurs in only 5 to 7 days and you can begin harvesting very early in the plant’s life. There are two approaches to harvesting chard: leaf-by-leaf or cut-and-come-again. The leaf-by-leaf method mentioned earlier simply means outer leaves are removed as needed. The cut-and-come-again method refers to cutting the plant down to just an inch or two above the soil line, avoiding the growing point in the middle. New leaves will emerge from this point. To keep yourself in year round chard, these plants can also be grown indoors in containers. Because chard has a taproot, a 5-gallon planter is recommended. There is far more to beets than the canned, pickled variety. These easy to grow, sweet tasting vegetables love mild winters, making them an excellent autumn crop.
Beets grow well in full sun or in shade gardens and they absolutely love raised beds. Beets can be sown directly into the ground as long as temperatures remain cool. Seeds should be planted 1/2 inch deep and thinned to 12 inches apart. It is a good idea to top dress around the plants to help retain moisture and add important nutrients. Be sure to water regularly, allowing the top inch of soil to dry out between waterings. Once you discover how delicious fresh beets really are, you will probably want to start planting them in succession, for a ready supply. 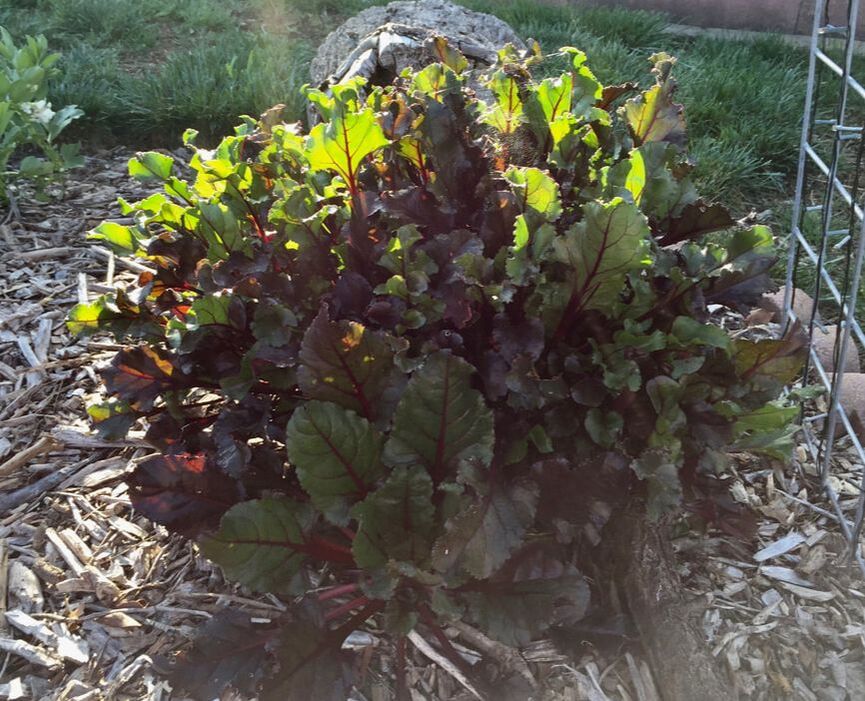 A perennial beet produces abundant edible greens Beet pests and diseases All of the usual pests will go after your beet plants: aphids, armyworms, cutworms, flea beetles, grasshoppers, leaf miners, leafhoppers, spider mites, whiteflies, and wireworms. Row covers can be used to protect young plants, but older plants seem to be well equipped to protect themselves. Diseases commonly occurring in beets include whitefly- and aphid-borne viral diseases, powdery mildew, curly top, and various root rots. Perpetual beet harvest Your beets can be harvested at any time, but most people wait until the beet root’s “shoulders” have pushed their way above ground. Before you pull up all of your beets, consider this: beets make a lovely foodscape plant. Rather than harvesting all of your beets, leave a strategic few in the ground.These plants will develop short, gnarled trunks that put out tall, feathery, flowering stems that can reach 4 to 5 feet in height. 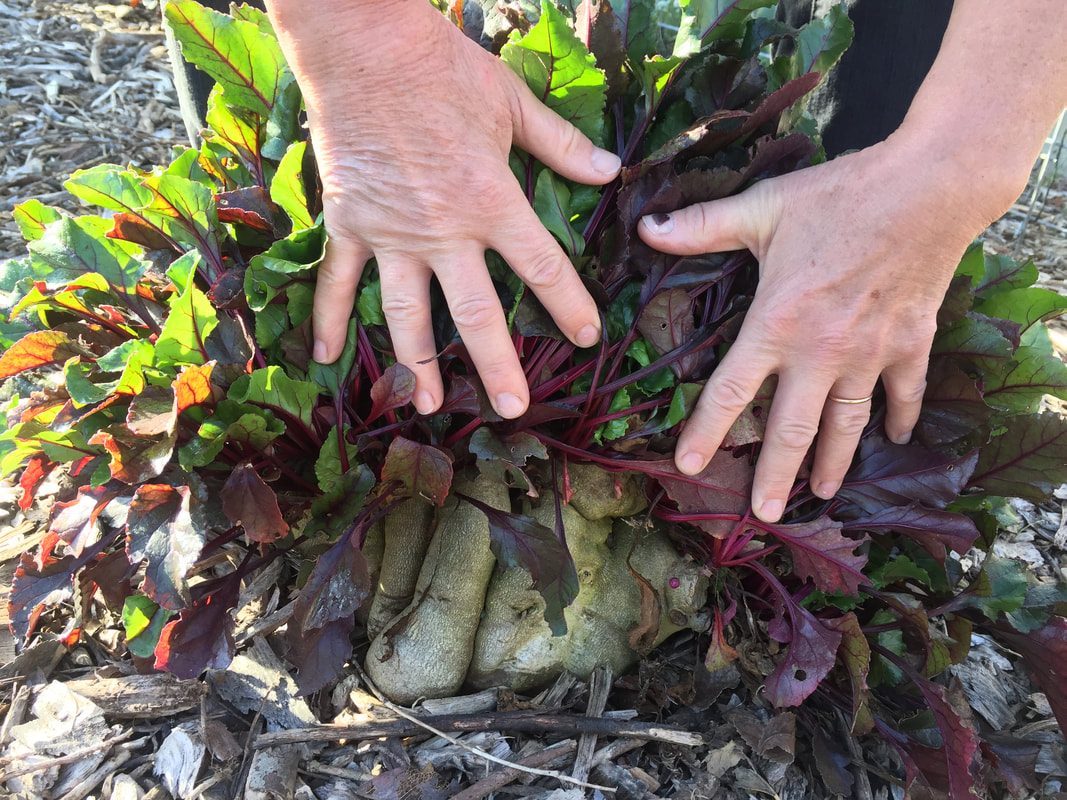 A 7-year old beet looks more like a tree trunk than a root vegetable These stems will produce hundreds of seeds that you can allow to scatter naturally, or you can collect the seeds, or cut the stems and shake the seeds loose wherever you might want beets. Birds and other seed eaters will get most of your beet seeds, but, a lucky few, will, in time, germinate and produce new beets. It ends up, these seeds usually pick the best growing spots for themselves. The greens of your seed-producing beets will continue to be edible for, well, I’m not sure how long. My two have been producing since 2013 and they are still growing strong.
UPDATE: If a delicious, nutritious crop isn't reason enough to grow beets, cat owners have yet another reason: Research has just shown that adding beet pulp to your cat's food will help them poop out more hairballs, rather thank hacking them up. Now you know. |
Welcome!You can grow a surprising amount of food in your own yard. Ask me how! To help The Daily Garden grow, you may see affiliate ads sprouting up in various places.
You can also get my book, Stop Wasting Your Yard!  Index
All
Archives
July 2024
|


 RSS Feed