 Culantro (Mokkie) CC BY-SA 3.0 Culantro (Eryngium foetidum) is a distant relative to cilantro, but don’t let the name similarities confuse you. This herb is more pungent and bitter. But it does wonders for stimulating the appetite and adding depth of flavor to many South and Central American and East Asian dishes. Culantro is a low-growing tropical plant with saw-toothed leaves that grow in a rosette form.
When transplanting, space plants 12” apart. Unlike most herbs, culantro prefers soil that stays moist. Mulching around (but not touching) these plants can help stabilize soil moisture and reduce competition from weeds.
Culantro is relatively pest- and disease-free. Its umbrella-shaped flowers attract several beneficial insects, such as hoverflies and lacewings. The best reason for growing culantro is its delicious flavor. Lemon verbena (Aloysia citrodora) is a woody perennial shrub you can add to your garden for delightful teas, lemony fish and poultry dishes, puddings, custards, and syrup. You can also use it to create a fast-growing* lemon-scented hedge. *Lemon verbena grown from seed grows slowly. Plants grown from cuttings or dividing grow fast.
Is lemon verbena an effective herbal remedy or not?
There are numerous claims about the effectiveness of lemon verbena as an herbal remedy for everything from stomach upset, anxiety, and muscle repair to weight loss and joint pain. While claims like these often turn out to be untrue or exaggerated, science is beginning to support at least some of them. The National Institutes of Health published a study concluding that lemon verbena has “promising antioxidant and anti-proliferation effects.” Until we know more about how lemon verbena can improve our health, we can happily grow it at home for other reasons. How to grow lemon verbena These plants are drought-tolerant. They grow best in fertile soil with excellent drainage and full sun. Plant seeds, seedlings, or tip cuttings 12-18” apart. In USDA Hardiness Zones 8a-10b, you can grow these plants as perennials. In cooler regions, it can be grown as an annual. Common pests and diseases of lemon verbena Aphids, slugs, and snails are the most common pests of lemon verbena. Leaf miners, mealybugs, spider mites, thrips, and whiteflies may also cause problems. Yellow sticky sheets can significantly reduce populations of these pests. These plants also experience root rots, which can be avoided by allowing the soil to dry out between waterings. Other potential diseases of lemon verbena include gray mold, powdery mildew, spotted wilt, and Verticillium wilt. Again, monitor soil moisture levels and avoid overhead watering. Add this lemony fresh herb to your landscape for years of delicious flavor and showy flowers. I am a baker, and I love the smell and taste of vanilla. I was trying a new recipe yesterday, a pear skillet tart, when I had a thought. Could I grow my own vanilla? Let’s find out.  Dried vanilla beans (B.navez) CC BY-SA 3.0
The vanilla plant Somewhere in the back of my brain, I had the idea that vanilla pods came from trees. I was wrong. Vanilla is a genus of orchids, of all things! Originally from Mexico and Belize, there are three major (and several minor) vanilla species: Madagascar vanilla (V. planifolia) is grown in tropical areas around the Indian Ocean; V. tahitensis comes to us from the South Pacific; V. pompona hails from the West Indies. Most of the vanilla extract we find in grocery stores is Madagascar vanilla, because of its stronger flavor. A few species grow in southern Florida, as well. Vanilla orchids are vascular, evergreen vining plants. Those vines can be 35 feet long. They climb trees, called tutors. It is common to see aerial roots dangling from stem nodes. Underneath their gray outer covering, those aerial roots have green chlorophyll used to perform photosynthesis, as well as the thick, leathery leaves. Each flower produces one pod. Vanilla orchids generate a lot of flowers, but pollination can be a problem.
Vanilla pollination Like many other fruits, pollination is a necessary part of the process. Madagascar vanilla flowers have both male and female parts. This should make things easy, but it doesn’t. Those parts are separated by a membrane. The only bees that can pollinate vanilla flowers are Eulaema orchid bees, found throughout Central and parts of South America. These bees are only successful at pollinating vanilla flowers 1% of the time, which doesn’t make growing vanilla financially feasible. Because of this, all of the vanilla we buy comes from flowers that were pollinated by hand. Each flower. By hand. They use a bamboo stick to lift the membrane, and then use a finger to move the pollen from the anther to the stigma. That’s one bean. This process was discovered by an enslaved 12-year-old child, Edmond Albus, in 1837. Hand-pollination allowed vanilla plants to be grown productively in other regions. Vanilla extract Did you know that 95% of the “vanilla” products you buy are flavored with vanillin and not vanilla? Vanillin is made from lignin. Lignin is a component of bark. It is also the stuff that holds trees upright. But it is not vanilla. And vanillin is only one of the 171 aromatics that make vanilla so delicious. In 1996, the FDA found that products labeled as vanilla were made from Mexican tonka beans, which are toxic. And that “natural flavoring” found on many food labels may not be vanilla or vanillin. It might be castoreum. Castoreum is something mature beavers use to mark their territory. Yuck! When it comes to vanilla, paying for a quality product appears to be a good idea. The reason behind the high cost is that these crops are incredibly labor-intensive. If that weren’t reason enough, tropical storms and crop thefts are common in Madagascar. It’s a wonder we get any vanilla at all! But we’re not finished.
If you were able to get your hands on a vanilla cutting, you would need to provide a hot, humid, shady environment. Temperatures between 59°F and 89°F during the day, down to 68°F at night, are ideal, with 80% humidity. Living in Seattle, I wouldn’t have any problem with the humidity, but those temperatures might be hard to come by most of the year. If you live in a hot, sunny area, you would need to use netting that provides a shade rating of 50%.
Vanilla plants grow best in loose, loamy soil with a pH of around 5.4. Mulching around vanilla plants is said to help them grow well. Your vanilla cuttings will take three years to produce pods and should live 12 to 14 years. Vanilla pests and diseases Vanilla vines are prone to several fungal diseases, including Fusarium and Phytophthora. Mosaics, leaf curl, and other viral diseases can also occur. Many of these diseases are treated with Bordeaux mixture and other less environmentally or health-friendly solutions. Beetles, caterpillars, . grasshoppers, slugs, snakes, and weevils also damage vanilla crops. Sheesh! So, can I grow my own vanilla? I found vanilla cuttings on Etsy for $30, so, yes, they are available. But, after learning about all that goes into growing, harvesting, and curing vanilla (and that’s all before we even start making the extract), I’ve decided that paying for high-quality vanilla is totally worth the expense. You may feel differently. Caraway seeds taste similar to anise or licorice and caraway plants are easy to grow. Did you know that the entire caraway plant is edible? Read on!  Caraway fruits (Public Domain) Frequently used in rye bread, goulash, havarti cheese, and Irish soda bread, this cousin to carrots and dill has lovely umbrella-shaped flowers that attract many beneficial insects, such as hoverflies and parasitic wasps. Caraway description The caraway seed is actually a type of dried fruit, called an achene. Feathery leaves, strong stems, and small pink or white flowers make caraway (Carum carvi) both attractive and useful. Plants can reach 24-30” in height, though they only reach 8” or so their first year. As a member of the carrot family, caraway plants can look similar to poison hemlock, so make sure you know how to tell them apart. How caraway grows Caraway, like parsley and many other umbellifers, is a biennial plant. This means it uses its first year to develop a root system and become established. In its second year, flower production takes place and seeds are produced. Some varieties are grown as annuals, and one type of caraway is a perennial plant. Caraway plants prefer warm, sunny locations, good drainage, and nutrient-rich soil. Commonly grown in Europe and Western Asia, caraway plants prefer cool temperate zones and a soil pH of 6.5 to 7.0, and can be grown in Hardiness Zones 3-11. While they prefer full sun, caraway plants can handle partial shade. 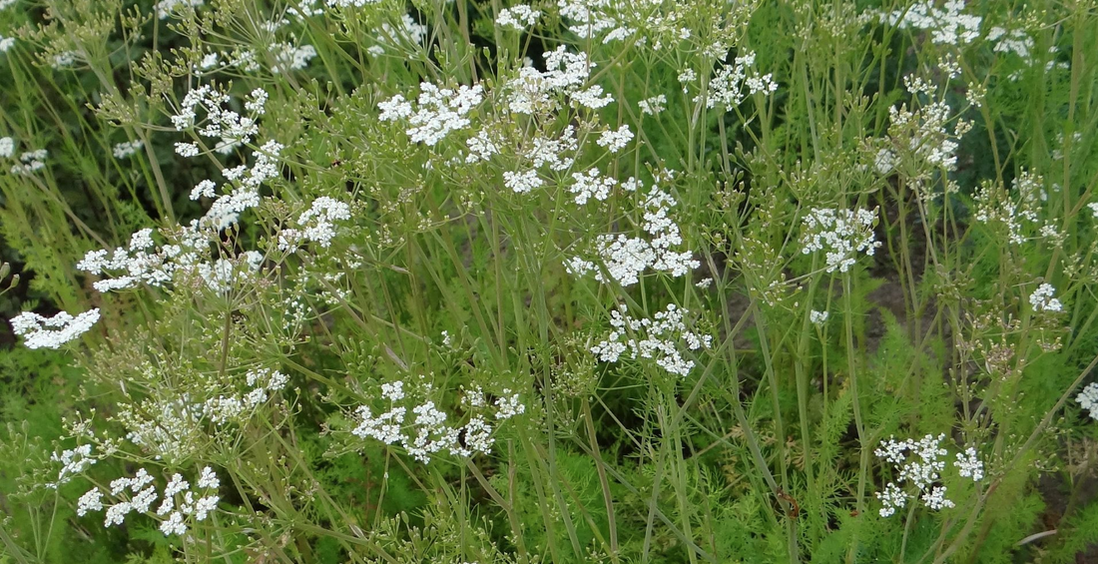 Caraway plants (Jerzy Opiola, CC BY-SA 4.0) How to grow caraway
Caraway seeds should be planted 1/4” to 1/2” deep in spring or fall, directly in the soil. As is common with plants that feature a taproot, caraway does not transplant well. Plants should be thinned so they are 8-12” apart. Caraway is a slow grower, so you may want to intercrop with something faster to reduce weeds and to act as a nurse crop for your caraway. Water plants well during their first year, but avoid getting the leaves wet. Soaker hoses are an excellent tool for irrigating caraway. While caraway has very few pest or disease problems, it is a good idea to leave some distance between them and other members of the carrot family. If grown as a biennial, cut plants back in the fall. They will regrow, bigger than ever, in spring. If grown as an annual, be sure to start a new crop in succession, for a continuous harvest. Harvesting caraway Since all parts of the caraway plant are edible, you can use young leaves and stems in salads, soups, and stews. When seeds have turned brown, remove the flower head and hang it upside-down in a pillowcase until dry. Then you can simply rub the head between your hands to dislodge the caraway achenes. After seeds are produced and harvested, you can dig up the root and treat it the same way you would any other root vegetable. Try adding some caraway to your foodscape this fall! Cumin’s pungent aroma has made it a popular spice since ancient times. Kept on Egyptian tables the way we use salt and pepper, cumin is said to provide many different health benefits, though there is zero scientific proof for any of those claims, There are still plenty of other good reasons for growing your own cumin. 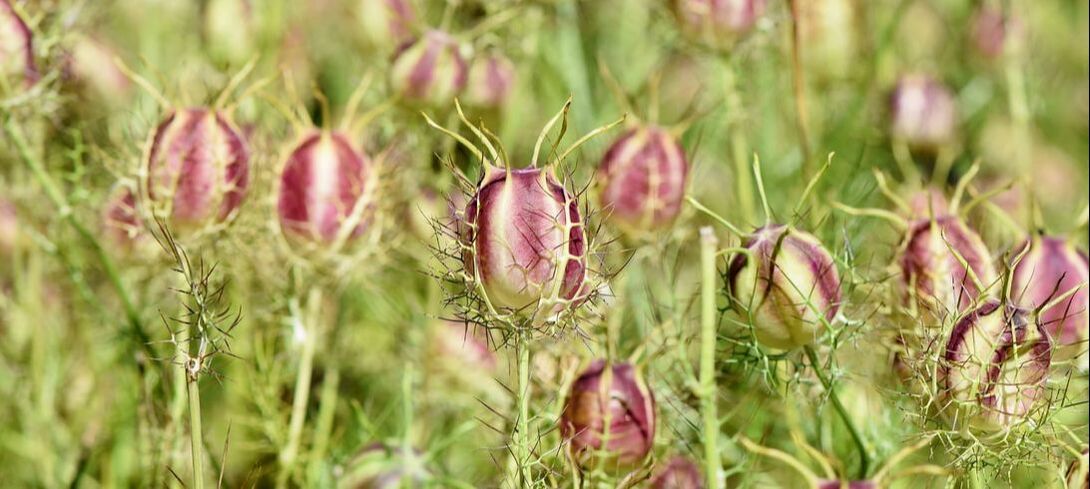 Cumin plants (Pixabay) Cumin’s umbrella-shaped flowers make it easy to identify as a member of the parsley family. Other common garden Umbellifers, or Apiaceae, include carrots, celery, dill, parsnips, and fennel. Like other umbellifers, cumin flowers attract many beneficial insects, such as hoverflies and pollinators. Native to the Middle East, cumin (Cuminum cyminum) grows best in hot, dry regions and is very drought tolerant. It takes 3 to 4 months of hot weather to reach maturity. If temperatures drop, leaves will turn purple. If it gets really cold, cumin is very susceptible to frost damage. The cumin plant Cumin seeds look a lot like caraway seeds, being oblong with ridges. Those ridges are oil glands. Cumin plants grow 12 to 20 inches tall, with attractive, feathery leaves. Cumin seeds are contained in dried fruits called achenes.  Cumin seed (Sanjay Acharya) CC BY-SA 3.0 How to grow cumin
If you have the heat, you can grow cumin. Seeds should be planted 1/4 deep and spaced 8” apart. These plants are very delicate when they first germinate and do not perform well in heavy clay soil. They prefer loose, sandy soil with good drainage, which makes them an excellent choice for raised beds. The ideal pH is 6.8 to 8.3. Cumin pests and diseases Aphids, mites, thrips, tobacco caterpillars, cutworms, cigarette beetles, drugstore beetles, and nots for cumin. Diseases that may strike your cumin plants include Fusarium wilt, blight, powdery mildew, and damping off disease. Cumin seeds are frequently included in birdseed mixes, so this plant has spread globally. Once established, this annual plant readily self-seeds an area. If you enjoy curry, you may want to try growing your own fenugreek. But don’t do it for the wrong reasons. Fenugreek is one of those foods touted as a miraculous cure-all for cramps, hair loss, high blood sugar, insufficient breast milk, indigestion, and diabetes. While there may be some truth to the diabetes claim, all the other claims lack any scientific proof, and even the diabetes research is incomplete at this time. That being said, there are plenty of delicious reasons to grow your own fenugreek. 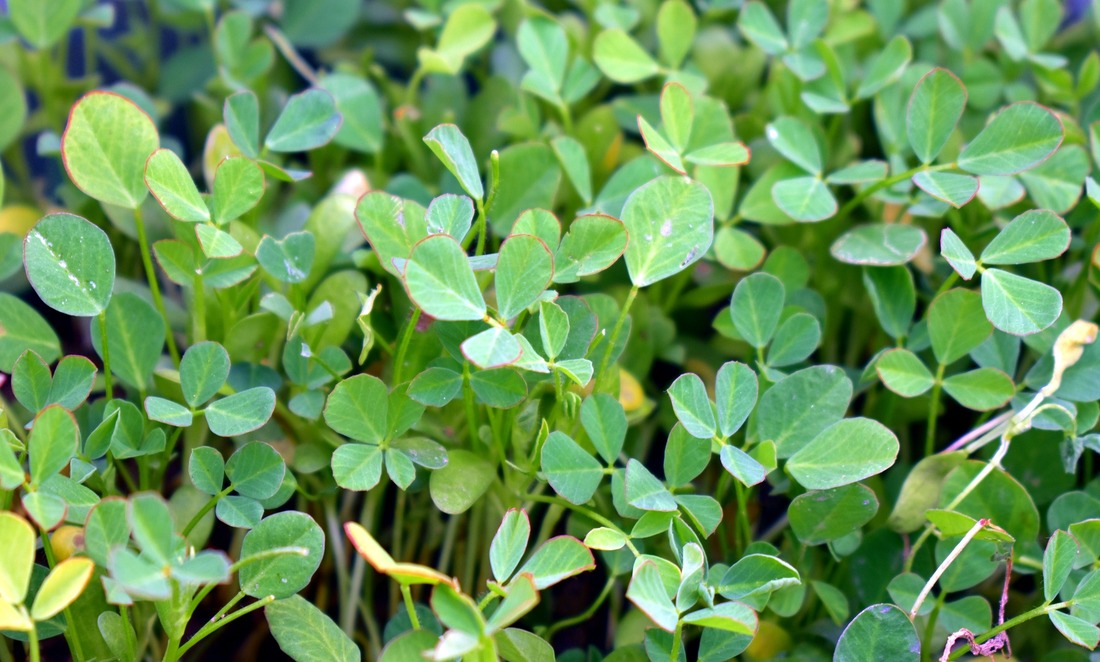 Fenugreek plants (SandeepHanda) Pixabay Fenugreek as food For over 4,000 years, people have grown this annual legume. It thrives in semiarid conditions, and its seeds and leaves are popular ingredients in dishes from South and Central Asia. Like other legumes, fenugreek is high in protein and fiber. A 3.5 ounce serving of fenugreek seed provides 323 calories, 58g. carbohydrates, 25g. dietary fiber, and 23g. of protein. It also contains significant portions of the RDAs for thiamine (28%), riboflavin (31%), Vitamin B6, (46%), folate (14%), iron (262%), magnesium (54%), manganese (59%), phosphorus (42%), and zinc (26%). [Who knew curry was so good for us?!!?] Fenugreek seeds are generally roasted to reduce bitterness and enrich flavor. And it’s not just the seeds of the fenugreek plant that are eaten. Fresh fenugreek leaves, which are said to taste similar to spinach, are used as a vegetable in many Persian and Indian dishes. Dried leaves are used as an herb. 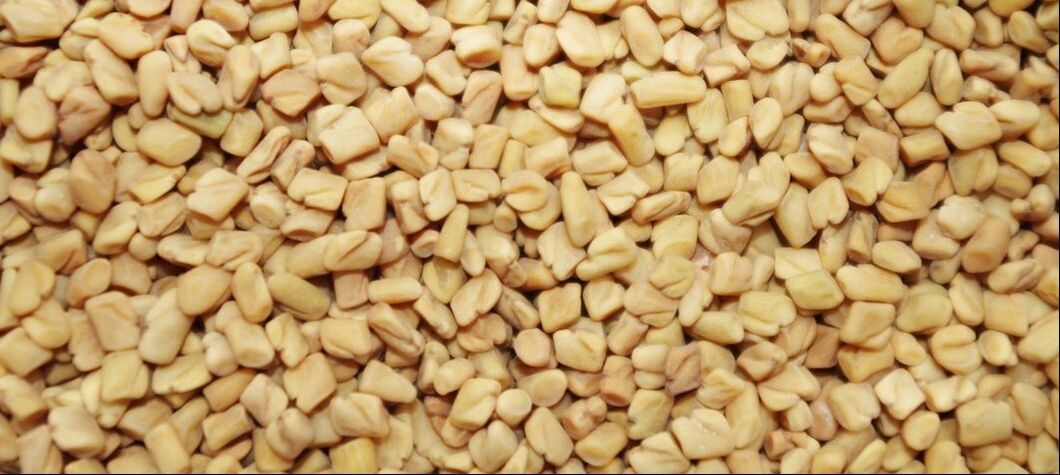 Fenugreek seeds (Ajale) Pixabay The fenugreek plant
Fenugreek (Trigonella foenum-graecum), also known as methi, samurai, and hilba, among others, is a fragrant annual. It may grow as a single stem, or as a small bushy plant, reaching a height of 2 feet. Green to purple oval leaves are small and trifoliate (having three leaflets). It looks a lot like clover and alfalfa. Flowers are small and either white or purple. Seeds develop inside curved yellow pods. This plant is moderately drought resistant and it can handle a light frost. How to grow fenugreek This plant needs heat, so you may want to grow it in a container, maybe on a windowsill. Fenugreek has a shallow root system, so the container does not need to be very large. You can grow fenugreek as a microgreen by simply sprinkling seeds on top the soil in a shallow container, and then lightly covering them with more soil. Fenugreek seeds should be planted 1/4” deep, in rich potting soil. Keep the soil moist until germination occurs. Fenugreek does not like our heavy clay, and it does not take kindly to being transplanted, so it is best started where it will stay for the growing season. These seeds sprout very quickly, usually in only 2 to 4 days, making it an exciting children’s activity. Fenugreek pests and diseases Fenugreek is susceptible to root rot, powdery mildew, and charcoal rot. These diseases can be minimized by allowing the soil to dry out between waterings. Aphids are the most common pest of fenugreek. Harvesting fenugreek Fenugreek can be grown as a microgreen, or you can go for the full growing experience. Generally, young leaves and shoots are snipped off the plant early in the growing season. Then the plant is allowed to continue growing to produce seeds, usually 3 to 5 months after planting. To harvest seeds, the plant is removed and hung upside down to dry. Have you had your fenugreek today? Ajwain may be an unfamiliar word, but the ajwain plant carries an herbal punch reminiscent of many more familiar spices and herbs.  Ajwain flower head (Bames24) CC BY-SA 3.0 Ajwain (Trachyspermum ammi) is an annual that hails from India, North Africa, and the Middle East. Also known as ajowan, bishop’s weed, carom seeds, or ajowan caraway, ajwain is an umbellifer, along with carrots, dill, and celery. People have been eating ajwain leaves and fruit for a very long time, but many Americans are unfamiliar with this attractive edible.  Ajwain schizocarps (Sanjay Acharya) CC BY-SA 3.0 Ajwain fruit If you were to look at a handful of ajwain fruit, you would swear they were seeds. Actually, they are schizocarps. Carrots, parsnips, cheeseweeds, and hibiscus all produce schizocarps. Schizocarps are tiny dried fruits that surround seeds. Ajwain flavor Ajwain is an overachiever, when it comes to flavor. It is described as being similar to oregano and anise, with strong overtones of thyme. Apparently, these fruits are quite pungent - a little goes a long way. Because they are so strong, they are rarely used raw. In most cases, the schizocarps are dry-roasted or fried in clarified butter, before being added to curries or sprinkled over bread. The leaves are used in chutneys. 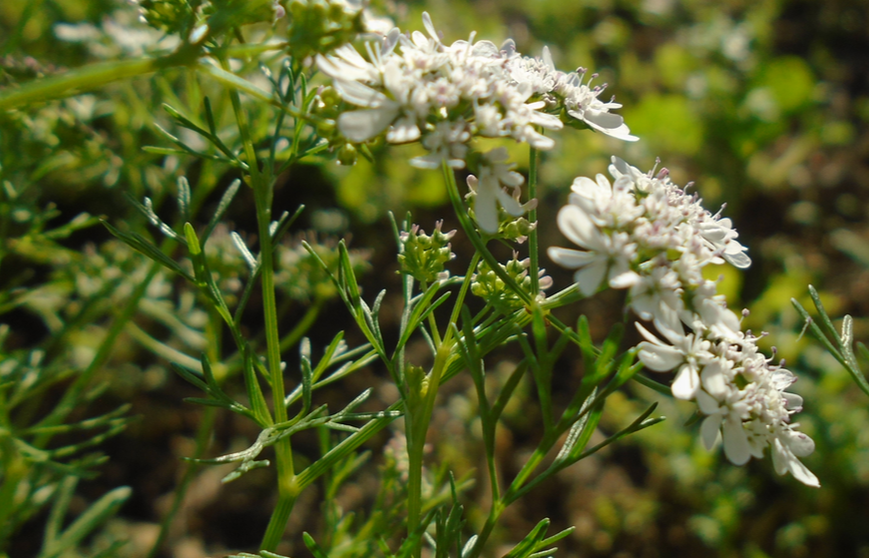 Ajwain flowers and leaves (Isabel14) Public Domain How to grow ajwain
Ajwain is generally grown from seeds, though you can use cuttings. To grow from seed, plant 1/4-inch deep in rich, potting soil, or scatter on top of the soil. Use a mister to water, to avoid washing all the seeds into a corner of the pot. Mist daily for a week or two, until germination occurs. Once the first true leaves emerge, you can transplant the seedling into a larger container. [I couldn't find any free images of ajwain plants, so you will have to wait until mine get started...] To propagate ajwain from cuttings, take stems that are a few inches long and remove all but the upper two sets of leaves. Bury the stem in potting soil, with the leaves exposed ands water regularly. Before you know it, new roots will emerge. Ajwain’s feather-like leaves grow on many branched stems, creating a lovely container plant. Because it is so pungent, most insects are not interested in ajwain plants. Ajwain prefers partial sun or partial shade. Full sun can be too much for these plants. And keeping the soil moist but not soggy will keep these plants healthy and productive. If you happen to have a tummy ache, ajwain seeds can help relieve some of that discomfort. If you have never tasted a stevia leaf, you probably won’t believe the level of sweetness this herb provides. It just doesn’t seem possible. A single, delicate green leaf placed on the tongue does nothing. Start chewing and you’d swear you just downed a spoonful of sugar! Let’s find out if this is a plant you can add to your garden or foodscape.  Stevia (Robert Lynch) Public Domain Native to Paraguay and the surrounding tropical regions, stevia (Stevia rebaudiana) is also known as sweetleaf. Stevia is the model used to create several ‘natural' sweeteners, except that most of them are not what we gardeners would think of as natural. The majority of these stevia plants are grown in China and the leaves are so highly processed that there is little left besides the sweetness. [Being 200 times sweeter than sugar, stevia packs a powerful sweetness punch, processed or not.] Using the unprocessed leaves as a sweetener, on the other hand, adds several different compounds, called glycosides, plus antioxidants, and we all need those! The stevia plant Being a tropical member of the sunflower family, stevia loves the heat. This tender perennial prefers USDA Zones 9 - 11, and is grown as an annual elsewhere. Stevia grows best under the same conditions as basil. Like basil, stevia needs some protection from the high heat of our California summer. Plants can reach 1 to 4 feet high and wide, depending on temperatures and the local microclimate.  Flowering stevia (Ethel Aardvark) CC BY 3.0 How to grow stevia
Stevia plants can be grown from seed, but results are hit-and-miss, as germination is tricky. If you decide to try your hand at seed starting stevia, begin indoors, 8 to 10 weeks before your last frost date. Seeds germinate best at temperatures between 68 and 75°F. Fill pots with a light potting soil or peat mixture. Press seeds into the soil and cover with perlite. This will protect seeds from the air and help the soil retain moisture, but provide seeds with the light they need to germinate. To avoid flooding seeds into the corners, water by misting heavily, at first. Like peppers, stevia plants benefit from the use of a waterproof germination mat. This gives them the heat they need to get started. Cover the pots with plastic and check twice a day to ensure that the top 1/2-inch of soil remains moist until germination occurs, which should take 10 to 15 days. Stevia needs well-drained soil. This makes them an excellent choice for large containers or raised beds, where high quality potting soil provides plenty of macropores and micropores in the soil. During summer heat, these plants need almost daily watering. Allow the soil to almost go dry before watering again. If you allow your stevia plants to go to seed, you can collect seed heads or let them grow where they fall. If you collect the seeds, discard light-colored specimens, as they are probably not viable. Most often, new plants are started from rooted cuttings. Stevia pests and diseases Outside of greenhouses, cutworms and sugar addicts are stevia’s only serious threats. In close quarters, aphids, whiteflies, and thrips can can become a problem. Harvesting stevia You can use stevia leaves fresh from the plant or you can harvest and dry them for later use. The sweetness remains unchanged in either case. Leaves are at their sweetest just before flowering. Once the plant flowers, leaves do not taste as good or as sweet. Each plant can provide you with approximately 1/2 pound of dried leaves each year. Using stevia Stevia is used to sweeten teas and other beverages, fruits, yogurt, custards, salad dressings, and many other liquid-based foods. Stevia can be used to replace some, but not all, of the sugar in baked goods. [Sugar has certain chemical properties that are needed in baking that stevia cannot provide.] Before adding even more sugar to your diet, how about adding stevia to the garden, instead? Ginger’s sweet bite makes it an excellent addition to many favorite foods, and it can be candied for a special treat. And you can grow it at home!  Ginger rhizome (Frank C. Müller) CC BY-SA 3.0 The ginger plant Ginger was one of the first spices to be exported from the Orient and it is a fascinating plant. As a plant family in its own right, ginger (Zingiber officinale) is cousin to turmeric and cardamom. The ginger we eat is not actually a root. It is a rhizome. Rhizomes are modified, underground stems that put out lateral shoots and adventitious roots. Ginger plants do not have aboveground stems. Instead, they grow much like the grass in your lawn, with leaves rolled together at the base of the plant to form pseudostems, except that they can grow to three or four feet tall! Equally tall floral stems emerge directly from the rhizome. Flower buds start out green and then turn white and pink before opening up into mature flowers. Mature flowers can be pale yellow, deep purple, or brilliant red, depending on the variety.  Ginger flower bud (Venkatx5) CC BY-SA 3.0 How to grow ginger Ginger needs loose, nutrient-rich soil, so it is best grown in containers. This makes it easy to bring indoors as temperatures drop in winter, as well. Most grocery store ginger ‘roots’ are treated with chemicals that prevent them from sprouting, but not always. While I normally warn against planting grocery store foods, due to the potential risk of introducing a safe-to-us-but-bad-for-plants disease, your ginger will, most likely, be growing in a container, so it’s not really an issue. Rinse off the ginger and place it in a container filled with potting soil, just under the soil line. Keep the soil moist but not soggy to encourage growth. Being from the tropical rainforest, your ginger plant will need lots of warmth, moisture, and protection from intense sunlight. [Under the canopy, jungles are actually pretty dark!] 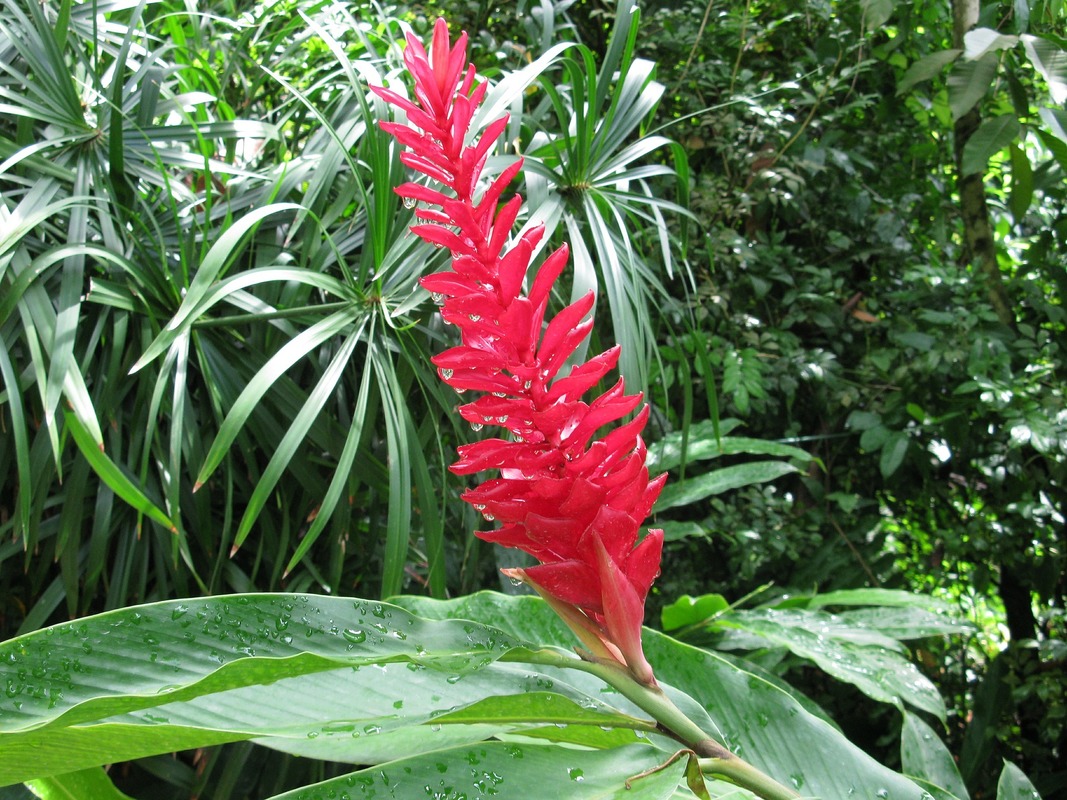 Ginger flower (Fordito) Pixabay Harvesting ginger While you can harvest ginger rhizomes at any time, it is best for the plant’s long term health if you wait until the aboveground portion withers, similarly to garlic. The desired portion of the rhizome is cut off and the rest of the plant can be returned to its container. The cut off portion is then scalded to prevent it from sprouting. The older ginger gets, the tougher and drier the rhizome becomes. Ginger is a perennial plant, which means it keeps on growing. It may look as though it dies in winter, but don’t be fooled. Unless your region is too cold for ginger, it will come back year after year. Each little nub on a ginger rhizome is a potential new plant.
Peppermint candy, peppermint tea, peppermint oil, and peppermint bark are all great reasons for growing your own peppermint. Like other mints, peppermint (Mentha x piperita) is easy to grow. It tends to spread, so you can let it run wild as a fragrant ground cover, or rein it in as a container plant. However you grow it, peppermint is sure to add a delightful fragrance and flavor to your foodscape! Just be sure you understand how tenacious this plant is - it is considered an invasive plant in many parts of the world.  Peppermint plant (Aleska Lukic) CC BY 3.0 The mint family The mint family (Lamiaceae) has grown alongside humanity since prehistory. It is a huge family that includes basil, oregano, thyme, rosemary, sage, marjoram, bee balm, lemon balm, lavender, savory, and many others. Mints are perennial plants that spread using rhizomes. Mint leaves have glands that produce aromatic oils. This is why they smell so lovely. Most mint plants have square stems. Flowers grow on spikes, and are generally a lovely blue or purple. If you look closely, you will see that mint flowers have four stamens and five fused petals, with two petals pointing up and three petals pointing down. Mints can tolerate drought and poor soil, making them an excellent choice for difficult areas.  Peppermint flowers (Sten Porse) CC BY-SA 3.0 The peppermint plant Peppermint is a hybrid between spearmint (Mentha spicata) and water mint (M. aquatica). Water mint thrives in acidic wetland areas of Europe, western Asia, and northern Africa, and is now naturalized around the world. Traditionally used in South Africa to treat depression, water mint has been found to contain naringenin, an MAO inhibitor. Spearmint, of chewing gum fame, got its name because of its pointed leaf tips. The volatile oils and menthol of spearmint have made it a popular addition to toothpaste and baked goods. It can also be used as an insecticide against moths. Spearmint prefers partial shade, but can be grown in full sun to nearly full shade. [Did I mention how rugged mint plants are?] Because peppermint is a hybrid, it does not produce seeds and can only be propagated vegetatively.  'Chocolate Mint' peppermint Peppermint leaves are dark green with reddish veins, and they contain more menthol than spearmint. Peppermint has a fibrous root system. There are several different peppermint cultivars to choose from. My favorite is ‘Chocolate Mint.’ If you chew a leaf, fresh from the plant, you’d swear you were eating a peppermint patty! And no calories! Other peppermint cultivars include:
How peppermint grows Peppermint loves lots of sunlight, but can also be grown in partial shade. Peppermint will grow 12 to 36 inches tall, but it can also be mowed regularly to keep it short. [And it smells amazing when you do!]. Peppermint is easy to grow from cuttings, simply make sure there is a node somewhere on the stem, cover it with soil and keep it moist until new growth emerges. Then allow the soil to dry out between waterings. Because of its preference for moisture, peppermint and other mints will need to be irrigated regularly during our California summers. As rugged as this plant is, once it becomes established, it is pretty difficult to kill. They may start slowly, but then there’s no stopping them! Peppermint pests and diseases The same volatile oils that give peppermint it’s refreshing flavor also work to deter many common pests, including mosquitoes! Mint root borers and webspinning spider mites are the most common mint pests in San Jose, California. Nematodes, cutworms, aphids, and grasshoppers may all take a bite out of your peppermint plants, but these pests are not normally much of a problem. Also, beneficial insects, such as the spider mite predator (Neoseiulus fallacis) will fight off more common pests without any effort on your part. All you have to do is avoid using broad spectrum pesticides. Young peppermint plants grow slowly, so competition from weeds can be a problem. Also, some fungal diseases, such as verticillium wilt, anthracnose, and leaf spot diseases may occur, especially on older plants. Harvesting and using peppermint You can snip off fresh stems or leaves anytime for immediate use. For drying or distillation, leaves and flowers can be harvested as soon as flowers begin to open. Peppermint’s cooling properties have made it popular topical treatment for muscle pain, tension headaches, and itching. There is even research that demonstrates peppermint is able to provide some relief for irritable bowel syndrome. The aroma of peppermint has also been shown to improve memory and alertness! This is a truly useful plant that takes little care. Too much peppermint can cause skin irritation or heartburn, but you’d have to use an awful lot of it. Also, some people are allergic to peppermint, but it’s rare. If you take medications for heart conditions, high blood pressure, or to decrease stomach acid, you should use peppermint with caution. [Did you know that peppermint is used in plumbing and construction to help locate leaks? I didn’t either.] You can beat the summer heat with a spray bottle filled with water and just a few drops of peppermint oil. [It’s easy to make your own peppermint oil. Simply fill a container with a light oil - I use extra virgin olive oil - and a bunch of peppermint leaves. Cover and allow it to sit for a few days. Strain out all the solids and that's it! You have your very own peppermint oil!] If you ever eat too much, nothing helps ease discomfort faster than a cup of strong peppermint tea. Find a place in your foodscape for peppermint today! Bright, cheery colors, delicate textures, and you can eat them! Edible flowers have been part of the human diet since, well, since there have been people! Did you know that carnation petals have been used as one of the ingredients in the French liqueur, Chartreuse, since the 17th century?  Carnations (Darkone) CC BY-SA 1.0 Before we start, let me first share a story from my early trials with edible flowers. My dear sister decided to marry an Australian sailor and asked me to make her wedding cake. It was a lovely tiered white cake with yellow borders. I decided to add some stunning yellow flowers I saw outside. My sister’s reaction of horror was not what I expected - until she explained that the Angel’s Trumpet flowers I used were extremely poisonous. Needless to say, the flowers and the frosting came off. So… When in doubt, don’t Before you go popping random blossoms in your mouth, you need to know that some flowers can make you sick, and others can kill you. If you are even remotely unsure about a plant, do not eat it. Sometimes there is a fine line between edible and inedible. For example, regular garden variety pea flowers and shoots are edible and delicious, while fragrant sweet peas (Lathyrus odoratus) are poisonous. Some varieties of daylilies are edible and others are not. The same is true for phlox and geraniums. Make sure you know what you have before tasting it. Also, chemical sprays and car fume residue can be toxic, too. Chemical pesticides, herbicides, and insecticides should not be used on flowers that will be eaten. Never eat flowers from commercially grown plants, as there is no way to know for sure what has been applied to or used in growing these plants. Now that I have reminded you to be careful, let’s see just how many flowers in your garden are edible!
Edible herbs All herb flowers are edible. Basil, chives, cilantro, garlic, dill, lavender, marjoram, mint, oregano, rosemary, sage, savory, and thyme flowers can all be used to add an extra depth and a touch of color to many different dishes. You can also eat the flowers of anise hyssop, angelica, bee balm, burnet, chervil, fennel, ginger, and lemon verbena.
Edible flowers There are a surprising number of edible flowers. All members of the viola family, which includes Johnny-jump-ups and pansies, and the dianthus family, or carnation fame, are edible.
Edible fruit tree flowers The flowers of many fruit and nut trees are also edible. Apple, apricot, peach, pear, and plum blossoms can be used to add color and a delicate complexity to many dishes. When using these flowers, be sure to only use the petals, and not the stamens or pistils. Because they contain low levels of cyanide, apple blossoms should be eaten in moderation. Citrus blossoms are very pungent and should be used sparingly. Leftovers can be added to floral arrangements, so that you can still enjoy the aroma. 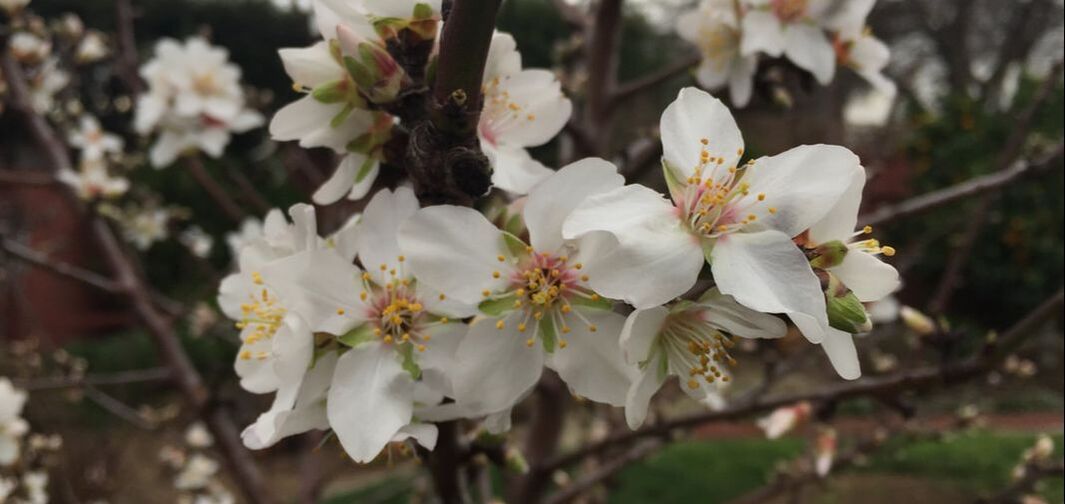 Almond blossoms Edible vegetable flowers Your probably already eat several vegetable flowers: artichoke, broccoli, and cauliflower, for example. While eating the flowers of your vegetable plants reduces your crop yield, it can be a nice way to try something new. There are several different vegetable plants with edible flowers:
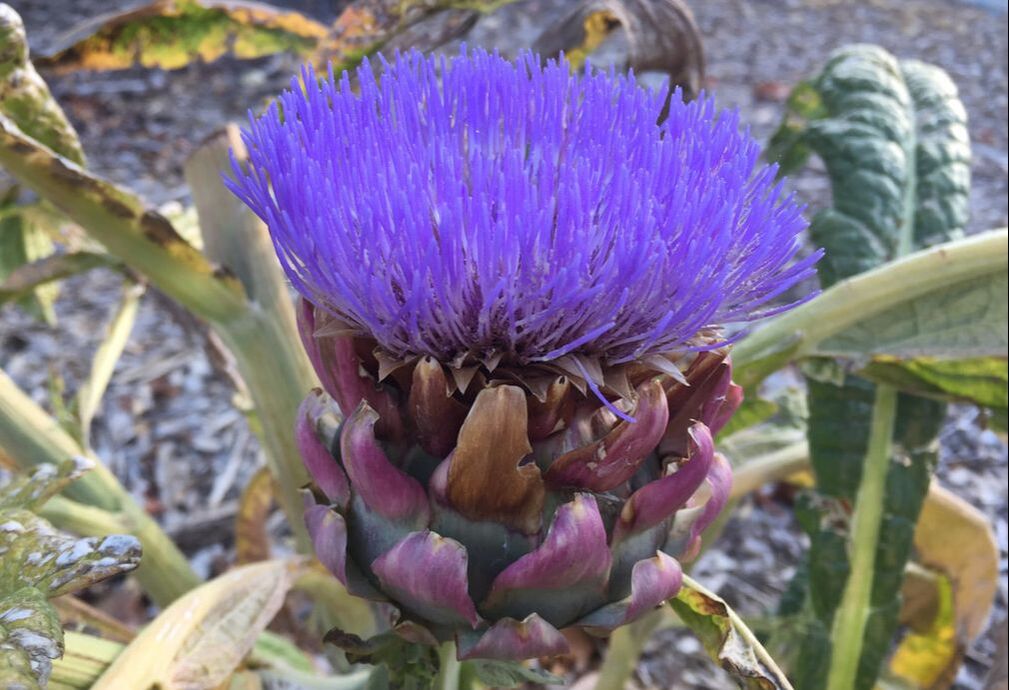 Artichoke flower Ways to use edible flowers
While it is easy to sprinkle petals into a salad for a splash of color and flavor, there are many other ways to incorporate edible flowers into your diet:
Preparing edible flowers Edible flowers should be picked just before using and thoroughly rinsed off. This will help remove dust, frass, microorganisms, and any surface chemicals that may have blown in or been applied. Taste the flowers before using them, so that you know what flavor you are adding to your food. Remove the pistils and stamens from most flowers. The only exceptions are violas and Johnny-jump-ups - in these cases, the other parts add good flavor. If you detect some bitterness in any edible flower, you may need to remove the white base of the petals. This is commonly needed when working with carnations, chrysanthemums, day lilies, and roses. How many edible flowers do you have in your garden? Tell us in the comments!
Before we begin, let me clarify that we are talking about anise (Pimpinella anisum L. – anise burnet saxifrage), and not star anise (Illicium verum). Anise and star anise are not related. They do, however, both contain anethole, an oil that gives them their strong flavors. In each case, people often mistake the fruits from these plants for seeds. Tiny anise and star anise fruits are schizocarps. A schizocarp is a type of fruit that splits in half when dried. The two halves of a schizocarp are called mericarps. Star anise has a distinctive star-shaped fruit, while anise fruit is oblong.
Anise plants Anise plants are herbaceous annuals that start out as bright green mounds. Then, feathery leaves shoot skyward, much like fennel. Being umbellifers, these cousins of carrots, dill, and celery have flowers that are large, flat clusters of tiny flowers that pollinators and other beneficial insects love. Plants can reach 3 feet in height.  Anise bush in a field (Fastily) CC BY-SA 3.0 How to grow anise Being native to the eastern Mediterranean and Southwest Asia, anise is a warm weather, full sun crop. It prefers loose soil with good drainage, and a soil pH of 6.0 to 6.7, so it is better suited to raised beds in the Bay Area, unless you have improved your soil structure with plenty of aged compost. These plants have a taproot, so they do not transplant well. They can be grown in containers, as long as the pot is at least 8 inches deep and wide. Seeds should be planted 1/4-inch deep, at least two weeks after the last frost date. Thin plants to 12 inches apart. [Unless you really like anise, your family will probably only need one plant.] Regular irrigation is important, but an occasional top dressing is the only feeding these plants need. Anise pests and disease Larva of the wormwood pug, a small brown moth, will feed on anise foliage, but that’s about it. The oils that give anise its delicious flavor are the same components that most pests find offensive. Anise plants also have no major disease issues. Harvesting anise Anise leaves can be harvested as needed. Seed heads should be snipped while green and hung upside down in a warm, dark, dry location until they are completely dry. 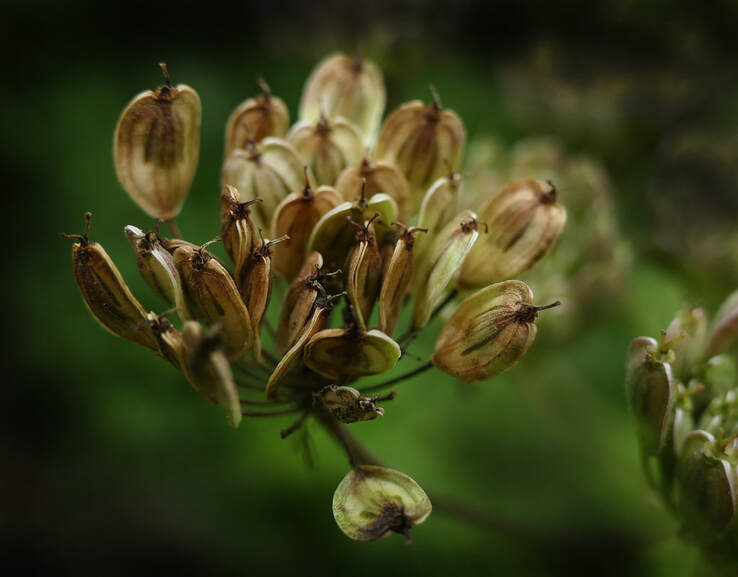 Anise seed head (anaterate) Pixabay Capers are pickled flower buds. Used to flavor to fish, poultry, sandwiches, soups, salads, and martinis, immature buds from the caper bush have been collected, dried, brined, and then pickled for over 2500 years. This plant thrives in harsh conditions, with only a little water, making it a good choice for San Jose, California.  Caper flower (Wilson44691) Public Domain The caper bush Caper bushes (Capparis spinosa), also known as Flinders Rose, are broadleaf perennial evergreens that thrive in harsh conditions, with very little water. Native to Australia and Southern Eurasia, caper bushes are now naturalized throughout many Mediterranean regions. Plants can grow 2 to 3 feet high and wide, though they tend to stay low to the ground. Round or oval edible leaves are thick and leathery. Showy white or pinkish-white flowers (2-3”) feature several pale purple stamens and a sweet fragrance.  Ripe caper berry (Clematis) CC BY-SA 3.0 After the flowers have attracted pollinators and fertilization has occurred, caper berries emerge. Caper berries are oblong fruits that contain many seeds. These fruits are also pickled and eaten, along with the leaves. Caper bushes have strong relationships with mycorrhizae (root fungi) that help them extract nutrients from poor soils. Capers grow well on rocky areas and in soils with higher than normal salinity. How to grow capers You can grow your own capers from seed. Simply place fresh seeds in rich potting soil, with good drainage, and add water. Older seeds may have entered dormancy and will need stratification (cold treatment) to germinate. Caper bushes can also be grown from stem cuttings. Stem cuttings are most successful when tender new shoots are used. Instead of producing leaves at leaf nodes placed below the soil level, they produce roots. Rooting powder (auxin) is commonly applied to encourage root growth. Caper bushes produced by cuttings are generally less drought tolerant in their early years than plants produced by seed, so water accordingly. There are poisonous varieties of caper, so be sure to get your seeds or cuttings from a reputable supplier.  Caper leaves and flower buds (Lazaregagnidze) CC BY-SA 3.0 Caper bushes love wet springs and hot, dry summers. They grow best in USDA Hardiness Zones 8 - 10, in full sun. While they can tolerate temperatures above 100°F, they do require frost protection. Once a caper bush is well established, the root system and soil level stump may be able to withstand limited freezing temperatures.
Harvesting capers The smallest, youngest flower buds make the best capers, so daily harvesting is recommended during the flowering season (May through August). When they are ready to pick, caper buds will be dark, olive green, and about the size of a kernel of corn. (They shrink during pickling.) Caper bushes produce curved thorns, so be careful! One of the nicest things about growing your own capers is if you happen to miss a few buds, you end up with beautiful, fragrant flowers! It's a win-win situation! The tangy flavor of capers is partly from the salt and vinegar used in brining, and partly from the mustard oil produced by the plant. Did you know that it is capers that give tartar sauce its unique flavor? I didn’t either. Note: If you are a Santa Clara County (CA) resident, caper bushes are on the Qualified Plants List for the Lawn Replacement Rebate. It’s an excellent way to get paid to replace your lawn with something more productive and environmentally friendly! If you ever get the chance to grow your own turmeric, you really ought to give it a try. It makes a lovely houseplant, as well as a nice addition to your spice collection. 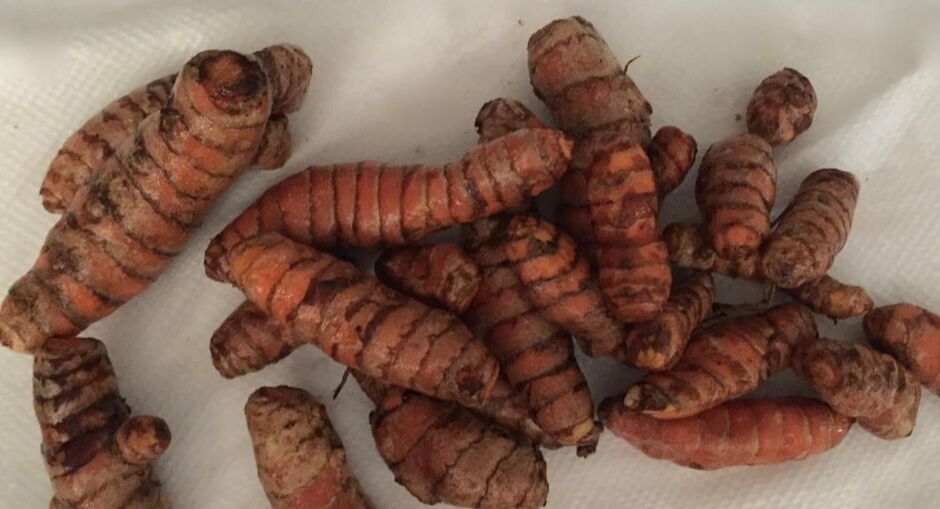 Turmeric rhizomes Before we learn how to grown our own, let’s clear up a couple of things: pronunciation and medication. Many people mispronounce the word ‘turmeric’ by leaving out that first ‘r’ to make it ‘tumeric”. The correct pronunciation is ter-mer-IC. As for medicinal properties, I’ve got some bad news—it doesn’t have any. Wild, far-reaching claims have been made about the medicinal qualities of turmeric, but the science has not been able to verify any of those claims. Studies are being conducted, and we may find that turmeric really does have some health benefits, but for now, let’s just enjoy it in our curry and let that be reason enough to grow it. Turmeric is a close cousin to ginger and is frequently used in Asian cooking. It is a major ingredient in curry powder. It’s bright yellowish-orange color have also made it useful as a fabric dye. The plant is a herbaceous perennial grown mostly for its nubby rhizomes that grow underground. The powdered turmeric you buy in the spice aisle is made from rhizomes that are boiled for 30 to 45 minutes, dried in an oven, and then ground into a powder. The turmeric plant Turmeric is a tropical plant. As such, it prefers moist, warm temperatures (85 to 95°F). If it isn’t warm enough, your turmeric rhizomes will rot, rather than sprout. Seedling heat mats can be used to keep your turmeric toasty warm. Mature plants can grow 3 feet tall and the large green leaves make it a lovely houseplant. Just be sure it gets plenty of sunlight and an occasional misting. Once your turmeric plant has become established, and if it is particularly well suited to its location, it may send up a greenish-white stalk and you may even get some stunning pink flowers! What you’re really growing, of course, is the lateral underground rhizomes. If you have a sunny protected spot, and you are in Zones 8 - 11, you can even grow turmeric outdoors.  Wild turmeric (John Hill) CC BY-SA 4.0 How to grow turmeric
If you take a close look at one turmeric rhizome, you will see little nubs. Those nubs are buds. You can break a larger chunk into smaller pieces, just make sure each chunk has 2 or 3 buds. For each chunk of root, fill a medium sized container with rich, loose organic soil and place the root 2 inches below the surface with the buds pointed up. [If a nub has two buds, pointing in opposite directions, lay it down so that the buds point to either side and let nature do the rest.] Water it well, the first time, making sure the container drains properly. After that, water only when the top inch or so of soil has dried. Your turmeric plant will take 7 to 10 months to reach a harvestable size. Harvesting turmeric Harvesting turmeric is a lot like harvesting potatoes. You really can do it at any time. The longer you wait, the bigger the bounty. Gently dig your fingers down into the soil, near the stem, and feel for the rhizomes. If they feel large enough, wriggle them loose and pull them up. Then, just take what you need and put the rest back in the soil for the next harvest! The rhizomes can be boiled and eaten like any other root vegetable. The leaves are often used as food wrappers for steaming, the same way corn husks are used to hold tamales. Add some turmeric to your windowsill garden today! Miner’s lettuce is native to many areas, grows without human intervention, and makes a tasty addition to your salad. It can also be cooked the way we cook spinach, with a similar taste. Miner’s lettuce (Claytonia perfoliata), also known as winter purslane, spring beauty, and Indian lettuce, is rumored to have gotten its name because Gold Rush miners used to eat it to prevent scurvy. I don’t know if this is true, or not, but it sounds good and it makes sense. The leaves are high in vitamin C and can be quite abundant in late winter through late spring.  Miner’s lettuce (glmory) Public Domain Miner’s lettuce identification
Miner’s lettuce is a fleshy annual with petite white and pink flowers. It grows in a rosette form with several erect, slender, spreading stems. The leaves are bright green and can be football-shaped, triangular, diamond- or kidney-shaped. The easiest way to identify miner’s lettuce is the tiny white or pink flower stalks that appears to grow out of a round, cup-like bract that surrounds the stem. Flowers bloom February through May. Growing miner’s lettuce Miner’s lettuce should be planted starting a couple of weeks before the first frost. Miner’s lettuce can be grown in full sun or partial shade. Seeds should be planted 1/4-inch deep and spaced 4 inches apart. Keep the soil moist until germination occurs. While this annual does die off in our summer heat, it reseeds prolifically and will return each year, making a nice edible ground cover. Miner’s lettuce does contain oxalates, which can accumulate in older leaves and can be mildly toxic in large quantities. Miner’s lettuce also provides food for our native mourning doves and quail. Summer savory is an herb that deserves more attention. It has a unique earthy flavor similar to marjoram, thyme, and mint. It is commonly used in bean, fish, pork, barbecues, and poultry dishes. Summer savory is also a primary ingredient in herbes de Provence. The ancient Greeks believed that satyrs lived and frolicked in fields in savory. You may or may not see any satyrs in your savory patch, but it is still worth adding to your foodscape. Summer savory is an annual cousin of (and sweeter than) perennial winter savory. It tends to grow to one foot in height and drapes nicely from containers. When your summer savory plants die off in winter, fear not! Summer savory readily self-seeds. Native to southeastern Europe, summer savory is slow to germinate, but worth the wait. I grow summer savory in a tower. It also grows well in small containers and on sunny window sills. Bees and other pollinators love the tiny white and lilac-pink flowers and the flower heads end up tasting pretty amazing in meatballs! 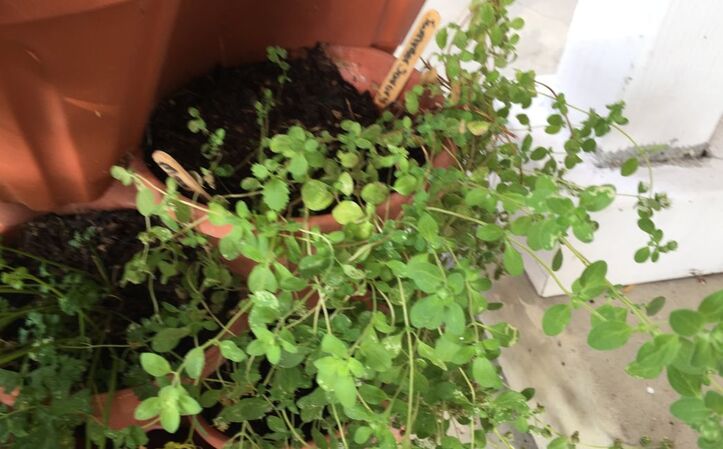 Summer savory How to grow summer savory
Summer savory (Satureja hortensis) prefers at least 6 hours of full sunlight, well drained soil, and a daily drink of water. If the soil dries out too much, the plant will bolt and go to seed. Seeds need a little light to germinate, so only cover lightly with soil and use a mister to water until seedlings emerge. That should take two weeks. Place plants one foot apart. They can withstand light frost and will produce well into winter with just a little protection. Harvesting summer savory Summer savory leaves can be used fresh or dried. Simply snip off what you need during spring and summer. As the growing season winds down, you can cut the plant off at ground level, hang it upside-down in a shady, dry space and allow the leaves to dry. Pillow cases work well. Well, there you have it. Yet another easy to grow plant that you can add to your landscape Marjoram is the soft-spoken cousin of oregano. 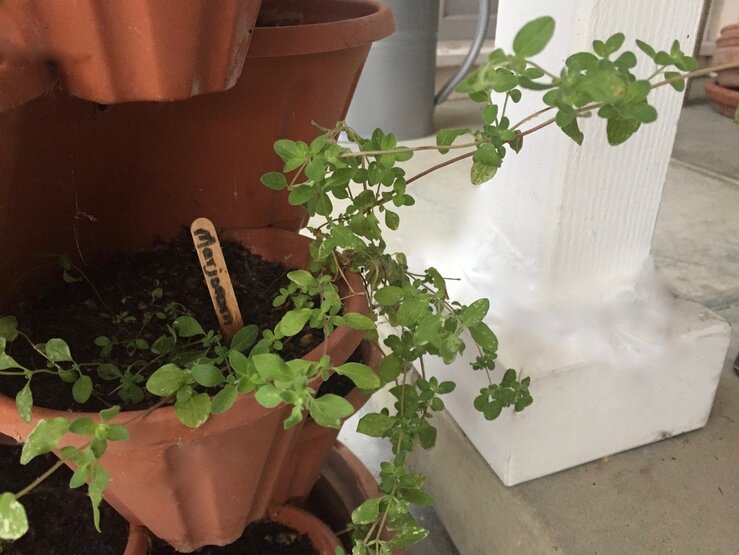 Marjoram growing in an herb tower Marjoram is a tender perennial herb that can do well on a window sill, in a tower or other container, or tucked away in a quiet corner of the garden. These plants also make nice rock garden additions and they look (and smell) lovely next to walkways and in parterres. The Greeks and Romans used marjoram as a symbol of happiness, and it certainly puts a smile on my face whenever it turns up in my foodscape.
Uses for marjoram Marjoram leaves have been a culinary herb for a very long time. It is slightly more mild and piney than its boisterous cousin, oregano. Marjoram is used to make herbes de Provence and za’atar. Marjoram also attracts many beneficial insects, including butterflies and bees, with its tiny white, pink, and lavender flowers. An herb by any other name Marjoram (Origanum majorana) has been around long enough to have several names to differentiate it from oregano (Origanum vulgare), including sweet marjoram and knotted marjoram. Oregano is also known as wild marjoram. Other varieties of marjoram include:
Growing marjoram Marjoram is best started in pots. Seeds should be covered only lightly with soil. Keep the soil moist until seeds germinate, being careful not to wash them into a corner of the pot with miniature floods of water. Marjoram prefers full sunlight and loose soil. Plants should be hardened off before installing outside, and spaced 18 inches apart. Marjoram and oregano are both members of the mint family. As such, they tend to spread underground using rhizomes. This makes them a good ground cover plant, as well. Marjoram has semi-woody stems that lend themselves nicely to cascading out of hanging pots, or as a low shrub. While technically an evergreen, cold temperatures will cause them to lose their leaves and frost will kill the above-ground portion. One way to protect your plants and keep the garden attractive in winter is to cut the plants back to ground level and cover with a winter blanket of mulch. Come spring, those delicious new leaves will come right back for another year. Luckily for those of us in the Bay Area, marjoram prefers alkaline soil, which we have in abundance. Marjoram never needs fertilizer when grown in the ground, and it rarely needs watering once established. Marjoram pests and diseases I have found whiteflies and spider mites to be the biggest problems for marjoram. Those tiny sap suckers leave behind speckled, bleached out leaves that don’t look at all appetizing. You can fight back with a spray bottle filled with soapy water or diluted horticultural oil. (Dormant oil is too heavy.) Aphids, cutworms, mealybugs, and thrips may also try feasting on your marjoram plants, but a forceful spray of water can every morning can usually displace most of these pests. Though rarely affected, fungal diseases such as dodder, damping off, downy mildews, powdery mildew, rust, and botrytis blight (gray mold), can occur on marjoram. How to harvest marjoram Just as your marjoram plants begin to flower, snip off the upper portions and hang them in a shady spot to dry. Garages work well. Guest room closets work even better. I like to believe that the gentle aroma helps guests enjoy a restful sleep. That might just be me. Try adding marjoram to your garden or landscape today for many years of fragrant, delicious beauty. The golden threads of saffron sell for anything from $200 to $1,000 an ounce, depending on the source and quality. And you can grow your own. For free. 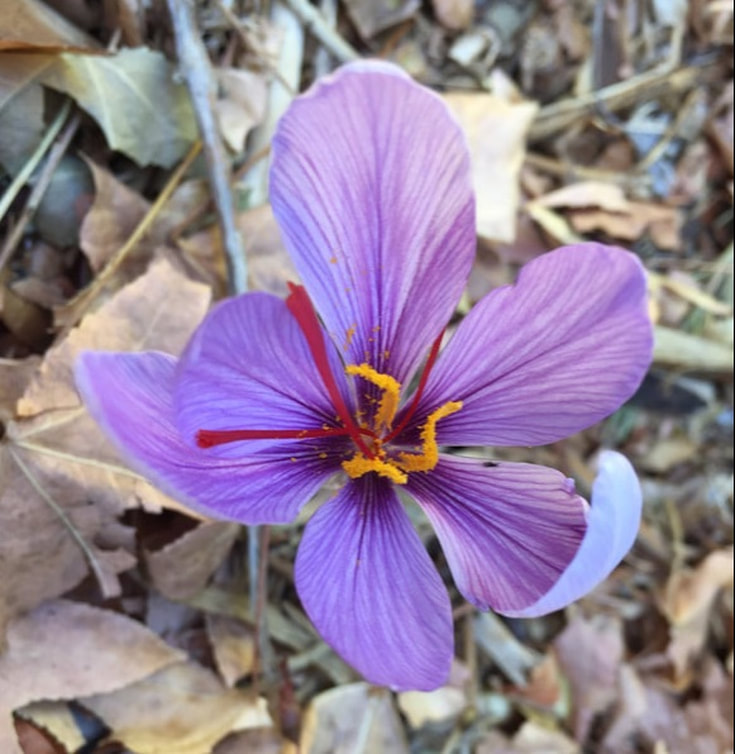 Saffron crocus with yellow stamen and dark orange saffron threads While you can certainly buy saffron for less, there’s no denying that it is one of the world’s most expensive spices. One of the biggest reasons for these prices is that harvesting the threads is very labor intensive. Also, it takes approximately 4000 flowers to create one ounce of saffron threads. What is saffron? First, a quick flower review: the male part is called the stamen, which is made up of the anther and filament. The stamen usually surrounds the female part, or the pistil. The pistil is usually in the center of a flower and is made up of the stigma, style, and ovary. Saffron threads are the dried styles and stigmas of a specific crocus flower species. IMPORTANT NOTES:
How saffron crocus plants grow
Farmed primarily in Iran, saffron crocus plants prefer full, blistering sun in the summer, heavy rains in spring, and they can tolerate a surprising amount of cold in the winter. The two things they don’t like are shade and soggy soil. Saffron crocus flowers are sterile, which means they cannot produce viable seeds. Instead, crocus plants reproduce by creating corms. Corms are similar to bulbs. Each corm lives for only one season, but each one can produce up to 10 cormlets. Cormlets are usually small and brown, covered with a fibrous coating called a ‘corm tunic’. How to grow saffron crocus Plant your saffron crocus (Crocus sativus) bulbs in June in a sunny, well-drained location. Keep in mind that these plants will continue to propagate (potentially) for decades. Crocus corms should be planted 3 to 6 inches deep, depending on the variety, with the pointy end up. Once a bed of saffron crocuses is established, these cormlets will need to be dug up and divided every so often, to prevent overcrowding. Saffron crocus pests and diseases Squirrels. Of course, squirrels. Also, rats, moles, birds, nematodes, and other bulb eaters can damage crocus corms in the ground. The only diseases that seem to affect crocus are rust and corm rot. Harvesting saffron In mid-autumn, purple blooms will begin to emerge. Each morning, check your crocus plants for new flowers. Within each flower, you will find three golden saffron threads. Gently pluck them from the flower and place the threads in a paper envelope so that they can dry in darkness. I keep my saffron threads in my spice cabinet, where it is nearly always dark and dry. These unobtrusive flowers spend most of their year underground. Come fall, dark green spikes emerge, followed by lovely purple blooms, and a jackpot for your spice cabinet. Put some in this year for yourself! Dill’s delicate fronds and distinct aroma make it a useful addition to your landscape. 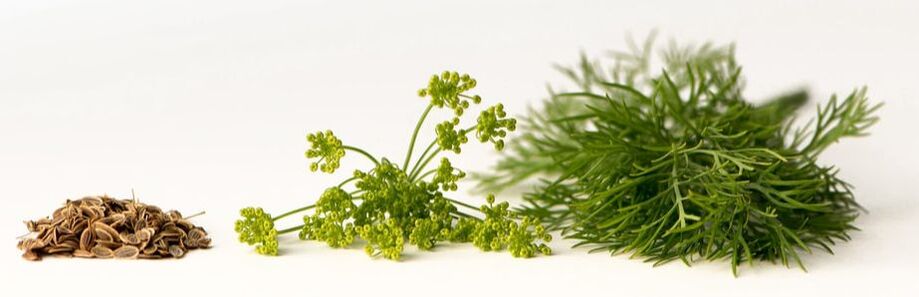 Dill seeds and fronds (milesz) Pixabay Dill (Anethum graveolens) is an herb that is related to celery and is known for elevating pickled cucumbers, asparagus, garlic, and green beans to new heights. Did you know that dill oil, extracted from seeds, stems, and leaves, is used to make soap?  Dill (H. Zell) CC BY-SA 3.0 How dill grows Dill can reach a height of 2 to 4 feet, making it only slightly smaller than fennel, which has a similar feathery growth. Dill’s leaves are wider and more firm than fennel’s. Flowers are white or yellow umbels (think umbrella) that attract many beneficial insects. Dill seeds look like tiny brownish-gray orange slices. Once dill begins producing seeds, leaf production is over and the plant will soon die. Worry not, dear gardeners! Dill reseeds itself so easily that you are nearly assured of a new crop from seeds that fall to the ground. To collect seeds for kitchen use or future crops, remove seed heads and hang upside down over a bowl or in a pillow case. Seeds will fall when they are mature and the flower head can be added to the compost pile to feed next year’s generation!  Dill plants (H. Zell) CC BY-SA 3.0 How to grow dill
Dill is a biennial that is normally grown as an annual. Dill does not transplant well, so site selection is your first step. Dill prefers lots of sun, though partial shade can be tolerated. Shadier sites will result in less bushy plants. You can easily grow dill in a container that is at least 12 inches deep. This will make room for dill’s taproot. (‘Fernleaf’ is a dwarf variety best suited for containers.) Seeds should be planted 1/4 to 1/2 inch deep and the soil keep moist until seedlings emerge. Seedlings should be thinned to 12 inches apart. Once plants are established, the soil should be allowed to dry out between waterings. Side dressing plants with aged compost during the growing season will provide important nutrients. (Side dressing simply means dumping an amendment around a plant and watering it.) Dill pests and diseases Dill has very few pests, thanks to the volatile oils that give it its flavor. Tomato hornworms and parsley caterpillars may be seen and can be handpicked. Bacillus thuringiensis (Bt) or insecticidal soap can be used to treat severe infestations. Dill is relatively disease-free. Harvesting dill So many dishes will be enhanced by dill leaves, simply snip off what you need. You can also dry dill leaves for later use by placing cut leaves between cloth napkins or paper towels, laid on top of nonmetallic screens, and storing in an airtight container. Dill leaves can also be frozen. You can keep harvested leaves fresh by wrapping them in a damp paper towel and refrigerating them for up to a week in a sealable container. Growing dill for yourself is easy and rewarding! Give it a try! No self-respecting baked potato would consider its raiment complete without freshly snipped chives. Chives can elevate even the simplest dish, and they look lovely, growing on a window sill. 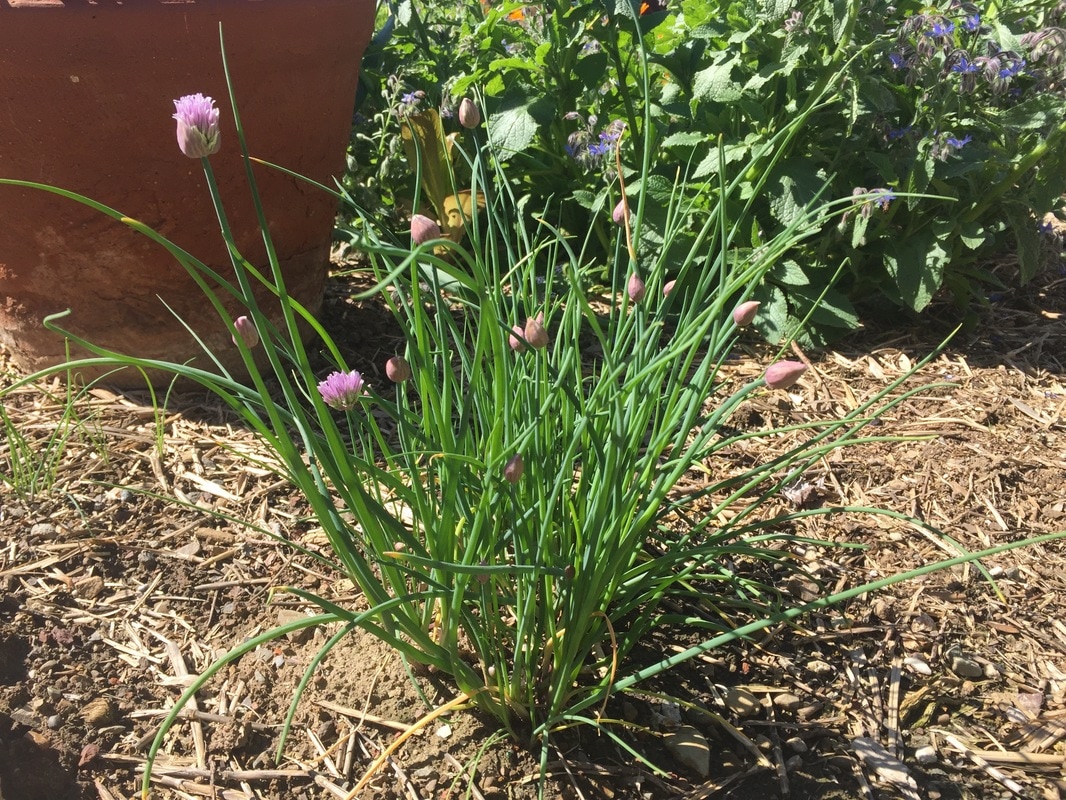 Chives Chives are members of the onion family. Chives (Allium schoenoprasum) are edible perennial bulbs. Their tender green spikes are frequently offset by purple spherical blooms that are equally edible. Many beneficial insects are attracted to the flowers, as well. Plant them once and they will provide many years of flavorful beauty.
How to grow chives Chives are so easy to grow that they are an excellent children’s activity. Chives prefer well-drained soil with a pH of 6.0-7.0 and full sun. I have had chive plants perform equally well in partially shaded clay. This herb is tenacious - I’ve even had chive plants return after being decimated by chickens! Plant seeds 1/4 inch deep and water well. Light is not needed, at first, but seeds must be kept moist and at a temperature of 60-70°F to germinate. Chives make excellent container plants and they transplant easily, once seedlings are 4 to 6 inches tall. Established plants can and should be divided periodically to avoid overcrowding. To divide a chive plant, gently dig the entire plant out of the ground and pull it apart into smaller clumps, or you can leave it in the ground and sink a shovel down through the middle, removing a portion to be transplanted elsewhere. You will want at least 5 - 10 bulbs in the clump to be moved. Once established, your chive plants will readily self-seed. Chive pests and diseases The only pest I have seen on my chives is an infrequent visit from individual slugs. Onion maggots and thrips are said to cause problems, but I have never seen them. Damping off disease, powdery mildew, and pink root are also said to attack chives, but not in my experience. I think, in this case, the chive plant is the anti-pest. In fact, European gypsies traditionally hang bunches of dried chives to ward of evil and illness! Harvesting chives Snip off however much you will be using, as close to the base as you can without damaging the rest of the plant. If your chive plant starts looking worn out, especially in late winter, you can cut the entire plant to a height of 2 or 3 inches to stimulate fresh growth. If you harvest more chives than you need, you can snip them into small bits, lay them between layers of cloth or paper towel to dry and then store in an airtight container. Herbs are excellent additions to an edible landscape or a windowsill garden, and chives are the easiest of the edible herbs to grow. Get yours started today! Summer iced teas, winter colds, and many fruit and fish dishes are all made better with lemon balm. This easy to grow perennial herb is a member of the mint family, which means it is a rugged, tenacious, and fragrant addition to your foodscape.  Lemon balm (Nabokov) CC BY-SA 3.0 Using lemon balm
Also known as cure-all, sweet balm, and honey plant, lemon balm adds a soothing lemon flavor to teas, tinctures, and steam. Traditionally, lemon balm has been used to treat digestive upset, anxiety, thyroid disease, Alzheimer’s disease, ADHD, high blood pressure, sores, and even insect bites. Scientific research has demonstrated that lemon balm does provide some significant benefits (besides making a great cup of tea):
Unlike other herbs, lemon balm loses much of its flavor when dried, so fresh is better. I just learned that there is a lemon balm pesto recipe - I’ll let you know how it tastes in an update. How to grow lemon balm Once lemon balm is established, it will readily self-seed, so choose a site that has room for it. Individual plants can reach 2 feet in height and width. It can also spread vegetatively, where twig ends touch the ground and develop roots. Unlike many other members of the mint family, lemon balm does not spread using stolons (runners). Regular trimming will keep lemon balm plants healthy and attractive. You can also grow lemon balm in a container. My in-ground lemon balm has always stayed rather low-growing and has been pretty year-round (even after frost!) with just a little bit of trimming. Lemon balm normally dies back in winter above-ground, but comes back in spring. Lemon balm seeds require light and warmth (70 °F) to germinate, but the mature plants prefer some afternoon shade. Lemon balm prefers rich, moist soil with good drainage, and a pH of 6 to 7. Lemon balm attracts honey bees! The scientific name of lemon balm, Melissa officinalis, is a reflection of how much it attracts honey bees. The word ‘Melissa’ is Greek for bee. Small flowers, which can be white, pink, red, or yellow, appear each summer, packed with nectar. Many beekeepers throughout history have planted lemon balm near their hives. Whether you keep honey bees or not, attracting them to your garden is sure to improve pollination and production. Add lemon balm to your garden, landscape, or balcony for healthier bees and a happier you! Chamomile makes a soothing tea, an excellent ground cover, and, hey, it looks pretty. Just ask Beatrix Potter fans! Seriously, these dainty little flowers have been used and enjoyed for a really long time. According to the National Institutes of Health, “Chamomile is one of the oldest, most widely used and well documented medicinal plants in the world and has been recommended for a variety of healing applications.” Scientific research has shown chamomile’s anti-inflammatory and soothing properties to be moderately to significantly effective against a number of digestive, respiratory, and sleep-related problems.
Attracting beneficials with chamomile
If all those medical conditions weren’t reason enough to add chamomile to your garden or foodscape, many beneficial insects are also attracted to chamomile. Syrphid or hoverflies, parasitic wasps, tachinid flies, bees, and other pollinators are attracted to chamomile. Chamomile varieties There are many daisy-like plants that fall under the name chamomile, but only two genuine varieties: Roman and German. German chamomile (Matricaria recutita), also known as ‘Water of Youth’ or wild chamomile, is an annual that can grow up to 2 feet in height and 2 feet across. Roman, English, Russian, or garden chamomile (Anthemis nobilis) is a low-growing perennial, often used as a ground cover or lawn replacement. When selecting chamomile plants for tea, be sure to select German chamomile and not Roman. How to grow chamomile Chamomile (or camomile) prefers full sun to partial shade and moderate amounts of water. It can be grown in a container or directly in the ground. Chamomile is best planted in protected areas if temperatures are expected to rise above 100 degrees F. Chamomile generally does not require supplemental fertilizer. Chamomile is best grown from established plant cuttings or division, but it can be grown from seed. Chamomile seeds require light to germinate, so they should not be covered. Seeds take 1 or 2 weeks to germinate. Plants should be cut back 3 to 5 inches every so often to prevent excessive size and legginess. Trimming will also promote flower production. If growing for tea, flowers should be removed (deadheaded) on the first day they bloom for the best flavor. Chamomile pests & diseases Chamomile is a sturdy, drought tolerant plant, but it may become susceptible to powdery mildew, white rust, leaf blight, aphids, thrips, and mealybugs if weakened by lack of water or other environmental stresses. Several beetles find chamomile flowers to be as appealing as we do, so it is important to wash plants off when harvesting, to avoid contaminating your tea. The bad news Just when you had every reason to add chamomile to your garden, it is important to know that it is not for everyone. All the chemicals that make chamomile so helpful can also make it harmful. People who are sensitive to ragweed or chrysanthemums may develop allergic reactions to chamomile. Also, since chamomile has been shown to stimulate uterine contractions, it should be avoided by pregnant and nursing women. You can dry chamomile flowers in an old pillowcase, the same way you can preserve lavender. Dried flowers should be stored in an airtight container out of sunlight. So, put the kettle on and have yourself a piping hot cup of soothing chamomile tea. Sorrel may be considered a weed by many, but it ’makes real nourishin’ soup,’ according to Milly in Seven Brides for Seven Brothers, and she was correct. Similar in appearance to spinach, sorrel grows very easily in many different environments. Sorrel is far more heat tolerant than spinach and is less likely to bolt. There are actually two different types of sorrel and both are edible: common sorrel (Rumex acetosa) and French sorrel (Rumex scutatus). Common sorrel has a more bitter taste than the French variety, which is more lemony, but both have been used in soups and salads for thousands of years. Sorrel description & lifecycle A close cousin of curled dock (R. crispus), rhubarb, and buckwheat, sorrel is a perennial herbaceous plant commonly found in the grasslands of Europe, Scandinavia, and Central Asia. It is an introduced species in North America. The plants are dioecious, which means that there are distinctly male and female plants. Flowers are reddish green. Sorrel has deep roots that can help break up compacted soil. Garden sorrel vs. French sorrel Common sorrel goes by several other names: garden sorrel, spinach dock, sheep’s sorrel, sour dock, red sorrel, vignette, acedera, and narrow-leaved dock. “Dock” refers to broad-leafed members of the knotweed family (Polygonaceae). Common sorrel grows tall, up to 3 feet in height, and has many branching stems. French sorrel has a more prostrate growth pattern, usually no more than 18 inches tall, and leaves tend to clump together on the upright stems. French sorrel leaves are smaller and more rounded than common sorrel leaves.  French sorrel (Salicyna) CC BY-SA 4.0  Common sorrel (Burschik) CC BY-SA 3.0 Uses of sorrel
The edible juicy stems and narrow leaves of sorrel are packed with nutrients. A single cup serving of raw sorrel provides 15% of the DV of fiber, 16% Vitamins A & C, 5% calcium, 17% iron, 14% potassium, nearly 3 grams of protein, and all for only 29 calories. Sorrel leaves taste somewhat sour. It has been described as tasting similar to unripe strawberries or kiwi. Sorrel adds a good tang to soups, salads, and otherwise too heavy casseroles, and it has been part of the human diet for a very long time. Sorrel is the primary ingredient in traditional French “soupe aux herbes”. As folk medicine, sorrel has been used effectively as a diuretic, for treating bacterial infections, to reduce pain and inflammation, and it is currently used in the herbal cancer treatment Essiac. Sorrel contains tannins, which can help dry out congested nasal passages associated with sinusitis. On the downside, sorrel also contains oxalic acid, which can cause problems for individuals prone to gout, arthritis, rheumatism, or kidney stones. How to grow sorrel Sorrel is a tenacious addition to your edible landscape. Sorrel self seeds easily, is drought resistant, and wicked tough. Seeds should be planted in spring or fall. Sorrel can tolerate shade, but it prefers full sun. Sorrel leaves should be harvested while they are relatively small, for the best flavor. As with all greens, it is best to harvest in the morning, while they are at their crispest. Sorrel pests & diseases Many butterfly and moth species larvae feed on sorrel. Other than that, sorrel grows pretty much uncontested. Adding sorrel to your edible landscape not only provides your family with nutrient rich greens, it also adds biodiversity and improved soil health. Parsley - it’s not just for restaurants any more. As a kid, I always turned a suspicious eye toward that sprig of greenery on my plate. My mother urged me to try it, so I did. Unfortunately, my young taste buds were not impressed. The mildly bitter bite of parsley was not my idea of delicious until many years later. Now that my taste buds are older and wiser, the refreshing tang of parsley adds a bright balance between flavors, cleanses the palette, and spices things up. If that weren’t reason enough to add parsley to a landscape, parsley packs one heck of a nutritional punch and, hey, it looks nice in the garden! 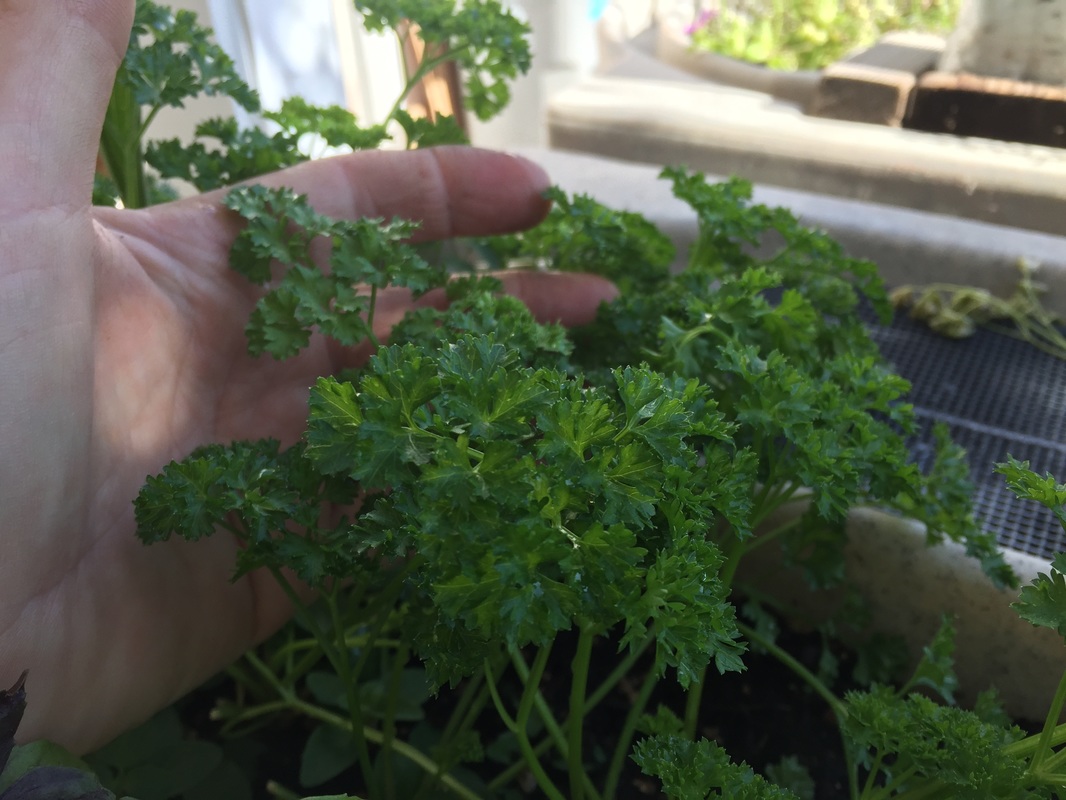 Parsley growing in the top of a rain barrel Parsley is a central Mediterranean plant. Parsley makes an excellent shade garden or container plant. You can even grow it on your kitchen window sill for easy access and nice color if you have strong enough sunlight.
Parsley is related to celeriac and celery, which explains its Latin name (Petroselinum crispum), which means ‘rock celery’, but it’s a heck of a lot easier to grow than celery. Parsley prefers well-drained soil that is kept moist, but my plants seem to grow under just about any conditions. Research has shown that parsley also repels asparagus beetles, making it a good companion to asparagus and tomato plants. Growing parsley does require some patience if you are starting from seed. Seeds should be planted 1/2 inch deep, 6 inches apart, and they can take 4 to 6 weeks to germinate. Germination rates are pretty high, so growing parsley from seed is the most cost effective method. While you’re at it, plant some extras and give young plants to family and friends as gifts! In tropical areas, flat-leafed and curly parsley are grown as annual herbs. In more temperate regions like ours, parsley is biennial. Biennial plants take two years to go from seed to seed, but some of my parsley plants keep on growing for another year or so. In addition to leaf parsley, there is a variety called Hamburg root parsley (P. crispum radicosum). Root parsley is grown for the taproot, which looks, cooks, and eats like a white carrot. (I may have to try that!) Parsley plants allowed to go to seed provide habitat, pollen, and nectar to honey bees and many other beneficial insets, some swallowtail butterflies, and even goldfinches.You will probably also end up with many free, randomly placed parsley plants next year! If flavor and looks weren’t reason enough to grow your own parsley, the CDC says it’s a nutritional gold mine. They ranked parsley at #8 as a food that reduces chronic diseases, such as cancer, coronary disease, and osteoporosis. To learn more, check out the U.S. Dept. of Agriculture’s nutritional analysis website that allows you to look up the nutritional value of pretty much any food. Just 10 sprigs of parsley provides 22% of the RDA for Vitamin C and 200% of Vitamin K. It’s pretty. It’s durable. It’s good for you. And it tastes good. Where’s your parsley planted? While walking across Spain in 2016, I came upon an albergue (something like a hostel) where someone was using a riding mower. There wasn’t any grass, but the air was filled with a sweet, powerfully refreshing smell. Rather than caring for a lawn, this family had a yard filled with mint!  Chocolate mint Now, mint is an amazing plant. It is crazy invasive and comes in many varieties. We’ve all heard of spearmint and peppermint, but did you know there is a chocolate mint? I have one growing in a leaky, handmade, stone pond that came with our property. Visitors are always amazed when I urge them to chew on a leaf - instant peppermint patties! I have also learned that there are apple, pineapple, orange, banana, and ginger mints. Needless to say, I am intrigued! Mint (Lamiaceae) is a huge family, with over 7,000 species. People have been using mint plants for, well, forever! Mint is cousin to a surprising number of familiar herbs and other plants: basil, oregano, thyme, rosemary, sage, bee balm, lemon balm, lavender, savory, and even your desktop coleus plant and the mighty teak tree! Lamb’s ears, hyssop, self-heal, catmint, salvia, horehound, chia, skullcap, wild bergamot, and bugleweed are also members of this clan. Peppermint (Wikipedia) CC BY 3.0 Most members of the mint family have square stems, small flowers, opposite leaves, and volatile oils that make them taste and smell so wonderful. If you look at any of the mint family flowers up close, you will see that they each have four stamens and five petals that are fused together, with two petals pointing up and three petals pointing down. Most mint plants are perennial.
Mint is super easy to grow. They love the sun, but can handle partial shade, and prefer easy access to moisture. Because mint can be so invasive, you may want to try it for your own lawn replacement, or, for a more restrained planting, use mint in containers. I have found that mint is easiest to grow from cuttings. All you have to do is cover the cutting lightly with good soil and keep it moist until new roots start growing. Left to their own devices, mint plants will spread everywhere, using rhizomes, at or just below the soil surface. The real problem with mint is stopping it. Mint juleps anyone? |
Welcome!You can grow a surprising amount of food in your own yard. Ask me how! To help The Daily Garden grow, you may see affiliate ads sprouting up in various places.
You can also get my book, Stop Wasting Your Yard!  Index
All
Archives
July 2024
|


#/media/File:Vanilla_planifolia.jpeg)
.jpg)
#/media/File:Vanilla_pompona_(Botanischer_Garten_TU_Darmstadt).jpg)


.JPG)
 RSS Feed