|
Alternaria leaf blight, also known as black rot or Alternaria leaf spot, is a conglomerate of leaf spot diseases. Alternaria fungi are one of the most destructive plant pathogens, causing an estimated 20% of crop losses worldwide. Those numbers can go as high as 80% in location-specific infections. Making matters worse, many people are allergic to Alternaria fungi, a type of black mold. Exposure can trigger asthma attacks and other respiratory problems. But what about your plants? 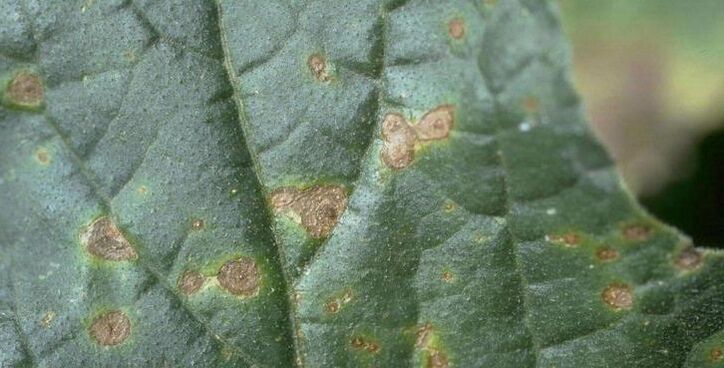 Melon leaf infected with Alternaria leaf blight (Howard F. Schwartz, CSU, Bugwood.org) CC BY 3.0 US This fungal disease collective caused by various types of Alternaria fungi. Depending on which form of Alternaria is present, almonds, apples, plants in the cabbage family, calendula and marigolds, carrots, cherries, citrus, escarole, mango, papaya, parsley, potatoes, squash family, and tomatoes are all susceptible to one type of Alternaria leaf spot or another. Alternaria leaf blight symptoms Symptoms of Alternaria leaf blight tend to be family-specific. Generally speaking, brown smudges first appear on older leaves, near the base or crown, of the plant. If you look closely, you may be able to see yellow halos around these damaged areas. You may also see concentric, target-shaped rings that darken as the disease progresses or a shot-hole effect similar to early blight. Ultimately, leaves wither, curl upward and die. 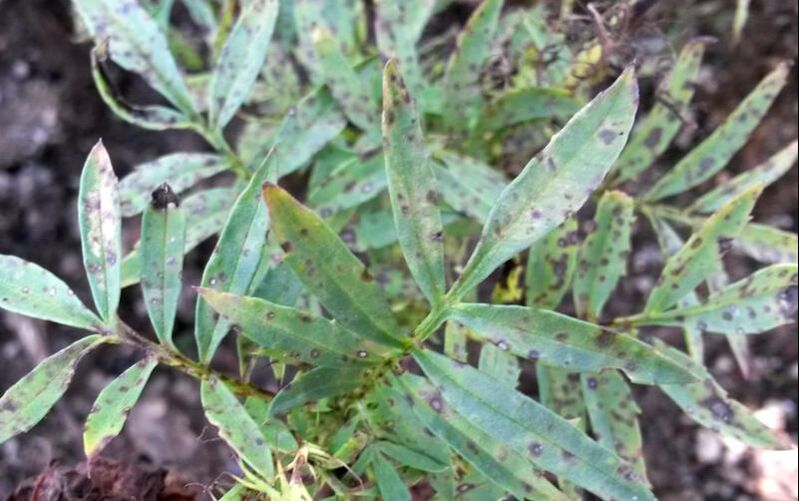 Tagetes marigold infected with Alternaria leaf spot (Scot Nelson) Public Domain When broccoli, cauliflower, and other members of the cabbage family are infected with Alternaria leaf blight, the heads deteriorate rapidly and look unappetizing. Infected cherries, papayas, and tomatoes will exhibit dark, round, flattened lesions on the fruit. Similar in appearance to blossom end rot, Alternaria leaf spot damage can appear anywhere on infected fruit. While Alternaria leaf blight doesn’t always attack your crops directly, it does interfere with photosynthesis enough to reduce crop size and can lead to sunburn damage. It also creates points of entry for other pests and diseases.  Alternaria leaf blight on Chinese kale (S. Seemadua) CCY BY 3.0 AU Alternaria leaf blight control
Nine hours of continuous wetness sets the stage for Alternaria to attack plant leaves. This is especially true when temperatures range from 70°F to 82°F. Thirteen hours later, spores start germinating. Since Alternaria leaf blight spores can travel for over a mile on the wind, it’s important to use good cultural practices to reduce the odds of infection in the first place. These practices include:
There are fungicides rated for use against Alternaria leaf blight, but I’d rather prevent the problem in the first place. Purple blotch is a fungal disease of chives, garlic, leeks, and onions. Caused by the Alternaria porri fungus, purple blotch occurs throughout North America. It is responsible for losses of up to 50%.  Purple blotch on onion leaves (Ollie Martin) CC BY-SA 3.0 Fungi enter mature leaves through wounds and dead tissue caused by chemical overspray, mechanical damage, pollution damage, thrips, and water stress. Germinating Botrytis spores, the fungi responsible for gray mold and chocolate spot can also create points of entry. Purple blotch symptoms Once fungal spores attach themselves to leaves, small, water-soaked spots develop. These spots turn brown as plant cells die, creating oval-shaped lesions that get bigger and eventually turn purple, surrounded by a yellow halo. Look closely, and you may see black or brown masses of fungal spores. As the disease spreads, leaves turn yellow and then brown. Lesions may also develop on stalks and flowers. Purple blotch management Since the Alternaria porri fungus is nearly always present in the soil, gardeners should monitor plants for conditions conducive to disease. Mid-season warm, wet weather, typically ranging from 77°F to 85°F, is all purple blotch needs to activate. Cycles of low and high relative humidity can also cue spore growth. Temperatures below 55°F slow these fungi to a halt. It doesn't kill them. They lie in wait for warmer weather.  Purple blotch on onion bulb (Ollie Martin) CC BY-SA 3.0 Use these tips to prevent purple blotch from cutting into your onion family harvest:
Growing onions, garlic, leeks, and chives can be very rewarding. Keep as much of your harvest as possible by preventing and controlling purple blotch. Sclerotinia blight is a fungal disease of alfalfa, beans, cabbage and other cole crops, kiwifruit, peanuts, soybeans, sunflowers, sweet potatoes, and tomatoes. .jpg) Bush bean infected with Sclerotinia blight (Rasbak) Public Domain The Sclerotinia sclerotiorum fungus is found in the soil and on infected seeds. It can cling to shoes, garden tools, and wheelbarrow wheels. And once it’s in your soil, you may never get rid of it. This insidious pathogen infects your plants long before you see any symptoms. Recognizing it can help you treat this problem more efficiently. Sclerotinia blight symptoms Plant wilting and yellowing of side and main branches are the first signs of Sclerotinia blight, usually occurring mid to late-season. A closer inspection of the bottom of the plant will show white, fluffy mycelium on the stem and soil surrounding the plant. If you were to open up this blighted stem, you would see black bits, called sclerotia, that may be as large as mouse droppings. Those sclerotia are fungal intruders.
Remove diseased plants immediately and throw them in the trash. Do not add sick plants to the compost pile. Fungicides rated for use against Sclerotinia blight can prevent this disease but won’t cure it once it takes hold. These fungi can remain viable in the soil for several years, so crop rotation is not helpful. Rhizoctonia blight is an infection caused by the same fungi responsible for belly rot of cucumber, black scurf of potatoes,, collar rot, damping off, and root rot. Rhizoctonia solani translates from the Latin for root murder.  Rhizoctonia blight on bean roots (Howard F. Schwartz) CC BY 3.0 Rhizoctonia blight attacks dry beans, beets, chickpeas, escarole, peanuts, peas, potatoes, safflower, turnips, yacón, longleaf pines, and, more recently, coastal redwoods. Rhizoctonia blight symptoms Stem cankers, root rot, and seedling death are the most common symptoms of Rhizoctonia blight. The hypocotyl, or first stem, is often affected. Typical cankers start as reddish-brown streaks or small sunken areas. These cankers grow and become darker over time, creating a rough texture. Eventually, these cankers can girdle the stem. All this damage to the root system ultimately causes the plant to collapse and die.  Rhizoctonia blight symptoms of beet (Howard F. Schwartz) CC BY 3.0 Rhizoctonia blight lifecycle
Like many other fungi, the one that causes Rhizoctonia blight is a soil-borne disease that can lay in wait for years. It does this by clustering a bunch of hyphae into a hard resting body called sclerotia. Mycelia may also lay dormant in the soil. When neighboring plants grow or decompose, they release chemicals that trigger the dormant fungi to awaken and attack. They get in through damaged roots and lower stems, but the fungi can also pierce the plant’s epidermis or enter the stoma. Then the fungi use plant cells for food and shelter, and reproduction begins. Rhizoctonia blight management This pathogen prefers warm, wet weather. Fungi become active in early summer. But symptoms do not appear until later in the season. It is far better to prevent Rhizoctonia blight with these tips:
The fungicide pentachloronitrobenzene (PCNB) is somewhat effective against Rhizoctonia blight, but there is debate about its safety. It was removed from the U.S. market altogether in 2010. The EPA authorized its use in limited cases one year later. I don’t want it anywhere near my food crops (or me). Once again, prevention is the best medicine. Keep your soil healthy. Space your plants out properly. And toss sick plants in the trash. Unlike most blights, which are fungal in nature, common bacterial blight is caused by bacteria. And blight is not a disease per se. It is a symptom. But many plant diseases with blight symptoms include the word blight in the name. This particular pathogen (Xanthomonas campestris pv. phaseoli) is attracted to legumes, such as beans, and fenugreek. 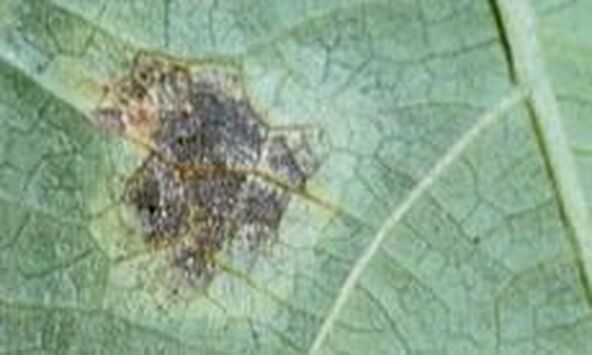 Common bacterial blight on bean leaf (Howard F. Schwartz, CSU, Bugwood.org) CC BY 3.0 US Common bacterial blight symptoms
Common bacterial blight looks like halo blight and bacterial brown spot, but there are differences. Common bacterial blight starts with insignificant angled, light green, water-soaked areas that start out on the underside of leaves. These areas expand and merge. You may also see a yellowish bacterial ooze or a dry crust on affected plants. As plant cells die, these areas turn brown and dry. You may be able to see a distinct yellow halo around these lesions. If a plant is infected with halo blight or bacterial brown spot, that halo would be pale green. Also, leaves infected with halo blight tend to turn pale green, while the bacterial brown spot lesions merge into large ovals. Infected stems have sunken, water-soaked areas that develop red streaks. These stems often become girdled, causing them to break and fall over, exposing the bacteria to wind, garden tools, and your pant leg. Infected pods exhibit round sunken, water-soaked spots that follow the same expansion, merging, and drying pattern. These damaged areas may or may not affect the seeds within. You wouldn’t want to plant or eat them, though. Common bacterial blight management This disease commonly occurs when contaminated seeds are planted. Hot, humid weather compounds the problem, especially when temperatures reach daytime highs of 82°F–90°F. Beetles, leaf miners, and whiteflies can also carry common bacterial blight. Use these tips to prevent common bacterial blight in your garden:
Some fungicides may treat common bacterial blight, but these chemicals come at a price since bacteria can evolve much faster than we can. Fixed copper or Bordeaux mixture may be applied while plants are in the vegetative growth and flowering stages, but preventing disease is much easier and more effective. Squash ladybugs? But I thought lady bugs were good? Well, they are and they aren’t. It ends up that there are two camps in the world of lady beetles. Most of them are voracious predators that help keep aphids in check. Mexican bean beetles (Epilachna varivestis) and squash lady beetles (Epilachna borealis) are something else entirely.  Squash lady beetle eating a squash leaf (Mangoreads) CC BY-SA 4.0 Squash lady beetles and Mexican bean beetles are vegetarians. Bean beetles prefer legumes. Squash lady beetles prefer the leaves of squash plants. This means your butternut squash, chayote, cucumbers, gourds, pumpkins, watermelons, and zucchini are all vulnerable to this garden pest. They might eat your bean and pea plants, too.
Squash lady beetle identification Squash lady beetles have the familiar dome-shaped body we associate with the more helpful lady beetles. But these slightly larger insects are yellow with black spots. They look a lot like spotted cucumber beetles, which have more elongated bodies. Unfortunately, the eggs of squash lady beetles look exactly like the eggs of helpful lady beetles: yellow, oblong, and laid in clusters on the underside of leaves. The larvae look a little different. Good lady beetle larvae look like tiny alligators, while squash lady beetle larvae look more like yellow hedgehogs. The pupae are fat yellow grubs. Damage caused by squash lady beetles Adults, larvae, and pupae feed on leaves, usually from the underside. They have an odd way of circling the leaf as they feed, in a technique called trenching. A study at the University of Delaware found that this behavior reduces the likelihood of the plant sending out chemical defenses. Leaves end up skeletonized, with only the veins remaining. The fruit is rarely affected, but leaf damage weakens the plant, reducing crop sizes and increasing the chance of other pests and diseases taking hold. How to control squash lady beetles Handpicking in the middle of the day is your best control method. Heavy infestations can be treated with products containing Spinosad. As you grow cucurbits this summer, be on the lookout for squash lady beetles. A blog reader just brought bitter melon to my attention. I had never heard of it before, so we’re going to learn about it today. [Thank you, Jose Jaison!]  Bitter melon in hand (FlyingToaster) CC BY 3.0 Bitter melon is a type of gourd. It goes by several other names: balsam-pear, bitter apple, bitter cucumber, bitter squash, and wild cucumber are just a few of those names. But why would you want to eat something bitter? It ends up there’s far more to bitter melon than the pucker factor. Traditionally, bitter melon has been used as an herbal medicine for a variety of ailments, but more research is needed. Because these plants do contain active ingredients, they are not recommended for women who are pregnant. But don’t be scared off. These gourds are edible. Don’t get me wrong. Bitter melons are bitter. Apparently, that first bite can be a bit of a shock. But then, as with many hot pepper aficionados attest, the flavor becomes an addiction that is craved. You can reduce some of that bitterness by soaking the fruit in water before eating or cooking. But you may decide that isn’t necessary, once you’ve had your first taste. The bitter melon plant Bitter melons (Momordica charantia) are tropical and subtropical vining plants that come in a variety of sizes, shapes, and bitterness levels. They grow best in USDA Hardiness Zone 9–11 but can be grown in cooler areas if a warm, sunny spot is available and protection is provided in winter. Bitter melon’s herbaceous vines grow up to 16’ long during their three- to four-month growing season. Leaves may be 2-5” across, deeply lobed, alternate, and simple. As with other cucurbits, large yellow and white male and female flowers can occur on each plant.  Unripe bitter melon (Fred Hsu) CC BY-SA 3.0 Bitter melon fruit is shaped like a big cucumber and covered with warty bumps. Unlike cucumber, the interior has very little flesh and lots of big, flat seeds and pith. The flesh is usually eaten while green or as it begins turning yellow. The texture of the skin and flesh is described as being similar to bell pepper and chayote, as well as cucumber. The edible pith becomes quite sweet and, in some varieties, turns bright red. It is a common ingredient in many Southeast Asian salads. Young shoots and leaves are also eaten as greens. Most growers harvest their bitter melons when the fruit is 4–6” long. [Note, the younger the melon, the more bitter it will be.] If your bitter melon goes soft and starts peeling itself like a banana, you know it’s fully ripe (and probably past the good eating stage).
How to grow bitter melon Bitter melon seeds should be planted ½” deep in loose, nutrient-rich soil, in a location that receives full to partial sun. Plants should be spaced 12” apart. Bitter melons thrive in hot, humid regions, so you will need to keep the soil moist. Top dress around the plants with aged compost or feed with a slow-release organic 5-10-10 fertilizer for the best results. Bitter melons grow best in soil with a pH of 5.5 to 6.7. These plants use tendrils to climb, so trellising or stock panels can help you make better use of your garden real estate. This also helps prevent belly rot and other fungal diseases from affecting your bitter melon crop. As plants reach the top of the trellis, pinch back the tips to encourage lateral growth lower down the stem. If your bitter melons end up on the ground, provide a protective layer of straw between them and the soil. You can also grow bitter melon in 5-gallon containers. Bitter melon are said to be best intercropped with beans, corn, and other cucurbits. It is not recommended grown around potatoes or herbs, though I couldn't find out why. Bitter melon problems Bitter melons are susceptible to all the normal cucurbit pests and diseases. Downy mildews, powdery mildew, rots, rusts, and watermelon mosaic virus are the most common diseases of bitter melon. If possible, use disease-resistant varieties. Spotted and striped cucumber beetles, which can carry bacterial wilt disease, can become problematic, along with fruit flies. Bitter melon’s bright yellow flowers normally attract plenty of pollinators. If those garden helpers are in short supply, you can always hand-pollinate. And leave one or two fruits on the vine at the end of the season for next year’s seeds. Jose told me that one of his favorite bitter gourd dishes is called ‘Bitter gourd thoran’. He also told me that all ‘thoran’ contains grated coconut. Bitter gourd thoran is a slow-cooked stir fry made with chopped bitter gourd, shallots, garlic, and green chili) usually served with rice. I may have to give that recipe a try. Thanks again, Jose! Malabar gourds (Cucurbita ficifolia) are edible squash plants native to South and Central America. Also known as Asian pumpkins, black-seeded squash, cidra, figleaf gourds, pie melons, and seven-year melons, Malabar gourds are less likely to cross-pollinate with other winter squashes than many of our more modern varieties.  Malabar gourd (Wikipedia) Public Domain Unlike many other gourds, the entire aboveground portion of the plant is edible. Leaves are eaten as greens, seeds are roasted, and immature fruits (a type of bery known as pepos) are eaten cooked, like other squash. Mature fruits are very sweet and commonly used to make candies, pies, beverages, and alcohol. In Asia, the thready pulp is used to make a soup.  Malabar gourd leaf (Spedona) CC BY-SA 3.0 When grown in tropical zones, Malabar gourds are perennial vines. Everywhere else, they are annuals. Unlike other cucurbits, Malabar gourds do not develop storage roots. They do generate some substantial vines, however. A well-established plant can grow stems that are 45’ long. Tendrils are used to climb neighboring plants and structures. Each plant can produce up to 50 fruits in a season. [I’ll bet one of these would look amazing growing up a pergola!] Tan or dark green fruit is oblong, looking much like a speckled watermelon. The fruit is white with black seeds. This fruit can reach 8” in diameter and weighs an average of ten pounds. Like other cucurbits, Malabar gourds produce orange and yellow flowers that are male or female on the same plant, so only one is needed.  Female Malabar gourd flower with immature fruit (Victor M. Vicente Selvas) Public Domain How to grow Malabar gourds
You can grow Malabar gourds from seed or by layering an existing plant in USDA Hardiness Zones 3–11. Tendrils covered with soil can also develop roots and be cut from the parent plant to create the next generation. Seeds should be planted one- to two- inches deep in loamy, nutrient-rich soil. These plants can grow in partial sun to full sun. They need regular irrigation and good drainage. Plants should be spaced 2–3 feet apart. Being heat lovers, only the sturdiest plants can handle brief periods of frost. Harvested fruit can last for several years if kept dry. Problems with Malabar gourds Being something of an ancient rogue, Malabar gourds have very few pest or disease problems. In fact, these plants are often used commercially as rootstock for other cucurbits. Research has shown that eating Malabar gourds can help reduce the complication associated with diabetes. But these ancient edibles would probably make a nice addition to your foodscape, even if that weren’t the case. Buffalo gourds are desert natives that go by several names: coyote gourd, Missouri gourd, prairie gourd, wild gourd, wild pumpkin, and fetid gourd just to name a few. But don’t let that last name put you off. These high protein edible gourds thrive in areas with frequent drought.  Young buffalo gourd (Lee Ruck) CC BY-SA 2.0 Buffalo gourds (Cucurbita foetidissima) are not the lush, juicy melons of the cucurbit family. They are not the substantial zucchinis of summer garden and Chocolate Zucchini Cake fame. [Email me if you'd like the recipe.] At only 3–4” in diameter, these denizens of the desert are hardy, rugged, and durable. In fact, once you put a buffalo gourd in the ground, it will continue to produce for several years. Unlike most cucurbits, buffalo gourds are perennial. How buffalo gourds grow These wild cousins of the cantaloupe have a tuberous taproot that stores nutrients and water during harsh summer weather. Over time, that taproot can weigh as much as 150 pounds! Your average buffalo gourd root system will be eight feet long and weigh 100 pounds. In some cases, the taproot splits, creating two legs that look like a human form when dug up. Vines can spread for several yards, but these plants don’t need much in the way of attention. Leaves are heart-shaped, being 5” across and 10” wide. Some people think the leaves smell funky when brushed against, hence the fetid reference.  Buffalo gourd vine (Paigeblue08) CC BY-SA 3.0 Germination can occur when temperatures are between 60°F and 100°F, with 77°F being optimal. Flowers are large and yellow, like most other cucurbits. The fruit starts out green with white stripes and then ripens to a yellowish-green. These plants are slow growers, taking five to eight months to reach maturity, but you’ll want to eat them long before that. Life stages of buffalo gourds Leaves, fruit stems, and vines dry as the fruit matures, but you wouldn’t want to eat a mature buffalo gourd. These plants work hard to protect themselves in their native arid environments. By the time they are full-grown, they are too bitter to eat. [Your chickens will still love them, I’m sure.] Each winter, the aboveground portion of the plant will die back. In spring, it will return. How to grow a buffalo gourd Buffalo gourds need soil with excellent drainage, but the soil quality can be marginal. Sandy, slightly alkaline loam soils are best for these desert gourds. Most buffalo gourds are grown from seed, but they can also be propagated from nodal roots. When planting buffalo gourd seeds, deeper is better, up to a point. Seeds planted two to four inches deep grow best. Allow the soil to dry out between waterings. How to use buffalo gourds Buffalo gourds can be eaten fresh when young, the same way you would eat summer squash, but there isn’t much flesh and that flesh contains relatively high levels of something called cucurbitacins. Cucurbitacins are chemicals that create bitterness which protects the plant. Those same chemicals are found in all types of modern squash but at much lower levels. If you eat too much buffalo gourd flesh, it can make you sick. The seeds are the real crop.  Buffalo gourd interior (CharleBernardo) Public Domain If you’ve ever roasted pumpkin or butternut squash seeds, you know what a treat they can be. Buffalo gourds can provide you with a hefty harvest of snackable high-protein seeds. These seeds contain a lot of healthy oil (linoleic acid), too. Traditionally, that oil was used by Native Americans to make soap.
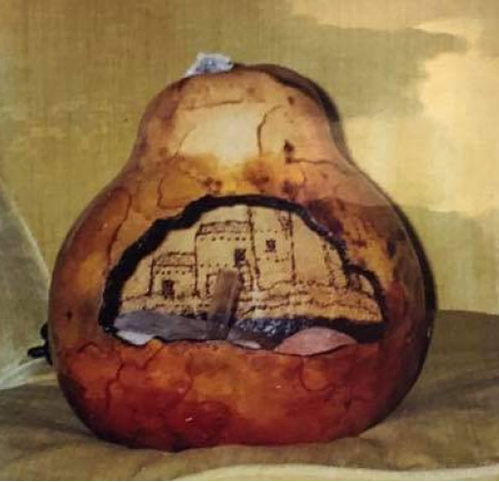
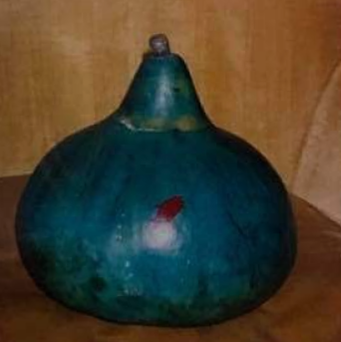
Buffalo gourd problems Being such rugged individuals, buffalo gourds have very few problems other than white mold related to drainage issues. Cucumber beetles and squash bugs, which normally plague cucurbits, have a hard time penetrating the tough skin of buffalo gourds. If you live in an area with plenty of hot weather and you love snacking on seeds, give buffalo gourds a try. Some people say gardeners are out of their gourds, spending so much time with plants. Personally, I take that sort of commentary on dedication and commitment as a compliment. But what makes a gourd a gourd? Let’s find out! 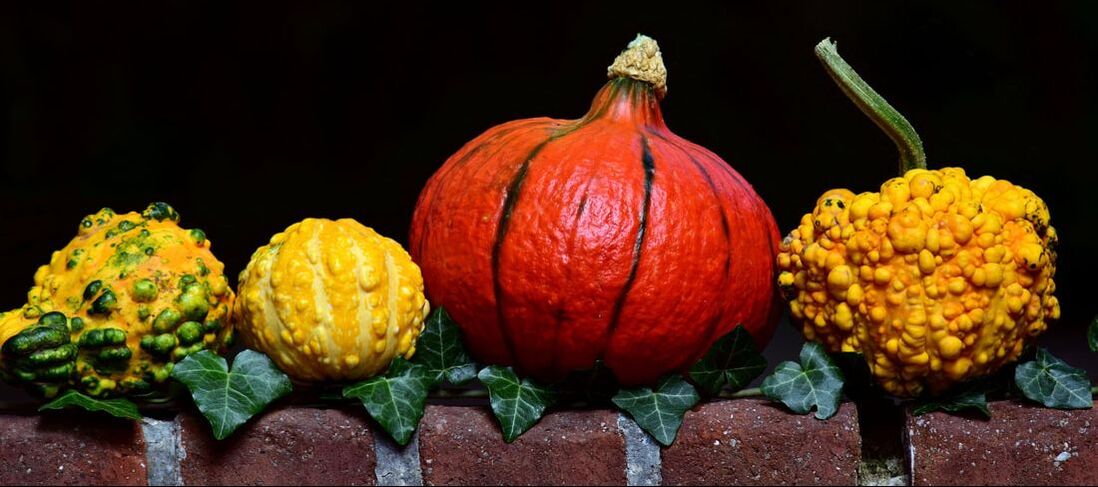 Gourds (Ulrike Leone) Pixabay People have been growing gourds for over 13,000 years, making it one of the oldest domesticated plants. It's also one of the biggest edible plant groups. Most gourds are large, fleshy, hard-skinned fruits, called pepos. Some of them are edible and some of them are used as containers or musical instruments, called güiros.  Cuban güiro (Miguel Andrade) Public Domain This second group is often called bottle-gourds. Bottle gourds can be used to make bird houses, bird feeders, and some amazing art.
There are also the luffas, or sponge gourds, used in the bath.  Loofah or sponge gourd (Roger Culos) CC BY-SA 3.0 The gourd clan Gourds come in all shapes and sizes. Some are no bigger than your thumb, while the biggest on record was a pumpkin that weighed in at 2,323.7-pounds back in 2014. For comparison, your average car weighs 4,000 pounds. Unless you are willing to commit an awful lot of time, water, and real estate to your gourds, I don’t think you’re going to have to deal with anything that substantial. Most gourds are annual vines, though bush varieties have been developed and there are even a few trees. Most gourd plants use tendrils to climb. They have large palmate leaves that are often covered with bristles. The stems tend to be hairy. These plants produce large orange, yellow, or white flowers which are either male or female, making hand-pollination easy. Cross-pollination can occur between some gourds, but not with others. It depends on which group they are in. If you want to be technically correct. the word gourd refers to two specific genera of Cucurbitaceae: Lagenaria and Cucurbita. But we don’t need to be that picky.
How to grow gourds
There are many edible gourds that deserve room in the garden, including buffalo gourds, burr gherkins, chayote, cucamelons, cucumbers, melons, pumpkins, and squash. Being from Africa, Asia, and Central America, gourds need lots of heat and sunshine. Annual gourds also need frequent irrigation to reach full size. Perennial gourds, not so much. Large seeds should be planted one to two inches deep in loose, nutrient-rich soil. Cattle panels, trellising, and pergolas can be used to keep the fruit off the ground. They look pretty impressive, hanging overhead, too. Gourd problems If the leaves of your gourd plants start getting skinny and the fruit develops warts, your plant may have been infected with zucchini yellow mosaic. If you see witches’ brooms, it may be aster yellows squash gourd mosaic. Other gourd diseases include blights, powdery mildew, and squash mosaic. The chance of these diseases occurring can be significantly reduced by spacing plants out properly and avoiding overhead watering. Cucumber beetles, flea beetles, guava fruit flies, melon flies, and squash vine borers will be the most commonly seen pests. And rats. If you want to grow gourds, take a look at the weeds in your yard. Do you see bur cucumber (Sicyos angulatus) or creeping cucumber (Melothria pendula)? If you do, gourds will love your yard! An interesting note on gourds: these plants often exhibit tiny knobby glands, called extrafloral nectaries, that produce nectar to attract pollinators and other beneficial insects. Self-heal, heal-all, woundwort, brownwort, carpenter’s herb, and blue curls are all names for a surprisingly useful and attractive edible herb. With a scientific name like Prunella vulgaris, that might sound like a stretch, but it’s true.  Common self-heal (Ivar Leidus) CC BY-SA 3.0 The Prunella vulgaris plant is used both as food and medicine. Young leaves and stems can be added to salads. Entire plants can be boiled and eaten the same way you might eat cooked spinach or collard greens. You can also dry the aboveground portions of a self-heal plant and use them to make a tea. As the name suggests, people have been using self-heal for far more than just food. Traditionally, self-heal plants were boiled in water, which was then used to bathe to relieve muscle pain. Self-heal was also used to treat bruises, burns, fever, sores, stomach upset, ulcers, and wounds. Modern research is beginning to show us that some of those uses may not have been entirely unfounded. Because of its antibacterial, antiseptic, and other beneficial characteristics, self-heal is currently being considered for use in treating conditions ranging from HIV and cancer to pink eye and sore throat. More research is being done, but those ancient cultures may have been onto something when it comes to self-heal. The self-heal plant Self-heal is a low-growing perennial member of the mint family (Lamiaceae). It rarely reaches more than twelve inches tall. Like many other mints, its reddish stems tend to be square. There are two major (and several minor) varieties of self-heal: vulgaris and lanceolata. The former has broader leaves and the latter has lance-shaped, serrated leaves. Self-heal flowers are lovely whorled purple and white clusters with two stalkless leaves just below. Unlike most mints, self-heal is not particularly aromatic.  Self-heal flowers (Jim Conrad) Public Domain Self-heal has a rugged creeping growth that can become invasive, so you may want to grow your self-heal in a container. Those stolons can move surprisingly fast when you’re not looking. Self-heal also readily self-seeds an area.
How to grow self-heal If you know someone who has a self-heal plant, ask for a cutting. Simply cover it with soil, keep it moist, and you’ll have your own plant before you know it. You can also grow self-heal from seed. Self-heal grows in grasslands, wastelands, wooded areas, and wetlands. Did I mention this plant is rugged? It seems to prefer damp, somewhat shaded environments, in Hardiness Zones 4a-9b, so plant accordingly. Honey bees (Apidae), gossamer-winged butterflies (Lycaenidae), humbleflies/bee flies (Bombyliidae) scoliid wasps (Scoliidae), skippers (Hesperiidae), and small bees (Halictidae) will all be attracted to your self-heal plants’ nectar and pollen. Self-heal plants can live for up to 10 years, making them a nice addition to your butterfly garden, herb garden, stumpery, or tea garden. Tepary beans are not the same thing as common beans, though they look and grow very much the same ways. 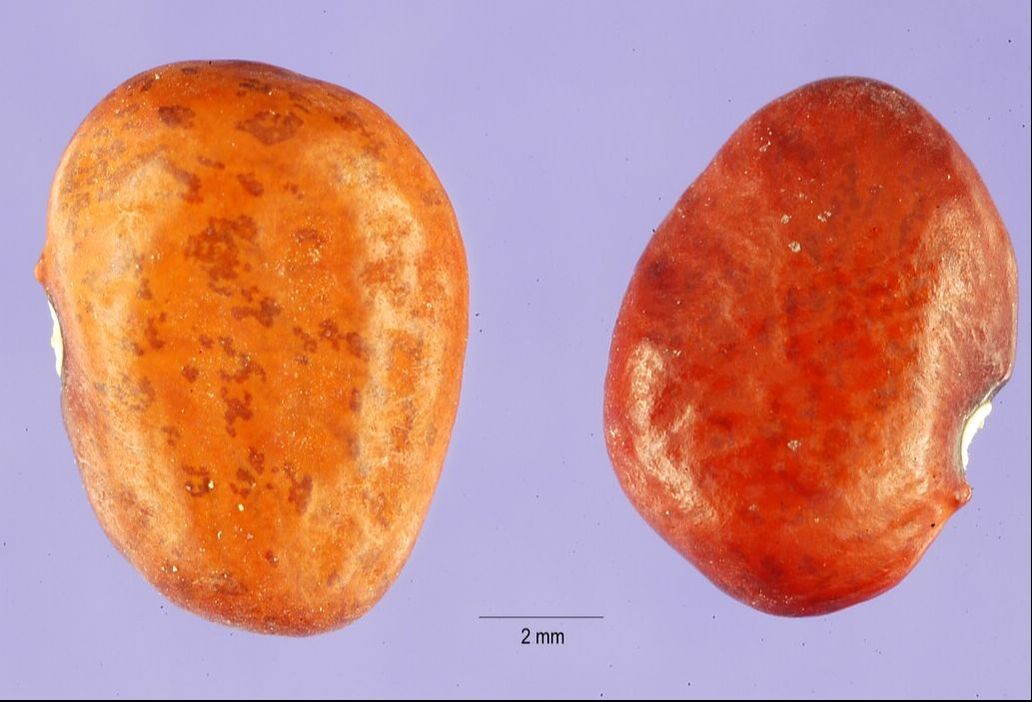 Tepary beans (USDA) Public Domain Common beans (Phaseolus vulgaris) and tepary beans (P. acutifolius) are both annual legumes that produce edible seeds. The real difference is that tepary beans can be grown in desert and semi-desert environments, making them an excellent choice for areas with frequent drought conditions. Tepary beans are also higher in protein than their more common cousins.
These high protein edibles nearly disappeared, but efforts to bring them back have been very successful. As global temperatures continue to rise, we may find these beans become a regular part of our gardening plans. Cultivated for thousands of years by the Tohono O'odham desert people of the Sonoran Desert and peoples from Mexico’s Valley of Tehuacán (where corn was originally grown), tepary beans are known by several names, including Bawĭ, escomite, pavi, pawi, and yorimuni. Types of teparies Tepary beans are available in bush, pole, and trailing forms. Stems can reach up to thirteen feet long. Most tepary bean plants have pointed leaves. There is another form, latifolius, with broad leaves. There are white and brown tepary beans, with the white beans tasting somewhat sweeter and the brown beans have a more earthy flavor. There are nearly 100 types of tepary bean, including black, blue speckled, pink, red, tan, and yellow varieties. Tepary beans tend to be small, which is no surprise, growing up in a desert, where they may only receive three inches of rain all year and temperatures can go as high as 118°F. Generally speaking, flowers appear after summer rains and pods ripen in autumn. Once germination occurs, very little water is needed to produce a crop. In fact, too much water interferes with pod development. How’s that for water conservation? Rather than the plump shape of dried common beans, many tepary beans are more wrinkled and they need to be soaked overnight before cooking. How to grow tepary beans Traditionally, climbing tepary beans were grown along with corn and squash in the Three Sisters Method of intercropping. Broad squash leaves shade the ground, reducing evaporation and competition from weeds, corn provides the beans with something to climb, and the beans’ ability to fix atmospheric nitrogen into a form usable by plants adds to the mix. Of course, that nitrogen stops being available as soon as the beans start producing seeds of their own. Seed production is hard work! When growing tepary beans, early peoples would plant three to five seeds together in hills that were six to eight feet apart. When you grow tepary beans, plant seeds one to five inches deep and 4 to 6 inches apart. Rows should be at least 12 inches apart. Do not soak your teparies before planting. Tepary beans do not handle clay soil very well. If you have clay, you may want to grow your teparies in containers or a raised bed. When 80% of the mature pods are dry, cut the plant off at soil level. Allow the remaining pods to dry in a protected spot. As they dry, the pods shatter when handled, making it easy to separate the beans from the pods. Problems with tepary beans Unless there’s too much humidity, tepary beans are relatively disease-free. Too much moisture can lead to common mosaic virus and other fungal diseases. Tepary beans are susceptible to garden variety bean pests, including aphids, armyworms, cucumber beetles, cutworms, darkling beetles, leafhoppers, leaf miners, loopers, lygus bugs, spider mites, stink bugs, thrips, weevils, whiteflies, and wireworms. Tepary beans mature in 60 to 20 days after planting, depending on your microclimate and the variety. You can find tepary bean and other endangered seeds at Native Seeds/SEARCH. What do tarantulas, a handful of moths, and some of your garden plants have in common? Urticating hairs.  Stinging nettle urticating hairs (Jerome Prohaska) CC BY-SA 3.0 More accurately called urticating bristles, because only mammals have hair, these protrusions are an effective form of defense for several reasons. Being sharp and pointy, they are no fun to run into. In some cases, urticating bristles can be forcibly ejected at an enemy, thwarting attack. Very often, these bristles are coated with chemicals that can cause burning or itching sensations. If you’ve ever gotten ahold of stinging nettles, you know what I’m talking about. The word “urticating” is Latin for “nettles.” Nettles are characterized by pointy, hollow trichomes that grow next to a gland which produces bothersome chemicals. Adding insult to injury, the tips of urticating hairs often break off in your skin, making matters worse. In most cases, urticating bristles are painful but not dangerous. There are exceptions. Australia’s gympie gympie (Dendrocnidae moroides) causes stings that are described as a cross between being electrocuted and burned with hot aid. The gympie gympie has been known to kill people, horses, and dogs. And there is a tree in New Zealand, called the ongaonga, or tree nettle, that killed a person who walked through a thick patch. All because of urticating bristles and the associated toxins. Yikes!  Buck moth caterpillar (Judy Gallagher) CC BY 2.0 Urticating caterpillars Several species of moth and butterfly caterpillar have protective urticating bristles. These include:
As for tarantulas, you're on your own.  Tarantula showing patch of urticating hairs due to light exposure (Sarefo) CC BY-SA 3.0 First aid for stings
Sadly, there isn’t much you can do about these painful stings. Adhesive tape may help remove the urticating bristles from your skin. Wash thoroughly with soap and water to remove at least some of the irritating chemicals. Applying an ice pack may help, too. Personally, I make a paste out of baking soda and a little water. It seems to work better than anything else. Antihistamines are not helpful. Fools may tread where angels fear to go, but gardeners go where they have to, to care for their plants. Before reaching into a space blindly, take a moment to put on your gloves. It looks like a tomato, but it’s a pepper. [Sadly, I could not find a photo I could use.]
Tomato peppers (Capsicum annuum var. annuum) were one of the first peppers grown by Europeans. Also known as the Hungarian, Kalman’s, Beaver Dam, and Hussli tomato pepper, this small heirloom variety was brought to Wisconsin in 1912 by the Hussli family from Hungary. As hybrids took over the market, tomato peppers nearly became extinct. Until 2010, when one woman, Lee Greene, took it upon herself to rescue this meaty, flavorful pepper. There are now festivals held in its honor and seeds are readily available to anyone who wants to try their hand at growing tomato peppers. You can even find different varieties. One orange variety looks like a miniature pumpkin! Plants reach 2½ feet tall and are heavy producers. The walls of tomato peppers are twice as thick as most peppers, with just a little heat, similar to a poblano. Glossy green peppers turn deep crimson when ripe. Like heirloom tomatoes, tomato peppers were not bred for shipping and storing. Instead, they have been grown for flavor and sweetness. How to grow tomato peppers Like most members of the nightshade family, tomato peppers need at least 6 hours of sunlight each day and a long growing season, with most temperatures above 80°F. You can start seeds indoors or in a protected space up to six weeks before your last frost date. Plant seeds only ¼” deep and mist the soil to keep it moist until seeds germinate, usually in a week or so. If you use a watering can or hose, all your seeds will end up smashed together in a corner of the pot, making transplanting more traumatic. As your seedlings grow, you can up-pot them into larger containers. Once temperatures are above 60F, you can begin hardening them off. Prepare planting areas by digging in aged compost. These plants thrive in loose, nutrient-rich soil. You can also grow them in 5-gallon containers. Tomato pepper problems Aphids, armyworms, broad mites, Colorado potato beetles, hornworms, leaf-footed bugs, leaf miners, pepper weevils, stinkbugs, thrips, tomato pinworms, and whiteflies are common pests of tomato peppers. Common diseases include anthracnose, early blight, Fusarium wilt, gray mold, late blight, Septoria leaf spot, and Verticillium wilt. In many cases, proper plant spacing and the avoidance of overhead watering go a long way toward minimizing these problems. Tomato peppers can be enjoyed raw, pickled, or cooked into sauces, soups, and stews, or in hot sauces and pepper jellies, Tomato peppers are also popular ingredients in a Louisiana dish called maque choux made with corn, peppers, onion, tomato and garlic. [I think I’m going to have to try that one—it sounds delicious!] Tillers are used to steer boats. Tillers are used to plow the soil. But the word tiller can also refer to a type of lateral shoot that grows at the base of corn and other grass or cereal grains (Poaceae). Tillers are a form of vegetative reproduction. Tillers are often seen in barley, oats, and wheat. When they occur on corn plants, they are frequently called “suckers.” Children were traditionally sent into the fields to remove corn tillers. But was this really necessary?  Diagram of grass family plant with tiller (Kelvinsong) CC BY 3.0 Grass family growth
Corn and other grass plants generally send up central stalks with leaves wrapped around that main stem. Sometimes, new branches start growing from the lower five to seven stalk nodes, or from below ground. These "daughter plants" are clones that are able to grow into independent plants with their own root system, leaves, nodes and internodes, and even their own ears (female flowers) and tassels (male flowers). When this type of new growth occurs higher up the stalk, they tend to grow into ear shoots which are morphologically different from tillers. Ear shoots have shorter internodes, smaller leaves, and they always terminates in an ear, rather than a tassel. Tillers can sometimes get confused as they grow, terminating with a flower that is both male and female. These are known as tassel-ears. Tiller science Research has shown us that tiller development indicates optimal growing conditions. Abundant water, sunlight and nutrients create a situation in which the plant has enough reserves to invest in tiller development. While tillers may compete with their parent plants, they usually don’t have enough of a growing season to develop harvestable ears. Tillers can also occur in response to damage. When the main stalk is damaged early in its development, whether through insect or herbivore feeding, frost or hail, or mechanical injury, tillers can take over and may even develop harvestable ears, though this is rare. In most cases, tillers have little or no effect on crop size. But if your kids are driving you nuts this summer, you can still send them out to remove tillers. Compost tea. What is it? How does it work? And are all the beneficial claims about compost tea true? Let’s find out. What is compost tea? Compost tea is a brewed extract of bacteria, fungi, micro arthropods, nematodes, and protozoa made from compost. Traditionally, compost was placed into a permeable bag, which was then placed in a container filled with water until the water turned black. That water was then used to irrigate both indoor and outdoor plants as a liquid organic fertilizer. The idea behind it was that all the nutrients and microbes would end up in the water, easier for plants to absorb. Makes sense, right? 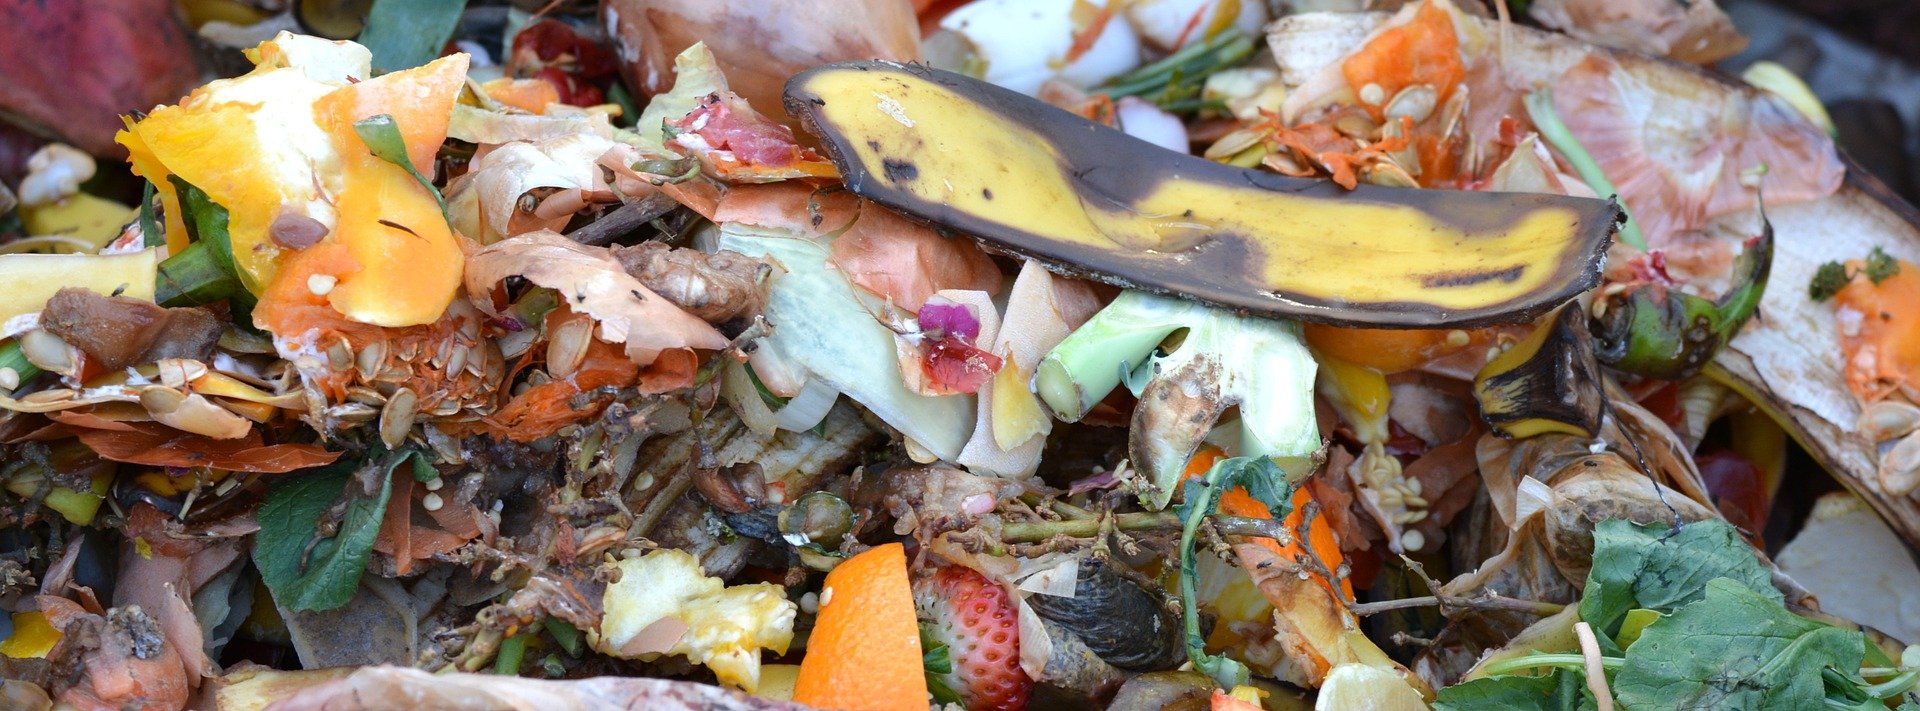 Compost (Ken Kerckx) Pixabay That was the old-fashioned method of making compost tea and it resulted in a soup of anaerobic (without oxygen) microbes and nutrients. Modern marketing and manufacturing now offer compost tea brewing kits, or ready-made compost tea. These kits use energy to aerate the tea. The differences between aerated and nonaerated compost tea will be discussed in just a moment.
Compost tea claims Compost tea is said to be a mild food additive for plants, much like our daily vitamin pills. Proponents of compost tea claim it makes plants and the surrounding soil healthier, reducing the need for fertilizer. Compost tea is also said to improve soil water retention, reducing the need for irrigation. The addition of all those microorganisms is supposed to improve soil structure, reduce compaction of heavy clay soil, and help sandy soil retain water and nutrients. But wait! There’s more! Using compost tea is also said to stimulate root growth and counteract the negative effects of chemical-based herbicides, insecticides, and pesticides. And foliar (leaf) sprays of compost tea are said to stimulate the growth of beneficial microbes on leaf surfaces, reducing the chance of disease and pest damage. Science and skepticism Like most claims that sound too good to be true, compost tea does not hold up well to scientific testing. First, the availability of nutrients is misleading. Unlike slow-release fertilizers and composts, compost tea risks dumping large (variable) amounts of nitrogen, potassium, and other nutrients into the soil all at once. Plants can only absorb so much at one time, so many of those nutrients (assuming there are any) end up in ground water causing eutrophication, or nutrient contamination. Second, claims of disease prevention are greatly exaggerated. Just because something works in a lab does not mean it will continue to work in your garden. There are simply too many other factors at play. It’s true. Some studies have shown that foliar sprays of nonaerated compost tea do, in fact, reduce the incidence of some diseases in laboratory settings. Disease severity is not altered, and results are less clear out in the real world garden. Also, some fungal diseases were reduced with foliar sprays of aerated compost tea. Those diseases were growing on Petri dishes. In greenhouse testing, the diseases were not affected. Other studies have shown that foliar sprays of aerated compost tea actually made diseases of apples and potatoes worse. Like probiotics, the microbial and nutritional makeup of compost tea is extremely variable. It is almost impossible to say what each batch actually contains. In fact, some compost teas can contain human pathogens. [Can you say e. coli or Salmonella?] The bottom line According to the U.S. Environmental Protection Agency, it is against the law to sell unregistered substances for use as pesticides. Compost tea is not registered in this way, so any claims made about its effectiveness as a pesticide are false. Aerated compost teas have no documented ability to suppress disease. Rather than wasting time and effort on something that lacks a scientific basis, use that compost the way nature intended. Apply a nice thick layer of aged compost as a mulch on your planting beds and let the worms, microorganisms, and other natural processes take advantage of billions of years of evolution. The benefits of mulching with aged compost are well-documented. And if your plants need a little nutritional boost, I suggest fish meal. Today we are going to delve deep into the soil under our feet and talk about something you will probably never see. Discovered in 1977, archaea [are-KI-ah] used to be classified as bacteria and were called archaebacteria. Scientists now know they are their own group. Their name means “ancient things” and they are believed to be one of earth’s oldest life forms, first occurring some 3.8 billion years ago.  The many forms of archaea (Maulucioni) CC BY-SA 4.0 Archaea are completely new to me. But it ends up they are very important to soil and plant health, so let’s see what we can find out. Classifying life In the world of living things, there are three basic groups: eukaryotes, bacteria, and archaea. Eukaryotes have nuclei and organelles. Bacteria and archaea do not. Archaea and bacteria are prokaryotic. Prokaryotes are primitive, single-celled organisms with no organelles or nucleus. Archaea are slightly more complex than bacteria, but not by much. Simple as they may be, there are more bacteria and archaea in the soil than any other microorganism and they are critical to nutrient cycling. Archaea are found pretty much everywhere on Earth, including some pretty extreme environments. These microscopic beings can tolerate hot springs, salt marshes, and even deep, frigid ocean environments. Some species live inside of plankton and termites, as well as in our guts and on our skin. In fact, archaea make up 10% of the microbes in our digestive systems, but I digress.  Archaea found in volcanic hot springs (Jim Peaco) Public Domain Types of archaea
Archaea come in several shapes and sizes. There are flat archaea, square archaea, and cylindrical archaea. Archaea can range in size from 0.1 micrometers (μm) to 15 μm. For perspective, an American dime has a diameter of almost 18,000 μm. In some cases, archaea will form chains that can be 200 μm long. These chains form biofilms. Scientists are unsure about why these chains form, but many believe that they facilitate communication and nutrient exchanges, much the way other soil microorganisms work to share nutrients with nearby plants. Archaea feeding Archaea are classified by what they eat. These nutritional groups choose from an extensive menu. There are phototrophic archaea that use sunlight for food. Other archaea break down inorganic minerals such as carbon and sulfur for food. Yet other archaea eat sugar, ammonia, and even hydrogen gas. [I guess when you’re as small as they are, a molecule of hydrogen probably looks like a potato chip.] As they feed, archaea become major players in nutrient cycling. They fix atmospheric nitrogen in the nitrogen cycle, make sulfur available to plants in the sulfur cycle, and are essential to decomposition and the carbon cycle. Put simply, without archaea, many plants would starve. Nitrogen fixation Plant growth is most often limited by insufficient nitrogen. There’s plenty of nitrogen floating around in the atmosphere, but plants can’t use it in that form. Instead, atmospheric nitrogen needs to be “fixed” into compounds, such as ammonia, that can be used by plants. Archaea help fix that nitrogen. While bacteria and fungi can cause several garden variety diseases, archaea are not known to be pathogens or parasites. On the contrary, they tend to be very helpful wherever they are. So what can we, as gardeners, do to protect and provide for these microscopic helpers?
Now you know, It’s still pretty cold outside for most insects, but it’s always nice to be able to recognize signs of spring. Gulf fritillaries (Agraulis vanillae) are cheery orange butterflies whose appearance marks the changing seasons. These butterflies overwinter in the southern states and South America, returning to more northern territories as temperatures rise.  Gulf fritillary (Korall) CC BY-SA 3.0 Affectionately known as gulf frits, these garden visitors usually appear in early April, flitting erratically from flower to flower in search of nectar and mates. Eggs are most commonly laid on types of passionflower (Passiflora). When those eggs hatch, caterpillars begin feeding on the leaves of the host plant. Heavy infestations can cause defoliation, but this is rare.  Gulf fritillary (Wilfredor) Public Domain Gulf frits are medium-sized butterflies with bright orange wings and black markings. They have a 3” wingspan and the forewings are elongated, with three black-rimmed white spots on the top side. The underside is brown with elongated silvery spots. Eggs are yellow and laid singly on or near passionflower plants. Larvae are bizarre looking. Caterpillars start out bright orange and covered with black barbed spikes. Those colors slowly change as it grows. The pupa looks like someone wadded up a tiny brown paper lunch sack. The truth is, they need all the protection they can get.  Young gulf fritillary caterpillar (Zygy) Public Domain  Older gulf fritillary caterpillar (Filo gèn') CC BY-SA 4.0 The life of a gulf frit is fraught with danger. Scrub jays and other insect-eating birds snatch them from the air. Lady beetles, spiders, and wasps eat their eggs. Parasitoids and wasps attack caterpillars and chrysalids. European paper wasps and praying mantids eat their share. If you are able to get a close look at a gulf fritillary, you will often see that their wings are ragged and torn from these dangerous encounters. Gulf frits are not entirely helpless, however. These gentle souls have chemical warfare on their side. When predators get too close, gulf frits release foul-smelling pheromones to discourage attack. They have another pheromone they use to attract mates, but I have to assume that it smells good to other gulf fritillaries. Smell isn’t the only aspect of gulf frit courtship. All too often we forget that in the tiny world of insects, life can be highly complex and fascinating. When a male gulf frit spots an alluring female, he lands next to her, at a 45° angle, and places his head affectionately against hers. Then he claps his wings open and shut in a something called a wing clap display until she is receptive. Males also give their mates chemical and nutrient treats, called nuptial gifts, that improve her health for better egg-laying.  Newly emerged gulf fritillary (Gwillhickers) CC BY 3.0 To attract and provide for gulf frits, add varieties of passionflower and lantana to your butterfly garden or landscape this spring.
Dark spots on leaves can mean many things. It may be black spot, bacterial brown spot, or bacterial leaf spot.  Bacterial leaf spot on peppers caused by Xanthomonas (Netty4299) Public Domain Black spot is a fungal disease caused by Diplocarpon rosae that features round, black spots on leaf tops. Bacterial brown spot (Pseudomonas syringae pv. syringae) features narrow light green borders with centers that tend to dry out and look tattered. But bacterial leaf spot is something else.
Bacterial leaf spot refers to infection by two bacterial families. Pseudomonas and Xanthomonas are pathogens that live in damp soil, plant debris, and mulch and reproduce at an alarming rate when temperatures are in the 77°F to 86°F range. Sprinkler spray and raindrops often splash these microscopic pathogens onto nearby plants, spreading the disease. Bacterial leaf spot can kill leaves and weaken plants, and resulting defoliation can cause sunscald damage to fruit. Basil, beets, eggplant, lettuce, peppers, and tomatoes are susceptible to bacterial leaf spot, as are almond, cherry, peach, and other stone fruits trees. .jpg) Bacterial leaf spot caused by ‘Pseudomonas cichorii’ on hibiscus (Scot Nelson) Public Domain Bacterial leaf spot symptoms
Symptoms first appear along leaf margins (edges) of older leaves as yellowish-brown spots, ¼” to ½” in diameter, that can be round or angular. These spots start out looking water-soaked and then dry. They may be seen on both the tops and bottoms of leaves and may form clusters. Regardless of the pathogen, these spots quickly turn black. The Xanthomonas bacteria tend to produce small brown spots with yellow halos. The Pseudomonas bacteria produce reddish-brown spots. Stem streaking and dented areas on the fruit can also occur. These areas are open invitations to other pests and pathogens. Bacterial leaf spot control Bacterial diseases can be devastating, but bacteria tend to be relatively weak pathogens. Unlike warrior-like viruses and fungi, bacteria generally need an opening to access the inside of a plant. Those vulnerable openings may result from rubbing branches, wind damage, or insect and herbivore feeding. By keeping your plants’ protective layers intact, you can significantly reduce the chance of many bacterial diseases taking hold. These are other steps you can take to help prevent bacterial leaf spot:
There are no chemical controls for bacterial leaf spot. If you see spots on your leaves, take a closer look. See if you can determine the cause. And then the cure. |
Welcome!You can grow a surprising amount of food in your own yard. Ask me how! To help The Daily Garden grow, you may see affiliate ads sprouting up in various places.
You can also get my book, Stop Wasting Your Yard!  Index
All
Archives
July 2024
|


.jpg)
 RSS Feed