|
Mizuna is a tasty Asian green that you can grow in containers, on a windowsill, or in your garden.  Mizuna greens (Masahiko Satoh) CC BY 2.0 With its slightly peppery flavor, similar to arugula, it should come as no surprise that mizuna is part of the cabbage family. Young leaves are used raw, in salads, and mature leaves are lightly cooked in stir-fry and soups. Flowering stems can also be cooked the same ways you might cook broccoli. In Japan, mizuna is also pickled. Mizuna (Brassica rapa var. niposinica), also known as Japanese mustard, water greens, or spider mustard, is cousin to bok choy, mustard, Napa cabbage, ruby streaks, and turnips. Mizuna is a great addition to salad gardens and stir-fry gardens. It can be grown outdoors in U.S. Hardiness Zones 4 to 9. Mizuna description This cool season crop looks as good as it tastes. Mizuna grows in a mounding rosette that can be up to 9” high and 18” across. The glossy green leaves are feathery and serrated. Stems are pale green to white. Some specialty varieties even have purple stems! Mizuna flowers look like those of most other cruciferous plants with four yellow petals. Mizuna is a biennial, which means it generally goes to seed in its second year. How to grow mizuna Mizuna grows easily from seed. You can start seeds in pots and then transplant seedlings, or sow seeds directly in the ground. In either case, seeds should be covered with 1/4” of soil or vermiculite. Plants grown to be used while young should be spaced 4” to 6” apart, plants grown for “cut and come again” harvesting should be planted 8” apart, and plants destined to be harvested when mature should be spaced 12” to 16” apart. Keep the soil moist until germination occurs and then water frequently, allowing the soil to dry out between waterings. Mizuna plants can be grown in full sun or partial shade, as long as they get at least 3 to 4 hours of sunlight each day. They prefer loose, nutrient-rich soil, so you may want to band the area with aged manure or compost at planting time and top dress with fish emulsion or more compost throughout the growing season. Banding refers to incorporating fertilizer or other nutrient sources into the soil on either side of seeds at planting time. Mizuna grows best in soil with a pH of 6.0 to 7.5. Succession planting can extend your harvest throughout the cooler months. Mizuna will bolt as temperatures rise. If you allow it to go to seed, you will be providing local pollinators and other beneficial insects with pollen and nectar, plus you will get seeds for future crops. Mizuna pests and diseases Flea beetles and slugs and snails will pose the biggest threat to your mizuna crop. Aphids and whiteflies may also try feeding on your mizuna. Mizuna is not disease-prone. 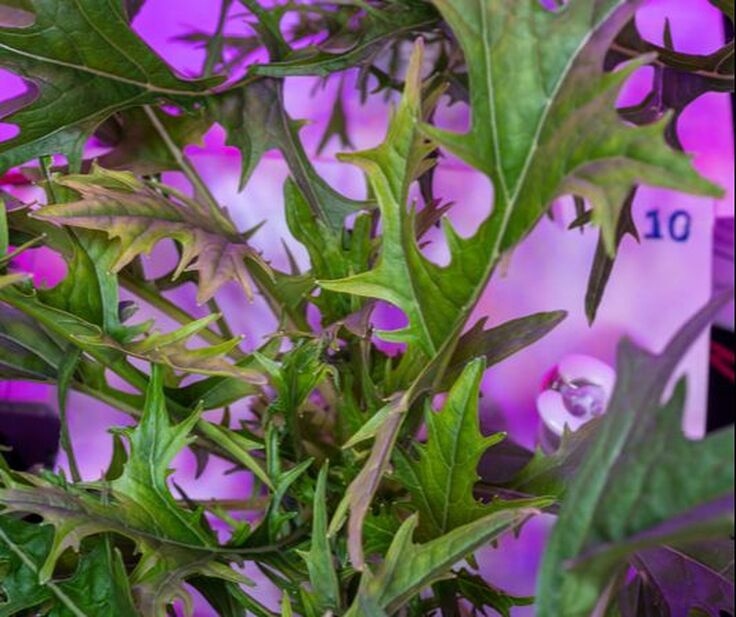 Mizuna growing on the International Space Station (NASA) Public Domain  Fresh green whole Kohlrabi (Jonathunder) GFDL 1.2 All parts of the kohlrabi plant are edible. Sweeter and more mild than either cabbage or turnips, kohlrabi (Brassica oleracea) is a highly nutritious vegetable, with plenty of fiber and vitamins. Kohlrabi description The swollen bulb-shaped portion of kohlrabi is actually a modified stem. The outer skin can be pale green or purple, depending on the cultivar. The blue-green leaves look striking. This biennial plant makes an attractive addition to your garden, as well as your dinner table.  Basket of kohlrabi (Secretlondon CC BY-SA 3.0) How to grow kohlrabi
Kohlrabi is generally a cool season crop. It needs full sun and good drainage. Kohlrabi plants prefer a soil pH of 5.5 to 6.8. If your soil is more alkaline than that, acidification may be a good idea. Here in San Jose, California, kohlrabi plants can be started in February and March, and then again in September and October. These are heavy feeders, so top dressing with aged compost can ensure they have access to all the nutrients they need. Mulching around plants is also helpful. Regular irrigation will prevent your kohlrabi from becoming woody textured. If you are starting with seedlings, put them in the ground so that the first set of leaves is just above the soil line. If growing seeds, cover seeds with 1/4” of soil and space plants 9-12” apart. It takes 45 to 60 days for kohlrabi to reach maturity. Kohlrabi pests and diseases Cabbage loopers, cutworms, and imported cabbageworms are the most common pests of kohlrabi. These plants are susceptible to cabbage yellows, clubroot, and downy mildews. Give kohlrabi a try and see how productive these plants can be! Arugula is a tangy salad green that grows best in cooler seasons. 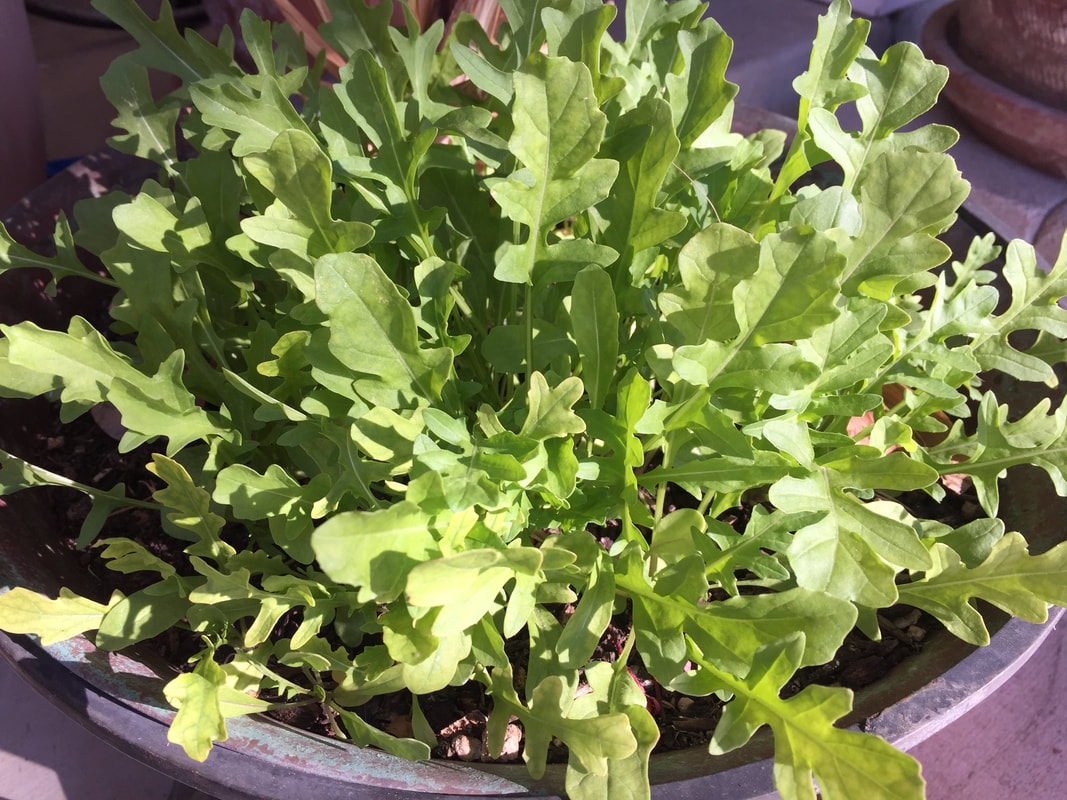 Containerized arugula grows well on a patio protected with a pergola (Kate Russell) Back in Roman times, it was forbidden to grow arugula in monastery gardens because it was considered an aphrodisiac. My guess is, it got that reputation because of all the Vitamins A, C, and K, and potassium it provided, giving diners the energy and good health needed for physical activity. In any case, arugula is now recognized as a delicious, healthy, gourmet salad green. As a member of the cabbage family (Brassicaceae), arugula is cousin to cauliflower, turnips, kale, and the mustards. Also known as rocket or Mediterranean salad, arugula (Eruca vesicaria ssp. sativa) makes an easy addition to any foodscape. Arugula grows rather quickly. Within 40 to 50 days after planting seeds, you can begin harvesting its tasty leaves. Because arugula grows so quickly, it makes a good catch crop. Catch crops are those plants added between bigger crops, to maintain soil microorganisms and to reduce erosion.
How to grow arugula
Arugula roots enjoy muddy, mucky soils. Since the Bay Area’s clay soil can hold a substantial amount of water, autumn and early spring are the perfect times to plant this healthy salad green. Start by planting seeds 1/2” deep, and water them in well. When seedlings are 1” tall, thin them so that they are spaced 6 to 9” apart. You can do this by tickling their roots apart and transplanting, or you can snip off any extras at ground level, reducing stress to delicate new roots. To keep leaves tender and tasty, be sure to keep the soil evenly moist. Periods of dryness will increase bitterness and trigger bolting. Continuous crop By regularly snipping off outer leaves for kitchen use, you will stimulate your arugula plants to continue producing new, tender leaves through the cooler weather. Because arugula becomes peppery and bitter as it matures, you may want to continue planting new seeds in succession, for a continuous crop. If allowed to go through their lifecycle unmolested, arugula plants will readily self-seed an area, providing many years of salad greens with little to no effort on your part. Local pollinators, and pollen and nectar eaters, will appreciate the banquet, as well, increasing your garden’s biodiversity. Arugula pests and diseases As with many other older species of plant, arugula tends to be relatively pest and disease free. Bacterial leaf spot, downy mildews, and white rust may occur if water stays on the leaves for an extended period. Bagrada bugs can also be a problem, but your arugula plants will be relatively trouble-free. Try adding arugula to your garden today! No Southern supper would feel right without an occasional serving of collard greens. And no New Years Day celebration would be complete at my house without a big pot of Hoppin’ John, which combines rice, blackeyed peas, and collard, mustard, or turnip greens. Traditional folklore claims a bowl of Hoppin’ John on January 1st ensures prosperity in the coming year. It is certainly packed with protein, fiber, vitamins and minerals. Personally, I just love how it tastes! What many people don’t realize is just how healthy collards are for you, or how easy they are to grow at home. 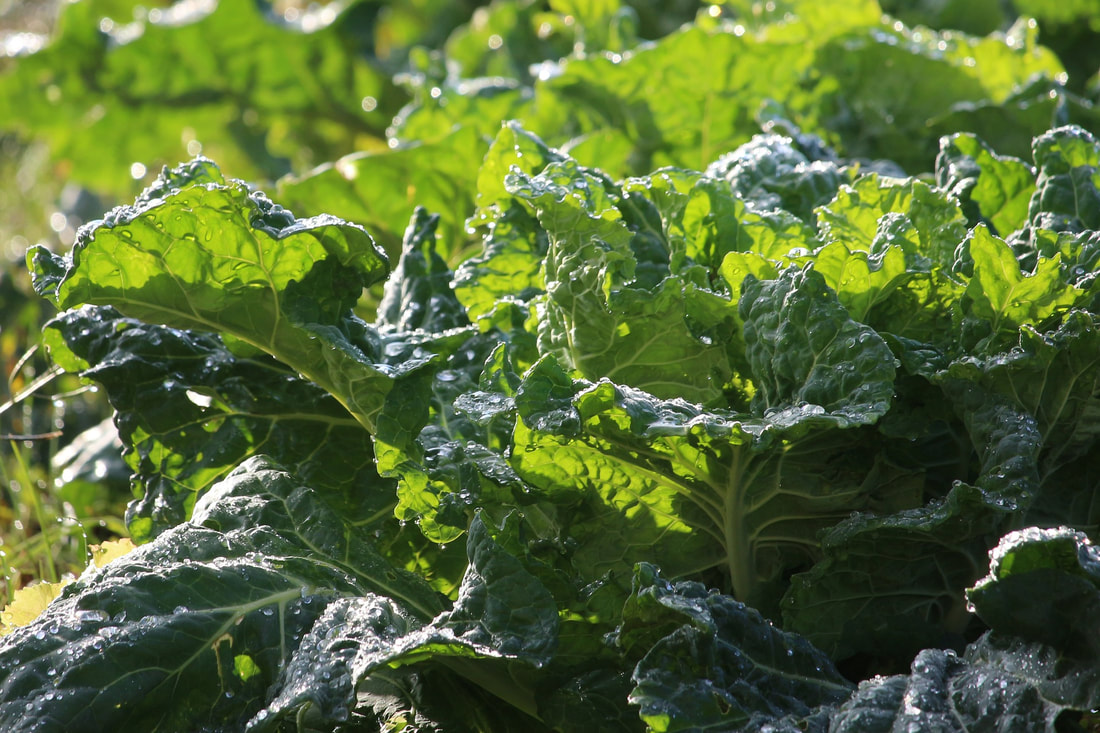 Collard greens (PurpleOwl) Pixabay Collards (Brassica oleracea, var. acephala) are biennial members of the cabbage family, along with broccoli and Brussels sprouts. In fact, collards, along with kale, are actually non-head forming cabbages! The name, collards, comes from the word colewort, or wild cabbage. Along with kale, collards are one of humanity’s oldest cultivated vegetables. Heart-healthy collard greens Collards contain more vitamins and minerals of any other vegetable, along with kale. Eating collards regularly is believed to reduce the chance of some types of cancer. A study published in Nutrition Research found that eating steamed collard greens was 13% more effective at blocking ‘bad’ cholesterol than the prescription drug Cholestyramine! Collard greens, being a dark leafy vegetable, also contain high levels of Vitamins A, K, and C, along with manganese, dietary fiber, and calcium. Google collard greens and you are sure to see them listed frequently in the world’s healthiest foods, so why aren’t they growing in everyone’s garden? Collards taste funny to some people Collard greens contain so much calcium that some people find the taste bitter. You can lose or soften some of that bitterness with these cooking tips:
Unlike spinach, which can only tolerate gentle cooking, collards often need to be cooked for 15 to 20 minutes to soften completely. The liquid left behind after cooking collard greens is called pot liquor, or potlikker. Frequently seasoned with salt, pepper, salted pork or smoked turkey, pot liquor makes an excellent broth, made even better when sopped up with a piece of freshly baked cornbread. So, let’s get some of these healthful, flavorful plants growing in your foodscape!  Collard plants grown in pest control study (USDA) Public Domain How to grow collards
Collards can tolerate temperatures as low as 5°F, but they will bolt in our California summer heat. Bolting does not affect leaf flavor (and it can give you seeds for your next collard crop), but collards are generally a cool season crop. A light touch of frost actually sweetens the flavor of collard greens. Here in the Bay Area, collards can be planted February through April, and again in September and October. These plants can get relatively large, with broad, waxy, dark green leaves. They prefer lots of sunlight and need plenty of organic matter in the soil. You may need to acidify the growing area, as collards perform best in soil with a pH of 6 to 6.5. Plant collard seeds 1/4 to 1/2 inch deep. You can start seeds in cell flats and then transplant into your garden or foodscape. [Since seed packets nearly always contain far more seeds than you will ever need or use, hold a seed swap with friends and neighbors!] If you direct sow, plants should be thinned to 18 to 36 inches apart, depending on the variety. Side dress plants with aged compost or manure every 4 to 6 weeks, and mulch around plants to reduce competition from weeds and to maintain moisture levels and temperatures. Collards have a shallow root system and water-stressed collards taste far more bitter than properly irrigated plants. Collard pests and diseases As with other members of the cabbage family, collards are frequently fed on by aphids. You can blast these pests off of plants with a powerful stream of water from the garden hose, or you can apply insecticidal soap. Cabbageworms, slugs, and cabbage loopers can be handpicked. [I feed them to my chickens.] Flea beetles, bagrada bugs, whiteflies, and cabbage root maggots can also be a problem. Research conducted at UC Davis found that flea beetle and aphid populations can be reduced when collards are interplanted with beans. They found that the same was true for weeds, but I’d rather have beans than weeds! Apparently, the mixed plantings work better at attracting parasitic wasps, making crops harder to find, and by providing other food sources for the pests. Diseases that affect collards include white rust, blackleg, cabbage yellows, and clubroot. You can reduce the likelihood of these diseases occurring by rotating crops in the cabbage family into a different growing space each year. Harvesting collards Most collard varieties are ready to harvest in 55 to 75 days. Collards are one of those cut-as-you-go crops. Just keep picking outer leaves, as you want them, and the paints will continue producing more for several months. It is a good idea to allow plants to reach a height of at least 10 inches before harvesting leaves. If you find that you have more collard greens than you can eat, you can always cook them and then freeze them, for longer storage. Your friends and neighbors may appreciate some, as well! Collards are large, attractive plants. They do not need to be sequestered into traditional garden rows. Find a nice, sunny spot in your landscape and make it home to your very own collard plant! Of cabbages and kings…. Lewis Carroll (Charles Lutwidge Dodgson) has always been one of my favorite authors, and cabbages and other cole crops nearly always have their place in a kitchen garden. Cole crops Where do we get the word ‘cole’, as it refers to cabbages and other members of the cruciferous, or brassica, family? I wish it were as simple as a variation on ‘cold crops’, since most of them prefer growing in cooler weather, but that would be a fabrication. The word ‘cole’ actually comes to us from a Latin word for ‘stem’. How they decided that the word “stem’ has anything to do with a head of cabbage is beyond me, but there it is. 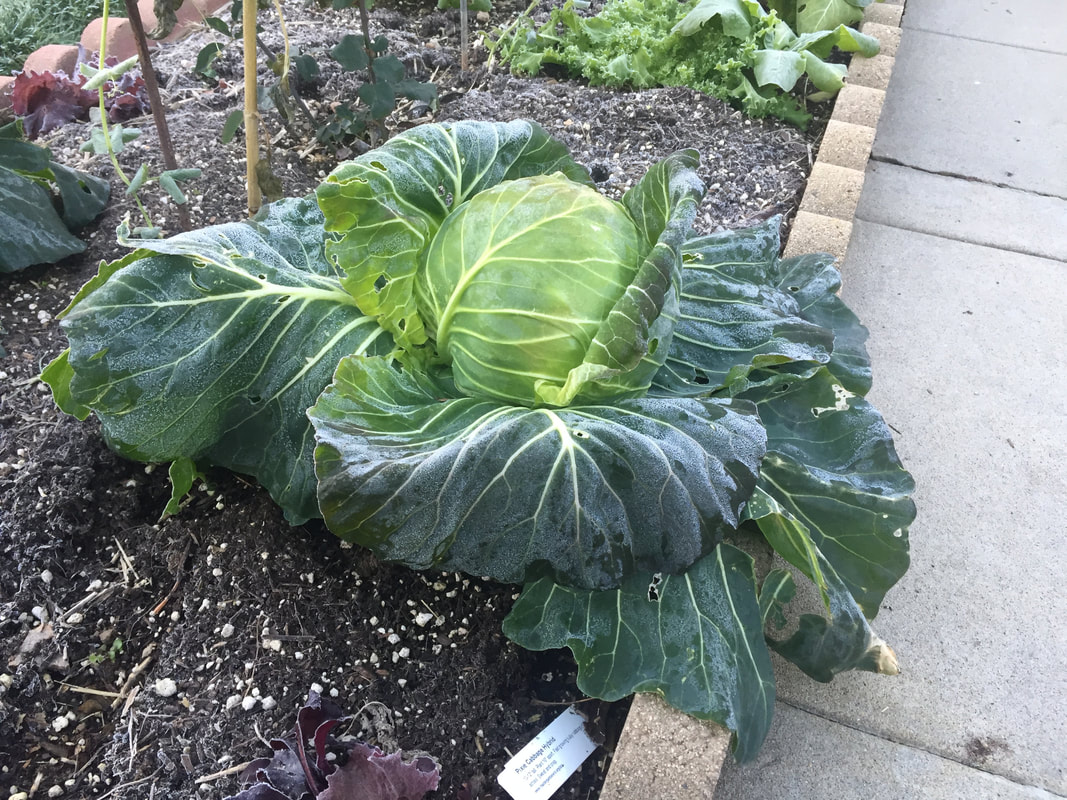 Cabbage are sweetened by a light frost The cabbage family includes broccoli, cauliflower, kohlrabi, horseradish, Napa/Chinese cabbage, collards, turnips, rutabagas, Brussels sprouts, watercress, kale, radishes, bok choy, and mustard. Rapeseed (canola) is also a member of this family. The old Latin name, Cruciferae, is going out of favor and is being replaced with Brassicaceae, due to more accurate genetic information. Some scientists include capers in this family, but that particular DNA is still being sorted out. Cabbage family stems and other parts Also known as the mustard family, this group of plants has flowers with 4 petals and 4 sepals, arranged in what looks like a letter “H” or a cross (hence the old name, cruciferae). They also have 6 stamens, usually 2 short ones and 4 longer ones. These plants have a waxy surface (cuticle) that helps them retain water and a characteristic sulfur-like smell.
Growing cole crops Cabbages, broccoli, and cauliflower take up a fair bit of room in the garden, but they require very little of the gardener, once they are established. Here, in the Bay Area, one crop can be started in mid- to late-winter, for a spring harvest, and then a second crop can sometimes be started in late summer to early autumn, for a winter harvest. Mustard and canola both make excellent cover crops. Many of these plants are biennial, which means it usually takes two years to complete their lifecycle. Our summer heat is strong enough to cause plants in the cabbage family to go to seed early, or bolt. Often, plants do not taste as good once bolting begins. Stresses caused by too much cold, too much heat, not enough food, water stress, pest or disease damage, or mechanical injury can cause a condition called ‘buttoning’. Buttoning refers to the way all cole crops, except cabbage, produce smaller than normal heads in response to stress.  Purple cauliflower Cabbage family pests and diseases
Many moth and butterfly species use members of the cabbage family as food, including cabbage loopers, cabbage maggots, imported cabbageworms, diamondback moths, and inchworms. Some of these pests are developing resistance to commonly used pesticides, but I’ve taught my dogs to chase them away, and I use row covers. Other common cole crop pests include cabbage aphids, armyworms, bagrada bugs, wooly aphids, root maggots, millipedes, flea beetles, and cutworms. Voles can also cause problems. Bt and neem oil are effective organic controls, but not against voles. Cole crop diseases include ringspot, clubroot, blackleg, verticillium wilt, bacterial leafspot, downy mildews, and phytophthora root rot. Crop rotation is your best method of disease prevention. Research has shown that eating fresh, steamed, or sautéed (not boiled) brassicas may reduce many types of cancer, so plant and eat your vegies! Turnips are a white, cool weather root crop. Cousin to rutabaga, radishes, and other members of the cabbage family, turnips (Brassica rapa) are grown for the bulbous taproot that looks more like a beet, except that it is white, and its nutrient rich leaves.  Turnip roots (thebittenword.com) CC BY 2.0 Fun turnip trivia: the pink, purple, red, or greenish color of a turnip’s shoulders is a result of being exposed to the sun. Taste for turnips Many people believe that they do not like turnips, but this is often because the turnips they tried were too old. Old turnips taste bitter. This is because of a self-defense chemical produced by many members of the cabbage family. Also, some individuals have inherited a pair of genes that make them extra sensitive to the bitterness, so don’t force anyone to try the fruits of these labors. It just might not be possible for them to enjoy the flavor. That being said, young, tender turnips do not contain as much of the bitterness, so harvest early and often! Also, consistent irrigation reduces the chance of your turnips becoming bitter. Turnip greens Turnip leaves are a popular side dish in the southeast. Tender leaves are less bitter than older leaves. Bitterness can be reduced by pouring off the cooking water and replacing it with fresh water and reheating. Unlike rutabagas, which have a visible crown or neck between the taproot and the leaves, turnip leaves grow directly from the root. How to grow turnips Like other root crops, turnips prefer loose soil, but they are resilient plants. They can handle conditions that thwart more gentle crops. Turnips can be planted late winter through early spring and again in late summer and early fall. Seeds should be planted 1/2 inch deep, directly into the garden. Seedlings should be thinned to 4 to 6 inches apart, when grown for roots, and 2 to 3 inches apart for greens. Depending on the variety planted, your turnip crop should be ready within 50 to 75 days. Tokyo turnips, which tend to be smaller, are harvestable after only 30 to 60 days!
Turnip pests and diseases
As a Brassica, turnips are subject to attack by caterpillars, whiteflies, cabbage loopers, Bagrada bugs, beet armyworms, and aphids. Aphids can also carry turnip mosaic, a viral disease common to Brassicas. Row covers can prevent damage, but only if they are installed before the problem starts. Turnips have been grown for over 4,000 years. Pliny the Elder ranked turnips third only to cereals and beans as the most important crops. Turnips were also used in early experimentation with crop rotation. Give turnips a try in your garden today! Chinese cabbage refers to two different cool weather crops that lend themselves to areas with mild fall and winter weather. Chinese cabbages (Brassica rapa) are variations on the lowly turnip. The two subspecies we most commonly see are forms of Napa cabbage (var. pekinesis) and bok choy (var. chinensis). These healthful foods have been grown in China since before the 15th century. 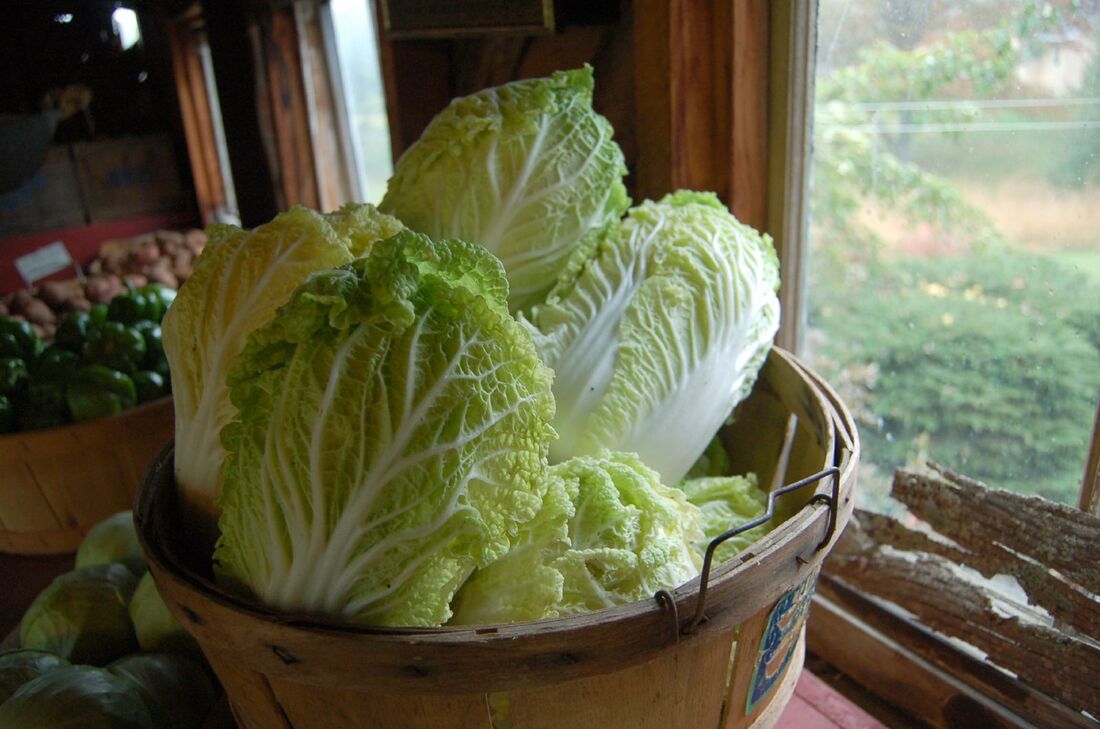 Napa cabbages Jay & Melissa Malouin) CC BY-SA 2.0 Napa cabbage Also known as Korean small cabbage or celery cabbage, Napa cabbage has a milder flavor than more domestic varieties, but it packs a nutritional punch that’s difficult to beat. According to a study conducted by the Centers for Disease Control in 2014, Chinese cabbage ranks second only to watercress as a nutrient dense food. Napa cabbages come in both head and loose leaf varieties. Napa cabbages can be planted here in my garden, twice each year: first, February through April; and again, August through October. .JPG) Bok choy (Karl-Heinz Wellmann) CC BY-SA 3.0 Bok choy
Unlike the Napa cabbages, bok choy does not form heads. Bright white stalks give way to dark green blades, growing in a cluster, much like celery. Bok choy can be planted in late summer and early fall, and then again, late winter through early spring. How to grow Chinese cabbages These biennial plants are generally grown as annuals. If you allow your plants to go to seed, you can create a seasonally perpetual crop within your landscape. To begin, find a location with full or partial sun and well-drained soil. Adding aged compost to the planting bed ahead of time can provide a nutritional boost to your plants and improve soil quality, while you’re at it. Chinese cabbages can also be grown in containers. Use pots that are 8 to 12 inches across and 18 to 24 inches deep. Seeds should be planted 1/2 inch deep and successful seedlings should be thinned to 12 - 18 inches apart. These plants do not transplant well, so it is better to put them where you want them right from the beginning. Pests and diseases Being closely related to broccoli and cauliflower, Chinese cabbage is subject to many of the the same pests: aphids, flea beetles, armyworms, loopers, cabbageworms, leaf miners, and millipedes. Common diseases include white rust, damping off, yellow virus, clubroot, black rot, and bottom rot. Many of these diseases can be prevented by allowing soil to dry out between waterings. Harvesting Chinese cabbages Chinese cabbages are good candidates for succession planting. If you start one new plant per person every two weeks, through fall and winter, you will have an abundance to harvest. You can extend that harvest by only cutting away outer leaves on an as-you-need-them basis. These plants will continue to produce inner leaves through the growing season. Storing cabbages Like other cabbages, these plants to not produce a lot of ethylene gas. Ethylene gas is what makes fruits and vegetables ripen. Cabbages are, however, very sensitive to the ethylene gas produced by other plants, so it is a good idea to keep harvested leaves or heads in a plastic bag in the refrigerator. Or, your can always try your hand at fermenting some cabbage for your very own kimchi! 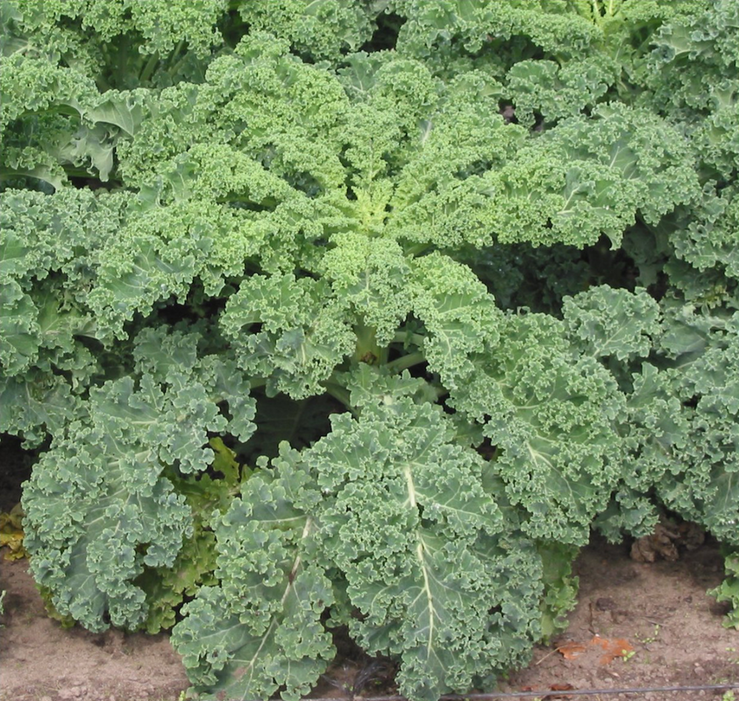 Mature curly leaf kale plant (Rasbak) CC BY-SA 3.0 Edible kale, or leaf cabbage, is the wild cousin to other members of the brassica family, including broccoli, collard greens, rutabagas, watercress, Brussels sprouts, Romanesco broccoli, and cauliflower. Kale was once the most commonly eaten green vegetable in Europe. [Probably because it is easy to grow and stores well.] Nutrient-dense kale Each serving of kale contains many times the daily dose of Vitamin K. Vitamin K is used by the body to coagulate blood, strengthen bones, and reduce calcification of the arteries. Kale also contains a lot of Vitamins C, B6, folate, and manganese, and many other important nutrients. If you enjoy eating kale, your body will thank you. How kale grows Kale loves cold weather, which makes it an excellent winter garden plant in San Jose, California. Kale can tolerate occasional temperatures as low as 5°F below zero, and if plants happen to be touched by frost, they taste even sweeter! Kale is a biennial plant, which means it generally only grows leaves in its first year, and then produces flowers and seeds in its second year. A period of cold weather is what triggers seed production. This is called vernalization. Kale comes in many different sizes, shapes, and textures. Plants can be compact or reach 6 feet in height, depending on the cultivar. It’s green or purple leaves are used to classify different types of kale:
Kale can grow in a wide range of environments. It can also get by in partial shade, making it a good choice for shade gardens. In warmer regions, kale can be planted in September and October, and then again in January, February, and March. How to grow kale While direct seeding is the way to grow kale in colder climates, our scorching hot summers and autumns make starting seeds in small pots a better idea. Seeds should be planted 1/2 inch deep and the soil kept moist until germination occurs. You can reduce the amount of water needed (and time invested) by covering pots with a 1/4 inch layer of vermiculite. Vermiculite reduces evaporation and can hold many times its weight in water, but tiny seedlings can easily push their way through. As your seedlings are growing, use that time to prepare planting beds. Kale prefers loose, loamy soil, so incorporating aged compost will improve the flavor of your kale. Two months before the first frost date, seedlings can be transplanted into their garden locations. When transplanting kale, bury the plants up to the first set of leaves. This encourages a stronger root system. Be sure to mulch around each plant to conserve moisture, reduce competition from weeds, and provide a nutrient boost. You can also side dress plants halfway through their growing season for the best production. Side dressing simply means placing aged compost around the base of each plant. Watering and critters will get the nutrients down into the soil, where the plants can use it, without the disturbance and damage caused by digging. 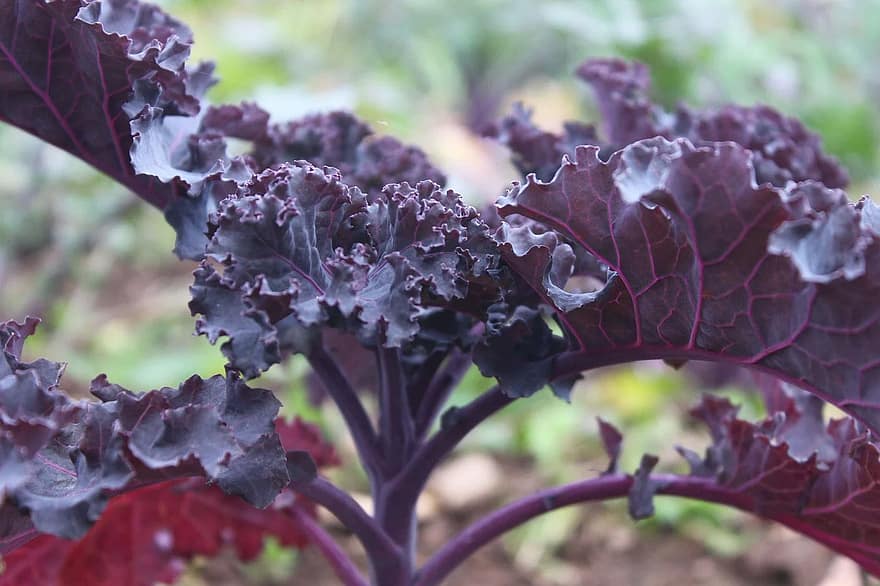 Purple kale (Pikist) Kale pests and diseases
As with all growing things in San Jose, California, aphids, cutworms, nematodes, leaf miners, leaf rollers, whiteflies, and wireworms are common pests. Random, round holes in kale leaves are a sure sign of imported cabbageworm infestation. Damage seen on the underside of leaves indicates cabbage loopers. Flea beetles, cabbage maggots, and darkling beetles may also enjoy feeding on your kale plants. Row covers can protect your plants from many of these pests. Powdery mildew, downy mildews, clubroot, black rot, bacterial blight, alternaria leafspot, fusarium yellows, phytophthora root rot, verticillium wilt, and white rust are the most common San Jose kale diseases. Most of these diseases can be avoided with proper irrigation, good drainage, and regular crop rotation practices. Harvesting kale Your kale plants can produce edible leaves for many months if you harvest leaves from the outside first. The plants will continue to produce new leaves from the center, creating an ongoing harvest. Because kale grows so well in our winter climate, the plants make lovely landscape additions into areas that would otherwise be able through the winter. Kale has a strong flavor, but it packs a powerful nutritional punch and is easy to grow in California winters. Give kale a try. You may find that the fresh, tender new leaves are just what your body has been craving! Broccoli is the flowerhead of a member of the cabbage family. As a brassica, broccoli is cousin to kale, collard greens, rutabagas, watercress, Brussels sprouts, Romanesco broccoli, and cauliflower. Native to the northern Mediterranean region, modern broccoli is the result of centuries of careful breeding that started in the 6th century BC. 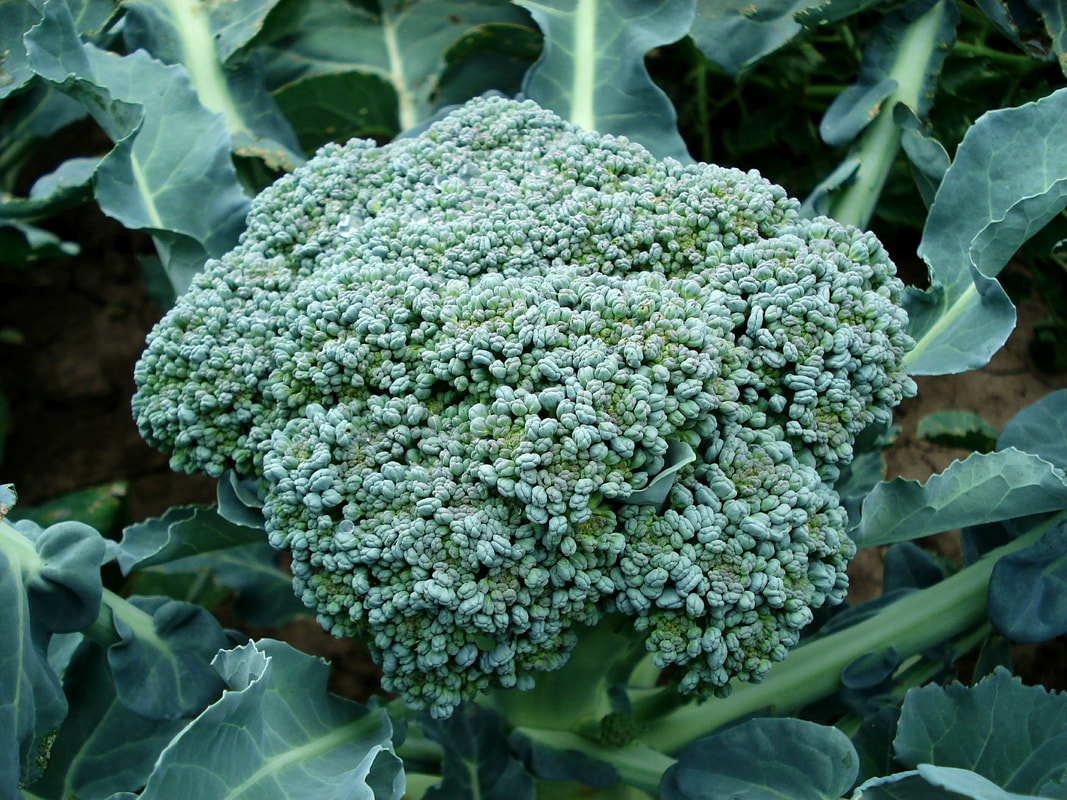 Broccoli (artverau) Pixabay Broccoli (Brassica oleracea) has been dreaded by children for decades. This is often due to overcooking and freezing. “Eat your trees!” Mothers have cajoled for generations. The truth is, broccoli contains bitter compounds and some people are more sensitive to them than others. There is no sense fighting over genetics. What you can do, for those family members on the broccoli fence, is to offer fresh, tender broccoli shoots, steam broccoli lightly, and there is always the cheddar cheese trick. [Cheese makes everything taste better, right?] How to grow broccoli Broccoli is a slow grower. It can take 3 months or more, from seed to harvest. In warmer regions, broccoli can be started from seed twice a year. For a summer harvest, plant in February, March, and April. For a late winter, early spring harvest, you can plant broccoli in August and September. Some years, you can plant as late as October. Broccoli loves cold temperatures and will bolt in hot weather. Also, heat stress can cause bitterness. Broccoli prefers full sun, but your spring crop can be grown in partial shade, to avoid heat stress, but it will benefit from strong morning sun. Broccoli prefers slightly acidic soil, so your plants will thank you if you perform a little acidification before planting. Seeds should be planted 1/2 inch deep. It is best to start plants in small containers and then transplanting when they have three or four true leaves. Plants can be placed in the ground slightly deeper than the soil level when transplanting. These plants get large, so be sure to provide plenty of growing room. They usually need a 2-foot square space, or more, per plant. Broccoli roots are shallow, so avoid digging around plants. To reduce weeds, mulch heavily. Broccoli needs a lot of water, so irrigate consistently, without getting the heads wet. Broccoli varieties There are three basic types of broccoli. The common grocery store variety is Calabrese broccoli. Sprouting broccoli has many small heads on thin stalks. Purple broccoli looks more like its cousin, cauliflower, with an occasional purple tint to flower buds. Not exactly a true broccoli, broccolini is a cross between standard broccoli and Chinese kale, or gai lan. 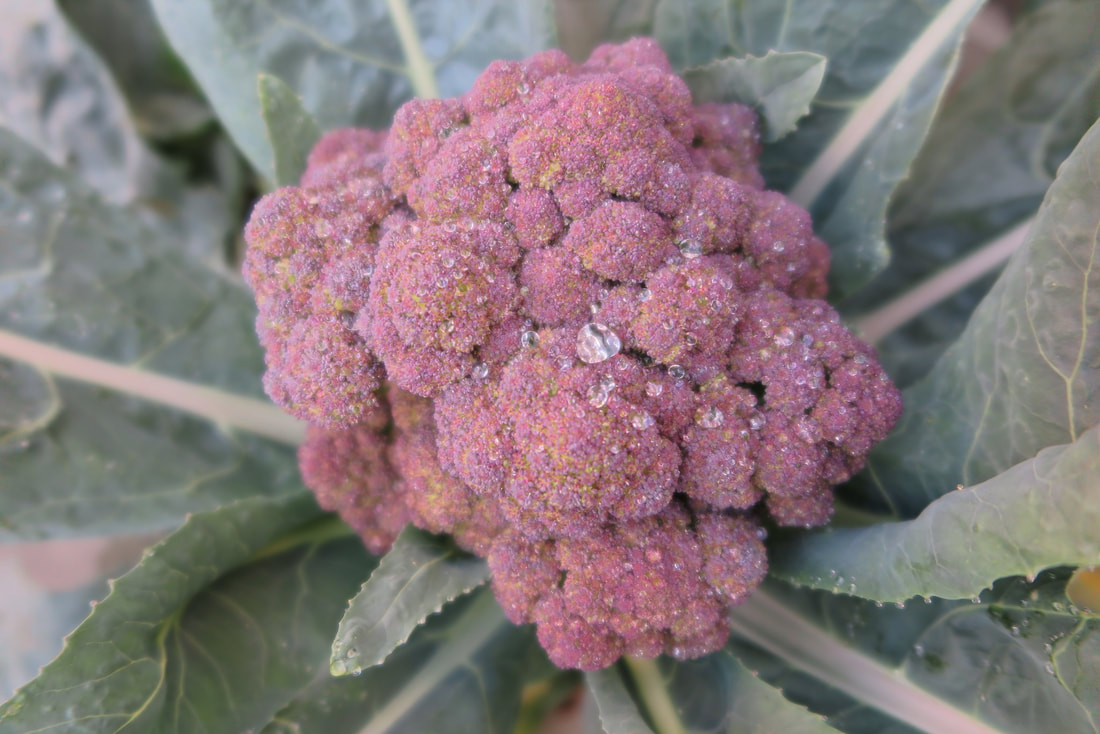 Sicilian purple broccoli (涼母 閒妻) Pixabay  Romanesco broccoli (Jon Sullivan) Public Domain Broccoli pests and diseases
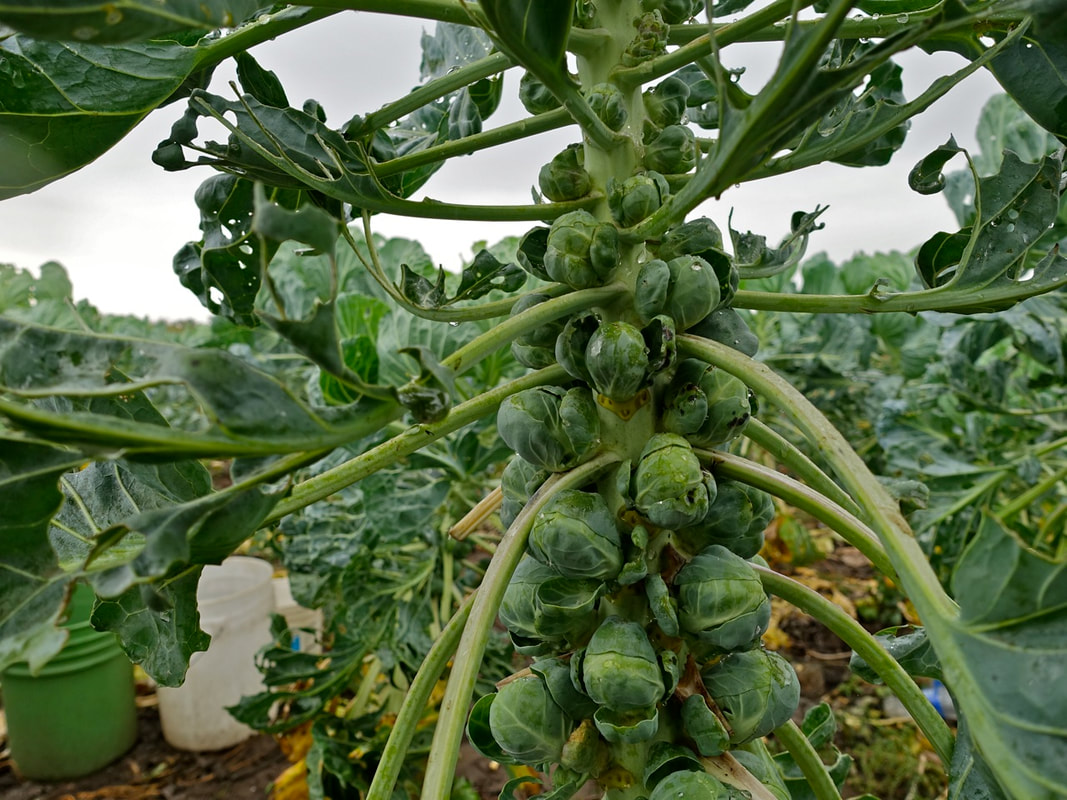
Downy mildews, bacterial leafspot, clubroot, damping off, powdery mildew, phytophthora root rot, and ringspot are common diseases of broccoli plants. Most of these are caused by poor irrigation practices. As for pests, well, we’re looking at all the usual suspects: aphids, whiteflies, bagrada bugs, crickets, earwigs, armyworms, leafminers, slugs and snails, thrips, and wireworms. You will also have to watch for cabbage loopers, cabbage maggots, cabbage aphids, and imported cabbageworms. Bacillus thuringiensis (Bt) sprays can help protect against some of theses. Imported cabbageworms will probably cause the most damage. The larva of an erratically flying white butterfly match the color of leaves and often are not seen until significant damage occurs. Row covers can protect against this particular pest. Since the moths fly, they can always come back to lay more eggs. Personally, I have trained my dogs to chase them away. Once in a while, they actually catch one! Braconid wasps will also help fight off some of these pests, so avoid using broad spectrum pesticides. Environmental conditions can also interfere with a successful broccoli crop. Early stress can cause plants to flower too soon, creating tiny heads. This is called buttoning. Too much heat can cause brown bud - it’s not pretty. Heat (and insufficient boron) can also cause hollow stem. Too much nitrogen in the soil can cause broccoli plants to produce lots of (edible) leaves, but no flowers. [Have I mentioned getting your soil tested?] Harvesting broccoli As flower heads develop, use a sharp knife to cut the stem an inch or two below the head. Delicious fresh, broccoli can be stored in the refrigerator for a short time, or frozen for longer storage. Broccoli is especially susceptible to the ripening effects of ethylene gas, so keep your broccoli away from foods such as apples and bananas. After you have harvested your broccoli, cut plants off at ground level and chop up the remainder, spreading it out over any areas in the garden prone to Verticillium wilt. There are chemicals in broccoli that harm the fungi. Young broccoli sprouts, cauliflower, and mustard greens all contain a chemical called glucoraphanin, which is converted into substances that fight infection, arthritis, and cancer. They can also ‘retune’ metabolism. So, eat your trees! And start planting! Brussels sprouts: prehistoric weapons, baby cabbages, or healthy garden addition? Many years ago, my mother showed up for a Thanksgiving dinner armed with what looked like a medieval weapon. Having never seen the unopened flower buds still attached to the stalk, it confused me, at first. If you have never seen Brussels sprouts growing on a stalk, you are in for a surprise!  Brussels sprouts (Pikist) A little history Brussels sprouts (Brassica oleracea) were first grown as far back as the 5th century throughout the Mediterranean. The Romans liked them, so they moved around quite a bit. They were widely grown in Belgium, back in the 16th century, hence the name Brussels. These plants prefer cooler, coastal weather, so they are a winter crop in California. Lucky for us, a touch of frost actually makes Brussels sprouts sweeter! In fact, California grows Brussels sprouts on several thousand acres each year. How to grow Brussels sprouts Brussels sprouts seeds can be planted in the Bay Area in July and August, and transplants can be put in place as late as September. Brussels sprouts and other cole crops love growing in raised beds, with their nice loose soil with plenty of nutrients. (It makes weeding a lot easier, too!) These plants do not perform well in poor soil. Each plant will need an area 2 to 3 feet square, so thin accordingly. Seeds should be planted 1/2 an inch deep and watered well. Keep the soil moist until germination occurs. A nice light mulch can help keep that moisture in place. If you are placing transplants, be sure to dig the planting hole large enough to accommodate the root ball plus the stem, up to the first set of true leaves. Mud them in by watering thoroughly, to eliminate any air pockets, and water every day for the first week. After that, allow the soil to dry out between waterings to prevent fungal diseases. Pests and diseases of Brussels sprouts Like other members of the cabbage family, Brussels sprouts are host to many different pests: earwigs, cutworms, flea beetles, beet armyworms, crickets, cabbage aphids and cabbage maggots, whiteflies, loopers, imported cabbageworm, harlequin bugs, nematodes, slugs and snails, thrips, wireworms, and diamondback moths are the more common pests here in California. Brussels sprouts diseases include downy mildews, powdery mildew, bacterial leafspot, bacterial soft rot, while mold, verticillium wilt, phytophthora root rot, clubroot, and ring spot (black blight). Clearly, with so many fungal diseases threatening our Brussels sprouts, moisture is a factor. Brussels sprouts should be on a 2 to 4 year crop rotation to break these disease triangles. Research shows that intercropping Brussels sprouts with fava beans has been shown to reduce pest damage significantly. Caring for Brussels sprouts As your plants grow and start to produce buds, break the lower leaves off, over a period of a few weeks, starting from the bottom of the plant. Brussels sprouts are susceptible to sunburn damage and will bolt if temperatures get too high. You can help prevent these problems by covering them with a 50% shade cloth or a double layer of row covers. You can also plant them in a location that is protected from direct sun in the hottest part of the afternoon. This isn’t much of a problem as we get into winter.
One of the most common reasons people dislike Brussels sprouts is because of the way the plants have been handled. Overcooking Brussels sprouts makes them gray, mushy, and bitter. Fresh Brussels sprouts are sweet and tender.
Try adding just one Brussels sprout plant to your garden this fall and share the rest of your seeds with family and friends! As a child, I detested cauliflower above all vegetables. It probably had a lot to do with the evening an encyclopedia salesman arrived just at dinner time. My single parent mother was bad at telling people to go away, so our already overcooked cauliflower sat on our plates, congealing, for nearly an hour. We didn’t have a microwave, so we had to eat it at room temperature. My mother’s rageful mood didn’t help our appetites.  Traditional white cauliflower (skeeze) Pixabay Since those days, I have come a long way in my view of cauliflower. Apparently, so has the rest of the world. The peppery flavor of this cruciferous treat now grace menus in every meal. Grilled slabs of cauliflower are used as burgers, pureed cauliflower provides a low-starch replacement for mashed potatoes and potato pancakes, and the list of cauliflower recipes is getting longer every day. If that weren’t reason enough to add cauliflower to your foodscape, here’s another reason: you can grow cauliflower twice a year in some regions! Cauliflower plants When we eat cauliflower, we normally assume we are eating a flower, but we’re not. That is only true if you are eating broccoli. The part of a cauliflower that we normally eat is botanically known as ‘inflorescence meristem’. This plant tissue is a cluster of undifferentiated plant cells that form a ‘curd’. You know, the stuff Little Miss Muffet ate, sitting on her tuffet. Okay, she was eating a dairy product, but the appearance is similar. How to grow cauliflower As a cool weather crop, cauliflower seeds can be started in January, February, and March, for an early summer crop, and again, in September, for a winter crop in regions with hot summers. If you are organized, you can also install cauliflower plants in August and October, but that means getting your seeds started beforehand. Cauliflower cannot survive scorching summer heat, so don’t waste your time with late maturing varieties. Seeds should be planted 1/2 inch deep in small containers and then transplanted when they look sturdy. Each plant will need an area 1-1/2 to 2 feet square to reach full size. Cauliflower (Brassica oleracea) uses a lot of water, so frequent irrigation is critical. As heads mature, protect them from sun damage by folding leaves over the flower. 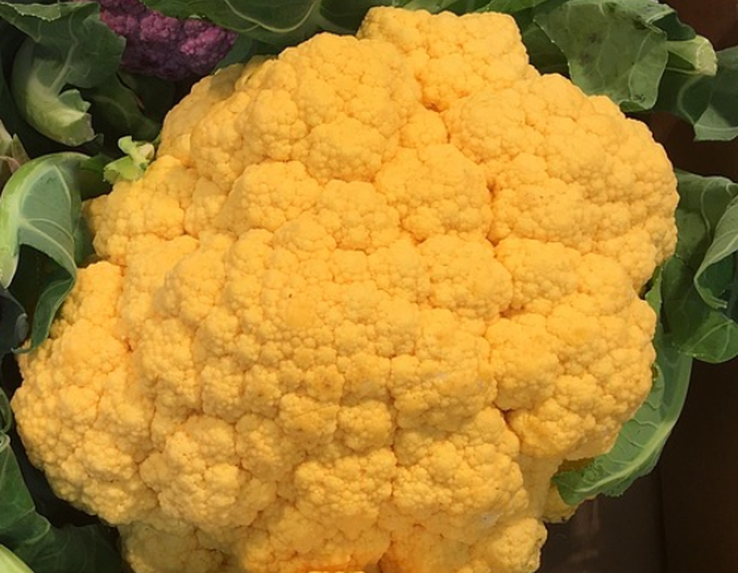 Orange ‘cheddar’ cauliflower (Pexels) Pixabay Cauliflower varieties While normally white, cauliflower varieties now come in purple, yellow, green, and orange. In my family garden, the best varieties are Snow King, Snowball, and Snow Crown. There is also a crazy, spiky looking hybrid, Romanesco, that you may want to try.  Green Romanesco cauliflower (Sputnickcccp) CC BY-SA 3.0 Cauliflower pests and diseases Cauliflower is susceptible to the same pests and diseases as other cole crops, such as broccoli and cabbage. For this reason, it is a good idea to avoid planting these crops in the same location, year after year. Crop rotation can break the cycle of many pests and diseases. This is called breaking the disease triangle. Row covers are very helpful when growing cauliflower. The most common pests of cauliflower include: Powdery mildew, verticillium wilt, phytophthora root rot, clubroot, and damping off are common cauliflower diseases. Cauliflower plants are also subject to blindness, buttoning, and whiptail. Blindness describes a plant that never grows a head. Buttoning occurs when several days of excessive cold hit, causing plants to rush to create flowers that end up being significantly smaller than normal. Cute as a button doesn’t really fly in the world of cauliflower - though individual minis might look amazing on the Thanksgiving Dinner table! And whiptail refers to the strap-like leaves that occur when there isn't enough molybdenum in the soil. Excessive salt in the soil, competition from weeds, and insufficient water or nitrogen can also cause problems. Basically, if the plant thinks it's on the verge of death, it will panic and produce tiny heads, rather than no heads at all. Harvesting cauliflower Leave your cauliflower heads to mature fully before harvesting. When it is done growing, it will be fully open. Cut the plant off at soil level and leave the below-ground portion to feed the soil, worms, and soil microbes.  Purple cauliflower Slow and steady is the name of the game when growing cauliflower. Many people say that cauliflower is not easy to grow, but I have not found that to be true. These plants need nutrient-rich soil, regular irrigation, and the protection needed to develop into substantial plants before flower production begins. I grew my first cauliflower plants in a narrow bed against my house, where I had processed my compost for a couple of years. They came up beautifully.
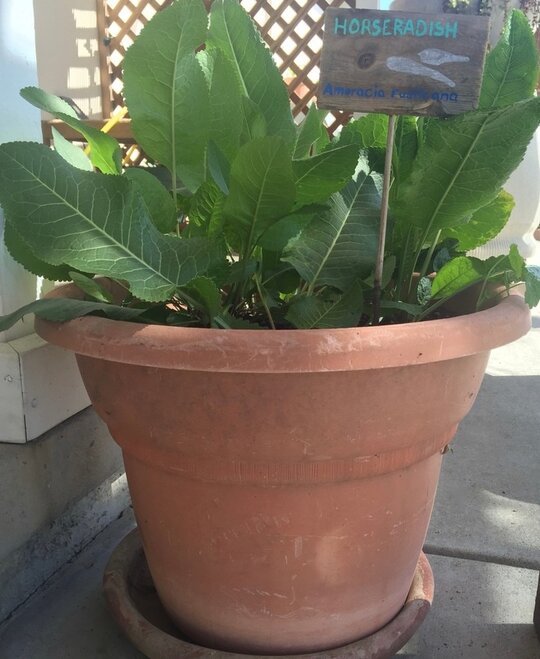
The fiery bite of horseradish adds its signature flavor to many dishes, and it also makes a nice patio plant.  Horseradish root (Anna reg) CC BY-SA 3.0 Horseradish (Armoracia rusticana) is a member of the Brassicaceae family, making it cousin to watercress, mustard, wasabi, radishes, broccoli, turnips, and cabbage. Scientists used to call these types of plants Cruciferae. The word cruciferous refers to the flowers, which have four petals, resembling a cross. Supposedly, the Oracle at Delphi told Apollo that horseradish was worth its weight in gold, so it’s been around for a really long time. Today, let’s learn how easy these plants are to grow at home. How horseradish grows The horseradish that you buy in the grocery store is usually peeled, pureed, and pickled. Grown for its root, horseradish plants can grow over 4 feet tall, but mine have never gotten bigger than a couple of feet all the way around. Horseradish needs a long growing season to get started. They also need a chilly winter to induce dormancy. We have both, here in the Bay Area. Horseradish plants spread underground and can become invasive, which is one reason why they make good container plants. As they age, roots become woody and unusable as food, but they can still be used to start new plants. The first leaves usually look distinctly different from the normal large lobed, tapered, or heart-shaped leaves, so don’t pull them out by accident! Horseradish as food Roast beef, Bloody Marys, and salmon are always made better with horseradish. You can buy ‘prepared’ horseradish, which contains grated root and vinegar, or you can buy ‘horseradish sauce’, which adds mayonnaise. Growing your own horseradish allows you to create a unique recipe of your own. But, when you first dig up your horseradish root, you may feel as though you did something wrong. The root itself has no smell. It isn’t until the root is chopped up that certain enzymes are released. These enzymes break down plant tissues, producing mustard oil. It is the mustard oil that lights up your sinuses when you take a bite. Chopped or grated horseradish turns brown and bitter when left untreated, which is why vinegar is always added as a preservative. The longer chopped horseradish sits before the addition of vinegar, the hotter it gets. Whether you grow your own horseradish or buy it already prepared, you really should try this recipe for remoulade. Your tastebuds will thank you! Horseradish leaves are edible, as well. Use them sparingly in a salad for the same fiery bite you get from the root.
Horseradish pests and diseases
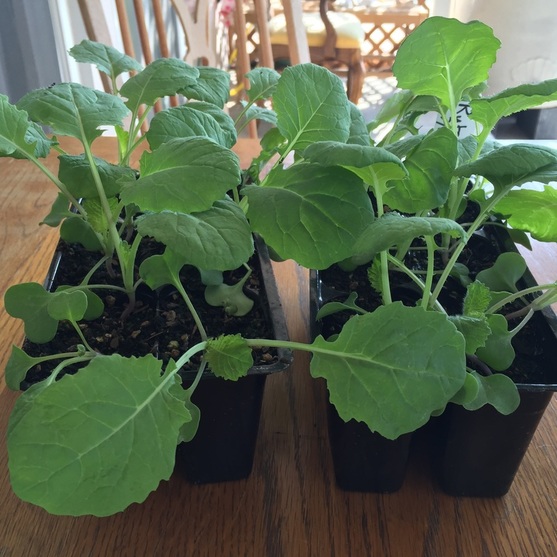
Cabbageworms, leafhoppers, and aphids may feed on your plants. Horseradish is also susceptible to viral diseases, such as beet curly top (rhabdovirus group) and turnip mosaic (potyvirus group). These diseases are spread by leafhoppers and aphids, respectively. Did you know that, when you buy wasabi, what you are probably really getting is horseradish? Wasabi plants are becoming scarce and horseradish is easy to grow. Manufacturers use the fact that these plants are closely related to mislead their customers. (Shame on them!) You can add a horseradish plant to your patio, balcony, or garden for lovely spring and summer greenery, and year round flavor! Bok choy is a type of Chinese cabbage. Rather than forming dense heads, these varieties have delicious dark green leaf blades and crisp white stalks. Cool season crop Cousin to broccoli, cabbage, and cauliflower, Bok choy (Brassica rapa) is a cool weather crop. This means it can be planted in warm weather regions in February, March, and April, and again in September and October. Your microclimate may vary. 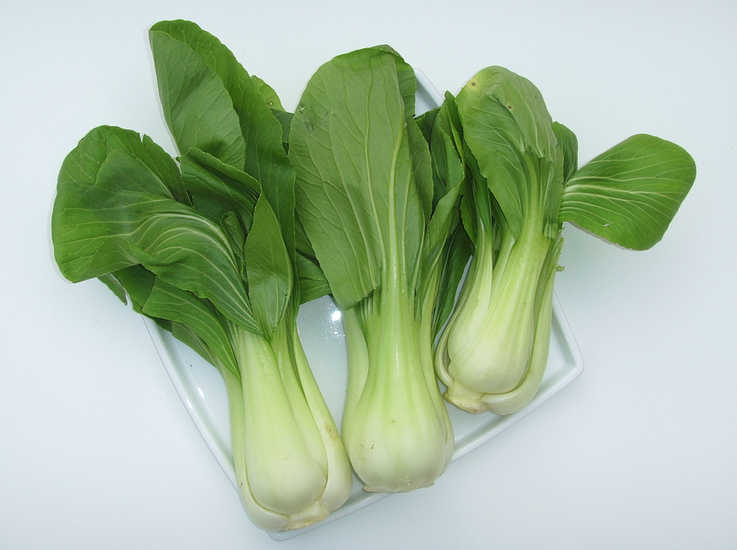 Baby bok choy (Karl-Heinz Wellmann) CC BY-SA 3.0 How to grow bok choy
Bok choy can be seeded directly in the ground, but starting the seeds in little pots, 2 to 4 weeks before it’s time to put them in the ground, seems to have a higher success rate in our area. Bok choy needs loose, rich soil. This makes it a good candidate for raised beds and containers, where you have more control over soil structure. Seeds should be planted 1/4 to 1/2 inch deep, and they should germinate in 7 to 10 days. After seedlings are 4 inches tall, they can be very gently transplanted to their garden location. Place seedlings 6 to 10 inches apart. Plants take only 45 to 50 days to reach maturity, so this is a pretty rewarding crop. Healthful bok choy Nutritionally speaking, bok choy is 95% water, but a single serving (100 g) provides more than 20% of the Daily Value of vitamins A, C, and K, and all for only 13 calories! Research has shown that eating bok choy, which contains chemicals called glucosinolates, which may reduce cancer risk. Bok choy grows quickly, requires little care, and it takes well to salads, soups, and stir-fry. Cole slaw and corned beef simply wouldn’t be the same without cabbage. Cole crops, or cruciferous vegetables, such as broccoli, cauliflower, Brussels sprouts, and the lowly cabbage were placed in the same family partly because they all have four-petaled flowers that look like a cross (Cruciferae is Latin for “cross bearing”). Luckily for us, there is no cross to bear when it comes to growing cabbages!  Cabbage are sweetened by mild frost These densely headed members of the Brassica family are biennials grown as annuals. If you grow cabbage for seed, you will want to make sure there is some distance between your cabbage plants and other members of the Brassica family because cross-pollination can occur. Seriously. In fact, that’s how rutabagas came to be - cabbages crossed with turnips. Hmm, how about tiny cauliflowers that grow on a stalk, like Brussels sprouts - we could be on to something!
How cabbage grows In the wild, as temperatures reach 80°F, two-year old cabbage heads send up a flowering stalk, the same way lettuce and spinach do, in a process called bolting. Tiny helicoptered seeds catch rides on every breeze, spinning their way to new homes. Over the next year, a taproot will go down and a head will form, preparing to repeat the cycle. How to grow cabbage Cabbage seeds should be planted 1/2 inch deep, with plenty of space around each plant. Cabbage plants can reach 2 feet in diameter. The more space they are given, the faster they will mature and the less likely they are to being attacked by pests or disease. Cabbage plants prefer sunny locations with good drainage, but they can tolerate partial shade. Cabbage grows best when given occasional deep waterings, rather than frequent shallow irrigation. Also, you can prevent many diseases by avoiding overhead watering. Cabbage is a heavy feeder, so you may want to work some aged compost into the soil before planting. In spite of having a taproot, cabbages can be grown in containers that are at least 8 inches deep. Rather than have all your cabbages reach harvestable size on the same day, it’s a good idea to plant seeds in succession. Cabbage pests & diseases There are plenty of pests and diseases that attack cabbage. The nice thing is, cabbage grows a set of outer leaves that frame a tightly packed head. Most cabbage pests never reach the inside of the head. That being said, it’s a good idea to know what you’re up against. Cabbageworms are common cabbage pests. These small white imported butterflies have black dots on their wings and they are relentless. Eggs are laid on the underside of leaves. Larvae emerge and start feeding like crazy. You can hand pick the caterpillars and I have taught my dogs to chase these pests away. Row covers can also protect your plants from cabbageworms. Cutworms, aphids, armyworms, cabbage maggots, darkling beetles, earwigs, flea beetles, wireworms, whiteflies, leaf miners, nematodes, and the ever-popular slugs and snails will appreciate finding cabbage in your landscape, but good cultural care and regular monitoring can minimize the damage. Cabbage is prone to several diseases, including clubroot, damping off, downy mildews, black rot, yellow virus, Verticillium wilt, Phytophtora root rot, and bacterial leafspot. Don't let all those threats deter you from trying your hand at growing cabbage. If you buy cabbage in the store, chances are 30 to 1 that it was grown in China. This is unfortunate, because cabbage is easy to grow, it looks nice in a landscape, and all that shipping traffic can’t be good for the environment. Grab a pack of seeds, or a couple of seedlings from your local garden store, and give cabbage a try. Peasants and Senators have been growing cabbage for nearly 3,000 years. You can do it, too! Rutabagas look funny, their name sounds funny, and, let’s face it, they have a rather odd family history. Imagine deciding to cross a cabbage with a turnip. What would you get? A rutabaga! The name comes from the Swedish words for stumpy root and it was first noted as growing wild in the early 1600s. Rutabagas are also known as swedes, yellow turnips, and Russian, Canadian, and Swedish turnips. The scientific name, Brassica napobrassica, tells us that it is a member of the cabbage family, which includes broccoli.
Rutabaga description
Rutabagas are biennial plants, which means they take two years to go through their complete lifecycle. The first year is dedicated to vegetative growth and the second year is used for seed production. The root we eat is actually made up of the base of the leafy stem (think cabbage) and the hypocotyls, which is part that grows between the true root and the first seedling leaves (cotyledons). You can tell the difference between a turnip and a rutabaga by the ribbed neck seen on rutabagas. Rutabaga flowers are small and pale yellow. How to grow rutabagas Rutabagas grow and ripen best in cool weather, making August and September the best time to start seeds. Rutabaga seeds should be planted 1/2” deep in rich soil. They transplant well, so starting them in small containers is a good way to give them a head start. Seedlings should be placed 12-18” apart. Rutabagas grow a little larger than turnips and need a few extra weeks to reach maturity. They are normally ready to harvest within 80-100 days. Rutabagas can grow pretty much anywhere, but their flavor and texture improve significantly when they are grown in soil treated with compost and watered regularly. Insufficient watering can cause a woody texture and splitting can occur with irregular watering. Soaker hoses are an excellent idea for rutabagas. Rutabagas prefer a pH of 5.5 to 7.0 and a rock-free environment. Like other brassicas, rutabagas should not be grown in the same spot for more than 2 years at a time. Rutabaga pests and diseases Rutabagas actually provide good weed suppression with their thick, broad, blue-ish colored leaves. Rutabaga leaves are frequently eaten by cutworms, caterpillars, root maggots, wireworms, flea beetles, aphids, and slugs, but I've never noticed any damage to the roots themselves. Using row covers while the plants are small can protect them from many of these pests as long as the covers are in place before the pests arrive. Planting mint, garlic, nasturtium, fennel, or marigold nearby can either repel or act as a trap crop. Clubroot is a fungal disease found in poorly drained, acidic soils. This fungus can remain viable in the soil for up to 20 years, so keep your rutabagas away from any areas that have ever been infected. How to harvest and store rutabagas One of the reasons rutabagas are an important fallback food in times of starvation is that they store well. Rutabagas should be harvested when they are about the size of a grapefruit. When rutabagas are small, they are more tender. As they mature, they become sweeter. To harvest rutabagas, simply pull or dig them from the ground. You can leave them in the ground for longer periods of time by trimming the leaves and heavily mulching the area with straw. Harvested rutabagas can be stored for months by trimming all but the top inch or two of greenery and storing in a cool, moist location, as close to 32-degrees F as possible, without freezing. Commercially, rutabagas are dipped in paraffin wax to prolong storage. Rutabagas as food Rutabagas are grown for the their roots and leaves. The roots are a starchy equivalent to potatoes in soups, stews, and casseroles. In Scotland, potatoes and rutabagas are boiled and mashed separately to create ‘tatties and neeps’ - now’s there’s a fun menu item! An interesting note, thanks to genetic research: some people find rutabagas, as well as watercress, horseradish, and broccoli, extremely bitter-tasting, compared to the rest of us. This is due to a specific gene that affects the bitter taste receptor. So, if someone says they really can’t eat members of this group, they may be telling you the truth! In our family, we have discovered that roasted rutabagas are surprisingly delicious! A serving of rutabaga roots contain 42% of the RDA for vitamin C. The tender new greens can also be eaten, just be sure to only remove a few leaves per plant. They can add a zesty bite to salads. Radishes are probably the easiest and fastest garden vegetable to grow. The most common variety of radish goes from seed to harvest in only 3 - 4 weeks!
Radishes germinate quickly, usually within 3 - 7 days, under ideal conditions. Radishes prefer a soil pH of 6.5 - 7.0 and loose soil. Keeping the soil moist will speed germination and initial growth, but too much water can cause root rot. For smaller taproots, seeds should be planted 1 cm deep, while larger radishes require a planting depth of 4 cm. Plants should be thinned to 4 - 8 inches apart, in rows 8 - 12 inches wide. To maintain a constant supply of radishes, you can plant new seeds every few days. This is called succession planting.
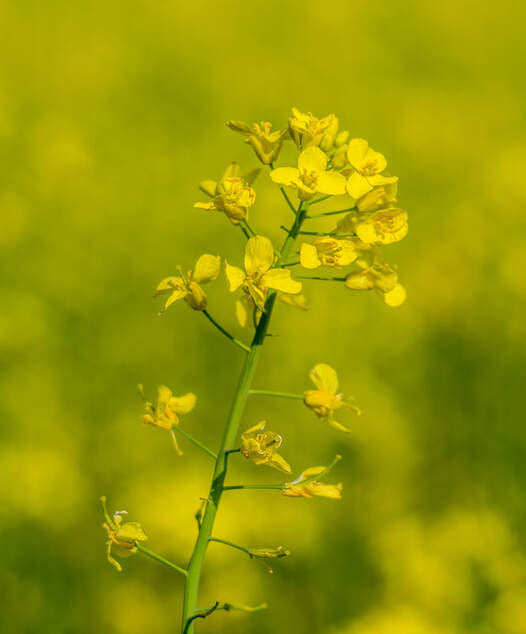
Radishes can be harvested when the taproot has reached a desired size or the plant can be allowed to go to seed for its edible seed pods, called siliquae. In each case, timeliness determines taste and texture. Roots and seed pods that are too old will be tough and bitter. Radishes can also be grown as a cover crop to add nutrients and prevent erosion, or as a forage crop, to feed livestock. Radish pests Because radishes grow so quickly, there are very few pests or diseases to worry about. Flea beetles may chew holes in young leaves, the swede midge (Contarinia nasturtii) may damage foliage or growing tips, and the cabbage root fly larvae may infest the taproot. In each case, good sanitation and keeping the plants healthy are the best defense. Radishes and other cole crops should not be planted in the same location more than once every 3 - 4 years to prevent the spread of disease. Regular crop rotation often breaks up the factors that make up what is called the Disease Triangle. Radishes as companion plants Radishes are often planted along with corn, squash and cucumber, which provide welcome shade. Radishes are said to repel cucumber beetles, squash bugs and squash vine borers, but I don't know if that is true. If nothing else, planting radishes makes efficient use of the soil around these larger plants. Some sources claim that radishes repel tomato hornworms, ants, and aphids, but I could find no scientific research to verify these claims. Condiment or cover crop, mustard’s sunny yellow flowers, tasty seeds, and deep tap roots make it a useful plant worth learning about.  Mustard field in Spain A member of the Brassica family, mustard is a popular hot dog condiment and a cheery yellow weed that grows in even the driest areas. Before ripping out any stray mustard plants in your garden, consider these benefits:
As mustard nears the end of its life cycle, you can feed the soil or feed yourself. By mowing the plants before they go to seed, nutrients are added to the soil. If the plants are allowed to go to seed, the seeds can be collected and used in cooking or to make your own prepared mustard. The condiment is made by combining crushed seeds with vinegar and water. The leaves (greens) are also edible and oil can be extracted from the seeds. Mustard is related to radishes and turnips. People have been growing it for nearly 4,000 years. There are three basic types of mustard: white (Sinapis hurta), black (Brassica nigra), and oriental (Brassica juncea). White mustard is most commonly used as a cover crop. |
Welcome!You can grow a surprising amount of food in your own yard. Ask me how! To help The Daily Garden grow, you may see affiliate ads sprouting up in various places.
You can also get my book, Stop Wasting Your Yard!  Index
All
Archives
July 2024
|


 RSS Feed