|
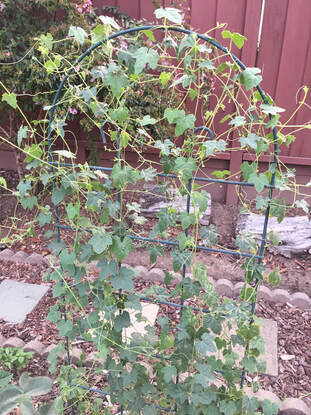
We are not talking about the okra found in your gumbo. Chinese okra is a member of the squash and melon family. Native to South Asia, this fruit is used as a vegetable while young and as a scrubbing sponge when mature. These fruits can grow 18” long and look impressive when interspersed with red noodle bean plants!
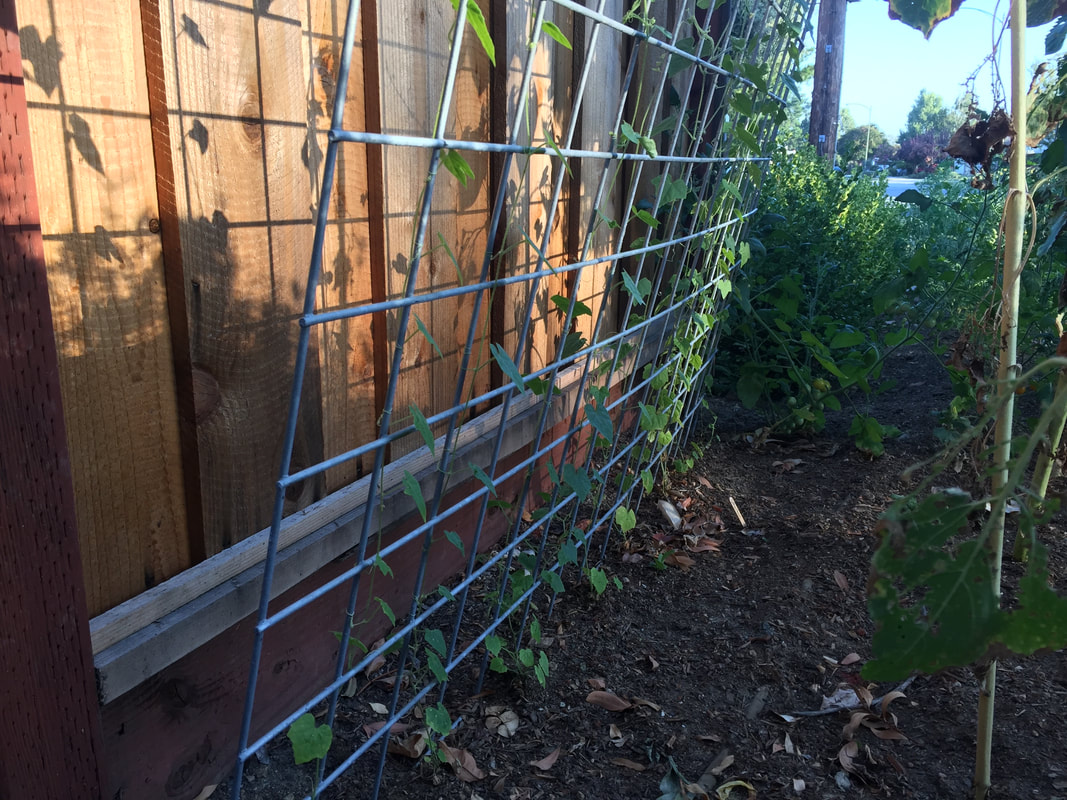
Chinese okra description Chinese okra (Luffa acutangula) looks like a cucumber crossed with a zucchini with longitudinal ridges. Flowers are a sunny yellow and beautifully fragrant, especially in the evening. Vines are sturdy and may climb up to 12 feet, making these plants an excellent choice for a pergola, fence, or trellis.
The broad leaves look like other cucurbits. Extrafloral nectaries are commonly found and provide a haven for beneficial insects. The slightly bitter fruit and flowers are edible, and the skin is tough.  Extrafloral nectaries and ants (Brnfvr) CC BY-SA 4.0 How to grow Chinese okra
These plants can be grown in temperatures ranging from 68°F to 106°F. They need lots of sunlight but may benefit from protection from harsh afternoon sunlight that may cause sunburn. The seeds are large and easy to work with. Many people soak seeds overnight before planting. Plant seeds one-half inch deep, next to something the seedlings can climb, in soil with good drainage. Water deeply each week, allowing the soil to dry out between waterings. Chinese okra pests and diseases If it gets too cold, the leaves will darken, and water-soaked necrosis and wilting may occur. Leaf beetles and leaf miners are common pests of Chinese okra. Yellow spot may also occur. Harvest fruits while young and enjoy the way they soak up sauces. And if your Chinese okra gets too old, you can always let it dry and enjoy a luffa in your bath! Yellow crookneck squash offers a sweet, buttery harvest and they are easy to grow 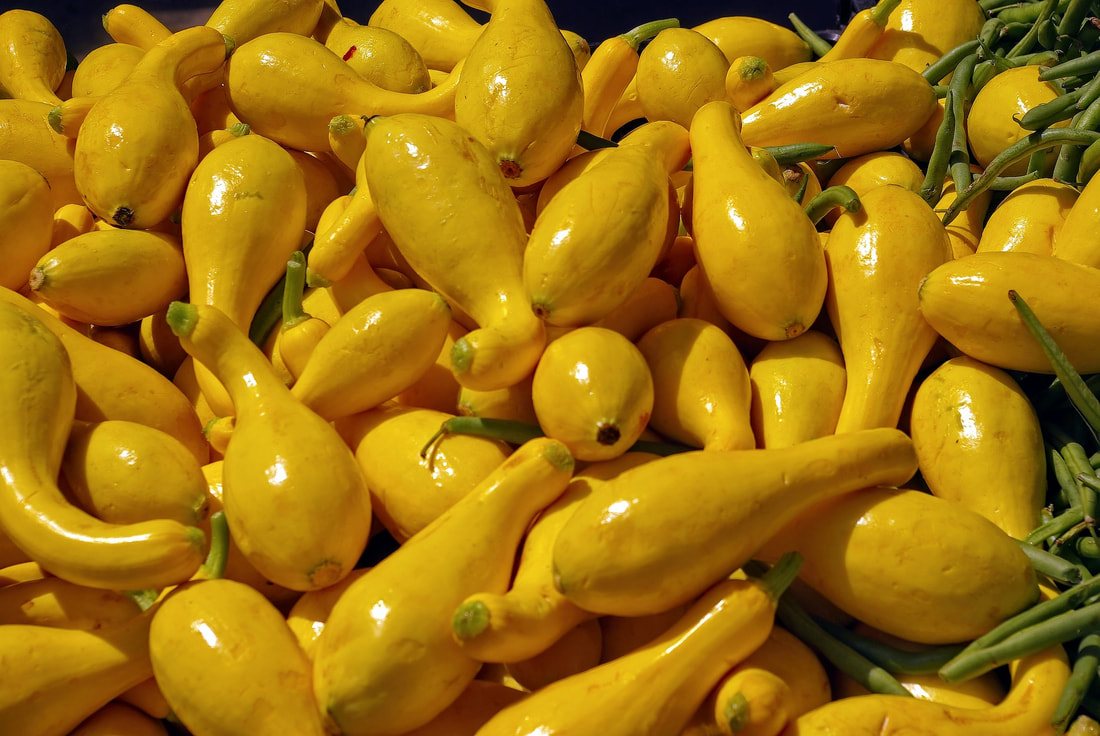 Yellow crookneck squash (Mike Goad) Pixabay Yellow crookneck is an annual summer squash, close cousin to zucchini, straightneck, and scallop squash. Yellow crookneck squash plants Yellow crookneck squash plants have very large leaves with bristles on the underside. The stems are tubular and also have bristles. Each plant may take up 3 to 4 square feet. The fruit is bright yellow (making it easy to find, come harvest time) with thin skin that may be smooth or bumpy and a hook at the stem end. Yellow squashes without the hook are called straightneck. 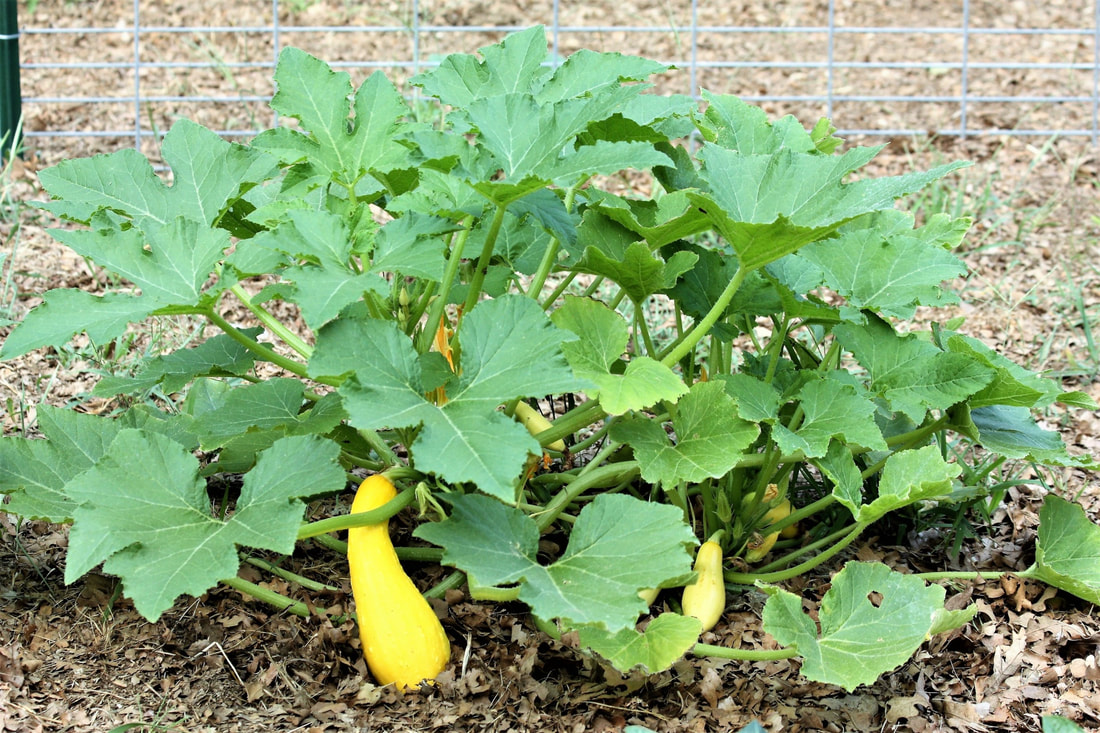 Crookneck yellow squash plant (Sheila Brown) needpix.com Unlike squashes and melons that spread vines around above ground, yellow crookneck squash are bushes that do their spreading in the soil. They have taproots, which may go down 30”, but the overall root systems are shallow and may spread out 2 to 4 feet in all directions. Squash plants produce both male and female flowers. The males flowers emerge first. Scientists believe this is to attract pollinators. Squash is not self-pollinating, so you will want bees, wasps, and other pollinators to come visit. You can boost those odds by planting shallow, bright white, yellow, or blue flowers, such as borage, lavender, nasturtiums, pot marigold, salvia, sweet alyssum, or zinnias nearby. 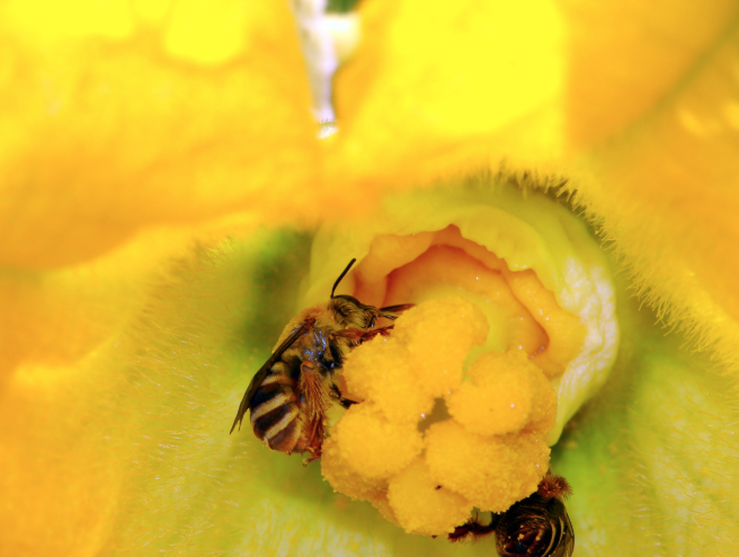 Squash bees pollinating female summer squash flower (USDA) Public Domain  Male summer squash flower (USDA) Public Domain How to grow yellow crookneck squash
Like other cucurbits, yellow crookneck squash prefers a sunny location with loose, well-drained soil and a soil pH of 5.8 to 6.8. If you are like me, the only one of those available in abundance is summer sunlight. Over time, you can acidify alkaline soil and improve soil structure with a mulch of arborist chips, but these things take time. If you’d rather not wait that long, raised beds or large containers are good options. Once temperatures stay at or above 60°F, seeds can be planted 2” deep and 3 to 4 feet apart, if planting in rows. Another option is to create hills that are 6” to 12” tall and 20” across. In each hill, plant 4 or 5 seeds, spread 3” apart, and keep only the best seedling for each hill, snipping off the others at soil level. In arid regions, you can use inverted hills, or shallow areas. This makes watering easier, but it may increase problems with pests and fungal disease. Fruit production should start 60 days after planting. If your plants are not producing, use a moisture meter to make sure they are getting enough water. Those big leaves may droop in the afternoon, but if they haven’t perked up by morning, they need more water. You can protect fruits from pests and disease by placing straw around the plant. This keeps fruit off the ground, preventing a case of measles, and it helps stabilize soil temperatures. Squash plants are heavy feeders. You can help them stay healthy and productive by top dressing around plants with aged compost or fish emulsion. Avoid applying extra nitrogen. Nitrogen stimulates leaf growth, not fruit. Harvesting yellow crookneck squash Fruits are produced near the base of the plant and should be harvested when they are 4” to 7” long and 2” in diameter. Like other summer squashes, yellow crookneck squash will get tough is allowed to grow too large. Harvesting frequently also spurs the plant to produce more fruit. Just be sure to cut fruit from the plant with a clean knife. Do not twist fruit off as this can damage the plant, making it easier for pests and diseases to get inside. While male squash flowers are edible, they are commonly battered and deep-fried, harvesting the flowers can significantly reduce your crop. If you keep harvesting, these plants will keep producing. Squash can be cubed or spiralized, blanched, and frozen for later use, or used in chutney and relishes. Because squash is a low-acid food, it cannot be safely canned on its own. Even using a pressure canner to preserve summer squash is no longer considered adequate. Yellow crookneck squash pests and diseases If you see a small hole in the stem of your squash plant, slit the stem open further to see if the problem is squash vine borers. Borers can be removed by hand and then the stem laid on the ground and covered with soil. If you’re lucky, new roots will develop at the cut. Other pests include armyworms, cabbage loopers, crickets and grasshoppers, cucumber beetles, cutworms, darkling beetles, dried fruit beetles, earwigs, false chinch bugs, flea beetles, green peach aphids, leafhoppers, leaf miners, melon aphids, seed corn maggots, spider mites, squash bugs, stink bugs, thrips, whiteflies, and wireworms. If you live in the southeastern U.S., melonworm moths and pickleworms may also be a problem. Irregular irrigation can reduce fruit production and lead to blossom end rot. Fungal diseases, such as anthracnose, charcoal rot, damping-off, downy mildews, Fusarium crown and foot rot, Fusarium wilt, Phytophthora fruit and crown rot, powdery mildew, sudden wilt, and Verticillium wilt. Bacterial diseases of summer squash include angular leafspot, bacterial leaf blotch, and bacterial wilt. Squash plants are also susceptible to viral diseases, such as cucumber mosaic, cucurbit aphid-borne yellows, cucurbit yellow stunting disorder, curly top, potyviruses, and squash mosaic virus. Most of these diseases can be prevented by installing clean, disease-free seed, selecting resistant varieties, spacing plants for good airflow, and by avoiding overhead watering. If you keep leaves dry and do not handle plants while they are wet, the spread of pathogens is significantly reduced. Diseased plants should be removed and discarded. Despite all those threats, yellow crookneck squash plants are impressive and productive. You probably only need two of these plants to keep your family supplied. If all that weren’t enough, molybdenum deficiencies can cause a condition known as yellows. Yellows eliminates squash fruit set and generally kills the plant. [What does your soil test say about molybdenum in your garden?] As the growing season nears its end, leave one fruit to complete its life life cycle. You won’t want to eat it, but the seeds can be used for next year’s crop. And your chickens will be happy to take care of the scraps. Just be sure to keep different types of summer squashes away from each other. Cross-pollination doesn’t always result in desirable offspring. Grow burr gherkins for your own tiny pickles!  Burr gherkin plant (Eugenio Hansen, OFS) CC BY-SA 3.0 Burr gherkins (Cucumis anguria) are an African cousin to the common cucumber (C. sativus). Burr gherkin description Smaller than cucumbers, burr gherkins go by several other names: cackrey, West Indian gherkin, and West Indian gourd. Whatever you call them, these heat-loving plants produce vines that can reach 9’ in length. The fruits are oblong and usually less than 2” long. They get the name burr because fruits are covered with tiny spines or warts.
While the vines and flowers of burr gherkins look a lot like cucamelons (Melothria scabra), the two are only distantly related and the fruits are very different.
These are also not the longer French gherkins, which are pickled in vinegar and tarragon and called cornichons. How to grow burr gherkins As a cucurbit, burr gherkins prefer warm temperatures, loose soil, and something to climb. Burr gherkins can also be allowed to sprawl across the ground, though a bed of straw will help reduce pest and disease damage. Six to eight seeds are planted in 12” hills with 18-24” spaces between hills. Once seedlings emerge, snip off all but the best three in each hill at soil level. Water as needed, allowing the soil to dry out between waterings. Burr gherkin pests and diseases Burr gherkins are particularly susceptible to aphids and cucumber beetles. Fungal diseases, such as damping-off, downy mildews, powdery mildew and verticillium wilt are also possible, as are viral diseases, such as mosaics and various yellows. Row covers can be used to protect against some insects, just make sure you don’t trap any pests under the cloth.  Inside burr gherkin fruit (Filo gèn') CC BY-SA 4.0 Preserving burr gherkins
These are very productive plants, but you will want to harvest fruits while they are young. This keeps the plant producing fruit, plus mature fruits are tough. Fruits should start appearing 60-65 days after planting. While burr gherkins can certainly be eaten raw or cooked like zucchini, they are most commonly brined or pickled. Because of their unusual fruit, burr gherkins are a great addition to children’s gardens. And, just so you know, most of the pickles sold in markets today as “gherkins” are actually just baby cucumbers, not gherkins. Now you know. Chayote is an edible gourd. These lumpy, green cousins to squash and pumpkins grow on perennial vines.  Chayote growing on vines (Bùi Thụy Đào Nguyên) CC BY-SA 3.0 Also known as Buddha’s palm, chocho, mirliton, or sayote, chayote (Sechium edule) is a relatively bland, highly productive plant. While chayote has been cultivated in Mexico and Central America since pre-Columbian times, archeologists have not been able to find any evidence of its existence back in those times. Apparently, chayote was not a food that lent itself to preservation. Chayote fruit, roots, tubers, seeds, young leaves and stems are all edible. That being said, many people find raw chayote to be rather tough. In cooking, chayote is handled much like summer squashes, such as zucchini. Cooked chayote sprouts are very popular in many Asian dishes.  Chayote root (Public Domain) Chayote description Chayote plants have thick roots and slender vining stems. Those vines can reach 30 feet in length. Fruits are oval and green, similar to pears, with deep wrinkles or ridges. When you slice a chayote open, you will find a large, flattened pit, similar to a mango seed.  Halved chayote showing seed. Ruler has 1cm/1mm markings. (J. Stolfi) CC BY-SA 3.0 Leaves are heart-shaped with three tips, and petioles (leaf stems) are grooved (sulcate) and 3” to 6” long. Tendrils occur along the stems. There are both male and female chayote flowers. Male flowers occur in clusters, while female chayote flowers are solitary. .jpg) Chayote leaf (Neil Palmer) CC BY-SA 2.0 How to grow chayote
You can start growing chayote with seeds or a chayote fruit. If using a fruit, allow it to sprout first, then lay it on its side and cover it with soil, leaving the sprout exposed. Personally, I like to get chayote seedlings from my local Master Gardeners’ fall plant sale. Chayote is known as a short day plant. This means that flowering is not triggered until each day has less than 12 hours of daylight. In San Jose, California, that means chayote can be planted April through October. These are sprawling plants that need a significant amount of room to grow, unless you train them up a trellis. Tendrils will grab hold of fencing, trees, a pergola, or cattle panels, lifting the fruit up off the ground. Similar to hops, chayote vines will grow as far upwards as they can, reaching 30’ to 36’ when a supporting wire or structure is available. While the vines can get quite long, your harvest will be better if vines are pruned back to a more manageable length. Plants should be spaced 7 to 11 feet apart. Chayote can grow in full sun or partial shade. Fruits exposed to full sun will tend to be a light yellow color, while shaded fruits are a darker green. Before feeding your chayote plants, get a soil test to see what is already available. Chayote plants do not need a lot of nitrogen. In fact, too much nitrogen can cause flower drop (abscission). After flowers have been pollinated, fruit will reach harvestable size in 1 - 2 months. Harvestable fruits are 4" to 6” in diameter. Chayote pests and diseases While these plants grow best in the rainy season, they do like soggy soil. Chayote needs good drainage to stay healthy. To offset the risk of root rot, plants are often installed in mounds or raised hills. Being a member of the cucurbit family, chayote is subject to many of the same pests and diseases. Chayote diseases include downy mildews and certain tropical fungal diseases, most of which are not yet seen in North America. Nematodes can be troublesome, as can chayote stem borers (Adetus fuscoapicalis), cucumber beetles, squash ladybugs, and squash vine borers. While chayote is a perennial vine that can remain productive for up to 8 years, many pest and disease problems can be reduced or eliminated by replacing individual plants every 3 years. Give these lovely vines a try in your garden this fall and let us know what it was like in the Comments! Cantaloupes are a unique type of muskmelon. And American cantaloupes aren’t actually cantaloupes at all. Did you know that melons are actually berries?  Cantaloupes growing on the vine (photosforyou) Pixabay It’s true! Because the fruit, or pericarp, of a cantaloupe is produced by a single ovary, cantaloupes are considered berries. Specifically melons are modified berries called pepos. Pepos are formed from an inferior (meaning internal, not less than) ovary and they feature many seeds. Pumpkins and cucumbers are also pepos. Also known as rockmelons, cantaloupes are members of the squash family. Like other cucurbits (Cucurbitaceae), cantaloupes feature a hard outer rind that protects the lush fruit inside. Types of cantaloupe Here, in the U.S., our cantaloupes have a strongly textured, or ribbed, rind and bright orange flesh. This North American variety (Cucumis melo var. reticulatus) is not technically a true cantaloupe. In Europe, where true cantaloupes are grown, you will find melons with green or orange flesh and less pronounced ribbing. The European variety is called C. melo var. cantalupensis. Whichever type of melon you decide to grow, you are sure to enjoy the fruits of this labor!
How cantaloupes grow
Cantaloupes are vining annuals that love heat. Temperatures between 85°F and 95°F are ideal, and these plants can tolerate temperatures as high as 104°F. Cantaloupe’s bisexual flowers are mostly pollinated by bees, so a healthy bee population is important for a good melon crop. Whereas a single bee visit is enough to pollinate other crops, cantaloupes are fickle and may need 10 to 15 bee visits before pollination is completed. Cantaloupes can be grown successfully in all types of soil and they even seem to thrive in our heavy clay, as long as there is good drainage. Cantaloupes are sensitive to root rot diseases, so proper soil aeration goes a long way toward keeping cantaloupe plants healthy. To grow your own cantaloupes, wait until temperatures are well above 60°F and plant single seeds 3” to 6” deep in loose mounds. Mounds should be 3 feet apart and in full sun. Keep the mound moist, but not soggy, until germination occurs. Cantaloupes are moderate feeders, which means a top dressing of aged compost after germination is probably all that is needed. [Of course, you should still conduct a soil test to make sure your plants have access to all the nutrients they need.] Cantaloupe pests and diseases Aphids, green peach aphids, in particular, cucumber beetles, cutworms, leafhoppers, leaf miners, root knot nematodes, seed-corn maggots, silverleaf whiteflies, spider mites, squash bugs, and wireworms may all pester your melons, but many of these pests can be thwarted by row covers and regular monitoring. The real threat to your melon crop is disease. Cantaloupes are prone to several fungal diseases, including belly rot, downy mildews, Fusarium wilt, Monosporascus root rot, powdery mildew, sudden wilt, and Verticillium wilt. Aphid-borne viral diseases, such as cucumber mosaic virus, cucurbit yellows stunt disorder, watermelon mosaic virus, and zucchini yellows mosaic virus may also occur, as can bacterial angular leafspot. Proper plant spacing and the use of a trellis can interrupt many of these diseases cycles by improving air flow. Fruits grown up a trellis will need to be supported with hammocks. Melons growing on the ground should be protected with a layer of straw or sawdust, a board, or some other material that gets them up off the soil. Choosing resistant varieties, removing weeds, maintaining good air flow, and avoiding overhead watering will all help keep your melon vines healthy. That being said, weeds can be a serious problem in cantaloupe beds as hideouts for pests and diseases. Stay on top of those water and nutrient thieves from the start to ensure a healthy crop of melons later in the summer. And watch your watering. Heavy rain (or over-watering) can cause fruit split. Harvesting cantaloupes Cantaloupes are ready for harvest when a thin crack can be seen encircling the stem end and the fruit comes away from the vine easily. This is called the “full slip” stage. Cantaloupes should be eaten as soon as possible after being harvested, as they tend to lose moisture more quickly than many other members of this family. If you end up with a bumper crop of melons, your best method of preservation is to try your hand at canning some preserves. Cantaloupe pairs nicely with peaches and nectarines. And be sure to save seeds for next year's crop! The majority of the world’s cantaloupe crop is grown in China and shipped around the world. Believe me when I tell you that harvesting a fresh melon from your yard is a very satisfying and delicious experience. And halved cantaloupes make lovely ice cream bowls... Cucamelons may look like tiny watermelons, but they taste more like sour cucumbers. Also known as Mexican sour gherkin cucumbers, mouse melons, and pepquinos, cucamelons (Melothria scabra) are cucurbits, which make them cousin to squash, melons, and gourds. 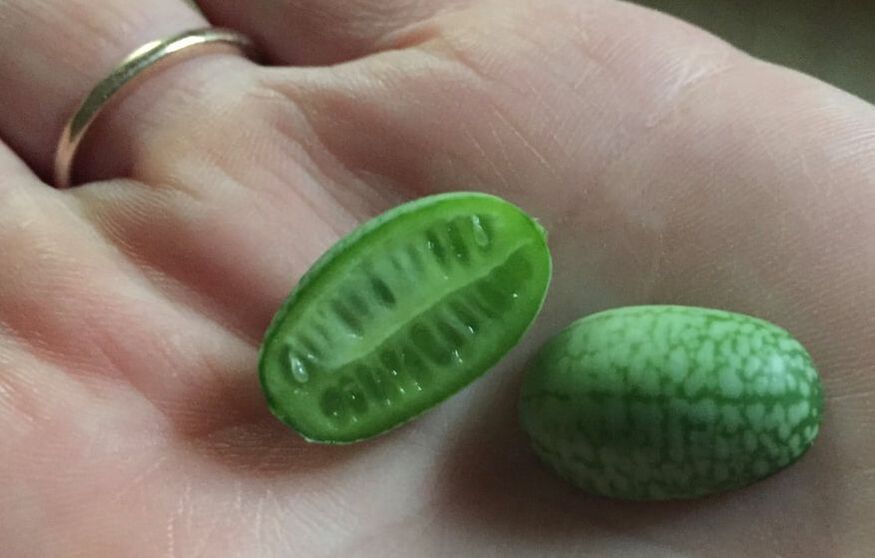 Cucamelon The cucamelon plant Cucamelons grow on vines that climb nearby supports using tendrils. These plants produce both male and female flowers, making them monoecious. This means the plants can pollinate themselves, but the individual flowers are not self-pollinating. Native to Central America and Mexico, cucamelons need warm to hot temperatures to get started. Once established, your cucamelon plants will continue to produce fruit well into November. How to grow cucamelons Seeds should be planted 1 inch deep and 6 to 10 inches apart. Cucamelons are more drought tolerant and more rugged than other cucumbers, but they are slow growers, at first. Since cucumbers perform best in rich soil with a pH of 5.5 to 6.5, your cucamelons will probably benefit from moderate acidification, and top dressing the planting area with aged compost is always a good idea.
It is difficult, at first, to put your mind’s expectation of a watermelon flavor aside, when biting into a cucamelon. And this leads to disappointment, because cucamelons don’t taste anything like watermelon.
The actual flavor is more akin to a tangy cucumber crossed with a fava bean. If you expect watermelon, you probably won’t like it. If, instead, you can bite into these grape-sized fruits with an open mind, you may end up with a new garden favorite! What summer picnic would be complete without watermelon? Sweet, refreshing, and adaptable, watermelon is another easy-to-grow addition to your foodscape. Botanically, watermelon is a type of berry called a pepo. It is also a gourd. As a member of the cucurbit family, watermelons are cousin to cucumbers, squash, pumpkins, and other melons.  Baby watermelon (Fred Hsu) CC BY-SA 3.0 History of watermelon Watermelons were cultivated 5,000 years ago, in Ancient Egypt. Watermelon seeds were even found in King Tut’s tomb! Watermelon ancestors were not the bright red, sweet fruits we know. In fact, the original watermelons tasted pretty awful. They were bitter and hard. People grew them anyway, because these melons could hold water for weeks and even months, if stored properly. [That’s how they got their name - get it?] Five thousand years ago, that was a really Big Deal. As plumbing became a thing, watermelons had to up their game. Over time, and with selective breeding, they became the sweet summer picnic favorites that we love.  Watermelon as depicted in a 17th-century painting by Giovanni Stanchi CC BY-SA 4.0 How to grow watermelon Watermelon plants (Citrullus lanatus var. lanatus) can take up some space. The 5-sided vines may reach 10 feet in length and the leaves are large. Plant watermelon seeds one inch deep in groups of 6 to 10 seeds. These seeds should be planted in ‘hills’ that are 3 to 4 feet apart. These hills are mounds of loose, rich soil two feet in diameter. Once seedlings emerge, save the best 3 and snip the others off at ground level. Mulch around the plants to reduce weeds and retain moisture. Individual watermelons can be grown in a container, but it should be large - at least 5 gallons. They can also be grown up trellising or on stock panels, but each melon will need a hammock. It is best to plant watermelon in late spring, though seeds can be started two weeks after the last frost date. Seeds will not germinate at temperatures below 70°F. Row covers can be used over seedlings to protect them from pests and to retain some heat. Watermelons prefer a soil pH of 6.0 to 6.8. Watermelons do require a significant amount of water to produce fruit, but avoid getting the leaves wet to prevent fungal disease. If the leaves wilt in the afternoon, don’t worry about it. If they stay wilted into the evening, check moisture levels. Once fruit starts to appear, you will want to get it up off the ground with some straw. This reduces the chance of belly rot. Reduce watering just before your watermelons ripen to increase sugar levels and intensify the flavor. Watermelon pests and diseases Like most plants in hot, sunny regions, watermelon are likely to be attacked by aphids, cutworms, crickets and grasshoppers, armyworms, cabbage loopers, leaf-footed bugs, earwigs, flea beetles, leafhoppers, leafminers, nematodes, slugs and snails, thrips, whiteflies, and spider mites. As a cucurbit, watermelon is also subject to stinkbugs, cucumber beetles, and squash bugs. Many of these pests can be thwarted by dusting your melons with kaolin clay, a non-toxic fine powder that clogs up their breathing holes. Diseases that can affect watermelon include damping off, powdery mildew, downy mildews, verticillium wilt, root rot, fusarium wilt, angular leafspot, curly top, and white mold. Nearly all of these diseases are related to overhead watering, so don’t do it. Most watermelon varieties are resistant to anthracnose, but seedless watermelons are not. Unlike other cucurbits, watermelon is not susceptible to cucumber mosaic and I have no idea why. Unsuitable environmental conditions can lead to blossom end rot, bitter fruit, blossom drop, and poor pollination. One nice thing about growing watermelon is that you can plant the seeds in a raised bed, straw bale, or container, and then let the vine cover unplanted areas, or areas that are looking poorly. The large leaves shade the ground, stabilizing temperatures and making the soil more habitable for worms and beneficial soil microorganisms. Add a little mulch and you can be preparing that area for planting next season. Add a watermelon plant to your foodscape every summer and save the seeds for next year's crop!  Seedless watermelon (Scott Ehardt, Public Domain) What’s up with seedless watermelons?
Seedless watermelon production began in the 1990s. Seedless watermelons happen because plant breeders do two things:
The resulting offspring have 33 chromosome and are highly unlikely to have viable seeds. Now you know. Few plants are as productive as summer squash. They grow quickly, provide a continuous harvest, and they shade the ground under their prickly leaves, making it an excellent foodscape plant. 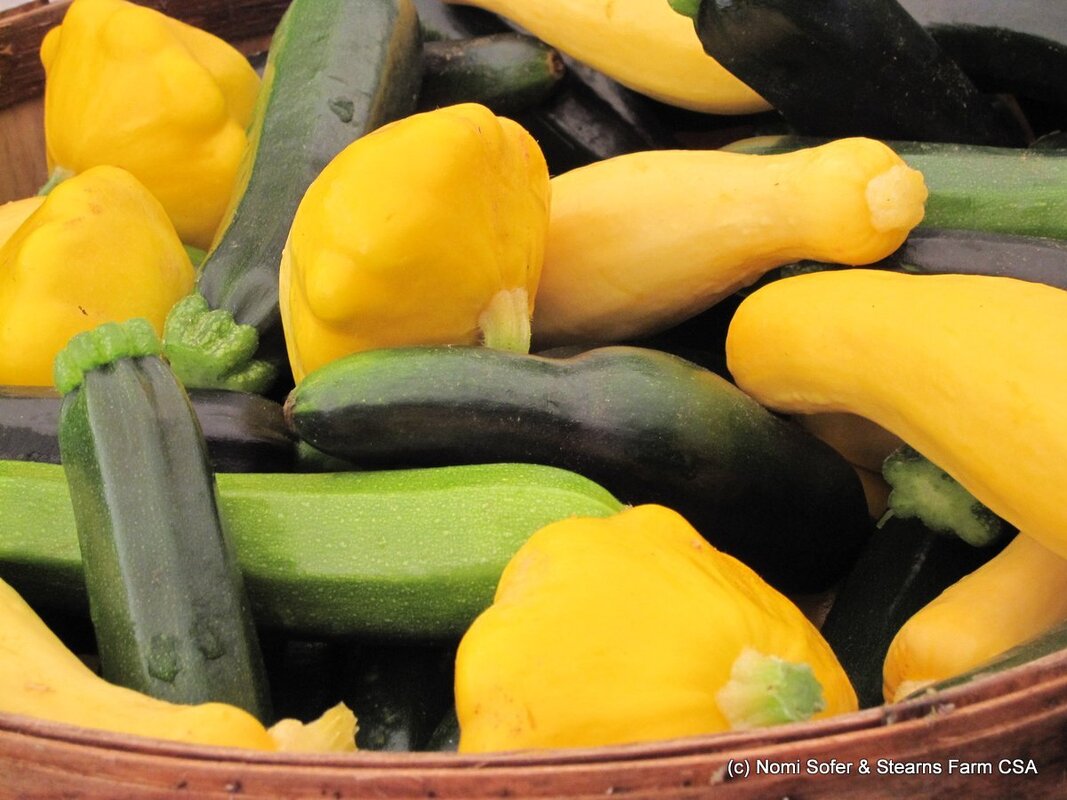 Summer squash (Stearns Farm CSA) CC BY-ND 2.0 Summer squash vs. winter squash All squash plants are cucurbits, along with gourds and cucumbers. Squashes are classified as either summer or winter varieties. The main difference between summer squash and winter squash is when it is eaten. Summer squashes, which are generally eaten immature, have thin, tender skins, while winter squashes have hard skins that allow them to be stored for longer periods of time. Common winter squashes include pumpkins, Hubbard, acorn, and butternut squash. Types of summer squash There are two main types of summer squash: zucchini and yellow, but these are divided up into several different varieties:
How to grow summer squash Summer squash prefers a sunny, well drained area, with a pH of 5.5 to 6.5, so acidification may be needed. Squash seeds are very large and should be planted about an inch deep in May and June. [The basic rule of thumb for the planting depth for any seed is to use the longest length measurement of the seed and bury it that deep.] Keep the soil moist until germination occurs, but do not let it stay soggy or damping off disease may kill your squash seedlings. Squash plants generally do not take kindly to transplanting, so it is better to plant the seeds where you want them in the first place. These plants will take up some space, though they can be grown in containers, towers, and straw bales, and they love raised beds! Squash is a traditional member of the Three Sisters Method of growing beans and corn in a mutually beneficial garden design. Generally, winter squash vines can get very long, while most summer squashes have more of a mounding growth, though this isn’t always the case. Be sure to read the seed packet for variety-specific information. Squash is a relatively light feeder, so fertilizer is rarely needed. These plants generally get enough nitrogen from the soil. Too much nitrogen will encourage plenty of leaves but very little fruit. Of course, adding some aged compost around the plants as mulch certainly wouldn’t hurt! Summer squash pests and diseases If you look at a list of all the pests and diseases that affect summer squash, you’d wonder how these plants survive at all. But they do. In fact, they thrive! But it’s always a good idea to know what might happen, so you can nip it in the proverbial bud before things get out of hand. Common summer squash pests include aphids, armyworms, cutworms, redhumped caterpillars, leaf miners, loopers, cucumber beetles, nematodes, grasshoppers, slugs and snails, stinkbugs, wireworms, earwigs, and various beetles. Squash bugs are generally your biggest threat and they make themselves known in July in the Bay Area. As far as I know, squash vine borers have not yet made their way over the Rockies, but be forewarned! Row covers go a long way toward protecting your summer squash plants against these pests. Summer squash diseases can categorized by the pathogen:
Environmental conditions, such as irregular watering, can cause blossom end rot, bitter fruit, and blossom drop. Poor pollination can also be a problem. Despite all these threats, summer squash plants nearly always produce an astounding amount of food. 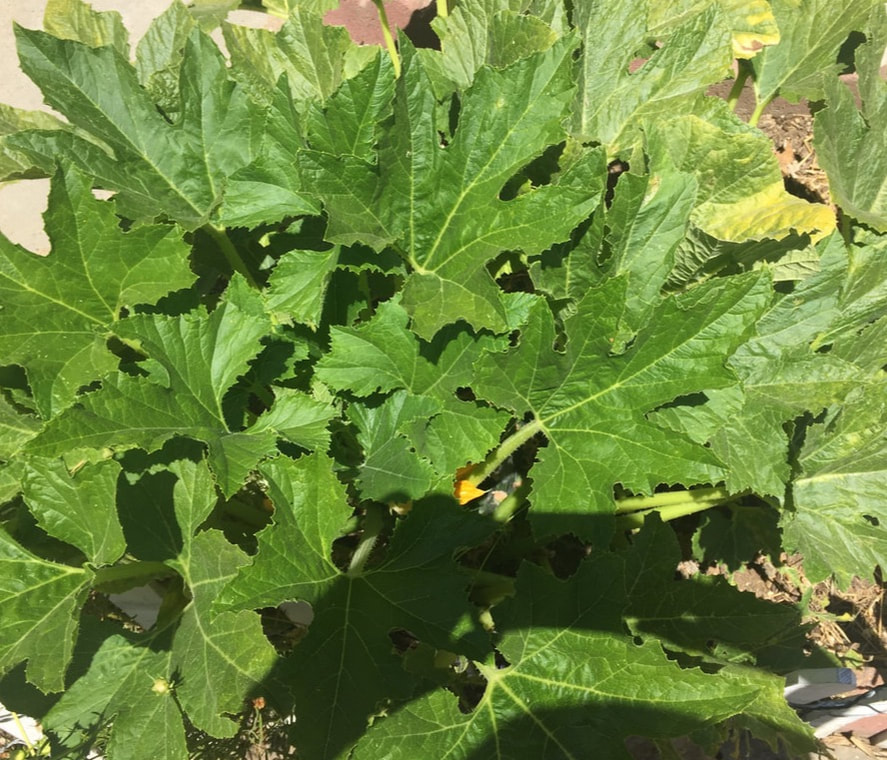 Summer squash (Kate Russell) Harvesting summer squash
Squash plants can run amok and get away from you. Everyone has a story of the monstrous zucchini they swore wasn’t there the day before. It happens. When it does, stuff it with sausage and onions, or make some chocolate zucchini cake. One nice thing about summer squash is that it can be harvested at any stage in its development. Simply cut the stem and enjoy the fruits of your labor! Once you’ve harvested a summer squash, you can add it to stir fry, salads, soups, stews, or just nibble on it while reading a good book. Odds are, another one will be ready to harvest in a day or two. Summer squash is particularly sensitive to ethylene gas, so you will want to keep them away from bananas and other ripening fruits. One seed and a little water can provide you with a surprising amount of fresh food. Plant one today and see what happens! Squash is an excellent plant for shading the ground and providing food for your family.  Fortuna white pumpkin plant Summer and winter squash There are two types of squash: summer squash and winter squash. This has nothing to do with when they are grown. Instead, it is more about when they are eaten. Winter squash, such as pumpkins, butternut squash, and acorn squash, have hard outer shells that make them easy to store. Summer squashes, such as zucchini and yellow crookneck squash, have softer skins and must be eaten (or preserved) sooner. Summer squashes tend to have bushier growth than winter varieties, but most squash plants can really spread out, so don’t plant more than you have room for in the garden. How to grow squash You can leave last fall’s pumpkin to go through the natural cycle of withering, collapsing, rotting, resting, and sprouting, or you can start with seeds.
Squash seeds are large and flat and should be planted 1” deep. Squash plants do not respond well to transplanting, so it is best to start them where you want them. Since these plants take up some room, they are often grown in ‘hills’. These hills are usually 6-8” high and 12-24” wide and can support two or three plants. Squash seeds planted in rows should be 18 to 30 inches apart, depending on the variety. Squash can also be grown in containers, raised beds, and towers. Squash plants are rugged and they thrive in hot, dry summers. They are heavy feeders, require frequent watering, and they prefer a soil pH of 5.5 to 7.5. Digging in some aged compost or manure when creating the hills will go a long way to ensuring a good harvest. Once these plants are established, they need nothing from you but water. During the peak of summer, afternoon wilting is normal and not cause for concern. Plants will need to be watered deeply once or twice a week, depending on the weather. Mulching around plants can reduce the need for water and it stabilizes soil temperatures. How squash plants grow As they grow, they create both male and female flowers. These flowers are usually yellow or orange, and the male flowers tend to emerge first. These flowers are edible, but eating the flowers means no fruit. Since there will be some female flowers emerging after all the male flowers have disappeared, you can boost your crop by cutting off and bagging the male flower anthers, which hold the pollen, and applying the pollen to later female flowers with a natural hair paint brush. In the same way, if there are not enough pollinators in your area, you can hand pollinate squash flowers. In fact, research has shown that applying pollen to female flowers manually causes larger fruit that is more likely to reach maturity. Also, the seeds within that fruit germinate faster and produce larger seedlings. This is called the xenia effect. As fruit is produced, many growers place a layer of straw underneath to reduce soil contact and the potential for fungal problems.
Squash pests and diseases As always, aphids, cutworms, earwigs, leafhoppers, grasshoppers, leafminers, mites, whiteflies, wireworms, and thrips will lust after your squash plants. (It’s really a wonder that anything grows at all, but grow it will!) Squash bugs, squash vine borers, and cucumber beetles cause the most squash problems. Cucumber beetles can also carry wilt disease. Placing row covers over seedlings and dusting plants with diatomaceous earth can reduce pest populations organically. Powdery mildew and downy mildews, anthracnose, verticillium wilt, root rot, curly top, bacterial wilt, scab, and mosaic diseases can be reduced by planting resistant varieties, avoiding overhead watering, keeping the garden clear of any diseased leaves (and not adding them to the compost pile), and using crop rotation. Harvesting squash Squashes should be harvested by cutting the vine with a sharp knife about one inch above the fruit. Do not twist or yank at it, as this can damage the plant. Summer squashes are best harvested young and eaten fresh. Of course, if you just can’t take another zucchini stir-fry, or you discover a specimen the size of a horse leg, you can always treat yourself to some chocolate zucchini cake or stuff it with some sausage and bake it. You can also cube, blanch, and freeze summer squash for use in soups and stews, but it tends to disintegrate. Winter squash, on the other hand, can be stored in a cool, dry, shaded area, such as a garage, for several months. I’ve had butternut squash that lasted nearly two years and tasted just as sweet and flavorful as fruit from the same vine that was eaten a year before. 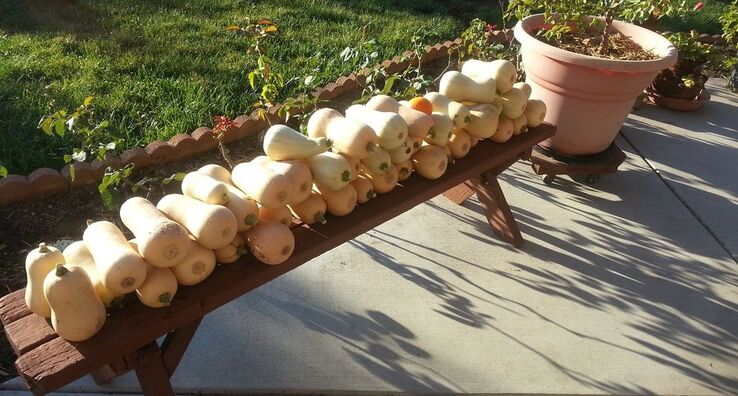 Butternut squash crop from two plants Healthy squash plants can produce an astounding amount of food. This makes them an excellent Plant It Forward addition to your garden or landscape.
Zucchini is a summer squash that can sneak up you. Large, prickly (edible) leaves shade the ground and defend against insects. They also hide the occasional zucchini, allowing it to reach horse leg proportions. In Britain, they call these epic squash ‘marrows’, but zucchini are generally harvested when much smaller and younger. According to Guinness World Records, the longest zucchini on record was over 8 feet long and the heaviest weighed in at over 64 pounds! Holy smokes! Imagine stuffing one of those monsters! Before our zucchini ever reach those proportions, let’s learn more about how they grow and how we can help them be flavorful and productive. 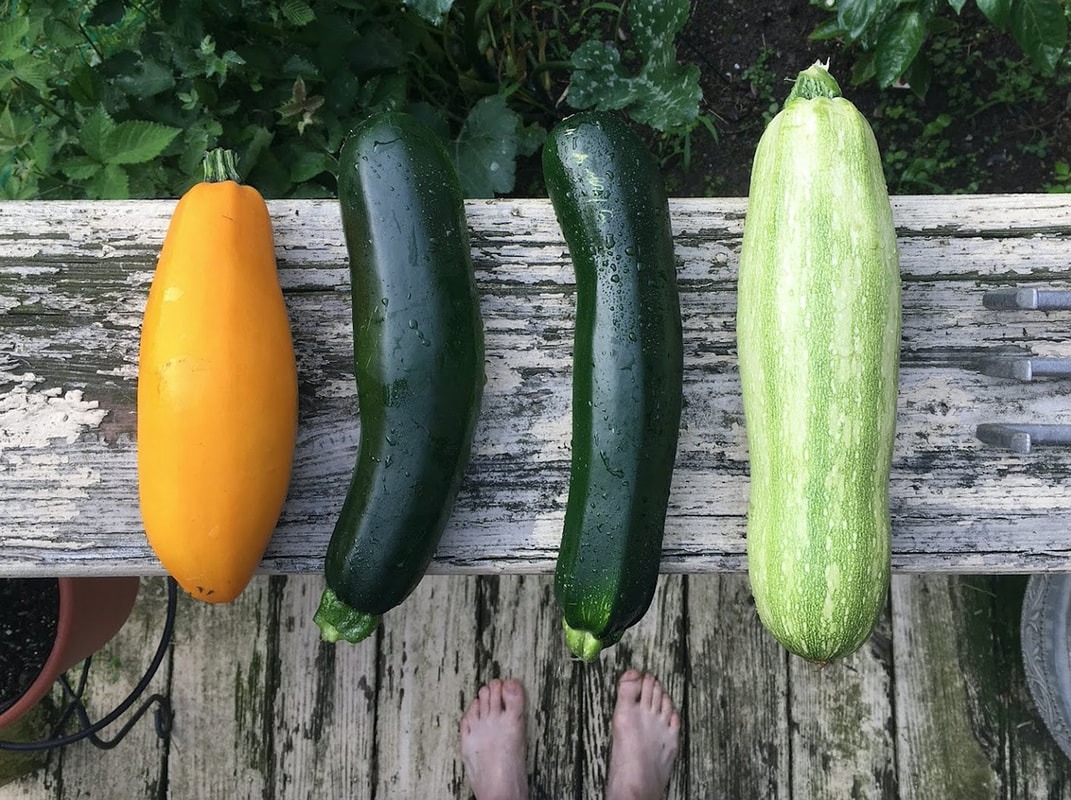 There are several types of zucchinis (needpix.com) How zucchini plants grow
Zucchini are members of the squash family, making them cousin to pumpkins and melons. Botanically, zucchini are berries - isn’t science fun? Adding zucchini to the garden or landscape is an excellent way to grow your own food. Like other gourds, zucchini have both male and female flowers. Both flowers are edible, with the pistil and stamen removed. Zucchini flowers can be deep fried, baked, sautéed, or added to soups or salads. Personally, I’d rather have the more substantial produce, so I leave the flowers alone. Honey bees and other pollinators are needed, so avoid using broad-spectrum pesticides near zucchini plants. If there are not enough pollinators, you can always hand-pollinate. Growing zucchini Zucchini is a very forgiving and productive plant and it loves warm, sunny weather. You can grow zucchini in large containers, straw bales, towers, raised beds, or in the ground. Seeds germinate best at 70° to 95°F and should be planted one inch deep. You can plant seeds individually or in hills. Individual plants should be spaced 3 feet apart. Hills (6-8” high and 12-24” wide) can support two or three plants. Zucchini plants do not handle being transplanted very well and they will benefit from a layer of mulch. Be sure to irrigate regularly. Water-stressed zucchini, and other squash, will taste bitter. This bitterness is caused by toxins that can be potentially dangerous. Don’t let this scare you off, just be sure to water your zucchini plants regularly. This will also help prevent blossom end rot. Zucchini pests and diseases Sporadic watering and insufficient calcium can cause blossom end rot in zucchini. Overhead watering can cause powdery mildew, downy mildews, and white mold, so irrigate regularly with soaker hoses. Other diseases include curly top, damping-off, fusarium crown and foot rot, verticillium wilt, and various viruses. Aphids (isn’t it always aphids?), earwigs, cutworms, cucumber beetles, crickets and grasshoppers, slugs and snails, flea beetles, armyworms, nematodes, loopers, leafminers, leafhoppers, thrips, squash bugs, squash vine borers, spider mites, wireworms, and whiteflies will all want some of your zucchini. The good news: you’ll still probably end up with more zucchini than you know what to do with! Too much zucchini? Zucchini plants are very productive. While harvested zucchini are very mild and can be adapted to many different dishes, sometimes you just need a change. After you have sautéed, stir-fried, baked, grilled, spiralized, and broiled all the zucchini you can handle, try making some Chocolate Zucchini Cake. This particular recipe has been responsible for transforming the opinions of toddlers, teens, and skeptics for generations. Zucchini can also be pickled, and you can puree it and freeze it for later use. Don’t bother trying to freeze cubed zucchini - it doesn’t end well. Zucchini and the cross-pollination rumor Many gardeners worry about cross-pollination between members of the gourd family, but this worry is unnecessary. Natural cross-pollination can only occur within a species (we will not discuss genetic manipulation at the nano surgery level). This means that zucchini plants can cross-pollinate with other zucchini and summer squash varieties, but not with melons or cucumbers. This is actually how we get many new cultivars. When cross-pollination does occur, it has no affect on the current season’s fruit or vegetable. It does alter the DNA within next year’s seeds. Even if you are a card-carrying Brown Thumb, give zucchini a try this year. It is a very rewarding plant and you can never have too much Chocolate Zucchini Cake! Cucumbers (Cucumis sativus) are a fruit from the gourd family (Cucurbitaceae). Originally from South Asia, cucumbers have found their way into gardens around the world. Botanically, cucumbers are classified as berries because they are the fruit of a single ovary. 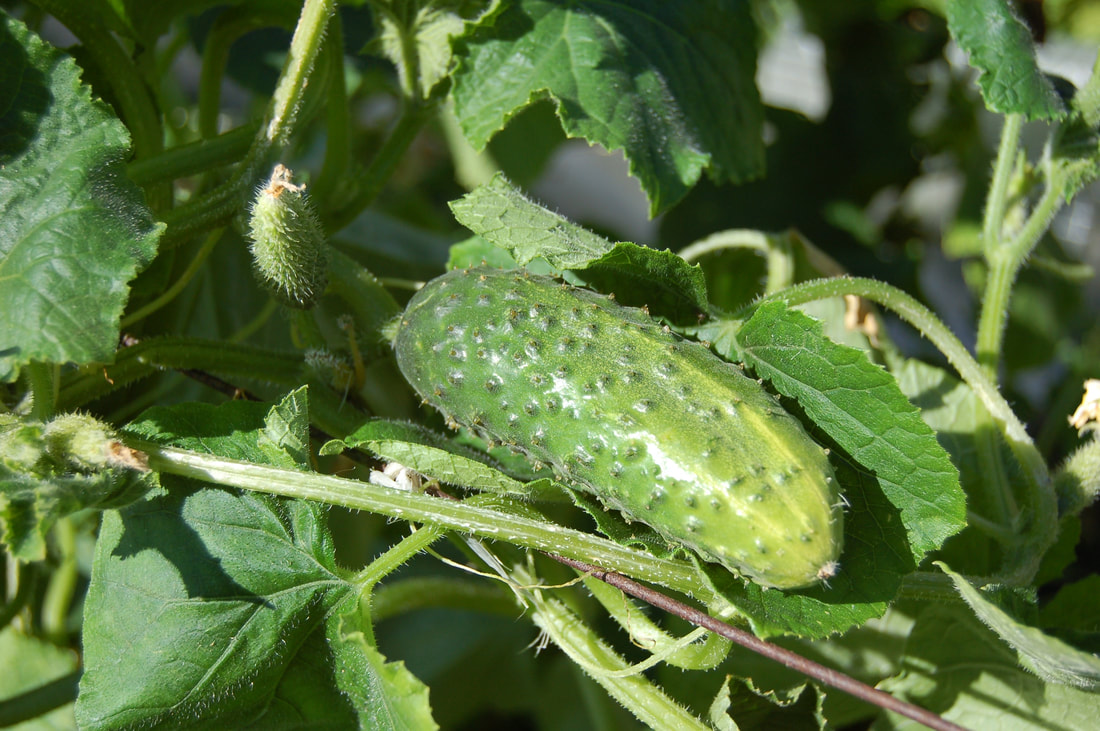 Cucumber plant with fruit (PxHere) Public Domain Cucumber varieties
There are many types of cucumber: slicing, pickling, gherkins, bush, burpless, and seedless. You can find an excellent article on different types of cucumbers you can grow at The Green Pinky. Seedless cucumbers are a parthenocarpic cultivar, which means the plants develop fruit without being pollinated. These cucumbers are usually grown in greenhouses. All the other types of cucumbers are self-incompatible. This means they need to be cross-pollinated, from a different plant, for fertilization to occur. While any cucumber can be pickled, pickling cucumbers are bred for consistent size and shape, and they tend to have larger bumps. Varieties of pickling cucumber that perform best in warmer regions include Pot Luck and Pickle Bush (good container plants), Saladin, County Fair 83, and Liberty Hybrid. Bush Champion, Parks Bush Whopper, Salad Bush and Spacemaster are good slicing varieties for containers. There are many good slicing varieties, including Marketmore 76, Marketmore 80, Dasher 11, Straight Eight, and Raider are good in-ground slicing cucumbers. New varieties are always being developed. In fact, I just discovered a Mexican Sour Gherkin cucumber that tastes like a sour cucumber but looks like a miniature watermelon! How to grow cucumbers Cucumbers love rich soil with a pH of 5.5 to 6.5, so moderate acidification may be helpful. Seeds should be planted 1 inch deep and 6 to 10 inches apart. After seedlings emerge, thin plants to every 12 inches. Cucumbers need lots of sunlight, so they are not the best choice for shade gardening. Cucumbers grow on creeping vines that can be trellised onto tomato cages, along fences, cattle panels, or on a teepee made from bamboo or other thin poles. Keeping your cucumbers off the ground will help reduce insect damage and fungal diseases. Cucumber pests and diseases Cucumbers have the same problems as other members of the squash family. Aphids, spider mites, whiteflies, nematodes, leafhoppers, leafminers, cutworms, squash vine borers, cucumber beetles, and squash bugs will all try to sink their tiny mouthparts into your delicious cucumbers, so keep a look out. When you shop for cucumber seeds and plants, you may see an alphabet soup of letters on the tags. These letters are a shorthand for disease resistance. Common cucumber diseases that have resistant varieties include:
If you see AAS, it means All-American Selection, which is a plant that resists most diseases. Some diseases, such as sudden wilt, belly rot, and bacterial wilt do not have resistant varieties (yet). Many fungal and bacterial diseases can be avoided by waiting until leaves are dry before working an area. This reduces the likelihood of any diseases spreading to uninfected plants. Cucumbers and bitterness Sometimes, cucumbers can taste bitter. It was once thought that water stress was the only culprit, but research has shown that this bitterness is often caused by two genes that control the creation and inhibition of two compounds called terpenoids, which are more likely to occur when temperatures are lower than normal. Bitterness can also occur when plants are exposed to temperature fluctuations that are greater than 20 degrees F, or when they are stored next to other ripening vegetables. Cucumbers and cross-pollination Cucumbers of differing varieties or cultivars can cross-pollinate. Although cucumbers are members of the gourd family and cousin to melons, squash, and pumpkins, they cannot cross-pollinate with these varieties. Increase pollination and fertilization rates by planting flowers near your cucumbers. This will attract more honey bees and result in larger yields. Sweet, juicy melons are a gardening favorite. Easy to grow, productive and delicious, what’s not to love? It just wouldn’t be summer without slicing through the hard outer rind of a melon and devouring the sweet, refreshing wetness within. 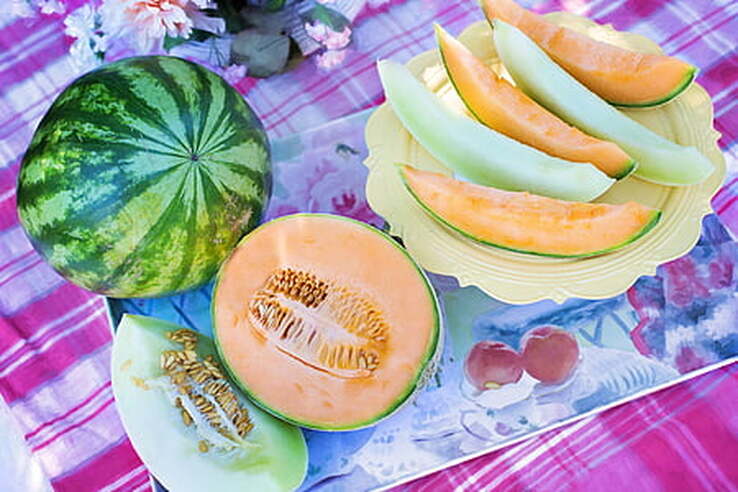 Sliced melons (PickPik) Public Domain Melon families Melons are members of the Cucurbit family, along with pumpkins, squashes, and even luffas! Within the melon family, there are several different groupings (by genus) of some familiar, and some not so familiar, melons:
How melons grow Like their cousins in the squash family, melons grow on vines. Unlike other vegetables crops, however, each vine has both male and female flowers. The male flowers generally appear first and usually only last for one day. Melon pollen is very sticky, so wind pollination does not occur. Honey bees are needed to carry the pollen from one flower to the next. If there are not enough honey bees in your area, you can use a fine paintbrush to transfer the sticky pollen to the female flowers, or you can break off a male flower, remove the petals, and apply the pollen that way. [I collect the pollen-carrying stamen for hand-pollinating, just in case.] Female flowers can be identified by the miniature fruit (ovary) at the base of each blossom. 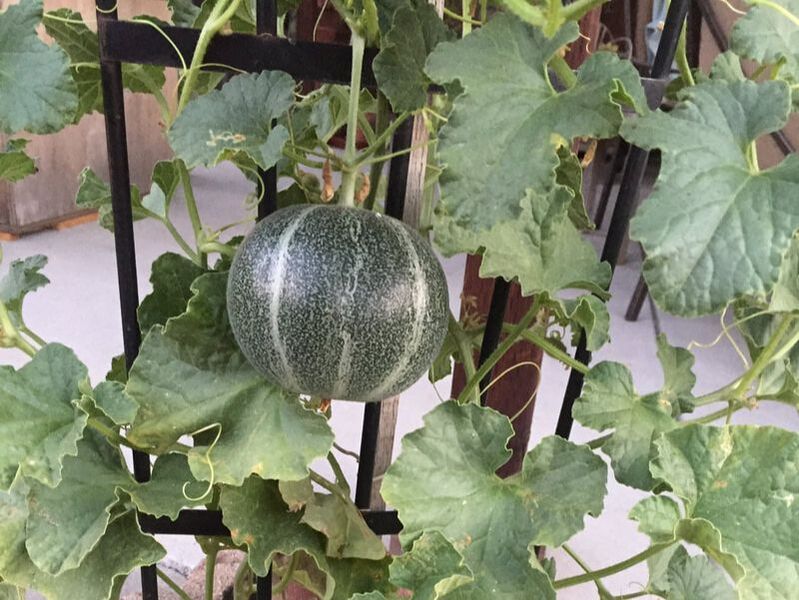 Melon plants can be trained to grow vertically How to grow melons
Melon seeds are big and easy to work with. In warm rgions, melons can be planted in May and June. They really love hot weather. Prepare the planting area by digging compost into the soil and creating hills. Each hill should be approximately 4 feet square. Plant 3 to 5 seeds, one inch deep and two inches apart, into the middle of each hill. Water the area well. Once your seeds have sprouted and grown into seedlings with a few sets of leaves, snip the smallest plants off at ground level, rather than thinning by pulling them out. This lets the remaining plant’s roots and helpful soil microorganisms stay undisturbed. Melons need to be watered every 2 or 3 days during the peak of summer. Sometimes even more. Regular watering can help prevent the fruit from splitting open. Side dressing melon plants with aged compost during the growing season also improves both crop quantity and quality. Side dressing simply means putting compost next to the plants and watering all those yummy nutrients into the surrounding soil. Easy and effective. You may want to add a layer of straw or sawdust under your melons, to get them up off the ground. This helps prevent rotten areas, and insect and fungal infestation. Melons can also be grown in containers, towers, or straw bales, and trellised. The fruit itself will need personal hammocks if you use a trellis. You can tell a melon is ready to harvest when you see a slight crack around the stem where it is attached to the fruit. This is called the “full slip” stage. Crenshaw, casaba, and some honeydew varieties do not develop a slip. Casaba and honeydew melons can be stored for several weeks, while other varieties are best eaten right away. Troubleshooting melon problems Melons are susceptible to the same problems as cucumber, pumpkin, and squash. Use the symptoms listed below to find (and solve) your melon problems!
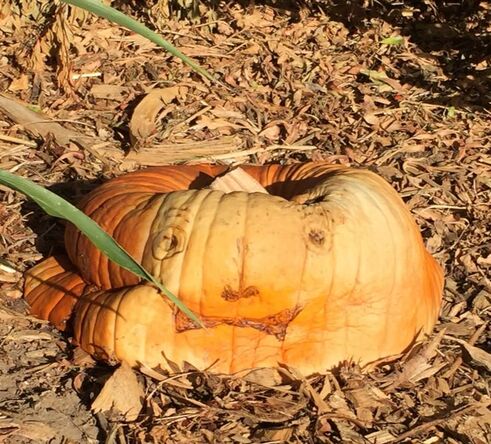
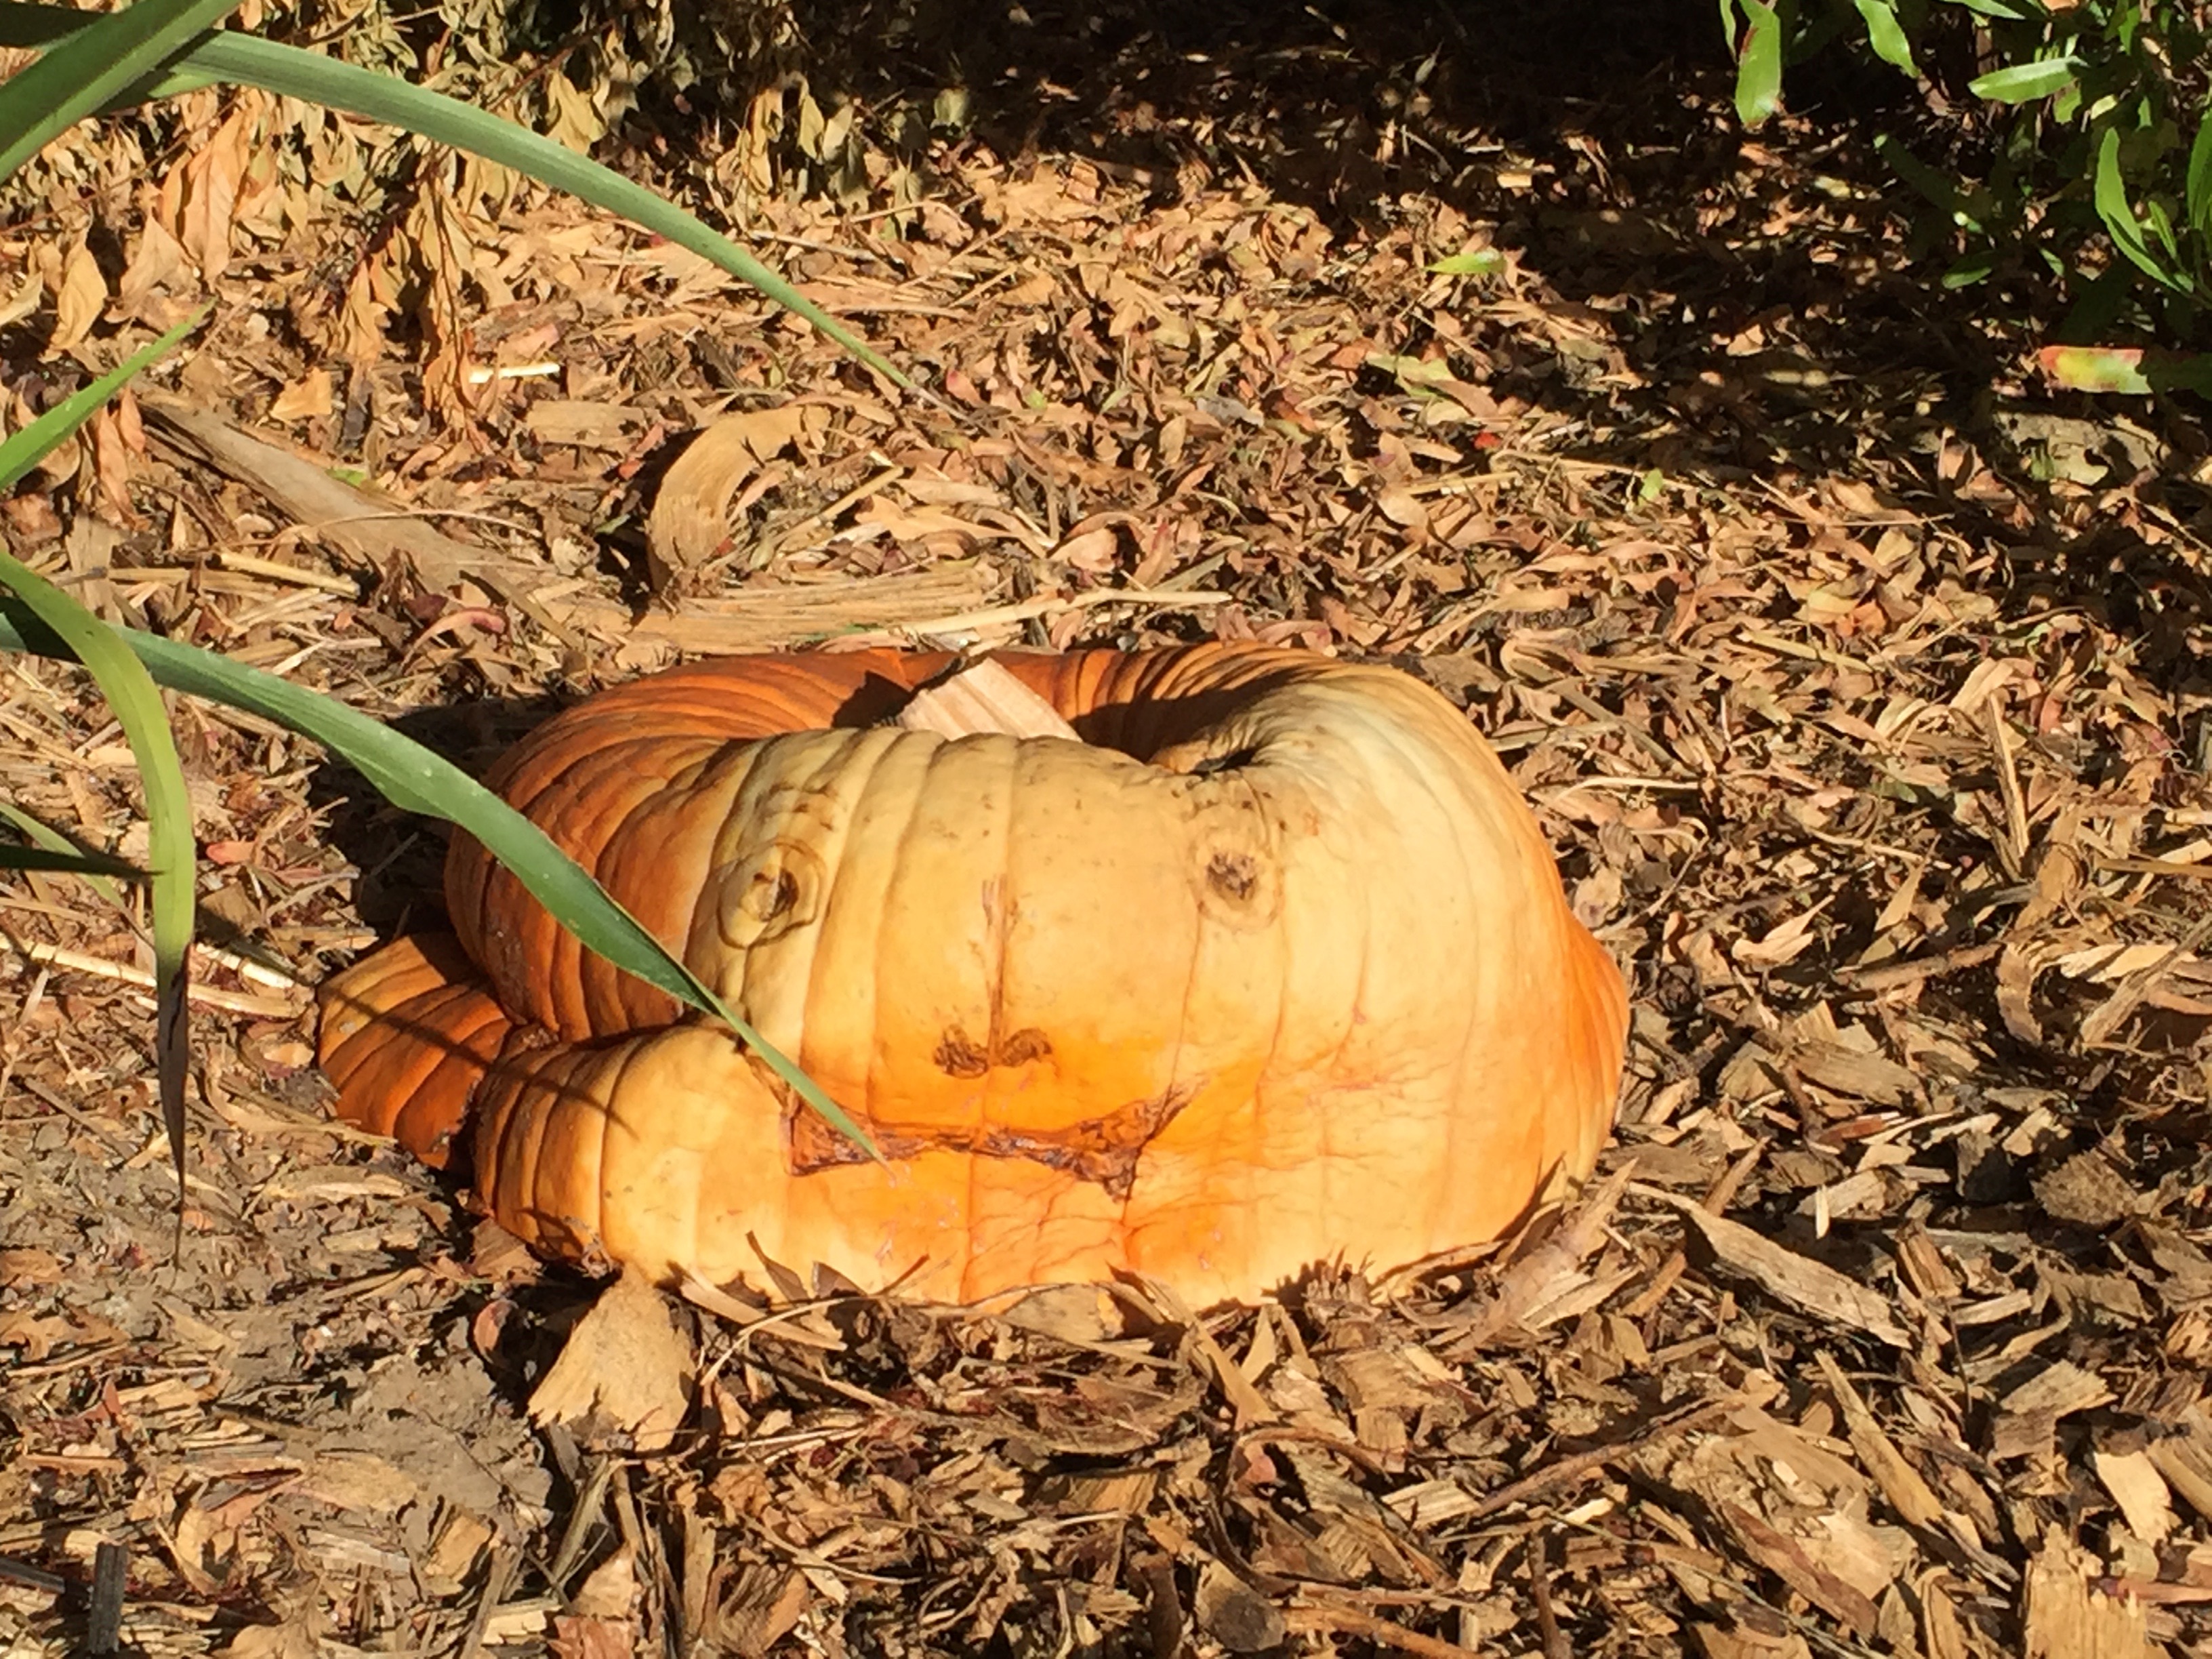
Cutworms, wireworms, crickets and grasshoppers, various beetles, earwigs, stinkbugs, and thrips may also try getting into your delicious melons, so be vigilant! (A light dusting of diatomaceous earth might help, too.) Cross-pollination myth All too often, gardeners hear the myth that members of the Cucurbit family can cross-pollinate. This is simply not true. Pollination between different species does not occur. What can happen is two different types of melon can cross-pollinate. In fact, that’s how Crenshaw melons came about - Persian melons were crossed with casabas. As you prepare to start growing your own melons, be sure to Plant It Forward with any leftover seeds! Pumpkin pie, pumpkin pudding, pumpkin bread, and the ever-popular Halloween jack-o-lantern are all autumn favorites. But, did you know that most canned pumpkin puree is actually squash? Being members of the squash family (Cucurbita), pumpkins and other winter squash share enough characteristics as to be indistinguishable according to the FDA. Huh. How about that? So much for truth in advertising. No matter. Growing pumpkins is rewarding and not nearly as difficult as you may think. The story of pumpkins Pumpkins are native to North America. Early Native Americans grew pumpkins along with maize and beans in the Three Sisters Method. This sustainable gardening method combines the nitrogen-fixing ability of beans with the climbable maize (or corn), and the soil protecting, weed preventing shade provided by broad squash leaves. Ripened pumpkins were roasted over fires, baked in dirt ovens, parched, and boiled. They dried pumpkin flesh and used it as flour, and dried the outer shells to be used as containers. Pumpkin blossoms were added to soups and stews, and any seeds that were not saved for the next year’s crop were roasted for as tasty snack. I don’t see any reason why we shouldn’t be using this durable and attractive plant in the same ways in our own gardens. How to grow pumpkins Pumpkins are now grown everywhere except Antarctica, as human and livestock food, and for use as autumn decorations. Now, I love seeing those round orange signs of a good harvest on porches and patios, but it kills me to see them tossed to the curb, many of them never even opened. What a waste! Unopened pumpkins can always be donated to local food banks, if nothing else. Personally, I put my pumpkins to work for my own family. The easiest way possible, is to simply let nature take its course. You can put a pumpkin in a suitable location to go through all the natural cycles and just leave it alone.
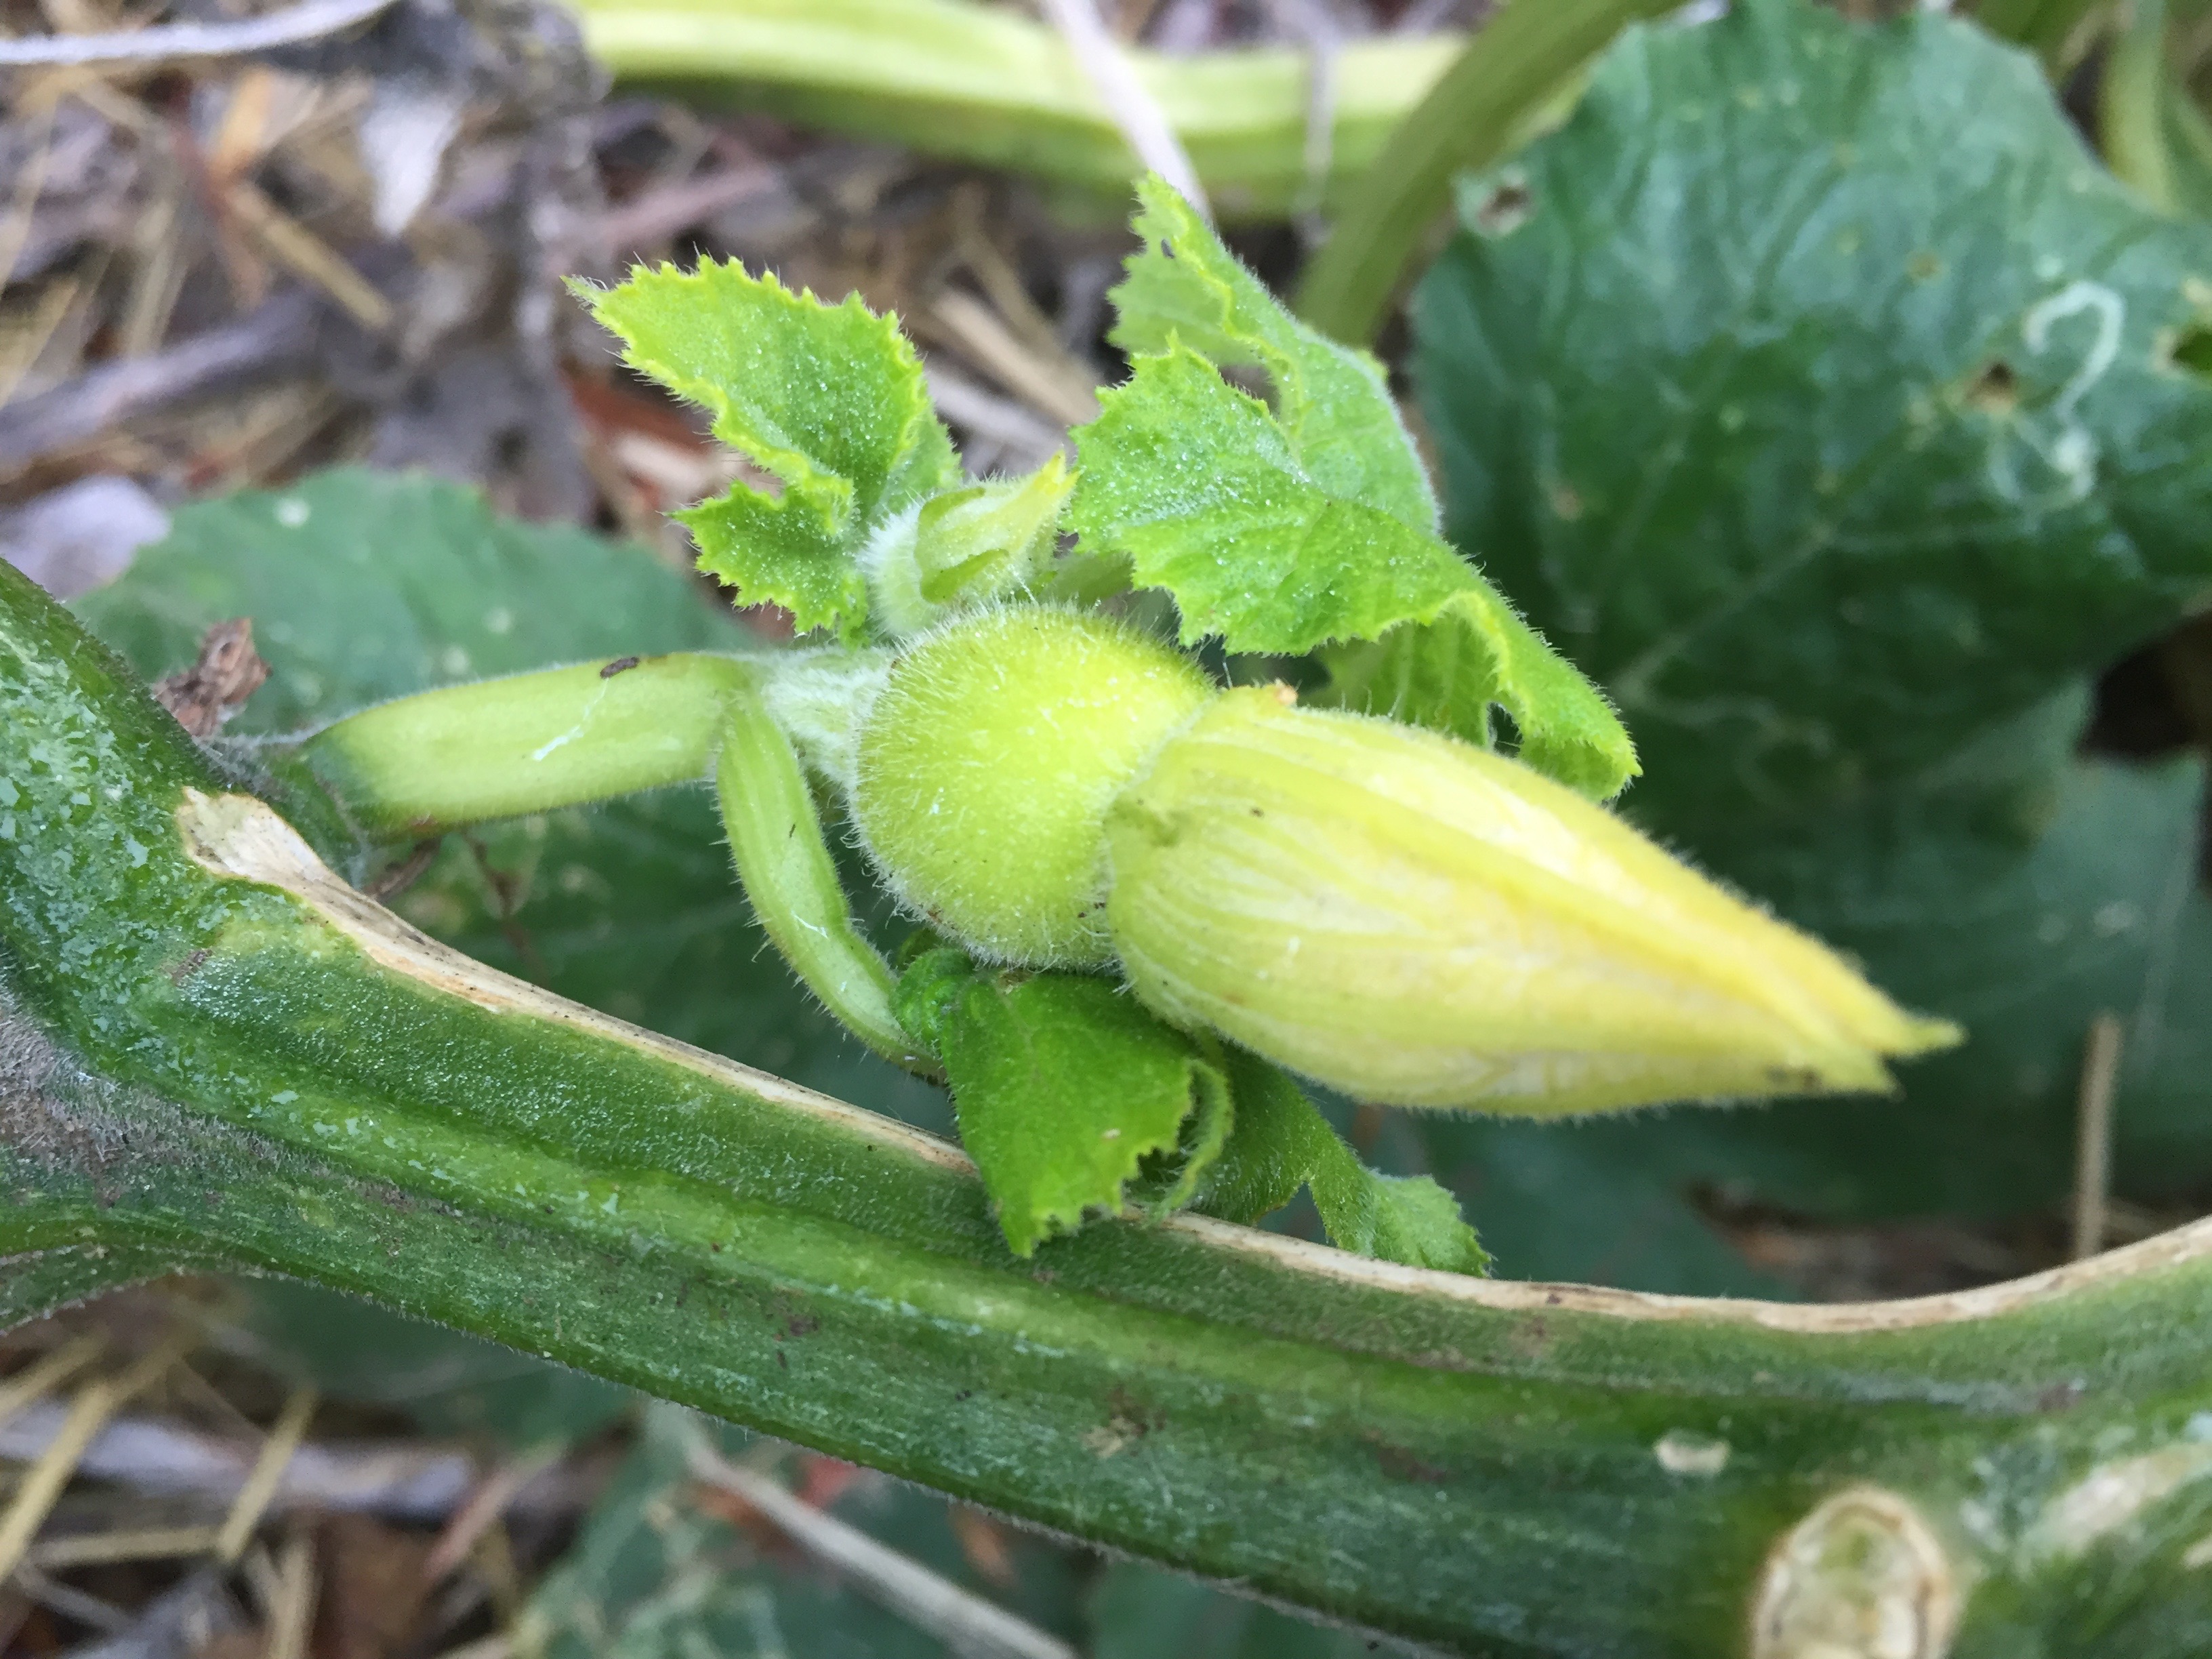
If you prefer a more focused effort, you will need seeds. It can start with a store bought packet, seeds from a friend’s pumpkin, or your own current pumpkin. Jack-o-lantern or not, I will eventually cut into my pumpkins. I can put this off for quite a while because pumpkins and other winter squashes, such as butternut, have one heck of a shelf life, if they are cured correctly. We’ll get to that in a minute. Cutting open the pumpkin, you will find a treasure trove of seeds inside. I remove the seeds and separate them from the stringy threads that nourished them (my chickens love that stringy stuff!). I choose the fattest, firmest seeds for next year’s crop, placing them inside a folded towel to allow for air flow without sun exposure, until they dry. The rest are soaked in a brine and roasted for a family favorite. After temperatures have reached a steady 70ºF, those saved seeds are planted in hills, or mounds, of loose soil amended with aged compost or manure. The hills improve drainage and the soil warms more quickly. Pumpkins are very heavy feeders and their seeds are temperature sensitive. Each pumpkin plant can take up to 50-100 square feet, given the opportunity. You can also redirect vines along walkways, lawns, or fences. Plant 4 or 5 seeds 1” deep in each hill. If you have room for multiple hills, they should be spaced 4 to 8 feet apart. After your seedlings are 2 or 3 inches tall, select the best 2 or 3 for each hill and snip the rejects off at soil level. This causes the least amount of disturbance to young roots and important soil microorganisms. If you are growing pumpkins in rows, rather than hills, seeds should be planted 6 to 12 inches apart in rows that are 6 to 10 feet apart, thinning seedlings to one plant every 18 to 36 inches. Caring for pumpkin plants It takes a lot of water to make a pumpkin. During fruit set, each pumpkin plant should receive approximately one inch of water per week. (One inch of water is equal to 0.623 gallons per square foot.) When watering, try to avoid getting the leaves wet, as this can promote fungal diseases. Mulching around pumpkin plants will help conserve water, stabilize temperatures, and reduce competition with weeds. Since pumpkins are shallow-rooted, it is not a good idea to disturb the soil. If you only have a small space, pumpkins can be trained up a trellis. Depending on the size of the fruit, you may need to provide hammocks as support. How to hand pollinate pumpkins One common problem with pumpkins is insufficient pollination. You can pollinate your pumpkins by hand for a bigger crop. To hand pollinate, you must first learn the difference between male and female flowers. It’s not hard. Male flowers tend to open earlier in the growing season and they feature a stalk that emerges from the center of the flower called the anther. If you touch the anther and your finger comes away dusted in yellow, it is ready to use for hand pollinating. Simply cut the male flower off and remove the petals to create a “paintbrush of pollen”. Female flowers contain an ovary, which looks like a small ball at the base, outside of the petals. Male flowers do not have this structure. Once female flowers begin to open, simply use the anther paintbrushes to apply pollen to the nubby bits (stigmas) in the center of the female flower. If pollination is successful, the ovary and the base of the flower will begin to swell, ultimately becoming a mature pumpkin.
Pumpkin pests & diseases
The most common problem I have had with pumpkins are powdery and downy mildews, with an occasional bout of blossom end rot. Weeks will go by and the leaves will stay bright green and healthy and then, it seems suddenly, the leaves are covered with fuzzy white and gray areas, top and bottom, and production slows to a near halt. Pumpkins are susceptible to other fungal diseases, such as Verticillium wilt, root rot, damping off, and curly top, but I have not experienced any of those in my garden. Many insect pests also enjoy pumpkins. Crickets, earwigs, several types of beetles, stinkbugs, wireworms, whiteflies, thrips, nematodes, armyworms, spider mites, aphids, and, of, course, slugs and snails. Looking at this list, it’s a wonder that pumpkins grow at all, but grow they do! Pumpkins are ready to harvest when the shell is firm and the stem is shriveled. After removing the fruit from the vine, allow it to dry, or cure, for a couple of weeks in a location with plenty of airflow and cool temperatures. Garages work nicely. After your pumpkin has cured, it will remain edible for several months. Give pumpkins a try in your garden! The bright orange flesh of butternut squash is a primary ingredient in rich, creamy soups, substantial casseroles, and delicious pies!  Butternut squash harvests can be substantial Winter squash can be stored for a surprisingly long time, plus, it’s easy to grow. Butternut squash is a no-brainer. Once it gets going, you can pretty much ignore it until harvest time. Summer or winter squash? Squashes are classified as either ‘summer’ or ‘winter’ varieties. This has nothing to do with when they are grown, Rather, it relates to when they are eaten. Winter squashes have thick, heavy duty skins that allow you to store them for several months. I’ve stored some successfully for two years! Butternut squash lifecycle Butternut squash is a member of the cucurbit family. Cucurbits are unique in that they produce both male and female flowers on the same plant. Insects, especially bees, are attracted to the large, showy blooms. As these beneficial insects travel from flower to flower, pollination occurs. Female flowers can be identified by the immature fruit seen at the base of the flower. Male flowers have a ‘beard’ at the base that easily breaks off. (Male flowers can be deep fried, stuffed with cheese and baked, or sautéed in an omelet!) 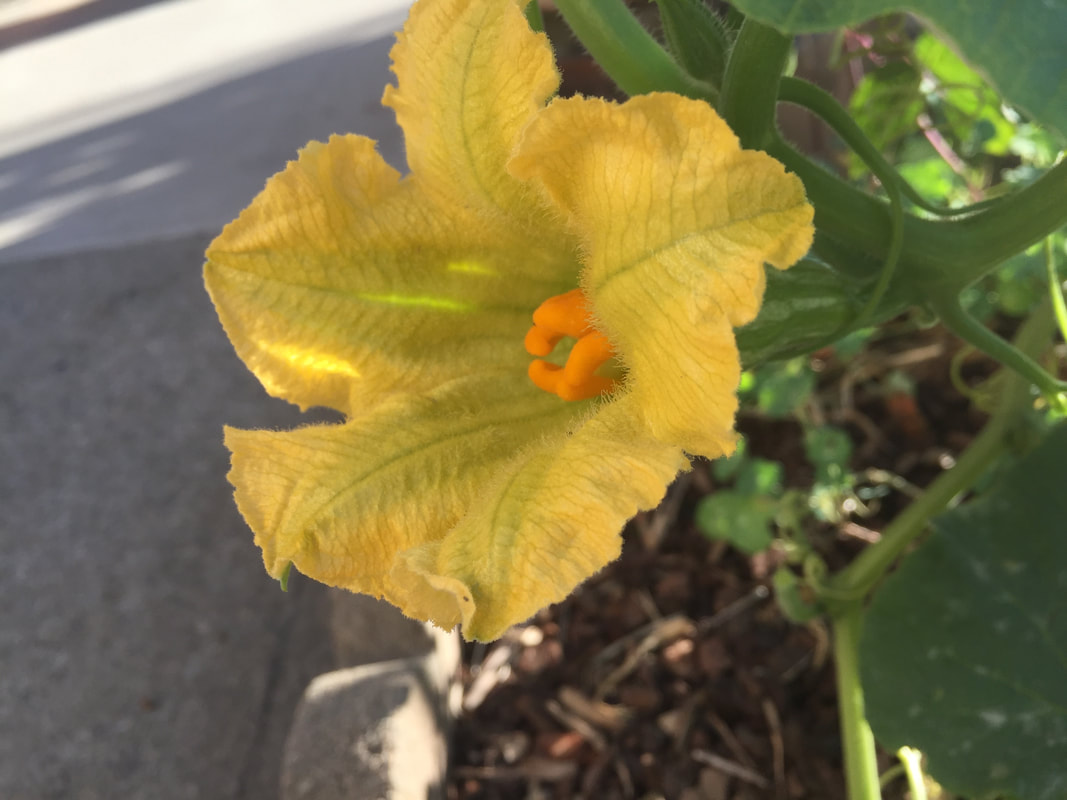 Female butternut squash flower  Male butternut squash flower How to grow butternut squash
Butternut squash grows best in full sun, though I have grown abundant crops under well-pruned fruit trees. This is a deep-rooted plant, making it well suited to areas experiencing drought. Butternut squash does not need particularly fertile soil and it can go weeks without watering. If larger leaves start to wilt, water deeply. There is no need to fertilize butternut squash. Pests & diseases of butternut squash Butternut squash is prone to root rot, so avoid over-watering. Seedlings are susceptible to damping off disease when the soil is too cold or too wet. Slugs and snails, caterpillars, and cucumber beetles will attack young plants. Later in the season, aphids, spider mites, and whiteflies can cause problems. Powdery mildew and other fungal diseases are common, but they rarely kill the plant or harm the fruit. Cucurbit cross-pollination This is one of those ‘partly true, partly myth’ situations in the garden. Traditional folklore warns gardeners against growing squash, cucumbers, and melons near each other. The claim suggests that cross-pollination will occur, affecting the taste of the produce. Since pollination can only happen with pollen of the same species, this cannot really happen. What can happen is cross-pollination between varieties of the same species. Cucumbers and melons are a different species, so they will not cross-pollinate with each other or other members of the cucurbit family. Summer squash, pumpkins, gourds, and some winter squash, all being members of the same family, can cross-pollinate. This pollination will create viable fruit identical to the mother plant. The genetic changes can only be seen in the seeds that are produced. If you save seeds, as I do, this may result in something really unique growing next year. Sometimes it will be edible and sometimes it won’t. Butternut squash will cross-pollinate with pumpkins, so you’ll want to keep them as far apart as possible. Oddly shaped fruit and poor taste are usually the result of over-fertilized soil, too much irrigation, or damp weather, and not weird cross-pollinations. Harvesting & storing butternut squash The more often you harvest the fruit, the more fruit the plant will produce. In the plant world, reproduction is the name of the game. Fruits can be eaten right away or allowed to dry out, or cure, for later use. Fruits can be allowed to cure on the vine or removed and stored in a cool, dry location. Cucurbits are members of the squash family. This family is a thick-skinned group that grows on vines and keeps its seeds in a line down the center of their fruit. The squash, or cucurbit, family is made up of cucumbers, gourds, luffas, melons, pumpkins, squash, watermelons, and the inevitable zucchini. These plants love hot weather and many of them have protective bristles.  White pumpkin starting up ladder; oats against the wall. (Kate Russell) Most of the 975 cucurbit species are susceptible to frost and many are trailing annual vines with tendrils. They tend to have large bristle-haired leaves and both male and female flowers (monoecious). Growing cucurbits Cucurbits have relatively large seeds and they do not transplant well after the first 3 weeks. It is best to directly sow seeds in the ground. As a group, cucurbits grow fast. They need very little nitrogen, but they use a lot of potassium and phosphorus. Side dressing plants with aged compost goes a long way toward creating a big harvest.  Zucchini plant Cucurbits prefer full sun and deep, infrequent watering. During the hottest days of summer, it is a good idea to keep an eye out for wilting leaves, a sure sign that you waited too long to water! These semi-climbing plants benefit from the use of trellises, stock panels, or ladders. Heavier fruits can be supported using hammocks or net bags. This keeps the fruit off the ground, preventing fungal disease, rot, and pest damage.
Cucurbit pests and diseases
Regularly watering in the early morning allows cucurbit leaves to dry out before evening, preventing powdery mildew and other fungal diseases. Because of the wide leaf coverage of most cucurbits, weeds are seldom a problem. Cucurbits are frequently attacked by cucumber beetles, flea beetles, squash vine borers, and squash bugs, so squash those bugs whenever you see them! Be sure to harvest fruits regularly, to ensure continuous production. Once plants believe they have completed their reproductive cycle, you generally won't get any more fruit. |
Welcome!You can grow a surprising amount of food in your own yard. Ask me how! To help The Daily Garden grow, you may see affiliate ads sprouting up in various places.
You can also get my book, Stop Wasting Your Yard!  Index
All
Archives
July 2024
|


_-_male_flower,_some_petals_and_1_filament_removed.jpg)


 RSS Feed