|
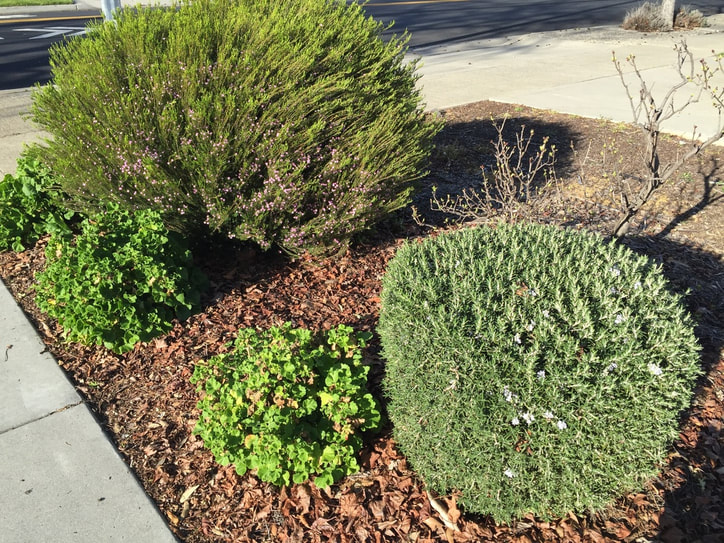
Unless you’re using a syringe filled with syrup, you’ve never really fed or watered your plants. When you irrigate or fertilize your plants, what you are really doing is watering and feeding the soil. It is the soil that feeds and waters your garden and landscape plants. Creating healthy soil is the best way to grow healthy plants that need less protection from pests and diseases, produce more flowers and food, and require less work. So why is improving soil health one of the last things on our garden To-Do lists? Let’s learn more about growing great soil. What is great soil? Soil is a highly complex natural body that scientists call the pedosphere. Some call it the Earth’s living skin. Soil stores water and nutrients, filters our drinking water, helps break down toxic wastes, and is a critical player in carbon cycling, nitrogen cycling, and, let’s face it, life on Earth. Soil is made up of minerals, dead things, living things, gases, and liquids. Great soil has spaces between its bits. These spaces, called macropores and micropores, hold and allow water and gases to flow, carrying nutrients to your plants. Great soil is rich in organic matter. Organic matter is made up of living things, and things that used to be alive. Great soil also contains the 17 primary nutrients required for plant development. But before you can grow great soil, you need to know what you already have. 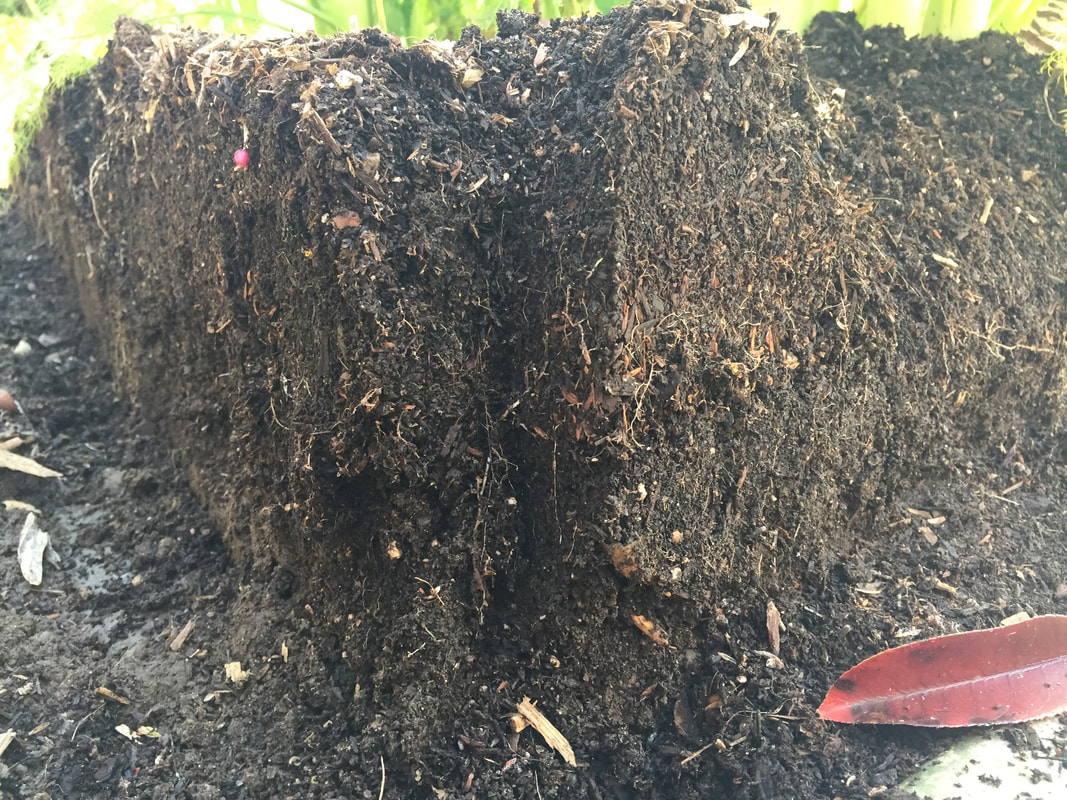 Healthy soil (Kate Russell) What is in your soil?
The 17 primary plant nutrients are called macronutrients. Plants use the inorganic form of these mineral elements (read molecule-sized rocks). The only way to really know what is in your soil is with a soil test from a reputable local lab. By local, I mean on whichever side of the Rocky Mountains you reside ~ the tests used are different for each region. The Olson test is better for the West Coast, while the Brays test is better on East Coast. Now, when your results arrive, you may be little confused by the information. That’s to be expected. Most of us do not read lab results on a regular basis. When I lived in San Jose, California, we tended to have clay soil highly prone to compaction. Aeration was frequently needed. Clay soil tends to contain plenty of most of the necessary minerals, and too much salt and phosphorus. Iron and nitrogen deficiencies are common around here. Other areas and soil types have other strengths and weaknesses. Your soil test results should include percentage ratings for each of the major plant nutrients. It may also tell you how much organic matter is in your soil. Organic matter in soil Organic matter is critical to soil health, and it can range from 1 - 8%. As living things die and begin to breakdown, they add nutrients and improve soil structure. They also alter the electrical charge of soil. Quick chemistry review: molecules can be stable, with no charge, positively charged cations (cat-ions), or negatively charged anions (an-ions). Calcium, potassium, and many other plant nutrients are cations, while organic matter tends to be anions. Plants need both. Ensuring that there is enough organic matter in the soil also improves porosity, aeration, and biological activity. Soil structure Soil is usually described as being sand, silt, or clay. Sand is big. You can see individual particles. And water and nutrients can quickly leach away. Silt is made up of medium-sized particles that hold a good balance of gases, liquids, minerals and organic matter. Clay is made up of extremely tiny particles that can hold a lot of water and minerals. [It can also turn into concrete, especially if you add sand.] Organic particles surrounded by clay are protected from the microorganisms that break them down into nutrients that can be used by plants, creating an unattainable banquet. Identify your soil structure with the test found here. Each type of soil benefits from the following:
Do you see a theme here? Adding organic matter to soil is critical to plant health. A 1% increase in organic matter can make a profound difference in soil structure (aggregation) and chemistry. This helps plant roots get to and absorb nutrients. You can add organic matter to your soil by:
Nitrogen Once you’ve increased the amount of organic matter in your soil, you will want to add nitrogen. Nitrogen levels are the single most limiting factor in most gardens, and organic matter can help your plants access the nitrogen that is already present. Nitrogen is a highly mobile nutrient and it is easily lost. Most soils contain less than 1% nitrogen, while 2-5% is ideal. But it is not simply a matter of adding more nitrogen. Which form will you use? Inorganic nitrogen can be found as nitrites or ammonium. When roots take up nitrates, they increase the pH of the immediate area, making it more alkaline. The opposite is true when plants take up ammonium, making the soil more acidic. Organic sources of nitrogen include blood meal and cottonseed meal, both of which will acidify soil. Soil pH You can’t know which form of nitrogen is right for your soil until you know its pH. Soil with a low pH makes it harder for plants to access some macronutrients. Soil with a high pH does the same thing. Most plants prefer a pH of 6.0 to 6.5 to thrive. Growing great soil means identifying and managing your soil’s pH. Creating healthy soil Soil creation is called pedogenesis. You can create great soil in your garden and landscape when you:
Other ways you can improve your soil’s health is by growing cover crops, using crop rotation, installing foot paths to reduce compaction, and avoiding irrigation run-off and urban drool. What will you do for your soil today?
815 Comments
Fir bark mulch is made from the chopped or shredded bark of conifers, such as redwood, pine, and fir. Fir bark mulch is just one of several different types of mulch you can use to reduce erosion, crusting, and soil compaction. Mulch also helps retain moisture, reduce weeds, and it stabilizes soil temperature. As it breaks down, it even adds nutrients to the soil. Mulch can be straw, grass clippings, compost, wood chips, or fir bark. Fir bark and wood chips last a lot longer than the other mulches. Which is better for your landscape: wood chips or fir bark?  Fir bark mulch (Apostoloff) GPL Fir bark v. wood chips Wood chips come from the interior of a tree. They can be hardwood, softwood, or a combination of the two. Generally speaking, large wood chip mulches will need to be replaced every 5 to 7 years, while smaller chip mulches need to be replaced every 2 to 3 years. Fir bark, because it is made from plant material that has evolved to provide protection against the elements, lasts 7 to 10 years. Besides durability, there are other factors to consider:
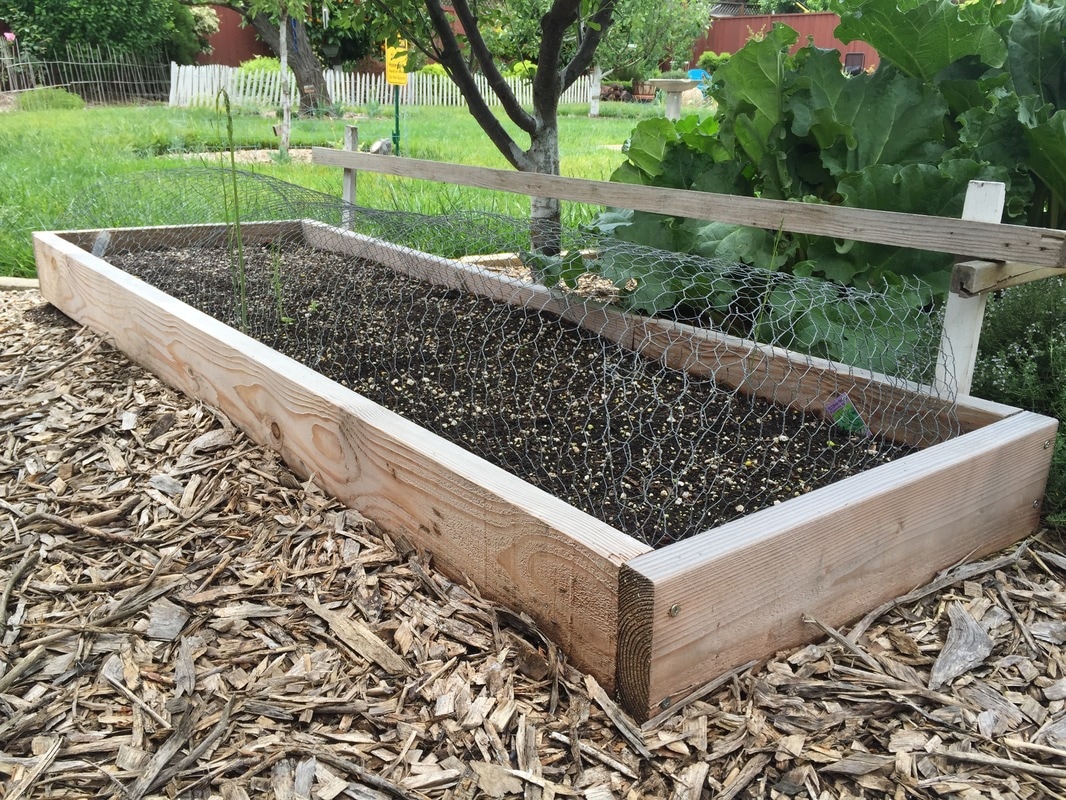 Wood chips around raised bed (Kate Russell) Grades of fir bark mulch Fir bark mulch comes in a variety of sizes, or grades:
The larger the pieces are, the bigger the spaces between them will be. These spaces allow air and water to flow through. Tiny pieces of mulch will hold more water in the soil, but allow for less gas exchange. Yes, it is a balancing act. The biggest thing to consider with fir bark mulch is the likelihood of flowing water in the area. Fir bark has a waxy coating that prevents it from absorbing water, plus it is very light, so it will simply float away. Wood chips, on the other hand, will absorb the water and are more likely to stay where they are. Calculating coverage To determine the cost of using fir bark, you will first need to calculate the area to be covered, and then deicide the depth of coverage needed. Generally speaking, mulch should be 2” to 4” thick. Newly developed areas should be given 3” to 4” of mulch, while established areas can often do with less. One cubic yard (27 cubic feet) of medium sized fir bark will cover an area of 324 square feet to a depth of 1 inch. Let me say it again: ONE CUBIC YARD COVERS 324 SQ. FT. ONE INCH DEEP As an example, let's say you have two areas that are 40 feet long and 3 feet wide, and one area that is 30 feet long and 2 feet wide. Here are the initial calculations:
= [2 (areas) x 40 (feet long) x 3 (feet wide)] + [1 (area) x 30 (feet long) x 2 (feet wide)] = [2 x 40 x 3] + [30 x 2] = [80 x 3] + [30 x 2] = 240 + 60 = 300 square feet In our example, one cubic yard of medium fir bark would give us a little more than one inch covered, since we only need 300 square feet and cubic yard provides 324 square feet. If we decide to use a 2 inch layer, we would need a little less than two cubic yards of fir bark. If you are a number nerd, like me, you could calculate the exact amount needed for a 2 inch depth (1.85 cubic yards), but that really isn’t necessary because a little extra is fine, or you can use it to top off your container plants. Cost of fir bark mulch Currently, in the Bay Area, prices for fir bark mulch average $67 per cubic yard, plus an average delivery fee of $77. A few suppliers will offer free delivery if you buy more than 7 cubic yards, but that is more than most of us will ever use. Some suppliers will also let you pick up fir bark in bags or trucks, so you can save money that way. Of course, it also means you will be picking up all that mulch One More Time. (After moving a full dump truck load of wood chips from my driveway to the back yard using a wheelbarrow, back and forth over 100 times, I can tell you that it feels like an ordeal after a while!) Nitrogen loss (and gain) If you use freshly chipped wood mulch of either type, keep in mind that it will, for the first 6 to 8 weeks, pull nitrogen from the soil as is begins to break down. You may need to add a little extra nitrogen during this time. In the long term, as the wood continues to break down, it will add nitrogen to the soil. Fir bark provides an attractive, durable, and protective covering for your soil, but wood chips are free and less likely to give you splinters. Acidification is a process that lowers soil pH. Soil can be alkaline, acidic, or neutral. The pH scale ranges from 0 (acidic) to 14 (alkaline), with (neutral) 7 in the middle. Soil pH dictates the availability of many nutrients to your plants’ roots.  Soil pH and nutrient availability (CoolKoon) CC BY 4.0 Your soil can be packed full of important minerals, but the wrong pH can make it impossible for plants to reach that bounty. According to my 2015 soil test, my soil had a pH of 7.7 and very little iron. Plants need iron to absorb many other essential nutrients. By lowering the pH, or acidifying, my soil, I can make the iron more readily available. By 2019, the soil pH had a pH of 6.2, which makes many more nutrients available. If you live in an area with alkaline soil and want to grow acid-loving plants, you will need to acidify your soil.
Which edible plants prefer acidic soil? If all of your plants prefer your soil’s current pH, you are in luck. It’s really the easiest way to go. Most garden and landscape plants prefer a pH range of 6.2 to 7.3. Acid-loving plants include:
Moderately acid-loving plants that prefer a pH of 5.5 to 6.5 include apples, basil, carrots, cauliflower, corn, cucumber, dill, eggplant, garlic, melon, peppers, pumpkin, rhubarb, winter squash, tomato, and turnips. Factors of acidification There are three factors that determine the amount of acid needed to lower soil pH. Some of this stuff gets deep in the world of chemistry, but I think I have sorted it out well enough. [If you understand these things better than I have explained, please educate us all in the Comments section!]
How to acidify soil While using the above information will give you more accurate data, you can gently acidify your soil by applying elemental sulfur (S) in stages. As the sulfur oxidizes, it turns into sulfuric acid, acidifying the soil. Changing soil pH takes several months to accomplish and it tends to require regular monitoring and adjustments. Since soil pH is a function of geology and climate, it will be an ongoing process. Just be sure to read and follow the package directions. Fertilizers and acidification Nitrogen has a powerful impact on soil pH. The form of nitrogen you use makes a difference. To lower the pH of your soil, use ammonium-based fertilizers, rather than nitrate-based fertilizers. Your blueberry plants will thank you. What's the pH of your tap water? Clay soil is prone to compaction. 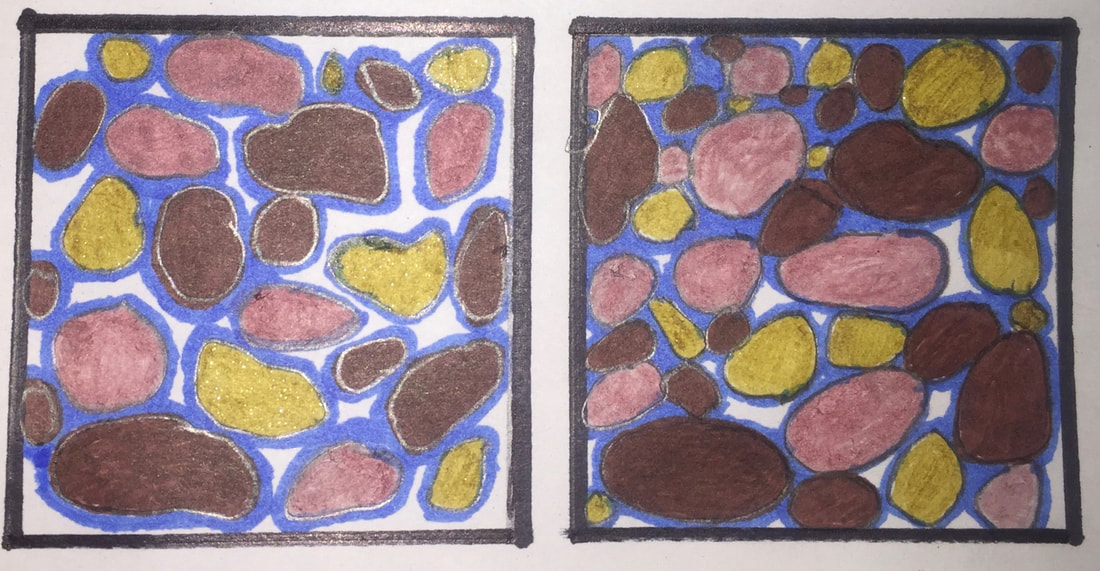 Loose soil (left) has plenty of room for water (blue) and compacted soil (right) does not (Kate Russell) Healthy soil is loose enough to allow roots and earthworms to move around freely, while still providing support and structure. Unlike sand (which has its own problems), compacted soil has too few macropores and micropores (larger and smaller spaces) between soil particles. These spaces are needed to hold air, water, and nutrients for plant roots. Compacted soil can prevent water from moving into the soil (infiltration), through the soil (permeability), and out of the soil (drainage). Standing water can drown plants and create mosquito habitat. It can also make life difficult for tender new seedlings trying to get a healthy start by reducing nutrient uptake and poorly anchoring plants to the ground. Soil compaction hurts mature plants, as well, by reducing nitrogen levels in the soil, as well as other nutrients. What causes soil compaction? Every step you take presses down on the soil beneath your foot. Healthy soil can spring back. Soil that is walked on too frequently loses that ability and it becomes compacted. Other common causes of soil compaction include:
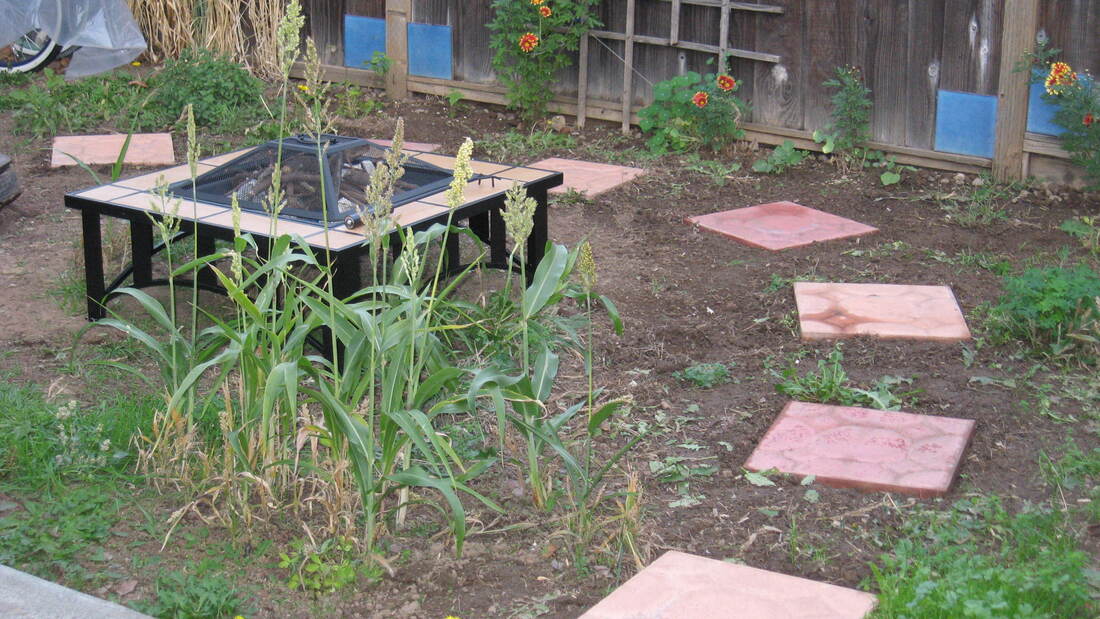 Stepping stones protect against soil compaction (Kate Russell) Plants that counteract compaction Deep taproots can help break up compacted soil. Put these plants to work for you, rather than compounding the problem with further digging. Adding these plants to your landscape can help reduce compaction and improve soil structure:
Other tips to reduce soil compaction
 Free arborist wood chips are a good treatment for compacted soil (Kate Russell) The very best thing you can do for compacted soil is cover it with a thick layer of aged mulch or some wood chips and leave it alone for a while.
Humus is the magical dark stuff of soil that helps plants grow. Or is it?
Microorganisms in the soil facilitate the decomposition of plants, bug bodies, and other living things in a process called humification. Humification occurs in the soil and in compost piles. Along with microorganisms, worms, nematodes, and other tiny critters help this transformation along. The black, rich, earthy smell from premium soil is the humus, or organic matter. (The black color is from carbon.)
When you add organic matter to the garden or compost pile, you are feeding the organisms that make nutrients available to your plants. Infiltration rate is a measurement of how quickly water can enter soil. Infiltration rates are reported as the depth water (in millimeters) can reach within one hour. For example, an infiltration rate of 10 mm per hour means that a 10 mm layer of water on top of the soil will take one hour to soak in. Understanding the infiltration rate of your garden or landscape can mean the difference between irrigation and flooding. Soil types & infiltration When soil is extremely dry, it won’t absorb water at all because it becomes hydrophobic. Before that point is reached, water is absorbed quickly in what is called the initial infiltration rate. It happens quickly because the macropores in the soil contain only air, giving the water plenty of places to go. As the pores begin to fill, absorption slows down to a steady rate called the basic infiltration rate. According to the Food and Agriculture Organization of the United Nations (I never knew there was such a group until today!), different types of soil have different basic infiltration rates:
Clearly, taking an infiltration test can help you have a better understanding of what type of soil you have. It also helps you to select plants that are best suited to your soil. Benefits of better infiltration Understanding and amending the infiltration rate of your soil can provide many benefits:
How to conduct an infiltration field test Generally speaking, most of these tests are done with specialized equipment. You can, however, follow these steps to perform a modified version that will give you useful information: Another testing method you can try only requires a shovel and a watch:
If your soil is like mine, compacted heavy clay when we moved in, adding organic material is the best way to improve the infiltration rate. If you plan on installing a rain garden, checking the infiltration rate is critical. Standing water can drown even the healthiest plant, given enough time. Help your garden and your landscape with improved permeability and infiltration rates. Your plants will be healthier, more beautiful, and more productive.
Every drop of rain that falls on your landscape ends up somewhere. Where that water falls and where it ends up is called a watershed. Rainwater may be absorbed by plants, sipped by local wildlife, or it may evaporate back into the atmosphere. Rainwater can also wash away valuable topsoil, carrying fertilizers and pollutants into our groundwater supplies, rivers, lakes, and oceans. In fact, the California Native Plant Society tells us that urban drool is the #1 source of ocean pollution. To prevent water waste, pollution, and runoff, a new approach to landscape design was created to protect our precious watersheds. Watershed approach to landscape design The watershed approach to landscaping uses garden design, installation, and maintenance methods that take advantage of natural processes to create spaces that are water efficient, while providing abundant plant growth, good habitat, and an enjoyable place to be. The watershed approach captures, cleans, and collects rainwater to slow, spread, and redirect its flow in ways that reduce the need for other irrigation. The benefits of using a watershed approach include:
How much rainfall do you get? Every yard is different, but your average 2700 sq. ft. roof in the Bay Area can collect more than 25,000 gallons of water each year! You can use the USGS rainfall calculator to determine how much rain water falls on your roof in any given storm, simply by entering your home’s footprint dimensions (length x width) and the amount of rainfall measured by you* or reported by your local news station. During a storm that drops one inch of rain onto a half-acre lot turns out to be nearly 14,000 gallons of water! Rain barrels, ponds, swales, and filtration tanks are all different ways you can collect rainwater.
Where does that water go?
All too often, rain water falls on buildings, roads, and concrete, where it collects pollutants and debris, and carries them to our groundwater. Our garden plants never have the opportunity to soak it up. On the other end of the spectrum, rain water either floods an area, carrying away valuable topsoil, or it gets stuck in one place, where soil, plants, and organisms begin to rot. Using the watershed approach removes those problems by studying where water comes from, where it goes, and taking actions that redirect water flow to be more efficient and environmentally sound. First flush and absorption areas First flush refers to the first 3/4 to 1 inch of rain that falls after a dry period. This rain water contains higher levels of pollutants and debris than the rain that follows. Can you filter those pollutants out or redirect this water to less vulnerable areas? After that water is dealt with, how much permeable soil is needed to absorb your expected rainfall? First, you will need to know how deeply your soil absorbs water. You can determine this by going outside after a few days of rain and digging in with your shovel. How far down did the rain actually go? This number can help you determine how big of an absorption area you will need for the expected rain. Example: You live in a 1,000 square foot house in San Jose, CA, where you receive an average of 15 inches of rain each year. Using the USGS rainfall calculator, you would discover that your house can collect 9,351 gallons of water in a year. To absorb all that water, you would need to divide the volume of water by 7.48 for a per foot absorption area. (There are 7.48 gallons of water in a one cubic foot of space.) This gives you 1250 square feet needed to absorb all that water, assuming that your soil absorbed water down to a depth of one foot. If it only went down 6 inches, the 1250 sq. ft. figure would have to be doubled. If you don’t have that much space, how can you prevent runoff? What if that’s not enough water? What are other sources of irrigation water? Be sure to check with your local municipality for laws regarding water collection (there have been countless wars started over water rights). You can collect water from your bath or shower, as it heats up, in a bucket. You may be able to redirect the outflow from your washing machine to irrigate ornamentals. Even the water left over from cooking pasta and vegetables makes useful water for the garden. How much water do you really need? There is no excuse for wastefulness when it comes to water. You might be surprised at how little water you and your garden actually need. Our household has reduced water consumption to only one-fourth of what it was three years ago and we get more production from the garden! This is possible by:
Other factors to consider when using the watershed approach:
Start using the watershed approach in your yard by asking yourself these questions:
What’s really nice about the watershed approach is that it takes advantage of natural processes that have evolved over thousands of years to work without any help on our part. Native plants and those suited to your microclimate require less care, which translates into less work, less expense, and a healthier environment. Activity: Inventory your landscape’s water needs
Every drop of water that you are able to use more efficiently protects the environment and your bank account. Perlite has a distinctive feel, lightweight and crispy, but what is it and how do we use it in the garden? (This one's for you, Jim!) 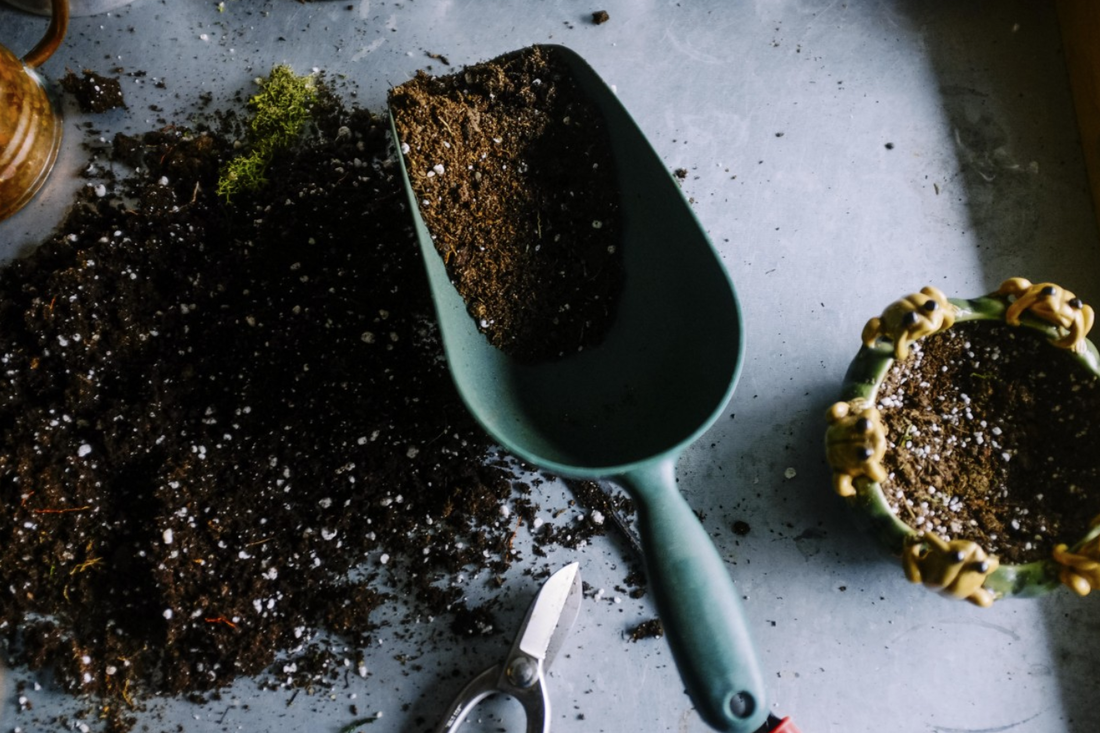 Perlite is the featherweight white stone found in potting soil. Public Domain What is perlite?
Perlite is actually a form of obsidian. Obsidian is a dark volcanic glass that forms when lava cools quickly. Obsidian is very brittle and extremely sharp. It was commonly used to make cutting and hunting tools by primitive peoples. [Back in the early 80’s, I had an archeology professor at Seattle Central Community College. He loved to tell us how, when he needed chest surgery, he found a surgeon who was willing to use obsidian tools. Being sharper than surgical scalpels, the obsidian left a scar that was practically invisible!] How perlite is made Coming out of a volcano, obsidian is less than 1% water. As it comes into contact with rain and groundwater, it starts to absorb moisture. This hydrated obsidian is mined and then baked in a 3,000°F oven where it pops like kernels of popcorn, growing to twenty times its original size! These glassy kernels look more like a froth of bubbles, but the outer bubbles are broken, leaving jagged edges. How perlite is used Perlite has many industrial uses, including insulation, mortar, plaster, and ceiling tiles. The broken glass bubbles of horticultural perlite are used to aerate soil, increasing porosity. Perlite does this by increasing the number of macropores and micropores that carry and hold air and water for plant roots. Perlite can hold 3 to 4 times its weight in water. Perlite is also used in hydroponic garden systems as a filtration medium. (Did you know that perlite is used to filter beer?) Perlite is also found in many planting mixes. You will see them as small white chunks. Sometimes these white particles are pumice, like the volcanic foot scrubbing stone you buy at the drugstore. Sometimes those white bits are styrofoam. Both perlite and pumice improve soil structure, but styrofoam does not. If you are going to use perlite to improve heavy clay soil, don’t just pour it on top. You will need to dig it in a bit, otherwise you will simply end up with a layer of perlite on top of your clay. Perlite is an excellent soil additive for roof gardens, balcony plants, and extra large planting containers, because it is so lightweight. Perlite is sterile, inert, and incombustible. Mold and mildew won’t grow on it and pests won’t eat it. Adding perlite to your soil can lighten heavy clay and it can help sandy soils retain more water and nutrients. Poise and grace may carry us through difficult situations, but sometimes things just need to fall apart. Decomposition is one of those things for which falling apart is a good thing. 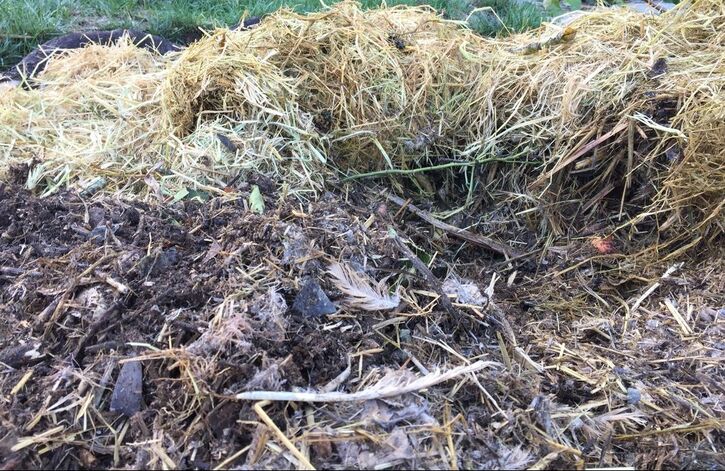 Decomposition in a compost pile (Kate Russell) Decomposition describes the way complex organic structures are broken down into simpler structures. When plants and animals die, all the processes that held them together and kept them functioning stop working and they become organic matter. The study of how things decompose is called taphonomy, from the Greek word for tomb.
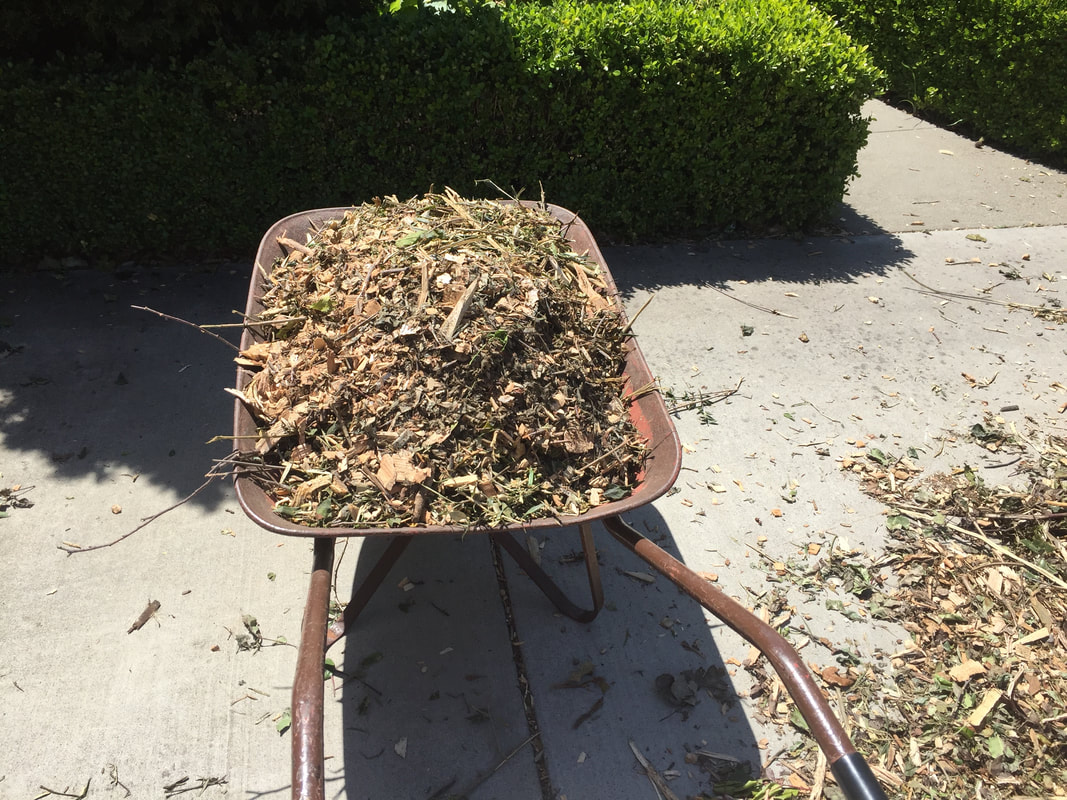
Most of the mineral food enjoyed by your plants comes from organic matter created by breaking down dead plants and animals. You probably already knew that, but did you know that the living things that speed decomposition actually reduce the amount of nitrogen in your soil as they feed? Basically, there are two ways decomposition occurs: with the help of other living things (biotic decomposition) or through physical or chemical processes (abiotic decomposition). Now, you may think that this doesn’t apply to you as a gardener, but what about your compost pile? What is all that mulch actually doing to your soil as it breaks down? It’s really pretty amazing, so read on! There are three basic stages of decomposition:
This is why your compost pile works faster when you chop it up and flip it periodically. The cut edges provide points of entry for all those microscopic workers and the air helps the microbes breath. Warmer temperatures also speed up the process. Like us, those little helpers don’t move nearly as fast in winter! But, as they feed, they take the chemical elements that made up the plant and break them down into nutrients that are available to living plants. So what happens when I put straw mulch around my fruit trees? Air, sunlight, and water will add their two cents to the decomposition process, but straw is pretty tough, so it will take some time to decompose. Local birds may grab a few bits and the sowbugs are sure to start feeding, but it is the microbes who will do the lion’s share of the work. The plants and microorganisms that feed on dead or decaying plant matter are called saprophytes. As the saprophytes feed, they poop out simple minerals that plants use and gummy substances that hold bits of soil together into aggregates. These aggregates improve soil structure by creating plenty of macropores and micropores. This means that water and nutrients will move through the soil more easily. These soil aggregates also improve aeration, drainage, water-holding capacity, and water infiltration rates. As decomposition takes place, carbon dioxide is also released. This CO2 can end up in the atmosphere, or it may combine with water to form carbonic acid. Carbonic acid (H2CO3) works with other chemicals to break down rocks and pebbles in the soil, making those nutrients available to nearby plants. What about the net loss of nitrogen? It ends up that there is a delicate balance between the amount of nitrogen available to plants and the needs of the saprophytic bacteria and fungi that make those nutrients available. If you add a bunch of carbon (straw, leaves, shredded paper) to an area, the microbes will begin feeding and breeding like crazy. The only thing is, they also need nitrogen to live, so they will pull it from the soil, creating an initial nitrogen loss. Of course, over time, all of those nutrients will end up back in balance, supporting your garden, but that may take time that your seedlings simply do not have. This balancing act is called the carbon-to-nitrogen ratio. Ideally, you will want a 10:1 to 12:1 ratio of carbon to nitrogen. This means adding one pound of nitrogen for every ten pounds of carbon. If you are going to add a large amount of carbon to an area, it is a good idea to also add nitrogen. This keeps all the inputs for your soil microbes in balance as they improve your soil. Personally, I sprinkle blood meal (a good source of nitrogen) over an area, top that with aged compost (a good slow-release of many different nutrients), and then mulch with straw. The mulch keeps down weeds, stabilizes soil temperature, and, combined with the compost and blood meal, provides excellent nutrients and improved soil structure. It’s my way of tucking in my plants for our mild winters or when plants are stressed by too much California sun. If you have access to a microscope, check out the various stages of decomposition to see what’s really going on down there! Whether you are talking about rain, plant food, or political arguments, there comes a point where nothing else can be taken in. Saturation is one if those points of perfect, momentary balance between plenty and too much. 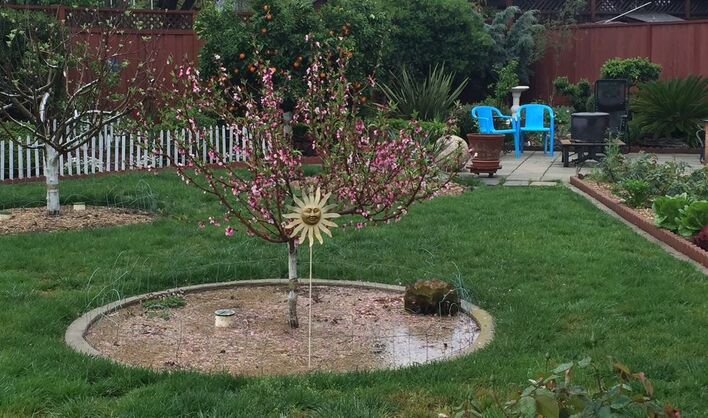 Nectarine tree saturated with water, setting the stage for peach leaf curl (Kate Russell) To the untrained eye, a garden looks tranquil. The quiet greenery is peaceful and calm. It’s like watching what appears to be a Perfect Family, with everything running smoothly - no conflicts, no stresses, no worries. Of course, in reality, it’s nothing like that. The chemistry and conflicts that occur in gardens and relationships are never as smooth as it looks from the outside.
Saturation tends to sneak up on me. The amount of water I use to irrigate the garden in one month doesn’t work as well in another. The daily 25 minutes of weeding in one week is enough to keep down the competition, but in other weeks, the weeds practically race across the yard. Recognizing the delicate balance between enough, plenty, and too much is part of what separates a successful garden from one that is struggling. Water is an obvious case of saturation. Whatever your soil structure and composition, there are only so many macropores and micropores that can hold onto water. Sand will have a lot more porosity and better drainage than the Bay Area’s heavy clay. But even clay reaches a saturation point. That’s when gravity pulls the water down and away, preventing your plants from drowning, but also leaching away valuable nutrients. If it can't go anywhere, it pools around your plants, drowning them and creating mosquito breeding grounds. Just enough water for each plant can be difficult to determine. In dealing with California’s drought, our family has reduced the amount of water we use to only 25% of what we were using 3 years ago and guess what? All the plants are fine. In fact, they are better off than they were before. Oops. Fertilizer is another case of enough is great and too much can be deadly. Many fertilizers can burn plants once the point of saturation is reached. If you are up for a fun read, try Don Mitchell’s 'Moving Upcountry' series. He has a hysterical account of using too much nitrogen and destroying his tractor. Of course, there’s nothing funny about burning your garden crops with too much fertilizer, but it happens. More common, and frequently unseen, is the case of certain minerals saturating a soil and creating an imbalance. After sending soil samples to a lab for testing, I learned that my heavy clay soil has tons of every nutrient, except iron. Unfortunately for my plants, they need iron to be able to absorb everything else. Getting your soil tested by a local, professional lab is the only way to really know what’s in it. It’s a complex dance of chemistry and molecules going on every moment in the garden. A nutrient imbalance or troublesome saturation can change everything. Saturation can also refer to sunlight, garden design, and your pantry. Are your plants showing signs of sunburn? Are you saturated with tomatoes by autumn? Do you still have butternut squash left over from two years ago? Are you tired of looking at a monotonous sea of green? Avoiding saturation may mean nothing more than adding some color or a piece of art to the landscape. It may mean planting shade-loving plants under sun-loving plants. Or it may simply mean planting what you and your family (friends and neighbors) will be happy to eat. Have you ever over-planted something to the point where you never wanted to see it again? How has saturation impacted your garden? Soil solarization is an environmentally friendly method used to rid an area of pretty much everything: weeds, fungal and bacterial pathogens, and nematodes. Solarization is particularly effective against the pathogens that cause fusarium wilt, verticillium wilt, root rot, blight, tomato canker, and crown gall disease. It is also used to eliminate a lawn and prepare it for more drought-resistant varieties of plants.
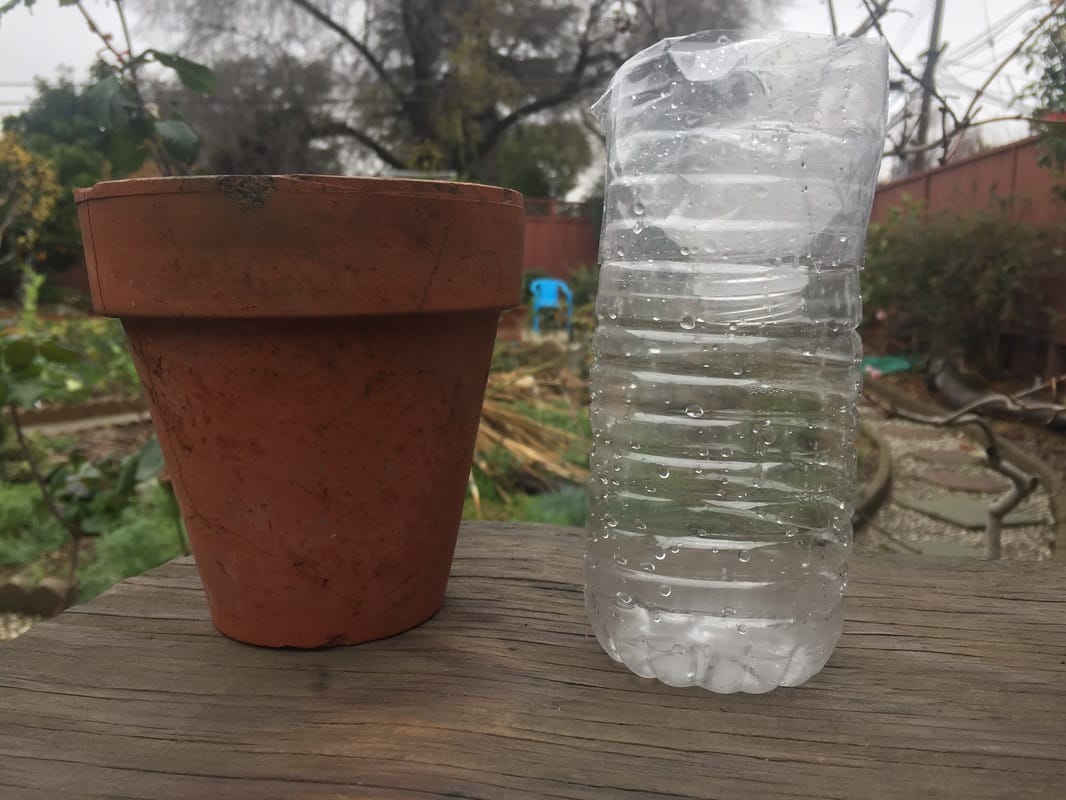
To prepare an area for soil solarization, it must be smoothed flat and free of dirt clods and visible weeds. Solarization works far better on level areas than on hillsides, but sun exposure is critical for the process to be effective. Shady areas are not suitable. Basically, soil solarization covers an area with clear or white plastic and lets the sun cook everything to death. Now, when I say covered, I mean completely. No cracks, no bubbles, no loose edges. If gophers, ground squirrels, or birds are a problem in your area, this can be difficult. Here are the steps to use for effective soil solarization:
NOTE: Black or colored tarps should not be used unless you live in a cooler, coastal area. In this case, a black tarp will prevent weeds from growing during the early part of the process and the tarp will need to be left on longer than normal. When selecting the sheeting material, heavier is generally better:
Using a double layer of plastic, separated with plastic bottles or PVC pipe, can increase the effectiveness of solarization. This has been shown to increase temperatures by 2-10°F. If it is done properly, the heat of the sun should reach 140°F, killing pathogens and weed seeds, without the use of chemicals. Another benefit of soil solarization is that it speeds up the breakdown of organic matter, making all the nutrients bound up in various life forms available to new plantings. Plants grown on solarized soil tend to grow bigger and faster, as a result. Of course, this process also kills earthworms and beneficial soil microorganisms. Soil solarization can also be used on planting containers and in raised beds that have become infested with undesirables. In this case, use a double layer of plastic and place the container in the sunniest place you can. Once solarization is complete, carefully remove the plastic and put it in the trash or recycling, depending on your region. Disturb the ground as little as possible to avoid planting newly arrived weed seeds. Mulch can be anything placed on top of soil to cover and protect it. Naked soil is vulnerable to erosion, weed seeds, compaction, and water waste. Mulching provides many benefits:
 Perennial plants protected by a mulch of free wood trimmings (Kate Russell) So, what makes a good mulch?
A good mulch allows air and water to pass through easily, while blocking the sunlight needed by weed seeds for germination. Obviously, gravel fits that description, but do you really want to pick out all those rocks at planting time? Or, what about black plastic landscape cloth - doesn’t that do the same thing, without all the work? No, it doesn’t. Ultimately, the plastic will break down, allowing weeds easy access and adding chemicals to the soil. Instead, take advantage of natural processes and use plant-based mulches. They add nutrients and improve soil structure as they break down and they can often be found for free!
How to apply mulch Mulch should be applied 2"–6” thick, depending on particle size. Smaller pieces fit together more closely, so you don’t need as much as for larger bits. If weeds are a serious problem, or you are eliminating a lawn, it is a good idea to use a really thick layer of wood chips. Be sure to keep mulch several inches away from trunks and stems. If mulch is in constant contact, problems such as crown rot can occur. As worms, beetles, weather and microorganisms breakdown the mulch, you will need to add more mulch, usually every 3–5 years. Creating and applying compost is one of the very best things a gardener can do for their soil. 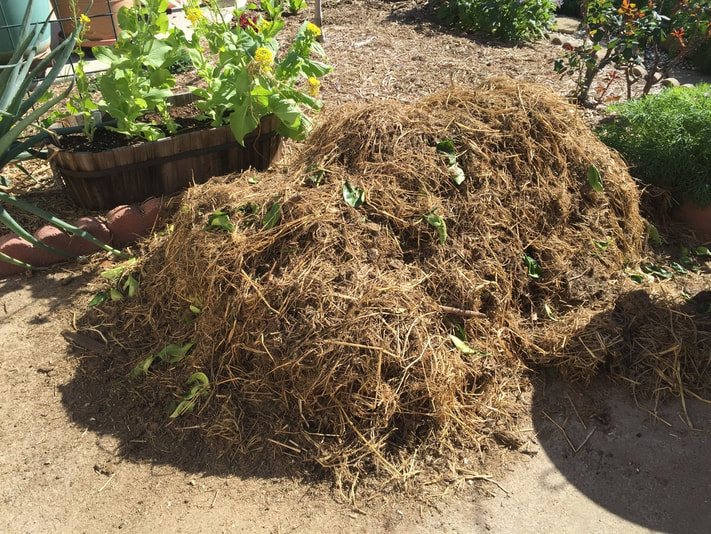 Compost pile on concrete (Kate Russell) Composting is the natural process by which organic materials are broken down, making them available to plants and microorganisms. It is a major component of pedogenesis, or soil creation. Without healthy soil, we begin to lose our food, water and air. Yeah, it’s kind of important. More benefits of composting include:
One of the nicest things about composting is that bacteria and fungi do most of the work for you! Other organisms, such as worms and insects, also pitch in to help. Now, it is possible to simply dump everything in a pile and wait for nature to takes its course. Eventually, there would probably be a nutrient rich soil amendment, but it might take years. Or it can turn into a stinky, rotten mess. Follow these tips for successful composting in a reasonable amount of time. Selecting a site for composting
 Composting bins (Antranias) Public Domain
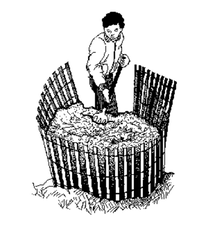
Wire bins work well and are highly mobile. You simply move the wire away to flip the pile and pitch the material back in, watering as you go. If you look online or in your local library, there are many DIY compost bin instructions available for free and these simple structures do not require a contractor's license or skill set to build. For me, I find that simple piles work the best. I keep my regular compost pile near my chicken coop, for convenience. Occasionally, I move it to an exhausted bed for a season to supercharge it with nutrients and organic material. 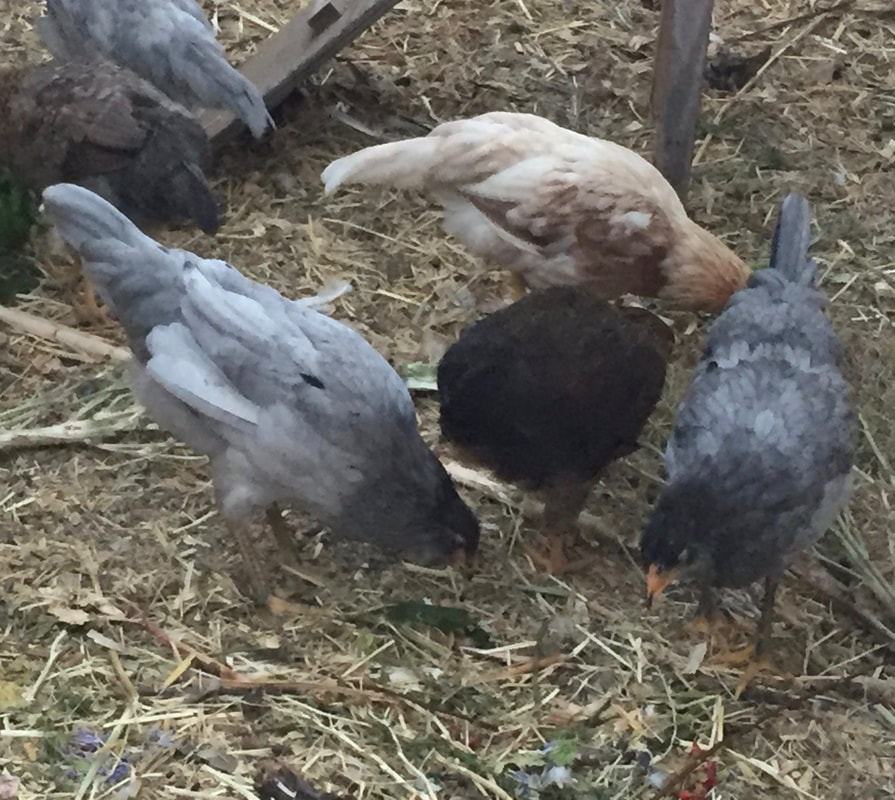 Chickens help produce some amazing compost - plus you get eggs! (Kate Russell) Understand the process: Organic matter + air + water = compost Organic matter consists of yard and kitchen waste that has been cut into 2” or smaller sized pieces. Smaller pieces compost faster because there is more surface area for decomposers to reach. Organic matter is considered either “green” or “brown”. Green matter includes cut grass, pulled weeds, kitchen scraps and manure, and it is rich in nitrogen. Brown matter is rich in carbon and includes dried leaves, straw, and shredded newspaper. The ratio of green to brown is a major factor in how long it takes a compost pile to breakdown. “Hot” piles work fastest and use a 30:1 carbon-to-nitrogen ratio, while slower piles can have a 2:1 carbon-to-nitrogen ratio. If material is continually added to a single pile, it will slow the process. A better choice is to have 2 or 3 piles, at various stages of decomposition. Meat and dairy in the compost pile? Most recommendations warn against using meat, dairy, and grease in compost piles. Other people have no problems with it. Personally, I use the majority of my kitchen “waste” to make soup stock. The solids are then fed to my chickens. Whatever they don’t eat (along with what they did eat) ends up in the compost pile, bones and all. I have had no problems and my plants seem to appreciate the calcium. Of course, my dogs do a very good job of keeping opossums, rats, and raccoons out of my yard. It's your call. One other method of decomposition that uses fermentation, rather than decomposition does allow you to add meat and bones without difficulty. This method is called bokashi. Decomposition Decomposition is an aerobic process, which means it needs air. Air helps breakdown organic matter and those tiny workers need it, too! Air enters a compost pile by turning it every few days. [Read: good exercise.] Water is needed for the same reasons as air: it aids in decomposition and it keeps microorganisms and other decomposers alive. Keep the compost as damp as a wrung out sponge and avoid simply watering the top, as this tends to cause runoff. Watering as the piles are turned works the best. If the pile gets too wet, spread it out and let it dry, or it will rot. Temperature is another composting factor. As materials break down, especially the green ones, energy is released in the form of heat. If you’ve ever watched a big pile of freshly cut grass, you know exactly what I mean. Under the right conditions, a pile of grass clippings can burst into flames! (And it stinks to high heaven). Ideally, the right conditions will generate temperatures between 122 - 131 degrees Fahrenheit. If temperatures remain above 140 for at least 10 days, weed seeds and pathogens will be killed. If temperatures stay above 160, however, decomposers will die and the process will stop. Because temperature is a factor, do not expect much out of a compost pile in winter. Material can still be added, or another pile started. In spring, the whole process will begin again. Also, if an area is especially hot or wet, cover the compost pile to maintain desirable moisture levels. Some people take composting very seriously and monitor temperature. I didn’t until I started composting the bedding from my chicken coop. Composting manure Animal bedding and manure are reasonably good sources of nitrogen and organic material, but they can make you sick. To be safe, manure must be composted for at least 45 days, 15 of which must be at temperatures between 131°F and 170°F, and turned at least 5 times. Assuming it hasn’t been recontaminated by air-dropped bird poop or other pathogens. Raw manure should never be applied to the soil while plants are growing. If it is, be sure that the manure does not touch the plants. Composted manure and bedding have significantly improved my soil health and helped to reduce compaction. Apparently, all those earthworms and burrowing beetles love the stuff! 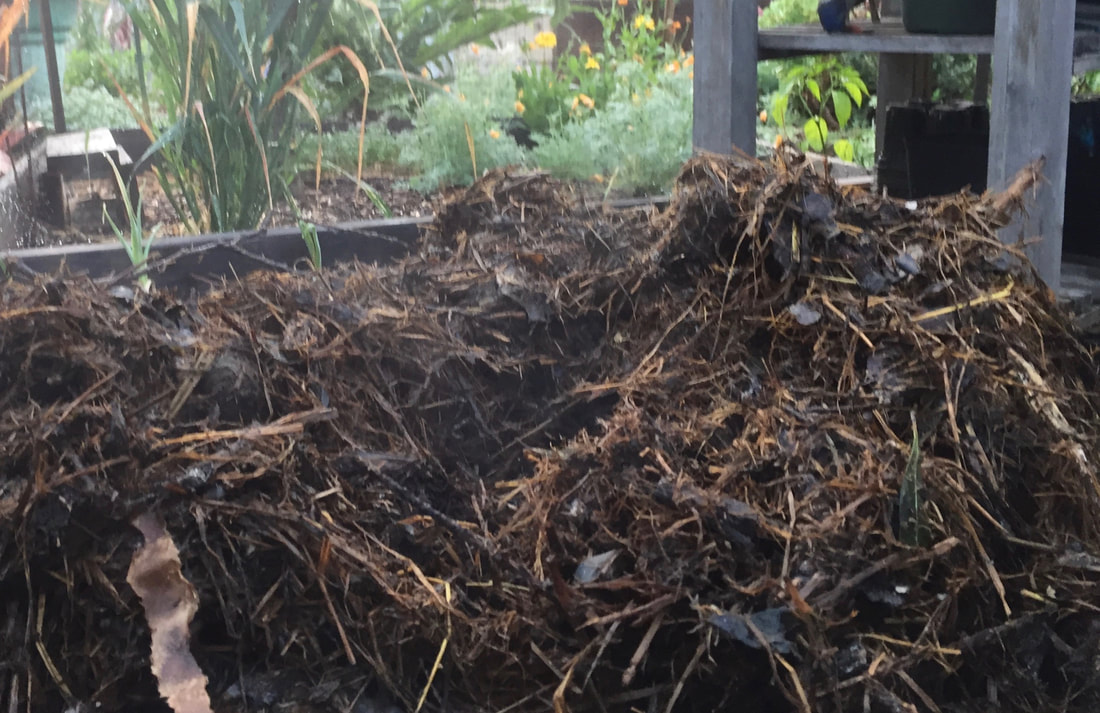 A steaming compost pile in the morning makes this gardener very happy! (Kate Russell) When is compost ready?
Compost is called “finished” when it is ready to use. There is simply no way to say how long finishing will take because of the factors already mentioned. Generally, speaking, under reasonably good conditions, a compost pile is ready for use within 45 to 60 days. Finished compost takes up 25-40% of the original occupied space, depending on its ingredients. Compost can be dug into beds before planting, a 2” layer can be applied over lawns as an amendment, or it can be used as mulch or top dressing. I like to add just a little compost to the bottom of potted plants before adding high quality potting soil and my plants seem to like it a lot. Composting with worms For those who do not have space for a compost pile, bin, or drum, try composting with worms! This is called vermiculture. Worm bins can compost an amazing amount of yard and kitchen scraps pretty quickly. Did you know that worms can eat their body weight in scraps every single day? Learn how to build worm bins and compost with worms at the UC Agriculture and Natural Resources page about worms. Remember, composting is easy and it provides a powerful boost to the garden. Start composting today! I don’t know about you, but my mornings nearly always start with coffee. I’ve been making and drinking coffee for a really long time. And all that coffee brewing ends up leaving behind a lot of coffee grounds. It is estimated that Americans drink 700 million cups of coffee a day, which translates into nearly 17 million pounds of coffee grounds per day!  Morning coffee at The Coop with Kate Russell There are many claims made about coffee grounds in the garden. It is said that they repel cats and insect pests, prevent weeds, kill slugs, add nitrogen, aerate the soil, and attract earthworms. Until recently, however, there wasn’t much real scientific proof behind any of those claims.
Chemicals in coffee grounds We now know that coffee grounds contain 1-2% nitrogen after brewing. That’s not much in the way of plant nutrition. Coffee grounds also contain 0.3% phosphorus and 0.3% potassium, plus cellulose (carbohydrates), structural lignin (woody plant parts), triglycerides (oils), lipids (fats), protective phenolics (flavonoids/non-flavonoids), and essential oils. There may also be a small amount of caffeine remaining. Breaking down coffee grounds After adding coffee grounds to the garden, fungi and bacteria work to break them down. These bacteria, in turn, are believed to help suppress many common fungal diseases, such as fusarium wilt, cavity spot (Pythium), and white mold (Sclerotinia). The caffeine and nitrogen decompose quickly, while other ingredients take longer, as with any other organic matter. Earthworms tend to pull coffee grounds deeper into the soil. This action aerates the soil, improves soil structure, and provides nutrients to deeper roots. The slower to decompose ingredients in coffee grounds provide humic substances (a fancy way of saying humus - the organic components of soil). In this use, organic does not mean chemical-free. The word organic refers to the fact that it came from living things. As coffee grounds decompose, the carbon-to-nitrogen ratio changes from high (25:1) to the ideal (10:1). The carbon-to-nitrogen ratio is important because soil microorganisms need both carbon and nitrogen when they feed. If the ratio is high (with more carbon), they will pull nitrogen from the soil. If the ratio is lower, these microorganisms will leave nitrogen behind for the plants. Effects of coffee grounds in soil Coffee grounds help moderate soil temperature, the same as any other mulch. Research has shown that coffee grounds bind to pesticide residues and toxic heavy metals. This is a really good thing because it keeps those chemicals from entering your plants. I have seen claims stating that coffee grounds help make nitrogen, iron, phosphorus, and zinc more easily available to plant roots in areas with alkaline soil, but I haven't found any verifiable proof. Contrary to common belief, coffee grounds do not consistently acidify soil. The pH of decomposing coffee grounds is very unstable and can range from mildly acidic to mildly alkaline. Plus, those changes in pH only affect the immediate area and not the soil profile as a whole. How to get the most out of coffee grounds in the garden Coffee grounds can be applied to the soil surface as a mulch (no more than 1/2” thick) or composted as a soil amendment. Fresh coffee grounds can cause light sensitivity (phytotoxicity) to above-ground plant parts, so direct contact should be avoided. Here are a few more interesting facts about coffee grounds in the garden:
So, enjoy that cup of java and let your garden make the most of what's left behind! Recent heavy rains have brought much needed water to the drought stricken San Jose, California, but one of my fruit trees was not happy about it. Take a look at the photo below to see how water pooled around the tree. 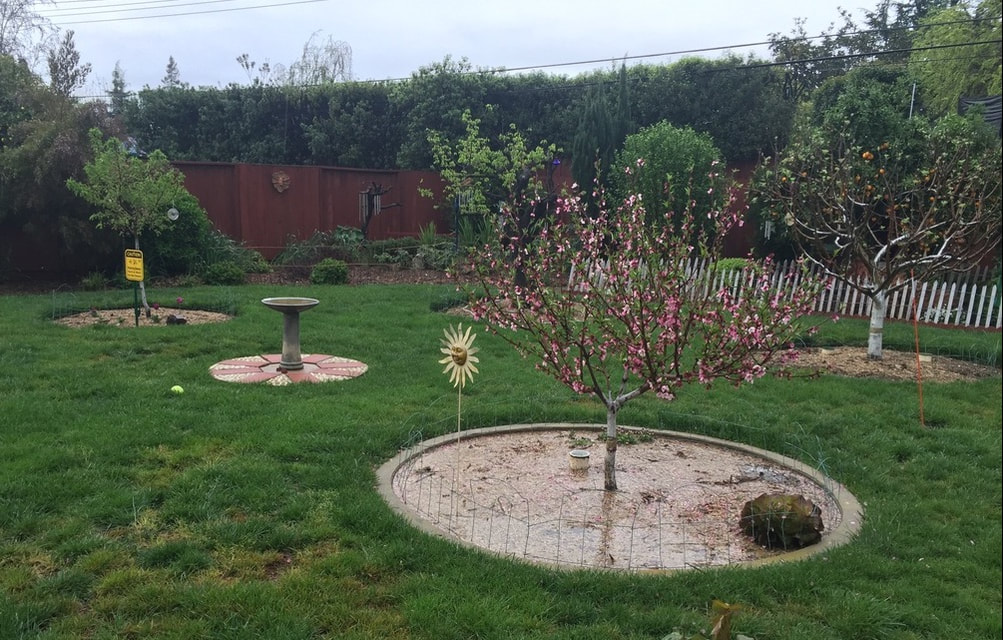 Standing water around nectarine tree (Kate Russell) The drainage around trees with irrigation rings was fine. I can only assume that it was the cement curb around the tree that was at least partially to blame for flooding my poor little nectarine tree. At the same time, the drainage pattern was so significantly different, that I will have to explore other possible causes and remedy them. Rainwater generally moves down, due to gravity, and sideways, toward drier areas. The curb prevents that sideways movement. All that standing water can lead to crown rot, root rot, and many other fungal diseases.
What is porosity? Porosity, or permeability, in the garden refers to the ability of air and water to move through tiny pockets in the soil. These tiny spaces are called macropores and micropores, depending on their size. Soil that is rich in organic material tends to have a variety of macropores and micropores that improve its porosity. Porous soil allows roots to reach out freely to find water and nutrients. In my yard, we tend to have heavy clay soil that is made up of very tiny particles that leave few spaces in between. Porosity is measured as a percentage of spaces compared to the soil around them. What happens when it rains? When rain starts to fall, or the sprinklers kick in, the soil is initially hydrophobic, causing runoff and urban drool. This is because the water is repelled, the same way a dry sponge allows water to run off the top, rather than being absorbed. Now, we all know that sponges are very porous. They have lots of holes that can hold water. That’s why we use them! Once the soil becomes damp, like a sponge, it can then hold a surprising amount of water. When all the pores are full, gravity then pulls the water downward into groundwater, where it is taken to creeks, lakes and oceans. That’s why it is so important to not overuse fertilizers, pesticides, fungicides or herbicides. All those chemicals leach into our water supply! Porosity and plant health As plants become saturated with water, tiny pores, called stoma, open wide and the plant starts panting in a process called evapotranspiration. Just as we can see steam when we breathe on chilly days, plants exhale moisture along with other gases. When there is no water to be found, and the plant risks the other side of water stress, the stoma close, to hang on to every bit of moisture possible. When the ground gets muddy, whether from too much rain or over-watering, roots cannot breathe and the plant can drown. In the case of my nectarine, I used plastic tubing to redirect the standing water away from the tree. That’s not something I want to do every time it rains, so I will use these methods to improve the porosity around the nectarine tree:
If you see standing water after a heavy rain, these tips can help you improve the porosity of your soil and the health of your plants. UPDATE (1/10/2017) After heavy rains, I was very happy to see that the soil around my nectarine tree is draining very nicely. It really is amazing how effective just a little mulch, compost, and cover crop treatment can change an area for the better! The rhizosphere is the area of soil that is directly impacted by root secretions and related soil microorganisms. Plants interact with the surrounding environment through chemical reactions, ion exchanges and complex trade agreements with soil microorganisms. The majority of these interactions occur below ground, in the rhizosphere. 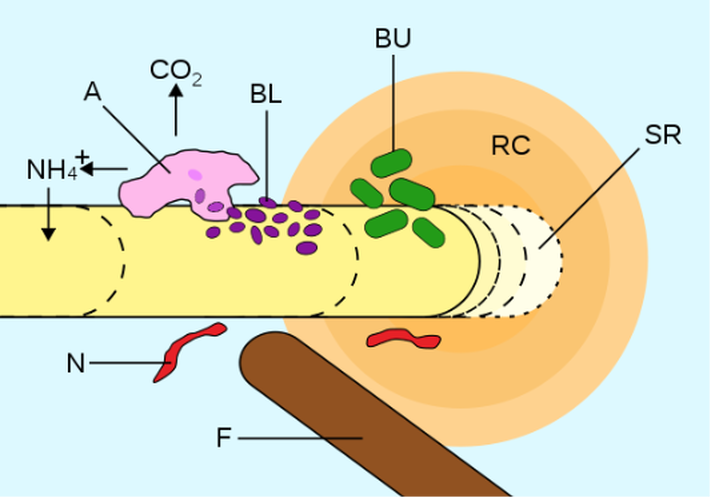 Rhizosphere illustration: A=amoeba consuming bacteria; BL/BU=bacteria; RC=Root derived carbon; SR=Sloughed root hair cells; F=Fungal hyphae; N=nematode (Smartse) CC BY-SA 3.0 Root secretions contain acids, sugars and amino acids. These secretions help plants obtain nutrients and protect against pathogens. They also stabilize soil aggregates.
The rhizosphere is broken down into three regions:
From the inside out Working from the inside and just around the roots of most plants, microscopic fungi (mycorrhizae) exchange water, hormones and mineral elements found within the soil for sugar created by the plant through photosynthesis. Rhizobium bacteria have a symbiotic relationship with members of the legume family. They detect flavonoids secreted by plant roots, which stimulates the bacteria to generate nod factors. These nod factors trigger the plant to form root nodules. The rhizobium bacteria then provide the plant with nitrogen from the atmosphere. There are other nitrogen fixing non-symbiotic bacteria within the rhizosphere that aid other plants in exchange for sugars and other nutrients. Some plants also produce allelochemicals within and beyond the rhizosphere that prohibit other plants from growing nearby. Just as we constantly lose skin cells, plants also shed cells. These cells fall to the ground (rhizodeposition) and are eaten by bacteria. The bacteria, in turn, are eaten by nematodes and protozoa. This process enriches the soil, making nutrients available to plants and improving soil health. There’s a fungus among us! The root systems of nearly all your plants (except those in the cabbage family) are infected with a tiny fungus called mycorrhizae. Now, before you panic, you need to understand that this is a good thing! 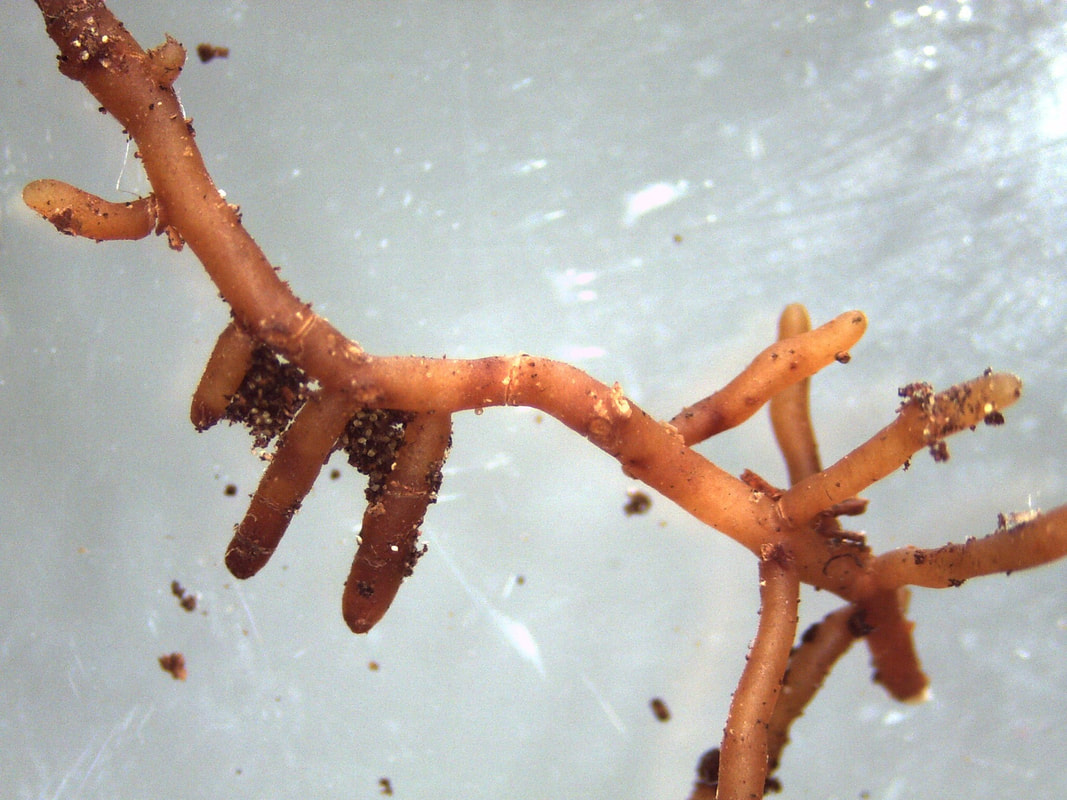 Beech tree root with mycorrhizae (Katrin Schulz) Pixabay Mycorrhizae means ‘root fungus’. These microorganisms have evolved in a symbiotic, or mutually beneficial, relationship with plant roots. Just as rhizobium bacteria help plants ‘fix’ atmospheric nitrogen into a form usable by plants, mycorrhizae are important part of the soil food web and critical to plant health. Mutually beneficial arrangements Tiny root hairs give the mycorrhizae sugars, created through photosynthesis, B vitamins, and other important resources in exchange for water, hormones and minerals found in the soil. This is how plants absorb soil nutrients. Without these critical elements, plants fail to thrive and they become susceptible to pests and diseases. Plants that host mycorrhizae have access to 50-100 times the nutrients than plants without. This is especially true when it comes to pulling phosphates from the soil. Types of mycorrhizae There are several types of mycorrhizae with two major players: those that live mostly on and occasionally inside roots (ectomycorrhizae) and those that “infect” the roots of nearly 80% of all plant species (ednomycorrhizae). These microscopic fungi extend thread-like appendages, called hyphae, into the soil. These are the white threads you see under decomposing wood chips, mulch, and compost. And they are worth their weight in gold! Mycorrhizae provide far more than a simple trade agreement with your plants. They also:
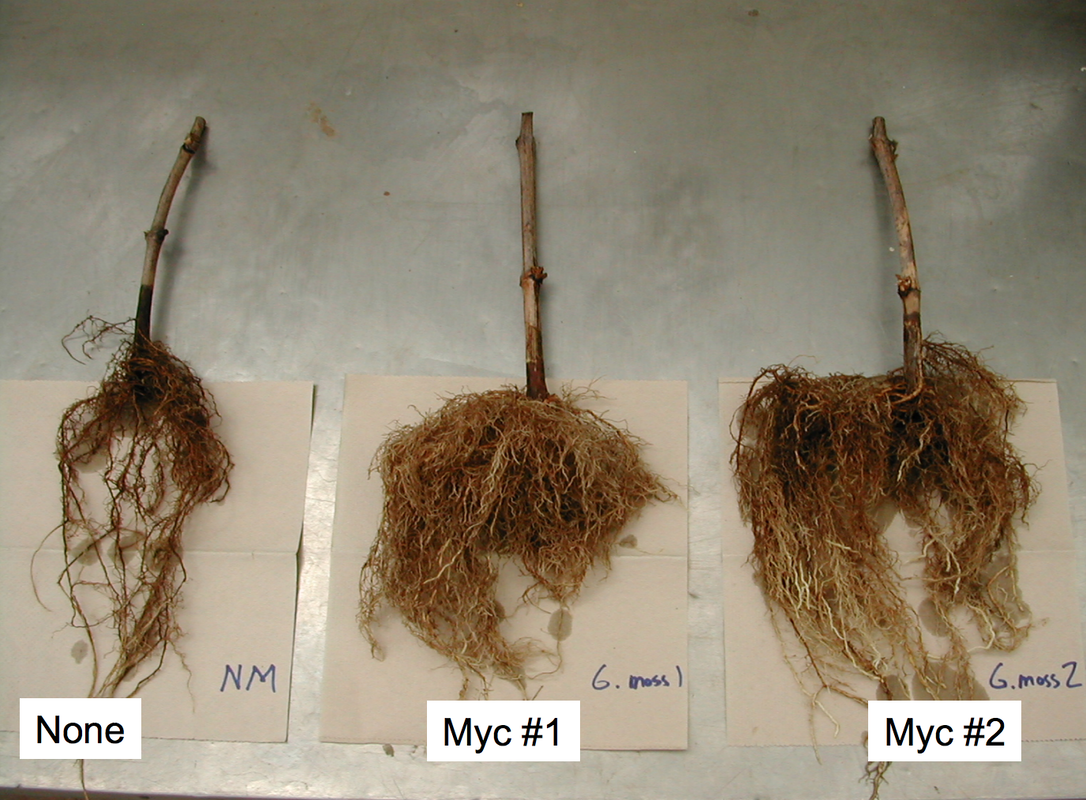 Mycorrhizae improve root growth significantly (USDA) Public Domain You can inoculate your soil with store bought mycorrhizae, but the conditions of temperature, moisture and soil must be exactly correct, or they will simply die off and be a waste of money. In most cases, repopulating soil with purchased mycorrhizae only works in the lab and not in the field. Instead, you can make your soil more hospitable to these mycorrhizae with these tips:
You can improve the health of containerized plants by tossing them a handful of soil from outside. That soil will contain beneficial mycorrhizae that will help your potted plants thrive. We may not need Noah just yet, but many areas are prone to winter and spring flooding. Years with El Nino events can bring severe rain and flash floods, wreaking havoc with homes, drainage, and the garden. After making sure that your family and home are safe, it is important to protect your landscape and garden from the negative effects of flooding. 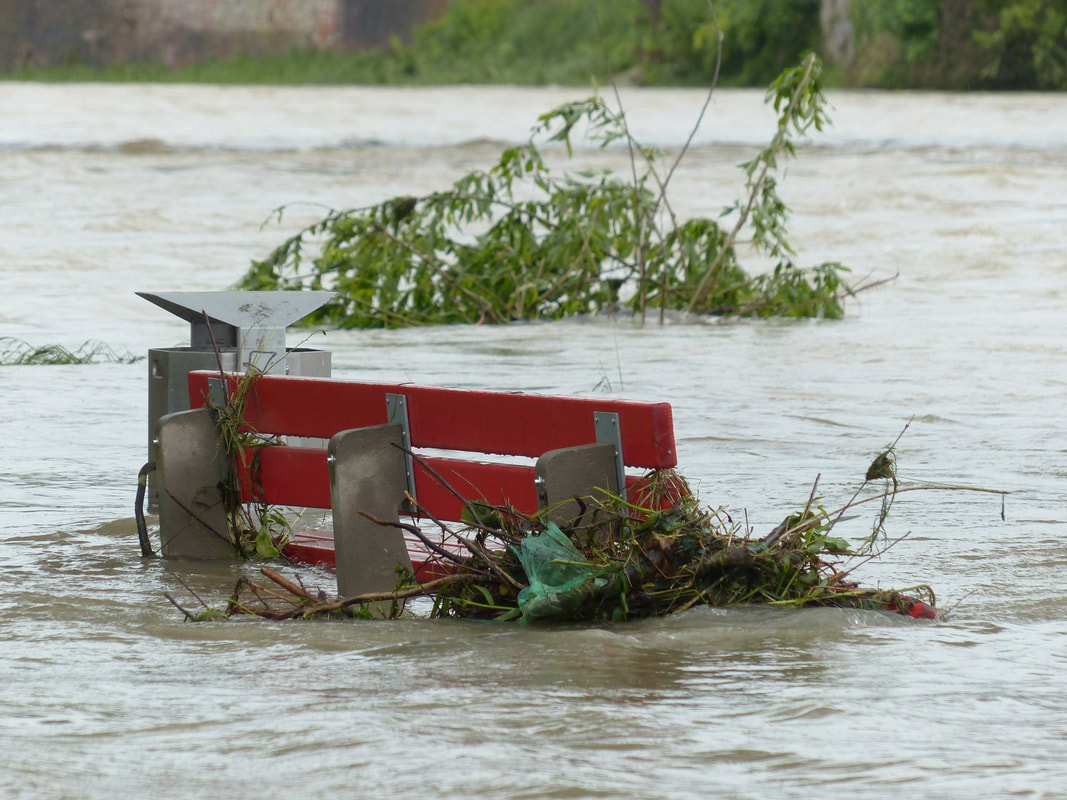 High water park bench (Hans Braxmeier) Pixabay Rain and soil Too much rain at one time can cause mountain creeks and streams to overrun their boundaries, carrying debris, mud, and even more water crashing down into already soggy bottom lands. Soil is an amazing structure, but the bedrock that holds it in place also creates a water barrier that can lead to pooling, flooding and more mud than your landscape can handle. As we have discussed earlier, permeability refers to the ability of water to drain. Our heavy clay soil does not drain well, which makes it great at holding on to water during the dry months, but creates significant problems when rainfall rates overrun carrying capacity. Flooding and standing water can drown your plants. Roots need air space to breath and to conduct photosynthesis. Standing water and poor drainage also encourages the development of fungal infestations, mosquito breeding grounds, and disease-carrying pests such as fungus gnats. Just as over-watering causes leaching of nutrients, salts, and chemicals, flooding can wash away valuable topsoil and pollute local groundwater. When you notice standing water in your garden, it is time to take action.
Floods can be devastating, but you can reduce the negative impact with these simple steps. Keep yourself and your garden healthy and safe!
No, I’m not talking about Medieval medical practices!
Clay soil holds far more water than sandy soils, but every soil has a holding capacity. Once that limit is reached, gravity will pull the water downward into underground waterways where it will ultimately flow to lakes and oceans. As it flows away, the water carries nitrogen, salts, fertilizer, pesticides, fungicides and whatever else was in your soil with it - leading to a potentially dangerous chemical soup that can wreak environmental havoc. Leaching also moves valuable nutrients out of reach from your plants roots.
To avoid leaching, it is always a good idea to water only as much as is needed. You can see for yourself where your irrigation water is going simply by inserting a moisture meter next to the plants you intended to water (but not too close). Many people are surprised to discover that the water intended for their tomato plants actually went in another direction due to hardpan, sandy pockets, or poor soil structure. Improving soil structure with compost can improve drainage and help prevent leaching. If it has holes in it, water will find a way through it.  Water droplet (ju lrun) Pixabay This is true for your tent, your roof, and your garden. In fact, permeability is pretty much the name of the game when it comes to plants and soil.
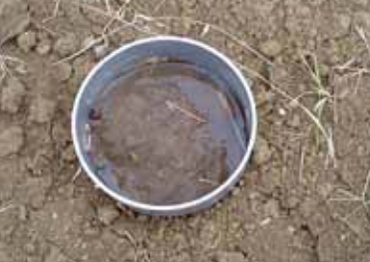
The rate at which water flows through something else is called permeability. If you’ve ever tried buying a home, you were probably required to pay someone to conduct a perc test. Real estate percolation tests are done to make sure that your house won’t wash away when it rains and that your septic system won’t back up into the living room. A percolation test In the garden can help plants get the water and nutrients they need without drowning. Before we learn how to conduct a perf test, let’s find out why it’s important. Water in the soil In the garden, water and air flow in and out of soil, leaves, and even individual plant cells. For a plant, this is the Stuff of Life. The water and air that flow in and out of a plant’s cell walls carry sugars, minerals, oxygen, carbon dioxide, hormones, waste products, and chemicals that allow your plants to thrive or die. [If you’ve ever battled poison ivy or poison oak on your property, you can use a leaf spray that gets absorbed through the stoma (sort of like pores) and carried down to the roots through the phloem. The chemical kills the plant at the roots. This only happens because of the permeability of the leaves.] Now, too much of a good thing is a bad thing. Without adequate permeability, your plants will drown, suffocate, dehydrate, or starve. Not good. Healthy soil is made up of different size bits of sand, loam and clay. The spaces between these bits are called macropores and micropores, depending on their size. Air and nutrient-rich water pass through these spaces, feeding and nurturing your plants. If the spaces are too small (or absent), plant roots cannot get to the food and air they need to live. So, how can you, as a gardener, improve the permeability of your soil? • avoid overwatering • aerate compacted soil • apply mulch and compost • avoid walking on wet soil Signs of permeability problems: • mud • standing water • hydrophobic soil • chlorosis (loss of green color) How to conduct a percolation test for soil permeability:
Ideally, you will want the water to drain at a rate of one or two inches per hour. Of course, sandy soil will drain much faster, taking valuable nutrients with it. You can improve the holding capacity of sandy soils by adding aged manure or compost. If your soil contains more clay, like mine does, you can improve permeability by adding… you guessed it - aged manure or compost! Compost and aged manure add organic material to the soil, creating a wider variety of sizes of both soil and spaces. This variety allows for healthier growth and drainage. Paved areas can lead to drainage and permeability problems. Permeable paving materials solve this problem by creating a firm surface for walking and parking while still allowing water to seep through. Permeable paving materials are affordable and attractive. They can also eliminate weeds growing up between paving stones! Do your garden a favor by learning about permeability and composting! |
Welcome!You can grow a surprising amount of food in your own yard. Ask me how! To help The Daily Garden grow, you may see affiliate ads sprouting up in various places.
You can also get my book, Stop Wasting Your Yard!  Index
All
Archives
April 2024
|


 RSS Feed