|
There’s always a certain measure of chaos in a garden, but chaos gardening has a purpose. Seeds don’t last forever. And few of us get around to using them all. While you can host a fun seed swap, you can also use those seeds to create a chaos garden. Like books sitting on a shelf, seeds left in a packet do no one any good. 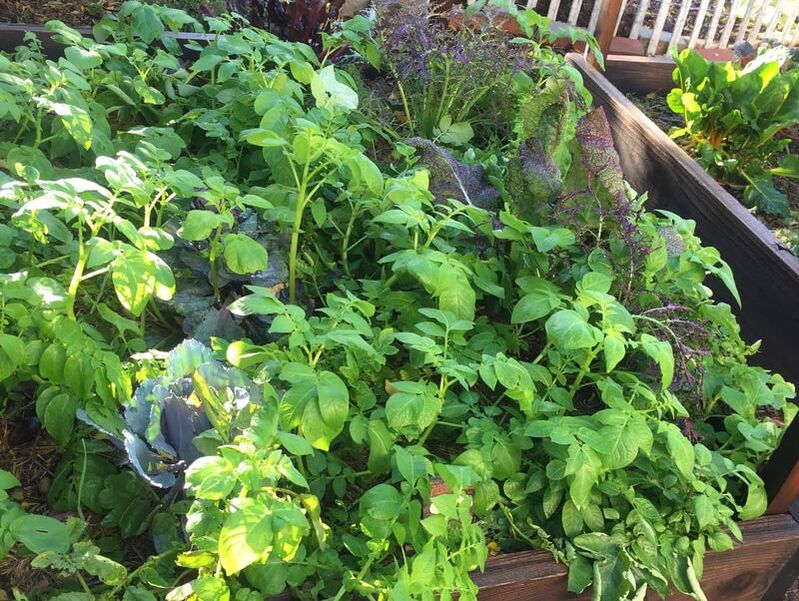 Beans, cabbages, chard, mustard and tomatoes grow well together (Kate Russell) Monoculture v. mixed plantings In Nature, monoculture rarely exists and never lasts. Pests and disease can quickly take hold, potentially wiping out everything. [Can you say Potato Famine?] Plants grow best when surrounded by other plant species. Meadows are healthier than lawns. Companion planting (in its true sense) is more productive than monoculture. Research has demonstrated that mixed plantings reduce the need for crop rotation, fertilizer, irrigation, pesticides, and added pollinators. And that means a lot less work for you. Chaos garden design takes advantage of this research by throwing every leftover seed you have into the mix. Instead of every plant grabbing for the same nutrients, a mixture of plant species grows at differing rates, using different nutrients at different times, reducing the strain of competition for all of them. This tight mix of plants chokes out weeds. It also attracts a variety of pollinators and other beneficial insects. This increasing biodiversity boosts pollination rates and creates bigger harvests. 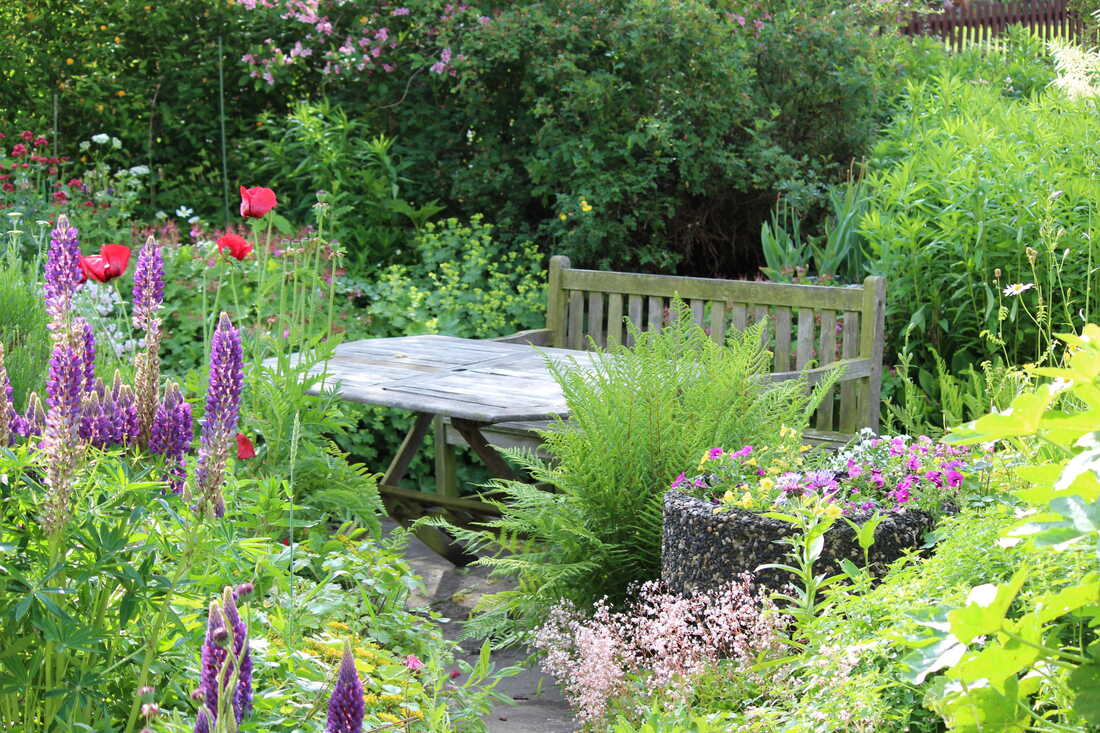 Mixed planting of ferns, flowers, and vegetables (PxFuel) Public Domain You can use a bare patch of ground, raised bed, a sidewalk strip, an old kiddie pool, or a window box for your chaos garden. Keyhole garden spaces work well, too. How to plant a chaos garden Unlike most vegetable gardens, which require planning, rows, and lots of preparation, a chaos garden lets Nature take its course and do most of the work for you. The process is simple:
At this point, you can decide whether to water your chaos garden or not. You can fertilize it or not. It is up to you. 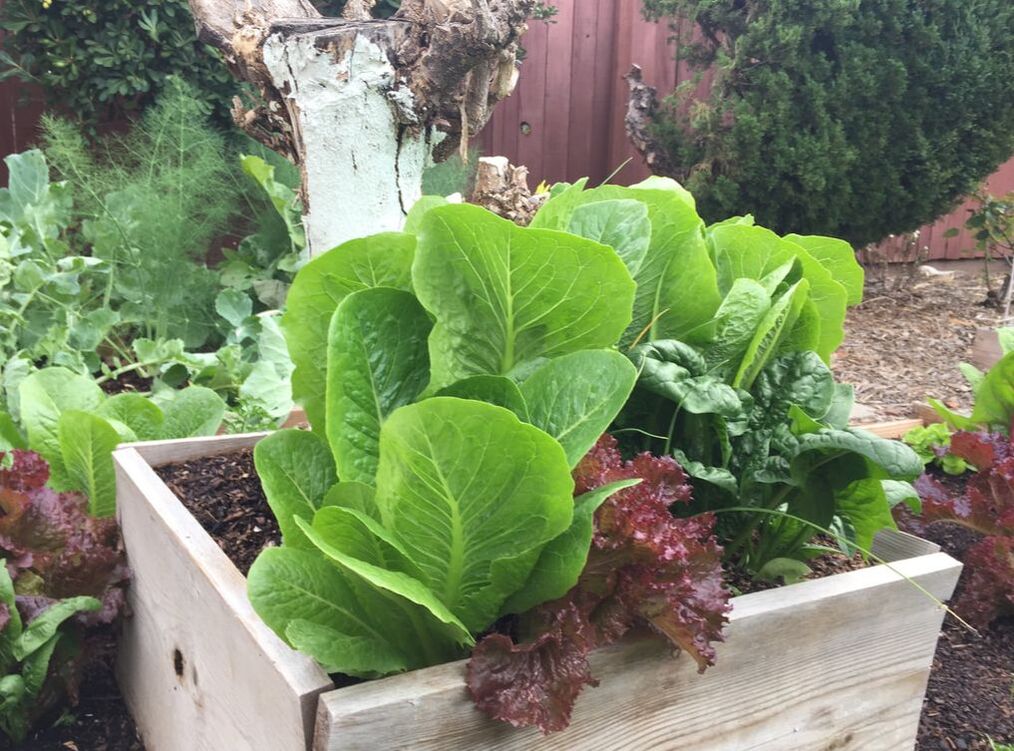 Mixed salad planting (Kate Russell) The downside of chaos gardening
Plants growing close together in a riot of leaves and stems can set the stage for fungal diseases such as blights, rots, and spots, so avoid overhead watering. It can also hide pest infestations. Simply throwing a bunch of seeds into a space does not mean your chaos garden is completely maintenance-free. You should still monitor your chaos garden for signs of pests and diseases. Chaos gardening is a great way to eliminate the waste of unused seeds. And you might be pleasantly surprised when you see how well they grow.
Popular in Indonesian, Malaysian, and Philippine recipes, pandan leaves are floral, grassy, and sweet, much like vanilla beans. They create green food coloring and give basmati rice, jasmine rice, and white bread their characteristic aromas.  Pandan cake (Midori) CC BY 3.0 Pandan cultivation
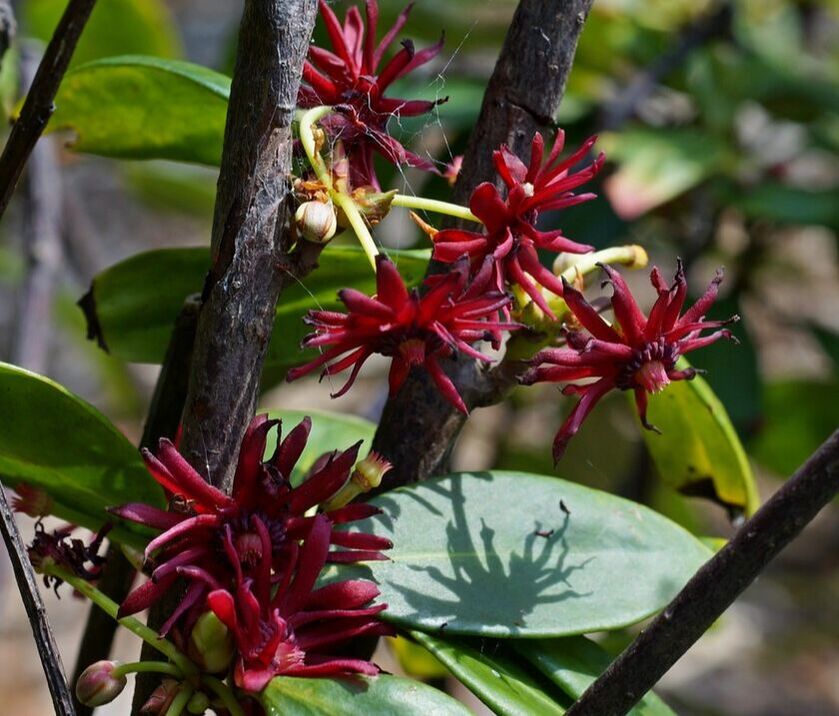
Unknown in the wild, the only way to create a pandan plant is through cuttings and suckers. Pandan is a wholly human-created plant that has been around since ancient times. When I say human-created, I do not mean someone was splicing genes 5,000 years ago. Instead, people cultivated pandan vegetatively for specific traits. Plants generated in this way are called cultigens. Pandan plants are available for purchase, or you may be able to get a cutting from a friend. As always, place new plants in quarantine when you bring them home. Just in case. Being tropical plants, pandan plants prefer moist, loose soil. They grow best with plenty of bright sunlight but can also grow in partial shade (or in your living room). When watering your pandan, keep the leaves and crown free of water. If your pandan is in a container, it is best to water from the base, filling the saucer instead of from above. The addition of a small amount of vermiculite can lighten the soil, as well as improve its moisture-holding ability. In winter, pandan plants need significantly less water. In summer, they need more to prevent sunburn. Pandan pests and diseases If the leaves start yellowing, it is probably due to overwatering. Allow the top 2 or 3 inches of soil to dry before adding water. Too much moisture often leads to root rot. Yellowing leaves may also indicate aphid, mealybug, or mite infestations. Profoundly cheaper than vanilla, a pandan plant might be just what you’ve been looking for! If you bite into a sunflower seed and find a worm, it’s probably a sunflower moth. 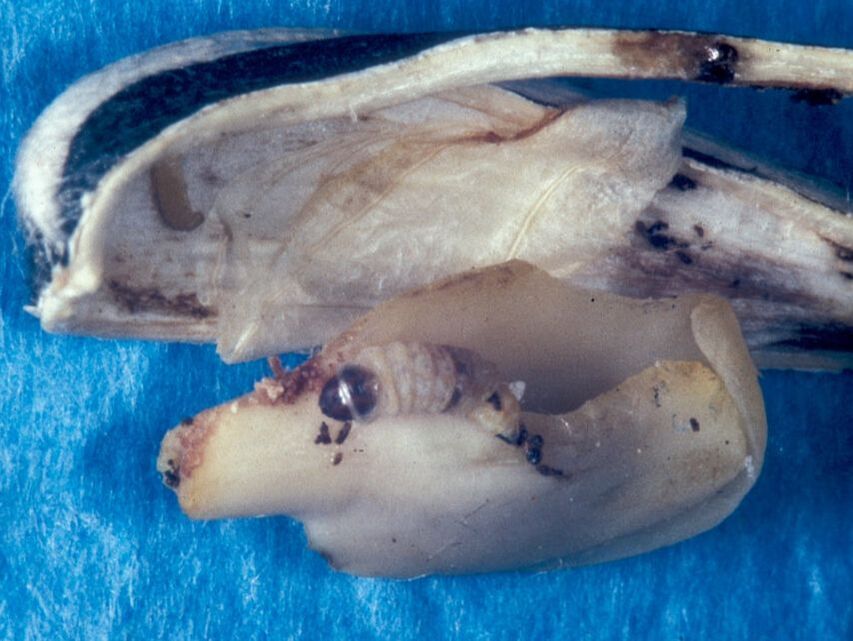 Sunflower larva on a sunflower seed (Frank Peairs, Colorado State University, Bugwood.org) CC BY-SA 3.0 Sunflower moths lay their eggs in sunflower heads. When those eggs hatch, tiny caterpillars begin feeding on developing seedheads and burrow into the seeds to feed. In doing so, they create wounds that allow diseases, such as Rhizopus head rot, to get in. And who wants to bite into a worm, even if it is tiny?  American sunflower moth (Ken Walker, Museum Victoria) CC BY 3.0 au Each moth only lives for 7-10 days, but females quickly begin laying eggs on the underside of sunflower heads and the inner bracts. Larvae go through five instars as they feed on developing sunflower seeds. Then they fall to the ground, burrow into the soil, and overwinter in a cocoon. There are several sunflower moth species, but they are all prolific and destructive. 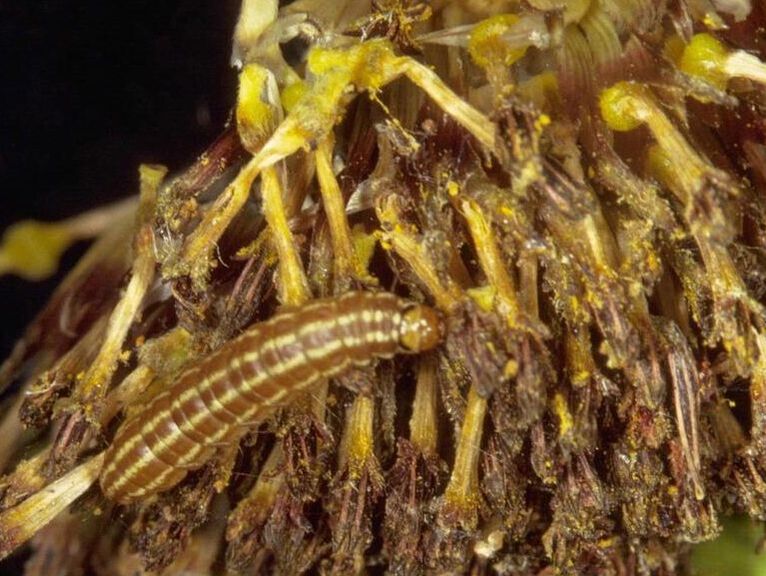 American sunflower moth larva (Frank Peairs, Colorado State University, Bugwood.org) BB BY 3.0 American sunflower moths American sunflower moths (Homoeosoma electellum) are also found in South America. They have a ¾” wingspan and off-white, feathered wings with dark spots scattered along the forward and outer edges. American sunflower moth caterpillars feed extensively on canola and sunflowers. They also feed on cotton, orange blossoms, and yacón. Banded sunflower moths Banded sunflower moths (Cochylis hospes) are tiny, pale moths with a ½” wingspan. Those wings are tan with a dark triangular band on the forewings. Larva are off-white when they hatch but turn red or green as they grow. Their heads are dark. These moths are found in the eastern United States. Cuban sunflower moths Less is known about Cuban sunflower moths (Heterocampa cubana), which are also found in Florida. These stocky moths have dark forewings decorated with lines and patterns and lighter underwings. Cuban sunflower moth caterpillars are solid green with a yellow, red, or purple stripe along the top and pinhole dots on the sides. These caterpillars feed on sunflowers, mangrove flowers, and probably other plants. 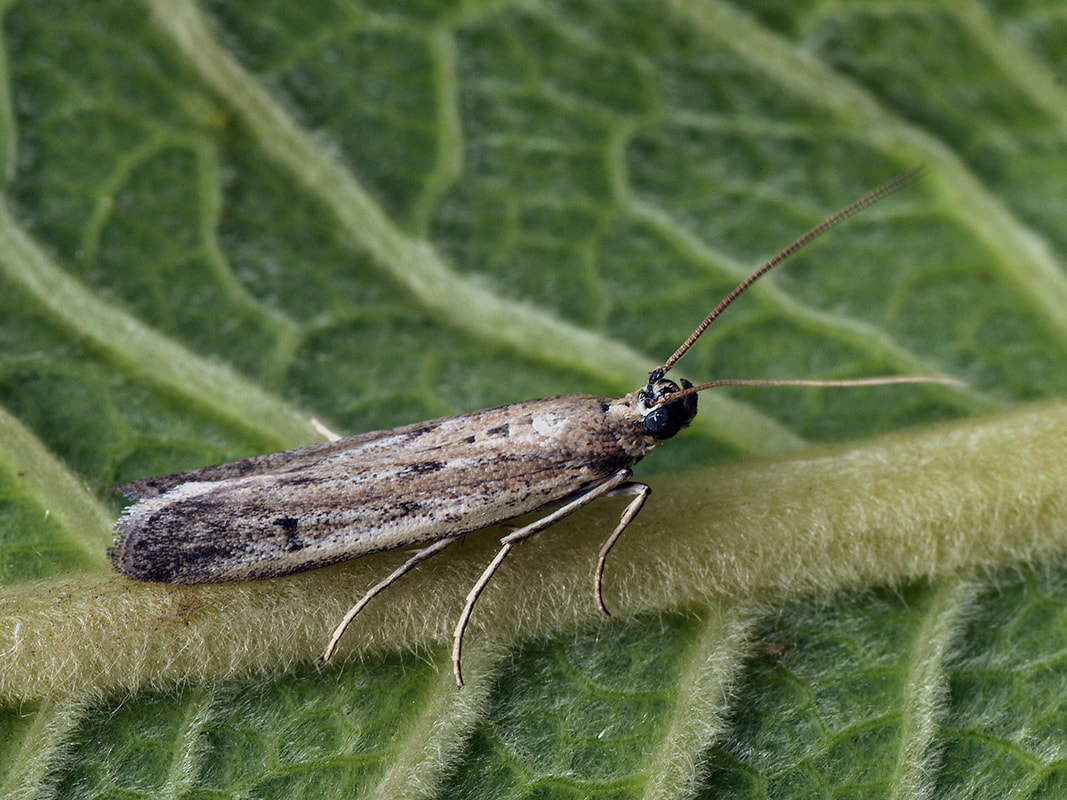 Eurasian sunflower moth (Ilia Ustyantsev) CC BY-SA 2.0 Eurasian sunflower moths
Currently found in Anatolia, Europe, the Middle East, Russia, and West Africa, Eurasian sunflower moths (Homoeosoma nebulella) are darker and slightly larger than their American counterparts. They have wingspans of up to one inch. Eurasian moth caterpillars are gray with three stripes on top. Their heads are yellow. They feed heavily on sunflowers, ox-eye daisies, tansy, and thistle. Larval feeding interferes with pollination as well as destroys your crop. You may see webbing on affected sunflower seedheads. You can use pheromone traps to determine if these pests are present, but the traps will not eliminate the problem. One way to reduce the risk of sunflower moth damage is to delay planting sunflowers until slightly later in the season. This makes life more difficult for the moths, who will look elsewhere for egg-laying sites. Beneficial insects should also be encouraged with a variety of flowering plants. These predators and parasites will reduce the damage done by sunflower moths. Research is currently underway for resistant varieties of sunflowers, so be on the lookout. If the caterpillars on your sunflowers are dark and have spines, it’s probably checkerspots. Minerals are in that category of things you feel pretty sure you know what they are until you start digging.  Pure calcium in a protective argon atmosphere (Matthias Zepper) Public Domain What are minerals? In my mind’s eye, I always thought of minerals as tiny rocks, but I was only partly correct. Rocks are relatively homogenous, solid geologic materials. Rocks may consist of one mineral or be an aggregate of several minerals. According to the dictionary, minerals are “solid inorganic substances of natural occurrence” which coincides nicely with my rock theory. More accurate definitions describe minerals as well-defined chemical compositions with specific, naturally occurring crystal structures. My tiny rock theory is okay up to this point, but this is where it starts getting tricky. Mineral species Did you know that there are different mineral species and varieties? I didn’t, either. One tiny difference in the composition of a mineral changes it completely. Common quartz becomes amethyst when impurities turn it purple.
Other minerals are biogenic. Biogenic refers to materials made from or by living things. Calcite of chalk and limestone fame is a biogenic mineral consisting of the bodies of tiny algae, fairy shrimp, oyster shells, and other marine organisms.  Calcite occurs in many forms (PaleoNeolitic) CC BY 4.0 The rules about mineral classification are not set in stone, however. Opals and obsidian seem to meet the mineral criteria but don’t quite make the cut. They are mineraloids. I have no idea why. Organic minerals Other minerals are classified chemically as organic compounds. These minerals are organic in the sense of being related to living material. For example, mellite is a mineral made from plant material. And the carbon that makes up all life on Earth is also in this category. The carbon cycle transforms inorganic compounds into organic ones. Of course, scientists are still debating about where the line between organic and inorganic lies, but we’ll leave that line in the sand to them.  Potassium (Philmason thunderf00t) CC BY-SA 4.0 Garden variety minerals
Plants use minerals as food. When they use relatively large amounts, we call them macronutrients. Nitrogen (N), phosphorus (P), and potassium (K) are the Big Three macronutrients but plants also use large amounts of calcium (Ca), magnesium (Mg), and sulfur (S). Plants also consume tiny amounts_of micronutrients like boron (B), chlorine (Cl), copper (Cu), iron (Fe), manganese (Mn), molybdenum (Mo), nickel (Ni), and zinc (ZN). These minerals naturally occur in the soil. And there’s only one way to find out what’s in yours. That’s with a lab-based soil test. These tests are inexpensive. They provide the information you need to feed your plants correctly. Unfortunately, those cute plastic test kits from your local garden store are not yet accurate enough to be useful. Too much fertilizer can cause some minerals to reach toxic levels, creating more harm than good, especially with boron, chlorine, iron, and manganese. Soil can also contain high levels of aluminum (Al) and sodium (Na) which interferes with plant growth. As of November 2020, the International Mineralogical Association (IMA) recognized 5,863 unique minerals on Earth. Of those, nearly 500 minerals came from somewhere else. Now you know. Imagine your landscape in tune with natural cycles and rhythms, filled with a balance of plants, animals, and other organisms that allow it to thrive with little help on your part. Regenerative gardening can make that dream come true.  Paths protect plants and soil (Kate Russell) Regenerative gardening and biodiversity You can plant rows of hybrids and install invasive box store specials. Or, you can create an environment that supports biodiversity, reduces pests and diseases, increases pollination rates, sequesters carbon, and creates a nurturing space in your backyard. You can make regenerative gardening a part of your landscape with these simple tasks. Attract birds While some birds, such as jays, will damage your tomato and fruit crops, many others, including chickadees, phoebes, and wrens, will take a big bite out of your insect population. Compost Composting your kitchen and garden waste adds plant nutrients, improves soil structure, and feeds helpful soil microorganisms, and composting is free. Cut the chemicals Natural cycles keep pests and diseases in check. Chemical herbicides, fungicides, and pesticides interrupt those natural cycles, while most organic gardening products do not. Integrated pest management (IPM) can help you win those battles without nuking your yard. 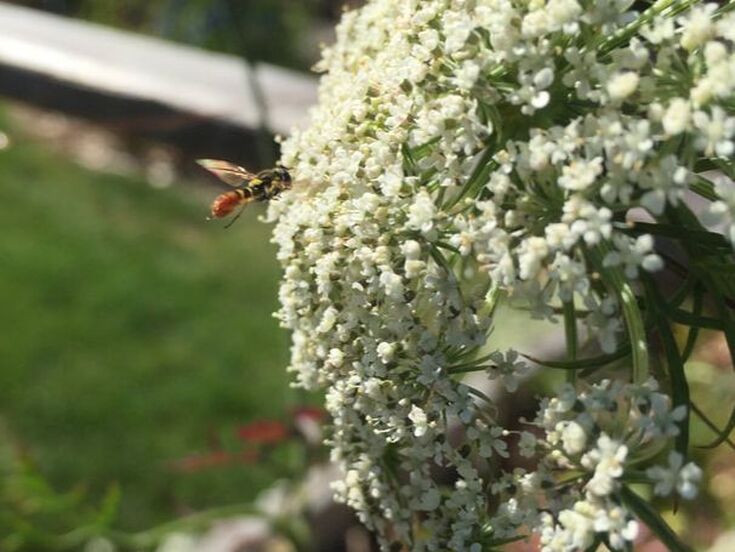 Hoverfly on carrot flower (Kate Russell) Go green During the dormant season, plant cover crops and green manures to feed beneficial soil bacteria, reduce erosion, and minimize weeds. Clovers, blackeyed peas, and other legumes make excellent cover crops as they add nitrogen to the surrounding soil. And sturdy fava bean roots make short work of compacted soil. Herbs and flowers Diversify your landscape by adding herbs and flowers. Intersperse your ornamental plants and edible crops with flowers of various colors, sizes, and shapes. Dill, marigolds, rosemary, sweet alyssum, thyme, and other herbs and flowers attract beneficial insects, such as honey bees and hoverflies. These garden helpers reduce the number of pests in your garden while increasing your harvest. And fresh herbs are always good to have on hand!  Red and green lettuce growing among the roses (Kate Russell) Mulch
A thick layer of clean mulch stabilizes soil temperatures, retains moisture, reduces weeds, and improves soil structure. You can often get mulch for free from local tree trimmers. Just be sure to keep it away from tree trunks. Nab those natives Native plants already know how to live successfully in your region. Adding them to your landscape provides food for beneficial insects and reduces your workload. Paths for peds Walking on the soil compacts it, making life more difficult for delicate plant roots. A simple path can protect plants, microorganisms, earthworms, and other aspects of your regenerated garden. Rest Digging the soil damages the fungal networks that feed our plants. After harvesting, let an area go fallow for a season to rest and recover. And replace that lawn with a self-sustaining meadow. Take the test You need to know what is in your soil before adding anything. Over-fertilizing is expensive, destructive, and hard to correct. An inexpensive soil test tells you exactly what is in your soil, what is needed, and what has reached toxic levels. Just Google “soil test” to find a lab near you, or use the University of Massachusetts soil test lab. Sadly, those pretty plastic tubes you see in garden centers are not (yet) accurate enough to be helpful. We cannot fix everything overnight, but we can all take small steps that move us in the right direction. Regenerative gardening is one of those steps. As a young child, I visited my grandmother in Oregon. We had hunkered down, picking luscious, red strawberries in her garden, when a snake suddenly slid over my hand and disappeared under the straw. Needless to say, I was startled. But it didn’t bite me, nobody killed it, and we resumed our strawberry picking.  Garter snake (Blaine Hansel) CC BY 2.0 We know then when we see them: skinny, legless, earless, some would say slimy reptiles. They frequently trigger a visceral response, but most snakes are more helpful than harmful. Case in point, you are nearly ten times more likely to die in the US from a lightning strike than a snake bite.  Rattlesnake (Victorrocha) CC BY-SA 3.0 However, even nonvenomous snake bites can cause an allergic reaction, so we should know how to respond. Snake bites Treat all snake bites as though the snake was venomous, using these tips from Johns Hopkins Medical:
Contrary to movie drama, do not suck out the venom or apply a tourniquet. If the swelling worsens, or your breathing becomes labored, go to an emergency room.  Garter snakes come in many colors (Steve Jurvetson) CC BY 2.0 Preventing snake bites The easiest way to prevent a snakebite is to leave them alone. If you are like me and created a meadow in your landscape, you can prevent snake bites and other foot injuries by wearing boots instead of flip-flops. And make sure you can see into dark spaces before reaching in with an unprotected hand. Snakes aren’t the only things that may be hiding there. Rat bites are far worse than snake bites, in my opinion. Snakes are solitary creatures and will avoid you when they can. As cold-blooded reptiles, snakes will often sun themselves to collect warmth. You can encourage snakes in your garden with rock piles that provide a place to hide, as well as a place to safely catch some rays. Before panicking at the first sight of a snake, let’s learn a little about these amazing creatures. _(16426738014).jpg) Eastern copperhead (Peter Paplanus) CC BY 2.0 The snake clan There are approximately 3,900 species of snakes (Serpentes) in the world. Of those, 725 are considered venomous. The US is home to two types of venomous snakes: coral snakes and pit vipers. Rattlesnakes, cottonmouths, and copperheads (water moccasins) are all pit vipers. To see which venomous snakes are native to your state, the antivenom company, CroFab created a handy interactive tool you can try here. While each region has its favorites, the most common garden-variety snakes include garter snakes, kingsnakes, milk snakes, racers, rat snakes, and water snakes. It is easy to confuse snake species, especially when the adrenaline is flowing. This rhyme may help: “Red on black, a friend of Jack; red on yellow, kill a fellow.” Or, simply, “Red on yellow, kill a fellow.”
Also, snakes of the same species can look very different depending on the region, locale climate, and other factors.  Black rat snake (Wikipedia) CC BY 2.0 Snake trivia Snakes smell using their tongues, and many species have heat sensors on their snouts. Their bellies are very sensitive to vibrations in the ground. Unlike bears, which sleep during hibernating, snakes remain awake but unmoving in a behavior called brumation when temperatures drop. And snakes do not dislocate their jaws. Instead, their lower jaws are flexible enough to allow them to swallow prey larger in diameter than they are.  Eastern kingsnake (Dawson) CC BY-SA 2.5 Snakes as an indicator species
As predators, snakes only live where there is food. If your garden hosts a snake, you can pat yourself on the back for creating a healthy and diverse ecosystem in your yard. Snakes commonly eat insects, mice, moles, rats, slugs, tarantulas, and voles that damage your crops. On the other hand, snakes are food for birds and other mammals. A garden with a snake is generally a healthy place Sharpshooters are cousins of cicadas and a type of leafhopper (Cicadellidae). And they can bring several diseases to your garden plants.  Blue-green sharpshooter (Katja Schulz) CC BY 2.0 Almonds, blackberries, citrus, cowpeas, elderberries, grapes, and stone fruits are are just a few plants vulnerable to sharpshooter feeding. And their tastes appear to be expanding to include other crops. Diseases spread by sharpshooters Once an adult sharpshooter becomes infected with a disease, it will act as a vector for that disease for the rest of its life. Those diseases include the following:
Scientists are still learning about sharpshooters. They believe further research will demonstrate that even more diseases will be associated with sharpshooter feeding. So how do you know if sharpshooters are in your landscape? Symptoms of a sharpshooter infestation Sharpshooters are hard to see. They are very good at hiding. When disturbed, they often leap into the air or shuttle sideways. The first sign of a sharpshooter infestation is leaf stippling. Leaves may also turn brown. New shoots curl and die before they ever get a chance to produce a crop. These pests feed on the sap found in the xylem. This sap is 95% water, so they must eat a lot to get the nutrients needed. They may be small, but sharpshooters can consume hundreds, or even thousands, of times their body weight in sap in their short lives. [That would be like you or me drinking 400 gallons of water each day!] In doing so, they produce large quantities of sticky honeydew. Honeydew is a type of bug poop that contains sugar and ammonia. Honeydew creates the perfect growing medium for sooty mold. You may also see pale exoskeletons scattered about as sharpshooters go through five instars before reaching adulthood. #/media/File:Homalodisca_vitripennis_-_the_nymph_of_a_Sharpshooter_Leafhopper_-_side_view.jpg) Sharpshooter nymph on lime stem (Plantlady223) CC BY-SA 4.0 Sharpshooter description Sharpshooter adults are small, usually one-quarter to one-half an inch long, wedge-shaped, and slender. Depending on the variety, they are brightly colored or may blend with their favorite food plants. Immature sharpshooters are called nymphs. Nymphs look like miniature adults but without wings. They may also be a different color. If you look very closely, you will see that the back of their legs are serrated. The most common sharpshooters found in North America include the following:
.jpg) A female glassy-winged sharpshooter carries on her wings masses of specialized brochosomes (the white spot) to be used during egg-laying. (Alex Wild) CC BY 2.0 Sharpshooter management
There are some nasty chemical pesticides used against sharpshooters in commercial environments. You can control them with ultra-light horticultural or neem oils. You can also protect your plants with reflective mulches, row covers, and yellow sticky sheets. And always quarantine new plants. You never know what's lurking. The easiest way to protect your crops against sharpshooter damage and the diseases they carry is to encourage their natural enemies. These include green anoles, dragonflies, fairyflies, praying mantises, snare-building spiders, and twisted-wing parasites. There are even a couple of fungi known to attack and mummify sharpshooters — but I can’t imagine how you might organize that attack! You can attract and protect beneficial insects by not using broad-spectrum insecticides, installing insectary plants, and providing a variety of flower shapes, sizes, and colors. Those flowers provide the nectar and pollen that attract and feed your garden helpers. What looks like a sweet potato, contains no starch, and tastes like an apple crossed with watermelon?  Yacón tubers (Wikipedia) CC BY-SA 3.0 It’s called yacón. Yacón (Smallanthus sonchifolius) is a cousin of sunflowers and Jerusalem artichokes, grown in Central and South America for its crisp, fruity tubers. It goes by several other names, including Bolivian sunroot, Peruvian ground apple, and strawberry jicama. Yacón description Yacón is a large perennial herb that grows from rhizomes. It can reach eight feet tall under ideal conditions. The leaves are large and furry on top, and the stems are angular and hollow. The bisexual flowers are relatively small and yellow. Dark brown seeds are achenes. .JPG) Yacón flower (Michael Hermann) CC BY-SA 3.0 There are two types of underground tubers. The large brown tubers are preferred for eating, while the reddish rhizomes growing at the base of the plant are generally left to propagate. Those brown tubers can weigh more than four pounds! How to grow yacón While you can grow yacón from seeds, the plants will mature faster when started from rhizomes or stem cuttings. Unlike potatoes, you cannot start new yacon plants from the tubers. Yacón grows best in temperatures between 65F and 78°F. Light freezing will kill the aboveground portion of the plant, but the rhizomes will generate new sprouts when things warm up. Heavy freezes will kill the plant, so you may want to grow yours in a large container. Raised beds with frost protection can also be used. Plant your yacón around the last frost date. Each rhizome should have several sprouts and be free of any rot. Place them two feet apart and cover them with an inch or so of soil. Mulch the area thoroughly. The yacón plant will grow through the mulch.  Young yacón plants (Suedpfalz) CC BY-SA 4.0 They are heavy feeders, so top dressing with aged compost will help your plants get established. These plants grow fast, which makes them lovely patio plants. In six or seven months, after the flowers have appeared and died back, your yacón crop should be ready for harvesting. The soil around the base of the yacón plant may also begin to ‘heave’ when the crop is ready.
As the upper portion of the plants dies back, the tubers in the ground get sweeter, so you may want to harvest over an extended period. When you dig up your yacon, do not damage the skin. Brush off any dirt and let them dry in the sun before storing. Yacón is often grown alongside agricultural fields to provide quick refreshing snacks to the workers. You can enjoy yours that way, as well! Yacón pests and diseases Root-knot nematodes can create galls on the root system, and sunflower caterpillars may feed heavily on the leaves. You can plant sunflowers among your yacón to draw the caterpillars away. Several Badnaviruses [Isn’t that a great name for a virus group?], such as the yacón necrotic mottle and yucca bacilliform viruses, can infect these plants. Rhizoctonia blight can also become a problem. You can prevent both diseases by installing certified disease-free cuttings or rhizomes. According to WebMD, yacón root syrup may help manage diabetes, inflammation, and weight control. You could be the first person in your neighborhood with fresh yacon on demand! Time is a precious resource. And it’s why many people think they can’t grow food at home. But they can. It’s a matter of putting nature to work for you in ways that reduce your workload while allowing you to produce the freshest food possible  Let nature do the work for you (Kate Russell) Start with the soil Soil is the bedrock of your garden. Get it tested by a lab. These tests are simple and inexpensive. Search online for a local lab (preferable) or use the University of Massachusetts soil lab. Lab-based soil tests will tell you precisely what is in your soil, what is needed, and what may be present in excessive levels. Adding more fertilizer is not always the right choice. Is your soil sandy, loamy, or clay? Plants have preferences. The more you know about your soil, the better equipped you will be to select the right plants for your low-maintenance garden. Consider your climate There’s no sense in creating extra work by installing plants unsuitable to your climate. A successful low-maintenance garden contains plants suited to your landscape’s temperatures, average annual rainfall, and frost dates. Identify your yard’s USDA Hardiness Zone and use that information to guide your plant choices. Shop for strength Learn about the pests and diseases most likely to cause problems in your neighborhood. You can get that information for free from your local County Extension Office. Once you know what your plants will be up against, invest in naturally resistant plants. Put the sun to work Plants need sunlight to produce food. And the type of sun exposure matters. Some plants prefer direct morning sunlight but need protection in the afternoon. Others thrive in all-day exposure. Seed packets and plant labels tell you about each plant’s sunlight needs. Use this information to make your life easier:
Some plants, such as artichokes and asparagus, can do well in partial shade or partial sun. But very few edible plants can thrive in full shade. And before you put any seeds in the ground, consider mature plant sizes. Sun-loving herbs will get too much shade hidden behind a wall of corn or sunflowers. What about water? Water is heavy. Hoses filled with water are heavy. You can reduce your workload by putting plants with similar water needs closer together. Hydrozoning prevents over- and under-watering while saving your back. Provide for pollinators and other beneficial insects We all know that bees pollinate the flowers that turn into fruits we love to eat. But other insects can lighten your workload by killing insect pests as you relax. All you need to do is provide pollen, nectar, and water. There is no need to buy these tiny workers. They will come. Install insectary plants that flower sequentially and provide a variety of shapes, colors, and heights. Butterfly and pollinator gardens look pretty, and they provide for an army of tiny helpers. And sprinkle those old coffee grounds around the garden. Earthworms love their java as much as we do! 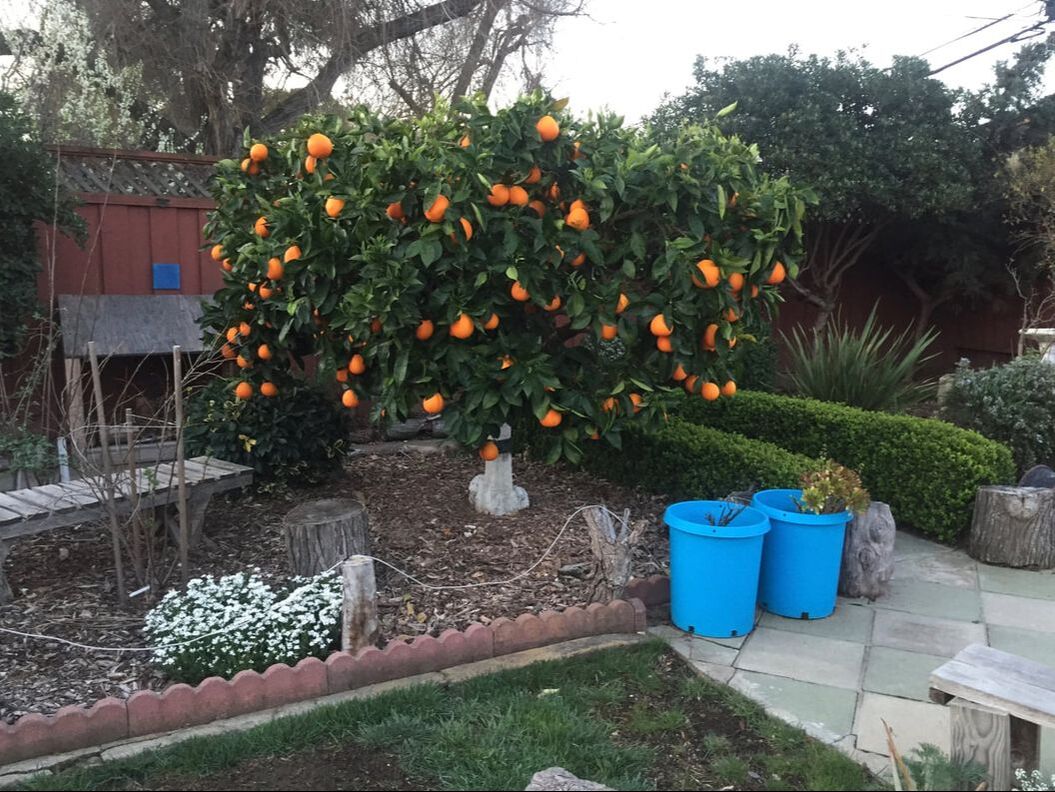 Orange trees can be very productive! (Kate Russell) Good cultural practices
Good cultural practice in the garden can reduce or eliminate the need for many tasks, treatments, and tribulations. You do not need to fumigate, rototill, or become a slave to your landscape. If you do nothing else for yourself and your garden, do these:
Evolve your plan as plants grow As your perennial plants grow, they will change shape and size. While they are small, surround them with sun-loving annuals. As they mature, change your plan to match the changing sun availability. Herbs, edible perennials, and trees can fill your larder without eating into your leisure time. Sit back and relax while your private victory garden takes care of itself. Starting fresh herbs, tomatoes, and melons from seed can be rewarding and delicious. But how many times have you found that you have leftover seeds? And what can you do with them while they are still viable? Host a seed swap!  Seed collections seem to grow on their own! (Kate Russell) Seed swaps are a great way to share with family, friends, and neighbors. Rather than allowing all that potential deliciousness to lie fallow in your seed box or junk drawer, a seed swap allows everyone to grow a wider variety of plants without spending more money. And it’s a great excuse to get together and talk plants! Seeds grown and produced in your neighborhood have the added benefit of being better suited to your microclimate than commercial seeds. 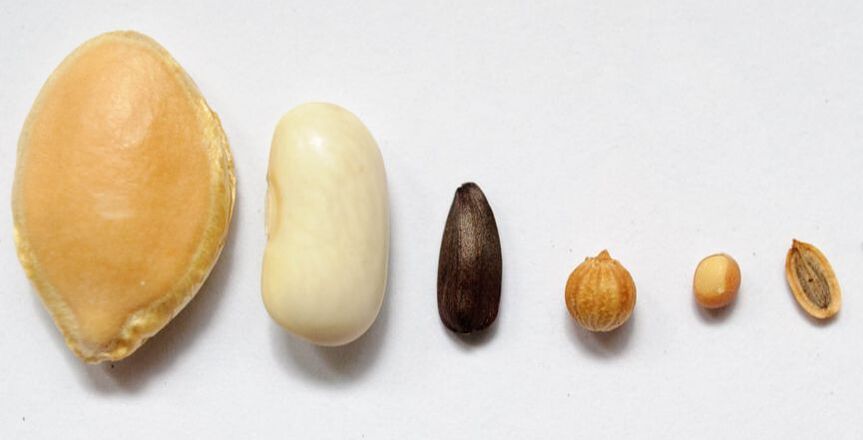 Pumpkin - Green bean - Sunflower - Coriander - Radish - Dill seeds (Frédérique Voisin-Demery) CC BY 2.0 How many seeds are in a packet? Seeds are sold by weight. Larger seeds, such as squash or beans, are heavier and take up more space, so you may only get 20 in a packet. But packets of the same size may contain 400 carrot or 500 lettuce seeds! I’m sure that none of us has the space or desire to grow 500 lettuce plants, and that’s where seed swaps come in. .jpg) Packet of dill seeds (Forest and Kim Starr) CC BY 2.0 US What is a seed swap? Seed swaps are casual get-togethers where everyone brings their excess seeds and a dish or beverage to share. These events can be large or small, a handful of friends, or a community event. Community events need more tables and supplies, but the basic steps are the same.
Seeds brought to share can stay in their original packets, making it easy for guests to copy planting instructions onto their envelopes. Or, to make things look more festive, place seeds in jars or other containers and lay the original packet alongside.  Heirloom seeds in glass jars (Cindy Shebley) CC BY 2.0 If your seed swap is a big event, you may want to create stations where guests can sort through various plant families or categories. Otherwise, relax and enjoy finding and learning about some new plant varieties with your guests! When creating your guest list, you can add non-gardening friends, too. Who knows, you may spark their interest! And you may want your experienced gardening friends to bring seedlings and succulents to share. Seed swap activities If your event would benefit from activities, you can add stations for these seed swap extras:
 Seed packet and label (Cindy Shebley) CC BY 2.0 Most seeds are only viable for a couple of years. Beyond that, results can be iffy. Put all your seeds to good use with a seed swap.
It seems so harmless. A bag of dried beans from the store costs much less than a packet of seeds. Those sprouting potatoes are simply begging for a soil blanket. You can start new celery and carrot plants from their ends, so why not?  Sprouting potatoes (Thamizhpparithi Maari) CC BY-SA 4.0 You see countless suggestions about how to start a garden for free using grocery store produce. It sounds like a great idea. But it isn’t.
As appealing and economical as it may seem, using dried beans, sprouting potatoes, or rootbound basil from the grocery store to start your garden can create a mountain of headaches and spread diseases into new regions where plants cannot protect themselves.
In a word: don’t do it. If you must, put grocery store plants in containers and quarantine them as you would for any other new plant. Defensive plants are not simpering wallflowers. People have used defensive plants to protect their crops, livestock, and homes for thousands of years. Wicked thorns and dense thickets have deterred a variety of predators and thieves. And some defensive plants offer the bonus of an edible crop!  Porcupine tomato (Frank Vincentz) CC BY-SA 3.0 What looks like an easy back fence to hop becomes much more of a challenge when it supports thorny blackberries or a row of prickly pear cacti. Most thieves and troublemakers will look elsewhere for easier pickings. And if they decide to hop anyway, their howls of pain will give you plenty of time to call the police 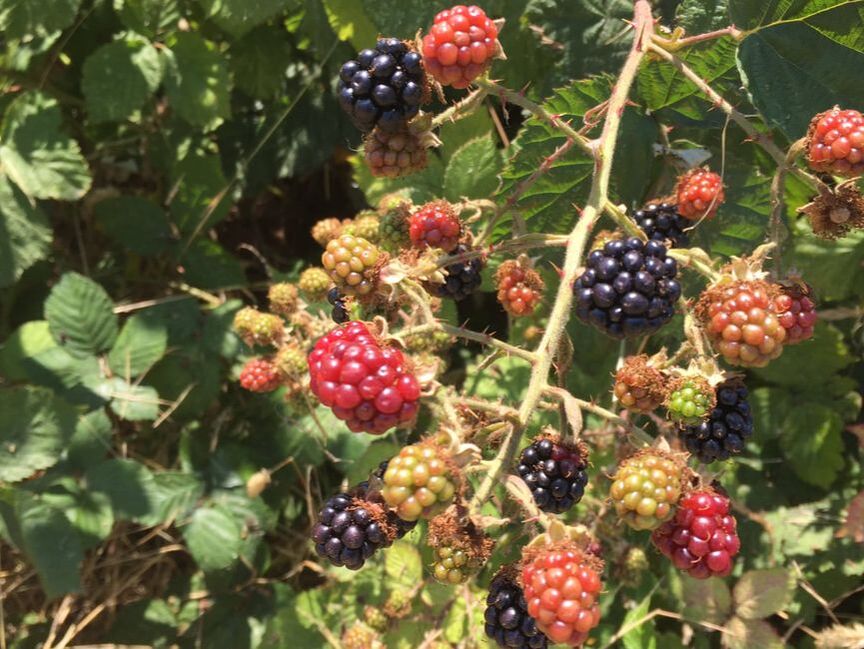 Blackberries (Kate Russell) The best places for defensive plants are along fences, under windows, and around sheds and other outbuildings. Keep mature plant sizes in mind when placing defensive plants, and ensure they will not block your escape should the need arise.  Prickly pear (Stan Shebs) CC BY-SA 3.0 Before adding defensive plants to your landscape, use the information below to ensure they are suited to your Hardiness Zone and local microclimate. Most of these plants prefer full sun and well-draining soil unless noted otherwise. [Note: the abbreviation "spp." indicates several species.]
 Honey locust thorns (Greg Hume) CC BY-SA 3.0 Add an extra layer of protection to your property with any of these plants.
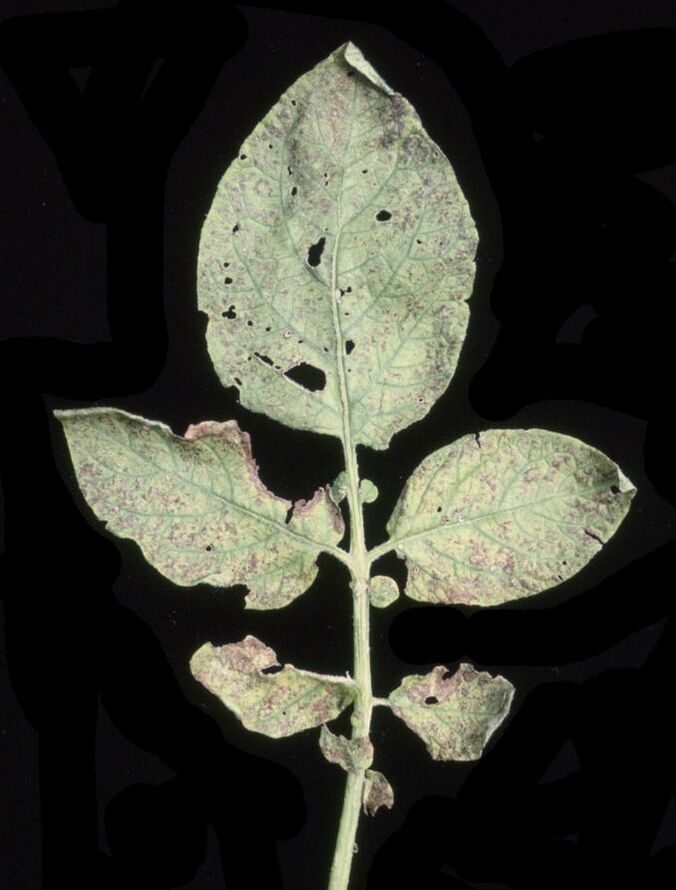
What do artichokes, barley, beets, patience dock, rhubarb, and strawberries have in common? Besides being delicious, they are all susceptible to a fungal disease called Ramularia leaf spot (RLS). Cotton, daffodils, jonquils, and narcissus are also vulnerable, along with several other wild plants, such as cowslip.  Severe Ramularia infection of strawberry (Jerzy Opioła) CC BY-SA 4.0 Ramularia leaf spot symptoms Like most other leaf spot diseases, this one is characterized by, you guessed it, leaf spots. Reddish-brown spots occur on both upper and lower leaf surfaces. Those lesions often have a yellow halo but can be angular, circular, or rectangular, making this disease difficult to identify. Some even call Ramularia the master of disguise. To get a clear identification, growers refer to the five R's of Ramularia infection:
Brown ulcers may also occur on flower bracts. Eventually, those bracts will curl up and dry out. Growers believe this disease is spreading because it is difficult to identify with certainty. But you can always assume that spots warrant a closer look.  Ramularia on patience dock (Tristram Brelstaff) CC BY-SA 3.0 In the case of Ramularia leaf spot, entire leaves will eventually shrivel up and die, taking millions of white fungal spores with them. Then those spores are splashed onto neighboring plants through rain and overhead watering. Ramularia leaf spot lifecycle Ramularia fungi have a rather complicated life cycle. There are several varieties with slightly different symptoms, but let's keep it simple, shall we? Most importantly, this disease spreads through infected seeds and plant debris and on the wind. Once spores come into contact with a plant, lesions form on lower leaves, spreading to upper leaves, then flowers. Those flowers produce infected seeds that continue the cycle.  Ramularia lesions (James Lindsey) CC BY-SA 3.0 Ramularia leaf spot management
Infected commercial crops are sprayed with fungicides up to eight times a year with limited success. Of course, you must wear protective clothing and limit the time spent around these chemicals to stay safe, so you might want to think twice before applying them to your groceries. Since stressed plants are more likely to become infected, keeping your plants healthy with these tips can prevent many problems.
Figuring out what leaf spots are telling you can be tricky, but it's worth the effort to find out. Do you see spots of bleached or straw-colored areas on the leaves of your strawberries, summer squashes, or corn? Or flecks and bands of red, orange, yellow, or brown on conifer needles? Those discolorations are ozone damage, and it is called weather fleck.
Technically, it is weather fleck only when it affects tobacco plants, but we’ll use the term more broadly. So what does ozone do? Ozone Ozone (O3) creates a barrier around the Earth, up in our stratosphere, protecting us from the sun’s harmful ultraviolet radiation but threatening us with several health problems. It is a reactive form of oxygen that forms as sunlight reacts with car and factory fumes, so it’s abundant. Ozone triggers plants to protect themselves, reducing fruit yield and quality. As a type of air pollution, excessive ozone can reduce chlorophyll, carotenoid, and carbohydrate levels in plants while increasing ethylene gas levels. Ethylene is responsible for ripening, but excessive levels are considered air pollution. Nearly all plants in urban areas are affected to one degree or another. It is considered the most destructive air pollutant for plants in the United States. In 2022, a study found that East Asia lost $63 billion in crops due to ozone pollution in only one year. 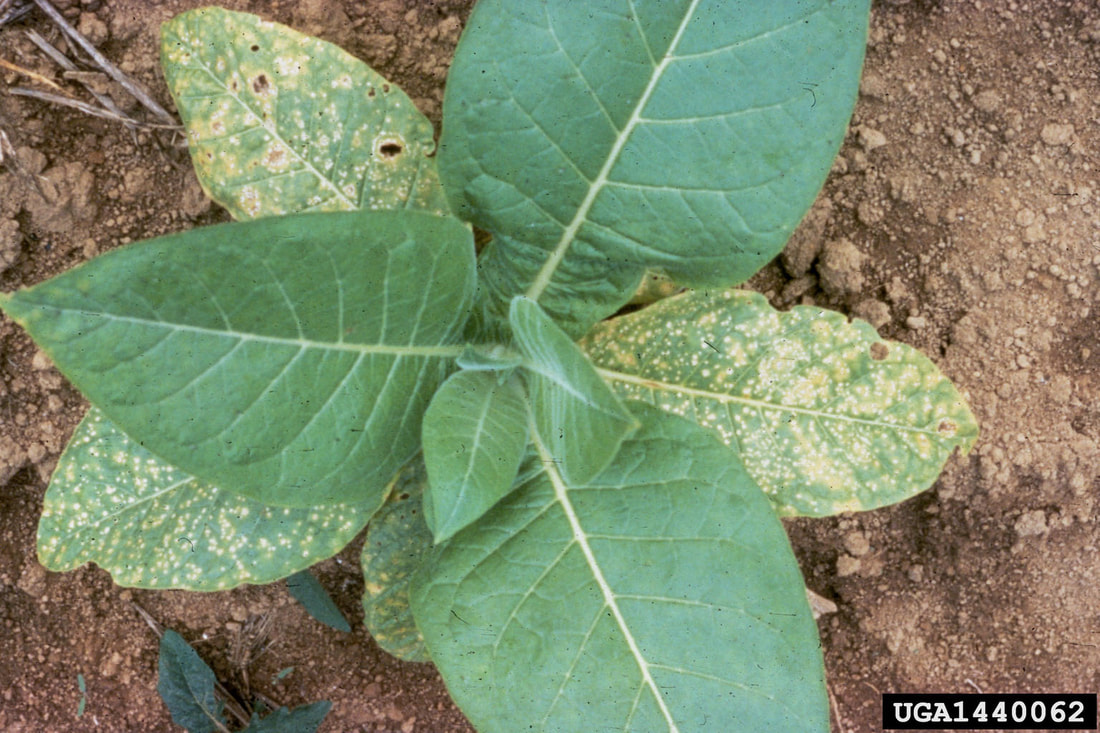 Mature leaves of tobacco plant exhibiting weather fleck (R.J. Reynolds Tobacco Company, Bugwood.org) CC BY 3.0 Symptoms of weather fleck Bleaching, bronzing, chlorosis, mottling, stippling, tissue death, and weather fleck are common symptoms of ozone damage. Weather fleck starts as small, dark green water-soaked areas. Within hours, those lesions turn brown, then tan or white. At higher ozone concentrations, this process can occur in just two or three hours. You might mistake weather fleck for spider mite feeding, except weather fleck symptoms are usually seen on the upper surface of mature leaves first, followed by younger and older leaves. Spider mites almost always start on the underside of leaves, trying to stay hidden. 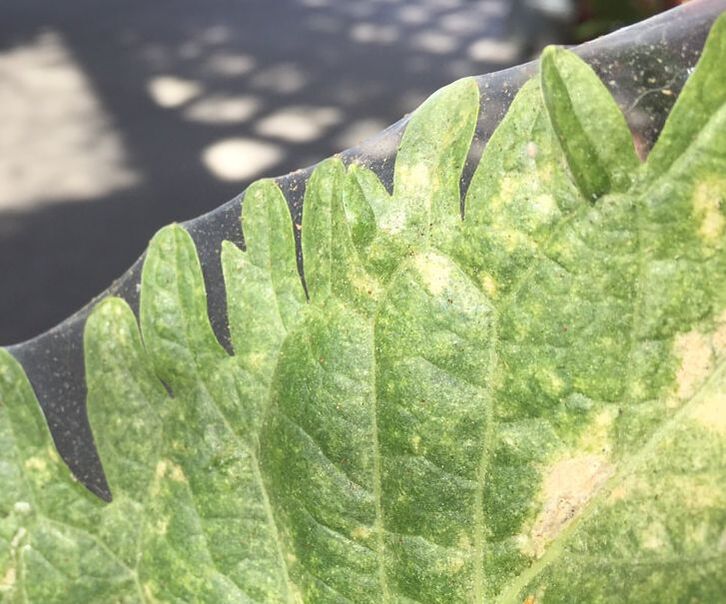 Spider mites on horseradish leaf As ozone exposure continues, damage spreads to both sides of the leaves. Mature plants are more resistant to ozone than younger plants, but those damaged areas are dead tissue. Weather fleck doesn’t look very impressive, but those tiny damaged areas can merge and form bigger problems. Bigger problems Any time tissue is damaged, it becomes less able to protect itself. Plants exhibiting weather fleck are especially susceptible to Botrytis fungi. Botrytis is responsible for gray mold. These plants are also experiencing internal stresses that cause cell seepage, chemical imbalances, and other problems. Susceptible plants Many garden ornamentals, such as dahlia, fuchsia, lilac, marigold, and salvia are very sensitive to ozone levels. The list of edible plants highly susceptible to ozone damage is rather long.
If you live in an area with lots of ozone, you may want to focus your gardening efforts on somewhat resistant cucumbers and peppers. What else can you do?
Aside from working from home and walking to the store instead of driving, you can protect your plants by not giving them more fertilizer than necessary. Plants are most susceptible to ozone damage during periods of rapid growth. Did you know that ozone smells a little like chlorine? I didn’t, either. A well-lit garden path can be a pleasant experience on a summer evening, but what do those lights do to your plants? Let’s find out.  Landscape lighting (Asaph441) CC BY-SA 4.0 Natural cycles Light at night is not natural. Nothing, us included, evolved to deal with artificial light at night. And we are all light-sensitive to one degree or another. Chickens produce more eggs in summer when their chicks have the best odds of survival. So chicken farmers put their hens under lights to get as many eggs as possible, as quickly as they can. This arrangement works well for the farmers. But it is hard on the hens. Left to live a natural life, the average hen can live 10 to 20 years. Commercial hens generally live only 3 to 4 years. All of those lights and productive demands are hard on people and plants, as well.
Sources of night light There are many sources of artificial light at night. Street lights, porch lights, decorative path lighting, and security lighting are the most common sources of light at night. Depending on where you live, headlights, factory lights, and strip mall lighting may also be sources of artificial light for your plants. And indoor plants are subject to our overhead lights, reading lamps, and computer and television screens. It’s a wonder anything gets any sleep these days! Natural cycles The natural cycle of light and dark triggers circadian rhythms within us that allow us to sleep, repair ourselves, and recover from the demands of our days. Plants have similar needs. While plants use sunlight to perform photosynthesis during the day, they need darkness to produce an important compound called phytochrome. What is phytochrome? Phytochrome regulates several functions within plants, including abscission, dormancy, photoperiodism, and seed germination. Without healthy seed germination, our gardens might be rather dismal places. And photoperiodism allows plants to anticipate the seasons, triggering them to bloom, grow, and rest at the proper time of year. That is where ‘short day’ and ‘long day’ varieties come in. They use photoperiodism to tell them if the correct balance of daylight and darkness hours is right for them to bloom and grow safely. 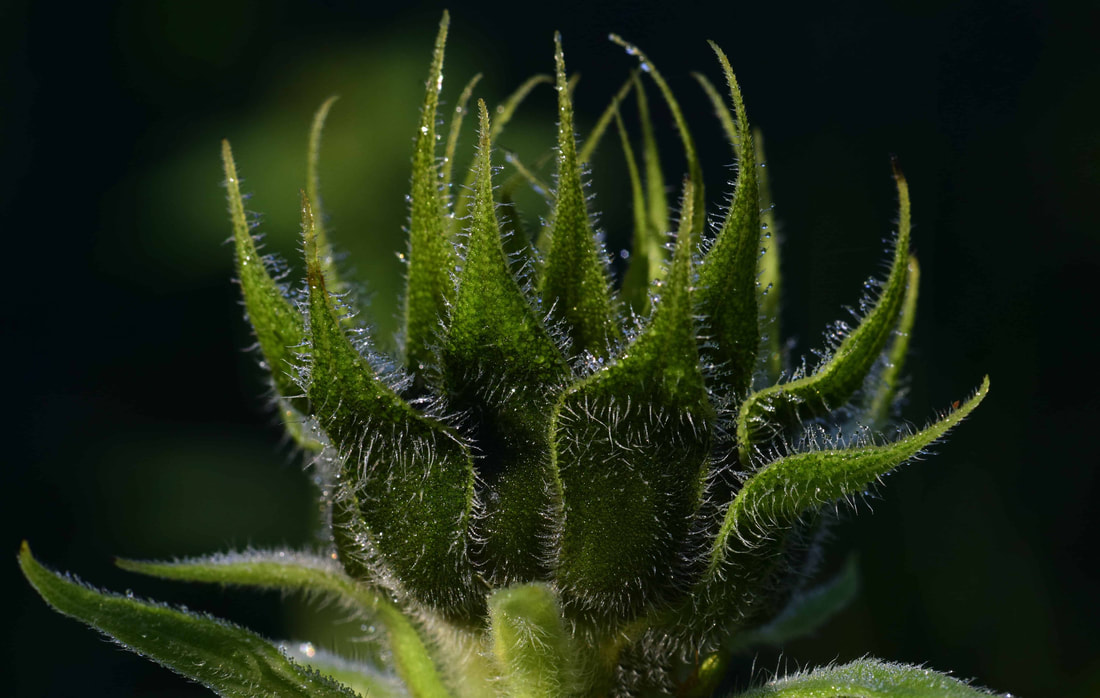 Plants need darkness to stay healthy (Pixnio) Public Domain Plants are much more sensitive to the number of daylight hours than you might expect. For some plants, as little as one-minute exposure to a 25-watt bulb is enough to halt blooming. Strawberries are very light-sensitive. If they don’t receive enough darkness, you might not receive any berries.
The number of hours of daylight can also cause bolting, which can shorten the useful life of your lettuces and spinach. If bolting is a problem in your garden, you may want to turn off some of those lights. Abscission and dormancy As the days get shorter and the nights get longer, plants produce hormones used to protect themselves through the colder winter months. Those phytohormones tell plants to pull nutrients out of leaves and let them fall. If any part of that natural cycle is interrupted or interfered with, plants can be unprepared for winter weather, making them more susceptible to pests and diseases. Night lights and insects We all know that moths are often attracted to porch lights, but nighttime lighting attracts several other insects to our landscapes. Research from the University of Exeter has shown that night lights “trigger complex effects on natural food webs [and that they] may have more permanent, widespread impacts on wildlife and ecosystems.” Managing light pollution Now we know: too much light at night can adversely affect our plants. So it’s up to us to reduce light pollution (and air pollution) to improve the health of our plants and the food they produce for us. Try some of these tips to help reduce light pollution in your home and landscape:
With a good night’s rest, you and your plants will both feel better. When someone starts talking about xeriscapes most of us picture gravel and succulents. There might be a yucca plant and some big rocks, but none of that sounds very appetizing to me. So I decided to see which edible plants could be part of a xeriscape. Here’s what I found out.  Classic xeriscape (Downtowngal) CC BY-SA 3.0 What are xeriscapes? Xeriscapes are low-maintenance landscape designs that use little or no water. Designed to reduce evaporation and runoff, they cut pollution. Xeriscapes incorporate plants best suited to the local climate. These plants have evolved to thrive without the addition of water, fertilizer, herbicides, or pesticides, hence the reduced pollution. The goal of a xeriscape is to conserve water, but they save time, too. How much extra time would you have if you didn’t need to water your garden? The only help an established xeriscape needs is occasional weeding and mulching. These gardens also tend to promote biodiversity, but water is the key. In arid regions, such as Arizona and Nevada, as much as 75% of household water is used to water lawns. You may be surprised to learn, as I was, that xeriscapes containing trees reduced the heat island effect by nearly 5°F. Imagine how that temperature change could help save on your electric bill! But what about edible plants? Planning your edible xeriscape Most edible plants need far more water than would be used in a xeriscape, but not all. To start your xeriscape design, create a drawing to scale of your property. You can find a trick to doing this in my post on sun maps. Once you know where everything is, you can start your xeriscape plan:
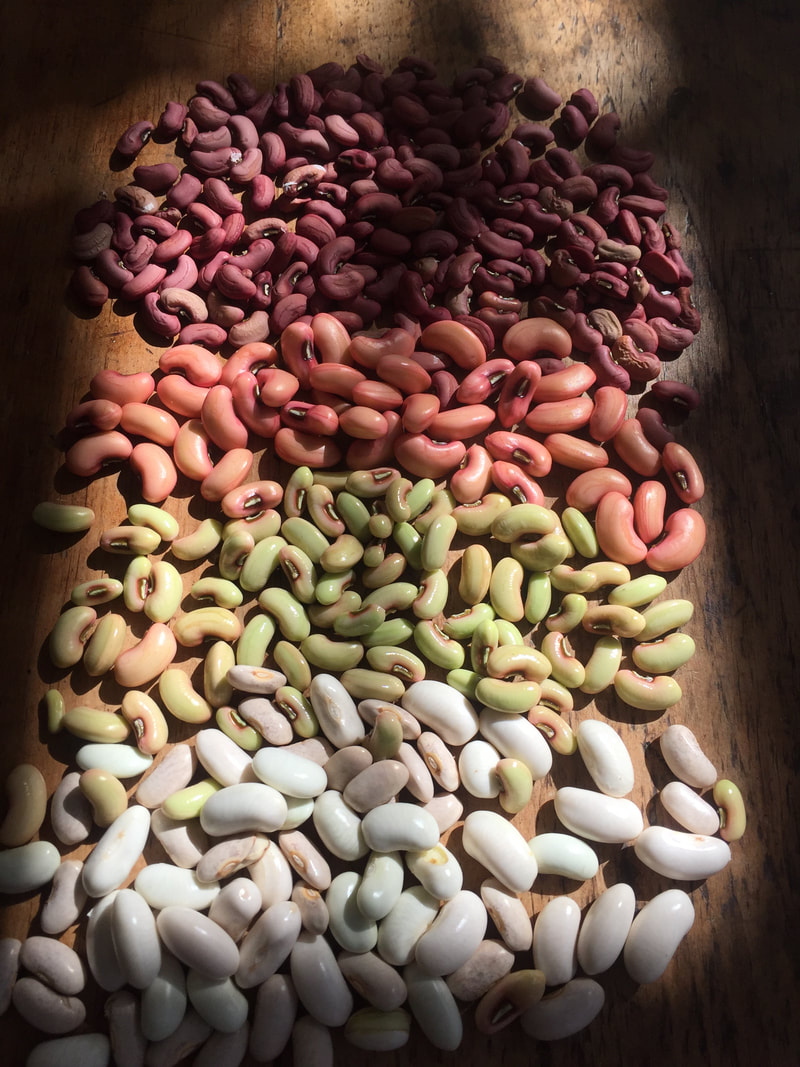
Once plants are in place, add 2 to 4 inches of mulch around, but not touching, your plants. If you opt for stone or gravel mulch, know that it will reflect sunlight into the underside of the plants, creating more heat. 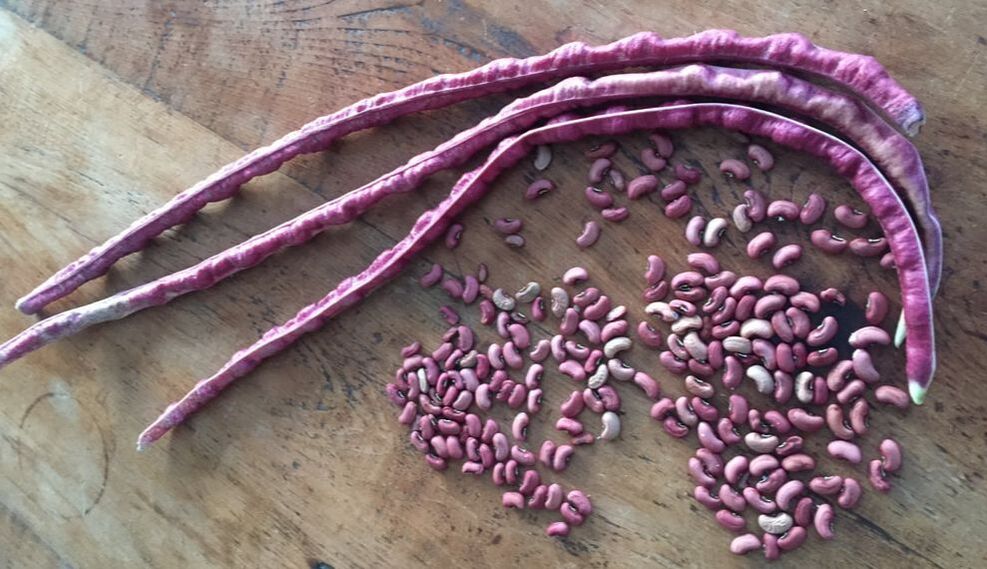 Red noodle beans are fun to grow! Edible plants for your xeriscape While these plants will all need some irrigation, especially as they are getting established, they should be able to provide you with edible crops using far less water than other traditional garden crops. Also known as dryland farming, this method uses plants that have evolved to use water stored in the soil from the previous winter’s rainfall. Some of these offer the convenience and ease of being perennial, too!
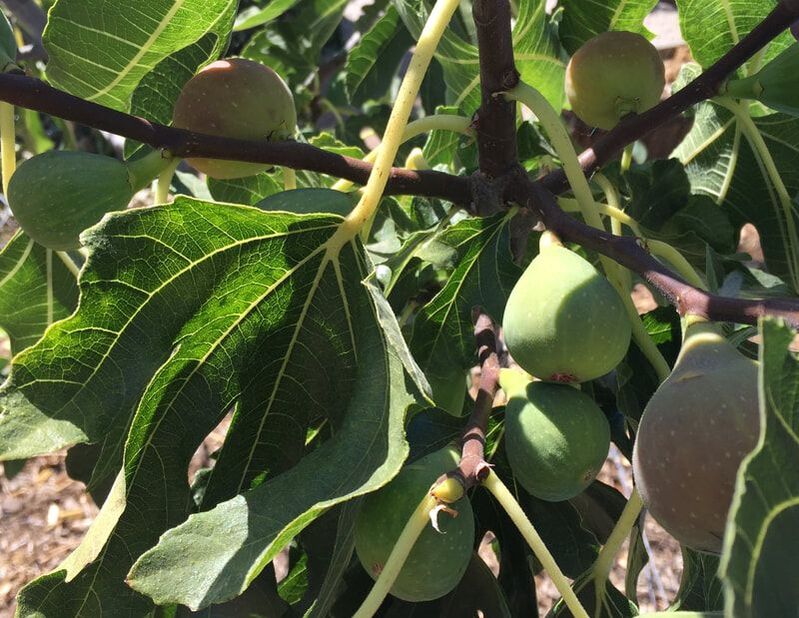 My fig tree Many of these plants will produce smaller-than-normal fruits when grown in a xeriscape, but the reduced water content translates into intense flavor and more sugar. You can see my post on deficit irrigation to learn more about that. Some people also grow corn, pumpkins, and even tomatoes in their xeriscape, though I’m not sure how well that would work. Herbs are your blue-ribbon xeriscape plants. Most of them evolved in poor, rocky soil. The aromas and flavors we love them for are defense mechanisms against insect and herbivore feeding. Caring for your xeriscape The trick to watering a xeriscape is to do it deeply and infrequently. As plants become established, they will need little or no irrigation. Water in the pre-dawn hours or evening by laying a hose on the ground near plants that need watering to reduce evaporation. As always, groups plants by their light and water needs. And be sure to add a fallow period to your crop rotation so that you don’t deplete the groundwater or nutrients. 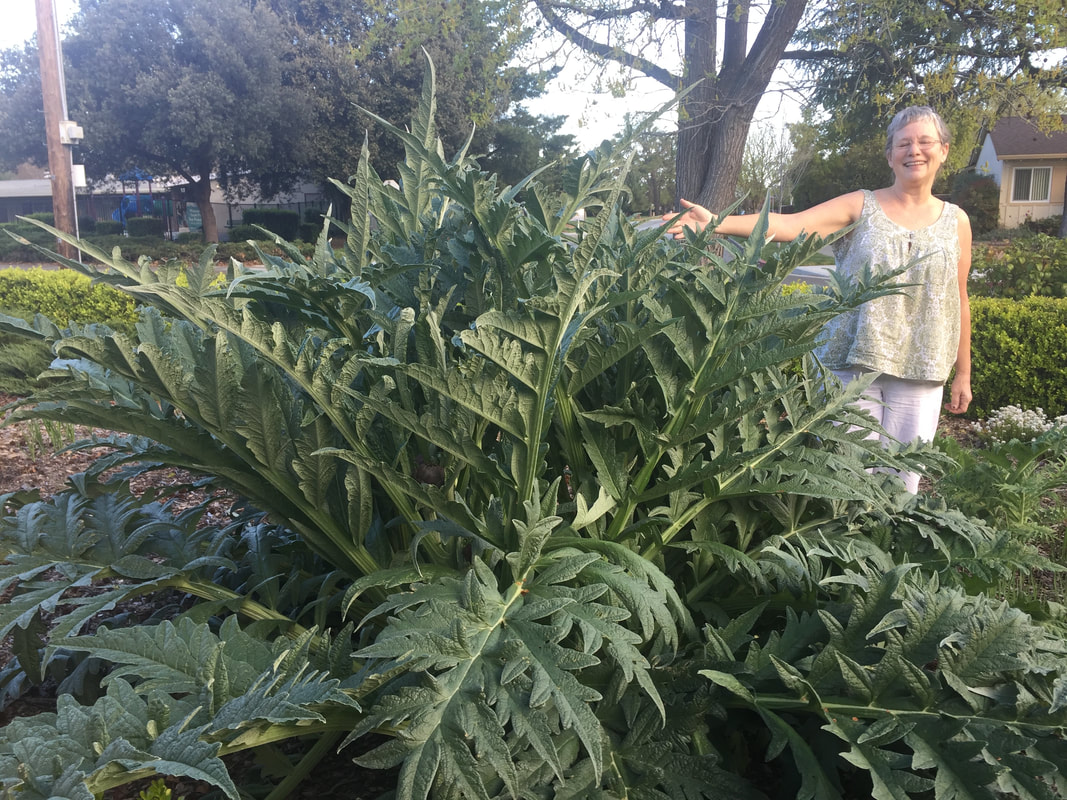 Me and my artichoke plant! It may surprise you, but rain gardens are a type of xeriscape.
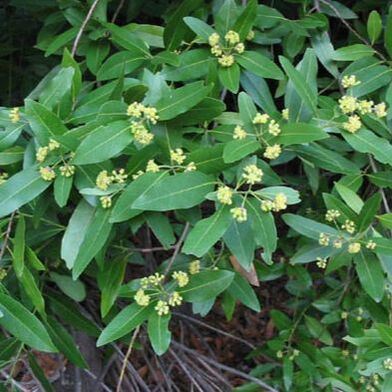
Do you know any other edible plants that would grow in a xeriscape? Let us know in the comments! Tomato sauce and bouquet garni wouldn’t be the same without bay leaves. But can we grow bay at home? Let’s find out.  Bay leaves (kropekk_pl) Pixabay Bay leaves come from the bay laurel tree. Also known as sweet bay, true laurel, and Grecian laurel, these trees are not to be confused with California bay laurel or cherry laurel. We’ll learn more about them in a minute. Bay laurels (Laurus nobilis) are evergreen shrubs or small trees native to the Mediterranean basin. Bay forests once covered that region. As humidity levels dropped and temperatures rose, the laurel forests retreated, and more drought-tolerant species moved in. Uses for bay laurel Bay leaves flavor more than your favorite spaghetti sauce. Bay leaves can add flavor to stocks, stews, and other savory dishes. Dried bay laurel berries are also spices, and burning the wood creates a unique smoke flavoring. But that’s not all. In ancient times, high-status bay laurel wreaths donned the heads of Olympic athletes and political leaders. Laurel oil was said to treat bruises, ear aches, paralysis, rheumatism, and sciatica, but I think they took things a bit far. More recently, bay leaves have been applied as an astringent to treat small wounds. The oil is popular in massage and aroma therapies. It is an ingredient in Aleppo soap. The fragrance certainly is relaxing. .jpg) Bay laurel leaves and stems (Forest & Kim Starr) CC BY 3.0 us .Bay laurel description Many of us are familiar with smooth, lance-shaped bay leaves. They are shiny and dark green while fresh. Trees can grow more than 50 feet tall, but most people keep theirs pruned to heights of two to eight feet. These plants produce small, yellowish-green flowers. The fruit of bay laurel is a small, shiny purplish-black drupe. 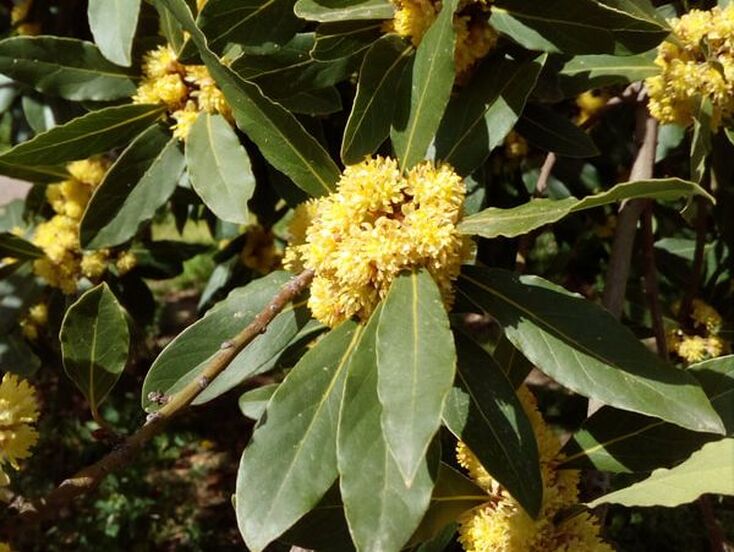 Flowering bay laurel (Ανώνυμος Βικιπαιδιστής) CC BY-SA 3.0 How to grow bay laurel Bay laurel plants can be grown from seed or cuttings. The easiest way is to buy a bare-root tree. These trees are dioecious, so some are male, and some are female. Since we mostly grow them for their leaves, this isn’t a problem. If you want berries, however, you’ll need one of each to get a crop. These shrubs lend themselves very well to the home garden in USDA Hardiness Zones 8 through 10. You can also grow them as containerized indoor plants. A 5-gallon pot is big enough. Bay laurel prefers full sun to light shade. If grown indoors, it will need lots of bright direct sunlight. Bay laurel prefers slightly acidic soil with good drainage. These trees benefit from wind protection, so select a site with that in mind. You can use bay laurel as a topiary, shaping and twisting it to your heart’s delight. Bay pests and diseases Bay laurel trees protect themselves against most pests and diseases. Soft scale (Coccus hesperidum) and jumping plant lice (Trioza alacris) are two insect exceptions. Phytophthora root rot and leaf spot and shot hole disease make also occur. Yellowing leaves on bay laurel often mean they need more nitrogen. A lab-based soil test is a good idea. Other laurels And what about those other laurels? It is not safe to assume they are all the same. Some of them are poisonous. And others can be a real headache.  American cherry laurel (homeredwardprice) CC BY 2.0 Here's a summary of those other laurels:
So, you can grow an edible bay laurel tree at home. It makes a lovely houseplant and a great addition to your dinner menu.
Tree roots may surprise you.  Tree roots (AustinTexas.gov) Public Domain We used to think trees looked pretty much the same underground as they did aboveground. We once thought trees sent taproots deep into the earth to suck up water and nutrients and hold themselves upright. All of those things are true except for the first one. Now we know that most tree roots extend laterally far more than horizontally. Most tree root systems extend 4 to 7 times the diameter of the aboveground portion. The root system of a mature oak can extend up to 250 feet! We also know that they communicate and exchange nutrients with neighboring trees, but that's another discussion. Today, our garden topic is root plates. What are root plates? Root plates are the combined disk-shaped mass of roots and soil immediately surrounding the trunk of a tree. If you have ever seen a tree knocked over by a strong wind, you have probably seen a root plate.  Dried root plate of European spruce (H. Zell) CC BY-SA 3.0 These structural roots and soil form massive disks. As tree roots spread out just under the soil surface in search of water and nutrients (and possibly neighbors), they quickly taper as they grow away from the main stem. The root plate edge occurs where the roots shift from thick and stiff to somewhat thinner and more flexible. Generally speaking, you can assume that for every inch of trunk diameter at chest height, these critical roots extend one foot in every direction. Smaller transport roots emerge from these structural roots to carry the food and water collected by fanning absorbing roots. These secondary roots help delay the symptoms of damage to the root plate. But they can’t carry the extra burden indefinitely. Trees store approximately 2/3 of the energy they create in their root systems. If those roots are severed or damaged, those stored nutrients are lost. Eventually, there is a deficit. Symptoms of a damaged root plate may take three to seven years before symptoms appear. By then, it may be too late. Nearly all tree roots are in the top 18 to 36 inches of soil. The combined mass of root material and soil is called a root plate. Because most tree roots are shallower than we thought, we now know that tree roots are more susceptible to our actions than we thought. But there are benefits. The benefits of wide, shallow rooting Trees with shallow roots spreading out in all directions have better access to the nutrients in decomposing leaf litter and other plant debris. They are also close enough to the surface for critical gas exchanges. Trees need nutrients, oxygen, and water to grow. Deep soil does not contain enough water or oxygen for trees to thrive, so they look elsewhere. The downside of root plates Shallow-rooted trees are more likely to fall over. A strong gust of wind can tear the root plate free from smaller roots. The entire disk of roots and soil can slip, spin, and upend a tree. We’re talking about massive force when trees break loose. And root plates are equally impressive. For example, a root plate that measures 11-feet across and 2.5 feet deep would have an average volume of more than 270 cubic feet and weigh more than 14 tons. You don't want any of that falling near your home or car.  Root plate of windblown pine tree (Ballogie) CC BY-SA 2.0 How can we help our trees?
So, what can we do to keep our trees from falling over?
Did you know that corn, sunflowers, and wheat have root plates? I didn't either. Eggnog, melon slices, and morning oatmeal are just a few things made better with nutmeg and you just might be able to grow your own.  Nutmeg (scym) Pixabay If you live in USDA Hardiness Zones 10–11 or have a greenhouse, you can grow nutmeg. If you can’t grow your own, it’s still a fascinating plant. Nutmeg tree description The nutmeg tree (Myristica fragrans) is native to Asia and the western Pacific. It is an evergreen that can grow 50 feet tall or more. Leaves are dark green and can be two to six inches long. They look similar to magnolia leaves. Pale yellow, bell-shaped flowers grow in loose clusters.  Myristica fragrans illustration by Franz Eugen Köhler in Köhler's Medizinal-Pflanzen - Public Domain Nutmeg tree flowers Similar to avocado trees, nutmeg trees change their gender. Instead of altering flower gender within a single day, nutmeg trees mostly begin as male. As they get older, they may turn female. You’ll probably need more than one tree to get a crop unless you can find a self-pollinating variety. Male flowers tend to have one to ten flowers on short stems, while female flowers grow in groups of one to three on slightly longer stems. In some cases, female flowers do not have petals. Nocturnal beetles are responsible for most nutmeg flowers pollination.  Nutmeg fruit (Joe Ravi) CC BY-SA 3.0 Nutmeg fruit Nutmeg fruits can be oval or pear-shaped. They are two inches long, smooth, and yellow. As the fruit ripens, it splits in half, exposing a shiny red coating called the aril that creates a web around the seed. The aril from nutmeg trees is what we call mace. I was surprised to learn that nutmeg fruit is also edible, though I have read that it tastes nothing like the nutmeg spice.  Aril surrounding nutmeg seed (AntanO) CC BY-SA 4.0  Red aril and nutmeg seed within fruit (David Richfield) CC BY-SA 4.0 How to grow nutmeg
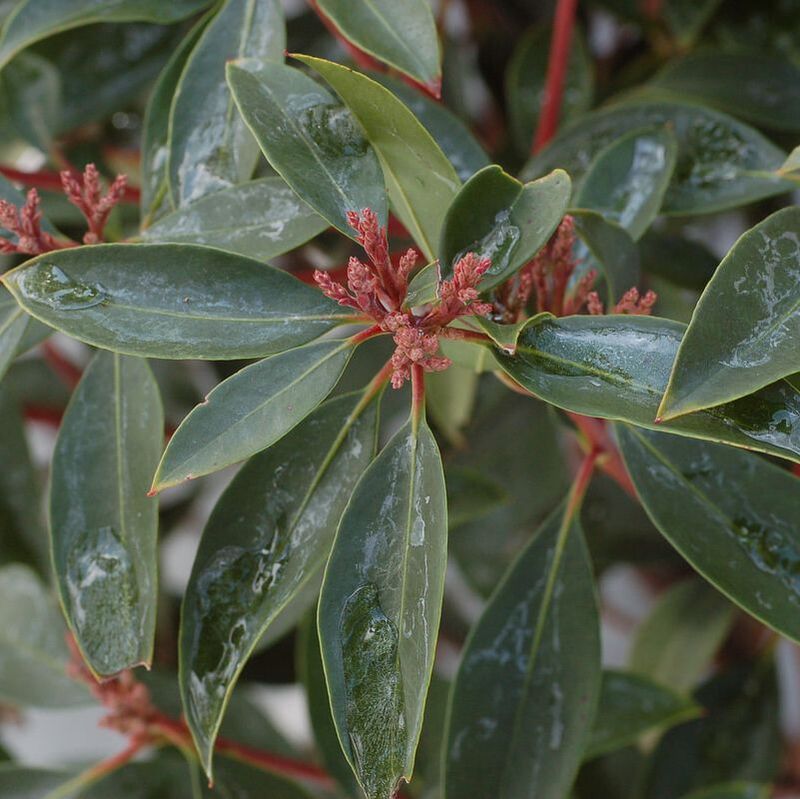
You can grow nutmeg from seed or start with a seedling. If you get an untreated nutmeg fruit for growing, place it in a paper bag and put it in the refrigerator for up to 45 days. Stratification of the seed in cold triggers hormonal changes that help the plant grow properly. Soak the seed in water for 24 hours prior to planting. Then plant the seed one inch deep in loose, nutrient-rich soil. Keep the soil warm and moist. You should have a nutmeg sprout in six to eight weeks. Nutmeg can be grown in a large container (10 gallons is ideal). If you put nutmeg trees in the ground and have more than one, space them 30 to 40 feet apart. Nutmeg trees prefer hot, wet weather, neutral soil, and good drainage. You’ll need to keep the soil moist but not soggy. Dry soil and nutmeg trees don’t mix. Two inches of water each week is a good standard for these trees. And mulching around your nutmeg tree (but not touching the bark) will help retain moisture and stabilize temperatures. Top dressing around your nutmeg tree with composted manure will provide many important nutrients. You can also use a standard fertilizer or fish emulsion. Nutmeg trees grow best in dappled shade with four to six hours of direct sunlight and 77–86°F temperatures. Nutmeg tree problems Once established, nutmeg trees have few problems. Holes in seeds indicate cocoa weevils are present. Anthracnose leaf spot and thread blight are the two most common diseases. You can use a Bordeaux mixture or fixed copper to prevent both. Many people have used nutmeg and mace from the grocery store, dried, ground, and bottled. Like many other edibles, homegrown or simply freshly grated, nutmeg and mace add new layers of taste and fragrance to your baking. When I first saw star anise, I assumed it was a seed. I was wrong. 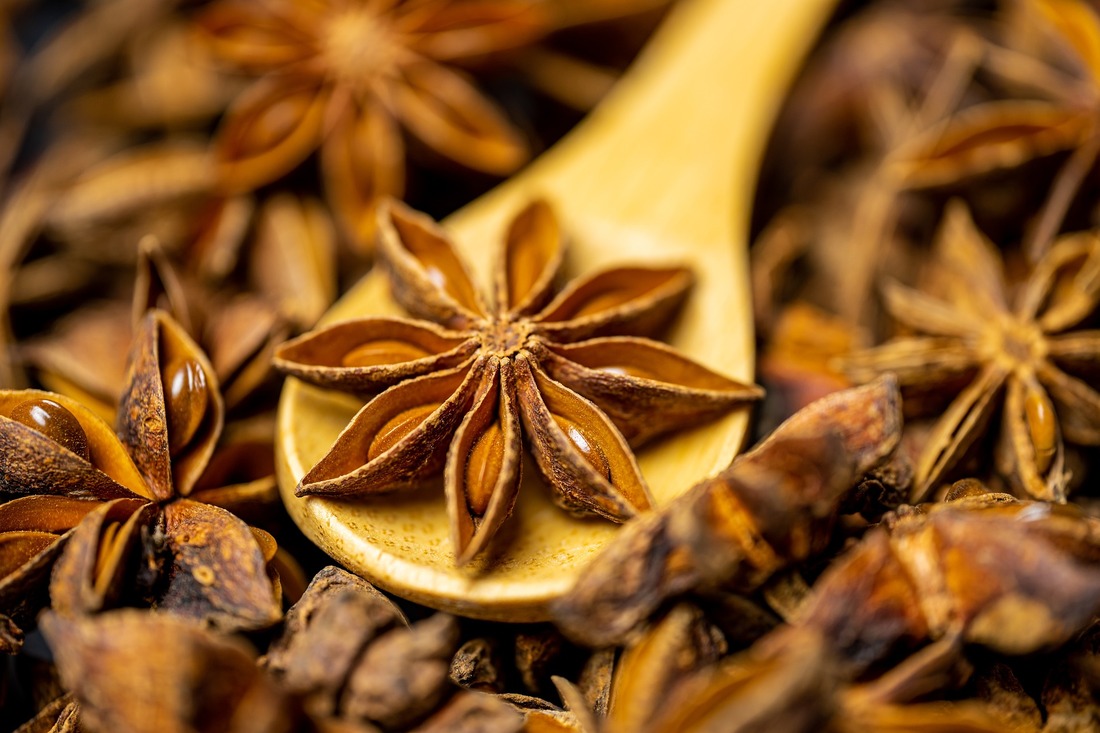 Star anise fruit and seeds (Kai Reschke) Public Domain The brittle black stars that smell akin to licorice and bring a rich sweetness to many Chinese dishes and Vietnamese pho are the dried fruits or pericarps of an evergreen tree that you can grow at home. Star anise (Illicium verum) gets its name from the Latin words for true seduction. If you’ve ever experienced the lush, potent fragrance of star anise, you know how well this name fits. How is star anise used? While star anise tastes similar to anise, they are not related. Star anise is the primary ingredient in five spice powder, with cinnamon, cloves, fennel, and Sichuan peppercorns. Added to baked goods, herbal teas, mulled wine, poached fruit, and savory dishes, star anise brings depth and complexity. And the plant is quite lovely. The star anise plant Star anise trees grow fast. They can reach a height of 26 feet with a 10-foot spread, but are often kept much smaller by pruning.  Star anise plant growing in the National Arboretum, Washington, D.C. (David J. Stang) CC BY-SA 4.0 The leaves are lance-shaped and fragrant but not used in cooking, and the flowers are pink or dark red. The fruit is star-shaped and green until it ripens. Ripe star anise fruit is brown and woody. Each of the spikes of a star anise fruit is a carpel that contains a single seed  Unripe star anise fruit (fuzheado) CC BY-SA 2.0 How to grow star anise These plants are native to southwest China and Vietnam and prefer warm temperatures and dappled sun (think lower in the jungle canopy). They can be grown outdoors year-round in USDA Hardiness Zones 7–9. If you live in a cooler region, give your star anise full sun and protect it from wind and frost. One way to do this is to grow it in a large, wheeled container. Simply bring it indoors each winter. The easiest way to grow star anise is by buying a certified disease-free sapling from a nursery. But don’t confuse these delectable spices with Japanese anise (Illicium anisatum) or swamp star anise (I. parviflorum) because those plants are toxic. And remember to place your new tree into quarantine to prevent bringing new problems into your landscape.
If grown from seed, it will take six years before you get a crop. You can also grow star anise from a branch cutting. These trees prefer loamy, slightly acidic soil (pH 6.0–7.5) and constant moisture. Your star anise tree will grow best with one inch of water each week, allowing the soil to dry out between waterings.
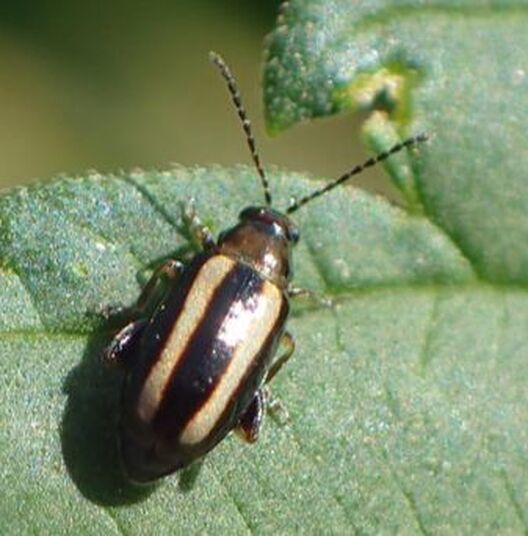
Top dressings of aged manure or compost can ensure your star anise gets the proper nutrients in spring and summer. Do not feed your tree in autumn or winter. You can also grow star anise as a hedge, but it will require regular pruning because of how quickly it grows. Pruning star anise generates amazing smells! Unripe fruits are harvested and left to dry. They can be stored for years in an airtight container. Problems associated with star anise Because of the oils that make star anise so fragrant, insect pests are not a problem for this tree. Alternaria blight and downy mildew, however, can cause problems. Use neem oil or fixed copper to prevent these problems. Did you know that star anise used to be used to make Tamiflu? I didn’t, either. Are you seeing small holes in the leaves of your garden plants? It may be palestriped flea beetles. 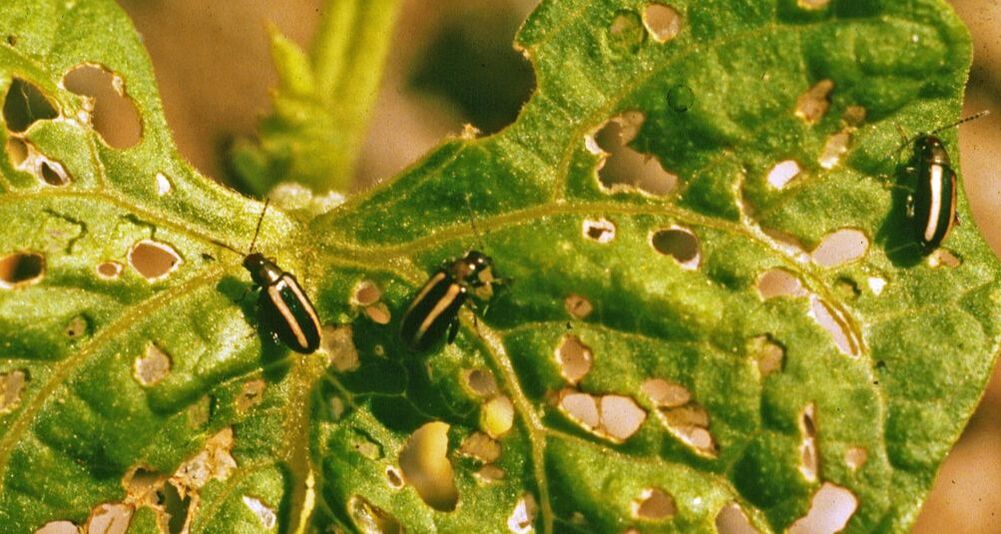 Severe damage to common bean by palestriped flea beetles (Whitney Cranshaw, CSU, Bugwood.org) CC BY 3.0 Palestriped flea beetles (Systena blanda) feed on artichokes, cabbages, and radishes. Beans, carrots, sunflowers, and other edibles are also at risk. Likely, you won’t even see these culprits unless you look closely. Like other flea beetles, palestriped flea beetles are small insects with large legs for jumping. And they can fly. But they feed on the underside of leaves, so it’s easy to miss them until you start seeing those holes. Palestriped flea beetle description Unlike their close cousin, the striped flea beetle (Phyllotreta striolata), and somewhat contrary to their name, palestriped flea beetles have a distinct white band down each wing. Striped flea beetles have wavy gold markings. Both species are only 1/8 of an inch long and tend to be brown with relatively long antennae.
Eggs are elliptical and pale yellow, larvae are white with dark heads, and pupae are small and cream-colored.
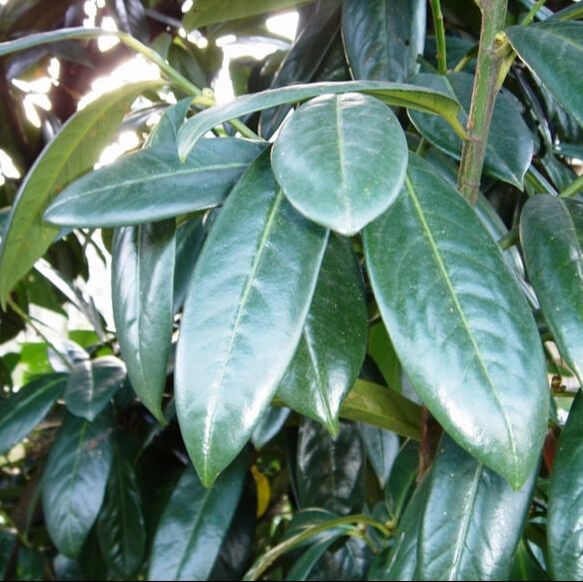
Palestriped flea beetle lifecycle Mated females lay eggs in the soil near the base of food plants each spring. When they hatch, larvae move into the soil where they feed on roots for 2 or 3 weeks before pupating. Pupae match hatch mid-summer through early autumn. There can be up to three generations each year. After pupating, adults emerge and begin feeding on the underside of leaves. As temperatures drop, adults look for sheltering dirt clods, plant debris, and weeds to protect them through winter. Palestriped flea beetle damage While the larvae chew on the roots, adult beetles are the ones that cause the most damage. Palestriped flea beetle feeding looks a lot like shot hole disease. It can also be mistaken for cavity spot. As beetles gnaw on the underside of leaves, the damaged areas die off and create small irregular holes. When this feeding occurs on seedlings and young plants, the damage can significantly reduce yield over the life of the plant or kill them outright. How to control palestriped flea beetles Pesticides generally don’t work against flea beetles. You can reduce the likelihood of them setting up shop in your garden by keeping attractive weeds away from your plot. By attractive, I mean members of the same plant families the beetles prefer. You can use that same logic turned around by employing trap crops to lure palestriped flea beetles away from garden plants you’d rather they left alone. Monitor seedlings twice a week for signs of palestriped flea beetle feeding. Knock any beetles you find into a container of soapy water. Once plants are established, a little damage won’t cause significant problems. When it’s time to put the kettle on, few of us consider the source of those tea leaves unless we’re drinking herbal tea. And that's only because we use the names of the herbs when we buy them.  A nice cuppa tea (Pixabay) Public Domain Herbal teas, such as peppermint or chamomile, are fragrant and earthy. I enjoy them regularly. But, in preparation for my first trip to London, I decided to drink the black tea of my earlier years. The tea bags look the same. [Did you know that many tea bags contain plastic? I didn’t either until recently. Yuck.] The way one makes tea is the same. But black tea is one of those things that somehow feels out of reach and unproducible at home, like paprika. Of course, that feeling led me to learn more about tea plants.  Tea plant (AxelBoldt) Public Domain The tea plant family If you read The Daily Garden regularly, you know that I like to learn about plant families. Much like human families, plant families have traits in common. Knowing about those traits can help in the fight against pests and diseases. It reduces your gardening workload, too. The tea plant family is no exception. The tea family (Theaceae) is primarily native to China and East Asia, though there are a handful of North American residents. Members of the tea plant family are now grown globally in warm regions. This family of flowering shrubs and trees includes tea and ornamental camellias.  Ornamental camellias (Kowloonese) CC BY-SA 3.0 I wouldn’t have thought my bright pink camellias were related to what was in my teacup, but they end up having a lot in common. Both plants have simple, glossy leaves that alternate along the stem and end with what’s called a Theoid leaf tooth. You’ve probably seen these before. When the medial vein expands and becomes slightly opaque and congested at the end of the leaf, with no other veins involved, you have a Theoid leaf tooth. Tea plants and camellias are both evergreens. They both have showy pink or white flowers. And those flowers are protected at the base with a calyx made with five or more sepals. Both plants can have lots of stems. While you wouldn’t see it without a microscope, both plants produce pseudopollen. Pseudopollen looks like the real thing, and it attracts and provides food for pollinators, but it doesn’t contain any genetic information.  Tea plant flower (Sanu N) CC BY-SA 4.0 Other members of the tea family have the same characteristics. A couple of North American natives are Georgia’s Franklin tree (Franklinia alatamaha), which is now extinct in the wild but still cultivated as an ornamental, and Loblolly-bay (Gordonia lasianthus), found throughout southeastern North America are both members of the tea family. But what about that cup of tea?
Tea plant basics Tea plants (Camellia sinensis) are evergreen shrubs that can grow six feet tall. They have deep taproots and use a lot of water. This makes sense because their native regions get an average of 50” of water a year. Those regions are also a lot warmer than, say, Minnesota. Tea plants can be grown outdoors in Zones 7-12 or indoors year-round. Because tea plants have large taproots, they need large containers. There are four unique tea plant varieties. Chinese small leaf tea (C. sinensis var. sinensis) and Chinese large leaf tea (C. s. var. assamica) are the most commonly grown tea varieties. There are thousands of cultivars. Tea plants grow more slowly and produce the best flavor at higher elevations. They prefer moist, nutrient-rich, slightly acidic soil with a pH of 5.5 to 6.5 and full sun. It may take 4 or 5 years of growth before you start harvesting leaves from your tea plant, but it will grow and produce for another 40-100 years. Harvesting tea leaves Harvesting tea leaves can be a labor-intensive process. Young tea plant leaves and terminal buds (flushes) are harvested by hand to make high-quality tea. Lesser teas are harvested by machine. Depending on the local climate, harvesting may occur twice a year or as often as every week or two. After being picked, leaves are allowed to wilt for a while. Then they are bruised or torn. Among professional tea producers, they are disrupting or macerating the leaves. Damaging the leaves this way allows enzymes to start oxidizing or breaking the leaves down. Next, leaves are rolled between human hands or crushed by machinery. Then the leaves are heated to halt oxidation. This process is called the green kill. The leaves are then dried completely, packaged, and sent to grocery stores, restaurants, and tea shops. Tea plant problems Tea plants are susceptible to bacterial diseases, including crown gall and bacterial canker. Nematodes and caterpillars commonly attack tea plants. But the biggest threat to tea plants comes from fungi. Anthracnose, armillaria root rot, black rot, and damping-off are a few fungal diseases that strike tea plants. Like camellias, tea plants make lovely additions to tea gardens, patios, and sunny rooms, depending on where you live.  Milkweed weevil on milkweed bud (Beatriz Moisset) CC BY-SA 4.0 Like many other gardeners, I have researched and planted native milkweed species for my region to help offset the habitat loss of monarch butterflies (Danaus plexippus). Unfortunately, milkweed plants (Asclepias syriaca) are the food of choice for more than just butterflies. Evil weevils Milkweed weevils are tiny black specks that damage milkweed plants, making them distasteful or even inedible to monarch larvae. There are tens of thousands of weevil species around the world. They all cause trouble. Boll weevils are estimated to have cost the cotton industry more than $100 billion over the past century, with inflation taken into account. On the other hand, some weevils are being employed to eradicate invasive plant species, so maybe they’re not all bad. And maybe the weevils consider monarchs to be pests. Milkweed weevil species There are two milkweed weevils: regular milkweed weevils (Rhyssomatus lineaticollis), which prefer the leaves of common milkweed, and stem milkweed weevils (R. annectans), prefer milkweed stems food and egg-laying. 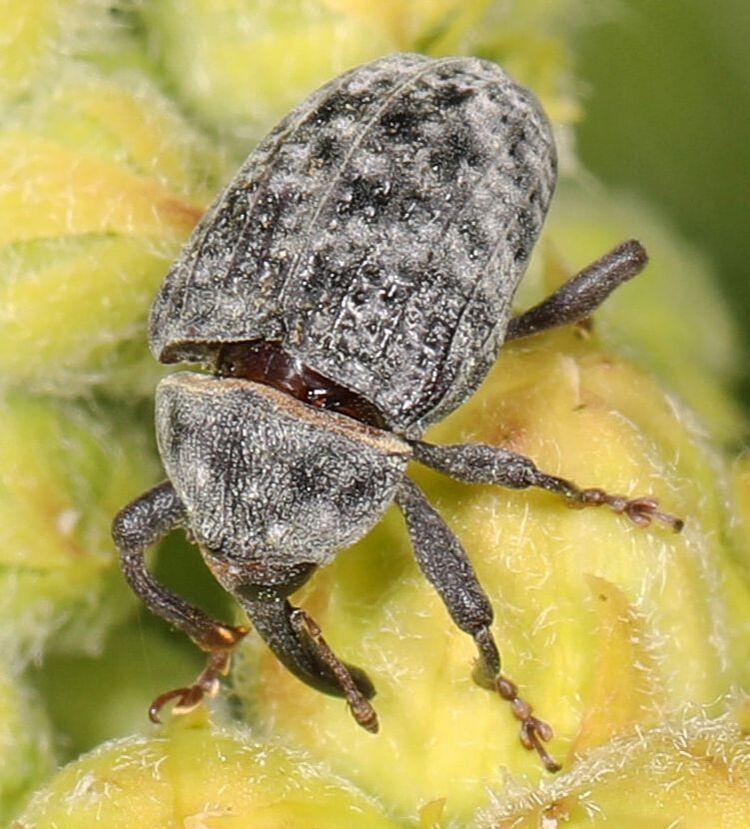 Milkweed stem weevil (Judy Gallagher) CC BY 2.0 Milkweed weevil description All weevils are small gray or black beetles. When I say small, I mean less than one-quarter of an inch. They may look like nothing more than specks. Get closer to see that they have long snouts called rostrums. Within those snouts are chewing mouthparts that take a significant bite out of buds, seeds, and stems. Like many other weevils, these evil twins have elbowed antennae with knobs on the ends, hard-scale bodies, and those snouts. Milkweed weevil larvae have tiny antennae, some scales, and no legs. Milkweed weevil behavior Milkweed weevils are nocturnal. They start eating tender new leaves and then move towards the buds and stems, where they lay eggs. They may also sever small petioles as they feed. When threatened, these pests play dead. Don’t be fooled. As soon as you turn your back, they’ll return to feeding and damaging your milkweed. Managing milkweed weevils The first step in any pest control problem is identifying the culprit. And milkweed plants are not without defenses of their own. As a milkweed weevil chews on a leaf, the plant starts oozing sticky, caustic latex. In some cases (pictured below), the plant can kill the pest without any help from gardeners. 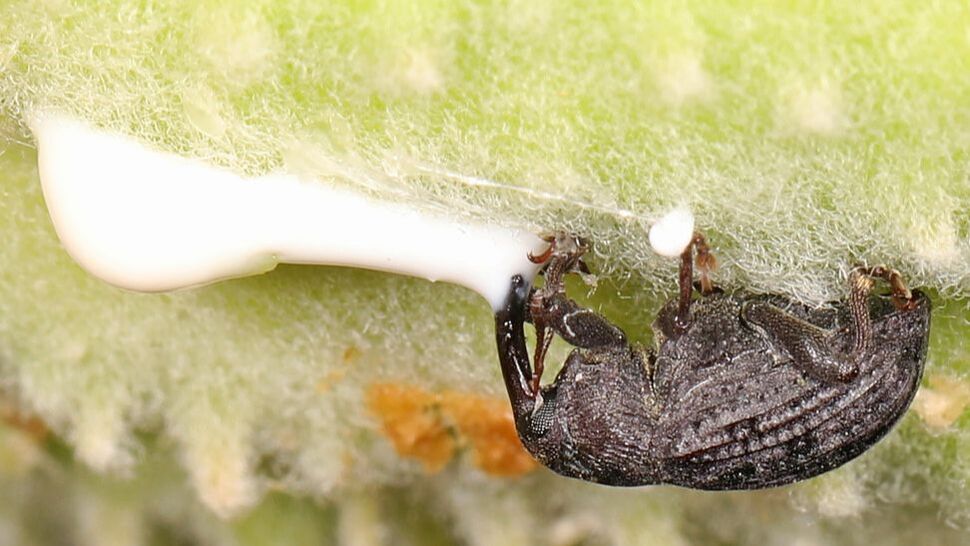 Milkweed stem weevil killed by latex from milkweed plant (Judy Gallagher) CC BY 2.0 Remember those boll weevils we mentioned above? Well, not too long ago, some researchers were trying to develop a pheromone trap for them when they discovered that milkweed weevils were more attracted to the traps than the intended victims. So, there are pheromone traps for milkweed weevils. You can also knock them into a container of soapy water. Some people say you can inject certain nematodes into the stems of plants infested with milkweed stem weevils if you’re into that sort of thing, but I couldn’t find any science to back up the claim, and they never mention which nematode. [There are more than 25,000 species.]
Check your milkweed plants regularly for those tiny black specks. And remember, if you are planting milkweed for monarch butterflies, be sure to plant native varieties, not tropical varieties. It matters a lot if you’re a monarch.  Monarch caterpillar feeding on common milkweed bud (Courtney Celley/USFWS) CC BY 2.0 These moths may be larger than many others, but they are not yellow. They are brown. And their larvae can be devastating to your garden. There are several types of yellow underwing. Whichever species you come across, these are airborne adult cutworms. Cutworms are destructive caterpillars that cut prized garden plants down at the soil level during the night. Native to Eurasia and North Africa, this invasive pest is now firmly established throughout North America.  Large yellow underwing (Dumi) CC BY-SA 3.0 Large yellow underwing description As far as moths go, large yellow underwings are sturdy. They have some heft to them. While many specimens are brown, other members of this family can range from tan to nearly black. Like other moths, they rest with their wings held flat, in tabletop fashion, over the body. [Butterflies tend to hold their wings upright when at rest.] Large yellow underwings have a wingspan of 2” to 2-1/2” across. The larvae start as tiny gray caterpillars but grow to 2” long. They can be green or gray-brown, with darkened heads. Brown cutworms have bands of gray or brown that run the length of the caterpillar. When disturbed, they curl up into a C-shape.  Large yellow underwing caterpillar (Ivar Leidus) CC BY 4.0 Large yellow underwing lifecycle
Adult moths generally fly from July to September, but those flight patterns have expanded in recent years. Females lay clusters of tiny, pearl-like eggs in the soil or on host plants. If you were to look closely, you would see that these eggs look ribbed or have a netting pattern. Eggs start white but soon turn grayish-pink. After they hatch, these tiny caterpillars may feed a little bit, but the real damage occurs as temperatures rise. Just when your tomato, spinach, and strawberry plants are coming to life, cutworms emerge at night, devouring young leaves and severing new stems. After eating their fill, they return to the soil. There, they surround themselves with hard, rust-colored oblong cases where they pupate. Adult moths emerge 2-3 weeks later, and the cycle begins again. Host plants Adult large yellow underwings are attracted to butterfly bush, ragwort, and red valerian. But it is larval feeding that causes all the damage. Larvae feed on the stems and leaves of young plants. The following plants (and other members of the same families) are commonly used as food by large yellow underwing larvae: • Beets (Beta) • Broccoli and cabbage (Brassica) • Carrots (Daucus) • Grapes (Vitis) • Lettuce (Lactuca) • Rhubarb • Spinach • Strawberries (Freesia) • Tomatoes and potatoes (Nightshade family) Carnations, chrysanthemums, dahlias, dandelions, freesia, gladiolas, sweet violet, and grasses are also vulnerable to cutworm feeding. But planting calendula in your garden will help to deter these pests. Controlling large yellow underwing moths These flying pests are attracted to lights at night. If you feel so inclined, you can sit on the porch with a butterfly net and put an end to their destructive ways with a container of soapy water or a garden shoe. Or, you can go out at night with a flashlight and handpick the buggers before too much damage is done. You might also use a garden claw to gently disturb the soil around affected plants. The larvae tend to stay near the surface, so you may be able to find and remove those pests that way. Drench tests can also flush cutworms out of the soil. A while back, lectins made their way into the media. They were held responsible for practically every illness known to man, thanks to Steven Gundry’s book, The Plant Paradox. He claimed that lectins were responsible for disease and obesity. He was wrong. There is no scientific evidence to support his claims. But lectins can hurt you. Let’s learn the truth about lectins and how they impact the plants in your garden (and your body).  Toxic lectin found in fava beans (Thamelry) Public Domain What are lectins? Lectins are protein molecules that bind to specific carbohydrates. The word lectin comes to us from the Latin word for choose, which is a good description of what scientists believe lectins do inside your plants. While more research is needed, lectins appear critical to cell recognition. Plants use lectins to facilitate interactions between pollen and the stigma during pollination. They also play a role in maintaining seed hull integrity. When a plant cell bumps into harmful bacteria, beneficial microorganisms, or fellow plant cells, lectins initiate the proper response. That response can be anything from toxic warfare, a welcome mat, or cell-to-cell communication.
Lectins as toxins
The toxic warfare response may be what triggered Mr. Gundry's belief that lectins cause human disease. Lectins are toxic in specific situations. They are the reason why beans and other legumes are difficult for us to digest. That’s why we cook them. The heat breaks down the lectins (among other things). Can lectins hurt me? Some plants contain enough lectin to cause illness or even death. Castor oil beans are one example - but who wants to eat those?
In most cases, we typically can not eat enough lectin-containing plants to hurt us. As always, take sensational media with a grain of salt. And cook your beans.
|
Welcome!You can grow a surprising amount of food in your own yard. Ask me how! To help The Daily Garden grow, you may see affiliate ads sprouting up in various places.
You can also get my book, Stop Wasting Your Yard!  Index
All
Archives
July 2024
|
_1.jpg)


 RSS Feed