|
If you love your trees (or your blueberries), be on the lookout for Asian longhorned beetles.
The U.S. Customs Department is working hard to halt the importation of these pests. Eradication in the U.S. is still possible, but it’s an uphill battle. And they need our help. Asian longhorned beetle identification Asian longhorned beetles (ALBs), also known as starry sky or sky beetles, are easy to identify. Approximately one inch wide and and an inch-and-a-half long, they are shiny black with 20 white spots on each wing cover, and they feature an impressive set of black and white banded antennae. They have long, whitish-blue feet and large mandibles. Larvae are large and cream colored. ALB lifecycle Adult female beetles chew pits into wood and then deposit their eggs into those pits, one at a time. She can lay up to 90 eggs in just a few weeks.  ALB eggs within pits with bark removed (Melody Keena) Public Domain When the eggs hatch, larvae tunnel deep into the tree (where they are safe from predators and pesticides), leaving behind a trail of frass. Deep within the tree, the larvae go through several instars before entering a pupal stage.  Multiple ALB instars removed the gallery (USDA Forest Service) Public Domain As adults, they tunnel out of the tree, leaving 3/8-inch exit holes along trunks and branches. Piles of frass can be seen at the base of infected trees and in branch crotches. Branch dieback and leaf wilting are early signs of infestation. The egg sites and larval feeding make the trees susceptible to many other pests and diseases, as well as more vulnerable to damage from heavy winds. Sap is often seen oozing from wounds. This larval tunneling causes extensive damage and girdling, making the wood unusable and eventually killing the tree. Infested trees must be removed and destroyed by trained professionals. Do not attempt this yourself. 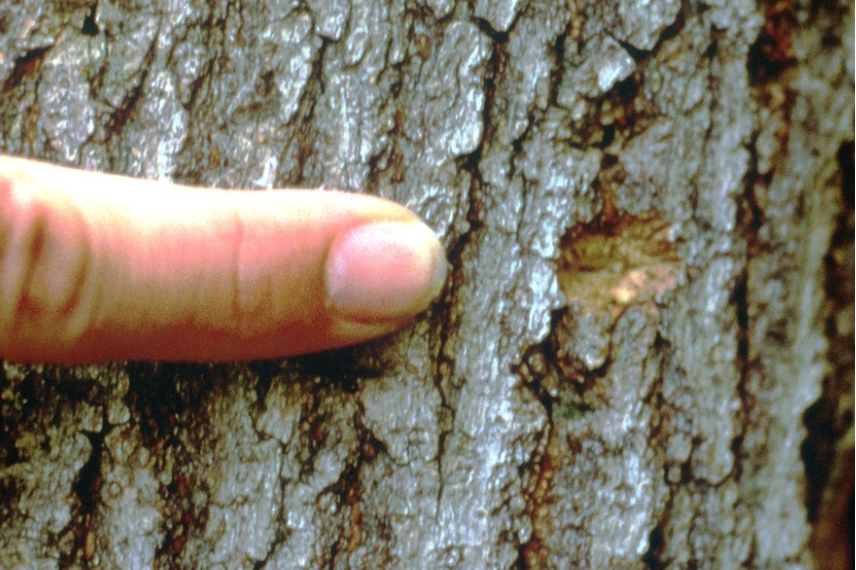 Egg-laying pit and exit hole of ALB (USDA Forest Service) Public Domain Trees susceptible to ALB
Many popular hardwood trees are vulnerable to ALB infestation. These trees include alder, ash, beech, birch, boxelder, elm, hackberry, hornbeam, horse chestnut, mimosa, planes, poplar, sycamore, and willow. And blueberries! And members of the Prunus family, which includes apricots, peaches, nectarines, cherries, and almonds! We do not yet know what the impact will be on California’s native hardwood trees. Experts predict that this pest could cause more damage than gypsy moths, Dutch elm disease, and chestnut blight combined, destroyed millions of acres of trees across the country, in parks, along streets, in backyards, and in agriculture. Dead and dying trees are more likely to cause fires and they are unable to support the biodiversity that keeps a region healthy. If you consider all the wood-based products we use every day, ALB could cause many prices to increase significantly. All because of an insect. If you see it, catch it! Report it! If you see an Asian longhorned beetle, catch it. Period. Just do it. They don't bite or sting. While they can fly, they don’t do it very well and only for short distances. You can do this. Your efforts could save millions of trees and billions of dollars. Seriously. Put your captive in a glass jar [they chew through trees, remember?] and place it in the freezer. Be sure to label the jar with where you found it (GPS position, if possible), the date you found it, and your contact information. These reports are critical if we are to protect our trees. Using this information, experts can create quarantine zones and implement eradication programs most effectively. If you live in California, call the CDFA hotline at 1-800-491-1899. In fact, put the number in your phone now, so you’ll have it if you ever need it. I did. If you live outside of California, report it to your state’s Department of Agriculture. Together, we can save millions of trees. Pierce’s disease poses a significant threat to grape vines and citrus trees. The bacteria responsible for Pierce’s disease, Xylella fastidiosa, was first seen on grapes in Southern California in the late 1800s when it was called Anaheim vine disease. By the 1930s and 1940s, it had spread to California’s Central Valley. By the late 1990s, the disease had spread to several California counties. This increase appears to be a function of warmer temperatures allowing more bacteria to survive the winter and increasing their range. According to CABI, Pierce’s disease now occurs throughout the Americas, Italy, Iran, and Taiwan.  Pierce’s disease on citrus (Alexander Purcell, University of California, bugwood.org) CC BY 3.0 Disease vectors Pierce’s disease is carried by sap-feeding insects. Most commonly, this means sharpshooters, such as blue-green and glassy-winged sharpshooters. [Did you know that sharpshooters can consume hundreds, or even thousands, of times their body weight in sap in their short lives?] Spittlebugs also carry this disease. Whichever insect is chewing on your grape vines injects the bacteria into the vine’s vascular bundle as they feed, making them a disease vector. These bacteria then live and reproduce in the xylem, clogging the flow of nutrients and water through the plant.  Blue‐green sharpshooter (Katja Schulz) CC BY 2.0 Host plants
Pierce’s disease can occur in several weedy and ornamental crops, such as wild grape, California blackberry, periwinkle, stinging nettle, eucalyptus, live oaks, blue elderberry, and mugwort. These plants are not affected by the bacteria that cause disease in grapes. But they provide a transitionary location for the insects that do carry the disease. Symptoms of Pierce’s disease Infected plants exhibit leaf scorching and stunting. These symptoms start as slightly yellow or red leaf margins (edges) of white or red grape varieties, respectively. Concentric areas of infected leaves may dry up. You may also see ‘matchstick’ petioles, ‘green islands’ on mature brown stems, shriveled clusters of fruit, and dieback. These symptoms do not appear until spring after temperatures are above 65°F. There is no cure for Pierce’s disease. Sometimes it will disappear on its own. We don’t yet know how or why. It seems to be a function of temperature, the timing of the initial infection, and the variety of plants. Generally speaking, late-season infections have a 95% chance of recovery. Water-stressed plants are more likely to succumb. If a plant becomes infected early in the season, the bacteria will take over, and the vine is doomed, so remove it. Pierce’s disease control and prevention This disease triangle consists of the host plant, the feeding insect carrier, and the disease-causing bacteria. Break the connection between any of those three, and you reduce the chances of disease. The easiest way to prevent Pierce’s disease is to keep host weeds out of the area and control sap-sucking insect pests. Since insect-eating birds, such as bluebirds, and several predatory insects, love to eat sharpshooters, keep your garden welcoming to these natural helpers. Monitor your plants for signs of Pierce’s disease so that you can act quickly, reducing the spread of the disease. Most vector insects are low fliers, so physical barriers can be used to quarantine potentially infected plants. During the dormant season, remove any vines infected for more than one year. They will not recover. As vector insects feed on them and move to nearby plants for more feeding, they spread the disease to healthy plants. There is no cure for Pierce’s disease. In some cases, the disease will disappear on its own and we don’t yet know how or why. It seems to be a function of temperature, the timing of the initial infection, and the variety of plant being infected. Generally speaking, a late season infection, one that occurs after June 1st, has a 95% chance of recovery. Water stressed plants are more likely to succumb to the infection. If a plant becomes infected early in the season, the bacteria have time to become firmly established. Once that happens, you will ultimately have to remove the vine completely. Pierce’s disease control and prevention This disease triangle consists of the host plant, the feeding insect carrier, and the disease-causing bacteria. Break the connection between any one of those three and you can reduce the chances of disease. The easiest ways to prevent Pierce’s disease is to keep host weeds out of the area and treat for the sap-sucking insect pests. Since insect-eating birds, such as bluebirds, along with several predatory insects, love to eat sharpshooters, keep your garden welcoming to these natural helpers. Monitor your plants for signs of Pierce’s disease so that you can act quickly, reducing the spread of the disease. Most of the vector insects are low fliers, so physical barriers can be used to quarantine potentially infected plants. During the dormant season, remove any vines that have been infected for more than one year. They will not recover and they will spread the disease to other plants as vector insects feed on them and then move to nearby plants for more feeding. Ladies bugs, or lady beetles, are always welcome in the garden, except when they’re not. Because, if it’s a Mexican bean beetle, it’s the last thing you want to see in your garden! .jpg) Mexican bean beetle (Stephen Ausmus) Public Domain Mexican bean beetles are found throughout Mexico and much of the eastern U.S., and in areas west of the Rockies that receive a lot of rain or irrigation. These pests have been found in and eradicated from California once. Let’s find out why Mexican bean beetles are so bad.
Mexican bean beetle identification Mexican bean beetles look like ladybugs, sort of. They have the same oval, domed shaped, and they have spots. To be exact, Mexican bean beetles have eight black spots on each side. These evil cousins to ladybugs can range in color from golden yellow to a rusty brown. Larva look like spiny oval pills and the eggs are yellow. Pupae are found hanging from the underside of leaves. Mexican bean beetle lifecycle In late spring, adults emerge and begin feeding and breeding. Each female will lay hundreds of eggs in clusters on bean leaves. When these eggs hatch, the real damage begins. Heavy infestations can defoliate an entire field of legumes. After a few weeks of feeding, the larvae enter a pupal stage. Newly emerged adults often travel long distances in their search for food. Host plants Mexican bean beetles (Epilachna varivestis) are a type of lady beetle that eats plants, rather than other insects. In particular, these pests feed on legumes. That means your cowpeas, mung beans, soybeans, green beans, wax beans, lima beans, peas, and fava beans are at risk. It also means you need to monitor any alfalfa, peanuts, wisteria, lupins, tamarind, carob, and lentils for signs of Mexican bean beetle feeding. Mexican bean beetle damage and control Adult beetles feed on the undersides of leaves, leaving them skeletonized. Beetles may also feed on fruit and flowers. The larvae eat even more than the adults! Luckily, parasitic wasps can do a lot to reduce bean beetle populations, so avoid using broad spectrum pesticides and insecticides. You can also use row covers when you know that Mexican bean beetles are present or likely to appear. As always, take the time to quarantine new plants. If you live in California and suspect seeing a Mexican bean beetle, please try to capture it and report it to the California Pest Hotline at 1 (800) 491-1899, or contact your local Department of Agriculture. Wax is made by honey bees to build the comb used to store honey and to protect larvae. Did you know that plants also make wax?  Water beads on the waxy cuticle of a kale leaf (Rei) CC BY-SA 3.0 Nearly all vascular plants manufacture wax. This wax is used as part of the cuticle, or outer layer of the epidermis, of leaves, stems, and even some fruits. Protective wax Having a waxy outer layer reduces evaporation, making it easier for plants to hang on to the water they need. It also reduces the chance of abrasion, when plant parts rub against each other. Finally, wax makes it more difficult for pests to attack. Wax chemistry Wax is actually a class of fatty compounds that are insoluble in water and tend to be relatively soft at room temperature. When honey bees are between 12 and 20 days old, they develop a special gland on their belly that converts the sugars in honey into waxy flakes. The flakes are collected by other bees and chewed up before being used to make new comb. [I thought you’d want to know about that.] Plants, however, have neither the organ nor the chewing ability. Instead, plants synthesize wax out of hydrocarbons, made up of fatty acids and long chain alcohols, along with aromatics, ketones, and other chemicals. The chemical make up of a plant’s wax varies by species and geographic location.
Plant wax candles Carnauba wax, of shiny car and confectionary fame, is a wax made by the Brazilian palm Copernicia prunifera. A lighter colored substitute, ouricury wax, comes from the Brazilian feather palm Syagrus coronata. Several species of native bayberry (Myrica cerifera), also known as wax myrtle, and the succulent stems of candelilla (Euphorbia antisyphilitica), produce so much wax that they were used by Native Americans to make candles. In the case of bayberry, the berries are boiled until the wax separates from the plant material. After it hardens, it is removed from the soup. These candles are still made today, due to the pleasant smell as they burn. Candelilla plants are now endangered and collecting them is forbidden. Other plant waxes include castor wax, rice bran wax, and tallow tree wax. 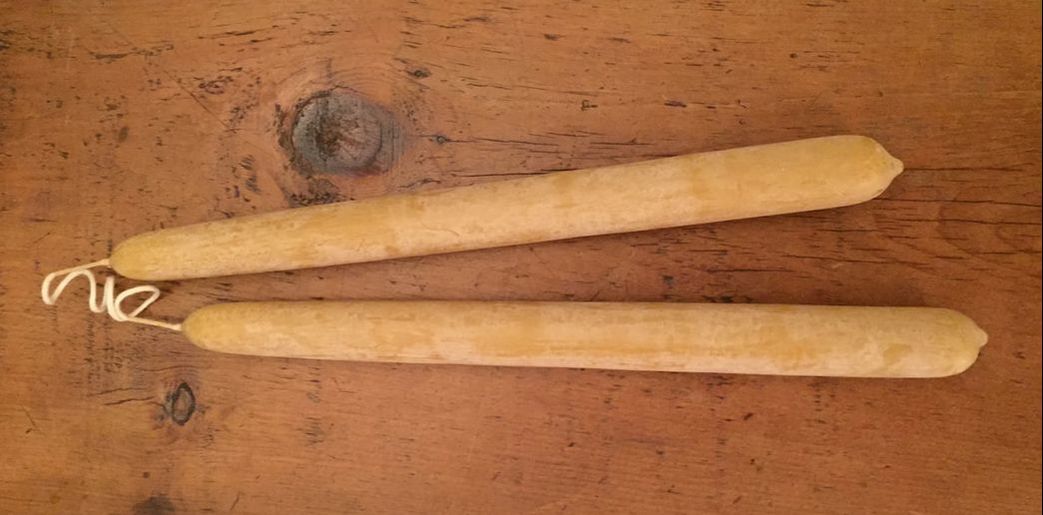 Bayberry candles The next time you look at a leaf or stem, take a closer look and see if wax is part of that plant’s defense system.
Moles are creatures of darkness. They almost never leave their tunnels. Often falsely blamed for plant damage, moles are primarily insect eaters.  Closeup of a mole (Michael David Hill) CC BY-SA 3.0 Mole description Moles are rather funny looking. They have stubby, hairless tails, cylindrical bodies (usually 5 to 7 inches long), pointed snouts, and short, webbed hands and feet. They don’t see very well because their eyes are covered with skin, and you can’t see their ears. Mole fur, however, is quite thick and velvety, and moleskin is the stuff of hiking blister legends. There are 42 mole species worldwide, 7 of which live in North America, and 4 species found in California:
Moles like their privacy. Unless it’s the breeding season, you will only find one mole per tunnel system. Moles have one litter each year, usually with 3 or 4 young, in spring. Differences between moles and pocket gophers Many people assume that moles and voles (also known as pocket gophers) are related. They are not. Voles are plant eating rodents, while moles are primarily insect-eating members of the Scapanus species, more closely related to shrews. Crescent-shaped mounds with closed holes indicate the presence of pocket gophers. Pocket gopher populations can lead to girdled trees, slope erosion, and dead plants. Moles, on the other hand, have round mounds which may have open or closed holes, and long surface ridges from their shallow tunnels are often visible. Moles normally feed on worms, grubs, insects, and other invertebrates. Moles will occasionally eat mice, shrews, and nuts. Your average mole will eat 40 pounds of insects each year.
Mole tunnels
Moles create an extensive system of both deep and shallow tunnels. The deeper tunnels are their permanent housing, with separate rooms for food storage, sleeping, and rearing young. Tunnels are usually 2 inches in diameter and found 8 to 12 inches below the soil surface. The shallow tunnels are for hunting out grubs, worms, centipedes, and other soil dwelling creatures. It is the shallow tunnels that cause most of the problems associated with moles. As they burrow under the surface of the soil, looking for their supper, moles often dislodge smaller plants and expose root systems to the air, drying them out. If you want a lawn that looks like a putting green, moles are not your friends. Mole management If you cannot tolerate moles in your garden or landscape, trapping will be necessary. While there are dozens of repellants, scaring devices, home remedies, and plants that claim to offend moles, research has not shown that any of these methods actually work. The only exception is castor oil solutions, which have been shown effective on eastern moles. Flooding tunnels wastes water and does not rid an area of moles. [They’ve dealt with floods for far longer than we have been gardening.] Trapping always works. Underground harpoon traps and scissor-jaw traps are the most effective methods. Of course, this means dealing with a dead mole and a messy trap. Some new mole baits are showing limited effectiveness, but then you have to worry about children, pets, and local wildlife also suffering a horrible death. Plus, if your landscape was appealing to a mole before, it probably will be again, to a different mole. If you have valuable plants that need protection against moles, you can install a hardware cloth barrier 2-feet into the ground, with a 6-inch lip bent at a 90° angle away from the plant to thwart mole digging. Mole trivia Moles are fascinating creatures. Some of the more interesting mole facts include:
If you can tolerate moles, they actually provide many benefits to the garden and landscape. Did you know that mole saliva contains toxins that paralyze earthworms? Researchers have found underground storage spaces filled with thousands of paralyzed earthworms, for later eating. Now you know. Kuno scale is a pest of plum and other stone fruits.
Like other soft scale, kuno scale (Eulecanium kunoensis) is a sap-sucking insect that hides under a dome-shaped protective barrier. Unlike armored scales, which can be separated from their dome, kuno and other soft scales are attached to their dome. Kuno scale description Kuno scale females are 1/6 of an inch in diameter and a dark, shiny brown. They actually look like tiny beads on tree stems, during summer. Just before egg production, they turn yellow or orange, with black markings. During winter, they are more flattened and less shiny. If you remove a kuno scale from its host, you will see a visible lip on her body, which is used as a point of attachment. Nymphs are flattened, and either brown or yellow. Male cocoons are 1/12 of an inch long and translucent. Kuno scale lifecycle Eggs hatch under their mother in spring. These first instar nymphs are called ‘crawlers’ because they crawl away from her and find a place to feed on leaves throughout the summer, going through multiple instars as they feed. In fall, mature nymphs find a hiding place on twigs just before leaf fall. These nymphs overwinter on twigs and reach adulthood in spring, just in time to lay more eggs. Kuno scale damage As a sap-sucking insect, Kuno scale sucks phloem sap from twigs and leaves. While it prefers plum trees, Kuno scale can also be found on peach, cherry, nectarine, apricot, and almond, as well as rose, walnut, and pyracantha. These pests can populate an area so quickly, that it can seem as though they appeared overnight. Plants may appear water stressed. Heavy infestations can lead to twig dieback and premature leaf drop. Also, Kuno scale produces a lot of honeydew (sugary poop). Honeydew is the perfect growth medium for sooty mold. It also attracts ants, which will protect and farm Kuno scale. If you see ant trails on your plum tree, make a point of finding out where they are going in your tree. Kuno scale control Since ants protect Kuno scale from natural predators, blocking ants from getting up in your trees is the easiest control measure. To do this, simply wrap the tree trunk with a sticky barrier. You can also apply horticultural oil to twigs and the ends of branches just as buds are swelling, in spring. You can also try drenching the undersides of leaves in early summer, but this is tricky, because it’s not a good idea to spray dormant plum or walnut trees with oil, especially during periods of drought. And, let’s face it, spraying the underside of leaves is a royal pain. Stinging insects can really take the fun out gardening. Knowing what to watch for can reduce your chances of getting stung. Some insects will bite you, while others have a chemical arsenal at their disposal that they can inject through a stinger which may or may not be barbed. While bug bites may suck, today we are talking about those insects with stingers. Those insects are bees, wasps, and one type of ant.  Wasp stinger with drop of venom (Pollinator) CC BY-SA 3.0 Stingers A stinger is a pointed organ, often attached to a venom gland. The venom causes pain and paralysis of specific organs within the victim. Normally found at the tail end of an insect, stingers are used as weapons against real and perceived threats. Most stingers are relatively smooth and can be used repeatedly. Honey bees and a handful of other species have barbed stingers that are torn from the insect’s body, causing it to die with minutes. These barbed stingers, once embedded in flesh, continue to saw their way deeper, injecting even more venom. This is why it is so important to remove the stinger as soon as possible after being stung. [Barbed stingers are able to sting other insects repeatedly without harming the attacker.]  Yellow jacket stinger in its sheath (SecretDisc) CC BY 2.5 Bees Buzzing bees are usually a welcome sound in the garden. As highly efficient pollinators, they are the reason many of our crops produce food for us. There are over 20,000 species of bees around the world, but the honey bee is the most well known. If a honey bee stings you, it is because she feels that she, or her hive, are threatened. Moving deliberately and calmly around bees is often all it takes to avoid getting stung. There are four major types of bees found in North America: bumble bees, carpenter bees, honey bees, and sweat bees: Bumble bees Bumble bees (or bumblebees) are important pollinators. Fat, furry, and hard working, it is best to leave these garden helpers alone. Their stings are about as painful as a honey bee sting, but they only sting when provoked. California varieties include the American bumble bee, western bumble bee, golden northern bumble bee, tricolored bumble bee, and the yellow-faced bumble bee. Small colonies often build nests under patios and attic soffits.  Buff-tailed bumblebee (Alvesgaspar) CC BY-SA 3.0 Carpenter bees Solitary carpenter bees build circular holes and tunnels in wood. While they may damage your fence, they are powerful pollinators. Male carpenter bees look like golden teddy bears and they cannot sting you. Female carpenter bees are a metallic black and rather noisy. Generally, they will not sting if you leave them alone.
Sweat bees Tiny sweat bees are often mistaken for flies. Sweat bees are attracted to the salt in human sweat. They do sting, but it is considered only mildly painful. Varieties found in California include the agapostemon and bicolored agapostemon sweat bees.  Agapostemon sweat bee (Jon Sullivan) Public Domain Wasps Wasps are aggressive. They will come after you, and sting multiple times. While wasps do not pollinate flowers, they are garden predators. Wasps will also parasitize many garden pests by laying their eggs on or in other insects. Unlike most bees, which are covered with tiny hairs, wasps are smooth-bodied and are usually marked bands of black and yellow. Wasps have remained relatively unchanged over the past 34 million years. There are over 75,000 species of wasps around the world. Many different types of wasps found in California including blue-winged, braconids, common thread-waisted, black and yellow mud dauber, cuckoo, four-toothed mason, ichneumon, short-tailed ichneumon, and giant ichneumon, great black, great golden digger, horntail, leucospid, multillid, potter, spider wasps, and weevil wasps. Not all of these species attack humans. Hornets and yellow jackets are both types of wasps that do attack. Hornets (Provespa and Vespa genera) There are 22 species of Vespa and 3 species of Provespa. Provespa are unique in that they are nocturnal. Hornets are aggressive social insects. They feed on sugary plants and fruit, as well as other insects, including honey bees. Hornet stings are more dangerous to humans that other insect stings because they contain higher concentrations of acetylcholine. Hornet stingers are not barbed and can be reused many times. Also, when one hornet stings you, it releases chemicals that tell other hornets to sting you, as well. These same chemicals are also released when you kill a hornet, so be forewarned. Hornets build ‘paper’ nests in trees and under the eaves of houses. Bald-faced hornets and European hornets are commonly found in California.  European hornet eating a honey bee (Richard Bartz) CC BY-SA 2.5 Yellow jackets Most yellow jackets are black and yellow, though some are black and white. Yellow jackets have a distinct side-to-side flying pattern and all female yellow jackets have barbed stingers that can reused several times. They do not carry pollen on their legs. Yellow jackets prey on pest insects., and they feed on nectar, fruit, and tree sap. Yellow jackets build paper nests in trees, burrows, and under house eaves. Only the inseminated queen lives through the winter. All the other members of a yellow jacket colony die the year they are born. Yellow jackets are responsible for the greatest number of allergic reactions among stinging insects. They are often found around trash cans and picnics.  Yellow jacket (Fruggo) CC BY 2.0 Ants There are many different ant species found in California, but only the red imported fire ant (RIFA) has a stinger. While other ants can inflict a painful bite, fire ant stings burn furiously for quite a while. There is no mistaking that sensation! Red imported fire ants (RIFA) came to North America in 1985, from South America. By 1998, they had spread throughout the southeastern states, from their point of entry in Alabama. By 2007, fire ants had found their way to the west coast and everywhere in between. Fire ants eat meat, grain, sugar, and grease. They are a highly organized social species that will work together to kill young livestock and wildlife. They can really dampen a picnic, too. Be on the look-out for mounds in the soil.  Red imported fire ant workers (Stephen Ausmus) Public Domain Allergies
If you are allergic to wasps, you will also be allergic to hornets. If you are allergic to stinging insects, you should always carry antihistamines or an EpiPen with you. Signs of an allergic reaction include shortness of breath, swelling of the face, lips, or throat, severe itching, weak or racing pulse, nausea, wheezing or gasping. If any of these symptoms occur, get medical help immediately. Call 911, grab a family member, or a neighbor right away. These symptoms can quickly escalate into a life-threatening situation. Otherwise, follow these steps to ease your temporary pain. If you get stung If you are unlucky enough to get stung, inspect the area to see if a stinger is visible. If it is, scrape it out with your fingernail. Then, clean the area with soap and water, take an antihistamine, and apply an ice pack. You can also take aspirin or acetaminophen to ease the pain, just be cautious about mixing medications, as that can cause yet another medical problem. Generally speaking, you are going to feel really miserable for 30 to 45 minutes, moderately uncomfortable for the rest of the afternoon, and you may experience discomfort for a week or so. You may also want to apply hydrocortisone or calamine lotion to the area. Pastes made of baking soda or colloidal oatmeal can also sooth the area. If you haven’t had a tetanus shot in the past 10 years, it can be a good idea, as well. To avoid gettin stung, take the time to look before reaching into an area, and wear protective clothing when outside. Hoophouses are growing in popularity as a way to protect plants from a variety of threats. Traditionally used in commercial agriculture, hoophouses are similar to cold frames, greenhouses, and row covers in that they provide a physical barrier between frost, insect pests, and disease vectors and your crops.  Open-ended hoophouses (Val Vannet) CC BY-SA 2.0 Hoophouses are also known as poly tunnels. grow tunnels, high tunnels, and hoop greenhouses. Hoophouses are typically created from steel frames that are covered with plastic (polyethylene) sheeting. These frames can be square or semi-circular. Hoophouses create heat Hoophouses extend the growing season by several weeks by increasing temperatures. This can be done with mechanical heaters, or with passive solar heat. In areas with extreme cold, smaller hoophouses are placed under larger versions, creating a buffer zone. As the sun’s rays warm the plants and soil within a hoophouse, the plastic sheeting slows heat loss. The heat can come in, warming the plants and soil, but it cannot escape as fast, so temperatures continue to rise. This provides the warmth needed by many sun-loving plants, such as strawberries, raspberries, blackberries, eggplant, basil, and peppers, and As temperatures become too hot, fans and other forms of ventilation are added at either end, along with other helpful equipment.  Commercial multi-span hoophouse (Kattegatt) CC BY-SA 4.0 Hoophouses offer control Another benefit of hoophouses is that they allow growers to manipulate humidity, along with temperature and air flow. Crops prone to fungal diseases can receive extra air flow with the use fans. Hoophouses also provide protection against strong winds, hail, sunburn damage, and sudden, unexpected cold. In areas with too much heat, misters can be installed inside hoophouses to keep the environment conducive to strong growth. All this protection allows fruit and vegetables to develop at a steady pace. It also allows them to be grown during traditionally unproductive seasons, and it helps more sensitive plants overwinter without too much damage. Hoophouses also offer protection against many pests.  Backyard hoophouse (Kattegatt) CC BY-SA 4.0 Pests blocked by hoophouses
Most flying insect pests (and neighborhood cats) are thwarted by the walls of a hoophouse. Not only are the plants harder to see or smell, the plastic wall creates an impenetrable barrier. This protection can extend to birds, rats, and squirrels, but only up to a point. Once these pests realize there is food inside, they will work harder to find a way in. The real protection is against insects that act as vectors for disease. Hoophouses in the home garden Smaller versions of commercial hoophouses are now available for purchase for the home garden, or you can create your own, using PVC or conduit. If you had a hoophouse, what would you grow in it? Bogs are a type of wetland. There are three basic types of wetland: swamps, marches, and bogs.  Canadian sphagnum bog (Boréal) CC BY-SA 3.0 Swamps feature trees and other woody plants, while marshes are home to grasses and other herbaceous plants. Both swamps and marshes are common to warmer regions. Bogs occur in area with low soil nutrients and lots of acidic surface water. Bogs generally occur in areas with cool temperatures and frequent rain. This combination of conditions slows both growth and decomposition. Bogs are unique in that they are areas where dead plant material accumulates in layers called peat. This dead plant material is mostly made up of mosses, especially sphagnum moss. Peat can be several yards deep and it is traditionally used as a building material and as fuel for fires. Plants in the heather family are the most commonly found in bogs. This family (Ericaceae) includes blueberries, cranberries, and huckleberries, along with azaleas. Carnivorous plants are also found in bogs. Evergreens and sedges are also common.  Carnivorous pitcher plant (André de Saint-Paul) CC BY-SA 3.0 Types of bogs Bogs are classified by either nutrient content, or according to local weather and geography. When classified according to nutrient content, a bog can either be eutrophic, mesotrophic, or oligotrophic. This ranking goes from most to least nutrients present. When bogs are classified according to local weather and geography, these names are used:
 Estonian bog in October with morning mist (Amadvr) CC BY-SA 3.0 ee Bogs can be deadly, if something sinks below the surface. They can also be stunningly beautiful.
Netting can be used to protect your fruit and nut crops from marauding birds and squirrels. But, did you know that it can also be used to modify lightwaves from the sun? Read on. 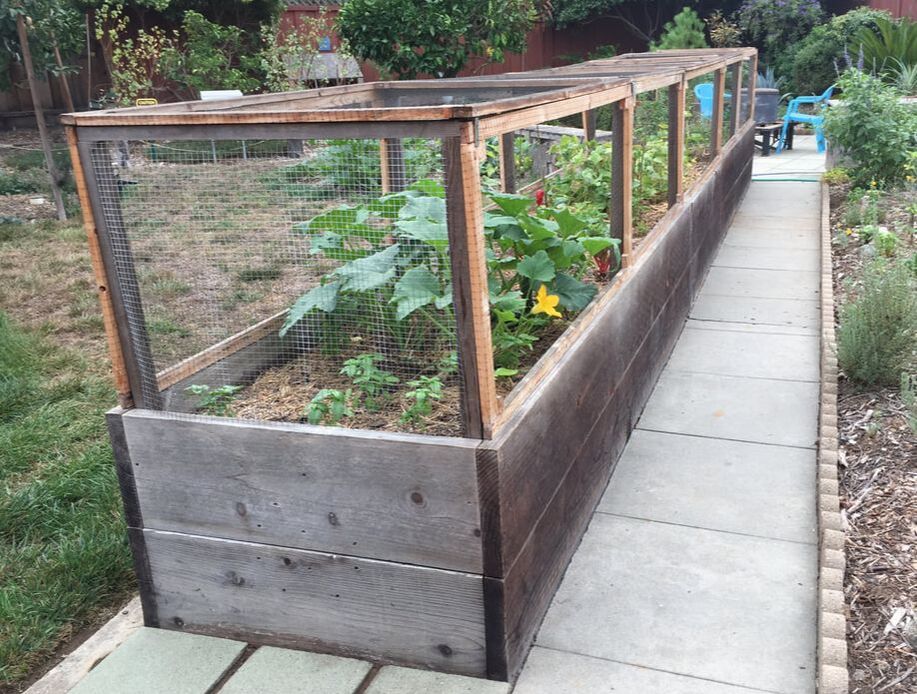 Netted panels protect raised beds from birds People have used nets to protect fruit and nut trees from birds for a very long time. Birds have a nasty habit of pecking a bite out of one fruit and then moving on to the next, and the next, leaving behind a wake of damaged fruit that is prone to rot and infestation. Netting is also used as hail protection, in areas prone to that particular weather pattern, and to reduce seed loss in newly planted areas. This is particularly helpful with pea, bean, and quinoa crops. Pests thwarted by netting Netting is most commonly used to protect fruit and nut crops from bird feeding. Netting can also be used to protect against squirrels, voles, rats, Junebugs, and dried fruit beetles, though that protection is fleeting. I have been able to harvest far more of my almond, apple, grape, blueberry, nectarine, and fig crops with addition of tree cages enclosed with netting. As soon as my young apricot and pear trees start producing fruit, they will get their very own tree cage, for the same reason. 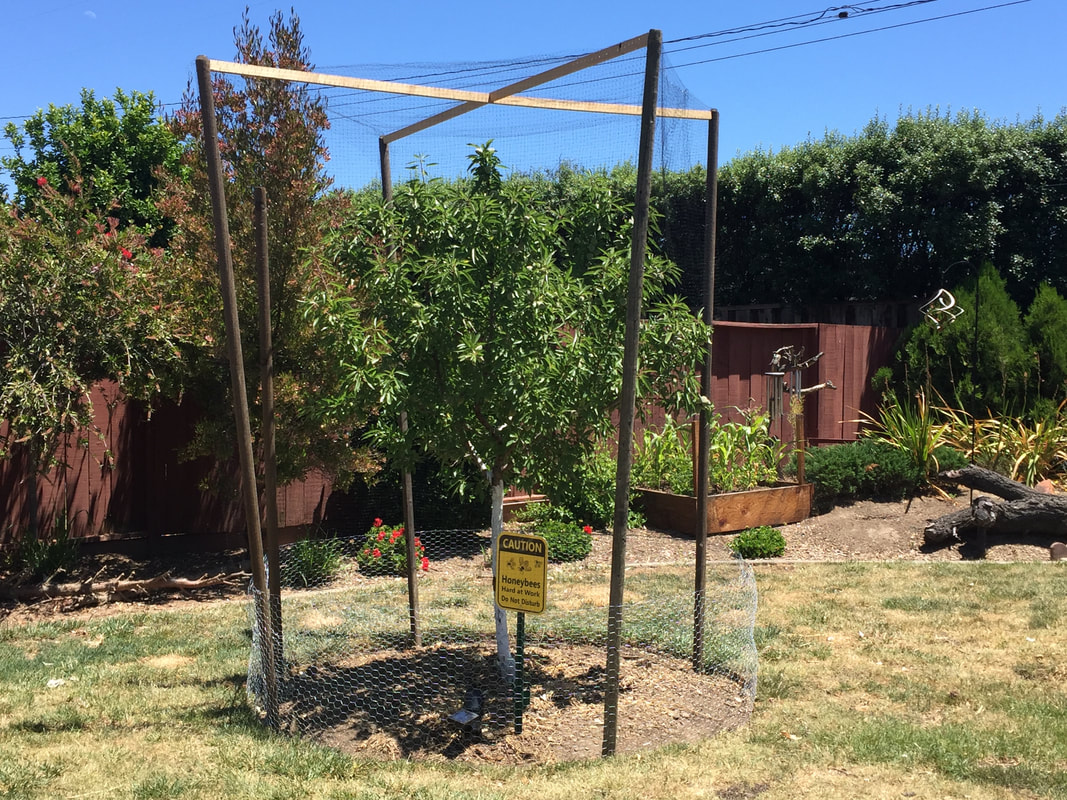 Almond tree protected by tree cage and netting The down-side of netting
As handy as netting can be, it does have a few problems associated with its use. First and foremost, it is made out of plastic and it is not nearly as durable as the advertisements make it out to be. In reality, birds will try repeatedly and with great enthusiasm to get at your fruit crop (or your chicken feed), tearing holes in the netting. Also, netting snags on every twig, nub, and button it comes across, damaging plants, and adding more holes (and a certain measure of frustration). Birds and other wildlife have met with cruel and horrible deaths because of netting that has been allowed to blow on the wind or swish around in oceans, lakes, and other waterways. Finally, birds are not only things that can get caught in loose netting - we had a rat get tangled up in the netting over our chicken run. It was not a pleasant experience for anyone involved. So, if you opt to use netting, you will need to monitor it regularly for tears and trapped creatures, and please, for goodness sake, dispose of it properly. Now, what was I saying about lightwave manipulation? Photo-selective netting Photo-selective netting is the latest in agricultural technology. As the plastic filaments used to make this particular type of netting are manufactured, light dispersive and reflective elements are built in. These elements screen out certain lightwaves and then scatter the light that is allowed through. This spectral manipulation allows farmers to decide which light-regulated physiological responses are promoted. The scattering effect increases the amount of light that reaches the inner canopy. By doing this, farmers can grow bigger fruit with less water. The netting provides wind protection and substantially reduces evaporation. This lowers the likelihood of water stress and water-related diseases. How to use netting If you simply drape netting over your garden beds or trees, birds and other fruit eaters will still be able to reach a large portion of your crop. To be effective, there must be a space between the netting and whatever is being protected. Ideally, the netting is held taut, bouncing birds off the surface, rather than entangling them. This can be achieved with a tree cage, PVC hoop, or other structure. Netting is a simple way to protect many crops from feeding damage, but it has its limitations and needs to be handled responsibly. Whenever possible, hardware cloth is a safer, more durable option. Buckwheat pancakes, buckwheat eye pillows, and soba noodles are all made from buckwheat seeds, but what is it, really? And what can it do for your garden or landscape? 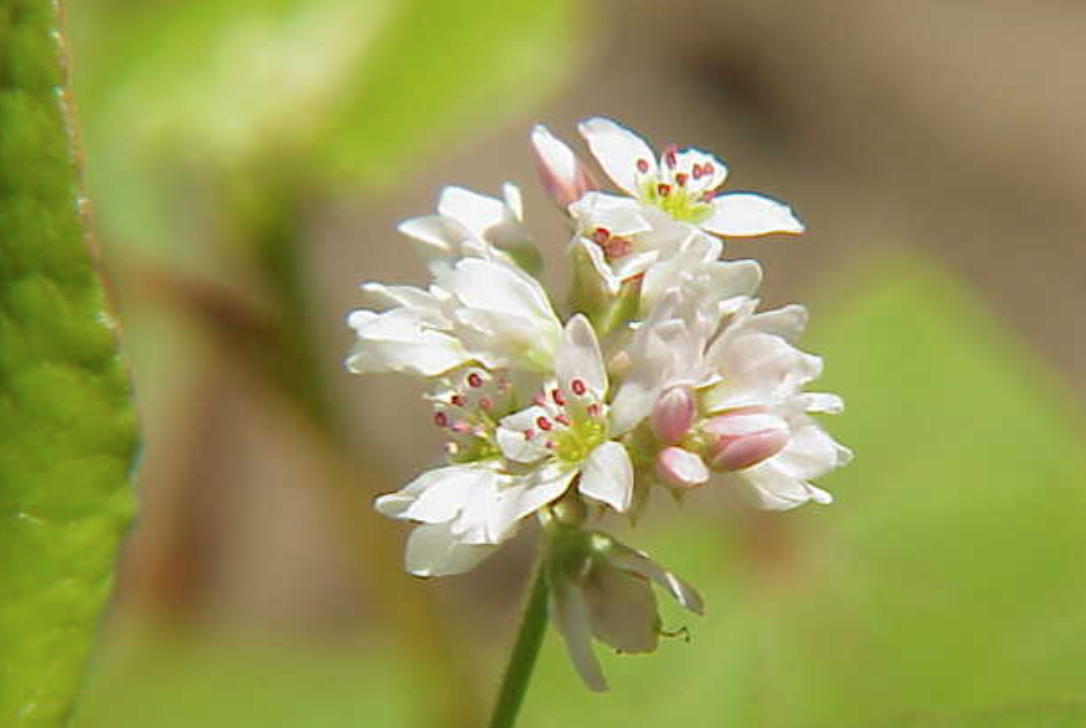 Individual buckwheat flower (Kurt Stüber) CC BY-SA 3.0 Despite its name, buckwheat (Fagopyrum esculentum) is not a type of wheat. Nor is it a type of grass. Instead, buckwheat is related to knotweed, sorrel, and, you won’t believe this - rhubarb!
If you compare buckwheat seeds with rhubarb seeds, you can see the similarity. Both produce triangular seeds. Buckwheat gets its name because it is used like wheat, but it has triangular seeds, similar to the beech tree. [The Dutch word for beech is boec.] Buckwheat, like quinoa, is a type of pseudocereal. Originally from Yemen, buckwheat was a popular food staple for nearly 8,000 years. This was true until nitrogen became commercially available, which made other cereal and pseudocereal crops more productive than buckwheat. The buckwheat plant Buckwheat has a taproot that goes deep in search of water, and a dense, fibrous root system that stays within the top 10 inches of soil. Here, roots produce a mild acid that breaks down phosphorus, making it easier to absorb. Buckwheat is three times more effective at phosphorus extraction than barley, and ten times more effective than wheat. In areas with excessive phosphorus, growing buckwheat can help bring micronutrients back into a better balance for other plants. When the buckwheat is used as a green manure, those nutrients are returned to the soil. The buckwheat plant reaches a height of 30 to 50 inches. Its seeds are a type of simple dry fruit called an achene. How buckwheat grows Buckwheat does not handle heat, drought, or compacted soil very well. That being said, it’s fast growth makes it the best choice for newly cleared or overly farmed land. I have planted buckwheat next to my fences, partially under large, established plants, in an effort to bring life to soil that was exposed to the elements for decades before we moved in.  Withered buckwheat flowerhead with seeds (K.G.Kirailla) CC BY-SA 3.0 How to grow buckwheat
You can broadcast buckwheat seeds over an area, or you can drill holes for it. Drilling 1/2 to 1-1/2 inch holes for your buckwheat seeds means more will grow, and local birds will get less. These holes can be surprisingly close together. Converting the farming instructions of 50 to 60 pounds of buckwheat seed per acre, using 15,000 seeds per pound, you can cram 15 to 20 buckwheat seeds per square foot of garden space. Buckwheat pests and diseases Like many other ancient grains and pseudograins, buckwheat has very few pests or diseases that affect it. Occasionally, leaf spot and root rot can take hold. Also, competition from lambsquarters and pigweed can seriously reduce buckwheat growth. Buckwheat as cover crop and green manure Buckwheat makes an excellent cover crop and green manure. Buckwheat is a fast-growing plant that grows well in crappy soil. Germination usually occurs in only 3 to 5 days. Because buckwheat grows so quickly, you can plant it just before harvesting one crop, and before the next crop takes hold. This will help stabilize the soil, support soil microorganisms, and add nutrients in just a few days. In less than 45 days, your buckwheat plants will grow, flower, and be ready for mowing, as a green manure. You can also mow your buckwheat in the early stages of flowering to encourage regrowth and to extend the growing season. If you want the seeds for food or replanting, they will be ready in 70 to 90 days. Buckwheat as insectary Buckwheat plants start producing flowers within 3 weeks, and those flowers can last for 10 weeks. This is good news because buckwheat flowers are favored pollen and nectar sources for many pollinators and beneficial insects that parasitize aphids, mites, and other garden pests. Some of these beneficials include minute pirate bugs, green lacewings, insidious flower bugs, hoverflies, predatory wasps, big-eyed bugs, tachinid flies. and lady beetles. The “other” buckwheats Completely different from the pseudograin buckwheat, California hosts a collection of over 125 native plants known as buckwheats. These plants are in the Eriogonum genus. You can find both annual and perennial native buckwheats. These plants are also enjoyed by butterflies and other beneficial insects. Unlike the edible buckwheat, native buckwheats are very drought tolerant, and most of them are evergreens, adding color and texture to the landscape for most of the year. Popular varieties of native buckwheat include:
Native buckwheat provides food and habitat to native beneficials, with minimal effort. Edible buckwheat suppresses weeds, attracts pollinators, and improves soil structure and soil health. Whichever type of buckwheat you decide to add to the garden or foodscape, the soil and local beneficial insects are sure to improve! Chickpea, gram, or garbanzo bean, these legumes have been cultivated for 7,500 years. High in protein and easy to grow, chickpeas also make an excellent green manure.  Fruiting and flowering chickpea plant (Nundhaa) CC BY-SA 4.0 Speaking of green manure, chickpeas produce the most seeds when they are provided with plenty of sunlight and very little nitrogen. Being a legume, chickpeas are able to convert atmospheric nitrogen into a form usable as plant food. If they have access to too much nitrogen in the soil, you will get plenty of vegetative growth and very few seeds. The chickpea plant Chickpea plants (Cicer arietinum) grow 8 to 20 inches tall and are bushy. They have feathery leaves and delicate white flowers with pink, violet, or blue veins. Like other legumes, the seeds are called pulses. Often (incorrectly) called a pod, pulses are simple fruits that develop from a single carpel, and that usually open along a seam (dehisces). Each pulse contains one or two seeds. Chickpeas have taproots that can reach 15 to 40 inches down into the soil. This makes them a good choice for reducing compacted soil and improving soil structure. [Translation: this fall, pick the worst spot in your landscape and plant chickpeas. Fava beans are another good choice.]
Chickpea varieties There are four major chickpea varieties, and over 90 genotypes. The familiar garbanzo bean (kabuli chana) is light-colored, large, and smooth-coated. Cicer reticulatum only grows in Turkey. There are two black chickpeas: Desi chana and cici neri. Ceci neri are a rare large, black chickpea grown only in southeaster Italy. Desi chana is the closest relative to ancient chickpeas. It is small, dark, and rough-coated, and can be black, green, or speckled  Chickpea pulses (Eitan Ferman) Public Domain How to grow chickpeas
Here warm regions, chickpeas are a winter crop that is usually started around the first frost date. To speed the process, you can start chickpea seeds indoors, in pots, several weeks ahead of time, as long as you can provide them with enough sunlight and protection from summer heat. Transplant seedlings into the garden when they are 4 to 5 inches tall. Chickpeas prefer full sun. They can be grown in partial shade, but you won’t get nearly the same production. Chickpea seeds are planted deeply, from 1-1/2 to 2 inches deep. Contrary to popular myth, do not soak chickpea seeds before planting, or water heavily after planting, as this makes them susceptible to cracking. Seeds should be planted 3 to 6 inches apart and thinned to 6 inches between plants. If you are growing chickpeas in rows, space rows 18 to 24 inches apart. Your chickpeas will be ready to harvest in approximately 100 days. Chickpeas do not handle competition from weeds very well, so you need to stay on top of them. Also, high boron levels can stunt chickpea growth, so be sure to get your soil tested. There are also a few pests and diseases you’ll need to watch for. Chickpea pests and diseases Fusarium wilt, verticillium wilt, ascochyta blight, anthracnose, bacterial brown spot, bean mosaic, bacterial blight, cucumber mosaic, curly top, and several root rots affect chickpea plants, especially those caused by Pythium, Rhizoctonia, and Macrophomina. Charcoal root rot, white mold, and black rot may also occur, and nematodes can be a problem. Aphids, armyworms, corn earworms, cucumber beetles, cutworms, darkling beetles, leafhoppers, leafminers, loopers, lygus bugs, spider mites, stinkbugs, thrips, weevils, and wireworms may all try feeding on your chickpeas. Luckily, these plants can produce an abundant amount of food, and crop rotation goes a long way toward interrupting the lifecycle of most of these pests and diseases. Did you know that roasted chickpeas can be ground up and used as a coffee substitute, or that chickpea water (aquafaba) can be used as an egg substitute to make merengue? I didn’t either. Good fences make good neighbors. Fences in and around your garden can create spaces, cause problems, or they can be sturdy helpers. How do fences impact your garden?  Wooden fence (Wikipedia) Public Domain Fences add perspective While some gardeners (farmers) prefer wide-open, Nebraska-style landscapes, fencing can create manageable spaces. Short fences can line pathways, providing support to a row of tarragon, oregano, or sweet peppers, while a medium-sized fence can block a view of your pool pump and provide afternoon shade for more delicate plants, such as currants. Tall fences create a sense of security and privacy. They also provide structure for vining plants. 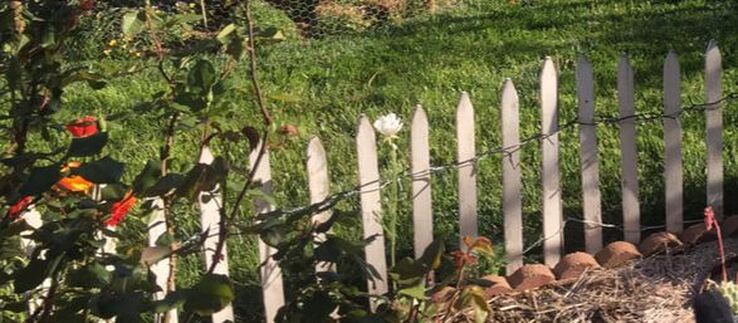 Picket fence Fencing materials have an impact, too. A solid brick or stone fence has a very different feel than a crisp white picket fence, a rustic pole fence, or a cedar plank fence. The materials and the construction method used alter the look and feel of your property and your garden. They also impact the way your plants grow. .JPG) Wattle fence (Lucekbb) CC BY-SA 3.0 Fences as barriers Neighborhood fences are a great way to keep kids and pets safely at home. A good fence can also block garden invaders, such as deer, gophers, squirrels, chipmunks, and rats. Of course, some of those pests will need more than a wattle fence (or a very tall fence, in the case of deer) to slow them down, but fences provide a good starting point. For burrowing pests, such as voles and rabbits, the fencing material needs to go underground a ways to be effective.  Typical urban fence (Wikipedia) Public Domain Fences and air flow A solid fence can provide serious protection against strong winds. Rather than tearing through your garden, leaving broken stems and branches in its wake, the wind is pushed over and around your sanctuary, keeping everything safe. Sometimes that safety comes at a price: poor air flow. In gardens prone to fungal diseases, poor air flow is a liability. If you have a solid fence and fungal problems in your garden, judicious pruning for good air flow and proper plant spacing can counteract these problems.  Cyclone fencing with vines (Shareef Taliparamba) CC BY-SA 2.0 Fences as climbing structures
Fences make it easy to grow vines and other climbing plants. They also provide a great support for espaliered fruit and nut trees. Fences can also be used in tandem with planting containers. A mounted rain gutter with end caps can transform a bare fence into a strawberry wall. Short walls or railings provide the support needed for container plants that a re prefect for growing herbs, lettuces, Swiss chards, spinach, and many other edibles, without taking up extra space. Fences are also a great place to hang garden tools! Fences block sunlight The same fences that offer protection from wind and marauding pests are the same structures that can block much-needed sunlight. Most garden plants need at least 6 to 8 hours of sunlight each day to thrive. If you have fences, it is important that you take the time to see how much sunlight nearby plants actually get. While a west-facing fence may offer respite from scorching summer afternoon sunlight, an east-facing fence will only provide that protection to your neighbor’s plants. Fence care Some fencing materials, such as chain link or stone, require very little care. Other fences, particularly those made out of wood, have some special needs. Since wod can rot, these tips will help your wood fence last longer:
Make the most out of the fences in and around your garden or foodscape. And, if you have the time, do an online search for “unique garden fence ideas.” There are some gorgeous, creative, stunning ideas out there! I started my journey growing peanuts when something emerged from a planting container that I hadn’t planted. And it was unmistakably a peanut. 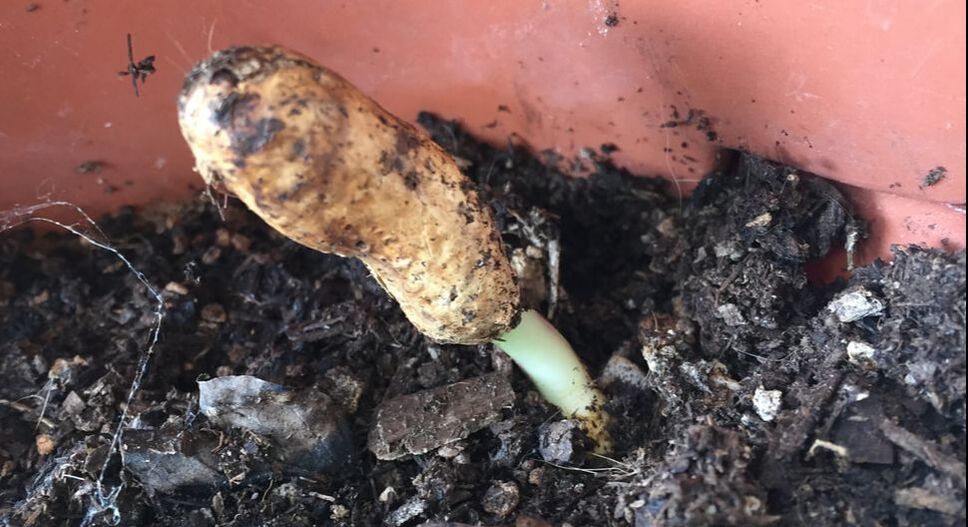 An unexpected peanut The only thing I could figure was that one of my local scrub jays had ‘planted’ it for later consumption. At the time, I had no bandwidth for growing peanuts. So I dug it out to take a closer look at the root system. [Now I let them grow!] 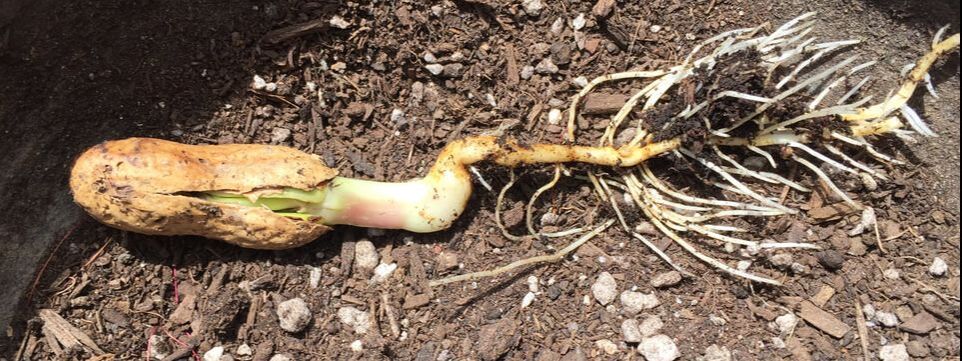 Immature peanut plant Nuts that are not nuts Peanuts, also known as goobers, or groundnuts, are legumes. This means that they are able to ‘fix’ atmospheric nitrogen into a form they can use as food, with a little help from certain bacteria that live on or in their roots. The botanic name, Arachis hypogaea, describes a legume that produces its seeds “under the earth”, in a behavior called geocarpy. Geocarpy is rare in the plant world. It is a means of reproduction in which pollinated flowers are transformed into specialized stems, called pegs. Pegs are budding ovaries that bend downward and push their way into the soil. Seeds are produced along these pegs. Unlike other plants, which produce seeds above ground for easy dispersal, the peanuts we eat are the underground seeds of the peanut plant. And they are not nuts at all.  Peanut pegs growing into the soil (H. Zell) CC BY-SA 3.0 Parts of a peanut If you look closely, it is easy to see how peanuts are related to peas and beans. They have very similar seed structures. Each delicious peanut has five parts:
 Peanut seeds (Jeusorizales) CC BY-SA 3.0 Peanut varieties Peanut plants come in two forms: runners and bush. Bush varieties are 18 to 22 inches tall, while runners can spread out 28 to 31 inches. Peanuts are believed to be a human construct, through artificial selection between two wild varieties. This occurred in Argentina or Bolivia, nearly 8,000 years ago. Selective breeding of this first peanut has resulted in six major and two minor landraces. A landrace is a regional, domesticated variety. These groups are:
Until the 1930s, peanuts were used predominantly as a livestock feed. That was when the USDA actively promoted peanuts as a commercial crop for human consumption. How to grow peanuts While it’s true that peanuts prefer the sandy loam of the southeastern U.S., peanuts can be grown in raised beds and large containers that are filled with a lightweight potting soil. You can start peanuts in a tray filled with potting soil. Make one inch deep holes by hand or with a dibble, and drop one shelled peanut into each hole, cover with soil, and water well.
In commercial peanut fields, as peanut plants begin to yellow, machinery is used to dig plants out of the ground, give them a good shake, and then flip them over and leave them on the soil surface for a few days to dry. In the home garden, you will harvest your peanuts by simply pulling the plants out of the ground, giving them a good shake to get rid of any clinging soil, and leave them, upside-down, to dry for a few days. [You may want to do your peanut drying in the garage, to protect your harvest against marauding birds and squirrels.] Next, peanuts are threshed, or removed from their stems. You may be surprised to learn just how important the drying aspect of peanut harvesting is - peanuts stored with too much moisture can become infected with a fungus (Aspergillus flavus) that produces toxic substances that can be carcinogenic. Be sure to dry your peanuts thoroughly!  Mature peanuts (Pollinator) CC BY-SA 3.0
Cucamelons may look like tiny watermelons, but they taste more like sour cucumbers. Also known as Mexican sour gherkin cucumbers, mouse melons, and pepquinos, cucamelons (Melothria scabra) are cucurbits, which make them cousin to squash, melons, and gourds. 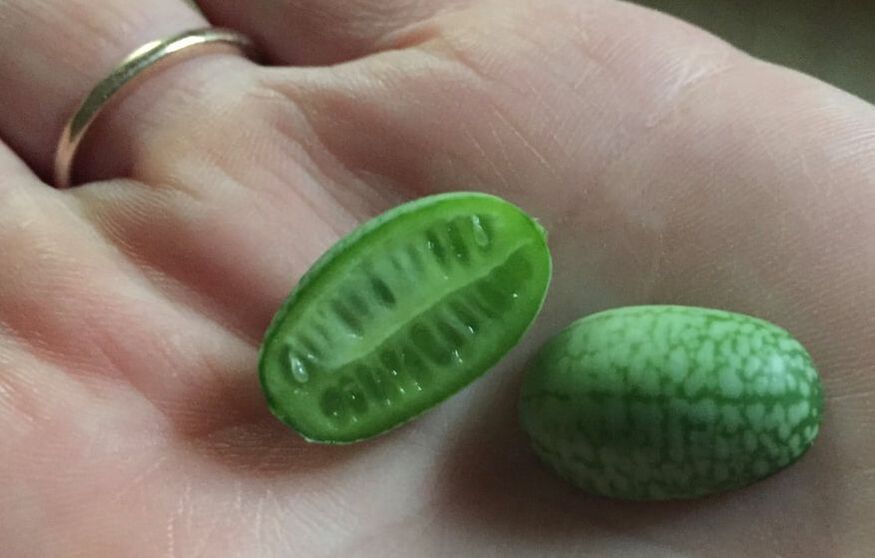 Cucamelon The cucamelon plant Cucamelons grow on vines that climb nearby supports using tendrils. These plants produce both male and female flowers, making them monoecious. This means the plants can pollinate themselves, but the individual flowers are not self-pollinating. Native to Central America and Mexico, cucamelons need warm to hot temperatures to get started. Once established, your cucamelon plants will continue to produce fruit well into November. How to grow cucamelons Seeds should be planted 1 inch deep and 6 to 10 inches apart. Cucamelons are more drought tolerant and more rugged than other cucumbers, but they are slow growers, at first. Since cucumbers perform best in rich soil with a pH of 5.5 to 6.5, your cucamelons will probably benefit from moderate acidification, and top dressing the planting area with aged compost is always a good idea.
It is difficult, at first, to put your mind’s expectation of a watermelon flavor aside, when biting into a cucamelon. And this leads to disappointment, because cucamelons don’t taste anything like watermelon.
The actual flavor is more akin to a tangy cucumber crossed with a fava bean. If you expect watermelon, you probably won’t like it. If, instead, you can bite into these grape-sized fruits with an open mind, you may end up with a new garden favorite! Cottony cushion scale inspires a certain measure of fascination. One look at these intricate insects, and you’re sure to want to learn more. Cottony cushion scale (Icerya purchasi) are soft scale insects. Like other scale insects, their lifecycle touches on the bizarre. But before we get started, take a look at this photo and see if you can figure out what, exactly, is insect and what might be something else. 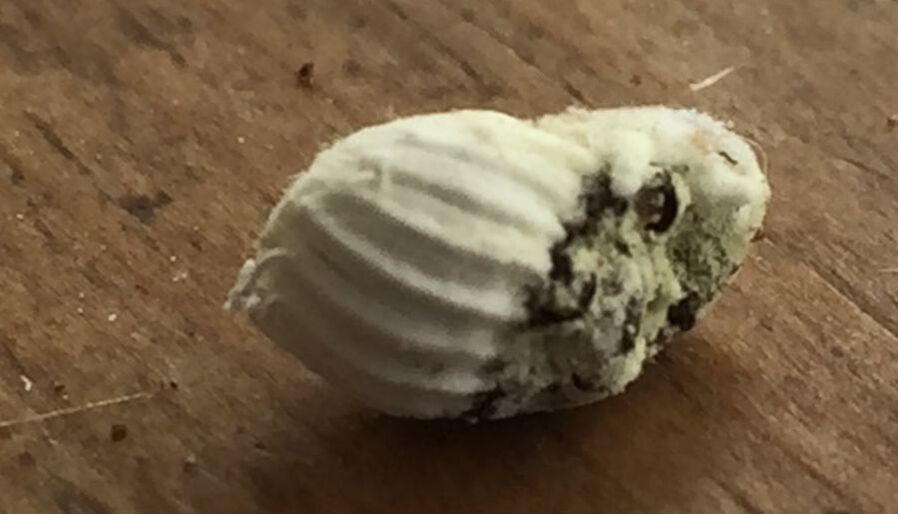 Cottony cushion scale insect and egg casing Cottony cushion scale lifecycle Females can produce young with or without the help of a male. She will lay 600 to 800 eggs. Before she does, she will carry them around in a white, fluted sac that can be 2 or 3 times the length of her body. Most people mistake this egg sac for the insect’s body. Did you? The eggs hatch out into crawlers. First stage (instar) crawlers are red, with black legs and antennae. These newlings make their way to nearby leaf veins, where they will begin producing their telltale white, cottony secretion. As they grow, these tiny pests will shed their outgrown skins (molt) and grow a bigger protective coating. Second instar crawlers make their way to twigs and leaves. Third instars prefer branches. Adults are usually found on branches and tree trunks. Nearly every cottony cushion scale insect you see will be female, and they tend to form colonies. The males have red wings, but are really too small to see. The image below was taken after a female and her eggs were collected and placed in a container until they hatched. The coin next to them is a dime. 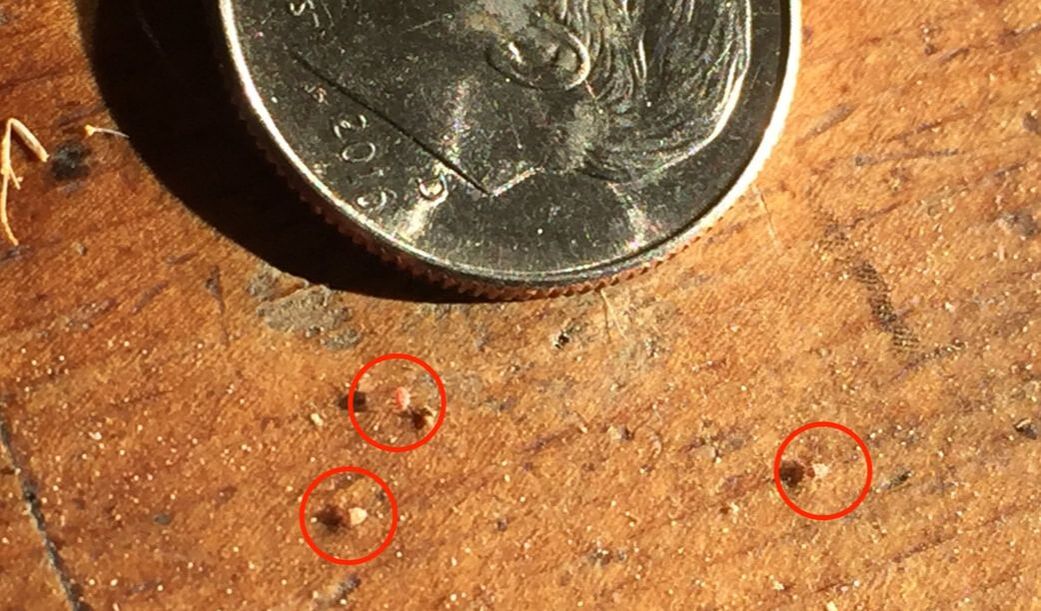 Male cottony cushion scale insects Damage caused by cottony cushion scale
Scale insects feed by inserting tiny, straw-like structures into bark, leaves, or fruit. One attached, they will suck the sugary juices out of fruit, or mainline sap directly from the xylem. This high sugar diet results in the insects pooping out honeydew, an equally sweet, high nutrient discharge that ants and fungi just love. Heavy infestations can lead to overall stress and loss of vigor, branch dieback, and defoliation of affected areas. Very often, it is the presence of sooty mold and heavy ant traffic that will first cue you to the presence of scale insects. How to control cottony cushion scale Natural predators do a much better job of controlling these pests than we do. Specifically, the vedalia beetle (Rodolia cardinalis) and the parasitic fly (Cryptochaetum iceryae) feed only on this particular pest and nothing else. Normally, these two beneficial insects are all that is needed to control a cottony cushion scale infestation. Unfortunately, dust, ants, and insecticides can interrupt that assistance. 'Ants will actively protect and farm scale insects. You can remove that protection by attaching sticky barriers around the trunks of trees. Chemical controls are not generally effective against cottony cushion scale insects (regardless of what they say on the label). Take a look at your trees on a regular basis to see if cottony cushion or other scale insects have set up shop in your garden. Square watermelons, portrait gourds, heart-shaped oranges, and Buddha pears are purposefully distorted fruits that can be a fun way to play with your plants. These distortions are kin to the method of tree training known as pleaching. When it occurs without human intervention, however, fruit distortions warrant a closer look. Affectionately known as ugly fruit, naturally occurring fruit distortions can be nothing more than cosmetic. Or, they may indicate the presence of pests, disease, nutrient deficiencies, or chemical misuse. It can also be from stress.  Distorted strawberry (Silverije) CC BY-SA 3.0 Fruit distortions caused by stress Stressed plants (and people) do not perform as well as they might otherwise. If you were a plant, those stresses might be drought, insect damage, extreme temperatures, herbivore feeding, mechanical injury, excessive salt, insufficient nitrogen, severe weed competition, or water stress. If you were a stressed-out member of the cabbage family, you might surround yourself with a protective layer of bronzed leaves. Or you might shrink your head in a response called buttoning. Stress-induced distortions also include stunting, misshapen flowers, and reduced leaf size. Mechanical injury or blockage of cucumbers and other cucurbits can cause crooking. Low temperatures during pollination can cause uneven fruit development in strawberries. But what if it isn’t stress that is causing fruit distortion?  Cucumber crooking Fruit distortions caused by nutrient deficiency Plant nutrients are critical to the proper development of fruit. Distorted fruits often occur in boron-deficient soil. Of course, without a soil test from a reputable lab, you won’t know what’s in your soil. Unfortunately, those cute, over-the-counter soil tests are not [yet] accurate enough to be helpful. Insects that cause fruit distortion Citrus bud mite feeding can cause some dramatic distortions, especially in citrus. While there isn’t anything you can do to get rid of citrus bud mites, their feeding can create points of entry for other pests and diseases, so you will want to monitor infested trees.  Fruit distortion caused by citrus bud mite feeding (Giancarlo Dessì) CC BY-SA 3.0 Fungal disease and fruit distortion
Fungal diseases, such as apple scab, can also cause fruit distortion. Unfortunately, in this case, you won’t want to eat the fruit, as it will be mushy and rotten. One easy way to break the fungal disease triangle is to remove fallen leaves under infected trees and toss them in the trash. Chemicals and distorted fruit Since many herbicides are plant hormones (auxins) that force plants to grow so fast that they die, chemical misuse or overspray from a neighbor’s yard can cause fruit distortion. In this case, if in doubt, don’t eat it. If the suspected chemical is systemic, you won’t be able to wash it off. Unless fruit distortions are from chemicals or fungal disease, taste and texture are rarely affected. These fruits are simply funny looking. We can enjoy them for their uniqueness. In light of the 2016 $1 million potato photo sale, I thought I would share the amazing story of potatoes. 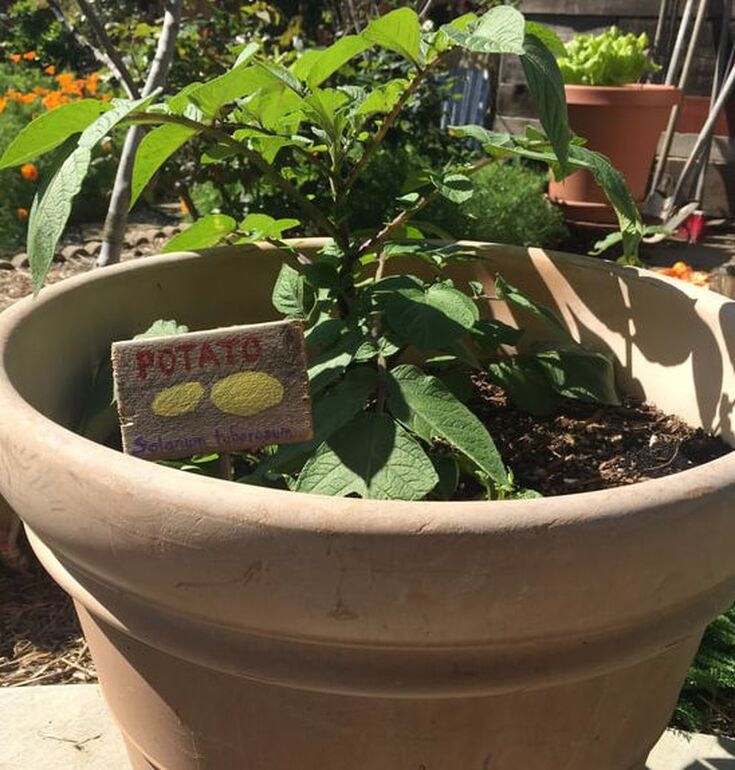 Potatoes growing in large container Food storage and geophytes Potatoes are tubers. Tubers are are type of geophyte. Geophytes are plant organs used to store food and water. They are also used in asexual reproduction. There are several types of geophytes: bulbs, corms, and everything else. That “everything else” is what we call tubers. Potatoes and yams are stem tubers. Stem tubers can emerge from modified stems. These stems can start out as stolons or rhizomes. Stolons are stems that grow at or just below the soil surface as “runners”. These “stems” are converted into adventitious roots at the nodes and what would have been a bud above ground becomes a spud below. Rhizomes are 'runners' that connect a parent plant to its offspring. A modified stem The “eyes” seen on a potato are actually stem nodes. Within each potato, you will find the same plant cells you would find above ground: vascular bundles, pith (spongy tissue), and cortex (outer tissue). Now here’s the funny part. While our standard spud grows from stem tubers, sweet potatoes grow from root tubers. The internal cell structure is very different. Root tubers have no nodes. That is why sweet potatoes have a more elongated form. At one end, you will find crown meristem tissue, which grows into stems and leaves. At the other end, called the distal end, the tuber produces roots. But enough of that, let's start growing some potatoes! Commercial potato farming Growing potatoes is surprisingly easy and I urge you to give it a try. In his book, The Botany of Desire, Michael Pollan describes how one potato farmer would not feed what they had grown commercially to their family, due to all the fungicides, herbicides and pesticides that are applied to commercial crops. That was a little misleading, since those chemicals are heavily regulated and rarely last long enough to be found on the food we eat. The real reason behind growing an untreated patch of potatoes was so they could enjoy the potatoes whenever they wanted them, rather than having to wait for the chemicals to dissipate. Personally, I don't use chemicals. How to grow potatoes While potatoes can can certainly be grown from spuds bought at the grocery store, this is a bad idea. Foods bought in the store are safe for human consumption, but they are not guaranteed to be free from common garden pests and diseases. You are far better off buying certified “seed potatoes”. The easiest way to grow potatoes is in a barrel, raised bed, or in a tower. If potatoes are planted in the ground, you will be finding rouge spuds for many years. Also, digging them up from the ground is, let’s face it, work. Growing potatoes in containers makes harvesting significantly easier and they make nice summer patio plants! To begin, fill the bottom of the container(s) with 4" of loose, moistened soil. Cut seed potatoes into 2 inch chunks, making sure that each chuck has several eyes (small seed potatoes can be planted whole). Place the chunks 6" apart and cover them with 3" of moistened soil and repeat the process until the container is filled. Water lightly and be sure to place planters where they will get lots of sun. To build a tower (which works nicely for strawberries and herbs, too), simply take a section of chicken wire or hardware cloth and create a cylinder. Landscape cloth can also be used, but it may fall over. You can also grow potatoes indoors, near a window, if it gets enough light. Potatoes need loose, well-drained soil and frequent, light watering. Never let potato plants sit in water, they will rot. Potatoes use a lot of nitrogen and potassium, and they prefer acidic soil (as low as 4.8 pH). At first, it will look as though nothing is happening. As a gardener, you know the value of patience. With time, water and sunlight, tubers will send out roots and stems that will pull nutrients from the soil and create carbohydrates out of sunshine. (Don’t you just love photosynthesis?) Before long, the container will be filled with lush, green growth. Aside from occasional watering and feeding (aged compost works great!), that’s all you have to do until it completes the season’s life cycle. Harvesting potatoes Eventually, the lush above ground growth will start to die off. When it starts looking ragged, dump the contents of the container out on a tarp and remove the mature potatoes. Now comes the really cool part: mix the remaining soil with some aged compost and do it all again with the immature spuds! I have been growing potatoes from the same batch of seed potatoes since 2011. To me, homegrown potatoes taste far better than store bought spuds. Pests and diseases of potato We’ve all heard about the Great Potato Famine. Over one million people died and another two million abandoned Ireland, all because of potato blight. Potato blight causes the tuber to rot in the ground. Other potato diseases include charcoal rot, corky ringspot, cucumber mosaic, curly top, fusarium wilt, leafroll, pink rot, sclerotium stem rot, cankers, verticillium wilt, and white mold. Many of these diseases can be prevented with good drainage and proper spacing between plants. Common potato pests include aphids, beet leafhoppers, cutworms, flea beetles, potato psyllids, potato tuberworms, silverleaf whiteflies, Colorado potato beetles, Jerusalem crickets, and wireworms. But don’t let these threats stop you from creating your own potato patch.  Potatoes grown in a raised bed with various mustards and a couple of cabbages Start your own potato patch today!
With a name like bottom rot, you know it won't end well. Bottom rot is a fungal disease of lettuce and other leaf vegetables caused by the Rhizoctonia solani fungi. This is the same fungus that causes damping off. It lives in the soil and can be a big problem in warm, moist conditions. Plants affected by bottom rot In addition to lettuce, bottom rot can wipe out your Chinese cabbage, escarole, broccoli, radish, collards, Brussels sprouts, cauliflower, and turnip crops. The Rhizoctonia solani fungus also attacks potatoes, onions, beans, and corn. _bolrot.jpg) Early signs of bottom rot on iceberg lettuce (Rasbak) CC BY-SA 3.0 CC BY-SA 3.0 Symptoms of bottom rot
At first, all you may see is some wilting of outer leaves. Closer inspection will show reddish-brown, sunken lesions on the midribs of leaves touching the soil. Brown or white fungal tissue may be visible, and lesions may discharge a light brown ooze. Leaf spots and brown lumpy bits may also be present on the plant. The fungus grows inward, toward the center of the head or body of the plant. The damaged plant tissue then becomes susceptible to other soft rots, causing a total collapse of the plant. Controlling bottom rot Fungicides are ineffective against bottom rot, so prevention is your only option. These tips will help protect your leafy bottoms:
As with all bottoms, keep them dry, and they will be happy. If you have never tasted a stevia leaf, you probably won’t believe the level of sweetness this herb provides. It just doesn’t seem possible. A single, delicate green leaf placed on the tongue does nothing. Start chewing and you’d swear you just downed a spoonful of sugar! Let’s find out if this is a plant you can add to your garden or foodscape.  Stevia (Robert Lynch) Public Domain Native to Paraguay and the surrounding tropical regions, stevia (Stevia rebaudiana) is also known as sweetleaf. Stevia is the model used to create several ‘natural' sweeteners, except that most of them are not what we gardeners would think of as natural. The majority of these stevia plants are grown in China and the leaves are so highly processed that there is little left besides the sweetness. [Being 200 times sweeter than sugar, stevia packs a powerful sweetness punch, processed or not.] Using the unprocessed leaves as a sweetener, on the other hand, adds several different compounds, called glycosides, plus antioxidants, and we all need those! The stevia plant Being a tropical member of the sunflower family, stevia loves the heat. This tender perennial prefers USDA Zones 9 - 11, and is grown as an annual elsewhere. Stevia grows best under the same conditions as basil. Like basil, stevia needs some protection from the high heat of our California summer. Plants can reach 1 to 4 feet high and wide, depending on temperatures and the local microclimate.  Flowering stevia (Ethel Aardvark) CC BY 3.0 How to grow stevia
Stevia plants can be grown from seed, but results are hit-and-miss, as germination is tricky. If you decide to try your hand at seed starting stevia, begin indoors, 8 to 10 weeks before your last frost date. Seeds germinate best at temperatures between 68 and 75°F. Fill pots with a light potting soil or peat mixture. Press seeds into the soil and cover with perlite. This will protect seeds from the air and help the soil retain moisture, but provide seeds with the light they need to germinate. To avoid flooding seeds into the corners, water by misting heavily, at first. Like peppers, stevia plants benefit from the use of a waterproof germination mat. This gives them the heat they need to get started. Cover the pots with plastic and check twice a day to ensure that the top 1/2-inch of soil remains moist until germination occurs, which should take 10 to 15 days. Stevia needs well-drained soil. This makes them an excellent choice for large containers or raised beds, where high quality potting soil provides plenty of macropores and micropores in the soil. During summer heat, these plants need almost daily watering. Allow the soil to almost go dry before watering again. If you allow your stevia plants to go to seed, you can collect seed heads or let them grow where they fall. If you collect the seeds, discard light-colored specimens, as they are probably not viable. Most often, new plants are started from rooted cuttings. Stevia pests and diseases Outside of greenhouses, cutworms and sugar addicts are stevia’s only serious threats. In close quarters, aphids, whiteflies, and thrips can can become a problem. Harvesting stevia You can use stevia leaves fresh from the plant or you can harvest and dry them for later use. The sweetness remains unchanged in either case. Leaves are at their sweetest just before flowering. Once the plant flowers, leaves do not taste as good or as sweet. Each plant can provide you with approximately 1/2 pound of dried leaves each year. Using stevia Stevia is used to sweeten teas and other beverages, fruits, yogurt, custards, salad dressings, and many other liquid-based foods. Stevia can be used to replace some, but not all, of the sugar in baked goods. [Sugar has certain chemical properties that are needed in baking that stevia cannot provide.] Before adding even more sugar to your diet, how about adding stevia to the garden, instead? Earworms. Those songs that get caught in our mind and play over and over and over… These are not those earworms, but they can be just as annoying. You don’t grow corn, you say? Don’t think that your garden plants are off the hook, just yet. The larval form of the corn earworm (Helicoverpa zea) goes by several names, such as cotton bollworm and tomato fruitworm. Tomato?!!? Yes, this is the dreaded tomato fruitworm. And these innocuous-looking moths can migrate as far as 400 km (or nearly 250 miles) to get at many favorite garden plants, including melon, beans, spinach, soybeans, peas, okra, squash, and sweet potato.  Corn earworm feeding on corn (Jack Dykinga) Public Domain Corn earworm description Adult moths are a little more than an inch across, and pale tan to light brown. The front wings can have various markings, and the hind wings are dirty white with a dark gray band at the tip. These moths are often found early in the worming, crawling in the lawn, as they get warm enough to start moving. [If seen, stomp on them!] Eggs are spherical and slightly flattened, with ribbed lines running from end to end. They look a lot like cabbage looper eggs.  Corn earworm moth (Wikipedia) Public Domain Larva start out a creamy white color, with a dark head. They have distinct, sparse hairs (tubercles) with dark spots. As the larva feed, the color changes to greenish-yellow to nearly black, depending on the food supply. Fine white lines can be seen along the body. The hairs and the spots remain. On some individuals, stubby bristles or spines can be seen with a hand lens. Corn earworm lifecycle Tiny pale green eggs turn creamy white, and then yellowish or gray. They are laid singly on upper and lower surfaces of leaves, leaf hairs, and on corn silk. They develop a reddish-brown ring within 24 hours. Eggs darken in color just before hatching, usually less than 72 hours after being laid. Larvae go through 4 to 6 instars, or developmental stages, all the while feeding heavily. In fact, corn earworm larvae are a brutal bunch. In addition to attacking your tomatoes, they will also attack and feed on other insets, especially butterfly and moth larvae, including their own kind. After 12 to 16 days, the larvae enter a pupal stage. If the soil is moist enough and temperatures are warm enough, an adult moth will emerge to begin the cycle again. A single adult female corn earworm moth can lay up to 2,500 eggs in her lifetime. .jpg) Corn earworm eggs (USGS Bee Inventory and Monitoring Lab) Public Domain Corn earworm damage Adult moths feed on nectar and pollen, but they are not the problem. It is the larval stage that causes all the damage. Being polyphagous, corn earworm larva eat many different things. And you won’t even know they are there until it is too late, unless you look very closely. The larvae feed inside the fruit, so it’s not until you cut into it or take a bite that the pest is discovered. Yuck! Also, larvae may move from fruit to fruit, leaving behind a wake of squishy, watery digested insides filled with frass and shed skins.  Corn earworm eating unripe tomato (Flex) CC BY-SA 3.0 Damaged fruit tends to ripen prematurely and the feeding action makes plants susceptible to other problems, including fungal diseases and mold growth. Because the larvae are inside the fruit, control is difficult. Controlling corn earworms Protected within fruit, corn earworms are tough to get rid of. Making matters worse, these pests have developed a resistance to our chemical arsenal. This means that integrated pest management must be used instead. Integrated pest management (IPM) is an approach that uses many sustainable methods to provide the least amount of damage. IPM practices that reduce the damage caused by corn earworms include:
Monitoring plants regularly for signs of eggs of young larvae can help you protect your tomato, corn and other garden plants.
Did you know that plants use the saliva of their attackers to figure out which defense chemicals to produce? Young sunflowers track the sun across the sky, reaching new heights with every passing day - except, sometimes they don’t. Sometimes, a small injury can become infected and a black rot spreads around the base of the flower, finally engulfing it in a black goo that dries and hardens into a smelly shadow of what might have been. What causes this, and can it be prevented?
Head rot, also known as pin rot, is a disease of sunflowers, lettuce, and broccoli, caused by the Pectobacterium carotovorum, subsp. carotovorum and P. atrosepticum bacteria. Symptoms of bacterial head rot The first symptom of bacterial head rot is nothing more than a small, brown, greasy or water soaked looking area on the surface of a cluster of unopened flowers or leaves. These lesions are usually seen at the sight of mechanical injury caused by bird and insect feeding, hail, or falling twigs. Bacteria enter the damaged tissue and that’s where the infection begins. Affected areas turn from brown to black as the infection spreads into surrounding plant tissue. There is a distinctly bad smell, similar to rotten potatoes, but it is rare for secondary fungal growths to occur when head rot is present. If the bad smell is absent and other bacterial and fungal infections are present, the infection is more likely to be caused by Alternaria fungi. Bacterial head rot prevention and control Cool winter and spring temperatures combined with prolonged periods of rain, fog, and dew provide the perfect medium for bacterial head rot pathogens. This means good air circulation between plants can go a long way toward preventing this disease. That’s a good thing, because chemical sprays and other treatments have not been consistently effective in preventing bacterial head rot. The best way to prevent this problem in your garden is to start with resistant cultivars, such as broccoli with dome-shaped heads, space plants properly, and avoid overhead watering. A cloche can protect young plants from cold, wind, heavy rain, and many small pests. Similar to the women’s hat of the same name, a cloche is generally bell-shaped, but it doesn’t have to be.
Solid-bodied cloches can provide protection for tender plants against caterpillars, snails, aphids, and many other pests. For a cloche to be effective against chickens, squirrels, and other larger pests, it has to be very sturdy and anchored in a way that can withstand repeated attacks. DIY Cloches While there are many sizes and shapes of cloche available for purchase, you can easily make your own. The most common DIY cloche suggestion is to use soda bottles or milk jugs by cutting off the bottom of the jug and using the lid to ventilate the cloche. The only problem with these ideas is that they add even more plastic to your garden soil.
Heat-loving plants, such as tomatoes, peppers, basil, and eggplant, get a much better start when protected with a cloche early in their development. Seeds or seedlings can be placed under a cloche after the soil has been watered. Most of the moisture will stay trapped in the cloche, but occasional waterings will still be needed as the plant grows. Because a glass cloche holds heat and air within, it can get too hot and too humid for your young plant.
Occasional venting is necessary. To do this, simply slide a piece of wood or a rock under one edge of the cloche to increase air flow. In the evening, before temperatures start to drop, remove the prop and allow the cloche to sit flat on the ground again. If your cloche is made with fabric, venting is not needed. Once the plant outgrows the cloche, simply store it for another season or use it on another, smaller plant. Cloches can also be used to help sensitive perennials make it through winter. Whether you call them June beetles, Junebugs, or May beetles, these small, reddish-brown, clumsy flyers can be annoying. They get their name because of when they emerge. In some regions, these pests come out in June, while other places get them in May, hence the difference. 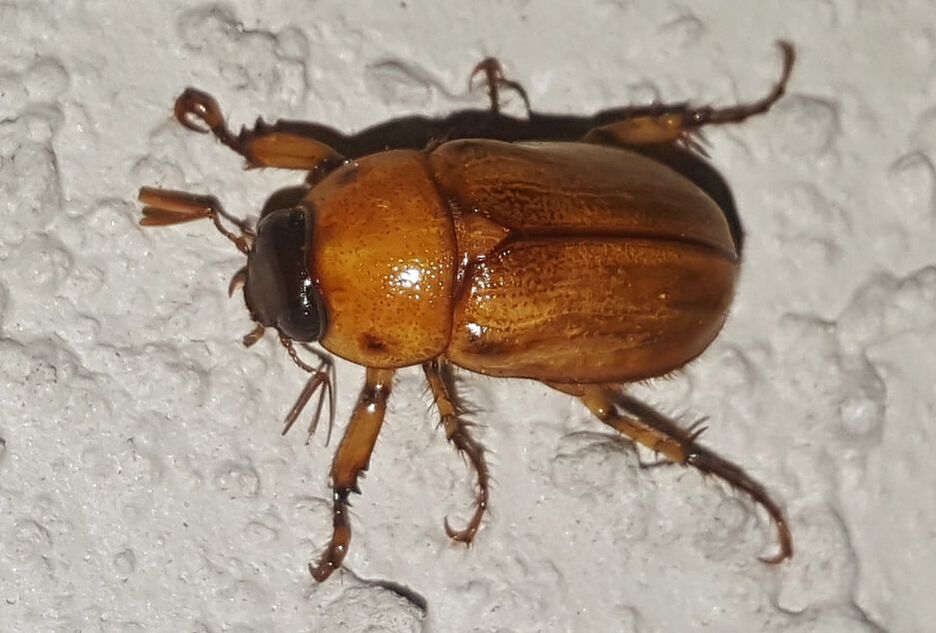 Junebug (Brett Hondow) Pixabay
Junebug damage
Adult Junebugs feed on leaves. They fly in from weedy areas to feed at night. During the day, they tend to hunker down in a shady spot or burrow into the soil until dusk. The damage they cause is similar to Fuller rose beetles, earwigs, and snails. Grasshoppers and caterpillars may also cause similar damage. The only way to be sure is to catch them in the act. The more insidious damage occurs underground as Junebug grubs feed on the roots of your lawn, especially ryegrass and bluegrass. Symptoms of infestation include brown, dying patches. If things get really bad, you can actually roll up patches of turf because it is no longer attached to the ground! Large numbers of Junebugs can defoliate a young tree in a matter of days. This is especially true for avocado trees, which may need to be protected with netting. Controlling Junebugs Commercial growers use blacklight traps when Junebug infestations cause too much damage. This is not recommended for home growers because the trap may attract more Junebugs than it captures. Heavy infestations are treated with an application of entomopathogenic nematodes. For the most part, home gardeners can’t do anything besides hand pick them whenever they are seen. Junebugs really are clumsy flyers, so it’s not hard to catch them. They are attracted to lights at night and often bump into windows and screens. When I catch them, I feed them to my chickens, who are very happy to help with Junebug control. If you have children, you can always gift them a butterfly net and offer a bounty on every Junebug they catch! Sometimes the best thing to do is to do nothing. Allowing land (or a garden bed) to go fallow means giving it a period of rest. It sounds right, doesn’t it? Rather than digging, planting, irrigating, fertilizing, and harvesting, simply allow the soil a season to itself, to recover from the demands we place upon it every day. Like most things we discuss here at The Daily Garden, it really isn’t that simple.  Raised bed allowed to go fallow for a season The truth is, soil never rests Fallow soil does what soil has always done. It provides structural support to root systems, it sequesters carbon, mineral nutrients, gases, and water. It also plays host to gazillions of chemical reactions and microscopic life forms. And the countless, amazing processes that take place in soil never actually stop and rest. [Unless, that is, it reaches sub-zero temperatures, and, even then, there’s probably still stuff going on!] Worms, insects, arthropods, mollusks, bacteria, fungi, algae, oomycetes, and chemical reactions continue, whether you plant tomatoes or not. Allowing soil to go fallow does, however, have certain benefits. Benefits of fallow ground Fallow ground enjoys uninterrupted natural processes that have evolved over billions of years. We know a lot, but we don’t know everything about everything. I like to believe that allowing soil to go fallow every once in a while gives time to life processes that we are not yet aware of, or that we do not fully understand. There are benefits to allowing land to go fallow that we do understand:
Different ways of doing nothing There are different ways of allowing land to go fallow. First and easiest, you can completely leave it alone. Second, and my favorite, is to top dress the area with aged compost and then leave it alone. You can plant a cover crop that will be used as a green manure. This is called green fallow. You can till the soil (to control weeds) but plant nothing. This is called black fallow. [Doesn’t that sound like a movie title? Black Fallow Returns!] But I digress. Cover crops on fallow land Cover crops, such as fava beans, vetch, oats, barley, or rye can be grown on fallow land as a soil amendment, rather than a crop. These plants are left to their on devices and are treated as a green manure at the end of their normal life cycle. This returns all the nutrients to the soil, along with some excellent organic material that improves soil structure. This is especially beneficial if you have compacted soil or heavy clay. Cover crops have the added benefit of converting some nutrients into forms more usable by the next season’s crop. Having plants growing on fallow land also reduces erosion and provides food and shelter for beneficial insects. Although, ground-dwelling bees would really appreciate a small patch of bare ground, and chickens are always happy to do their part against the resident insect population! 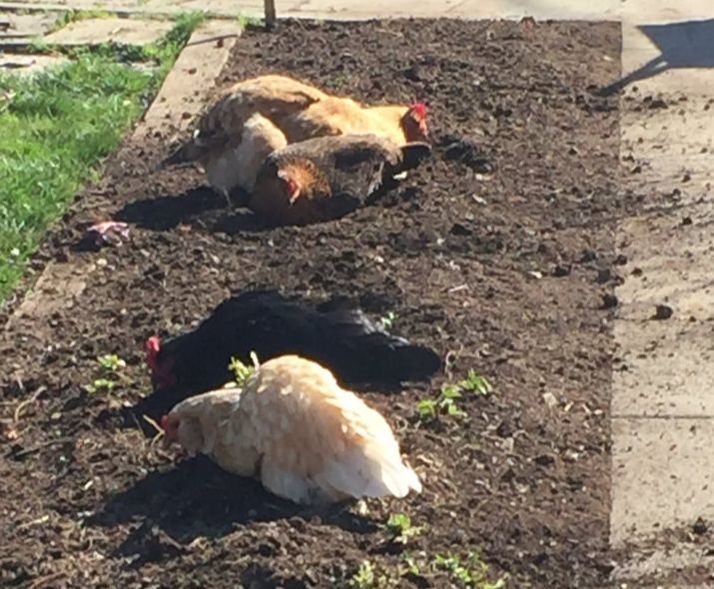 Hens dust bathing and hunting insects on fallow garden bed A form of crop rotation Allowing soil to go fallow should be part of your crop rotation or succession planting plan. Succession planting simply means sowing seeds in such a way as to constantly have something growing in a space, much the way plants grow naturally. Crop rotation allows you to keep a patch of ground as productive as possible, while switching up the crops being grown. This interrupts the lifecycle of certain soil pests, such as darkling beetles, nematodes, weevils, and wireworms. It also breaks the disease triangle for dieback, root rot, white rust, and other soil borne diseases. Incorporating a fallow year or season into the crop rotation cycle makes good sense for the health of your soil. This idea is not new “Six years you shall sow your land and gather in its produce, but the seventh year you shall let it rest and lie fallow, that the poor of your people may eat; and what they leave, the beasts of the field may eat. In like manner you shall do with your vineyard and your olive grove.” Exodus 23:11 Allowing something to grow naturally on your fallow ground is an excellent way to hand over some of your garden tasks to natural processes for a season. If you watch closely, you may be surprised to learn something new about the way things grow in your garden!
|
Welcome!You can grow a surprising amount of food in your own yard. Ask me how! To help The Daily Garden grow, you may see affiliate ads sprouting up in various places.
You can also get my book, Stop Wasting Your Yard!  Index
All
Archives
April 2024
|
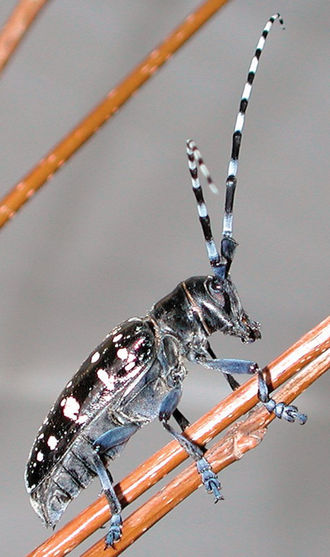
female.JPG)

.jpeg)

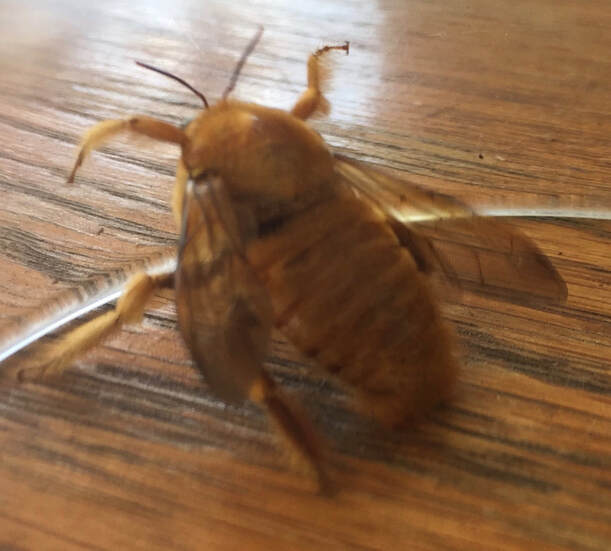
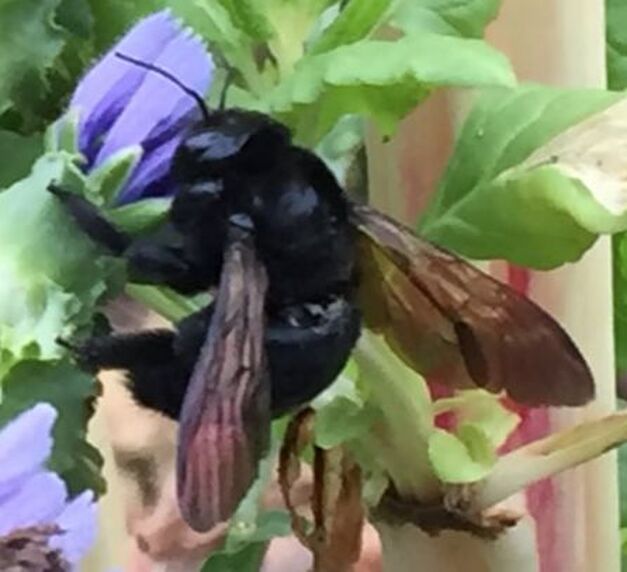
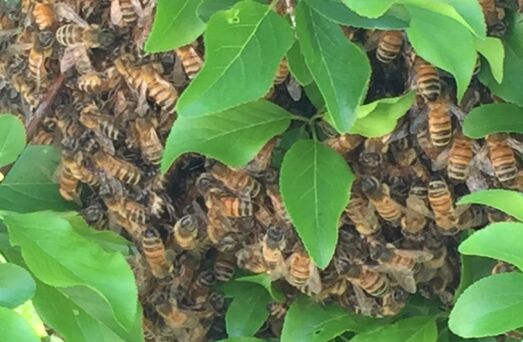

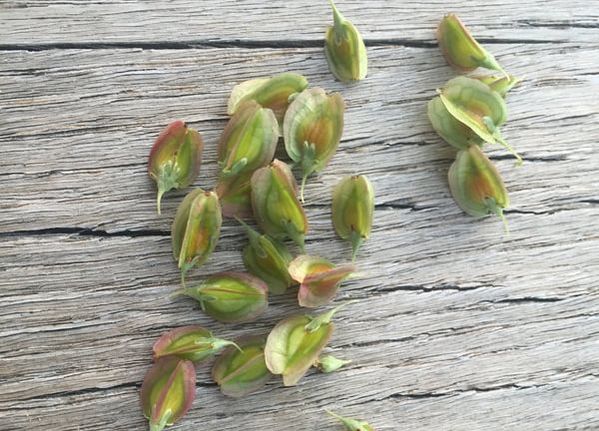


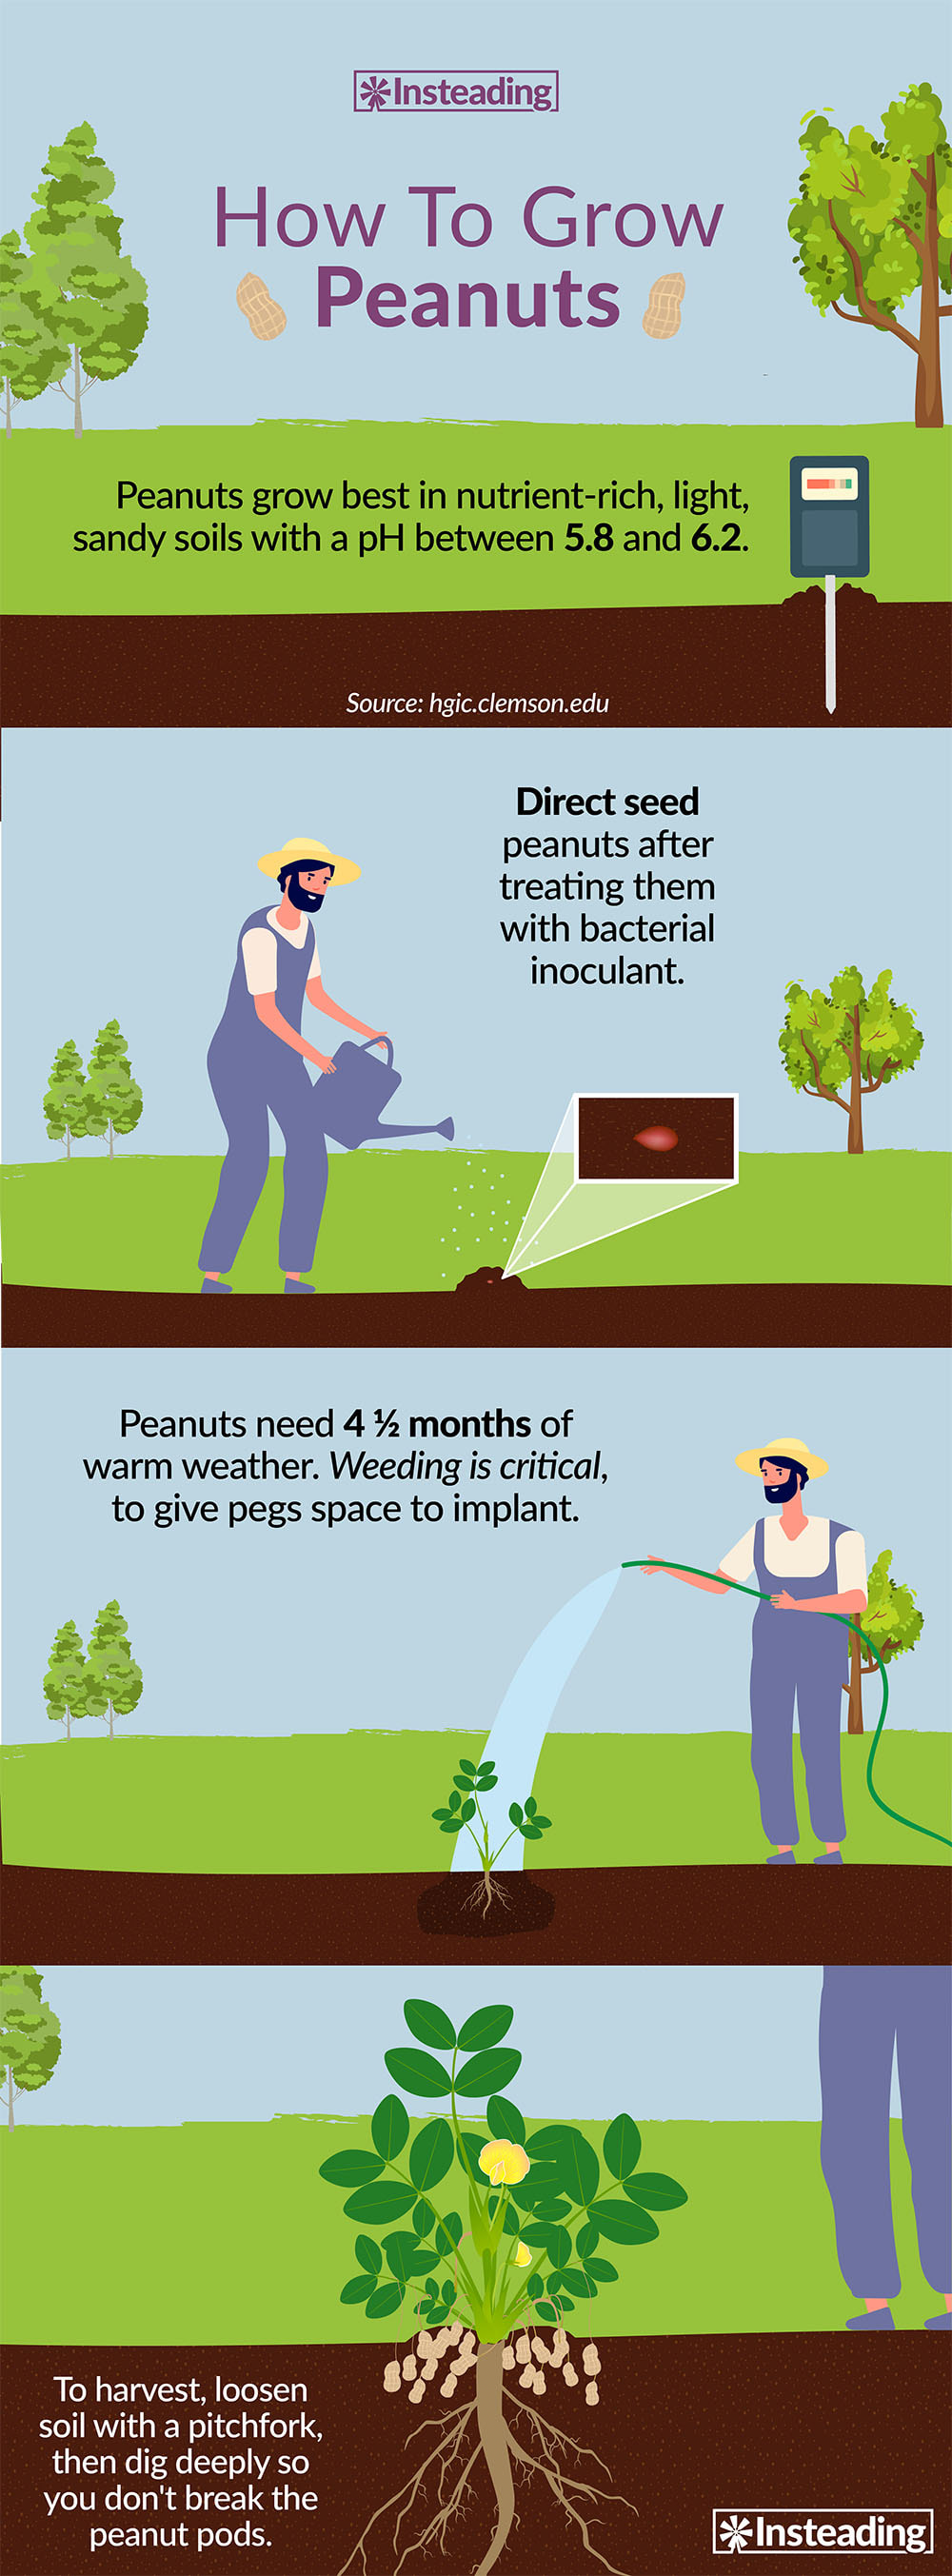

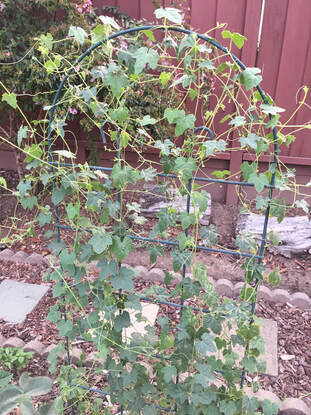


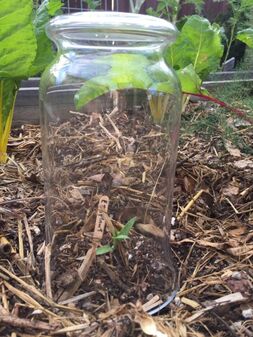
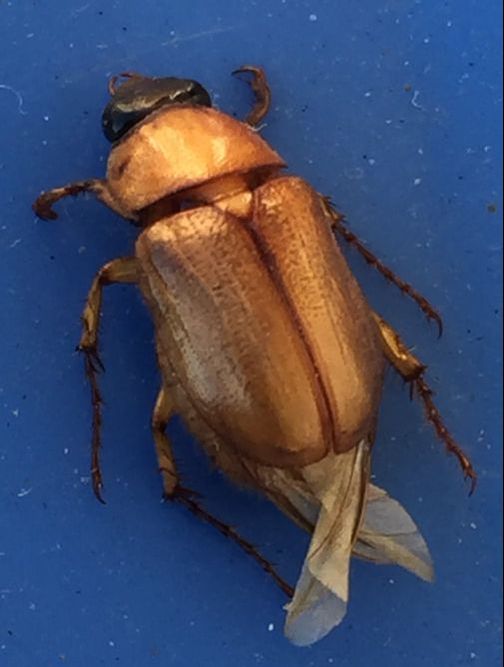
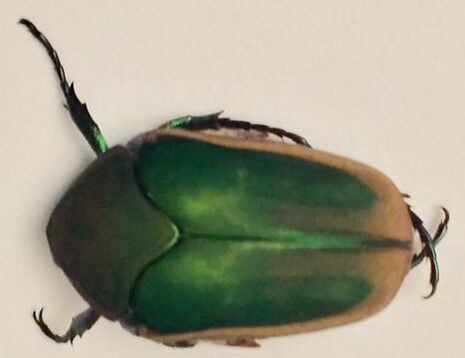
 RSS Feed