|
Heliotropism refers to a plant’s ability to track the sun’s movement. For many centuries, it was believed that a plant’s tendency to follow the sun as it crossed the sky was a passive action caused by water loss on the side of the plant exposed to sunlight. Now, we know that there is far more to it than that. 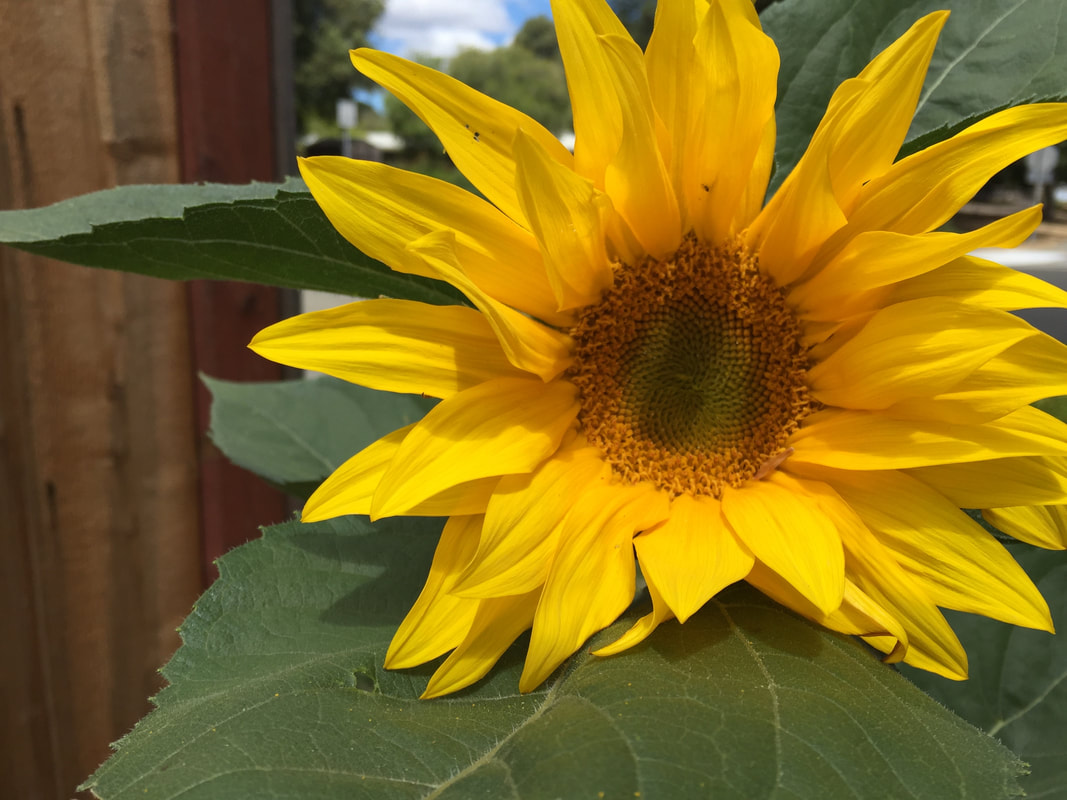 Sunflower Growing toward sunlight Instead of passively shrinking to one side as the sun’s harsh rays boil away a plant’s bodily fluids, we now know that plants actively grow toward (or away from) sunlight. [When a plant grows away from sunlight, it is called skototropism.] Experiments conducted in the 1800’s demonstrated that plants will respond to any type of light: street lights, grow lights, or sunlight. When plants are attracted to this light, it is called phototropism. Phototropism is a function of the hypocotyl, or individual cells found in the same region. Hypocotyls are the embryonic stem found below the seed leaves (cotyledons) and directly above the root. You can easily see examples of phototropism when seedlings first emerge and they don’t get enough sunlight - they become leggy and lean toward whatever light they can. This is phototropism. In heliotropism, not any old light source will do. It is only radiation from the sun that causes the reaction. And the mechanical causes of these two types of movements are very different. Mechanics of plant movements When plants move in response to the position of an external stimulus, it is called a tropic [TRO-pic] movement. If a plant’s movement is independent of the stimuli’s position, it is called a nastic movement. In phototropism, plant hormones (auxins), found in the meristem tissue of leaf and stem tips, photoreceptors, and multiple signaling pathways are used to direct a plant to grow more rapidly toward sunlight. In heliotropism, a structure called the pulvinus is used to direct movement. The power of pulvinus The pulvinus is an amazing, fluid-controlled joint found at the base of a plant leaf stem (petiole) or just below a flower.  Pulvinus of 'Oxalis rosea', from: Charles Darwin (1880): The Power of Movement in Plants. Public Domain The pulvinus causes movement by altering fluid pressure in the surrounding plant tissue. These changes in fluid pressure start when sucrose is moved from the phloem into the apoplast. The apoplast is the conjoined spaces between plant cells. As sugar is pumped into the apoplast, potassium ions are pushed out, followed by water molecules. This changes the pressure within the affected cells, causing movement. This is called turgor-mediated heliotropism. But not all heliotropic flowers have a pulvinus. Those that do not are still able to move by permanently expanding individual cells. This is called growth-mediated heliotropism. Pulvini are also used in response to nyctinastic and thigmonastic movements.
Heliotropic flowers Heliotropic flowers face the sun from dawn to dusk. Slowly tracking the sun’s path across the sky, these flowers are believed to use heliotropism as a way to improve pollination, fertilization, and seed development. Heliotropic flowers often have five times as many beneficial insects present, due to the added warmth. [Many tropical flowers exhibit a modified form of heliotropism in which flowers maintain an indirect tracking of the the sun. This is believed to reduce the chance of potential overheating.] Beans, alfalfa, sunflowers, and many other species turn their blooms to follow the sun’s path across the sky each day. But sunflowers only use heliotropism in their early development, in the bud stage. Once a sunflower head emerges, it may track the sun for a short time, as an expression of phototropism, until the flower head reaches full size. The majority of sunflowers found in the northern hemisphere nearly always end up facing east. Leaf heliotropism Like floral heliotropism, leaf heliotropism is the method by which plants focus their leaves perpendicularly to the sun’s morning rays (diaheliotropism), or parallel to midday sun (paraheliotropism). Diaheliotropism allows leaves to capture the maximum amount of energy from the sun, while paraheliotropism protects plants from overheating and dehydrating. How do your plants move during the day? What bottle of wine would be complete without its cork? The same is true of most trees. Everyone knows that trees and woody shrubs are made of wood, surrounded by bark. But there’s a lot more going on in those outer layers than meets the eye. #/media/File:1-Arraiolos-0050.jpg) Cork oak (Sallyofmayflower) CC BY 3.0 The bark you see protecting the living wood of a tree is made up of dead plant cells. This layer is called the rhytidome. The reason these cells are dead is because the cork layer cuts them off from the tree’s resources. Components of bark Bark is made up of three basic layers. The inner layer, or phloem, is a living part of a tree’s vascular system. Manufactured sugars ‘flow’ down the phloem to feed the rest of the plant. The middle tissue, or cortex, is made up of porous tissue that stores and transports carbohydrates, tannins, resins, and latex. The outermost layer of bark is called its periderm. #/media/File:Tree_secondary_components_diagram.png) Tree cross section diagram (Brer Lappin) Public Domain Periderm
The periderm is also made up of three layers: the cork, cork cambium, and phelloderm. Cork (phellem) is produced by a specialized layer of cambium tissue, known as the cork cambium, or phellogen. This cork cambium layer is only one cell thick and the cells divide in parallel (or periclinally) toward the outside of the tree. In some trees, the cork cambium layer also produces cells towards the inside of the tree. These inner cells are the phelloderm layer. Function of cork Cork keeps wine safe from the elements because it is impermeable to gases and water. Because of the cork, your wine stays where it is and (as long as the cork remains intact) will only grow better with time. The cork of a tree also blocks air and water. Cork is able to keep trees and wine safe from the elements, along with insects, bacteria, and fungal disease because it contains suberin. Surberin is a waxy material that creates a protective barrier. This barrier also blocks water and gas exchanges between the outermost layers of the tree killing the epidermis, cortex, and secondary phloem. This is the bark you see. Trees and shrubs also use cork to cut off an unwanted body part (leaf, diseased twigs, mature fruit) from the rest of the plant. This is called abscission. Most fruits hang in their own singularity: apples, oranges, and apricots are common examples. Other fruits, such as grapes, form clusters. Still other fruits are formed when a group of flowers merge to create a fruit. Soroses are that type of fruit. 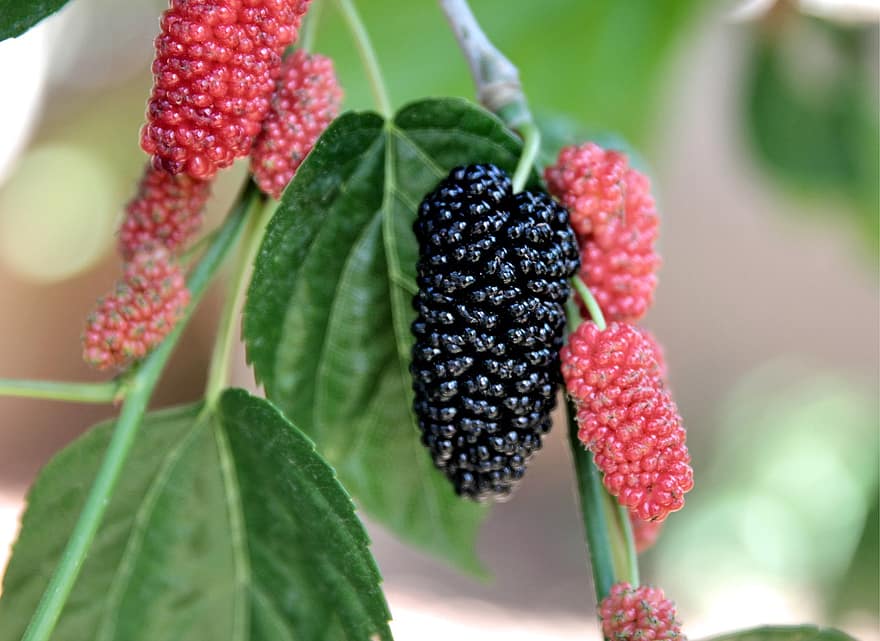 Mulberry fruit (Pikist) What is fruit? Fruit is the fertilized ovary of a flowering plant (angiosperm). After pollination and fertilization occur, two new structures are produced: seeds (fertilized ovules) and pericarp (thickened ovary walls). In the case of apples and oranges, one flower produces one fruit. Sometimes, multiple flowers can fuse together to create a fruit. There are three different ways that this can happen:
In nearly every piece of literature you see, pineapples are listed as a common example of sorosis, but this is incorrect. I don’t know why they do this. How a sorosis fruit develops If you look at a mulberry flower cluster, you will see several flower buds held tightly together. Each of these individual flowers open up, awaiting pollination. #/media/File:Mulberryflowerbud3000px.JPG) Clusters of unopened mulberry female flower buds (Fastily) CC BY-SA 3.0 If you look closely, you can see tiny fruits at the base of each flower. Each of these fertilized fruits will develop around the stem that they emerged from in the first place. This is unlike pineapples, which include the receptacles and flower parts in their fruit development. #/media/File:Black_Mulberry_Female_Flowers.jpg) Close-up of a mulberry flower cluster (JJ Harrison) CC BY-SA 3.0 Berries vs. soroses While mulberries may appear to have the same structure as blackberries and raspberries, botanically, they are quite different. Raspberries and other members of Rubus are made up of several drupes (a type of fruit) that are clustered around and attached to a dry thalamus. All of the drupes in a single fruit are made from a single flower. In mulberries, and other soroses, each rounded bit is its own fruit, formed from its own flower. #/media/File:Unripe_white_mulberry.jpg) Unripe white mulberry ( Petru Dimitriu) Public Domain It won’t make any difference, as you enjoy a fig, some pineapple, or a mulberry, but now you can impress your friends with this fascinating word!
Some garden words are fun to say. Schizocarp [ˈskitsōˌkärp] certainly qualifies. A schizocarp is a type of dry fruit that splits into single-seeded parts, called mericarps, when ripe. Each mericarp is made from its own carpel. [A carpel is the female reproductive parts of a flower, including an ovary, stigma, and usually a style.] Mericarps can be dehiscent, which means they split open when ripe, or indehiscent, which means they stay closed. 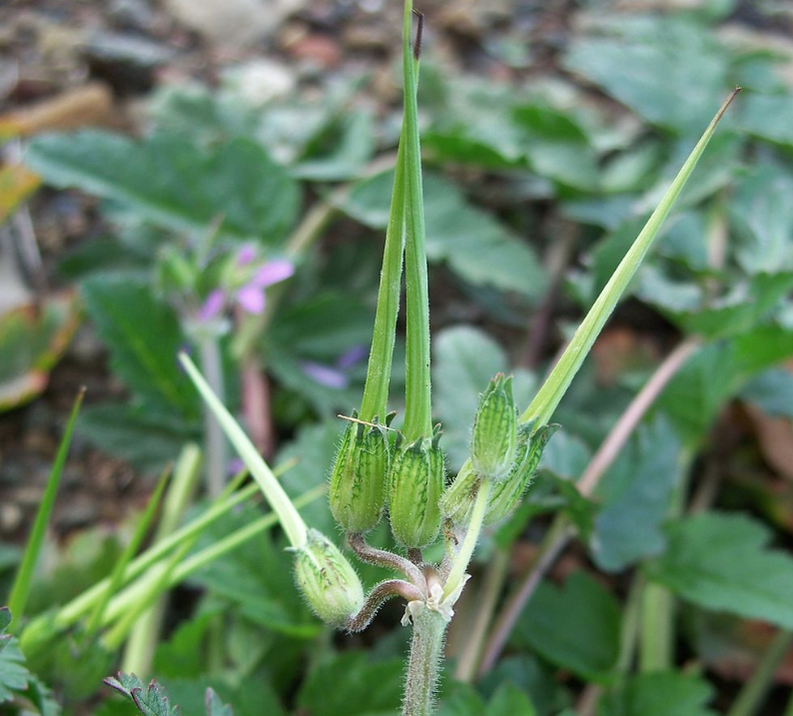 Musk stork’s-bill or whitestem filaree ‘Erodium moschatum’ (Eugene Zelenko) CC BY-SA 4.0 Indehiscent schizocarps The seeds of carrots, celery, coriander, anise, dill, parsnip, and other umbellifers are all indehiscent schizocarps. Hibiscus (Malvaceae), mallows and cheeseweeds (Malva), false mallows (Malvastrum), and wireweed (Sida acuta) fall in the same category.
Dehiscent schizocarps Members of the Geranium genus produce dehiscent schizocarps. [These are not the garden variety geraniums, which are another genus altogether (Pelargonium). I know, I know, it gets confusing.] True Geranium species include the cranesbill, horns’ bill and filaree plants that produce needle-shaped schizocarps that twist and gyrate into the soil (and were fun to play with, when we were children).
Maple trees produce winged schizocarps, called samaras.
Unlike the juicy fruits we enjoy each summer, or the dried caryopsis of cereal grains, plants that produce schizocarps have found that procreation works best when each flower produces a number of independent seeds protected by a dried fruit coating. Now you know. Clay soil is common in many different places, and it can feel like concrete on a hot day. In fact, clay particles have electrical charges that hold them tightly to their neighbors.  Electron microscopic view of clay (Wikipedia) Public Domain The science of clay Clay is just one type of soil. Soil is made up of varying combinations of sand, silt, clay, air, water, minerals, microbes, earthworms, and more. All those ingredients are arranged into soil structures called aggregates, which contain solids and spaces. [This is different from soil texture, which refers to the percentage of sand, silt, and clay found in a sample.] The particles of various minerals found in soil are measured in micrometers (μm), or microns [one micron equals one-millionth of a meter]: [For my Burner readers, playa dust can be 0.3 μm, or three-tenths of one one-millionth of a meter. That's why you will never get it out of your car or your tent.] The spaces between soil particles are called macropores and micropores. Macropores are greater than 0.08 mm and they hold air and water. Because the spaces are larger, water moves passively, pulled by gravity. Micropores are less than 0.08 mm and mostly hold air. Macropores are so small that the surface tension of water molecules means active suction must be used to pull the water out of these tiny spaces. Clay soil has far more micropores than macropores, so water and nutrients are held tightly, which means it is less porous. Porosity, or permeability, refers to the ability of air and water to move through soil. Soil that is rich in organic material tends to have better porosity. Porous soil allows roots to find water and nutrients, and allows for healthy gas exchanges. Being flat, clay particles lie on top of each other like a deck of cards. This is why clay soil is so susceptible to compaction. Clay and soil compaction Compacted soil can create a barrier to roots seeking water, nutrients, and stability. It can even alter nitrogen, making it unavailable to plants (denitrification). This is especially true next to streets, driveways, buildings, and other heat islands. [If your unimproved clay soil ever feels spongey, it may indicate a masked chafer infestation.] On the other hand, leaching of nutrients is far less common in clay soil. More often, we end up with a super abundance of certain nutrients that creates an imbalance for our plants. Clay soil and plant nutrients Clay is made up of many negatively charged secondary minerals. That negative charge loves to attract and hold on to cations, or positively charged particles, such as potassium, zinc, and nitrogen. [That’s why most San Jose soils have an abundance of potassium.] This attract-ability gives clay soil a high cation exchange capacity (CEC), which is a fancy ways of saying clay can hold onto 6 to 8 times more water and nutrients than sand. If you get a soil test (and I urge you to do so), you will also see a base saturation figure. To illustrate, CEC can be seen as the number of electrical outlets in your home, while base saturation is the number of those outlets currently being used. On average, sand has a CEC of 5-15, silt has a CEC of 8-30, and clay has a CEC of 25-50. In the same volume of soil, clay has 100,000 times more surface area than sand, so there are plenty of places for attachments to occur. You can improve your clay soil’s base saturation by monitoring and correcting soil pH. Alkaline soils may need acidification, while acidic soils may need the addition of lime to bring the pH into a range suitable for plant growth (6.0 to 7.0). A proper pH can make important nutrients, such as iron, available to your plants. Safety note: When planting trees around your home, keep in mind that root systems of plants growing in clay tend to be smaller, because so many more nutrients are available closer to the tree. This can result in a smaller in-ground support system for your tree, which makes it more likely to fall. Just sayin’… Clay and drainage When soil is extremely dry, it can’t absorb water because it becomes hydrophobic. Like a dry sponge, the water simply rolls off. Clay soil can act the same way. The rate at which water can enter soil is called its infiltration rate. Infiltration rates are given as millimeters of water absorbed per hour:
 Pooling water under nectarine tree indicates drainage problem in clay soil Because clay drains so slowly and can hold so much water, poor drainage can lead to fungal disease. This is particularly true for beans, stone fruits, and cucurbits. Proper irrigation of plants grown in clay soil means watering slowly and gently. Overwatering clay soil can drown your plants. Also, to avoid smooth dinnerware-like edges and compaction, avoid walking on or working wet clay soil or mud.
In areas prone to heavy rains, rain gardens can be used to offset the risk of flooding and fungal disease. Rain gardens divert excess water into sunken areas, away from buildings and vulnerable plants, filtering that water and allowing it to be absorbed slowly, without causing runoff or pollution. Transplants and bare root trees Because clay particles fit together so tightly, your soil can become as hard as a piece of pottery, making it difficult or impossible for transplants and bare root trees to get established. When installing stone fruit crops, such as nectarines, almonds, and apricots, you will need to be sure to rough up the edges of the planting hole to make it possible for new roots to work their way into the surrounding soil. In fact, roughing up these edges is a good idea for all your transplants. Plants that must have good drainage to avoid fungal problems, such as crown rot, are often planted in mounds. This added elevation keeps moisture away from the crown. This practice is common when installing avocados, olives, squash, and melons. Improving clay soil Mulching and composting are the best ways to improve the structure of heavy clay soil. As the organic materials break down, they increase the number of spaces between the clay particles. This allows air, water, and roots to move through the soil more easily. It also improves drainage and permeability. Other ways to improve soil structure include aeration, sprinkling coffee grounds on the soil, incorporating perlite, and cutting plants off at ground level, rather than removing them, roots and all. Those roots play host to millions of soil microbes that help maintain healthy soil. As you work to improve your clay’s structure, you can still garden using raised beds, vertical gardens, keyhole gardens, and containers. Whatever you do, do not add sand. The Sand-Clay Myth Our intuition tells us that we can lighten heavy clay soil by adding sand. It sounds right. Sand has plenty of spaces, right? Putting the two together should give us a nice, happy medium, right? Wrong. Instead, the tiny clay particles fill in all the spaces around the sand grains, creating a soil that is even heavier than before! Clay and plant choice While dandelions' taproots seems able to penetrate concrete, many plants have a difficult time getting established (ecesis) in compacted clay soil. Some plant families, such as the sunflower family, need a regular top dressing of aged compost to perform well in clay soil. These plants include artichoke, lettuce, and tarragon. Other plant families, such as the parsley family, simply cannot thrive in clay and are better grown in containers. This group includes carrots, celery, parsnips, and fennel. The allium family of onions, garlic, and chives can be grown in clay soil, but the addition of organic material will help them thrive. The same is true for lilacs, and members of the mint family, such as lavender and salvia. Beets and Swiss chard prefer loose soil, but can be grown in amended clay soil. Berries are shallow-rooted plants that really prefer loose soil. If you have clay soil and want to grow blackberries, raspberries, blueberries, or strawberries, you will want to work a lot of aged compost into the soil before planting. Some plants are so rugged that they can help break up compacted clay soil. These plants include cilantro, cowpeas, and fava beans. Other plants, such as germander, yarrow, and sage, seem to barely notice hard-packed clay soil, as long as they get a little water during the peak of summer, which makes them excellent ground covers. Olive and plum trees, like many herbs, seem to thrive in less than ideal soil. The “other” clay The finely textured clay used to make porcelain, called kaolin clay, can be used to protect many crops from damage by insect pests such as codling moth, stinkbugs, cucumber beetles, squash bugs, cabbage loopers, aphids, cutworms, and armyworms, just to name a few. Apparently, insects don’t like getting kaolin clay on their feet, so they go elsewhere. Your watermelons, apples, and peaches will thank you! Did you know that clay, sand, animal dung, and straw are used to plaster woven stick fences? It’s called pleaching! It is normal and healthy for the pruned tip of a twig to dry up and seal itself off from pests and disease. When that death keeps moving inward, there’s a problem. This creeping death is called dieback. Dieback can be from environmental conditions, insect feeding, or disease. 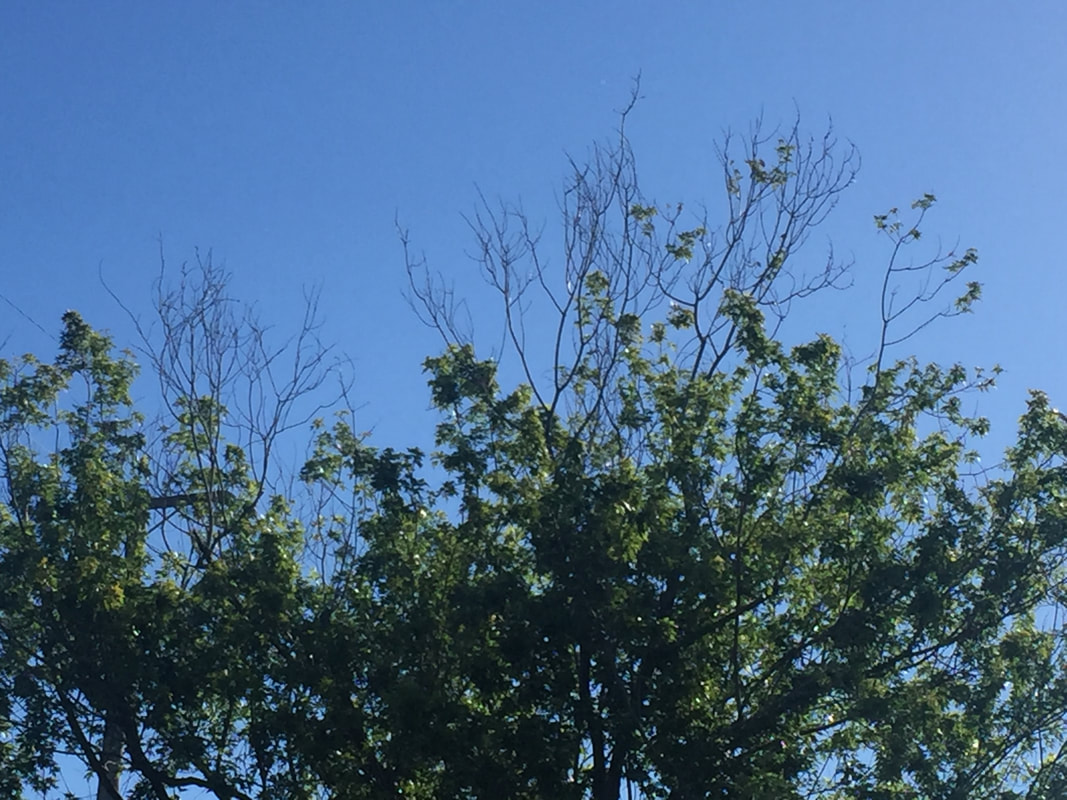 Hot wind and poor irrigation can cause twig dieback and shade tree decline (Kate Russell) Physical dieback It is not understood why, but delayed leafing out seems to be associated with dieback. The same environmental conditions that cause delayed leafing out and dieback include winter drought, extreme cold, or insufficient chilling hours. This form of dieback is common in blackberries and raspberries. Other causes of dieback include poor irrigation and hot, dry winds, potassium or zinc deficiencies, phosphorus toxicity, insect feeding by shot hole borers, black scale, wooly aphids, and mealybugs. Also, when the raspberry horntail, a tiny wasp, lays its eggs in a raspberry or blackberry cane. Dieback by nematodes Nematodes are microscopic, eel-like roundworms that live in the soil. Some nematodes are beneficial predators, and some are plant-eating, disease-carrying parasites. Nematode feeding can cause reduced plant vigor, wilting, smaller fruits and leaves, and twig dieback. Fungal dieback Several different fungi can cause dieback. Each pathogen has its own set of symptoms and host plants:
Viral dieback Lettuce is susceptible to viral dieback caused by the lettuce necrotic stunt virus. This pathogen causes stunting, leathery, dark inner leaves, and rotted areas on outer leaves. Bacterial dieback Apple, citrus, pear, and stone fruits are susceptible to bacterial blast, blight, and cankers, all caused by Pseudomonas syringae. This pathogen kills flower clusters and nearby leaves, along with twig tips. Fireblight is another bacterial infection that causes twig dieback. This disease is easy to spot because the dead twigs curl into a shepherd’s crook shape. Watch for fireblight in June. Huanglongbing, a deadly citrus disease, includes twig dieback as one of its early symptoms. 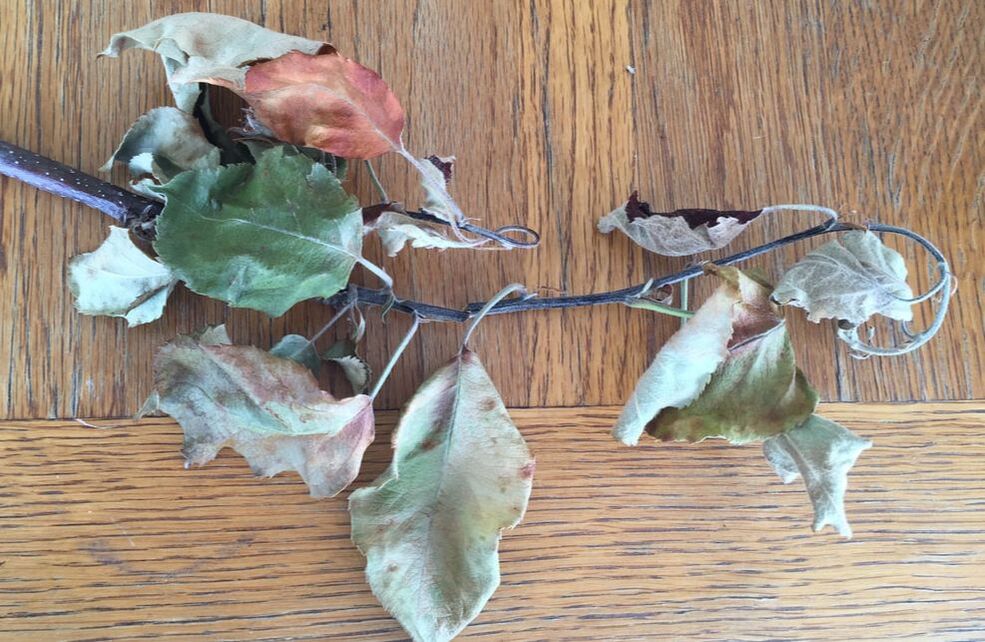 Fireblight of apple How to prevent dieback
Healthy plants can often protect themselves from dieback. These tips can help reduce the risk of dieback in your garden and landscape:
There are many causes of dieback. Determine the reason behind dieback to find an effective treatment. Too much water can result in a lack of vigor or sudden death by Phytophthora root and crown rot. Phytophthora is Greek phytón (plant) and phthorá (destruction), so the name means the plant-destroyer.  Raspberry plants showing symptoms of Phytophthora root and crown rot (H. J. Larsen) CC BY 3.0 US What is Phytophthora root and crown rot? Phytophthora [Fie-TOF-ther-uh] is a family of water molds called oomycetes. Oomycetes fall somewhere between fungi and algae in the web of life. There are many different types of Phytophthora molds. They generally attack stems and roots. Stem damage occurs at or just above the crown, at the soil line, though it can appear elsewhere on a plant. These molds cause many plant diseases, including sudden oak death, potato blight, damping-off disease, and crown rot. Phytophthora root and crown rot can kill a tree or shrub if the soil remains wet for too long or when planted too deeply. [Moist soil around the trunk is never a good idea.] Host plants Nearly all fruit and nut trees, including cherries and kiwifruit, are susceptible to Phytophthora root and crown rot. But so are members of the nightshade and cabbage families. So, tomatoes, eggplant, and potatoes are vulnerable, as are cauliflower, Brussels sprouts, and cabbage. And all because of too much water. Symptoms of Phytophthora root and crown rot Plants affected by Phytophthora root and crown rot look drought stressed. Unfortunately, because the natural response is to provide more water - the last thing you want to do when Phytophthora is present. Symptoms start in just one branch or area of the affected plant before spreading. Leaves may turn purple or reddish. Plants may die suddenly or linger poorly for years before dying. Symptoms can vary greatly, depending on the type and age of the plant, the plant’s genetic resistance to infection, overall health, soil temperatures, and moisture levels. The bark around the crown and upper roots of infected plants is dark. A dark sap or gum may ooze from damaged areas. Using a sharp knife, cut away an area of bark. Infected plants will show reddish-brown streaks or patches. Water-soaked areas on roots may also be visible. If white threads are visible between the bark and the inner layer or around the root system, it is Armillaria root rot. Preventing Phytophthora root and crown rot infestation Proper water management is the best way to prevent and control Phytophthora root and crown rot. Never allow standing water to remain around tree and shrub trunks. Also, don’t let sprinklers hit tree trunks. These other tips can help you manage Phytophthora in your garden or landscape:
You may be able to maintain an infected plant with proper irrigation and good cultural practices, but it will never be the same. Phytophthora can stay in the soil for many years, so prevention is far easier than control. NOTE: One new-to-us variety, Phytophthora tentaculata, is on the Dept. of Agriculture’s watch list. If it appears in your garden or landscape, contact your local Cooperative Extension Office. They may have helpful advice to protect your plants and need to know where this disease is spreading.
Ginger’s sweet bite makes it an excellent addition to many favorite foods, and it can be candied for a special treat. And you can grow it at home!  Ginger rhizome (Frank C. Müller) CC BY-SA 3.0 The ginger plant Ginger was one of the first spices to be exported from the Orient and it is a fascinating plant. As a plant family in its own right, ginger (Zingiber officinale) is cousin to turmeric and cardamom. The ginger we eat is not actually a root. It is a rhizome. Rhizomes are modified, underground stems that put out lateral shoots and adventitious roots. Ginger plants do not have aboveground stems. Instead, they grow much like the grass in your lawn, with leaves rolled together at the base of the plant to form pseudostems, except that they can grow to three or four feet tall! Equally tall floral stems emerge directly from the rhizome. Flower buds start out green and then turn white and pink before opening up into mature flowers. Mature flowers can be pale yellow, deep purple, or brilliant red, depending on the variety.  Ginger flower bud (Venkatx5) CC BY-SA 3.0 How to grow ginger Ginger needs loose, nutrient-rich soil, so it is best grown in containers. This makes it easy to bring indoors as temperatures drop in winter, as well. Most grocery store ginger ‘roots’ are treated with chemicals that prevent them from sprouting, but not always. While I normally warn against planting grocery store foods, due to the potential risk of introducing a safe-to-us-but-bad-for-plants disease, your ginger will, most likely, be growing in a container, so it’s not really an issue. Rinse off the ginger and place it in a container filled with potting soil, just under the soil line. Keep the soil moist but not soggy to encourage growth. Being from the tropical rainforest, your ginger plant will need lots of warmth, moisture, and protection from intense sunlight. [Under the canopy, jungles are actually pretty dark!] 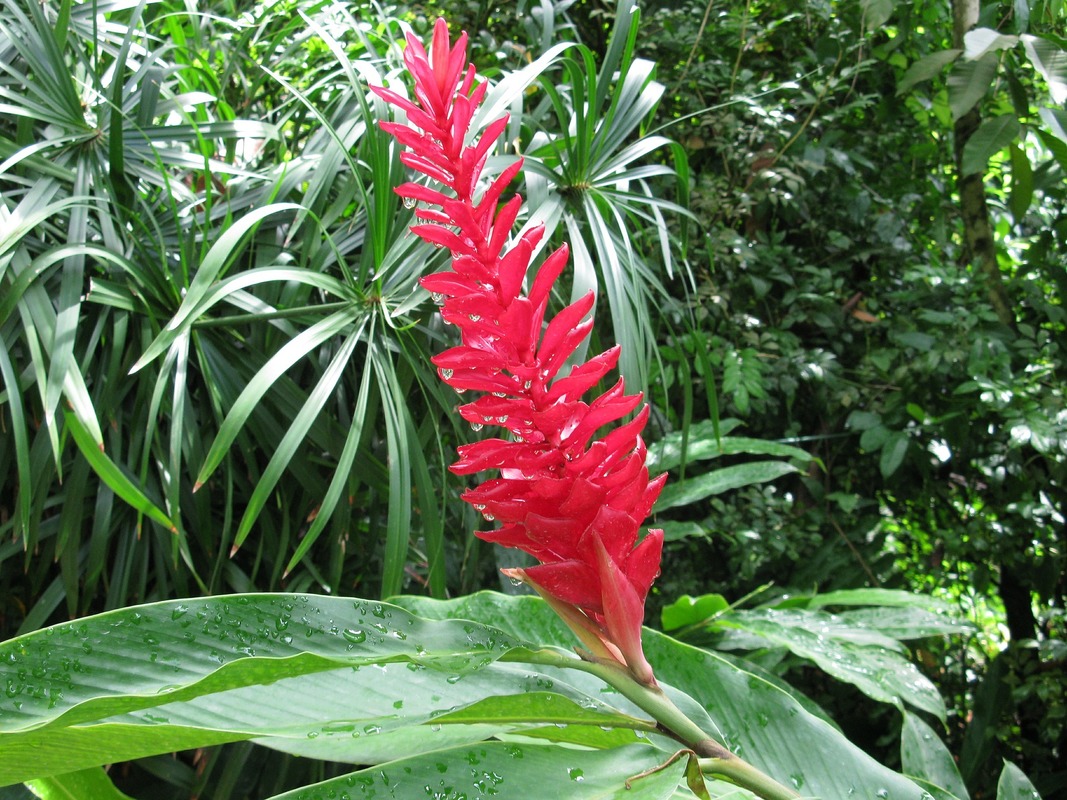 Ginger flower (Fordito) Pixabay Harvesting ginger While you can harvest ginger rhizomes at any time, it is best for the plant’s long term health if you wait until the aboveground portion withers, similarly to garlic. The desired portion of the rhizome is cut off and the rest of the plant can be returned to its container. The cut off portion is then scalded to prevent it from sprouting. The older ginger gets, the tougher and drier the rhizome becomes. Ginger is a perennial plant, which means it keeps on growing. It may look as though it dies in winter, but don’t be fooled. Unless your region is too cold for ginger, it will come back year after year. Each little nub on a ginger rhizome is a potential new plant.
Seeing unripe fruit or nuts on the ground, under your tree, can be normal or may indicate a problem. Fruit drop, or June drop, is a natural process that allows a tree to get rid of more fruit than it can support. Fruit drop is common to citrus, apple, avocado, almond, tomatoes, and many other crops. Earlier in the growing season, some trees will rid themselves of unwanted blooms (blossom drop) for the same reason. Some trees, such as loquat, can be messy during this time. Manual fruit thinning works the same way, reducing the quantity of fruit but improving its quality. 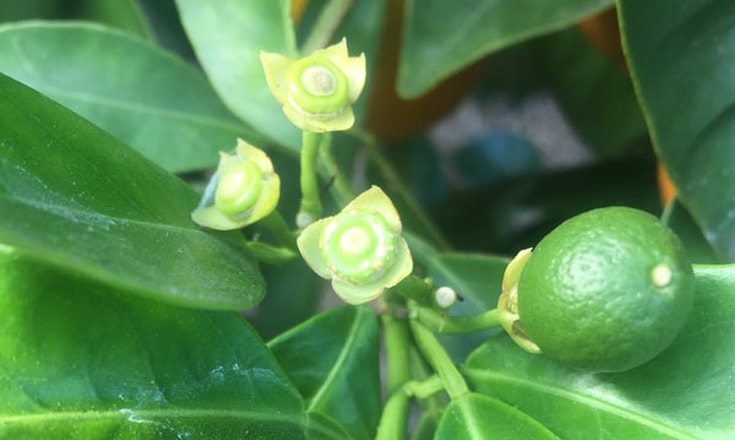 Citrus fruit drop after petal fall is normal Fruit drop can also indicate insect pests, disease, or adverse environmental conditions.
Fruit drop caused by insects Black scale feeding weakens the tree, leading to wilting, twig dieback, stunting, and early fruit drop. Mealybug feeding can cause early fruit drop, chlorosis, and sooty mold. Feeding by mites can also reduce a tree’s ability to support a crop, causing fruit drop. Finally, while weevils are better known for burrowing into beans, cotton bolls, and cereal grains, they will also feed on roots, stems, buds, flowers, leaves, and fruit. Often, the first sign of a weevil infestation is leaf wilting, scalloped leaf edges, and early fruit drop. Fruit drop caused by disease Trees will frequently abort diseased or malformed fruit rather than invest water and nutrient resources in fruit that won’t reach maturity. Fruit drop caused by environmental conditions Sudden cold or extreme heat can cause fruit drop, especially in young trees. Strong winds can blow unripe fruit from trees. The most common environmental cause of excessive fruit drop is insufficient irrigation or unbalanced soil nutrients. Almonds and tomatoes are particularly sensitive to feeding and irrigation fluctuations. Pollination and fruit drop Fruit drop can be the result of insufficient pollination. Some trees need genetically compatible neighboring trees they can use for cross-pollination. It can also mean there are not enough pollinators in your area. You can attract more pollinators to your garden by avoiding the use of broad-spectrum pesticides and by installing a wide variety of flowering plants. Or, you can start raising honey bees. Honey bees take up surprisingly little space, boost pollination of nearly all your crops, plus you get honey! Fruit drop and pruning Heavy pruning can leave a tree unable to support the initial crop, resulting in fruit drop. Unless necessary, it is better to leave pruning and tree training for the dormant season. Fruit drop and the soil Low magnesium (Mg) levels in the soil can cause fruit drop, as can high potassium (K) or boron (B) levels. You can’t know what your soil’s nutrient levels are without a soil test from a local, reputable lab. While they look convenient and appealing, over-the-counter soil tests are not yet accurate enough to be useful. The type of soil can also have an impact on fruit drop. Sandy soils are far more prone to fruit drop than heavy clay soil. Don’t panic if your orange tree drops dozens or hundreds of tiny green fruits in May or June. It is normal. Just pick them up and add them to your compost pile. If you notice heavy insect infestations, signs of disease, chlorosis, or wilting, track down the cause and correct it. Remove fallen fruit and mummies to avoid creating a disease triangle or a hotel for pests. Plants cannot be green without magnesium, but too much magnesium in the soil can turn plants yellow. How can this be? Magnesium is essential for plant health. Magnesium stabilizes cell membranes, making plants better able to withstand drought and sunburn. Magnesium is found in enzymes that plants use to metabolize carbohydrates. Most important, magnesium is contained in the chlorophyll molecules that convert the sun’s energy into food. This process, the Calvin Cycle, is what makes photosynthesis possible. Clearly, magnesium is important to plant health. But too much magnesium can interfere with the absorption of other plant nutrients.  Magnesium deficient tomato leaf (my own) CC BY-SA 3.0 Plant nutrients Plants use 13 dissolved minerals as food. There are three primary macronutrients (nitrogen, potassium, and phosphorus) and three secondary macronutrients (calcium, sulfur, and magnesium). Plants use large amounts of these macronutrients to grow, thrive, and produce. Seven other nutrients, used in smaller amounts, are called micronutrients. Fertilizers claim to provide all the food your plants need, but it’s not that simple. [Is it ever?] The chemical interplay, taking place in the soil, that allows plants to absorb nutrients, is a delicate balancing act. Too much, or not enough, of one nutrient can create a domino effect that causes starvation for plants that are surrounded by a banquet of nutrients. What is magnesium? Magnesium is an elemental metal. Pure magnesium (Mg) is too stable of a molecule for plants to absorb. The less stable, cation form of magnesium (Mg2+) is a dissolved salt that plants use for food. To be able to attract and hold those positively charged molecules, plants also need negatively charged molecules (anions), such as nitrogen, phosphorus, and sulfur. The ability of soil to perform this balancing act is called its Cation Exchange Capacity (CEC). Without a soil test from a reputable, local lab, you cannot know your soil’s CEC or nutrient levels. For example: My first soil test found magnesium levels of 798 parts per million (ppm). The ideal range is 50 to 120ppm. Clearly, before I moved in, someone was applying an awful lot of fertilizer. The problem they were probably trying to correct was not insufficient nutrients, but a nutrient imbalance. Without a soil test from a local, reputable lab, you simply do not have enough information. Base saturation and magnesium Soil test results also include base saturation figures for potassium, calcium, and magnesium. Base saturation is the percentage of available connections being used. [Think of it as how many grocery bags you can carry in from your car.] The optimal range for magnesium base saturation is 10 to 30%. This means that soil particles, because of their electrical charge, will ideally hold on to 10 to 30% of the magnesium in the soil. It takes the right absorption percentage and the right volume of magnesium in the soil for plants to be healthy. My soil’s magnesium base saturation was 32%. That sounds close enough to the 10 to 30% optimal range, right? The problem is, with seven times the amount of magnesium needed in the soil, my plants were getting 32% of too much.  Magnesium toxicity in cabbage (Alandmanson) CC BY 4.0 Magnesium levels
Too much magnesium in the soil makes it difficult for plants to absorb calcium and other anion nutrients, which can lead to blossom end rot, bronzing, and many other problems. This is a common problem in areas with alkaline soil. The opposite is true in areas with acidic soil. Insufficient magnesium symptoms look very much like potassium toxicity symptoms: older leaves, at the bottom of the plant, start turning brown, between and alongside the leaf veins, working upward through the plant. Magnesium deficiencies in stone fruits often start out as slightly brown areas along leaf edges (margins) that expand inward, causing cracking, necrosis, and leaf loss. Magnesium deficiency in California is extremely rare. Stabilizing magnesium levels Reaching and maintaining ideal mineral levels in soil for healthy plant growth is both science and art - mostly science. To start, get a soil test from a local, reputable lab. Unfortunately, over-the-counter soil tests are not yet accurate enough to be useful. Once you have your results, you can take these other factors into consideration:
Finally, schedule regular soil tests for your garden and landscape. Look at these tests as an annual physical for the living skin of your property. The information in these tests will help you make informed decisions about the magnesium in your soil. If older leaves on cucumber, melon, or squash turn yellow and leathery, they may have cucurbit aphid-borne yellows.
The cucurbit aphid-borne yellows luteovirus (CABYV) causes this viral disease. Luteoviruses are a genus of viruses that use plants as hosts. Aphids carry this disease and spread it to plants as they feed. Symptoms of aphid-borne yellow virus Early symptoms are chlorotic (yellow) areas on lower leaves. These spots expand to include the entire leaf, leaving the large veins bright green. The affected areas become leathery and brittle. Stunting and fruit drop are common symptoms as the plant struggles. Before genetic testing, gardeners thought this was plant aging (senescence), nutrient deficiencies, or other diseases, like cucurbit yellow stunting disorder. How the disease spreads As the name suggests, aphids carry this disease. As aphids pierce plant tissue to feed on sap in the xylem, they spread infection. Once infected, the aphid will continue to spread the disease as it feeds on squash family plants. Lettuces, beets, and many weeds can also become infected. Controlling aphid-borne yellows There is no way to control the virus, but you can reduce the presence of aphids in your garden with these tips:
Remove and destroy infected plants to prevent the disease from spreading to nearby plants Fresh, sweet cherries are delicious, but cherry trees can be difficult to grow. According to UC California Backyard Orchard, “cherries are the most difficult trees to keep alive.” If you are still determined, let’s see what we can learn about these trees. People have been enjoying cherries since prehistoric times. Cherries are stone fruits, which means the fruit is a drupe. There are two types of cherry trees: sweet (Prunus avium) and sour (Prunus cerasus). The two cannot cross-pollinate with each other. Both types are native to Europe and western Asia. Sweet cherries are also known as wild cherries or gean.  Prunus cerasus (Diako1971) CC BY-SA 4.0 How to grow cherry trees
Cherry trees cannot tolerate soggy ground and they need a lot of sunlight. Excellent drainage is critical. So much so, that cherry trees are generally planted on mounds, or berms. Trees should be spaced 14 to 20 feet apart, and you are going to need at least two because most sweet cherry varieties require cross-pollination to bear fruit. Sour cherries, the type used in pies and preserves, are self-fertile and do not require cross-pollination. While installing bare root stock is preferable, you can grow a cherry tree from a pit. The pit will need to be exposed to cold temperatures (stratification) before it will germinate. When selecting a cherry variety for your landscape, be sure to choose one with a chilling requirement that matches your microclimate. The tree will set fruit in 3 or 4 years. Seasonal care for cherry trees Each winter, you will need to prune out 10% of the previous year’s growth, as well as any dead, damaged, diseased, or crossing/rubbing branches. You will also want to apply dormant oil. An application of fixed copper can help reduce bacterial canker (gummosis). In spring, as blossoms appear, apply a fungicide, such as Bordeaux mixture, to control brown rot, and feed each tree 2 lb. of urea or 70 lb. of aged manure just before a deep watering. Birds will enjoy your cherries long before you do if you do not protect your crop with netting or a tree cage. Trees will need to be drip irrigated every day in summer, or given 3 to 5” of water every 2 or 3 weeks. After harvesting your cherry crop, feed each tree with 2 lb. of urea and irrigate right away. Keep trees irrigated regularly until September, then stop watering altogether. This will help prevent root rot. Cherry pests and diseases It is astounding to learn how many diseases and insect pests can interfere with growing cherries. If birds, squirrels, and pocket gophers weren’t bad enough, cherry trees are are regularly attacked by a wide variety of insect pests:
Black cherry aphids, cherry slugs, earwigs, green fruitworms, western flower thrips, nematodes, and cribrate weevil can also be added to that collection. And the list of cherry diseases is no less daunting:
Cherries are also susceptible to a genetic disease, called leaf crinkle, and a couple of mysterious diseases, called cherry necrotic rusty mottle and cherry stem pitting, that occur when grafting scions. Applying sticky barriers to the trunks of trees can block crawling insects, but it does nothing against flying insects. Bottom line: cherries are probably best left to the professionals. Hopefully, this information will help you appreciate just how much effort goes into providing these delicious summer treats. If you decide to give cherries a try, please share your experience with us in the comments! Neonicotinoids are a class of insecticides.
When neonicotinoids first came on the market in the 1980’s, they were touted as a cure-all for garden pests around the world. Since neonics affect certain receptors in an insect’s nervous system, humans and other mammals, birds, and fish would be perfectly safe, they said. That sort of marketing should have been a warning from the beginning. What quickly followed were massive bee die offs, and threats by the EU to regulate this class of chemicals, but it's not that simple. To understand the pros and cons of this insecticide, we need to know more about how it works. What are neonicotinoids? Neonicotinoids, or neonics, as they are more conveniently known, are a class of insecticides that are chemically similar to nicotine. This class of chemicals includes several ingredients you may see on a bottle of insecticide:
After the disaster of DDT, other chemical insecticides were tried. Organophosphates and carbamates were the most common, but these are far more toxic than the neonics. By 2013, according to YaleEnvironment360, 95% of the U.S. corn and canola crops, most of the cotton, sugar beet, and sorghum crops, and a “vast majority of fruit and vegetables, including apples, cherries, peaches, oranges, berries, leafy greens, tomatoes, and potatoes, to cereal grains, rice, nuts, and wine grapes” were sprayed with neonics. How do neonics work? Neonicotinoids work by interrupting an insect’s nervous system. Since insect nervous systems are so different from other living things, these chemicals are generally safe, as far as poisons go. Initially, plants and seeds were sprayed with neonicotinoids. Neonics are systemic, which means they can be sprayed on seeds or plants, or watered in. Sprayed seeds grow into plants that contain the insecticide. Sprayed plants absorb the chemical, which is then spread throughout the plant via the xylem. When an insect comes along and takes a bite, or grabs some nectar or pollen - WHAM! They’ve been poisoned. Problems associated with neonics The initial problems with neonics occurred when seeds were sprayed with the chemical and then put through a seed spreader that created clouds of neonicotinoids, killing tens of thousands of honey bees. Also, sprayed insecticides tend to go all over the place, causing overspray damage to nearby plants, waterways, and air. Of course, all this made the news and got everyone excited, but those particular problems have been resolved in most countries. Now, neonics are more commonly applied as a drench, which is poured into the soil, to be absorbed by the roots. This eliminates overspray. Treated seeds are now managed in ways that prevent the pneumatic seed dispersal issue. Currently acceptable application rates seem to only be causing minimal harm to honey bee colonies, but they are still devastating to native bee populations. Does your garden really need chemicals? Individuals impact the amount of chemicals found in the environment by thinking before buying:
As we have learned in the past, spraying chemicals all over the place ends up causing unexpected problems. These chemicals start building up in our ground water and soil. Also, insects evolve much faster than we do. It is common for insects to develop a resistance to the poisons we spray on them, while we remain vulnerable. Neonicotinoids may or may not be the next DDT. The truth is, we don’t know. What we do know is that there are better ways for home gardeners to care for their plants than to inundate the environment with chemicals. If you pick a dandelion, you will see a viscous, milky white goo come out of the stem. That goo is latex. Exposed to the air, latex coagulates, creating a protective barrier. Plants use latex as a defense against insect feeding. [Slugs will eat leaves drained of latex, but not before.] We use latex in very different ways. 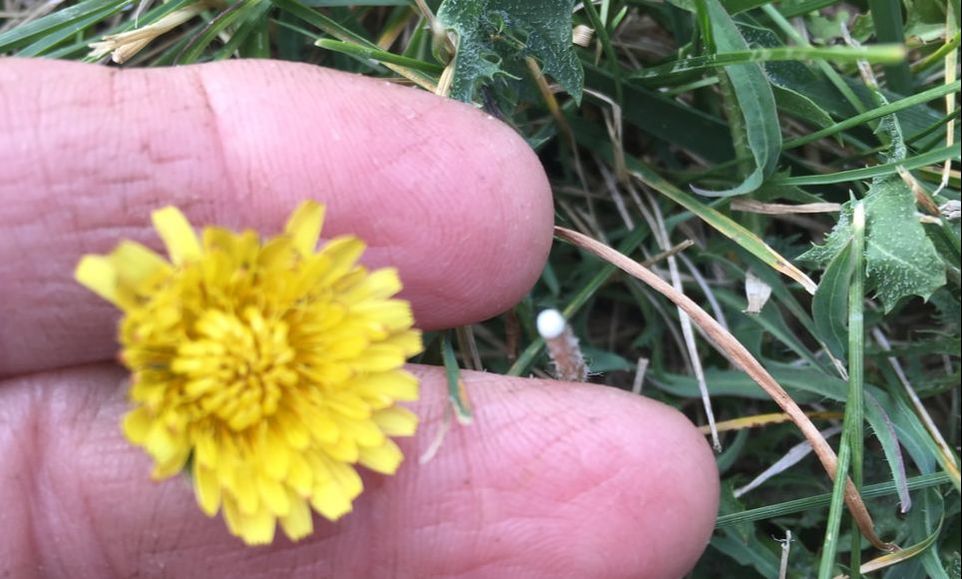 Dandelion with stem exuding latex Latex gloves, latex paint, and cosmetic sponges all get their start from latex. So do chewing gum, balloons, adhesives, and opium. The latex collected from the rubber tree is where we get, you guessed it, rubber. [Most latex paint, such as is used in whitewashing, is actually a synthetic latex.] It is estimated that 10% of all flowering plants, angiosperms, contain latex.
Plants that produce latex
There are over 20,000 species of plant that produce latex, occurring in over 40 plant families. Some of the more commonly known latex-producing families include:
Some mushroom, conifer, and fern species also produce latex as a defense mechanism. Allergic reactions to latex Because latex contains defensive chemicals, it can be an irritant. Prolonged exposure can lead to an allergic response. Individuals with a latex allergy are at risk for anaphylactic shock and should avoid contact. Some forms of latex can cause blistering of the skin, or blindness, while other plants produce a latex with reduced amounts of the allergen. As you work in the garden, note which plants exude latex when damaged. And monitor your skin for reactions to this liquid plant defense. Crawlers with no legs, a species with no males, and broody females who keep thousands of eggs warm and safe - what are these garden pests? Citricola scale. Native to Japan and southern China, citricola scale is currently found in California, Arizona, and Maryland, and in several other countries. Also known as gray citrus scale, citricola scale (Coccus pseudomagnoliarum) can be found feeding on citrus and pomegranate twigs in spring and early summer, and immature scale insects can be found feeding on the underside of leaves in late summer and fall. In addition to feeding on pomegranate, lemon, lime, orange, and grapefruit, these sap-sucking pests also feed on elm, bay laurel, hackberry, and oleander. Citricola scale lifecycle There are only female citricola scale insects. They reproduce asexually (parthenogenesis). Each female can produce between 1,000 and 5,000 eggs during the summer. She will keep her eggs safe under her body until they hatch out in to crawlers, usually from June through August. That may sound like a crazy broody season, but citricola scale eggs hatch after only 2 or 3 days. The babies that come out of those eggs are called crawlers. The name crawlers sounds a little misleading because they don’t look as though they could do anything. But they do. These crawlers move to a good feeding site, attach themselves, becoming sessile (fixed), and feed until they molt into second instar nymphs, usually around November. These nymphs produce a lot of honeydew and are often protected and farmed by ants.  Brown soft scale (Whitney Cranshaw, CSU, bugwood.org) CC BY 3.0 Citricola scale description
Citricola scale start out as a yellow, oval egg. First instar crawlers are oval, flat, and nearly translucent. Sometimes they are yellowish-green to brown. Second instars are mottled brown. Citricola scale adults are one-quarter of an inch long, gray, oval, and flat. Well, slightly convex, but flat enough. They can be difficult to see because they start taking on the color of the twig to which they are attached. Citricola scale are often confused with brown soft scale (which was the only image I could get my hands on). Citricola scale or brown soft scale? Citricola scale tends to have only one or two generations each year, while brown soft scale can have multiple generations going at any one time. This means that citricola scale insects you see will nearly always be at the same life stage, while brown soft scale specimens may be at any life stage. Also, adult citricola insects are gray, while brown soft scale adults are brown or yellow. Damage caused by citricola scale Underneath those tiny domes of protection, citricola scale attach themselves to stems and leaves of citrus and pomegranate. They pierce the surface to reach the phloem, to siphon away valuable nutrients and sugary sap, weakening the tree. And they poop. This poop, called honeydew, contains a lot of sugar, and it creates the perfect growing medium for sooty mold fungus. Sooty mold blocks photosynthesis, further reducing your tree’s vigor. Citricola scale can reduce flowering and fruit production. During heavy infestations, twigs can be killed by citricola scale. How to control citricola scale Regularly monitoring citrus and pomegranate trees for these pests is your first line of defense. If you notice ant trails or sooty mold, take a closer look at twigs and leaves for signs of scale. Since ants protect these pests, you can eliminate that protection, making the citricola scale more vulnerable, by wrapping the tree’s trunk with a sticky barrier. Also, there are naturally occurring parasitic wasps that will control citricola scale insects (as long as you do not apply broad spectrum pesticides). Applying dormant oil in winter can also help reduce citricola scale populations. Research has shown that 40% of citricola scale in San Joaquin Valley are resistant to organophosphates. It is believed that there is also a cross-resistance to malathion and carbaryl. This looks to be yet another example of chemical pesticides actually making the pests stronger, as we add more poisons to the environment and our food chain. Bottom line, to control citricola scale on your pomegranate and citrus trees, inspect twigs very closely in April through June, and then look at the underside of leaves in late July. These pests can then be flicked off the leaf or stem with your fingernail. Relatively new to the United States, the European pepper moth is poised to cause significant damage to gardens and commercial agriculture. Each time an invasive plant or pest is brought into an area, there’s no telling what might happen. Resident predators or local diseases may make short work of the interloper. Then again, the insurgent may find a rich, predator-free environment perfectly suited to a population explosion. We don’t know, yet, which way things will go for the European pepper moth, but it’s probably a good idea to know what we’re up against, just in case. _-_Flickr_-_gailhampshire.jpg) European pepper moth (gailhampshire) CC BY 2.0 Plants damaged by European pepper moths It’s difficult to get excited about something that hasn’t directly caused damage in your garden, so here’s the list of just some of the plants harmed by the pepper moth: If that list doesn’t get your attention, I don’t know what will. Also on the list of favorite foods are roses, African daisies, azaleas, orchids, and many other flowers and ornamentals.
Damage caused by pepper moths The moths themselves don’t cause any harm to plants. Like other moths and butterflies, it is the larval stage, or caterpillar, that feeds voraciously on leaves, roots, buds, fruit, and flowers. Pepper moth caterpillars may girdle young seedlings, causing what looks like damping off disease. Later larval instars may burrow into stems unnoticed, until the the stem collapses. Leaf damage starts out looking crescent-shaped, similar to damage by the Fuller rose beetle, or round, but the entire leaf ends up being eaten. Feeding is normally seen in the lower leaves, then moving up the plant until it is completed defoliated. Feeding on the roots can interfere with a plant’s overall health and vigor and feeding on buds, flowers, and fruit, well, there goes your crop. So, what does the European pepper moth look like? Pepper moth identification and lifecycle Also known as the European marsh pyralid, adult pepper moths (Duponchelia fovealis) have a wingspan of approximately three-quarters of an inch wide and a body less than half an inch long. The forewings are grayish-brown with two distinct yellowish-white transverse lines. The outermost line has a “finger” that points backwards. At rest, the pepper moth holds its wings out to either side in a triangular shape. The head, body, and antennae are olive brown, and the abdomen features cream-colored rings. Legs are pale brown. Both sexes have long abdomens, but the male’s is unusually long, and he holds his curved upwards at rest. Pepper moth eggs are really tiny (1/50 of an inch). The eggs start out whitish green or pale yellow, which turn pink, then red, as they mature. Just before hatching, the egg turns brown. Eggs are laid singly or in batches on the underside of leaves, normally near the leaf veins. Eggs can also be found on stems, at the crown, in the soil, on the tops of leaves, and even on greenhouse walls and furnishings. Caterpillars start out salmon pink with a black head, and a line of gray and brown spots along each side. Some sections may feature a double row of dots. Using a hand lens, you can see a hair emerging from each spot. Just behind the head, you can also see a hard plate, which is the same color as the head. As they grow, the pink turns a dirty white color that can range from pure white to pale or even dark brown, depending on which of your garden plants they are eating. These caterpillars can grow to over an inch long. Just before pupating, they may lose their spots. Pepper moth caterpillars create a cocoon out of soil, frass, and webbing. The cocoon can be 1/2 to 3/4 of an inch long. A single female pepper moth can lay up to 200 eggs. Under optimal conditions (temperatures around 68°F), those eggs can hatch in 4 to 9 days. Over the next 3 or 4 weeks, the caterpillars feed ravenously. Then, pupation takes 1 or 2 weeks. Adult moths live to mate and procreate for a week or two and the whole process begins again. In greenhouse environments, 8 or 9 generations a year can occur. That ends up being a lot of pepper moths! In areas like California, where cold winters rarely occur, this pest could prove to be devastating. These moths have an unusual flight pattern - both males and females fly fast and low, with their abdomens curved upwards. You may see individual moths, or they may swarm. Pepper moth caterpillars are photophobic, which means they do not like light. If you shine a flashlight on a pepper moth caterpillar, it will become agitated, moving rapidly side to side. How the pepper moth got here Pepper moths have been present in Europe for a very long time. In 1984, it became a greenhouse pest in Europe and Canada for the cut flower, vegetable, and aquatic plant industries. It is believed to have been spread globally through infested plants from those products. [Yet another example of why it is so important to quarantine new plants!] By 1988, the pepper moth had developed a taste for strawberries. In 2004, the pepper moth was found on begonia plants in San Diego, CA. It was again detected in 2010. By 2011, the European pepper moth had been found in seventeen California counties, as well as in fourteen other states. Departments of Agriculture in each of these states is monitoring for this pest. If you think you see one, please try to capture it and report it to your local County Extension Office. Native to Europe, the pepper moth moth prefers fresh and saltwater marshes. You might think, since you don’t have a marsh in your garden, that your plants are safe. But most of us have a creek, reservoir, or some other body of water nearby, and a pepper moth can fly up to 62 miles. What to look for Now that you know what these pests can do, keep an eye out for the following signs of pepper moth infestation: feeding tunnels, webbing, leaf rolling, frass, leaf wilting, and stem collapse. Also, check the debris (detritus) that falls from container plants and around the base of the containers for signs of eggs or pupae. You can also lightly brush the soil around potentially infested plants for signs of pupae and cocoons. How to control European pepper moths At this point, the best biological controls are to spray Bacillus thuringiensis (Bt) or beneficial nematodes (Heterorhabditis bacteriophora and Steinernema spp.). Rove beetles seem to enjoy feeding on pepper moth eggs and caterpillars, and certain predatory mites and wasps also parasitize these pests, so avoid using broad-spectrum pesticides. Since pepper moths prefer moist, hidden areas, keeping your garden tidy and free of overly moist areas can reduce the chance of perpetuating the species in your neck of the woods. Again, because this is a relatively new pest, with the potential for significant long term damage, if you see one, please report it. If you live in California, you can call 1-800-491-1899. If you live elsewhere, contact your local Department of Agriculture for reporting instructions. Knowing where this pest is can help in its eradication, which is really good news for your tomatoes, basil, figs, and cucumbers! What's eating your trees? If you see orange frass and bark damage, it's probably the American plum borer.  Orange frass indicates American plum borer infestation (James Solomon) CC BY 3.0 Like flathead borers, clearwing moths, and shothole borers, the American plum borer (Euzophera semifuneralis) feeds on the cambium layer of branch crotches, the lower trunk, and the root crown. This feeding weakens and damages branches, and can even kill a young tree. Host trees American plum borers feed on many popular fruit and nut trees, as well as several ornamentals. Here is a partial list of trees favored by plum borers: Plum borer lifecycle Each spring, adult plum borers emerge, mate, and eggs are laid in bark wounds. These wounds can be caused by branches rubbing together, a poorly aimed weedwacker, a careless pruning job, or any number of other insect pests. Also, branches that are growing too close together or at a tight angle, and heavily furrowed bark, can provide the necessary shelter. When the eggs hatch, larva enter the bark wound and begin feeding on the cambium, which contains the vascular tissue carrying water and nutrients throughout the plant. The larvae burrow shallow, irregularly-shaped tunnels between the wood and the bark. These larvae go though several stages, or instars, growing progressively larger, over the next 30 to 38 days. Finally, the larvae pupate in a loosely spun cocoon, inside the tree, where they overwinter. There can be up to four generations each year. Pupae that occur during the early part of the season can reach adulthood in as little as 10 days.  Adult American plum borer (xpda) Plum borer description Adult plum borer moths are dark gray with black and brown wing markings. The legs and body of the adult moth are a dusky gray with a reflective bronze. The wings have a white fringe. The larva can be white, green, or pink and are usually one inch long. If you use a hand lens, you should be able to see a circle of tiny hooks on the bottom of a plum borer’s fourth set of feet (B), called prolegs, as opposed to clearwing moth larvae (A), which have two rows of hooks. [Now you know how larva can climb up vertical surfaces!] More often, you will see the damage caused by the American plum borer, long before you actually see the insect. Adult American plum borer (xpda) CC BY 3.0 Damage caused by plum borers
As plum borers feed, they leave behind a trail of destruction. Reddish orange frass collects wherever they feed. Also webbing and extensive gumming can be seen. Gumming is a gooey discharge plants use to protect themselves. The gum hardens as it dries, but, unlike sap, it is relatively easy to wash off. Eventually, branches are weakened to the point of breaking and the tree’s overall health declines, reducing or eliminating any chance of harvesting those delicious plums. Controlling plum borers Plum borers are easier to prevent than control. Once they enter a tree, they are relatively safe from predators and pesticides. Use these tips to prevent a plum borer infestation:
If a bark injury is already present, or if your tree has bacterial galls or a fungal canker, and you know that plum borers are nearby, it may be worthwhile to hire a professional to apply a residual, contact insecticide. Over-the-counter products are not effective against the American plum borer. Plums, nectarines, apricots, cherries, peaches, and almonds are all stone fruits. But, so are olives, coconuts, mangoes, pistachios, and black pepper! So what, exactly, are stone fruits? 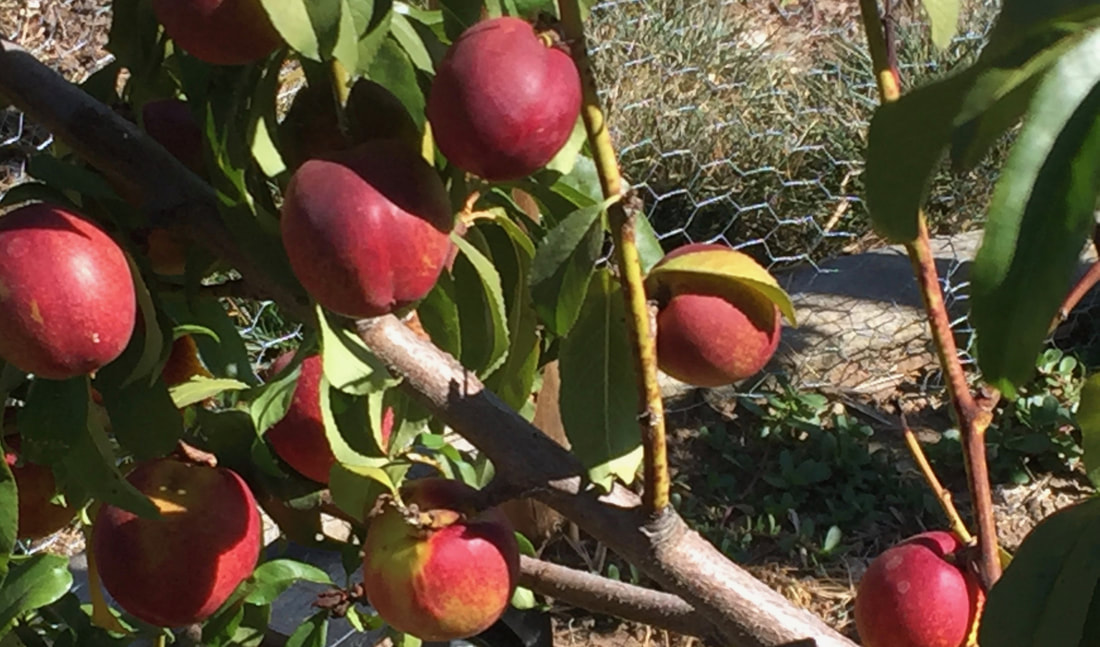 Nectarines
Prunus plants The Prunus genus is part of the rose family, making plums, almonds, and all the rest distant cousins to loquats and soapnut trees. [Did you know that almonds, nectarines, and peaches are the same species? I didn’t either.] There are both edible and ornamental stone fruits. Hawthorn, flowering cherries, and cherry laurels are ornamental stone fruits, but I much prefer investing time, water, and garden space on plants that produce food. When that food happens to be summer sweet peaches and apricots, well, all the better! The fruit of Prunus can be loosely or firmly attached to the seed, hence the terms freestone or cling varieties. Most stone fruits contain compounds which, when chewed up, generate hydrogen cyanide, but don’t let that scare you off. This is mostly true of the seeds, not the fruit, and the amounts are too small to do anything but fuel sensationalists. Propagating Prunus If you plant the pit from a grocery store stone fruit, you probably won’t get offspring that looks, behaves, or tastes the way the first fruit did. This is because most bare root fruit and nut trees available today are a hardy rootstock grafted onto a productive, flavorful fruit producer. Many of these plants are propagated by twig scions and cuttings taken from adventitious roots, to create clones. Because all of these fruit trees are members of the same genus, they can be grafted onto one another and produce edible fruit. One variety of grafted tree, in particular, boasts 40 different types of stone fruit on the same tree! These botanical masterpieces are created by New York artist Sam Van Aken. He calls them Tree of 40 Fruit. You can find similar stone fruit trees, with 4 or 5 types of fruit, available in garden centers and catalogs. These are a great way to make use of a small space. How stone fruits grow Members of the Prunus genus are all perennial trees and shrubs descended from a Eurasian ancestor. As such, these trees are best suited to northern temperate regions, or climates with four seasons. If you want grow these productive, rewarding trees, be sure to select a variety that has a chilling hour requirement that matches your microclimate, otherwise, you might not get any fruit. Adding a stone fruit tree to your landscape is a lovely way to enjoy spring blossoms and summer fruit. There are many dwarf and semi-dwarf varieties that don’t take up a lot of room, and some can even be grown in large containers. Caring for stone fruits When you first get a bare root tree, you will need to select a site with lots of sunlight and good drainage. Dig a hole slightly wider than the spread out roots and as deep as the roots go. There is no need to dig any deeper or wider. If your soil is heavy clay, be sure to rough up the edges of the hole a bit, to make it easier for young roots to penetrate. Cover the roots with soil, making sure that the soil level is exactly the same as it was before, relative to the tree’s trunk. Covering the graft area or trunk with soil can lead to rot and death of the tree. Water it in well, gently tamping down the soil to remove large air pockets that would allow the roots to dry out. It is a good idea to provide a tree support for your young tree. The first year or two, you can improve long term production by removing spring blossoms. This frees the young tree to focus its resources on developing a strong root system. As the tree becomes better established, it is still a good idea to thin fruit for better size and flavor.
It is not unusual for a protective gummy sap to appear at pruning cuts and other wound sites. While these trees are dormant in winter, they are sprayed with dormant oil, to break the disease triangle of many common pathogens.
Corking (dried out fruit) can be prevented by making sure that the soil contains enough boron and calcium. Before adding soil amendments, be sure to get a soil test from a local, reputable lab. Over-the-counter kits are not yet effective enough to be useful. Properly maintained, Prunus trees are classified as low flammability plants, making them a fire safe addition to your landscape. Pests and diseases of stone fruits While each species has its own set of problems, most stone fruits must deal with attacks by aphids, mites, caterpillars, shot hole borers, glassy-winged sharpshooters, San Jose scale, Eutypa dieback, peach twig borers, naval orangeworms, mealybugs, and cucumber beetles. Diseases of stone fruits include cane blight, shot hole fungus, crown gall, brown rot, bacterial spot, peach leaf curl, and bacteria blast. Stone fruit trees use idioblasts to protect themselves, and you can apply fixed copper, sulfur, or Bordeaux mixture (Bt), each in their own way and time, to aid in protecting your stone fruit trees. [Never use sulfur on apricots.] Netting and tree cages can help protect the fruit from birds and squirrels, and sticky barriers are an excellent way to thwart crawling insects. The shear volume of fruit that a single stone fruit can produce makes them an excellent choice for the home garden. When harvesting your crop, remember than these fruits produce ethylene gas, which which ripen everything nearby. Add stone fruits to your foodscape for years of sweet summer deliciousness and beauty. Yesterday, I harvested my first sun-warmed, tangy-sweet raspberry of the season. 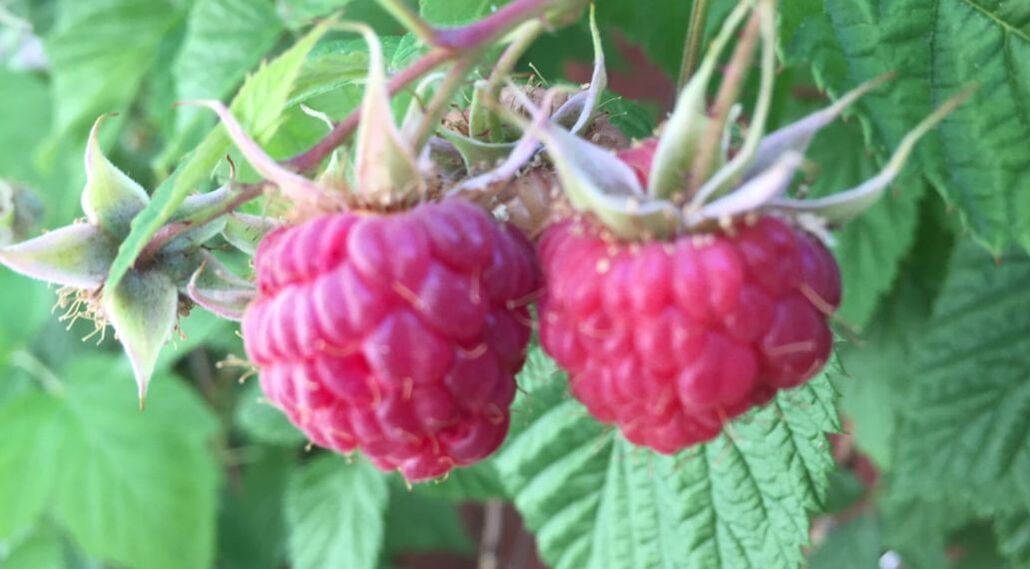 Raspberries For me, raspberries rank right up there with tomatoes for good reasons to grow your own. Store-bought raspberries rarely have the flavor or plump texture that fresh, homegrown raspberries provide. That being said, cane blight can take all the fun out of growing raspberries at home. If you know what to look for, you can prevent this disease from spreading. Cane blight is a fungal disease. The fungus responsible for cane blight goes by the name Leptosphaeria coniothyrium. It is also known as Paraconiothyrium fuckelii. [Apparently, someone hates this disease even more than I do!] Cane blight can also attack blackberries. The same fungus also causes a rose canker and root rot on strawberries. Unaffected host plants include bamboo, juniper, stone fruits, blueberries, and currants, so you may want to keep them at a distance from your blackberries and raspberries. Symptoms of cane blight This disease starts by looking similar to fireblight, spur blight, and anthracnose, but it progresses differently. Canes infected with Leptosphaeria coniothyrium will develop purplish-black lesions at wound sites. These lesions will develop into black or brown cankers that encircle the cane, causing wilt and twig dieback. Infected canes may also twist around other stems rather than grow normally. The bark may split, and the wood becomes very brittle. Leaves and fruit on those canes will wither and die but stay attached. If you look closely, you can see tiny, black fungal bodies on the wood. [Sadly, I was unable to find any photos.] 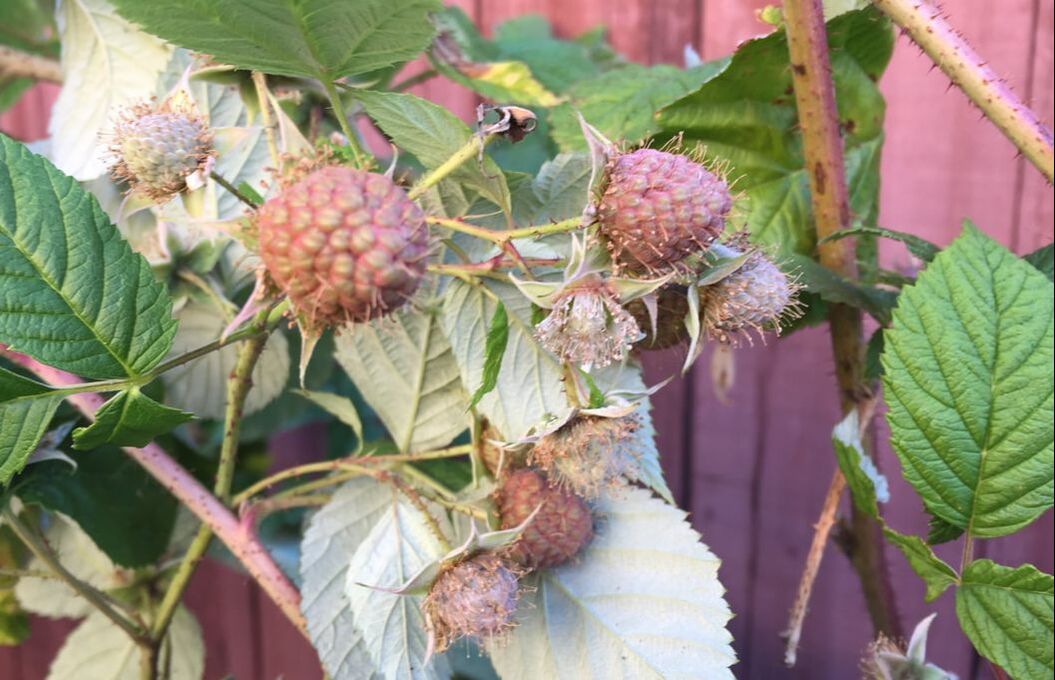 Unripe raspberries growing on healthy canes Preventing cane blight
Fungal spores can blow in on the wind and be splashed onto plants by rain, sprinklers, and overhead watering. Spores enter healthy canes through injury sites. Jagged pruning cuts, growth cracks, and damaged roots can all provide points of entry, so keeping plants healthy and protected is the best way to prevent this disease. Use these tips to help prevent cane blight on your raspberries:
How to control cane blight The only control is the removal of infected canes. The cane blight fungus overwinters on the canes, so infected canes should be removed and destroyed. Be sure to dip your pruners in a household cleaner between each cut. Remove severely infected plants. Fungicides are not effective against cane blight. Keep your raspberry plants healthy for many years of summer deliciousness! Fuzzy greenish brown skin and refreshing green fruit are what most of us know as kiwifruit, or simply kiwi. What you probably didn’t know is that there are actually many different types of kiwifruit, and that some of them can withstand temperatures as low as -40°F!  Kiwifruit and kiwi berries (Hiperpinguino) CC BY-SA 3.0 The word kiwi can refer to the smallest cousin of emus and ostriches (Apterygidae Apteryx), the people of New Zealand, or a delicious fruit that you might want to add to your garden or foodscape. Kiwifruit are native to China. Commercial cultivation didn’t start until the early 1900’s. Kiwifruit cultivars Your first decision, when growing kiwifruit, is to decide which species is best suited to your microclimate and taste. Collectively, kiwifruit are the berries of approximately 60 different woody vines in the Actinidia genus. The cultivars you see most often in the grocery are the ‘Blake’, ‘Hayward’, and ‘Saanichton’ kiwifruits. Some kiwi cultivars don’t taste good at all, but you probably won’t find them for sale at your local garden center. Nearly all of the fuzzy varieties of kiwifruit (A. deliciosa) are enjoyable to eat. Other varieties can also be quite tasty:
 Kiwifruit by species (Crowhurst et al.) A = hardy kiwi, C = golden kiwifruit, D = 'A. deliciosa', E = 'A. eriantha', I = 'A. indochinensis', P = silver vine, S = 'A. setosa'. CC BY-SA 3.0 In addition to the familiar egg-shaped kiwifruit, you can also plant fast-growing kiwi berries, a smaller, smooth-skinned version with a similar flavor. Also known as baby kiwi, cocktail kiwi, grape kiwi, and dessert kiwi, three cultivars are available:
Kiwifruit vines need a certain number of chill hours to produce fruit, depending on the variety. Be sure to calculate your local chill hours and select a cultivar that will produce fruit for you. How kiwi grows Pollination of kiwifruit is tricky. Apparently, bees are not impressed by kiwi flowers (I think they’re lovely). Commercial kiwifruit growers often have to inundate their kiwi orchards with honey bee hives, in a practice called saturation pollination, to increase the likelihood of pollination. As a home grower, you can always hand pollinate. Also, very few kiwifruit cultivars are self-pollinating. Most kiwifruit vines are either male or female (dioecious). If you want fruit from a cultivar that is not self-pollinating, you will need at least two vines, but one male plant for every 3 to 8 female plants is ideal. Even self-pollinating vines will produce more fruit if there is a male plant nearby.  Trellised kiwi in flower (A.j.morris) CC BY-SA 3.0 Like many bare root fruit trees, kiwifruit plants are generally sold as fruit producers grafted to sturdy rootstock that have been produced asexually, with cuttings. This gives you the best of both cultivars and an assurance of fruit that will be similar to the parent plant.
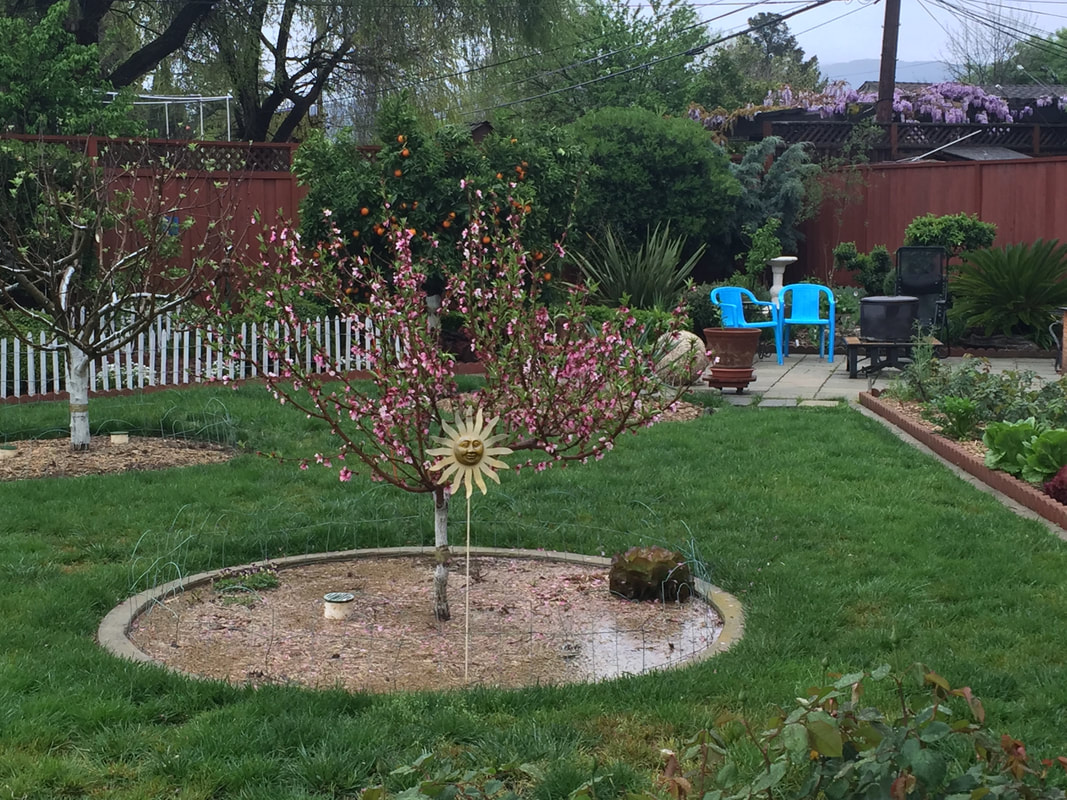
How to grow kiwi Being vines, kiwifruit grow best on a sturdy trellis or pergola. This gets the vines and fruit off the ground, provides excellent sun exposure, and ensures good air circulation. Kiwifruit vines tends to be weak, so the trellising also protects the vines from breakage. Kiwifruit grows best where it is protected from heavy winds. Vines need good drainage, but the soil must be kept moist at all times. This is a good time to put that drip irrigation system to work! Kiwis should be planted 15 to 20 feet apart, with one exception: plant one male and one female in the same hole. Caring for kiwifruit vines Kiwifruit is borne on all the canes, but production is at its peak in the first year or two. Vines should be pruned off in their third year. One way to make this job easy it to create a three-color system of ribbons or ties. Every year, simply look for a specific color and remove those vines. When you’re done pruning, use those ribbons on the current year’s growth. Kiwi vines should be fed a high-nitrogen fertilizer, once in spring and again in early summer, to give them the nutrients they need to produce all those leaves and delicious fruit. You may need to provide frost protection in winter, depending on your location and the vine cultivar. Kiwifruit pests and diseases Very few insects will bother your kiwifruit vines. Armored scale, boxelder bugs, and leafrollers are all you have to watch for. Nematodes in the soil may also cause problems. Kiwifruit diseases are nearly all of the fungal variety, although a devastating bacterial disease (Pseudomonas syringae actinidiae (PSA)) has appeared in New Zealand, Italy, and Chile. Armillaria root rot, bleeding canker, botrytis fruit rot, crown gall, phytophthora root and crown rot, sooty mold, and bacterial blight are the most common diseases of kiwifruit, in the US. Kiwifruit vines take several years to produce fruit. But it’s worth the wait! One of the many attractions of gardening is that you can play with it. We are not limited to the furrowed rows of earlier generations. You can be as creative as local growing conditions and the needs of your plants will allow. Deciding on a theme is one way to pull your garden together artistically or aesthetically.  The White Garden at Sissinghurst Castle Garden, designed by Vita Sackville-West (Pete Chapman) CC BY-SA 2.0 Themes provide a unifying framework, a story, and a uniqueness to your garden, and they can be a lot of fun. They are more artistic than simply how you grow your plants. Garden themes make it easy to decide which plants work best in a landscape, a raised bed, or even a single container, by providing a long-term, broader perspective on that space. You can create a theme based on flower color, leaf shape, or even a particular shade of green. You can create a garden theme that takes advantage of a shady corner, transforming it from a seldom used, mostly wasted space into a storybook hideaway, complete with peek-a-boo elf statues and a reading chaise lounge. [More lemonade, please!] Or, you can create a theme around a favorite book or movie, a sensory garden, or a copycat garden. Garden themes can be whimsical or more practical. Rain gardens are one type of more utilitarian garden theme.  Recently planted home rain garden (BrianAsh) CC BY-SA 4.0 Before you start your garden design, we should consider some garden planning basics. Information you will want to have on hand as you select your plants includes:
Creating a garden plan Planning a garden can feel overwhelming. Sometimes, the best way to start is to select one type of plant, often tomatoes, and grow from there. A single potted tomato, however, will not transform your landscape. You can also go to the other end of that spectrum and learn about landscape design, using boundaries, surfaces, forms, texture, color, art, and lighting to create your masterpiece. Somewhere in between those two extremes is a balance of what you want, what you have the time to maintain, and what plants need to stay healthy. A theme can help pull your garden together. Types of themed gardens Traditionally, themed gardens were classified by geographic location, terrain, or historical prototype. Using a theme narrows your options and pushes you to be more creative. Some traditional garden themes include:
But there is another way of looking at themed gardens. You can create your themed garden to create a favorite dish or holiday meal, or it may be a children’s garden, an herb garden, or an edible storybook garden. Having a theme can help guide you with plant selection. Today, we will look at some common edible garden themes, the plants that might be included in those gardens, and maybe a little garden art, just for fun. Butterfly gardens and pollinator gardens The more pollinators visit your garden, the bigger your harvest will be. You can attract bees, butterflies, honey bees, and many other beneficial insects with brilliant blooms of borage, salvia, and butterfly bush, and by allowing many food plants to go through their complete lifecycle. Carrots, caraway, celery, chervil, cilantro, cumin, parsnips, dill, fennel, and parsley are umbellifers. Umbellifers have umbrella-shaped flowers that beneficial insects love. Allowing lettuces, Swiss chard, and others to go to seed also provides nectar and pollen for these beneficial insects and hummingbirds. These plants will change shape, color, texture, and size over the course of a year, keeping your landscape interesting. Just be sure to provide a water source for all these tiny helpers. A birdbath or small fountain is all that’s needed. Just be sure to clean them every once in a while.
Unique plants, such as golfball-sized Parisian carrots and cucumbers that look like miniature watermelons (Mexican sour gherkins) add whimsy and fun to your children’s garden. Favorites, like strawberries, blueberries, and groundcherries, can create a magical play area filled with delicious, healthy edibles, curving paths, secret hideaways, and storybook reminders. [You may be surprised to discover that most children love the taste of spinach when they have grown it themselves…] Fruit cocktail gardens You may have seen grafted fruit cocktail trees available through garden catalogs. These dwarf trees usually feature nectarines, peaches, plums, and apricots, all on the same tree. You can flesh out your fruit cocktail garden with potted raspberries, blackberries, currants, and strawberries and surround the whole thing with a blueberry hedge. Imagine all that sweet deliciousness in one place! Gift gardens Gift gardens are spaces dedicated to growing gift plants. Flowers, herbs, and succulents all make lovely presents. One type of planting forward, gift gardens provide the space (and reminders) needed to have that perfect gift ready when you need a handy gift. Maintaining a gift garden ensures you will always be prepared for those special occasions.
Herb gardens Herb gardens are attractive, tenacious, and rewarding. Except for basil, most herbs will continue to grow for many years. Rosemary, lavender, and thyme add fragrance, flavor, and beauty wherever they grow. Members of the mint family, oregano, lemon balm, summer savory, marjoram, and sage are best grown in containers due to their invasive behavior. You can add chives, cilantro, and tarragon to an herb garden. You may want to add a nice place to sit and enjoy a good book. It’s going to smell so lovely. You’ll want to stick around. Holiday dinner gardens Nothing says gardener like fresh Brussels sprouts and baby beets at Thanksgiving, fresh greens at Easter, and juicy watermelon on July 4th. If you plan, you can harvest many popular holiday meal ingredients right when you need them. Beans, beets, carrots, fennel, onions, pearl onions, peas, potatoes, sweet potatoes, spinach, and tomatoes are just a few possibilities. Sage, basil, oregano, parsley, and mint can also be grown for your holiday meals. Whatever traditions your family celebrates, your holiday dinners garden can save you a trip to the grocery store and give you full bragging rights.  Pizza (HoaLuu) Needpix Pizza gardens Pizza gardens are fun. Imagine a round garden space, cut into wedge-shaped sections and planted with popular pizza ingredients. Aside from the meat and cheese, you can grow nearly every other pizza ingredient at home. Tomatoes, onions, and garlic make the sauce, along with fragrant herbs, such as basil, oregano, and thyme. You can also grow sweet red, green, orange, and yellow peppers, hot peppers, zucchini and other summer squash, and artichokes for your pizza. If you like, you can even grow an olive tree in a container, and a patch of wheat or cauliflower for the crust. If pizza isn’t your thing, you can pick a different dish and create your garden theme using those ingredients. Stir fry garden, anyone?
Your salad garden can include cucumbers, bell peppers, carrots, artichokes, corn, dandelion greens, mustard greens, fennel, jicama, and kale . You can even add a dwarf almond tree for some slivered almonds on top of that salad. If you prefer vegetables stir-fried, a stir-fry garden makes it simple to throw together a flavorful, healthy, fresh-from-the-garden meal. Carrots, onions, garlic, cilantro, bell peppers, hot peppers, and even your saffron can all be grown at home.
Tea gardens
Put aside images of a serene, manicured Japanese tea garden and imagine, instead, growing your tea. Tea plants (Camellia sinensis) can be grown outdoors in USDA Hardiness Zones 8 - 12 or indoors year-round. But, this traditional black tea is not the only plant grown for its use as a tea. You can also enjoy chamomile, mint, and lavender tea. Other options for a tea garden include lemon balm, jasmine, coriander, bergamot, hibiscus, elderberries, ginger, rose hips, raspberry and blackberry leaves, licorice, lemon grass, blackcurrants, dill, and dandelions can also be used to make tea. Pick a patch of ground today and cover it with aged compost or arborist wood chips. As you select your theme and start choosing plants, worms and microorganisms will be busy working to improve your soil. Before you know it, you will be enjoying the fruits (or vegetables and herbs) of your labor! If you see yellow spots that spread to fill the spaces between leaf veins, your melon or squash plants may have cucurbit yellow stunting disorder. Cucurbit yellow stunting disorder (CYSD or CTSDV) is a viral disease of cucurbits carried by whiteflies.
Cucurbits are popular garden plants. They include summer squash, winter squash, watermelon, muskmelons, pumpkins, cucumbers, and more. Since some whitefly species can travel relatively long distances, this disease can find your garden throughout the growing season. To reduce the chances of the infection spreading from one plant to another, it is a good idea to learn how to recognize this disease in its earliest stages. CYSD Symptoms The first symptoms of CTSD look much like water stress, as the virus begins spreading throughout the plant. Then, yellow spotting on older leaves will develop. Or, this yellow spotting may mean the plant has a molybdenum deficiency or has cucurbit aphid-borne yellow virus (CABYV). You can take a leaf sample to your nearest county farm advisor, where they will conduct a molecular test to verify the disease. If the chlorotic areas spread to the point that the entire leaf is yellow, except for the veins, it is likely to be CYSD. Small green patches may appear in the yellow areas. Other symptoms include leaves curling upwards and becoming brittle. As the virus spreads through the plant's vascular system, older leaves start to fall off, and fruit development slows or stops. Fruits that do occur are smaller, less flavorful, and more prone to pests and other diseases. Also, fruits from infected plants do not store as well as fruits from healthy plants. Controlling CYSD There are no chemical or biological treatments for this disease. Controlling whiteflies is critical to halting the spread of cucurbit yellow stunting disorder. These tips can help reduce the chances of CYSD spreading through your garden: • Only use high-quality, disease-free seeds. • Quarantine and carefully inspect new plants for signs of disease or whiteflies. • Avoid using broad-spectrum pesticides, which kill whitefly predators. • Use floating row covers over newly planted seeds and seedlings. • Remove and destroy infected plants. • Fertilize and irrigate established plants properly to keep them healthy. • Employ crop rotation. Protect your cucurbits from whiteflies for an abundant harvest this summer and fall! Licorice whips, dark, salty drops, and soothing teas all get their signature flavor from the licorice plant. Well, sort of. The root of the licorice plant is what gives us its sweet flavor. In fact, the word licorice comes from the Greek for sweet root. Licorice gets its flavor from certain chemicals found mostly in those roots. But licorice isn’t the only plant with those chemicals. Star anise, fennel, and anise, none of which are related to licorice, feature similar tastes. Most candies that are licorice-flavored actually contain very little licorice. Instead, aniseed oil is used to enhance and reinforce the flavor. A different kind of sweet Chemically, the sweetness of licorice is very different from the sweetness we expect from sugar. Licorice takes longer to register as sweet, but that sweetness lasts longer. In the Netherlands, dried sticks of licorice root are chewed as a candy. Thirty to fifty times sweeter than candy, these treats don’t hurt your teeth or your calorie count! Up until 2009, licorice root was used in the U.S. to enhance and moisturize tobacco products.
Licorice as medicine Licorice has long been seen as a treatment for upset stomach and upper respiratory illness. Countless other claims have been made about licorice as a medication, but the scientific research does not yet support those claims. What it has shown is that licorice contains chemicals that can cause medical problems. If you are pregnant, or have existing heart or kidney problems, you should not eat actual licorice root in excess. That shouldn’t be difficult, right? Licorice is a legume! The licorice plant (Glycyrrhiza glabra) is an herbaceous perennial legume. Being a legume, licorice has a relationship with certain root fungi, called mycorrhizae, that allow them to fix atmospheric nitrogen into a form the plant can use for food. Those roots (which contain most of the licorice flavor) are extensive. They can reach 3 to 4 feet deep, and the stolons can extend for up to 25 feet! Don’t let that scare you off. If you prefer, you can also grow licorice in a container.  Licorice foliage (Raffi Kojian) CC BY-SA 3.0 How to grow licorice
Traditionally, licorice was grown in Southwest Asia and the Mediterranean. The licorice plant prefers full sun to partial shade, good drainage, and slightly alkaline soil. Licorice can be propagated with cuttings, by division, or from seed. To start a licorice plant from seeds, you will need to soak the seeds in water for 24 hours before planting them 1/2 inch deep. Keep the soil moist until the seeds germinate, which should take two weeks. Germination is most successful when temperatures are around 68°F. These plants get large, so be sure to give each plant enough room to reach full size. Licorice is somewhat frost tolerant, able to withstand temperatures as low as 5°F, as long as it doesn’t stay that cold for long. Mulch around the plants to retain moisture, stabilize temperatures, and reduce completion from weeds. Your licorice plants do not need to be fertilized. Licorice pests and diseases The same flavors that make licorice so pleasant for us make it undesirable to most garden pests. Spider mites, slugs, and caterpillars are the only real pests of any concern. Powdery mildew can also be a problem. Other than that, licorice plants are trouble-free. How to harvest licorice Licorice root needs to grow for 2 or 3 years before it can be dug up in the fall. Leaving the main roots in place and undisturbed, dig up secondary roots, wash them, and store them in a dark location where they can dry. They can be kept for several months at this stage. To use, simply peel off the bark and chew or simmer out the root’s sweet deliciousness. You can also use licorice stems to make a tasty tea. This unassuming, resilient plant can fill a neglected spot in your garden or foodscape, providing a tasty diversion when the mood strikes. Who wants scabby apples? Yuck! If you see pale yellow spots on your apple leaves, fruit, and stems, that turn brown, your tree may be infected with apple scab.  Apple infected with scab (Margalob) CC BY-SA 4.0 Apple scab is a fungal disease that can defoliate your tree and destroy your crop. This disease is most common in areas with cool, moist weather in spring and early summer. This disease can also affect ornamental crabapple. Before losing your apples to the Venturia inaequalis fungus, let’s see what we’re up against. Apple scab symptoms Apple scab starts out as chlorotic (yellow) spots on leaves. Then dark, olive-colored spots appear on leaves and fruit. In severe cases, these spots may also show up on stems. If you look on the underside of infected leaves, the surface will look velvety. That ‘velvet’ is fungal growth. Affected leaves may also pucker or twist. Severe infestations cause leaves to turn yellow and fall from the tree. Infected stems can lead to blossom drop. Finally, later in the growing season, sooty or greasy grayish-black areas appear on the fruit. These lesions often have a red halo. As the fungi develop, the area becomes sunken, tan colored, and scabby. The fruit may also become distorted and crack, providing other pests and diseases with a point of entry.  Fruit and leaves infected with apple scab (Shuhrataxmedov) CC BY-SA 3.0 Apple scab lifecycle When infected leaves fall from the tree, they take fungal spores with them. These spores then overwinter on these leaves. When rain or sprinkler water hits these leaves, the spores can be bounced back into your tree, where they will germinate and start the whole process over again.  Severe scab infect of leaf (James Lindsey, Ecology of Commanster) CC BY-SA 2.5
If your apple tree(s) become severely infected, you can use fixed copper, Bordeaux mixture, sulfur, or neem oil from the time green tips appear, until the tree is in full bloom. Avoid using these treatments after that time as they can cause fruit russetting. And be sure to follow the directions for any of these treatments carefully. For example, applying sulfur within 3 weeks of using horticultural oils, or on days when temperatures are above 90°F can lead to phytotoxicity.
As you conduct a weekly inspection of your apple tree each spring, be sure to enjoy the emerging blossoms! How would you like a garden or landscape filled with plants for free? Rather than buying seeds and seedlings, digging furrows, rows, and hills, planting and watering those seeds and seedlings, and hoping for the best, you can let nature takes its course and grow a surprising number of self-seeding vegetables, herbs, and flowers without any help from you. What is self-seeding? Plants classified as self-seeding are usually annuals or biennials that tend to produce a large number of viable seeds, pods, or capsules. These seeds fall to the ground, where they then start a new crop of the same plants (called volunteers) within the immediate (and not-so-immediate) area, during the next growing season. All this productivity occurs without any human intervention. As an added advantage, self-seeding plants provide more pollen and nectar for local pollinators and other beneficial insects than would otherwise be available, and for a longer period of time.
Self-seeding plant selection and placement Self-seeding plants come in all shapes, colors, and sizes. Aeoniums, borage, marigolds, nasturtiums, poppies, snapdragons, sunflowers, sweet alyssum, and zinnias and are all self-seeding. Before installing a self-seeding plant, however, be sure to check with your local extension service to make sure it is not an invasive plant. Also, be sure to select a location suitable to long-term growth. You can introduce self-seeding plants into your garden for free simply by tossing a seed head from a mature plant into the area. The seeds will take care of themselves, providing a new crop during the next growing season. Self-seeding vegetables Allowed to follow their natural lifecycle, many popular garden vegetables will bolt and produce hundreds of seeds. While many of these seeds will rot or be eaten by birds and other critters, you will end up with more seedlings than you know what to do with. (Give them to neighbors, family, and friends, Plant It Forward style). A surprising number of vegetable plants readily self-seed, as long as your winters are not too cold: While these offspring are not always true to their parent plants, especially in the case of hybrids (names that include F1), I have found they are always delicious and edible! Open-pollinated (OP) heirlooms are more likely to look, grow, and taste like their parents. I have maintained the same four beet plants, two yellow, one white, and one red, for several years, for seed production. As a result, I have beets turning up everywhere! And the parent plants add changing shapes, sizes, and colors throughout the seasons. Endive and several lettuces are now naturalized in my foodscape. By naturalized, I mean that the plants turn up wherever they take hold. At first, they are low-growing mounds of salad deliciousness. Then, in mid-spring, a central stalk appears, drawing the plant upward in a cone shape that ends up bearing lovely blue and white flowers. After the seeds have been dispersed, I cut the plants off at ground level and feed them to my chickens. Next winter, new crops of endive and lettuce appear like clockwork, with no effort on my part. I transplant some of these volunteers to create lovely borders and accent plants. And they don’t cost me a dime.
Self-seeding herbs Many herbs are also self-seeding. Basil, chamomile, chives, cilantro/coriander, dill, fennel, lemon balm, oregano, parsley, and sorrel, are just a few favorite herbs that willful an area without any help from you. Parsley, in particular, is a super seed producer. A single parsley plant can produce the equivalent of 10 seed packets! For free! Self-seeding problems The very characteristics that make self-seeding plants so successful can also make them troublesome. Some self-seeding plants can take over an area, much the way mint plants do. Also, if a plant is prone to certain diseases, such as powdery mildew or blight, or susceptible to insects commonly found in your garden, you might need to incorporate crop rotation to break the disease triangle, or insect life cycle. If you really want them, these self-seeding plants are best corralled into containers and deadheaded frequently.
If your self-seeded volunteers turn up in undesirable locations, you can always transplant them into a more suitable or convenient spot, pull them by hand as seedlings, or mow any that turn up in a lawn. If your winters are too cold to allow self-seeding to occur naturally, you can always collect seeds from these abundant producers and use them to start next year’s crops.
Lighten your work load and increase biodiversity in your garden and landscape with self-seeding vegetables and herbs! |
Welcome!You can grow a surprising amount of food in your own yard. Ask me how! To help The Daily Garden grow, you may see affiliate ads sprouting up in various places.
You can also get my book, Stop Wasting Your Yard!  Index
All
Archives
April 2024
|
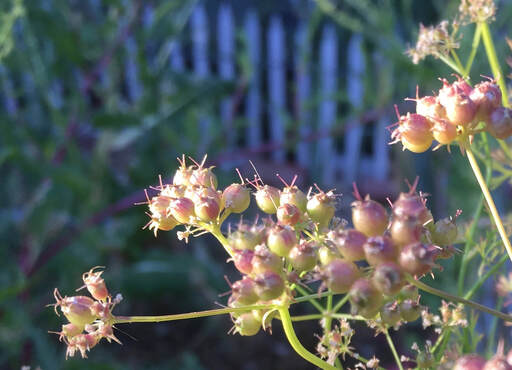
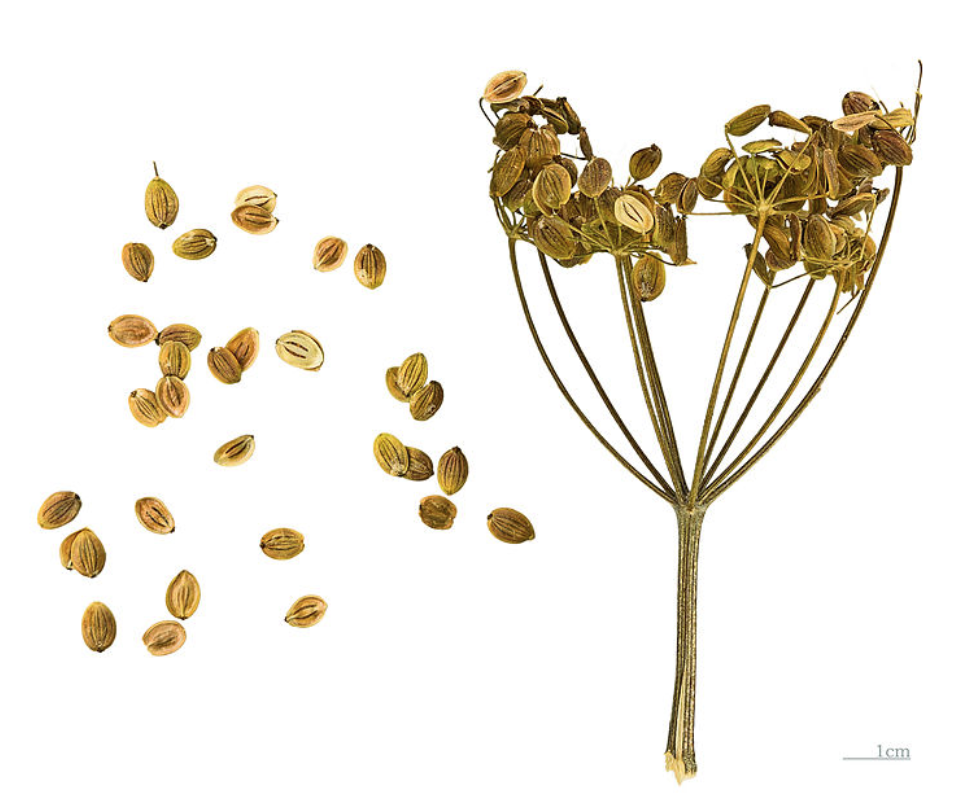


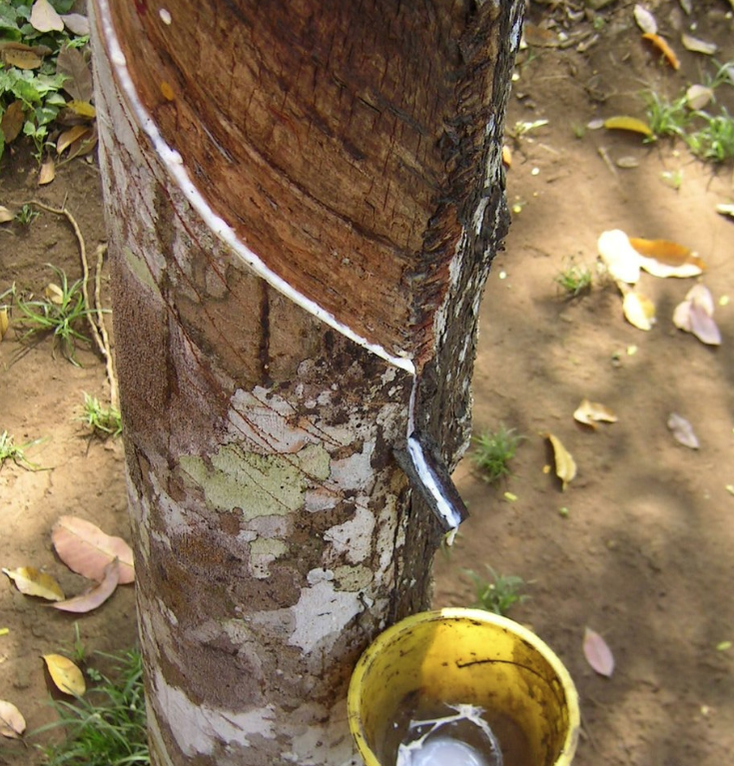

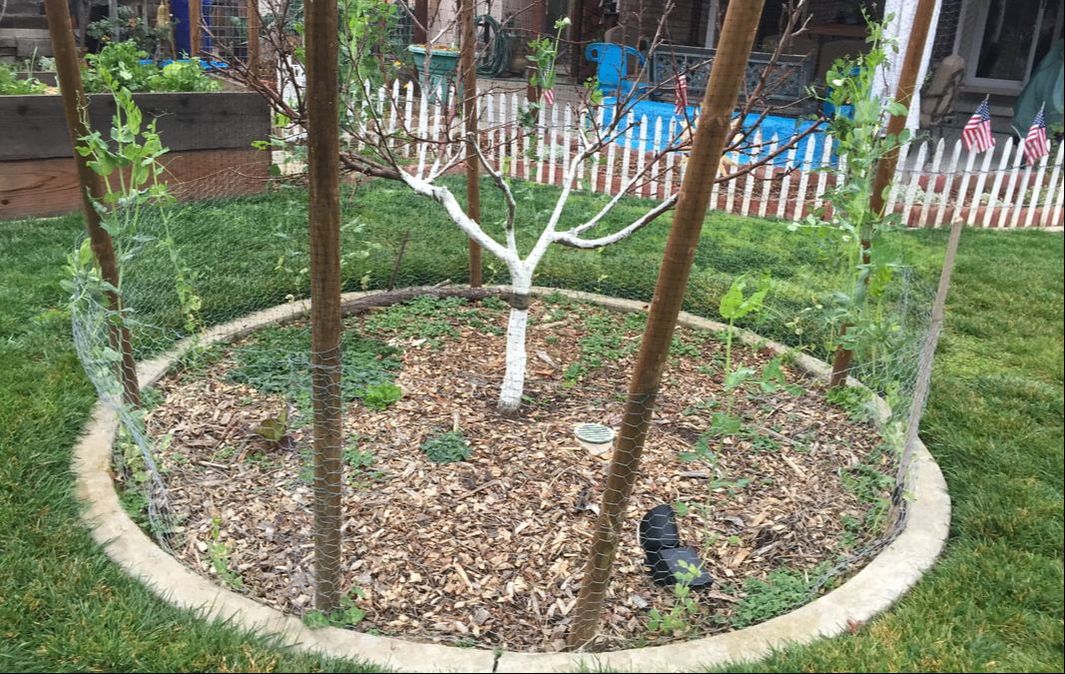

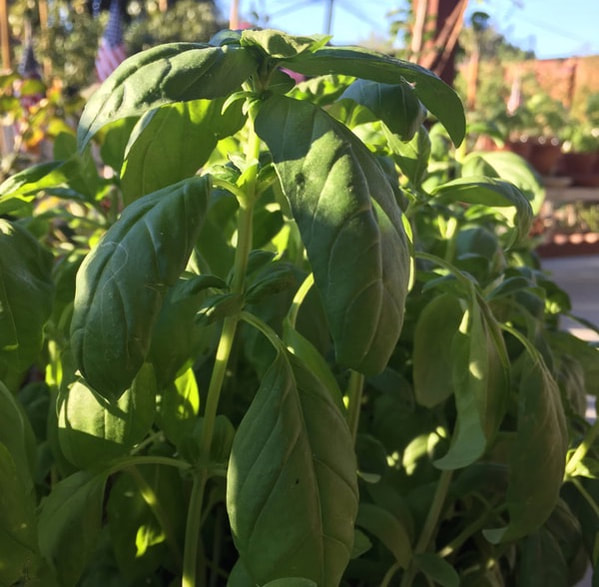
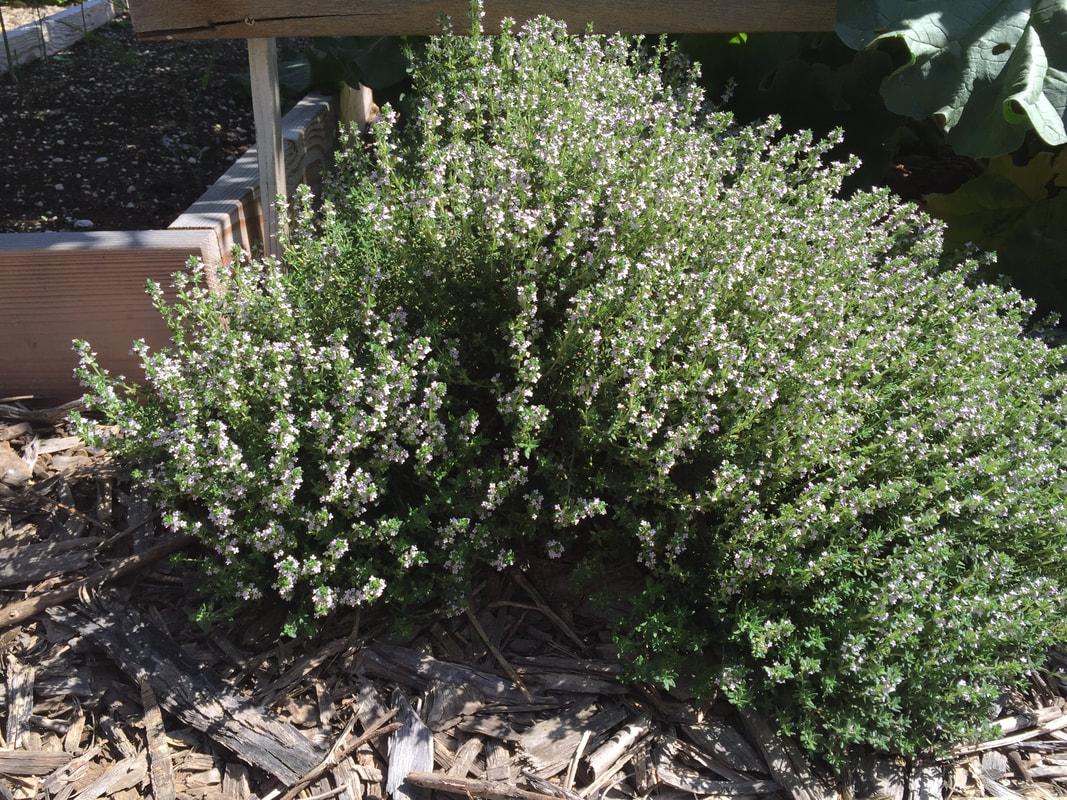
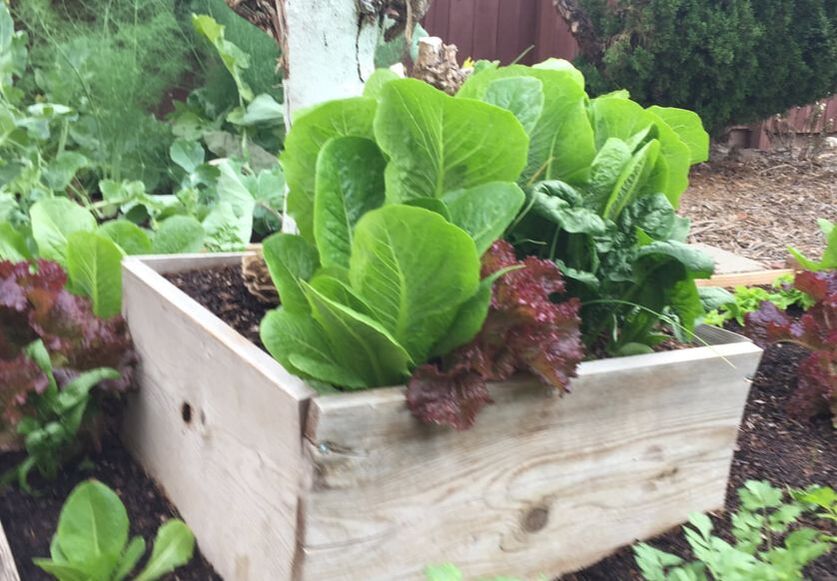


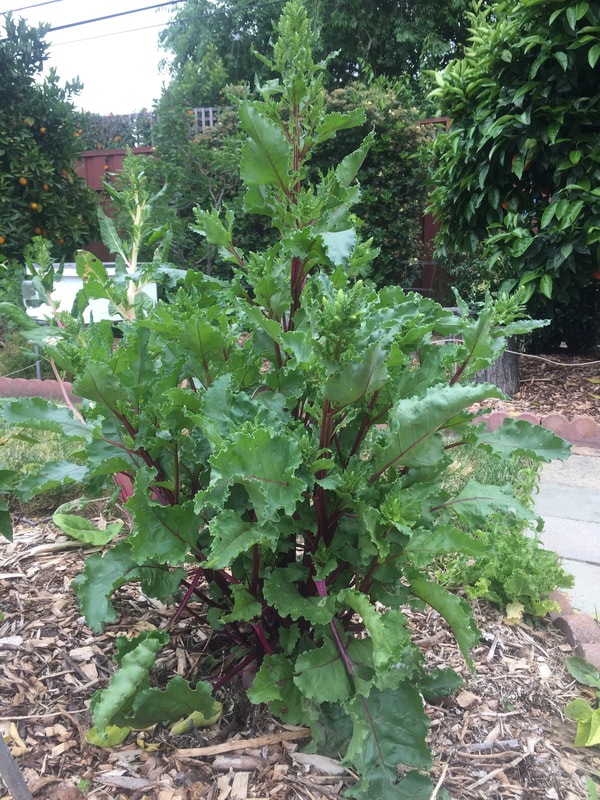
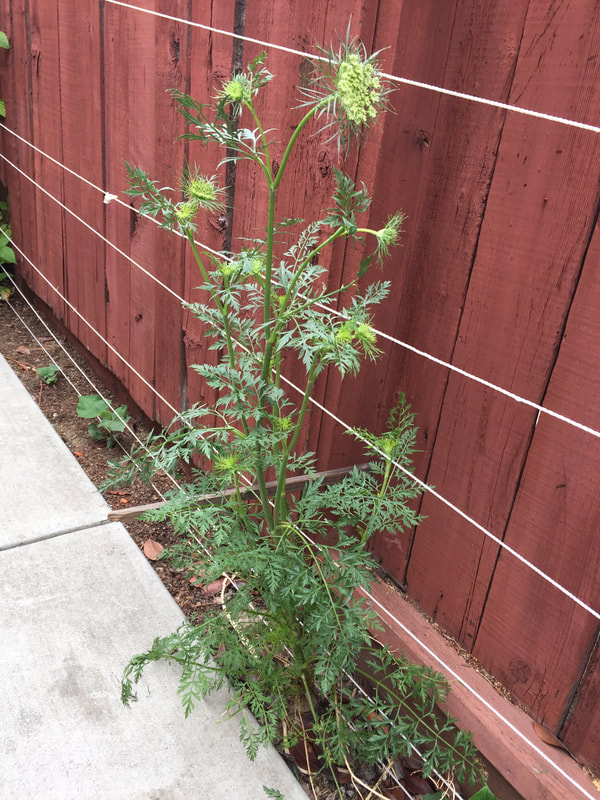
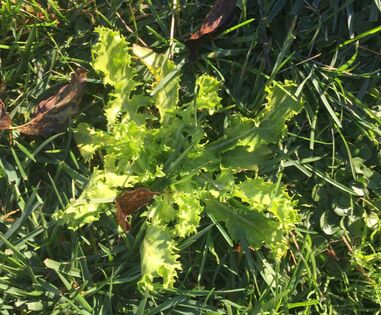
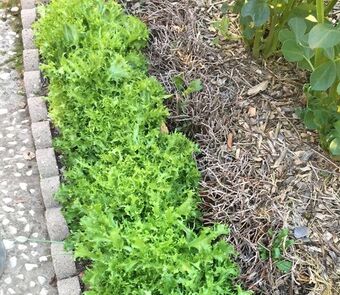
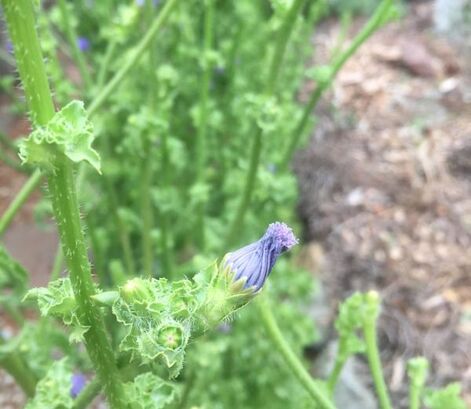
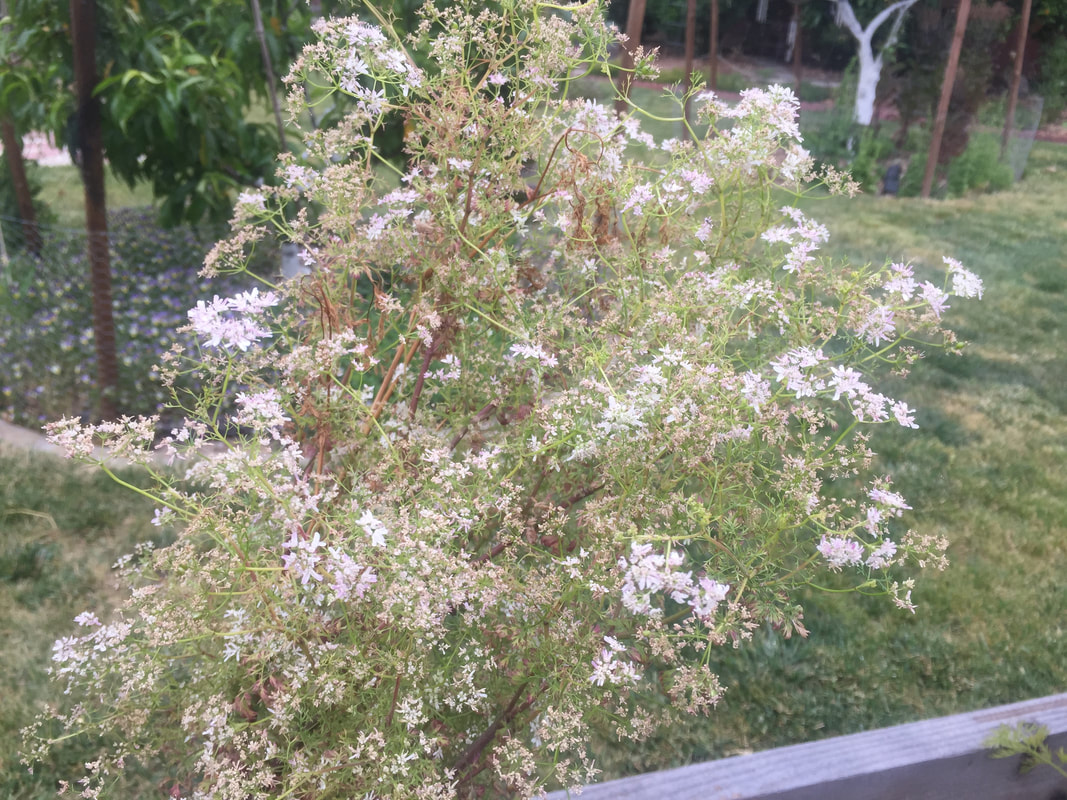
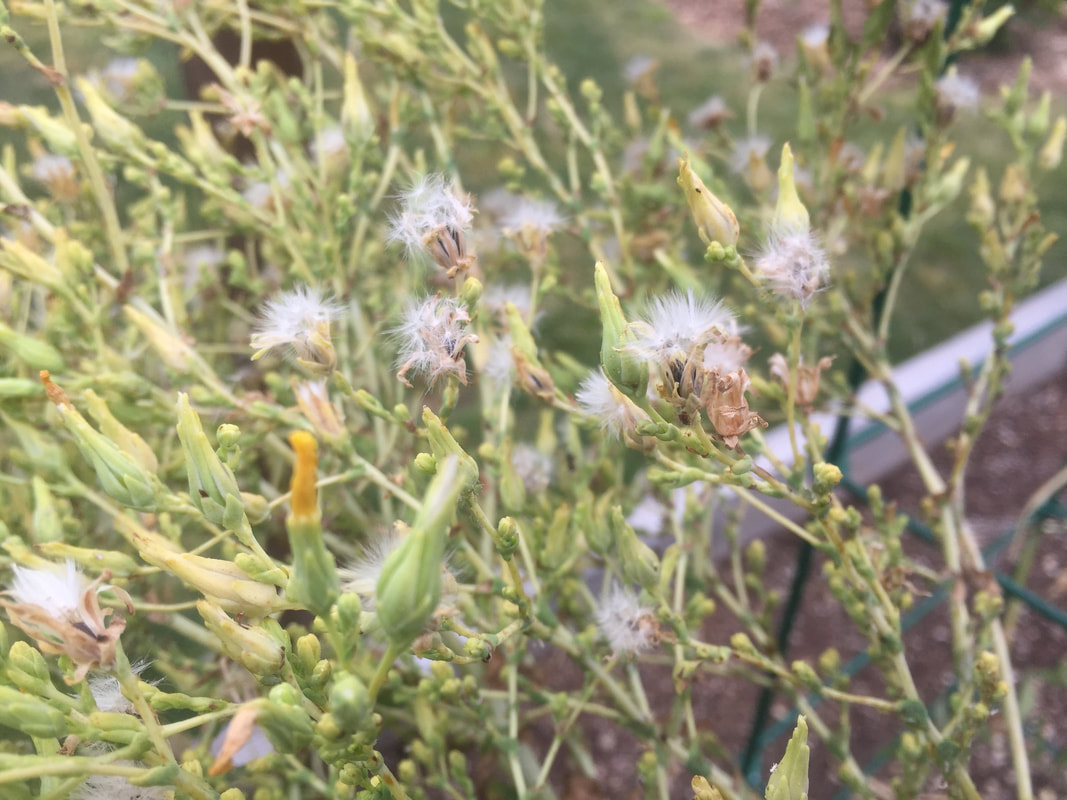
 RSS Feed