|
Fir bark mulch is made from the chopped or shredded bark of conifers, such as redwood, pine, and fir. Fir bark mulch is just one of several different types of mulch you can use to reduce erosion, crusting, and soil compaction. Mulch also helps retain moisture, reduce weeds, and it stabilizes soil temperature. As it breaks down, it even adds nutrients to the soil. Mulch can be straw, grass clippings, compost, wood chips, or fir bark. Fir bark and wood chips last a lot longer than the other mulches. Which is better for your landscape: wood chips or fir bark?  Fir bark mulch (Apostoloff) GPL Fir bark v. wood chips Wood chips come from the interior of a tree. They can be hardwood, softwood, or a combination of the two. Generally speaking, large wood chip mulches will need to be replaced every 5 to 7 years, while smaller chip mulches need to be replaced every 2 to 3 years. Fir bark, because it is made from plant material that has evolved to provide protection against the elements, lasts 7 to 10 years. Besides durability, there are other factors to consider:
 Wood chips around raised bed Grades of fir bark mulch Fir bark mulch comes in a variety of sizes, or grades:
The larger the pieces are, the bigger the spaces between them will be. These spaces allow air and water to flow through. Tiny pieces of mulch will hold more water in the soil, but allow for less gas exchange. Yes, it is a balancing act. The biggest thing to consider with fir bark mulch is the likelihood of flowing water in the area. Fir bark has a waxy coating that prevents it from absorbing water, plus it is very light, so it will simply float away. Wood chips, on the other hand, will absorb the water and are more likely to stay where they are. Calculating coverage To determine the cost of using fir bark, you will first need to calculate the area to be covered, and then deicide the depth of coverage needed. Generally speaking, mulch should be 2” to 4” thick. Newly developed areas should be given 3” to 4” of mulch, while established areas can often do with less. One cubic yard (27 cubic feet) of medium sized fir bark will cover an area of 324 square feet to a depth of 1 inch. Let me say it again: ONE CUBIC YARD COVERS 324 SQ. FT. ONE INCH DEEP As an example, let's say you have two areas that are 40 feet long and 3 feet wide, and one area that is 30 feet long and 2 feet wide. Here are the initial calculations:
= [2 (areas) x 40 (feet long) x 3 (feet wide)] + [1 (area) x 30 (feet long) x 2 (feet wide)] = [2 x 40 x 3] + [30 x 2] = [80 x 3] + [30 x 2] = 240 + 60 = 300 square feet In our example, one cubic yard of medium fir bark would give us a little more than one inch covered, since we only need 300 square feet and cubic yard provides 324 square feet. If we decide to use a 2 inch layer, we would need a little less than two cubic yards of fir bark. If you are a number nerd, like me, you could calculate the exact amount needed for a 2 inch depth (1.85 cubic yards), but that really isn’t necessary because a little extra is fine, or you can use it to top off your container plants. Cost of fir bark mulch Currently, in the Bay Area, prices for fir bark mulch average $67 per cubic yard, plus an average delivery fee of $77. A few suppliers will offer free delivery if you buy more than 7 cubic yards, but that is more than most of us will ever use. Some suppliers will also let you pick up fir bark in bags or trucks, so you can save money that way. Of course, it also means you will be picking up all that mulch One More Time. (After moving a full dump truck load of wood chips from my driveway to the back yard using a wheelbarrow, back and forth over 100 times, I can tell you that it feels like an ordeal after a while!) Nitrogen loss (and gain) If you use freshly chipped wood mulch of either type, keep in mind that it will, for the first 6 to 8 weeks, pull nitrogen from the soil as is begins to break down. You may need to add a little extra nitrogen during this time. In the long term, as the wood continues to break down, it will add nitrogen to the soil. Fir bark provides an attractive, durable, and protective covering for your soil, but wood chips are free and less likely to give you splinters. Soaker hoses are an inexpensive way to add a drip-system to your garden or landscape. While many gardening aficionados dream of The Perfect Drip System, most of us have neither the time or the money to do so. Also, drip emitters can clog and they require regular monitoring and maintenance. Hm, maybe they’re not so perfect after all, eh? Soaker hoses give similar results for far less money. How do soaker hoses work? Soaker hoses look just like other garden hoses, except they have thousands of tiny holes, or pores, in them. These holes allow irrigation water to slowly ooze out, along the length of the hose, dripping water where your plants need it most. 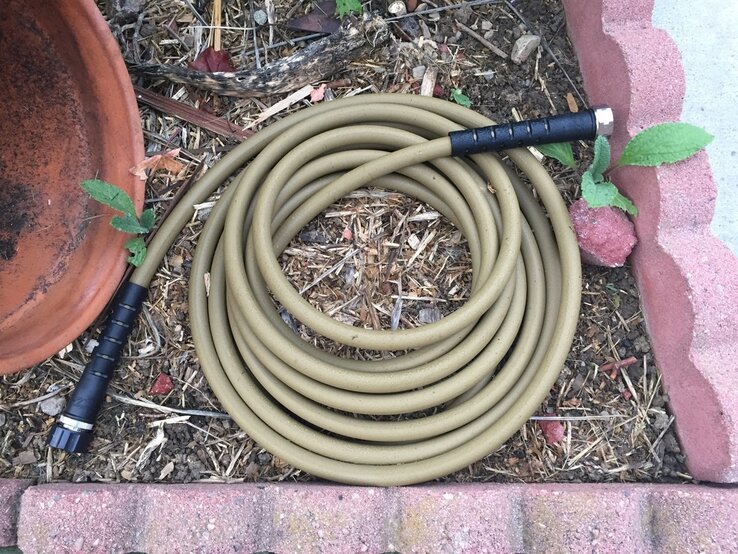 My WaterRight soaker hose Hand watering
I know that many of us enjoy a certain sense of tranquility, strolling through the garden, hose in hand, dispensing life-giving water as we go. Unfortunately, hand watering isn’t nearly as efficient as we would like to think. [Next time you hand water, take a trowel to the area and see just how much water actually made it to a root zone.] Also, overhead watering increases the chance of many fungal diseases. Benefits of watering with a soaker hose A well designed watering system can use 30 to 50% less water and get better results. Other benefits of watering with a soaker hose include:
Choosing the right soaker hose Like most garden hoses, the majority of soaker hoses currently available contain lead and other potentially toxic chemicals. Many of them are made from ground up old car tires, which doesn’t strike me as very appetizing. While they do cost more, I use food-grade hoses in my garden. Food grade garden hoses are becoming more readily available and prices are slowly coming down as they sell enough of them to cover their costs and make a decent living. They even come in pretty colors! You can find soaker hoses with built in pressure valves and quick-release connectors. You can also find soaker hose systems that allow you to connect segments of soaker hose with segments of regular garden hose for more control. Again, make sure that the materials used are durable and food-grade before you use it to water your tomatoes. How and where to use soaker hoses Soaker hoses are generally left in place for the growing season. Snake your soaker hose through your vegetable garden, looping around fruit and nut trees, or among your ornamentals. Soaker hoses are an excellent addition to raised beds and straw bale gardens. These tips will help you get the best results from your soaker hose:
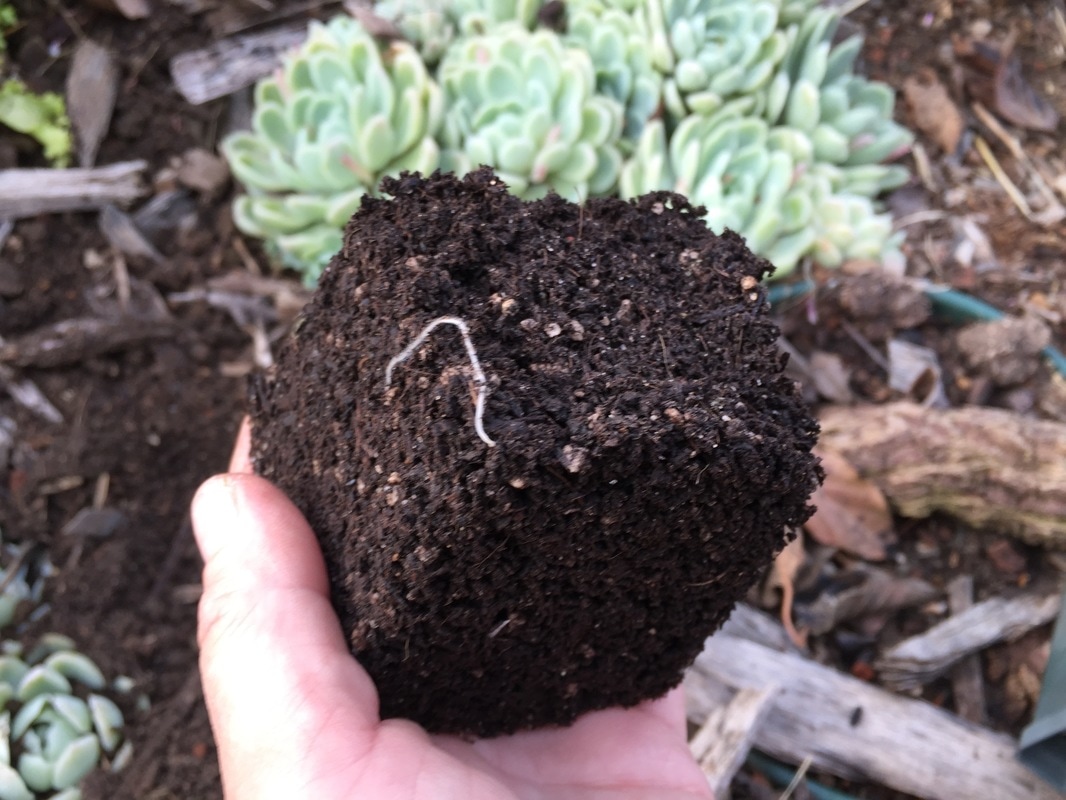
Leave soaker hoses running until the water has saturated your plants’ root zones. Since each plant is different, you really should use a trowel to see where the roots are and how deep the water is going. Monitor how long it takes for that much watering to occur, and then you can add a timer to your faucet for added convenience. Just remember that as temperatures rise and plants grow, they will need more water. It is a good idea to flush out soaker hoses a couple of times a year. To do this, simply take the end cap off and turn the water on. It only takes a minute or two. Then be sure to put the end cap back on! Invest in food grade garden and soaker hoses for better water efficiency and healthy plants. Transplanting young seedlings is a rite of spring for many gardeners. Learn how to transplant your seedlings safely and easily to help them thrive. Benefits of seed starts Some plants, such as lettuce, have very tiny seeds that need light to germinate. Planting these directly in the ground often leads to losses due to wind dispersal or rotting under too much soil. Starting these plants in containers makes it easy to monitor them closely and keep the soil moist until the seeds sprout. As seedlings grow, they can become root bound, which means the roots start wrapping around the inner wall of the container. Many store-bought plants are root bound. Before this happens, you can up-pot or transplant those seedlings. Up-potting means moving a seedling from a small container to a slightly larger container. Transplanting means moving the plant to where it will live out its life. When NOT to transplant Plants that are fruiting, flowering, infested, or infected should generally not be transplanted. New transplants need to be able to focus on building a strong root system. Also, just as some people are more sensitive than others, some plants do not take kindly to being transplanted. The following plants should be sown directly into the ground whenever possible: How to transplant seedlings For many vegetable crops, you can transplant seedlings with the first leaves (cotyledons) below the soil line. Very often, these meristem tissues will transform into root tissues, adding nutrients and vitality to your plants. Once your seedlings are a couple of inches tall, you should prepare their new home, making sure that the soil is loose. The Bay Area’s heavy clay can form an impenetrable barrier to new roots if it is left smooth from a trowel or shovel. Be sure to rough up the edges of the planting hole. Then, follow these steps to successfully transplant your seedlings:
Caring for new transplants
New transplants should be treated gently for a few days. To help a young seedling thrive in its new environment (ecesis), be sure to: Harden off seedlings before transplanting.
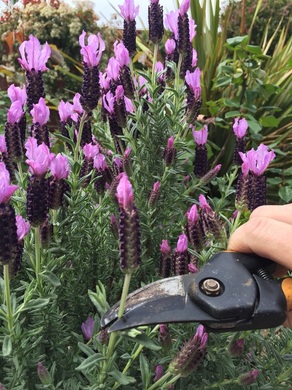
Be sure to use plant markers when transplanting. This will help you recall where everything is! As fruit trees begin putting out fruit in spring, it is your job to take some of that fruit off. It may seem counterproductive. Why on earth would I plant a fruit tree only to take the fruit off when it has only just started growing? Why would you want to reduce your crop that way? Read on and find out! Why thin fruit? Most fruit trees will produce far more fruit than can be supported or made flavorful. Too much fruit and branches start breaking. Now, the tree doesn’t care how the fruit tastes, as long as it tastes good enough to cause animals to help with seed dispersal. To get the sweetness, size, and shape that we want, we have to intervene. That starts with production pruning and ends with fruit thinning. Thinning fruit also helps reduce the likelihood of pests or diseases getting established in the nooks and crannies between fruit. Finally, fruit thinning reduces the chance of your tree taking a year off of production (alternate bearing) out of sheer exhaustion. How (and when) to thin fruit trees Different trees have different thinning needs. Generally, the time to thin fruit is dictated by fruit size. Stone fruits are thinned when they reach 3/4 to 1 inch in diameter, while pome fruits can be thinned when they are 1/2 to 1 inch. You can also predict the time for thinning by noting it 30 to 45 days after full bloom on your calendar. To actually remove the fruit, give it a gentle twist. Sometimes, pruners are needed. Your fruit tree is working very hard at this stage, so be kind. Do not be tempted to thin your fruit trees too early, as this can lead to split fruit later on, especially in peaches. Of course, thinning too late won’t help your fruit become as large as it might have. Fruit thinning by species Some trees do not require thinning. These include cherries, figs, citrus, Bartlett pears, pomegranates, and persimmons. You may want to monitor your persimmons tree, however, as a very productive year can lead to breakage. Use this information to determine just how much to thin, depending on tree species:
Natural fruit drop We are not the only ones who want to protect our fruit trees from breakage due to too much fruit. These trees have evolved to protect themselves with what is erroneously called “June drop”. June drop can occur late spring through early summer and it refers to a fruit tree dropping many immature fruits. Fruits that are diseased or infested may also drop prematurely. Don’t be afraid to get up close and personal with your fruit trees in spring. Thinning fruit will ensure a better crop and a healthier tree. Thinning also gives you a chance to see what’s really going on for your fruit trees, allowing you to halt a minor pest invasion before it causes any real damage. For those of you (like me) who need ways to remember what and how to thin, give this a try: Spring season of thinning, no need to despair
Help them grow stronger with inches to spare Small apricots and plums, give them each two to four Peaches and nectarines, need three inches or more Then muster the clusters of apples and pears Save just the biggest, only one or two there Mutants and mummies and twins all must go Leave only the best. Now just watch them grow! -KR Renewal pruning is a method that stimulates new growth while removing unproductive wood or canes.
According to some, renewal pruning refers specifically to plants that produce canes from the root system. I am going to use the broader definition above. The general rule of thumb for renewal pruning is to remove one-third of any older wood each year. These are thinning cuts that take branches back to the main stem or crown, depending on the growth habit. [When making thinning cuts, be sure to avoid damaging the branch collar.] Each species has its own characteristics, which need to be taken into account before you start lopping off branches. Some of the more common approaches to renewal pruning are listed below. Renewal pruning of currants Currants produce fruit on spurs that emerge from 2- and 3-year old wood. After that, those limbs are far less productive. Use the following pruning schedule on currants:
Renewal pruning of fruit trees Fruit and nut trees produce fruit on spurs and on twig tips. Some species only produce fruit on new spurs, while others can use the same spurs for several years. For example, figs, grapes, persimmon, and quince produce fruit on new shoots and one-year old wood. Pears, walnuts, and apples, on the other hand can produce fruit on the same spurs for several years. UC Davis offers a chart of fruiting wood characteristics that can help you decide what to remove and what to leave for another year. Did you know that large, unproductive branches are called bulls? I didn't either. Renewal pruning of raspberries and blackberries Some varieties of raspberry and blackberry produce fruit on primocanes. These are fall-bearing varieties that produce the best fruit on first-year canes. While leaving them in place will provide some fruit the following spring, the quality and quantity are usually poor. For these berries, it is better to cut the canes back to ground level in late autumn. This gives the plant time to pull carbohydrates from the leaves down into the crown and root system. These nutrients will be used to grow new canes in spring. Summer-bearing floricanes produce fruit on buds from second-year canes, so removing them at the end of year one would be problematic. Rejuvenation pruning Some trees and shrubs can become so out of control that they risk falling over, severe disease infestation, or they simply look awful. In some (but not all) of these cases, rejuvenation pruning can be used to give them a new start on life. These plants are cut to ground level and allowed to start over from an established root system. Before you try this method, be sure to research the plant to make sure this is an appropriate choice. Cutting back some plants in this way will kill them. Whole tree pruning Traditionally, trees that produce fruit in new growth, such as cherries, are pruned by removing selective branches. Another method being studied is whole tree pruning, in which all the major limbs are removed each winter, leaving only 12 to 18 inch nubs. This method is not for the faint of heart, but it is gaining popularity among commercial growers. Don’t be afraid to prune your trees and shrubs. It is an excellent way to help your plants to stay healthy and productive. As you move around under the canopy or peaking into the center of your shrub, you may even discover a new pest or disease before it gets out of hand! Starting seeds is the joy of spring gardening. It reflects confidence in natural cycles, the self-discipline needed to plan ahead, and the patience to wait for results. 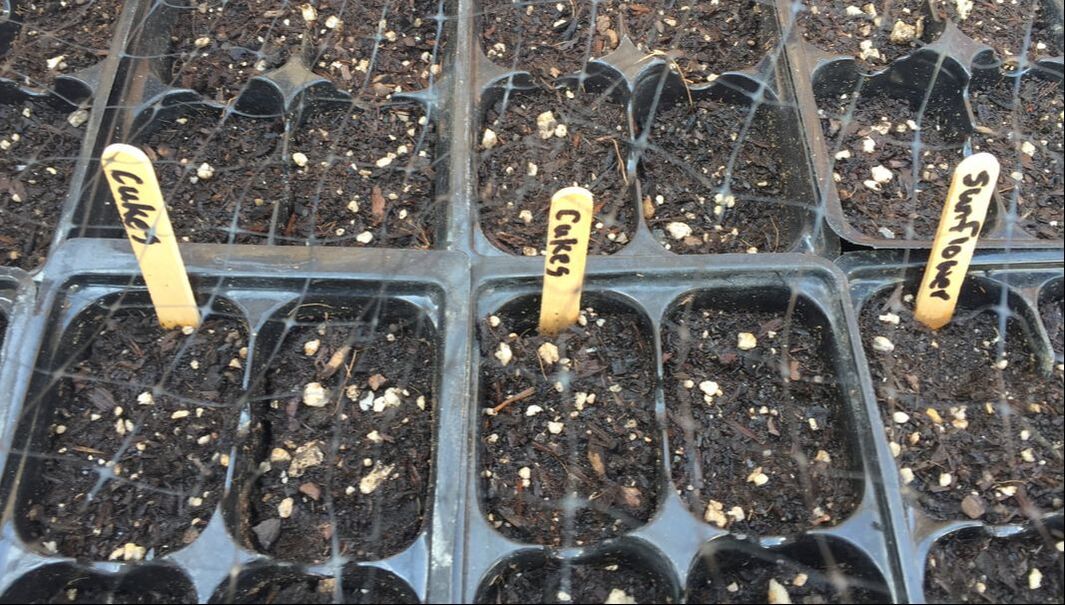 Seed starting As an experienced gardener, it is all too easy for me to take some tasks for granted, having done them for so long. My husband pointed out the error of my ways last summer when, during my annual desert outing, the aboveground portion of our backyard lawn died. He protested, saying it wasn’t his fault, that I had told him to not water it. My (incorrect) assumption was that he would know the difference between watering for growth and watering for survival. The mistake was mine. In an effort to avoid the same problem for beginning gardeners, this set of instructions will walk you through one of my favorite spring gardening activities: starting seeds. Seed selection Before you can plant seeds, you need to figure out what you want to grow. You will also want to ask yourself if you want only organic seeds, open pollinated seeds, or hybrids. Browsing through seed catalogs can be intoxicating. Rather than ordering everything that looks good, ask yourself which plants are:
Soil selection Some seeds can be planted directly into the ground. This is called direct sowing. While all growing areas will serve your plants better if they are fed with aged manure and compost, this is not particularly true for seeds and seedlings. Compost is swarming with microbial activity. Some of those microbes might cause problems for tender new growth. So can too many nutrients or, more commonly, nutrient imbalances. Simply adding nutrients on a schedule, whether as fertilizer or compost, backfires more often than not. Too many nutrients is just as bad as not enough. In some cases, it is worse. So get your soil tested by a reputable lab before you start transplanting or amending the soil. It will save a lot of time, money and effort later on. Seeds are better off started in small pots filled with high quality potting soil or starter mix. You can also use soilless mixes. Do not use planting soil. Planting soil, also called topsoil, is formulated as a soil amendment to be added to the ground. Potting soil is a special mix of vermiculite or perlite, peat moss, and/or shredded pine bark that are added to the soil to make it easier for containerized plants to thrive.
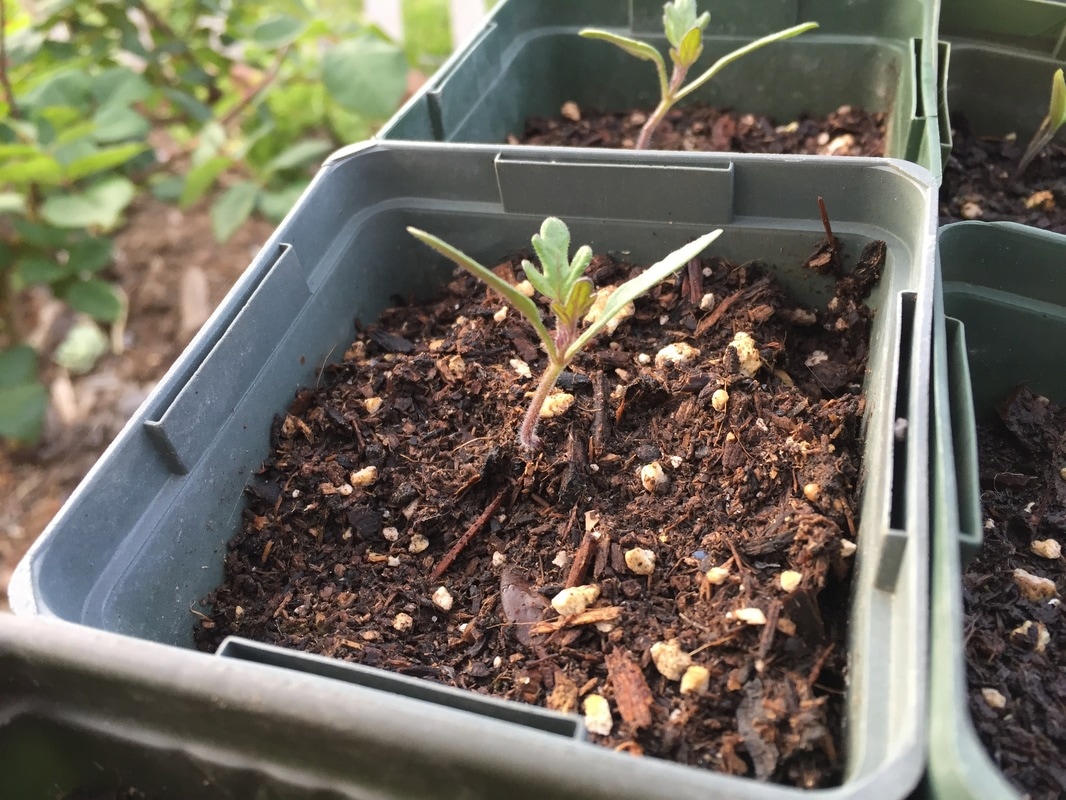
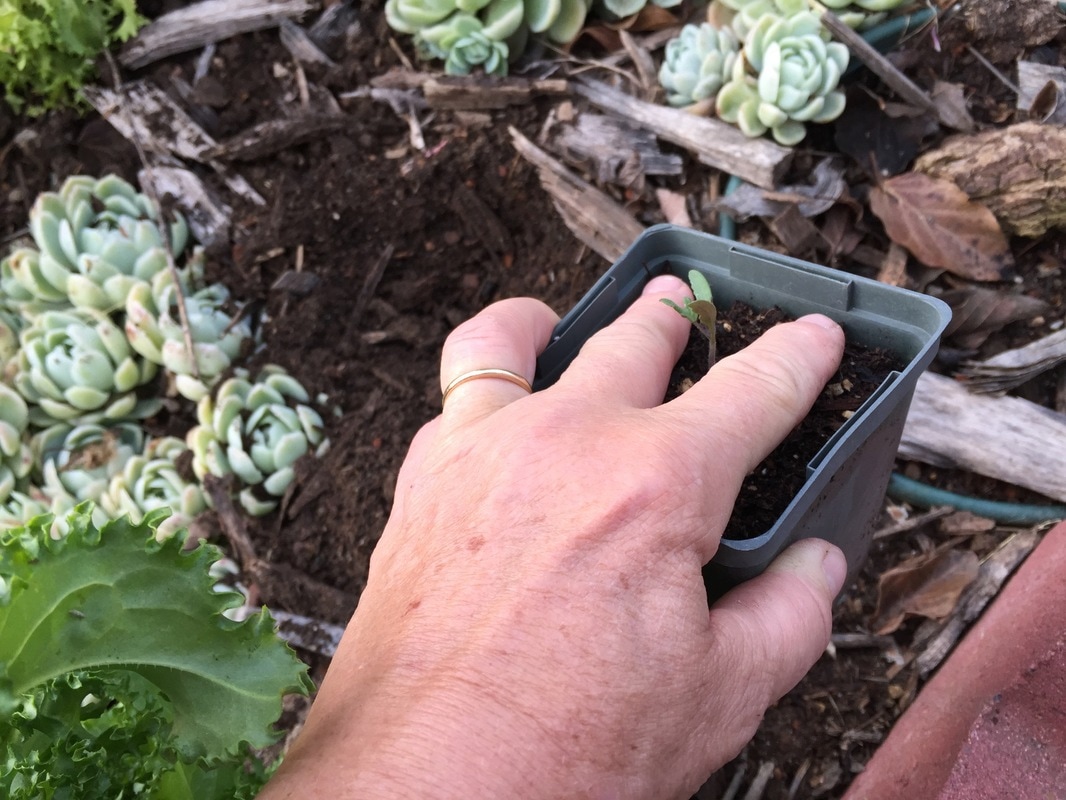
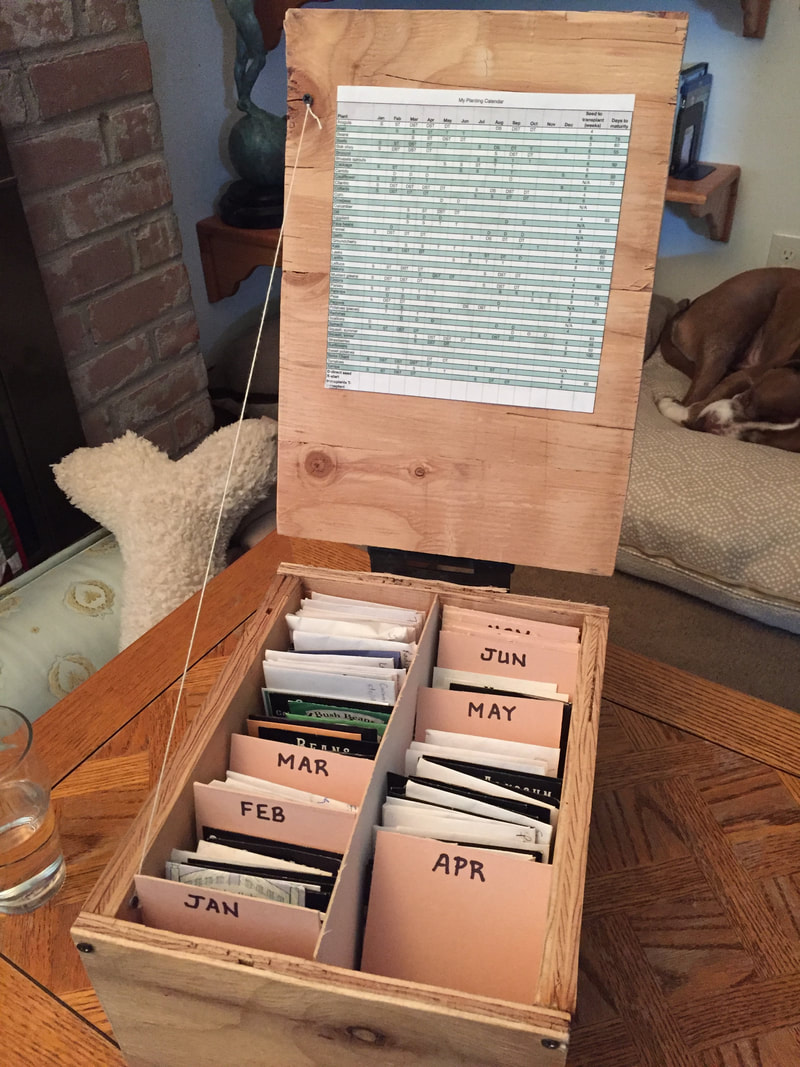
Your seeds have a much higher chance of success if you use this information. I save seed packets for future reference. Some gardeners turn emptied seed packets into plant labels. I have found that the paper packets don’t last very long, exposed to sun and rain, unless they are in a plastic bag. Instead, I have a plastic bin with a tight-fitting lid that holds all my seed packets, empty and full, in alphabetical order, for easy access. Select containers I have found that starting seeds in small containers is the easiest. Placing one seed into each small container allows tiny roots to develop unchallenged. It also makes transplanting less stressful, since you don’t need to pull entangled roots apart from multiple plants. [Leeks and scallions are the only exception. They prefer sticking together and it doesn’t hurt them to be planted in this way.] Personally, I hang on to those plastic seed starting pots, called “cell flats” whenever I buy seedlings. It is important to clean and disinfect them each year to avoid spreading pests or diseases from one year to the next. Old cell flats should be soaked in a household cleaner, such as Lysol, for 30 minutes to eliminate pathogens. Once I have used up all of my cell flats, I turn to seed starting containers that can be planted directly into the ground, once the seedling is strong enough. The following biodegradable seed starting containers can be made or gotten for free:
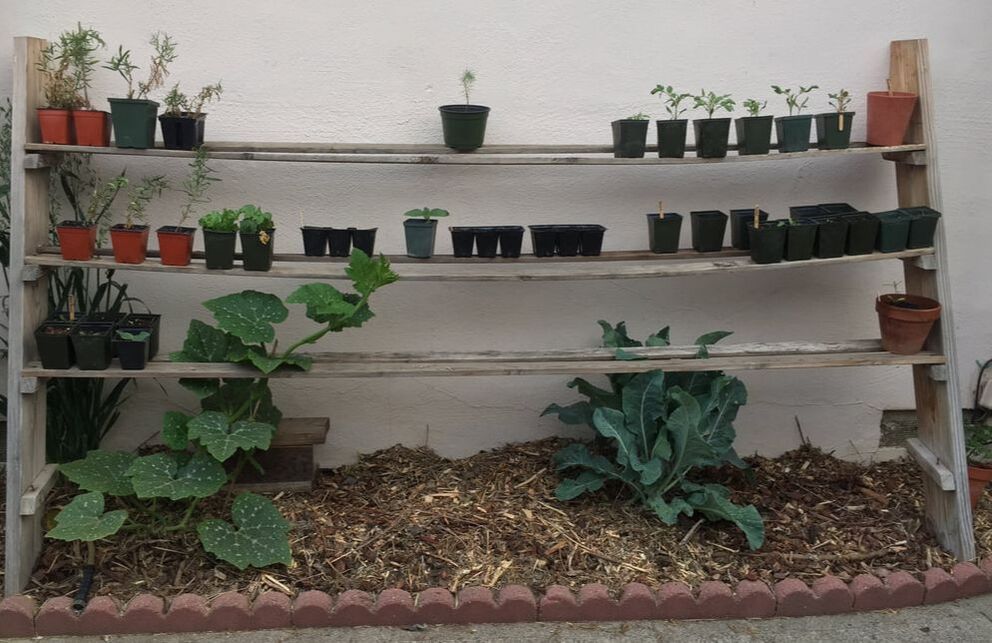 Up-potting seedlings gives them room to grow more roots before transplant time .You can also buy biodegradable seed starter pots made from peat moss, shredded wood, or paper, or sterilized manure (for extra nutrients). Many people save take-out food containers, with clear plastic lids, for seed starting. The plastic covers keep warmth and moisture in. Just be sure to remove them as the plant gets taller!
Start planting! I’ll bet you thought I’d never get to it! Just like painting, planting is far more about preparation than the actual name implies. Once you have your seeds, containers, and potting soil, I strongly urge you to collect a pen or marker and a bunch of popsicle sticks or other material to use as a plant label for each cell flat or other collection of starter pots. Please believe me - I speak from experience. It really stinks when you forget to do this because many young plants are very difficult to tell apart until they are long past the transplanting stage. I have a container that we use to collect popsicle sticks throughout the year. Come spring time, they are very handy. Follow these steps for successful seed starting:
As difficult as it may be to wait for warmer temperatures, seeds planted too early tend to grow into spindly, less productive plants. Using the seed packet information is to your advantage. Now your seeds are started and the waiting begins! Use this time to prepare garden beds, raised beds, containers, towers, and other planting areas so they will be ready when it is time for transplanting! Hardening off is a process that acclimates new plants and seedlings to your microclimate. When a plant finds itself in a new environment, it must make several adjustments to all the changes. This is called ecesis. Sudden changes in temperature, sun exposure, and wind can be fatal to plants raised in a greenhouse. Most plants sold commercially are raised in greenhouses. Greenhouses are generally warm, moist, protected areas that allow plants to get a good start. It does not, however, prepare them for the outside world. Many nurseries use equipment that bends the plants over, back and forth, a few times each day, in an effort to mimic the effects of wind. This strengthens the plants through a process called thigmomorphogenesis. It helps, but you can significantly help new plants become acclimated through hardening off.  Tomato seedlings (Golden Hound) CC BY-SA 3.0 When to harden off plants
Since all newly acquired plants have the possibility of carrying pests or disease, it is always a good idea to start them off in a protected quarantine area for 40 days. This gives you time to watch the plant for signs of infection or infestation. It also provides an opportunity to see what conditions best help the plant thrive, and it gives you time to carefully decide where in the garden this new plant will go. Depending upon the climate tolerance of the plant species, you may have to wait until it is a couple of weeks before your last frost date before you begin hardening off. How to harden off plants Plants should be brought outside for a few hours each day, at first. They should be in a location protected from wind, with filtered or morning sunlight. Increase the amount of time and sunlight by an hour or two each day until they are outside all day. If temperatures allow, plants can now be left outside overnight. If you are growing plants in a cold frame, you can harden them off by opening the frame a little more each day until the lid is no longer needed. Hardened off plants can now be installed in the landscape or garden, with a significantly higher chance of success. Which plants need hardening off? Generally speaking, bare root stock does not need hardening off. There are no leaves to dry out or get sunburned. Young blueberry plants, garden sale seedlings, and seeds you have started yourself indoors will all benefit from hardening off. By gradually getting plants used to your microclimate, they are more likely to thrive. What kind of plant is that? Um, well… Has that ever happen to you? It happens to me a lot. I will plant seeds in what appears to be the ‘perfect spot’, confident that the location will trigger a memory of what I planted there, except that sometimes it doesn’t. Sometimes, I have no idea what it coming up. In those cases, I have to wait until the plant reaches a recognizable size. That’s fine when it turns out to be what I planted, but it’s a waste of soil, sun, and space when it turns out to be a pesky weed that has choked out the intended resident. Using plant markers is a handy way to remind yourself of what is planted and where. This can help you take better care of your plants, especially when it comes time for feeding, propagating, or transplanting. Plant markers can also be used as lovely yard art. Here are several ideas for free (or nearly free) plant markers for your garden.  Carrot plant marker Popsicle sticks If your family eats popsicles, have them save the sticks. This works best if you create a place for them to collect: a cup, box, planter pot - something convenient. These wooden sticks will not last forever, usually no more than a single growing season, but they are fabricated with the intention of touching food, so I assume they are relatively safe. Popsicle stick plant markers absorb gel pen and marker colors nicely, so you can make them look colorful and easy to read. These plant markers are an excellent choice for seed starting. When the begin to wear out, you can simply toss them into the compost pile. Rocks I used to own a private school, called Children’s Academy, in Virginia. We were on three acres and had a vegetable garden, a butterfly garden, and a wide variety of trees, shrubs, and other plants. I encouraged my students to go out and select a plant, conduct research, and identify it. Whoever identified it first was given the opportunity to select a large rock, paint the common and scientific names of the plant on the rock, and then place it near the plant. The kids seemed to enjoy it (they became a bit competitive about it, at times) and the rocks made beautiful reminders of what was growing around our school. You can do the same thing in your yard, especially for the perennials.
Wood wheels
If you have a log or decent sized branch laying around, and a saw, you can cut disks of wood that make lovely plant markers. This requires some effort if you do not have a power saw, but it is certainly do-able. The wood grain looks really nice, without standing out too much, and the edge can be sunk into the soil enough to make it stand up or you can lay them flat. Yard sales & garden markets Yard sales and Master Gardener events are excellent sources for low-cost garden tools, and plant markers are no exception. Flatware, old mugs, saucers, and many other durable materials can be had for practically nothing and then painted with plant names. Give yourself permission to be creative. Heck, go for flamboyant! You can add a touch of your personal creativity to the garden or landscape while making it easier to recall where all of your plants are! Imagine a world without cabbageworms, leafminers, or whiteflies… Or one without Sudden Oak Death, bacterial spot, or tomato yellow leaf curl… Such would be our gardens, had quarantines been in place and enforced sufficiently. Alas, it is not to be. Imported plants that are not adequately inspected, nursery stock that is sold in spite of being infected or infested, and the use of grocery store produce to start a garden are responsible for a profound amount of damage to the environment. According to The Nature Conservancy, invasive species cost the U.S. economy $120 billion each year. The U.S. Forest Service echoes those figures, adding that 81 million acres of American soil are at risk due to these pests and diseases, and that 42% of threatened or endangered species are being pushed out by these invasives. Scale those figures down to the size of your garden and decide for yourself if it is worth the risk.  What is a quarantine?
To quarantine something means to keep it away from everything else, for a period of time, to avoid the spread of disease. In the world of plants, quarantines are used to halt the spread of diseases, pests, and other plants (weeds). In Italian, quarantina means 40 days and that’s where we get the idea behind quarantine. By isolating plants for 40 days, you are more likely to see signs of pests, diseases, or weeds, before exposing all of your other plants. When to quarantine a plant? Plants that are new, infected, or infested should be quarantined whenever possible. The easiest case, and the most useful, is when you bring a new plant home. As much as you want to add it to the landscape, 40 days in quarantine can prevent a whole lot of work later on. Plants new to your property can never be guaranteed disease-, pest-, or weed-free. Blithely adding it to your landscape may work out fine, or it may introduce a devastating disease that can stay in the soil for decades, introduce pests that you will have to battle every year forever after, or add even more weeds to your To Pull list. To avoid these risks, you can place new plants in quarantine until they have shown themselves to be safe for your garden or landscape. Containerized plants that develop problems are pretty easy to quarantine. Established plants are a bit more difficult. How to quarantine Ideally, new plants should be kept separate from all others for 40 days. This is especially true for houseplants, because there aren’t very many natural predators in your livingroom. This can be done by placing the latest addition in a different room, across the room, or in a clear plastic bag. The bag method is the most effective because it creates a barrier that you can see through. Established plants, such as fruit trees, are difficult, if not impossible to quarantine. In cases such as Citrus Greening, trees must be destroyed. If you suspect an invasive pest or disease in one of your established plants, contact your local County Extension Office for help. Alternatives to quarantine Some of us can’t (or won’t) invest 40 days of waiting before adding a new plant to the garden. When this is the case, use these tips to reduce the likelihood of problems:
Government mandated quarantines In 1912, the Plant Quarantine Act was enacted, giving the U.S. government the right and responsibility of preventing the spread of pests and diseases through nursery stock and other plants. This act evolved into the Plant Protection Act of 2000. If you’ve ever driven across the California state line, you have seen the inspection stations and you may have been required to hand over an apple, a bag of green beans, or a butternut squash before being allowed in. From a visitor’s point of view, this Orwellian treatment may feel extreme, but it’s not. In fact, too many invasive pests and diseases are making their way around the globe because of too few precautions. Grocery store produce As tempting as it may be (I know, I’ve done it), do not use grocery store produce to seed your garden. Garlic, onions, and leeks look easy to start from your discards (and they are), but they can also carry fungal diseases that will never go away. Take a look at the current list of current quarantines in California to see some of the other vulnerable crops. To quarantine or not to quarantine? That is the question. The answer is up to you. As you think it over, consider the fact that many pests can generate a surprising number of offspring pretty quickly. For example, a single aphid can turn into 600 billion descendants in a single season, according to entomologist Stephen A. Marshall. Forty days of caution, or a lifetime of reactionary treatment. Ecesis (eh-SEE-sus) is the establishment of a plant in a new habitat.
According to some, ecesis refers to plants becoming newly established in areas that were barren or previously devastated. However you define it, a better understanding of ecesis you to help your plants thrive. Note: In the past, I have lived in duplexes whose tiny patch of soil was nothing more than a moonscape. Apparently barren, it didn’t take long to create a lush, edible landscape. Before you start, however, you need to know that each time you plant a seed, install a seedling, or transplant an established plant into a different container or location, ecesis is a factor. Established plants Once a plant is established, there is a whole lot more going on than meets the eye:
Moving this plant to a new location, or into a bigger container, is a shock that can slow or halt growth, temporarily or permanently. Soil microorganism must repopulate the area. Roots that are damaged or overly stressed during transplanting mean less water and minerals available to the aboveground portion of the plant. (Ever have a plant wilt on you after transplanting?) Below, you can read about the many factors of ecesis that may impact plants being added to your garden or landscape. Light and temperature Significant changes in light and temperature can be devastating, or they can be necessary to a plant’s development. Some plants won’t put out fruit without enough chilling hours. Some seeds won’t germinate without being exposed to fire or ice or other damage to the seed hull. Most plants need a period of acclimation, called hardening off, when moved from one environment to another. Too much sun all at once and tender seedlings can be scorched. For your plants to be the most successful, choose varieties suited to your microclimate, be it a balcony, a farm, or a suburban yard. Wind and other airs Plants added to an environment with more wind than they are used to are going to need more water. Wind dries plants out. Wind can also blow containers and tall plants over, risking breakage. Placing containers against walls or tying plants to stakes can help prevent these problems. Insufficient air flow, whether through plant structure and improper pruning, geography, other plants, or fencing can increase the chance of fungal diseases occurring. Problems with pavement Plants installed near sidewalks, driveways, and buildings face a unique set of potential problems. The pavement and concrete create a heat sink, exposing plants to much more heat than is good for them. Also, these structures are usually designed to move water away, which means plants may need extra irrigation. And even easier solution is to select plants that can handle a lot of heat and very little water. Container plants grown in dark colored pots face similar problems. The dark color absorbs heat and the limited amount of soil can mean frequent drying out. From whence they came Where a plant came from should always be taken into account when installing it someplace new: Containers If a container plant is being moved into a larger pot, it is a good idea to keep it in the exact same environment, or a slightly more protective version of the same place, until the roots have a chance to recover. Nurseries Plants grown in nurseries are accustomed to climate-controlled warmth and moisture; they are often infested with aphids and other pests; they may have been sprayed with pesticides, fungicides, or herbicides; they may be carrying diseases or weed seeds. It is a good idea to have a quarantine area for all new plants that reduces stress to them and the chance of infection to established plants. Soil Seeds started in potting mix and container plants that are used to loose soil will need some help when being transplanted into the ground. This is especially true in the Bay Area, where we mostly have heavy clay soil. If you dig a hole in the ground, be sure to rough up the sides of the hole. Smooth clay is almost as impenetrable as a ceramic pot. Just as we need a period of time to get used to a new home or job, plants need a little TLC when they are moved into a new environment. Providing this care ensures that the move will be a successful one! Have you ever seen trees with knobby limbs, bare of all leaves and twigs? It’s called pollarding. Pollarding is a pruning method that limits the size of trees and shrubs. Unlike shearing, which trims everything past a certain point, pollarding cuts back all new growth. This stimulates regrowth that will bring it back to full size.  Shortly after pollarding... (Charles01) Public Domain Pollarding was first done by the Romans and we still use it today. The word pollarding comes from ‘poll’ which refers to the top of the head (as any horse enthusiast knows). To ‘poll’ someone was to cut their hair. [I wonder if polling at the voting booth came from the same root - asking what is inside someone’s head. It makes sense, but I digress.] Originally, trees were pollarded to provide food for livestock and fuel for winter fires. [Peasants were allotted a ration of firewood and other materials from the king’s trees in something called an ‘estover’. Pollarding stimulates vigorous upright growth, which turns into straight boards for boats and fence material. Thinner upright stems were also used to make baskets and garden bowers. Pretty smart for 2,000 years ago, eh?  …and two years later (Charles01) CC BY-SA 3.0 Which trees are pollarded? Pollarding is not recommended for all types of trees. Many conifers do not handle pruning very well. Their twigs tend to die back to the branch they grew out of, providing entry points for pests and disease. Yew are one exception. Trees that respond well to pollarding are those that tend to send out shoots quickly, a characteristic called ‘epicormic’, including:
When & how to pollard trees & shrubs
Pollarding is normally done annually in late winter. Maple trees are pollarded in summer to avoid bleeding sap. In most cases, each year’s pollard cuts should be just above the previous year’s cuts. Because pollarding large trees involves chainsaws and ladders, this is best left to the professionals. Small trees and shrubs can be pollarded with hand pruners and a tree saw. When evaluating a shrub for pollarding (or other pruning) keep in mind the future desired shape and size as you cut. Where each cut occurs, a mass of new stems will appear. Advantages of pollarding In addition to size maintenance, pollarding provides other benefits:
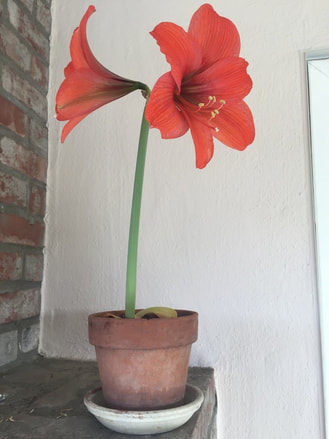
Disadvantages of pollarding Pollarding is stressful to trees and shrubs and it must be done every year or two, to avoid limb breakage. The sprouts that appear after pollarding are attached weakly to the ‘knob’ and may break off. Mature trees that have not previously been pollarded can be killed by the process if it is done incorrectly. Even healthy trees and shrubs are exposed to pests and diseases after pollarding is done. Whether you use pollarding or not, now you know what all those knobby looking trees are about! Poinsettias, Amaryllis, and miniature Christmas trees make delightful gifts during the holiday season, but they need special care to last.  Red & white poinsettias Two plants couldn’t be more different than poinsettias and miniature pine trees, and their care is equally diverse. In each case, if these plants are simply set on a countertop and watered occasionally, they will probably never make it to the end of January. Amaryllis plants are often watered to death. Being bulbs, your holiday Amaryllis can last for several years, given the proper care. Understanding what these popular holiday gifts need to stay healthy can transform them from short-lived hostess tokens to durable members of your garden, landscape, or home interior. Poinsettias Poinsettias (Euphorbia pulcherrima) are fascinating plants. The bright red blooms we see are bracts or modified leaves. The plant itself is a tree that can reach 13 feet in height! The flowers of poinsettia plants are tiny structures hidden away in pseudo flowers called cyathia. Native to Mexico, poinsettia plants need 12 hours of darkness for at least five days in a row to turn from green to red, in a process called photoperiodism. The slightest exposure to sunlight, street lights, headlights, or table lamps will interfere with this process. Poinsettias need strong morning sunlight and afternoon shade to be healthy. They can be grown outdoors, in warmer regions, as long as they are protected from frost. Commercially grown poinsettias are infected with a phytoplasma (bacteria) that causes the plant to produce abundant lateral buds, which make the plant grow in a more bushy structure. Poinsettias left on their own have a more open, spindly growth. Poinsettias are susceptible to certain fungal and bacterial diseases, including leaf spot, stem rot, crown gall, anthracnose, blight, black rot, dieback, gray mold, powdery mildew, rust, scab, mosaic, and root-knot nematodes. These tendencies indicate the importance of allowing plants to dry out between waterings and providing good drainage. The University of Vermont Extension provides an excellent way to remember how to care for your poinsettias:
As a member of the spurge family, poinsettias contain latex, which can be an irritant. Contrary to popular belief, poinsettias are not poisonous.
In early fall, as the leaves begin to turn brown, cut the leaves back to 2 inches from the bulb and remove the bulb from the soil. Clean the bulb and place it in the crisper drawer of your refrigerator for 6 weeks. Just be sure there are no apples nearby, as they will sterilize your amaryllis bulb! After 6 weeks in the cooler, bulbs should be returned to the soil about 8 weeks before you would like fresh blooms. This cycle can continue for several years.
Most holiday plants receive too much water, not enough sunlight, and too much heat to make it through the holiday season. Understanding what these popular holiday gifts need to stay healthy can transform them from short-lived hostess tokens to durable members of the garden, landscape, or home interior. Grow lights try to replicate the spectrum of light that plants receive from the sun. You can find grow lights at your local hardware store or online, but the choices can feel a bit overwhelming. By learning a little but about what’s available, you can choose the grow lights that are best for your plants.  Rainbow Now, everyone knows that most plants need light to grow. What you may not know is that plants need very specific types of light to perform photosynthesis. Grow lights can provide the right light for your indoor plants and windowsill gardens. Grow lights can also used to get a head start on the spring growing season, by planting seeds earlier than they could be started outdoors.
This is not going to be an in-depth scientific post about grow lights. The topic is too complex and new research is emerging that can alter the usefulness of old information. That being said, there are some facts about plants and light that can help you make the best choice when considering grow lights. Ornamental houseplants Many popular houseplants are shade-loving tropicals that evolved under the jungle canopy, where only filtered light was available. Peace lilies, African violets, and coleus can thrive without added light, but it’s not enough for many herbs and other edible plants. Even sunny windows that provide enough sunlight in summer, may need supplemental help come winter’s shorter days and weaker light. What is the right light? Picture a rainbow. That arc of color is the range of visible light, organized by wave length. Plants need the full spectrum of color to grow and thrive. Plants that don’t get enough of the right sort of light tend to grow long and spindly. Plants use very specific ranges of light waves for photosynthesis and different stages of development. It should come as no surprise that light quality changes throughout the year. Spring time sunlight is more in the blue and violet range, which encourages vegetative growth of roots, stems, and leaves, and promotes disease resistance. As the Earth’s tilt and rotation bring us through summer and closer to autumn, the light quality changes to the more red end of the spectrum, encouraging flowering and other reproductive growth. The light used by plants is measured using an index called the PAR value. PAR stands for Photosynthetically Active Radiation. Light bulbs Standard household light bulbs emit light most heavily in the orange and red end of the spectrum, leaving plants without the wavelengths they need to properly perform photosynthesis. According to NASA, the range of light used to grow plants can actually alter their nutritional value and antioxidant content. “How they are grown and then consumed in space could have a positive impact on people’s moods and could protect against radiation in closed environments.” (Dr. Ray Wheeler) Hey, in my humble opinion, Earth is a closed environment, so we could all benefit from making sure that the food we eat is grown in ways that promote good health and positive moods! Types of grow lights There are three basic types of grow lights: high-intensity discharge lights, light emitting diodes, and fluorescent lights. Within those three categories, there are several options. This [modified] list from Wikipedia makes it a little easier to understand: High-intensity discharge (HID) lights - currently the most popular, but they require some heavy duty electrical connections and each bulb type must have a specific ballast. (Just because a bulb screws into a socket does not mean you are using the correct combination.)
Light-emitting diodes (LEDs) - efficient and economical; used by NASA; can be plugged directly into a household electrical outlet; this bulbs do not get hot, unlike many others; while more expensive than most, LEDs last profoundly longer (11 years) Fluorescent lights - efficient and economical; some people get migraines or have seizures because of fluorescent lights
Many of these bulbs are available at a variety of intensities, the same way as regular light bulbs. To pick the right combination of intensity and color spectrum, you will need to learn about the sunlight requirements of your indoor plants. There are grow light bulbs that screw into traditional lamps, stand-alone planters with their own grow lights, and you can build your own seed starter set-up with inexpensive shop light hoods installed with fluorescent grow lights. How do you use grow lights? No, we’re not talking about your grandmother’s undergarments. Girdling, or ring-barking, refers to the removal of a complete ring of bark from a stem, branch, or trunk that generally kills whatever was growing past that point.  Girdling cut (Lamiot) CC BY 3.0 Sometimes girdling happens on purpose and sometimes it’s an accident. Accidental girdling frequently occurs when tree supports are used incorrectly. They may be allowed to rub against the bark enough to create a ring, or supports may be left on for too long and then removed, ripping off the bark that has started growing over the support. Beavers and rabbits are notorious pests aboveground and voles do the same work underground. Girdling can also be caused by grazers forced to eat bark during a harsh winter, or by birds or insects that have bored so many holes around an area that it is girdled. There are some insect pests who girdle tiny twigs or flower parts. Girdling is one reason why you see young saplings with protective plastic around the trunk. (Sunburn and protection against herbicides are other reasons.) Vines, such as English ivy and Wisteria, a tree’s own roots, and your weedwacker can cause girdling, too. How does girdling kill a tree? To understand how girdling can kill a tree, we first have to understand how trees grow. Trees grow by adding new layers (sapwood) on top of old layers (heartwood), underneath protective bark. It is the inner layer of bark, called the cambium, where this growth of sapwood occurs. Looking from the outside in, bark has several layers that serve different functions:
If you recall, trees, like other vascular plants, have structures that help move water and nutrients. Interrupting that action can result in wilting and death. Surprisingly, the center of an entire tree can be rotted out and the tree can continue growing, as long as the vascular bundle is intact! A quick review of those important parts:
Girdling removes the phloem. This interrupts the flow of sugars created in the leaves through photosynthesis. Since water and minerals are still being brought up though the xylem, death is not immediate, but it is nearly inevitable. In some cases, trees and shrubs are able to put out new branches below the girdled area, but pests and diseases will find easy access through the dying upper parts. It is possible to repair a girdled tree, if you want to try. How to repair girdling damage A tree that has been girdled can be saved by replacing the phloem path with healthy twigs. The twigs act as bridges and their healthy phloem tissue will provide a path for the tree to use until it is able to grow a new cambium layer. Follow these steps to repair girdling damage:
Done correctly, these repairs will provide a path for critical sugars. In time, the tree will grow new layers that will cover your handiwork - but you’ll know it’s there and that you saved a life! In some cases, an entirely new tree is planted right next to a girdled tree, to act as root stock to the damaged tree. Partially girdled trees can be aided by covering the damaged area with damp moss and wrapping it with waterproof adhesive tape to keep the moss in place and moist. Girdling on purpose Girdling on purpose is called cincturing, or scaffold girdling. It is an agricultural method used to force fruit-bearing plants to produce bigger, sweeter fruit. Think about it. You have a mature fruit tree. The roots are pulling water and minerals up from the ground through the xylem. Leaves are producing sugars which are distributed through the phloem. You girdle the trunk just below a major branch, or scaffold, blocking the path of sugars headed elsewhere. The only place for these sugars to go is in the fruit on the branches above the cut. The fruit gets more sugar, grows bigger, tastes sweeter. Viola! This method is commonly used on a surprising number of trees and vines: Care must be taken when using this method that only the layers above the cambium layer are removed. Done correctly, the tree will heal itself within a few weeks. (Part of me can’t help think how cruel we can be, as a species. Other methods for improving or increasing yield include beating on a tree, hammering nails into the trunk, or pruning the roots. From the trees’ point of view, it all sounds brutal.)
On purpose or by accident, girdling is a severe tree injury that should receive immediate attention if possible. One of my favorite sayings reminds us that, “Too much of a good thing is a bad thing.” This is especially true when it comes to rain. 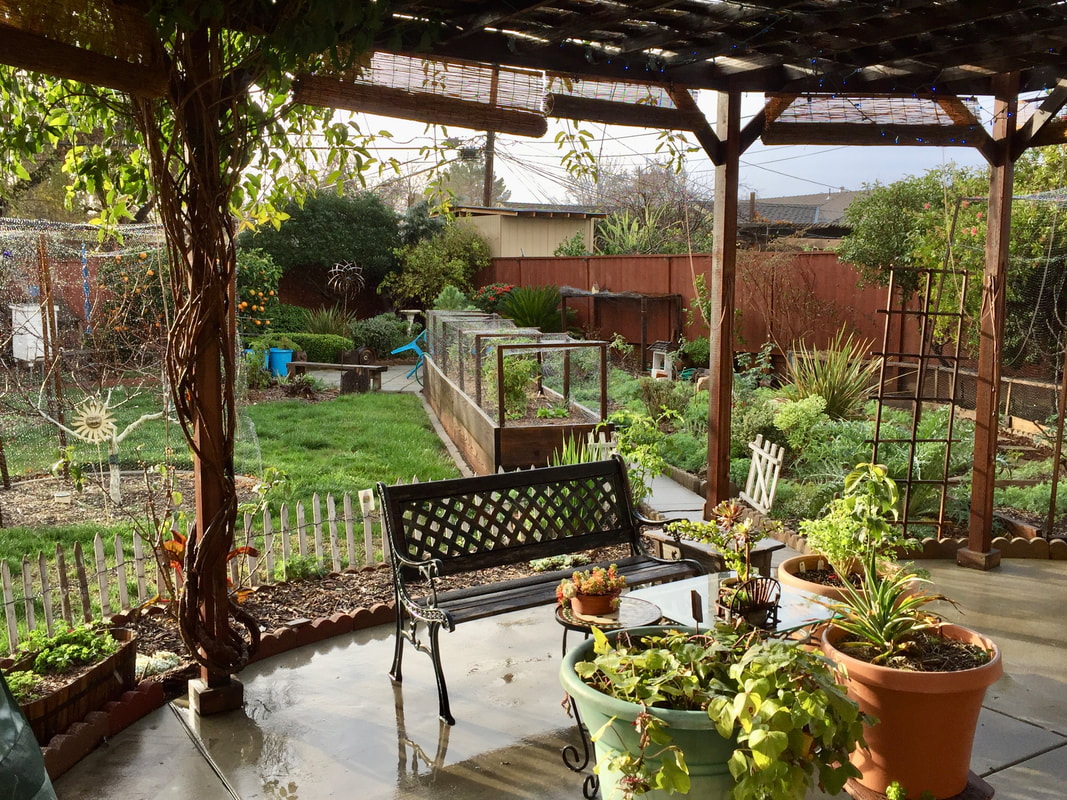 Rainy backyard As most of us learned back in school, rain occurs when water evaporates from the Earth’s surface, condenses into clouds, and then falls back to Earth. In doing so, this water cycle moves minerals, chemicals, dust, seeds, plants, and even insects around.
Now, after years of drought, many areas are happy to receive rain, any rain, all the rain it can get. Thirsty lawns, marginally watered ornamentals, and gardens of every size, shape, and style absorb the rain as fast as they can, except for when they can’t - and that can be a problem. As rain falls on your garden and landscape, one of the first things that happens is the dust is washed off the leaves. This is good for the plants because it allows them to perform photosynthesis more efficiently and it makes the neighborhood less desirable to spider mites. That dust-filled water falls to the ground where it is probably absorbed right away. In some cases, the ground is so dry that it becomes hydrophobic. Hydrophobic soil actually repels water, causing run-off and erosion. Assuming your soil can absorb the rain water, gravity and surface tension will pull the water deeper into the soil, hydrating roots at various soil levels, until it reaches bedrock or an underground waterway. If the water cannot keep moving away, it will pool, creating mud bogs that can drown your plants. If it can move away, it will leach nutrients and chemicals with it, which is why it is so important to avoid using excessive fertilizers and pesticides. When really heavy rain hits, we also have to watch out for flash floods. Creek beds that have been dry for so long that no one remembers when they were ever wet suddenly play host to a crashing, raging wall of water, seemingly out of nowhere. That’s not very likely, in most areas, but it can happen in flatlands surrounding hills. More often, rain causes car accidents because so many people forget about the oil on the road (and their good manners), but I digress. I collect rain water from the roof of my house with three rain barrels. Of course, these 65-gallon rain barrels fill up surprisingly fast, so I have to connect a hose to the spigot at the base and redirect the excess somewhere else, usually to the lawn or, if it’s been raining a lot, to a swale near my fence. I recently learned about rain gardens and I may install one someone in the landscape. You’ve already seen rain gardens, you probably just didn’t know it. Rain gardens are sunken areas with native perennials, shrubs and flowers planted around the depression. Most of the time, rain gardens are dry. When it rains heavily, the sunken area fills up with rain. Because there are so many plants in a rain garden, the water is usually gone within 12 to 48 hours, eliminating concerns about mosquitoes. According to The Groundwater Foundation, rain gardens allow 30% more water to soak into the ground, removing 90% of the nutrients and 80% of the sediments from the water, compared to a traditional lawn. [Looks like I’m going to have to do a bit more research on rain gardens!] So, if you are dealing with rain, keep a look out for soggy areas that need better drainage and enjoy the time you would have spent watering by doing something relaxing indoors instead! Are you prepared for too much rain in your garden? The drip line of a tree is the best place to irrigate.  Tree drip line (Ben McInerney) CC BY-SA 4.0 Tree roots have evolved to find water where it is most likely to fall after it rains ( as well as down deep, where underground waterways occur).
Tree drip lines are where the water would fall, if the tree canopy were an umbrella. Row covers are a chemical-free way to protect many plants from insect pests. 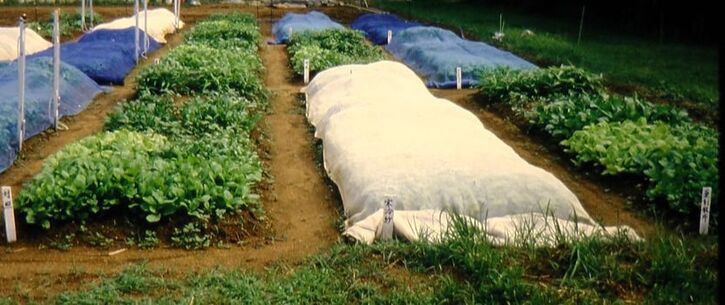 Row covers protect leafy crops from insect pests (Okimura Makoto) CC BY 2.0 Floating row covers are made from extremely lightweight synthetic or woven material that allows light and water to pass through, while protecting plants from pests. The fabric is so light that it “floats” on the top of your plants. If enough slack is made available when first placing row covers, the plants can push it up as they grow. The edges of the fabric need to be held down on all sides by dirt, wooden boards, or some other measure that prevents openings. Some growers use PVC or other material to create hoops to hold the material above the plants.
If you are growing cruciferous vegetables (cabbage, broccoli, bok choy) or members of the cucurbit family (squash, melon, pumpkin), the cabbage moth may be a major pest. Using row covers can stop cabbage moths from laying eggs on the underside of leaves, preventing the leaf loss that occurs when those eggs hatch and ravenous caterpillars (cabbageworms) emerge. Leaf miners, cucumber beetles, and many other pests are also halted by row covers, and vulnerable strawberries and bramble fruits enjoy protection from hungry birds and squirrels. Row covers are generally available in rolls that are 5 or 6 feet wide. These rolls can be as long as 375 feet and the material can be reused for several years if handled gently. The only downside to using row covers is that overwintering pests, such as tomato hornworms and flea beetles, among others, may find themselves borne into a Nirvana of abundant food stuffs and an absence of predators. The best solution in this case is to rotate crops each year. Row covers are an inexpensive, organic method of pest control that will make your job as a gardener easier and more productive. Deadheading refers to the removal of flowers that are past their prime. Since the production of flowers is part of a plant’s reproductive process, removing the flowers encourages the plant to produce more flowers, rather than entering the seed-producing reproductive stage.
Highly refined horticultural oils are sprayed onto plants as a pesticide. They are used to control mites and insect pests, and to prevent some fungal infestations.
When oil was first used to combat garden and agricultural pests, heavier “dormant oils” were used in the winter, while trees were dormant and leafless, and lighter “summer oils” were used when leaves were present. While both varieties are now much more refined, believe me when I tell you that using dormant oil on leaves in summer is a really bad idea.
Types of horticultural oil Horticultural oils can be petroleum or plant based. Currently, the petroleum-based horticultural oils provide better coverage without damaging leaves. Most over-the-counter varieties are made from petroleum. Vegetable oils, such as sunflower, soybean, and cottonseed, provide good insect control, but phytotoxicity is a still a problem. Phytotoxicity is anything that is poisonous to plants. Research is continuing. At this time, only Neem oil is a consistently safe vegetable-based horticultural oil, but it acts differently than other oils by adding a naturally occurring chemical to the mix that makes insects ‘forget’ to eat or breed. How to apply horticultural oil Horticultural oils are best used when pests are vulnerable. Soft-bodied pests, such as aphids, can be sprayed as populations become troublesome. Scale insects are most vulnerable in the crawler stage, while caterpillars and spider mites are best managed as eggs, in winter and early spring. Heavy infestations of scale insects may require repeated sprayings through June. Once pests have reached a protected stage of growth, such as the hard shell covering over adult scale insects, horticultural oils are not effective. Also, the oil must coat pests completely to work. WARNING: When applying horticultural oils, it is important that sulphur is not present. Horticultural oils should not be applied 2-4 weeks before or after a sulphur treatment, depending on who you ask. Also, horticultural oils should not be used on water stressed plants. Many horticultural oils are mixed with other ingredients, such as fungicides or insecticides, so it is very important that you read the label and follow the directions exactly, to avoid causing more harm than help. Most horticultural oils are considered appropriate for organic farming. Mulch can be anything placed on top of soil to cover and protect it. Naked soil is vulnerable to erosion, weed seeds, compaction, and water waste. Mulching provides many benefits:
 Perennial plants protected by a mulch of free wood trimmings So, what makes a good mulch?
A good mulch allows air and water to pass through easily, while blocking the sunlight needed by weed seeds for germination. Obviously, gravel fits that description, but do you really want to pick out all those rocks at planting time? Or, what about black plastic landscape cloth - doesn’t that do the same thing, without all the work? No, it doesn’t. Ultimately, the plastic will break down, allowing weeds easy access and adding chemicals to the soil. Instead, take advantage of natural processes and use plant-based mulches. They add nutrients and improve soil structure as they break down and they can often be found for free!
How to apply mulch Mulch should be applied 2"–6” thick, depending on particle size. Smaller pieces fit together more closely, so you don’t need as much as for larger bits. If weeds are a serious problem, or you are eliminating a lawn, it is a good idea to use a really thick layer of wood chips. Be sure to keep mulch several inches away from trunks and stems. If mulch is in constant contact, problems such as crown rot can occur. As worms, beetles, weather and microorganisms breakdown the mulch, you will need to add more mulch, usually every 3–5 years. Fertilizer is one of those things that falls under the, “Too much of a good thing is a bad thing” category. All too often, at the first sign of unhealthy plants, people grab a bag of fertilizer before checking for inhospitable soil conditions, unhealthy roots, irrigation problems, nutrient toxicities, and pest or disease infestation.  1907 fertilizer advertisement (Union Guano Company, Winston-Salem, NC, USA) Public domain Different plants have different nutrient needs. Simply dumping a box of 10-10-10 around the garden isn’t a good idea and it’s a waste of money. The chemicals can leach into ground water, burn sensitive new roots, and damage beneficial soil microorganisms. It can also make plants grow faster than they can maintain over the long haul, leaving them weak and vulnerable later in life. Many woody ornamentals never need to be fertilized, even when they are first planted, while containerized plants need regular fertilizing.  Fertilizer burn (Fenrisulfir) CC BY-SA 3.0 N, P & K
Most gardeners are familiar with the three numbers displayed on bags and boxes of fertilizer, but we’ll do a quick review, just to be sure. Those three numbers represent the percentage by weight of nitrogen (N), phosphorus (P) and potassium (K). Think about this for a moment. A 10-pound bag of 10-20-10 fertilizer contains 1 pound nitrogen, 2 pounds phosphorus, 1 pound potassium, and 6 pounds of filler. Yes, filler. If all your plants need is nitrogen, blood meal may be a better choice. Plant nutrients Plants use 16 chemical elements as food. Those elements include oxygen, carbon, and hydrogen, along with 13 mineral nutrients. Those mineral nutrients are broken down this way: Macronutrients Nitrogen (N) - leaf growth Phosphorus (P) - root, fruit and flower growth Potassium (K) - stem and cell growth Secondary Macronutrients Calcium (Ca) Magnesium (Mg) Sulphur (S) Micronutrients Copper (Cu) Iron (Fe) Manganese (Mn) Molybdenum (Mo) Zinc (Zn) Boron (B) Soil tests Before applying fertilizer, invest in a good soil test. It’s worth it. And it’s a fascinating snapshot of what is really going on in the garden. Now, I don’t mean one of those over-the-counter test tube kits. Those are a waste of money, in my humble opinion. When searching for a soil lab, it is best to pick one near you. The east and west coasts have very different soils (ours is alkaline; theirs is acidic, for one thing). This means that different types of tests are used to analyze soil samples. I learned some surprising facts about my soil when I sent in a sample. Most important, I learned that my soil already has a ton of everything, except iron. Without iron, the plants weren’t able to absorb the abundance of available nutrients. Adding fertilizer would have been a complete waste of time and money. Instead, because I had the knowledge, I was able to apply a foliar (leaf) spray of iron and my garden plants had access to everything they needed! So, get your soil tested before adding anything. Types of fertilizer If you are like me and prefer a more natural approach, use compost instead of fertilizer. Since I raise chickens, composting is even more effective. Chicken poop is high in nitrogen, and practically anyone can raise hens or build compost. Yard and kitchen scraps that would normally end up in landfills can be transformed into nutrient rich compost that that also improves soil structure. If you decide fertilizer really is necessary: READ THE BAG. Seriously. Federal law requires that specific instructions and useful information are printed on the container, and for good reason. Follow directions carefully and wash your hands when you’re done. Technically, there is no chemical difference between nitrogen from compost and nitrogen formulated in a lab. Nitrogen is nitrogen. The difference lies in everything else. What are the fillers? What else is in the compost that plants need? Honestly, there’s a lot we don’t yet understand about how living things interact. I prefer to err on the natural side, just in case. For a hysterical read about the effects of too much fertilizer, check out Don Mitchell’s Moving/Living/Growing Up Country series. The bare branches of January make this an excellent time for pruning.
Winter pruning helps improve the appearance and health of trees, shrubs, and roses. The only exception is apricot and cherry trees, which are susceptible to Eutypa dieback. Apricot and cherry trees are best pruned in the dry months of summer. Pruning goals Different plants have different pruning needs, but the overall goals are the same: a balanced structure, adequate airflow, and the retention of productive limbs. There are two types of pruning cuts: thinning and heading. Heading cuts control height, while thinning improves air flow and sun exposure. Keep in mind, while pruning, that new growth will head in the direction of the remaining buds. The first goal of pruning is to remove dead, diseased or crossing branches. Dead and diseased limbs can allow pests and disease easy access into healthy tissue. Crossed branches will rub against each other, causing similar problems. You will also want to trim away branches that are angled too closely together and those that hang downward. Proper pruning protects people and property Structural pruning reduces the likelihood of uprooted trees falling on you or your house. Trees with too much weight to one side also risk splitting the trunk and killing the tree. Pruning early in the tree’s life can create a safer, more balanced structure. While the depth and spread of tree roots depends on a number of factors (soil structure, irrigation, variety and age of the tree, and more), pruning can help the root system keep your tree upright. To give you an idea of how much weight we are talking about: an average mature hardwood tree, with a circumference of 100” inches at chest height, weighs nearly 13,000 pounds! Your average commuter car weighs 2,800 pounds - so imagine 4 or 5 cars hitting your roof in a storm to see why good pruning is so important. How to prune larger branches Pruning larger branches (those with a diameter of 2" or more), it is important to use multiple cuts to avoid peeling the bark beyond the final cut and damaging the remaining branch. In drought-prone areas with heavy clay soil, moisture retention is an art that most plants have mastered. This also means fungal diseases can be a real problem. Roses and fruit trees are especially vulnerable to brown spot, rust and fireblight. Pruning for good airflow between twigs and branches can help reduce these diseases. It can also provide sunlight to inner leaves, which translates into more vigorous growth and heavier fruit and flower production Too much pruning is bad Now, as I’ve said before, too much of a good thing can be a bad thing. Excessive pruning can expose interior branches to sunburn. Also, while pruning some or a little can promote new growth, heavy pruning can cause irreparable harm or death to the plant. Before you start pruning, research the specific variety of plant to learn about its natural growth and shape. For example, some trees produce fruit on last year’s growth, while others produce fruit on new growth. There's no sense in cutting off your nose to spite next summer's harvest! Fruit trees The backyard orchardist will generally want trees that are small enough to make harvesting fruit easier, so you will want to use heading cuts to reduce the height of your trees. Branches that grow vertically tend to be more vegetative, while horizontal branches produce more fruit. Branches growing at 45 to 60-degree angles tend to do both. When you cut off the end of a vertical branch, phytohormones, such as auxins, will cause the remaining buds will send out new growth horizontally. When you tip a horizontal branch, it will send out new fruiting wood. This is also a way to prevent too much fruit developing and risking a broken branch. It is always a good idea to remove suckers and water sprouts. Water sprouts are flimsy twigs that quickly grow vertically, directly from the trunk or older branches. Suckers are similar growths that occur at the base of the trunk or from the root system. These growths drain energy from the plant without providing any benefits. Roses In Mediterranean climates, roses never go completely dormant, but winter is still the best time to prune for better spring and summer blooms. Generally speaking, you will want to remove 1/2 to 2/3 of the existing bush. Remove dead, diseased and crossing branches and then reshape the bush for better airflow. You can learn more about pruning roses at the San Jose Heritage Rose Garden. When pruning, it is best to cut close to the branch collar without cutting into it. You also want to avoid leaving nubs that interfere with a plant’s ability to heal itself. There is generally no need to apply sealants to pruning cuts. Plants have evolved an effective system for that all on their own. Finally, be sure to keep your tools sharp and to clean your cutting tools between cuts. Use a household cleaner, such as Lysol. Otherwise, you may be spreading disease to healthy plant tissue. It can be incredibly rewarding to take before and after photographs of your pruning work. Feel free to share them with us! No, deficit irrigation doesn't refer to tossing the national budget into the ocean. Instead, it is a method used by growers to increase the amount of sugar in foods such as tomatoes, basil, pomegranates, and peaches.  Ripe, flavorful tomatoes are made even better with deficit irrigation Flavor facts
Plants have flavor because they contain sugar and volatile chemicals. Aroma plays a major role, as well, but we will leave that for another day. The volatile chemicals that generate flavor are used by plants as defense mechanisms. The pungent taste of many herbs is a perfect example of strong flavors being used to discourage herbivore and insect feeding. As water levels within a plant are reduced, those flavors get stronger. This is where deficit irrigation comes in. The opposite of dilution When the water supply is significantly reduced, sugar and flavor molecules become concentrated. More water means less sugar and flavor per plant, while less water means more flavor. It's a simple matter of dilution. Potential problems Some crops are bad choices for deficit irrigation. Cucumbers, melons, and other members of the squash family are more likely to turn bitter than better without adequate irrigation. For crops well suited to this practice, there is still a downside. Improperly done, deficit irrigation increases the risk of stunted growth and smaller fruit. Start too early and you end up with fruits and vegetables that are weaker, drier, and not what you were hoping for. In the case of backyard tomatoes, it's a good idea to significantly reduce watering as the fruit begins to turn red. This way, the size is already reached and flavor is in full production. Deficit irrigation also helps conserve precious water resources. Over-watering container plants is a surprisingly common mistake. According to the University of California, improper irrigation is the #1 cause of plant problems.
Unfortunately, the signs of too much and not enough look almost identical: yellowing, wilted leaves, stunted growth, and leaf drop are symptoms of both problems. Rather than drowning your plants, allow the soil to dry out between waterings. Don't guess. As critical as water is for good plant health, this is not a time to assume your plants are getting the water you give them. Soil structure can redirect water away from roots in surprising ways. When plants show water stress symptoms, gently dig down next to the root system to ensure the water goes where needed. An inexpensive moisture meter is an excellent investment in your plants' health. Harvesting the fruits of your gardening labor is an often forgotten yet critical aspect of the craft. When you get down to it, everything plants do is directed towards reproduction. Creating flowers attracts pollinators, pollination creates seeds, and fruit provides seeds with food and protection. As soon as your plants start producing harvestable fruits and flowers, it is very important that you harvest frequently.  The fruits of our labor! By putting your harvesting efforts off for another day, you are giving your plants the message that they have succeeded at reproduction and that no further effort is needed. This means less fruits and vegetables and flowers for you!
Bottom line - harvest every couple of days whenever your garden is producing to ensure maximum production. |
Welcome!You can grow a surprising amount of food in your own yard. Ask me how! To help The Daily Garden grow, you may see affiliate ads sprouting up in various places.
You can also get my book, Stop Wasting Your Yard!  Index
All
Archives
April 2024
|


 RSS Feed